はじめに
こんにちは! Rails学習中のYori-goreng(ヨリゴレン)です![]()
本記事では、ログイン機能を司るdeviseの導入と、ユーザーのアクセス許可についてご紹介します![]()
より詳しく知りたい方は以下の参考記事をご覧ください。
- 参考記事
環境
- ruby 2.6.3
- rails 5.2.4.3
- MacOS Catalina バージョン10.15.4
deviseとは
Rubyのgemの一つで、deviseを使うことでログインの機能を容易に実装できるようになります。
1. 【アプリの準備】
1.1. アプリ作成
rails new アプリ名でアプリを作成します。
ここでは、devise_testという名前にしてみます。
rails new devise_test
cd devise_test
1.2. DB作成
rails db:create
2. 【deviseの準備】
2.1. gemのインストール
gemfileにdeviseのgemを追記します。
gem 'devise'
gemをインストールします。
bundle install
2.2. deviseの関連ファイルを作成
rails g devise:install
以下のような長文がターミナルに表示されれば、成功です。
===============================================================================

Some setup you must do manually if you haven't yet:

  1.Ensure you have defined default url options in your environments files. Here
     is an example of default_url_options appropriate for a development environment
     in config/environments/development.rb:

       config.action_mailer.default_url_options = { host: 'localhost', port: 3000 }

     In production, :host should be set to the actual host of your application.

  2. Ensure you have defined root_url to *something* in your config/routes.rb.
     For example:

       root to: "home#index"

  3. Ensure you have flash messages in app/views/layouts/application.html.erb.
     For example:

       <p class="notice"><%= notice %></p>
       <p class="alert"><%= alert %></p>

  4.You can copy Devise views (for customization) to your app by running:

       rails g devise:views

===============================================================================
2.3. モデル作成
以下のコマンドにより、Userモデルを作成します。
rails g devise user
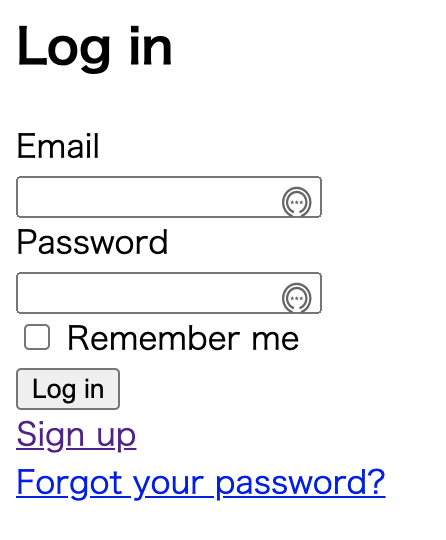
この時点でマイグレーションを実行すると、簡易的なログインページが完成します。
rails db:migrate
rails s
rails sのあと、http://localhost:3000/users/sign_in でログインページを開きます。
2.4. before_action :authenticate_user!
コントローラーにbefore_action :authenticate_user!を記載すると、ここで行われる処理がログインしたユーザーによってのみ実行することができるようになります。
例として、Homesコントローラーを作成します。
※コントローラーの命名規則に、homesのように複数形にするというものがあります。コントローラーの名前は自由に決めても問題ないようです。
rails g controller homes index
作成したhomes_controller.rbにbefore_action :authenticate_user!を加えます。
app/controllers/home_controller.rb
class HomesController < ApplicationController
  before_action :authenticate_user!
  def index
  end
end
これにより、indexアクションによる一覧表示はログインしたユーザーのみ確認できます。