Feature Toggleとは
※ 基本的な話なのでご存知の方はすっ飛ばしてください
FeatureToggleとは、簡単に言えばある機能をオンにしたりオフにしたりする条件分岐のことです。FeatureFlagと呼ばれたりもします。
例えば下記のように、ある新しいアルゴリズムを使うためにuseNewAlgorithmというboolean変数を用意し、useNewAlgorithmのtrue/falseに応じて新アルゴリズムと旧アルゴリズムを使い分けるような場面で使います。
  function reticulateSplines(){
    var useNewAlgorithm = false;
    // useNewAlgorithm = true; // UNCOMMENT IF YOU ARE WORKING ON THE NEW SR ALGORITHM

    if( useNewAlgorithm ){
      return enhancedSplineReticulation();
    }else{
      return oldFashionedSplineReticulation();
    }
  }

  function oldFashionedSplineReticulation(){
    // current implementation lives here
  }

  function enhancedSplineReticulation(){
    // TODO: implement better SR algorithm
  }
FeatureFlagはリリースタイミングが決まっている新機能の提供時やカナリアリリース、A/Bテストなどでよく使われます。
FF4J
FF4jとはFeatureToggleを簡単に実現できるJavaライブラリになります。
- Web Console, REST APIによるリアルタイムなToggle切り替え
- 多様なストレージを利用した状態の永続化
- Featureの利用状況のモニタリング
といった様々な機能が提供されています。
導入手順
プロジェクトの作成
みんな大好きSpring InitializrからSpring Reactive Web, lombokだけを選んでプロジェクトを作成します。
FF4jの導入
pom.xmlに依存関係を追加します。
<dependency>
    <groupId>org.ff4j</groupId>
    <artifactId>ff4j-spring-boot-starter</artifactId>
    <version>1.8</version>
</dependency>
FF4jのBean定義 & Featureの作成を行います。
import org.ff4j.FF4j;
import org.springframework.context.annotation.Bean;
import org.springframework.context.annotation.Configuration;

@Configuration
public class FF4JConfiguration {
    @Bean
    public FF4j ff4j() {
        FF4j ff4j = new FF4j()
                .createFeature(awesomeFeature())
                .createFeature(greatFeature())
                .createFeature(excellentFeature());
        return ff4j;
    }

    private Feature awesomeFeature() {
        return new Feature("AwesomeFeature", true);
    }

    private Feature greatFeature() {
        return new Feature("GreatFeature", false);
    }

    private Feature excellentFeature() {
        return new Feature("ExcellentFeature", false);
    }
}
今回はAwesomeFeature, GreatFeature, ExcellentFeatureの3つのFeatureを定義し、AwesomeFeatureだけオンにしています。
FF4jを利用したControllerを実装します。単純なメッセージだけを返すControllerで、定義した3つのFeatureがオンになっている場合そのFeatureに応じてメッセージに追記しています。
@RestController
@RequiredArgsConstructor
public class GreetingController {

    // コンストラクタインジェクション
    private final FF4j ff4j;

    @GetMapping
    public String greeting() {
        List<String> features = new ArrayList<>();
        addFeatures(features);
        String greeting = String.format("Hello, %s World!!", String.join(" ", features));

        return greeting;
    }

    // 各Featureの処理
    private void addFeatures(List<String> features) {
        if(ff4j.check("AwesomeFeature")) {
            features.add("Awesome");
        }

        if(ff4j.check("GreatFeature")) {
            features.add("Great");
        }

        if(ff4j.check("ExcellentFeature")) {
            features.add("Excellent");
        }
    }
}
アプリケーションを起動し、http://localhost:8080 にアクセスします。

デフォルトではAwesomeFeatureが有効になっているため、メッセージはHello, Awesome World!と表示されます。
WebConsoleの導入
続いて、FF4jの管理コンソールを導入します。さきほどまでの状態だとソースコード上でFeatureのオン/オフを切り替える必要がありましたが、WebConsoleを利用することでアプリケーションの起動中にFeatureのオン/オフを切り替えることが可能となります。
pom.xmlに依存関係を追加します。
<dependency>
	<groupId>org.ff4j</groupId>
	<artifactId>ff4j-web</artifactId>
	<version>1.8</version>
</dependency>
<dependency>
	<groupId>org.thymeleaf</groupId>
	<artifactId>thymeleaf</artifactId>
	<version>2.1.4.RELEASE</version>
</dependency>
新たにBean定義を追加します。
@Configuration
@ConditionalOnClass({ConsoleServlet.class, FF4jDispatcherServlet.class})
@AutoConfigureAfter(FF4JConfiguration.class)
public class FF4JWebConfiguration extends SpringBootServletInitializer {

    @Bean
    public ServletRegistrationBean<FF4jDispatcherServlet> ff4jDispatcherServletRegistrationBean(FF4jDispatcherServlet ff4jDispatcherServlet)
    {
        ServletRegistrationBean<FF4jDispatcherServlet> bean = new ServletRegistrationBean<>(ff4jDispatcherServlet, "/ff4j-web-console/*");
        bean.setName("ff4j-console");
        bean.setLoadOnStartup(1);
        return bean;
    }

    @Bean
    @ConditionalOnMissingBean
    public FF4jDispatcherServlet getFF4jDispatcherServlet(FF4j ff4j) {
        FF4jDispatcherServlet ff4jDispatcherServlet = new FF4jDispatcherServlet();
        ff4jDispatcherServlet.setFf4j(ff4j);
        return ff4jDispatcherServlet;
    }

}
起動して http://localhost:8080/ff4j-web-consoleにアクセスします。

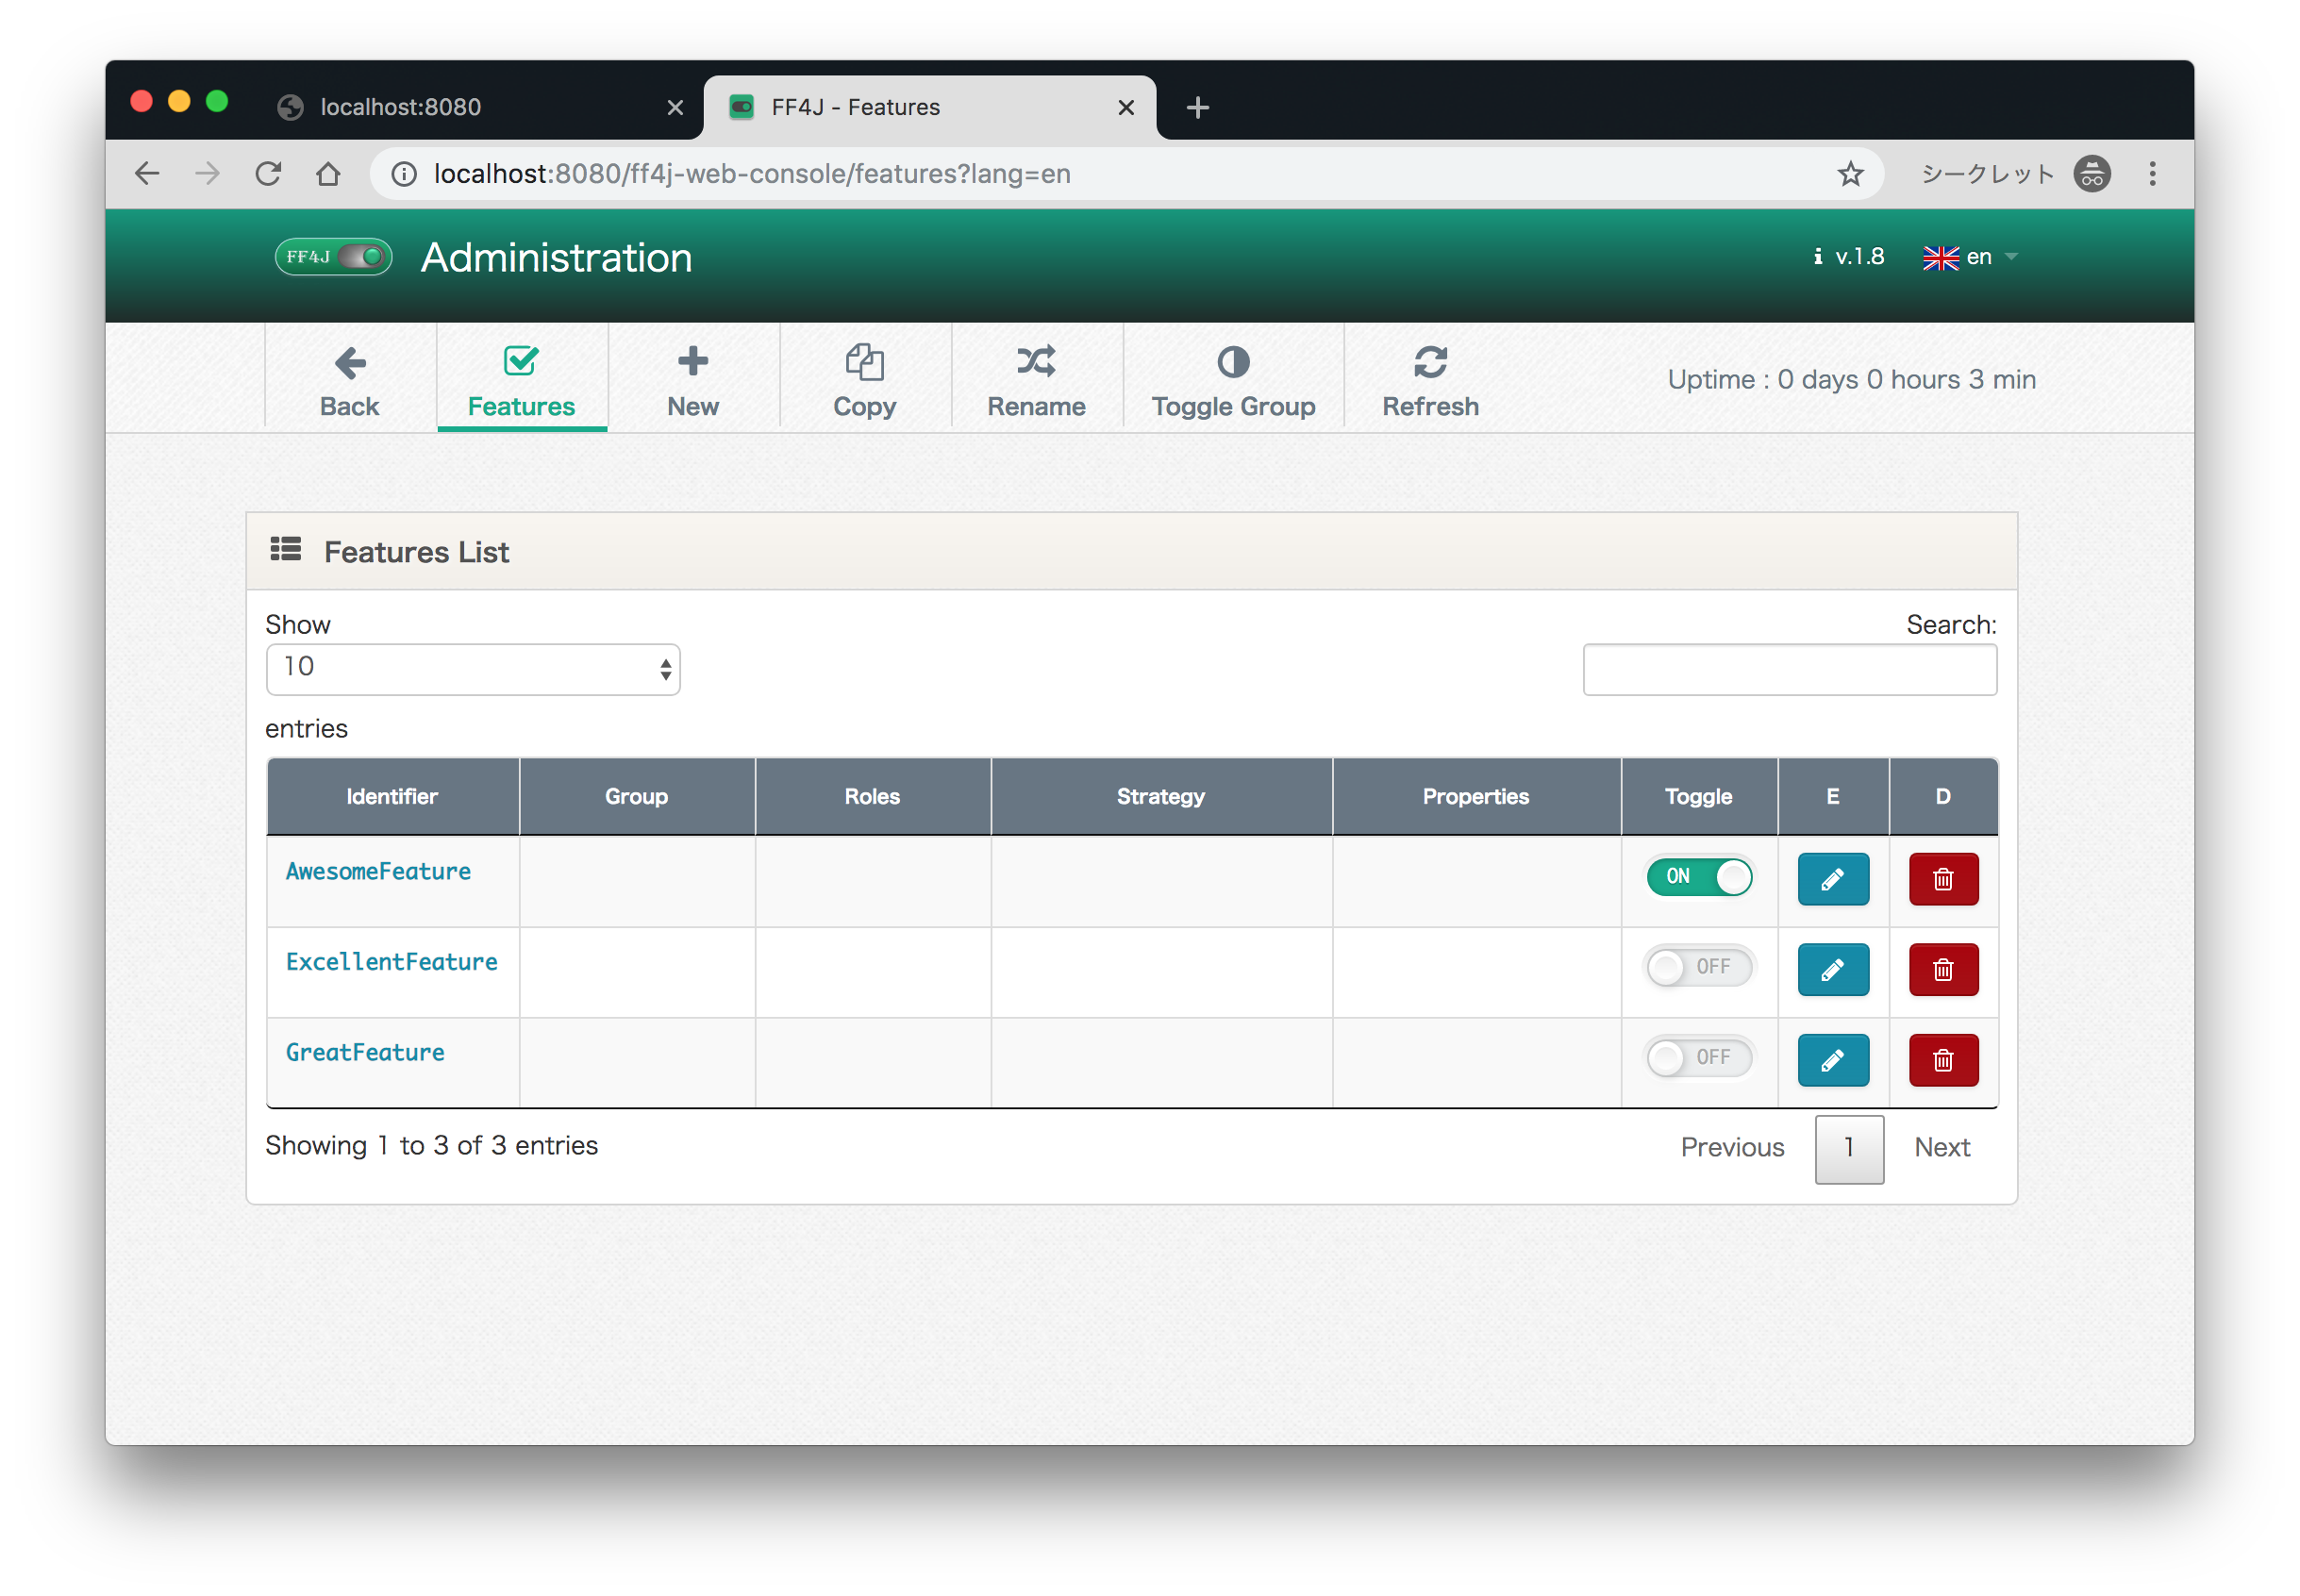
「Features」メニューで現在定義されているFeatureを確認することができ、
トグルをオン/オフするのに連動してFeatureがオン/オフになります。

GIFアニメーションデモ
上記で説明した内容をGIFアニメーションで撮ったデモも貼っておきます。ご参考程度に。

まとめ
FF4jの簡単な紹介をしました。Feature Toggleは強力なテクニックですが運用方針を定めないとカオスなコードベースが生まれてしまうので気をつけて運用したいです。ProfileごとにDIするFeatureをわける、コーディング規約とレビューポイントを定めるといった枠組みが必要になります。
参考
martinFowler.com - FeatureToggle: https://martinfowler.com/articles/feature-toggles.html
FF4j: https://ff4j.github.io/
今回使ったリポジトリ:https://github.com/IshinFUKUOKA/ff4j-demo
