その3です。
だんだん細かい設定が増えていきますが、あしからず。
では、ユーザ登録を進めていきましょう。今回の主役はfirebaseです。
その1:Firebaseの初期設定
https://console.firebase.google.com/u/0/?hl=ja
こちらのリンクからちょちょいとプロジェクトを作ってください。
Firebaseのドキュメントは以下のリンクにありますが、、情報量が多すぎて読みこむのが大変。。。
https://firebase.google.com/docs/guides/?authuser=1
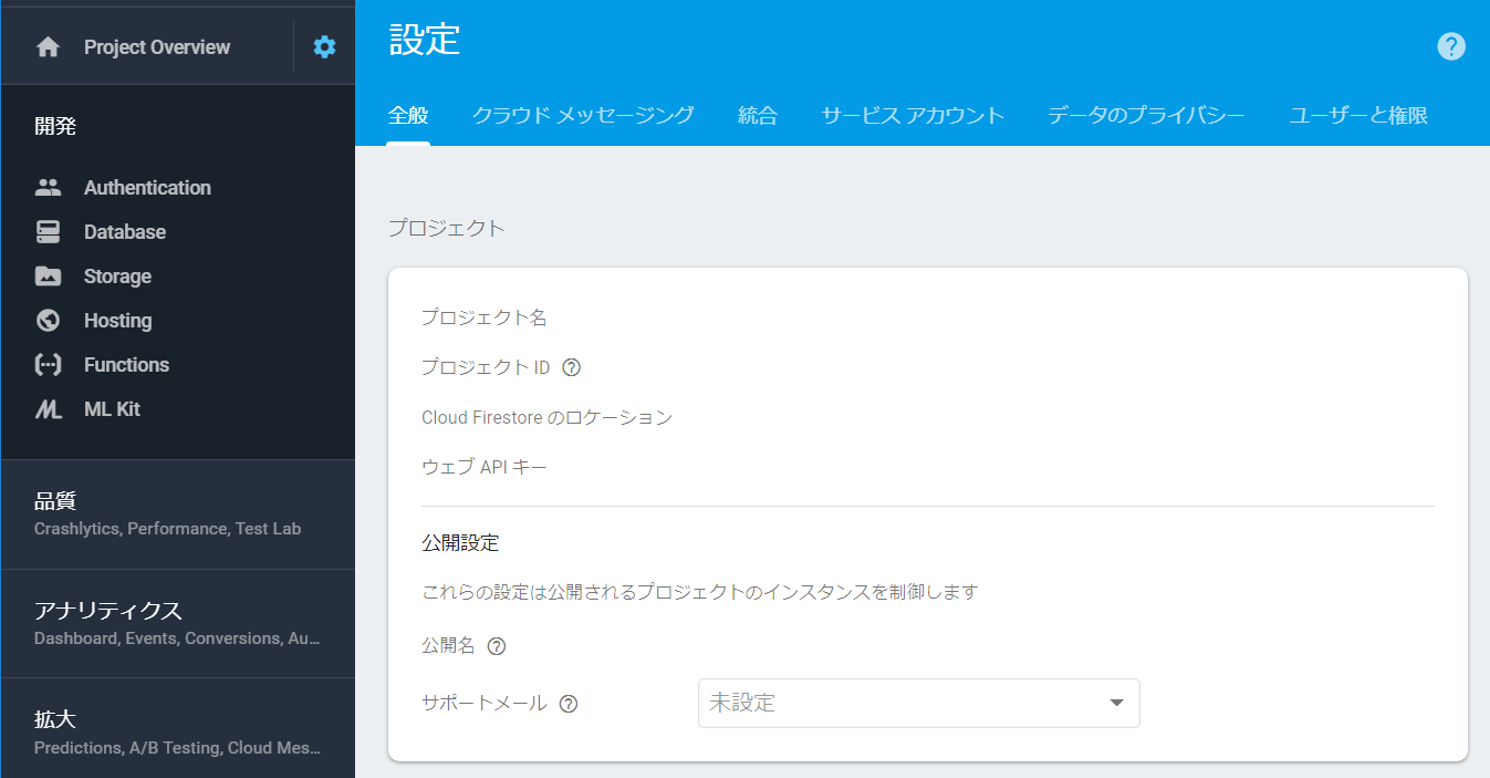
apiのkeyがわかればOKです。Firebaseの管理画面の歯車マークを押して「設定」画面を
開き「ウェブAPIキー」の値をメモっておきましょう。
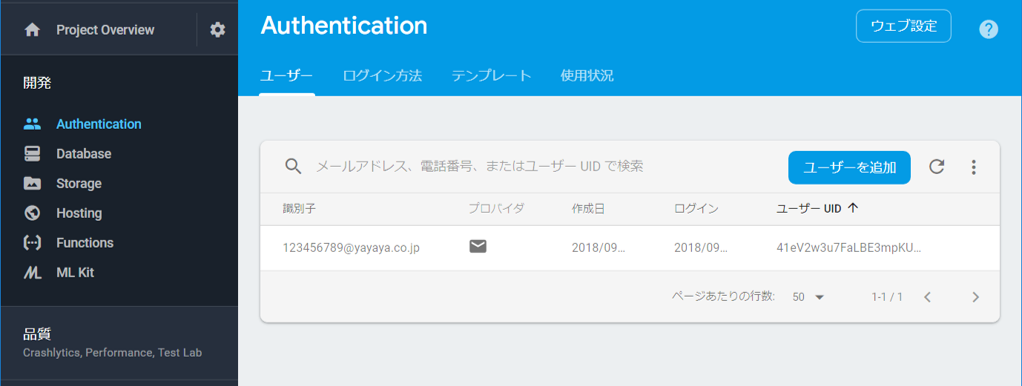
Authenticationをクリックし、ログイン方法で「メール/パスワード」を有効にしておきます。
ここまでで一度firebaseを離れ、vueアプリケーションに戻ります。
その2:Vueアプリケーションをごにょごにょ
次にmy-appアプリケーションにfirebaseのライブラリをインストールします。
npm install firebase --save
インストールが完了したら、main.jsにFirebaseへ接続するための情報を記載します。
import firebase from 'firebase'

// firebase info
var config = {
  apiKey: "さっきメモしたAPIキー",
  authDomain: "my-app.firebaseapp.com",
  databaseURL: "https://my-app.firebaseio.com",
  storageBucket: "my-app.appspot.com",
  projectId: 'my-app',
};
firebase.initializeApp(config);
上記で「my-app」としているところは、適宜Firebaseで作成したプロジェクト名にかえてください。
次に先ほど作成したSignup.vueを作りこんでみたいと思います。
まず最初にviewsフォルダの中にSignup.vueファイルを作成します。
作成したらroute.jsにルートを通しましょう。
    {
      path: '/signup',
      name: 'signup',
      // route level code-splitting
      // this generates a separate chunk (about.[hash].js) for this route
      // which is lazy-loaded when the route is visited.
      component: () => import(/* webpackChunkName: "about" */ './views/Signup.vue')
    }
これでルートが通りました。App.vueのnavに作成したvueファイルのパスを書いてみます。
<template>
  <div id="app">
    <div id="nav">
      <router-link to="/">Home</router-link> |
      <router-link to="/about">About</router-link> |
      <router-link to="/signup">Signup</router-link>
    </div>
    <router-view/>
    <div>copyright</div>
  </div>
</template>
これで画面上部に「signup」のリンクが増えました。クリックして、画面遷移が問題なくできていることを確認してみましょう。ヘッダーのリンクだけ表示されればOKです。routeの設定は問題ありません。
その3:登録画面の作りこみ
確認できたら、メールアドレスとパスワードの登録を行う画面を作成しましょう。Signup.vueを以下のようにかきます。
<template>
  <div class="signup">
    <h2>新規登録</h2>
    <input type="text" placeholder="メアド" v-model="username">
    <input type="password" placeholder="パスワード" v-model="password">
    <button @click="signUp">新規登録</button>
  </div>
</template>

<script>
import firebase from 'firebase'

export default {
  name: 'Signup',
  data () {
    return {
      username: '',
      password: ''
    }
  },
  methods: {
    signUp: function () {
      firebase.auth().createUserWithEmailAndPassword(this.username, this.password)
        .then(user => {
          alert('アカウントを作成しました ', user.email)
        })
        .catch(error => {
          alert(error.message)
        })
    }
  }
}
</script>

<!-- Add "scoped" attribute to limit CSS to this component only -->
<style scoped>
h1, h2 {
  font-weight: normal;
}
ul {
  list-style-type: none;
  padding: 0;
}
li {
  display: inline-block;
  margin: 0 10px;
}
a {
  color: #42b983;
}
.signup {
  margin-top: 20px;

  display: flex;
  flex-flow: column nowrap;
  justify-content: center;
  align-items: center
}
input {
  margin: 10px 0;
  padding: 10px;
}
</style>
buttonのクリックイベントを「signUp」とし、その内容を<script>の中のmethodに書いています。
カギになるのは以下の個所。
  firebase.auth().createUserWithEmailAndPassword(this.username, this.password)
    .then(user => {
      alert('アカウントを作成しました ', user.email)
    })
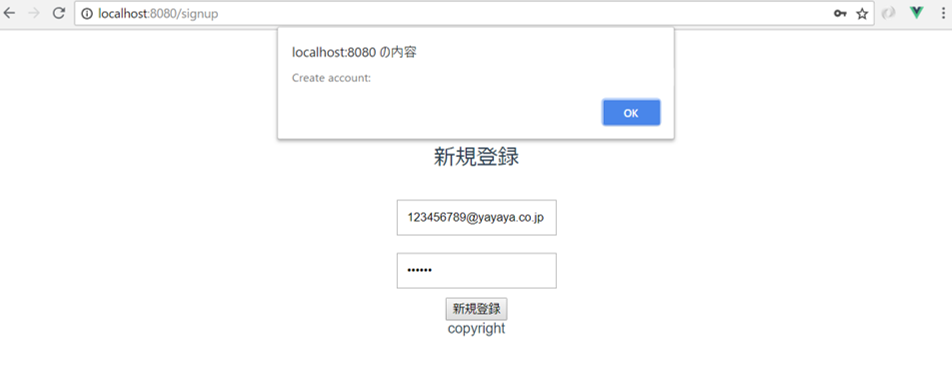
一言一句覚える必要はありません。コピペでOKです。登録がうまくいくと、alertが出てきて、Firebaseにデータが登録されます。

ちゃんと登録されているか、Firebaseの画面で確認してみてくださいね。
ちなみに、ちゃんと登録が動いているかを確認するのにconsole.logを
つけておくといいです。
  firebase.auth().createUserWithEmailAndPassword(this.username, this.password)
    .then(user => {
      console.log('登録OK')
      alert('アカウントを作成しました ', user.email)
    })
chromeの検証のconsoleで簡単に確認できますので重宝しますよ。
次回はログイン画面とログイン後の画面遷移、ログイン状態の管理をみていきます。三日坊主で終わらないことを誓って★

