はじめに
この記事では、Node.js のフレームワークである NestJS のプロジェクトファイル作成手順について記載していきます。
開発環境
開発環境は以下の通りです。
- Windows11
- VSCode
- Node.js 20.5.0
- NestJS 10.0.0
- TypeScript 5.1.3
プロジェクトの作成
まず、以下のコマンドで Nest CLI をインストールします。
npm i -g @nestjs/cli
次に以下のコマンドでプロジェクトを作成します。
nest-crud-app はプロジェクト名です。また、--strict を追加することで、TypeScript の strict 系のコンパイラオプションが有効になります。
nest new nest-crud-app --strict
パッケージマネージャーを選択します。

プロジェクトが作成されました。
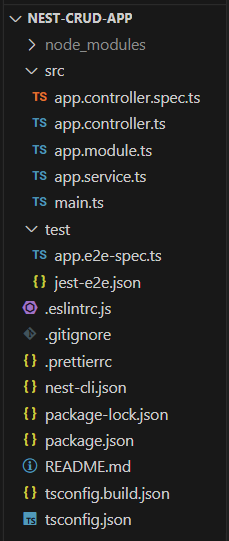
各ファイルの概要は以下の通りです。
| ファイル名 | 概要 |
|---|---|
app.controller.ts |
コントローラー(ルーティング) |
app.controller.spec.ts |
コントローラーのユニットテスト |
app.module.ts |
ルートモジュール |
app.service.ts |
サービス(ビジネスロジック) |
main.ts |
エントリーファイル |
エントリーファイルの中身は以下のようになっています。
main.ts
import { NestFactory } from '@nestjs/core';
import { AppModule } from './app.module';

async function bootstrap() {
  const app = await NestFactory.create(AppModule);
  await app.listen(3000);
}
bootstrap();
NestFactory クラスの create メソッドを利用して、Nest のアプリケーションのインスタンスを作成しています。また、listen メソッドを利用して、HTTP リスナーを起動させています。
動作確認
以下のコマンドでローカルサーバーを起動します。
npm run start:dev
