はじめに
この記事では、NestJS と MySQL で猫のデータの CRUD 処理を実装します🐱
開発環境
開発環境は以下の通りです。
- Windows11
- VSCode
- Node.js 20.10.0
- NestJS 10.0.0
- TypeScript 5.1.3
- MySQL 8.0.33
- MySQL2 3.6.3
- TypeORM 0.3.17
事前準備
- プロジェクトファイルの作成
- MySQL への接続に必要なパッケージのインストール
npm install --save @nestjs/typeorm typeorm mysql2 class-validator
npm install --save-dev @types/node
Entity の作成
猫テーブルを作るための Entity を作成します。
cat.entity.ts
import { Column, Entity, PrimaryGeneratedColumn } from "typeorm";

@Entity("cats")
export class Cat {
  @PrimaryGeneratedColumn()
  id: number;

  @Column({
    type: "varchar",
    length: 30,
    nullable: false,
  })
  name: string;

  @Column({
    type: "int",
    nullable: false,
  })
  age: number;

  @Column({
    type: "varchar",
    length: 30,
    nullable: false,
  })
  breed: string;
}
DTO の作成
猫データを追加・編集するときの型定義用に DTO を作成します。
cat.dto.ts
import { ApiProperty } from "@nestjs/swagger";
import { IsInt, IsString, Length } from "class-validator";

export class CatDTO {
  @ApiProperty()
  @IsString()
  @Length(1, 30)
  name: string;

  @ApiProperty()
  @IsInt()
  age: number;

  @ApiProperty()
  @IsString()
  @Length(1, 30)
  breed: string;
}
Service の作成
猫データの CRUD 処理のために Service を作成します。
cats.service.ts
import { Injectable } from "@nestjs/common";
import { InjectRepository } from "@nestjs/typeorm";
import { Repository } from "typeorm";
import { CatDTO } from "./cat.dto";
import { Cat } from "./cat.entity";

@Injectable()
export class CatsService {
  constructor(
    @InjectRepository(Cat)
    private catsRepository: Repository<Cat>,
  ) {}

  async findAll(): Promise<Cat[]> {
    return this.catsRepository.find();
  }

  async findOne(id: number): Promise<Cat | null> {
    return this.catsRepository.findOne({ where: { id } }) || null;
  }

  async create(cat: CatDTO): Promise<Cat> {
    const createdCat = this.catsRepository.create(cat);
    return this.catsRepository.save(createdCat);
  }

  async update(id: number, cat: CatDTO): Promise<Cat | null> {
    await this.catsRepository.update(id, cat);
    return this.catsRepository.findOne({ where: { id } }) || null;
  }

  async delete(id: number): Promise<void> {
    await this.catsRepository.delete(id);
  }
}
Controller の作成
猫データの CRUD 処理のルーティングのために Controller を作成します。
cats.controller.ts
import {
  Body,
  Controller,
  Delete,
  Get,
  Param,
  Post,
  Put,
} from "@nestjs/common";
import { CatDTO } from "src/cats/cat.dto";
import { Cat } from "src/cats/cat.interface";
import { CatsService } from "src/cats/cats.service";

@Controller("cats")
export class CatsController {
  constructor(private catsService: CatsService) {}

  @Get()
  async findAll(): Promise<Cat[]> {
    return this.catsService.findAll();
  }

  @Get(":id")
  async findOne(@Param("id") id: number): Promise<Cat | null> {
    return this.catsService.findOne(id);
  }

  @Post()
  async create(@Body() createCatDto: CatDTO): Promise<void> {
    this.catsService.create(createCatDto);
  }

  @Put(":id")
  async update(
    @Param("id") id: number,
    @Body() updateCatDto: CatDTO,
  ): Promise<Cat | null> {
    return this.catsService.update(id, updateCatDto);
  }

  @Delete(":id")
  remove(@Param("id") id: number): Promise<void> {
    return this.catsService.delete(id);
  }
}
MySQL への接続処理の追加
最後に MySQL への接続処理を追加します。
app.module.ts
import { Module } from "@nestjs/common";
import { TypeOrmModule } from "@nestjs/typeorm";
import { Cat } from "./cats/cat.entity";
import { CatsController } from "./cats/cats.controller";
import { CatsService } from "./cats/cats.service";

@Module({
  imports: [
    TypeOrmModule.forRoot({
      type: "mysql",
      host: "localhost",
      port: 3306,
      username: "****",
      password: "****",
      database: "nest_app",
      entities: [Cat],
      synchronize: true,
      retryAttempts: 3,
    }),
    TypeOrmModule.forFeature([Cat]),
  ],
  controllers: [CatsController],
  providers: [CatsService],
})
export class AppModule {}
動作確認
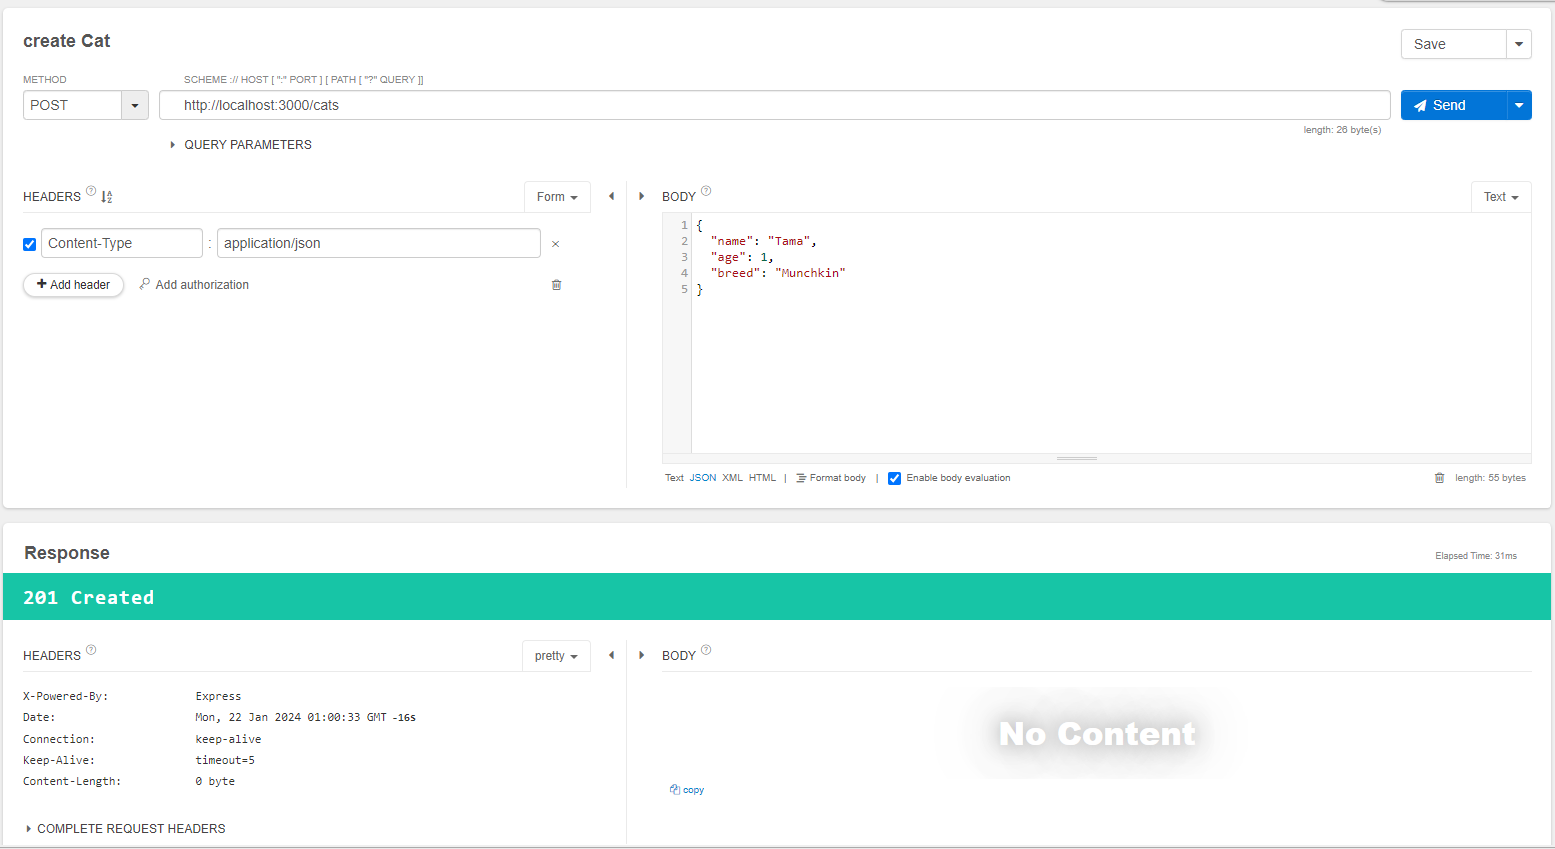
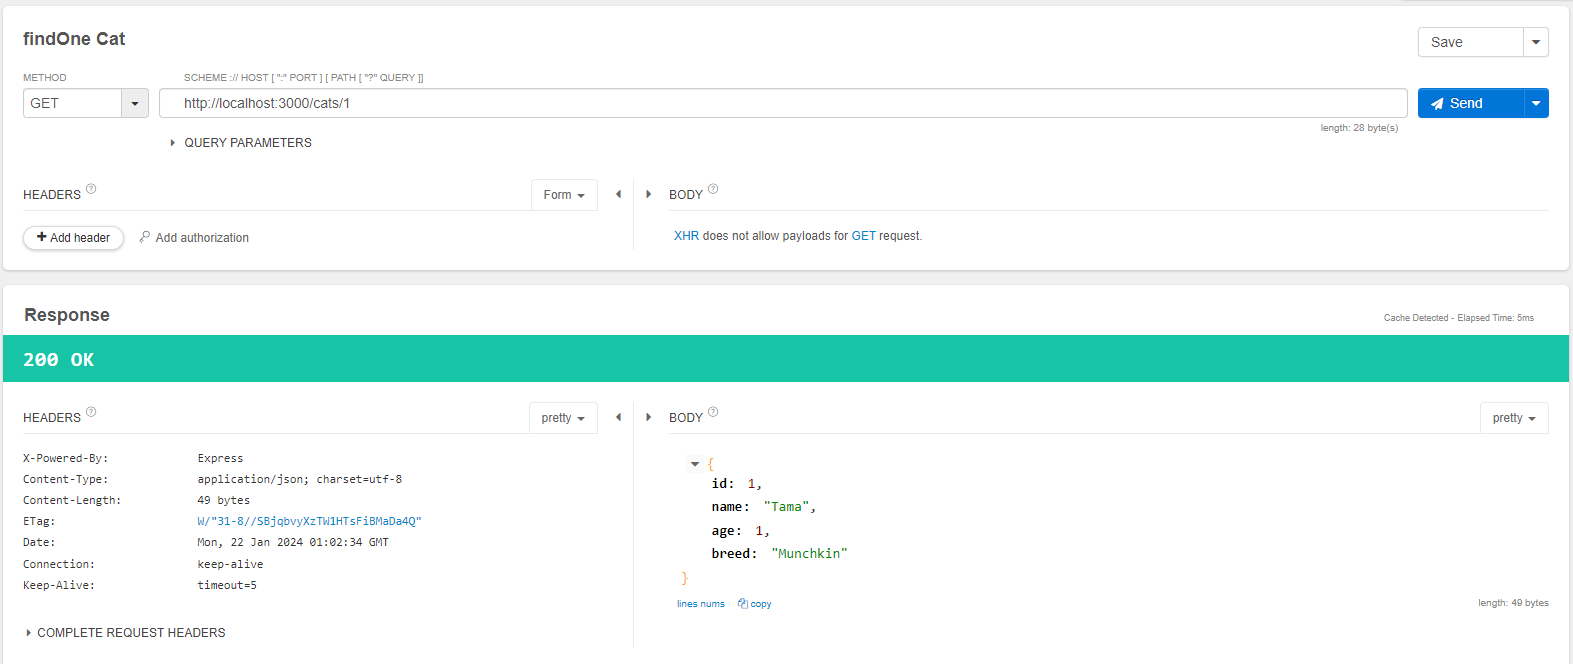
ひと通り実装できたので動作確認をおこないます。
Create & Read
create
findAll

findOne
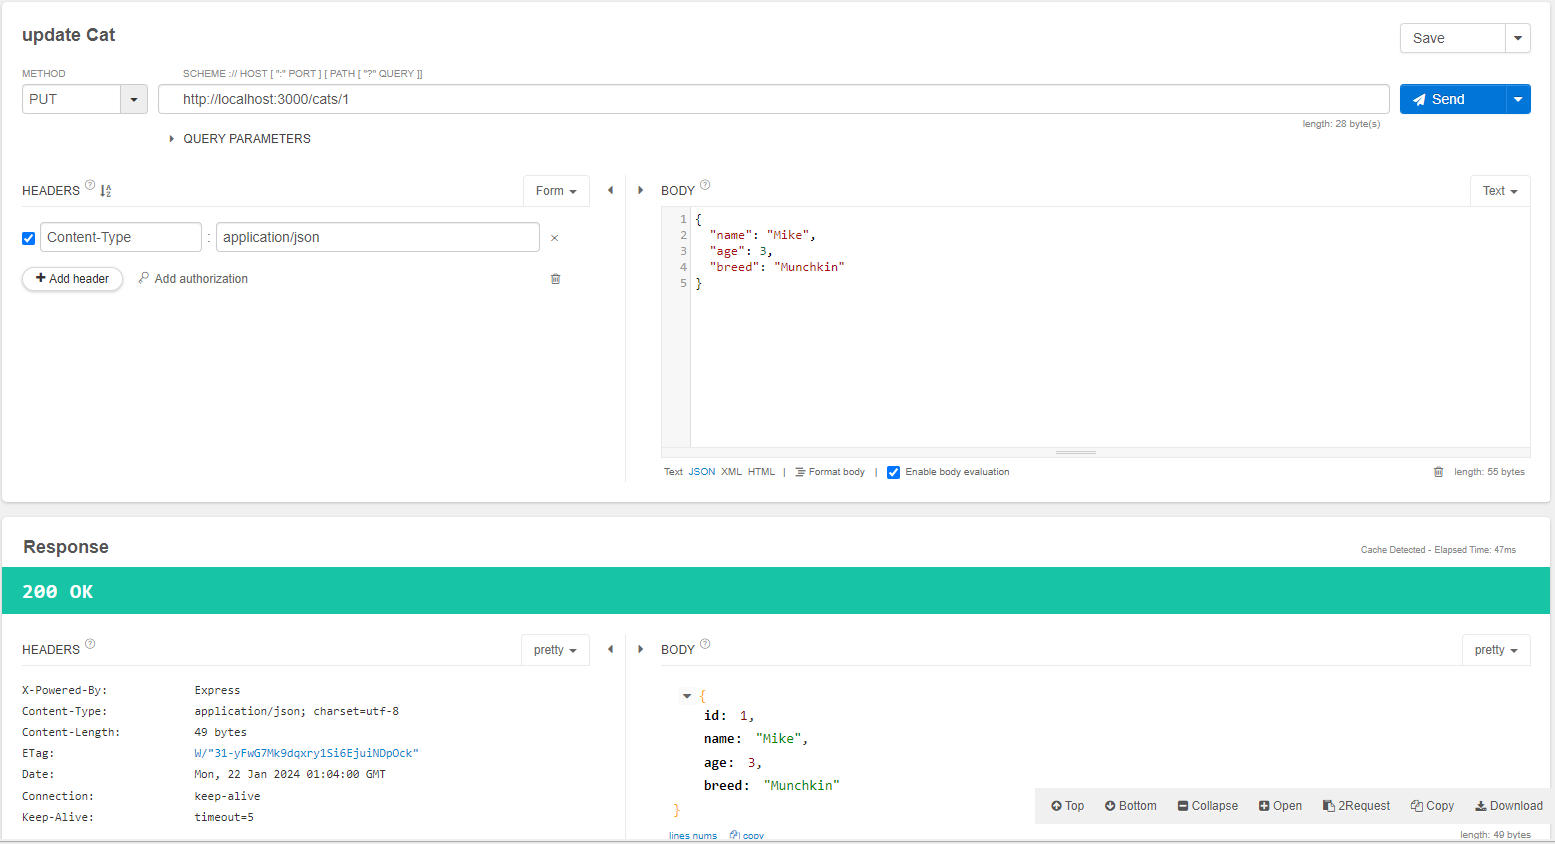
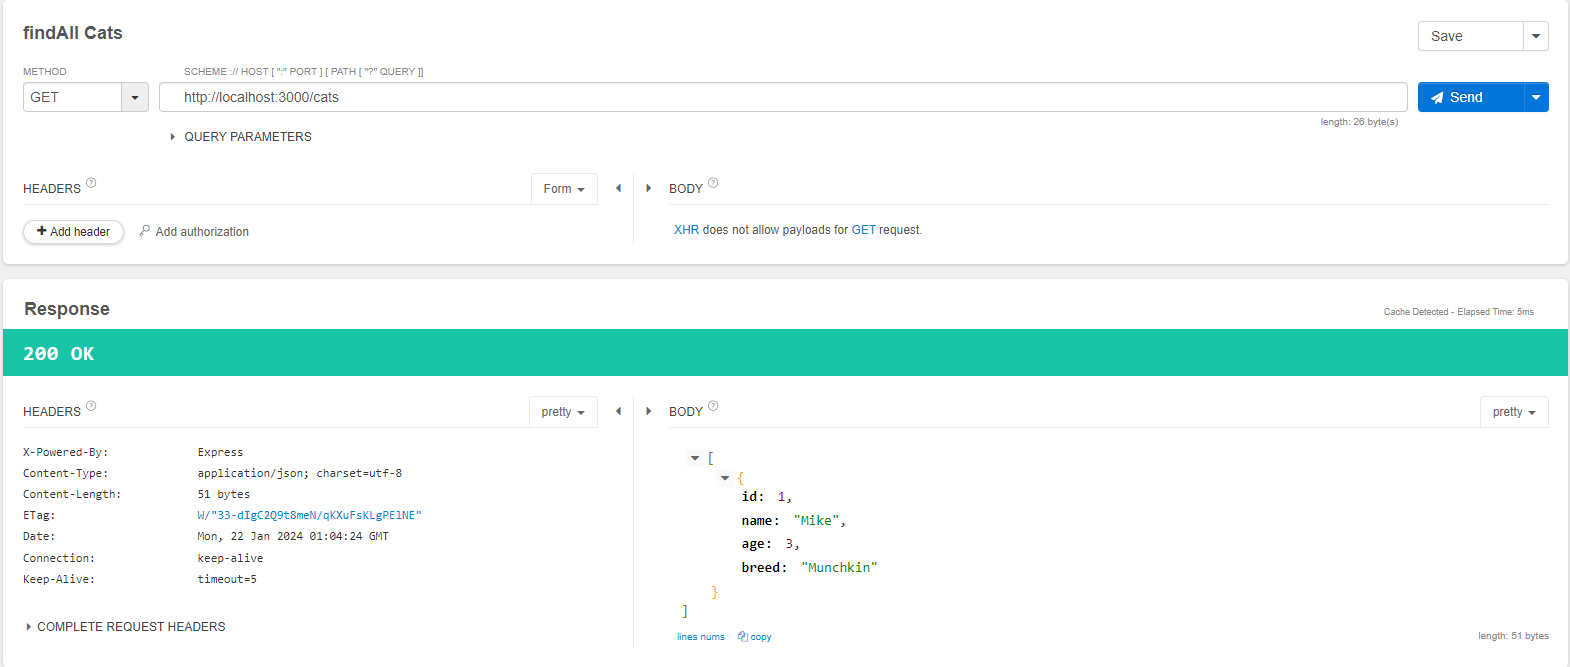
Update
update
findAll
Delete
remove
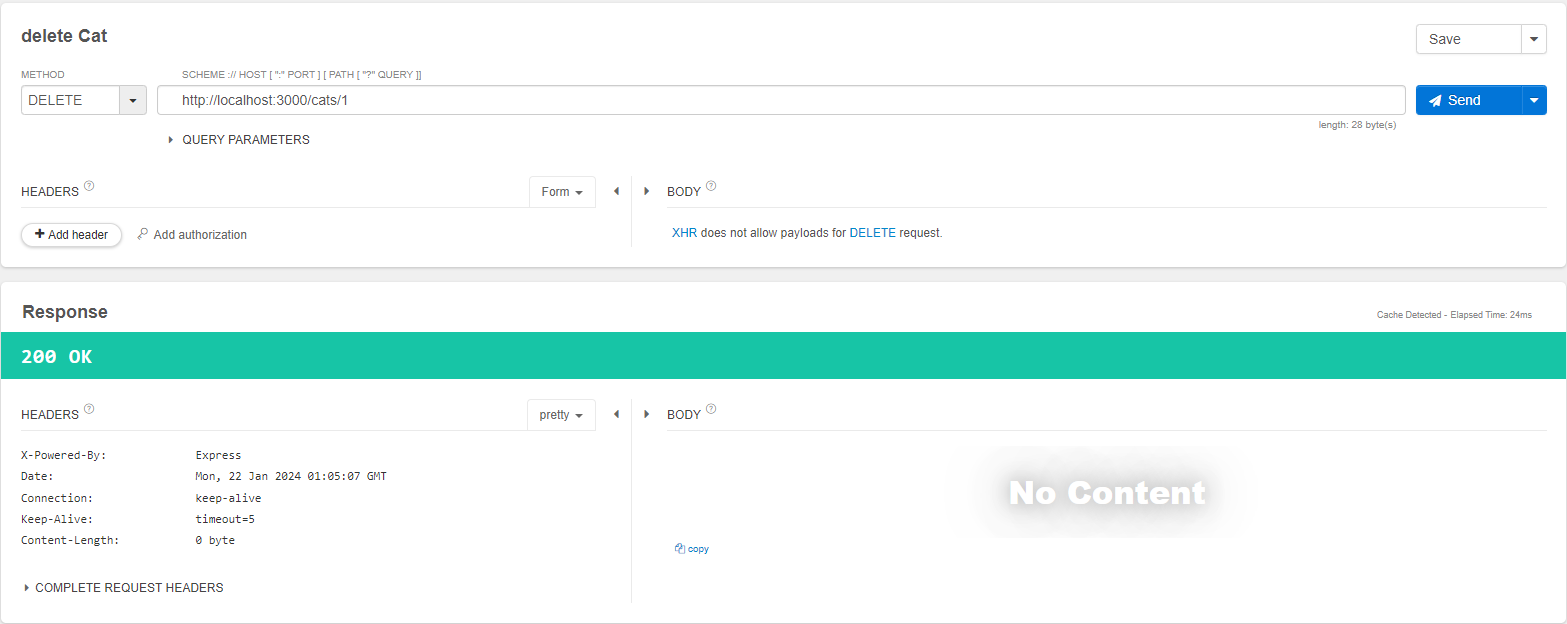
findAll

最後に
この記事では、NestJS と MySQL で猫のデータの CRUD 処理を実装しました。
実際のサービスとなるとエラーハンドリング等をもっと考慮する必要があると思いますが、概要はつかめたと思います。