はじめに
蟻本を始めるにあたってMacでC++の実行環境をVSCodeで構築したのでまとめます
主に以下のサイトを参考にさせていただきました
上記のサイトでは触れていなかった箇所でハマってしまったので、そのハマってしまった箇所を書き加える形で書いていきます
C++用のコンパイラをインストールする
Macの場合**「デフォルトで入っている g++ コマンドは clang++ のエイリアスで、 brew install gcc で入ってくるのが本物の g++ コマンドである」**というひどい罠があります(コメント参照)
今回僕は Clang ではなく GCC を使おうと思うので(AtCoderさんで言語選ぶ時のトップにきているのが GCC の方なので)、以下のコマンドであらためて GCC をインストールしました
$ xcode-select --install
$ brew install gcc
VSCodeをインストールする
次にVSCodeをインストールしましょう
公式サイトの Download for Mac からインストールしてください
VSCodeに拡張機能をインストールする
次にVSCodeに拡張機能をインストールしましょう
VSCodeを起動して、左タブの赤枠の部分から拡張機能をインストールすることができます
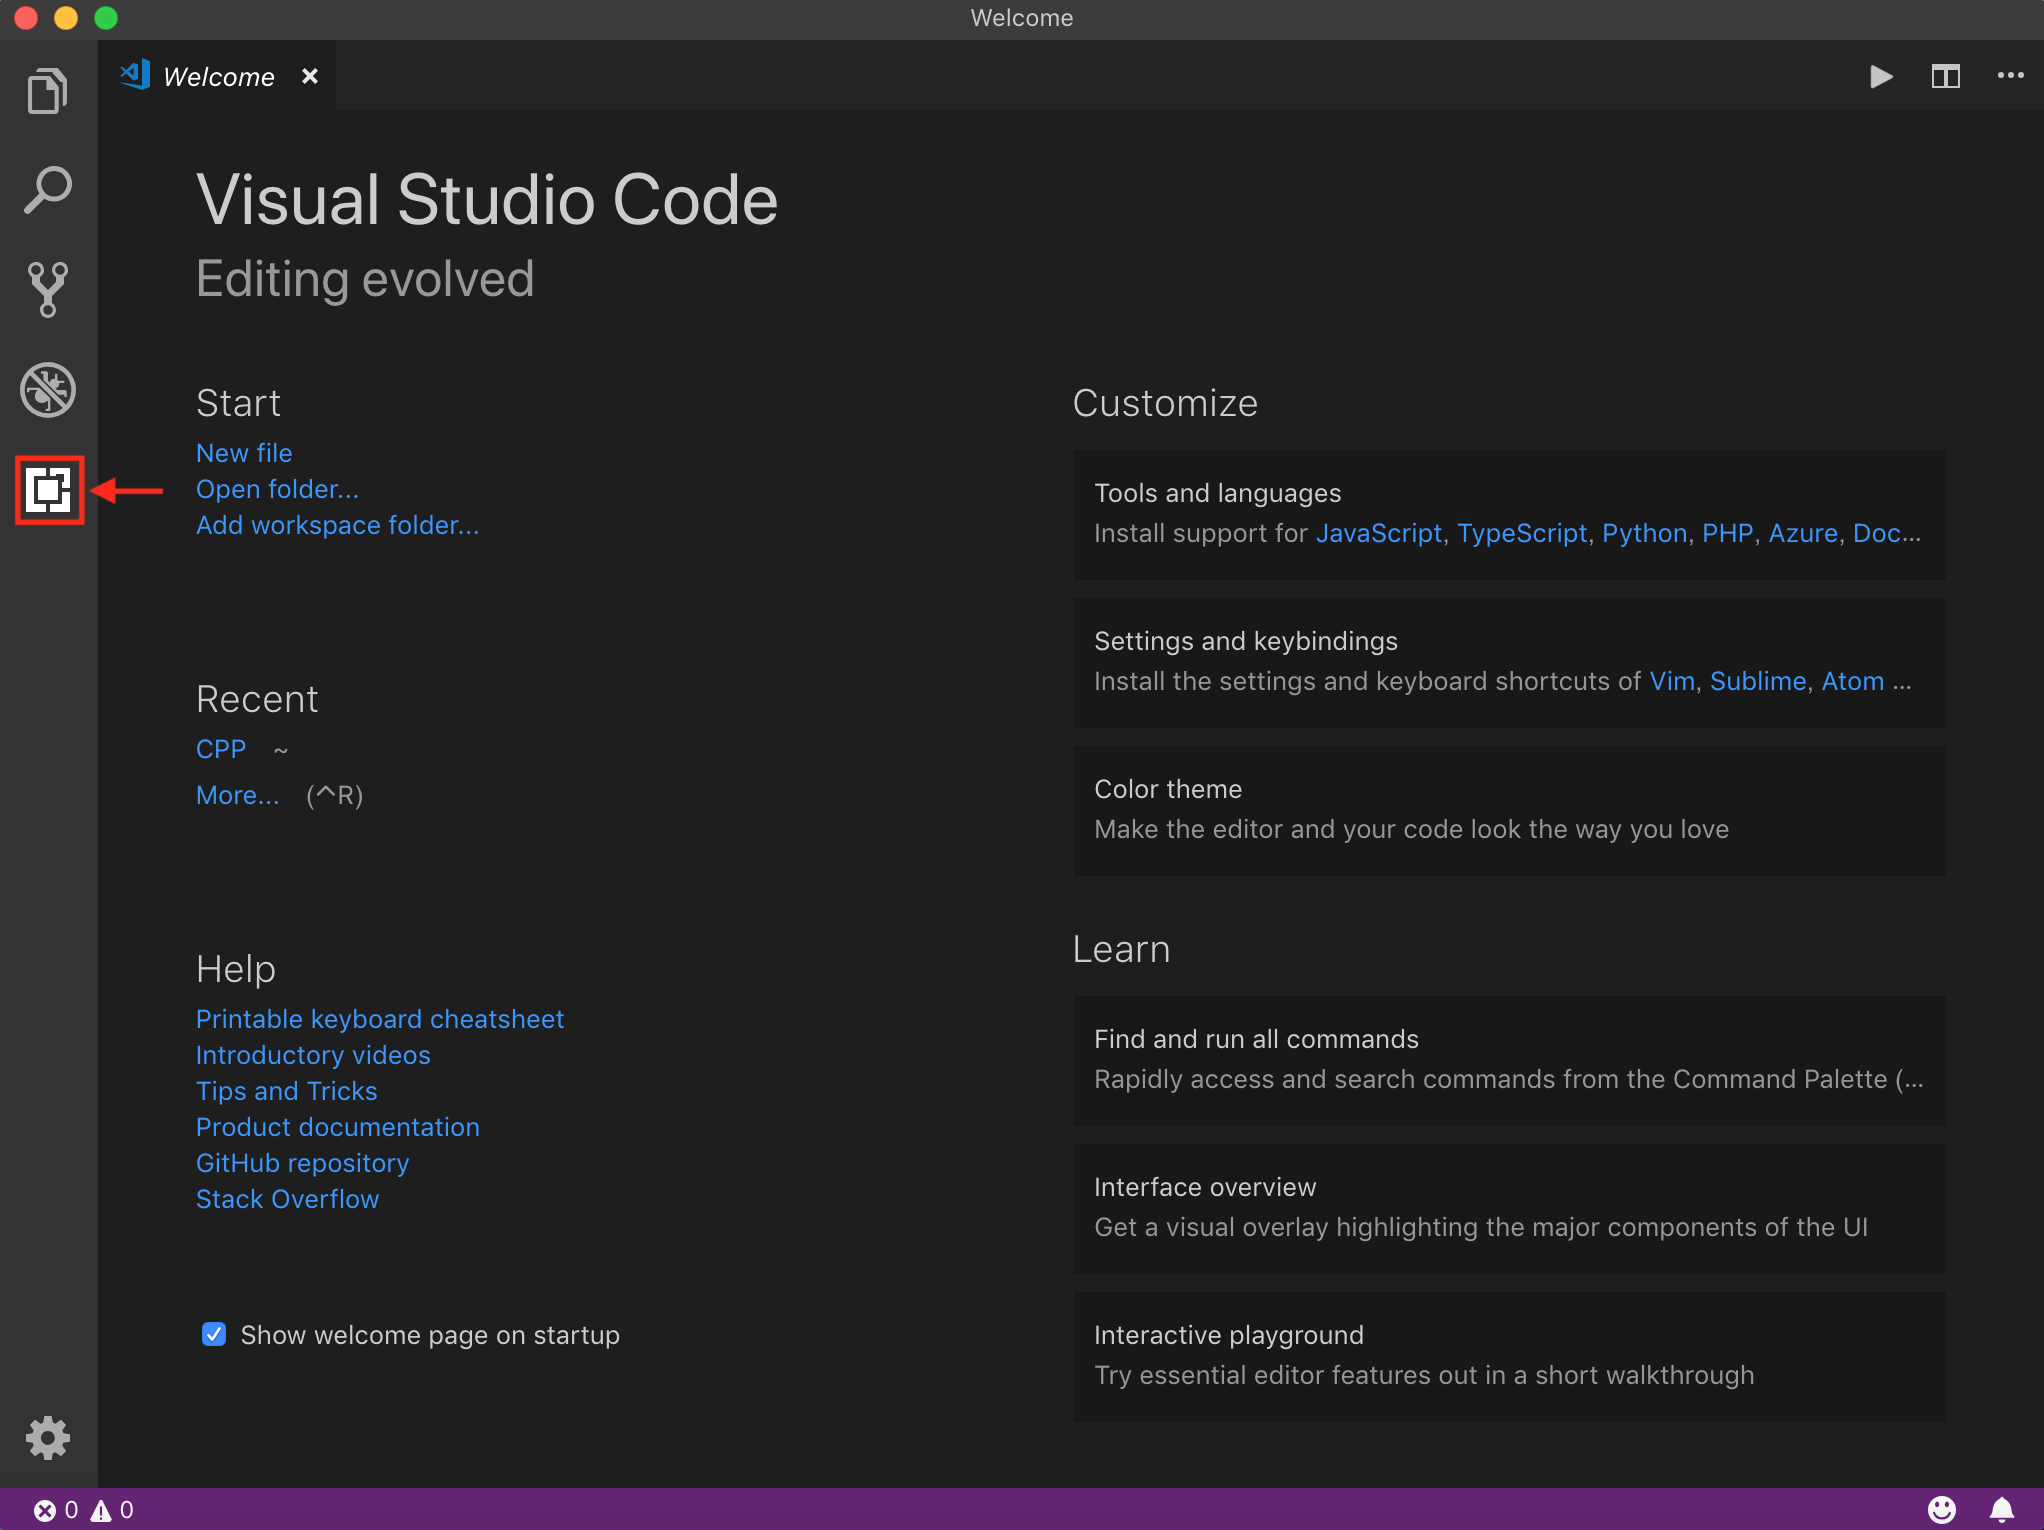
参考にさせて頂いたサイトにある通り、以下の3つの拡張機能をインストールしましょう
- C/C++
- C/C++ClangCommandAdapter
- CodeRunner
次に設定ファイルを編集します
上のバーから Code > 設定(Preferences)> 基本設定(Settings)を選択します
ユーザー設定(User)とワークスペース設定(Workspace)にそれぞれsettings.jsonが存在するので、ユーザー設定(User)の方のsettings.jsonを編集します
settings.jsonに以下を追記しましょう
{
    "clang.executable": "clang++",
    "code-runner.runInTerminal": true,
    "clang.cxxflags": [ "-std=c++14"],
    "code-runner.executorMap": {
        "javascript": "node",
        "java": "cd $dir && javac $fileName && java $fileNameWithoutExt",
        "c": "cd $dir && gcc $fileName -o $fileNameWithoutExt && $dir$fileNameWithoutExt",
        "cpp": "cd $dir && g++ -O2 -std=c++14 $fileName && ./a.out",
        "objective-c": "cd $dir && gcc -framework Cocoa $fileName -o $fileNameWithoutExt && $dir$fileNameWithoutExt",
        "php": "php",
        "python": "python -u",
        "perl": "perl",
        "perl6": "perl6",
        "ruby": "ruby",
        "go": "go run",
        "lua": "lua",
        "groovy": "groovy",
        "powershell": "powershell -ExecutionPolicy ByPass -File",
        "bat": "cmd /c",
        "shellscript": "bash",
        "fsharp": "fsi",
        "csharp": "scriptcs",
        "vbscript": "cscript //Nologo",
        "typescript": "ts-node",
        "coffeescript": "coffee",
        "scala": "scala",
        "swift": "swift",
        "julia": "julia",
        "crystal": "crystal",
        "ocaml": "ocaml",
        "r": "Rscript",
        "applescript": "osascript",
        "clojure": "lein exec",
        "haxe": "haxe --cwd $dirWithoutTrailingSlash --run $fileNameWithoutExt",
        "rust": "cd $dir && rustc $fileName && $dir$fileNameWithoutExt",
        "racket": "racket",
        "ahk": "autohotkey",
        "autoit": "autoit3",
        "dart": "dart",
        "pascal": "cd $dir && fpc $fileName && $dir$fileNameWithoutExt",
        "d": "cd $dir && dmd $fileName && $dir$fileNameWithoutExt",
        "haskell": "runhaskell",
        "nim": "nim compile --verbosity:0 --hints:off --run",
        "lisp": "sbcl --script",
        "kit": "kitc --run"
      }
}
この追記により、ソースコードを開いたまま
⌃(control) + ⌥(option) + N
を押すとターミナルが開いて、コンパイル&実行までしてくれます
と、ここまでが参考にさせて頂いたサイトの主な設定でした
が、僕の場合以下のようなエラーが出ました
# include errors detected. Please update your includePath.
例えば以下のコードにおいて
# include <iostream>

int main(){
    std::cout << "Hello, World" << std::endl;
    return 0;
}
#include <iostream> に赤線が引かれていた場合、上記のようなエラーが起きてしまいます
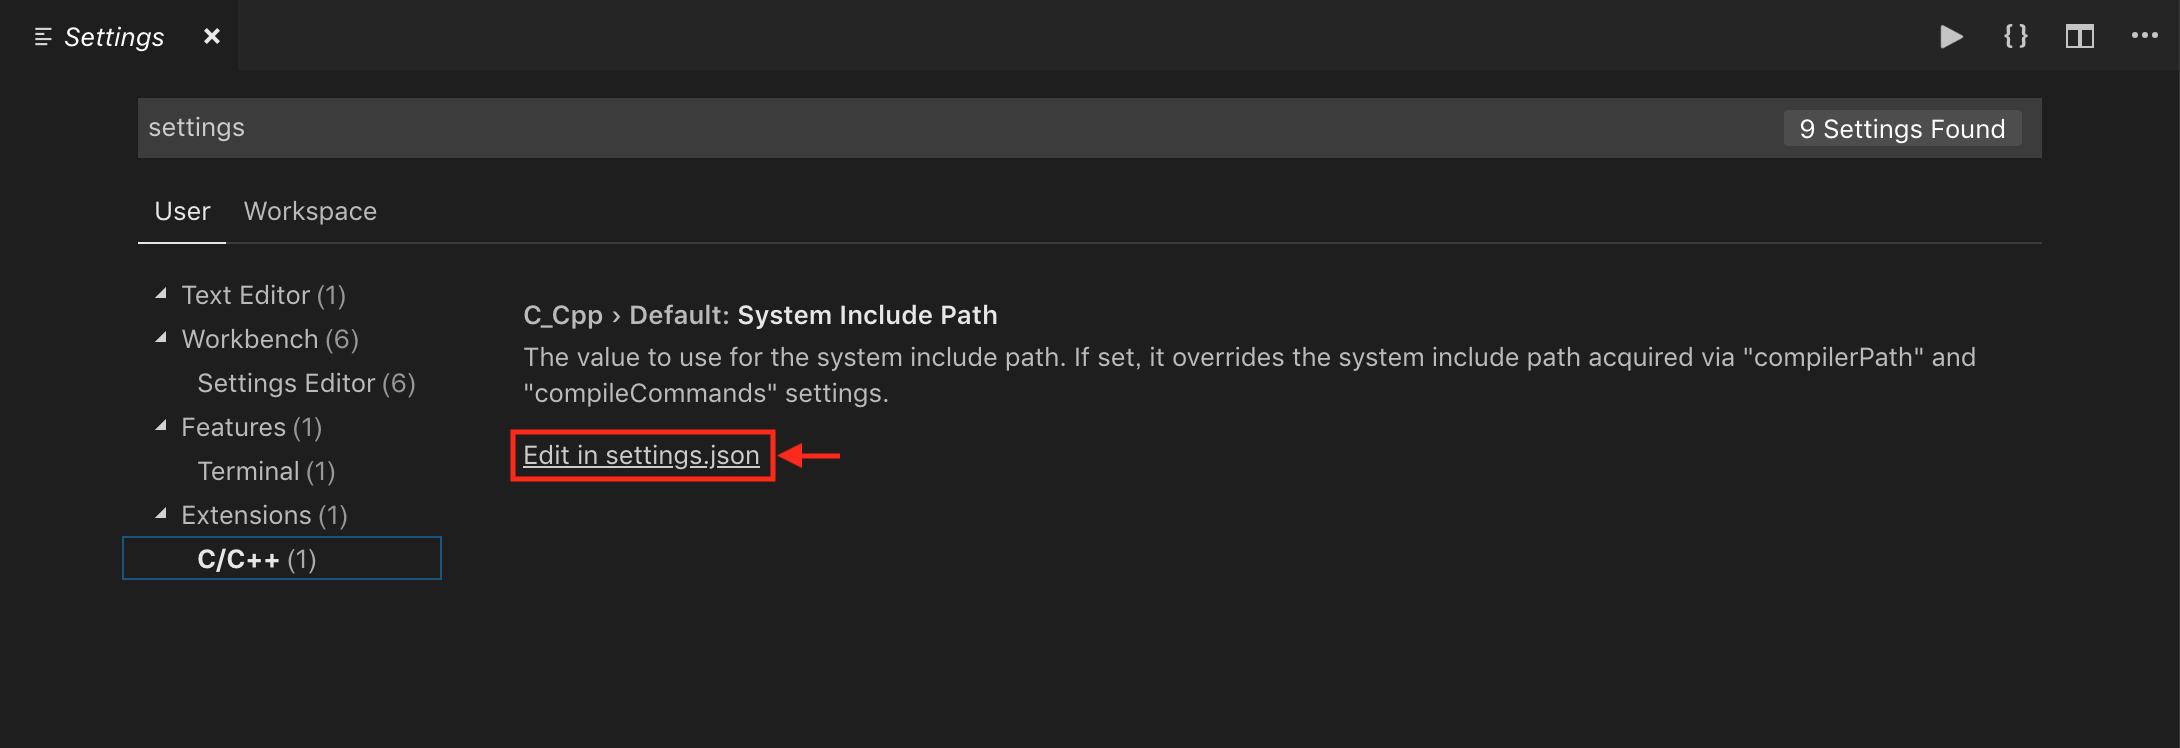
そこでさらに設定をします
c_cpp_properties.json を設定する
この部分は
Visual Studio Code での C++ の初期設定 (Windows x gcc(MinGW) 編)
を参考にさせていただきました
以下のようにして c_cpp_properties.json を設定します
- Ctrl+Shift+P でコマンドパレットを開く
- C/Cpp: Edit configurations... を選択
- c_cpp_properties.json が作成される
- c_cpp_properties.json を設定する
c_cpp_properties.json で具体的に設定する箇所は
1. "includePath"
2. "compilerPath"
になります
以下のコマンドをターミナルで実行して、brew install gcc で gcc がどこにインストールされたのか確認しましょう
$ gcc -v
確認したら、 c_cpp_properties.json を設定しましょう
僕の場合は以下のような設定にしました
{
    "configurations": [
        {
            "name": "Mac",
            "includePath": [
                "/usr/local/Cellar/gcc/8.3.0/include",
                "${workspaceFolder}/**"
            ],
            "defines": [],
            "macFrameworkPath": [
                "/System/Library/Frameworks",
                "/Library/Frameworks"
            ],
            "compilerPath": "/usr/local/Cellar/gcc/8.3.0/bin/g++-8",
            "cStandard": "c11",
            "cppStandard": "c++17",
            "intelliSenseMode": "clang-x64"
        }
    ],
    "version": 4
}
ちなみに以下のコマンドでデフォルトで入っている g++ の場所がわかりますが、デフォルトで入っている g++ をそのまま使うのはあまり良い習慣ではないので(コメント参照)、brew install gcc でインストールした g++ を使うようにしました
$ which g++
おわりに
以上でとりあえずは C++で始める競プロ / VSCodeの環境構築(Mac)が完成となります
また何かあれば追記するかもしれません(2019/5/24)
コメントを受け修正しました(2019/5/25)