txt2imgの基本についてはこちらをご覧ください。
はじめに
Stable diffusionのイカしたテクニック、txt2imghdの仕組みを解説します。
簡単に試すことのできるGoogle Colabも添付しましたので、是非お試しください。
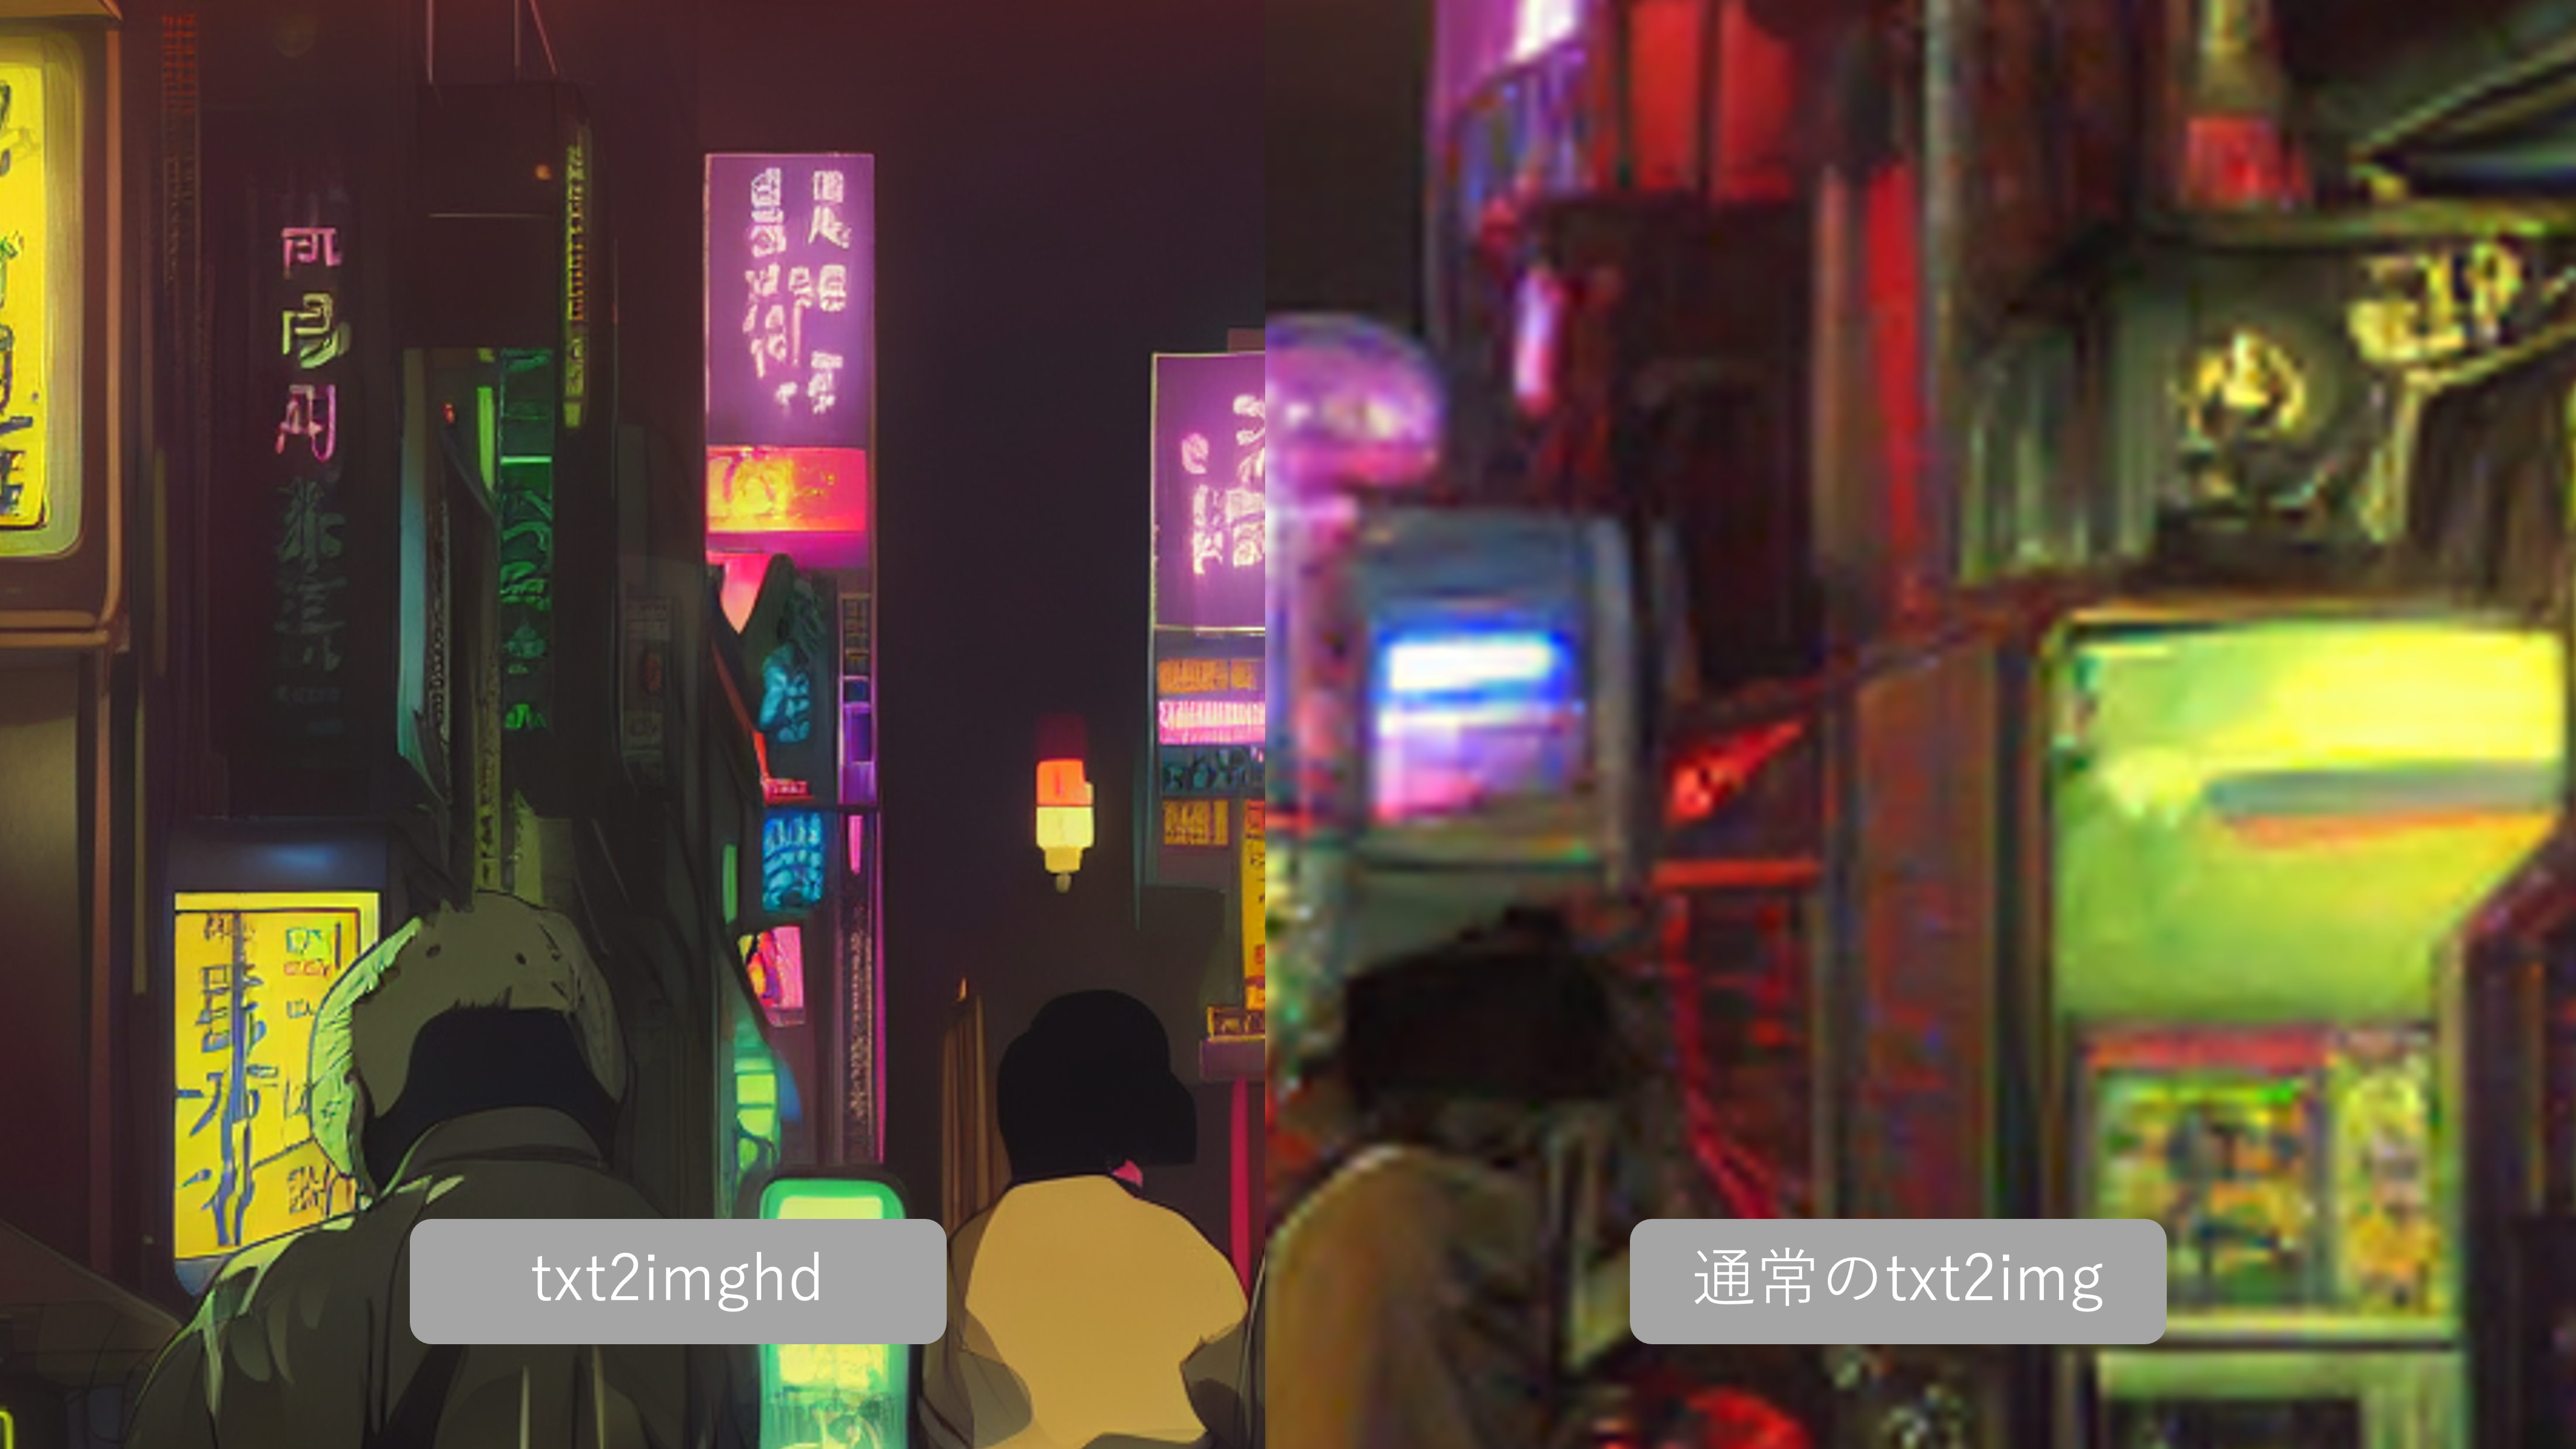
↓の画像は、通常のtxt2imgとtxt2imghdで生成した画像を拡大して並べたものです。明らかに綺麗になっていることがわかります。
TL;DR
txt2imghdとは、通常のtxt2imgにimg2imgと超解像技術を組み合わせることでStable diffusionで作成した画像のクオリティーを大幅に上昇させるテクニックです。
※既に作成した画像に用いることも可能です。
実際のコードはこちらのリポジトリから確認できます。
またこちらから私が作成したGoogle Colabバージョンにアクセスできます。
txt2imghdの仕組み
Stable diffusionで大きな画像を生成するには大量のVRAMを必要とします。1
私が試した限り、Colab pro上では512x756程度が限界でした。
従って、より大きな画像を生成するには別のアプローチを取る必要があります。
txt2imghdでは、以下のようにしてより大きな画像を生成することができます。
- txt2imgを用いて画像を生成する
- Real-ESRGAN2などの超解像技術を用いて画像を拡大する
- 拡大した画像を細かく分割し、1枚ずつimg2imgで綺麗にする
- 綺麗になった画像を結合する

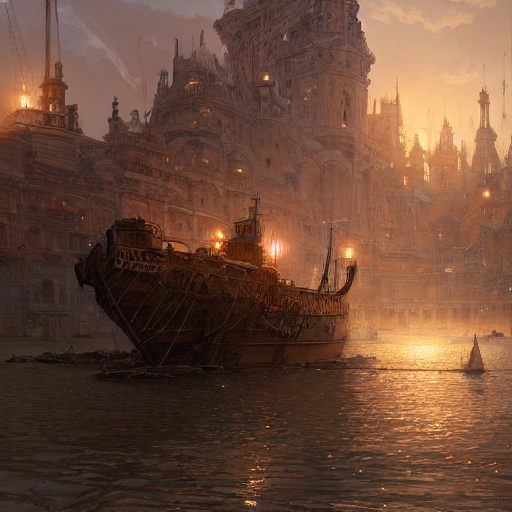
↓Step1で生成された画像(512x512)
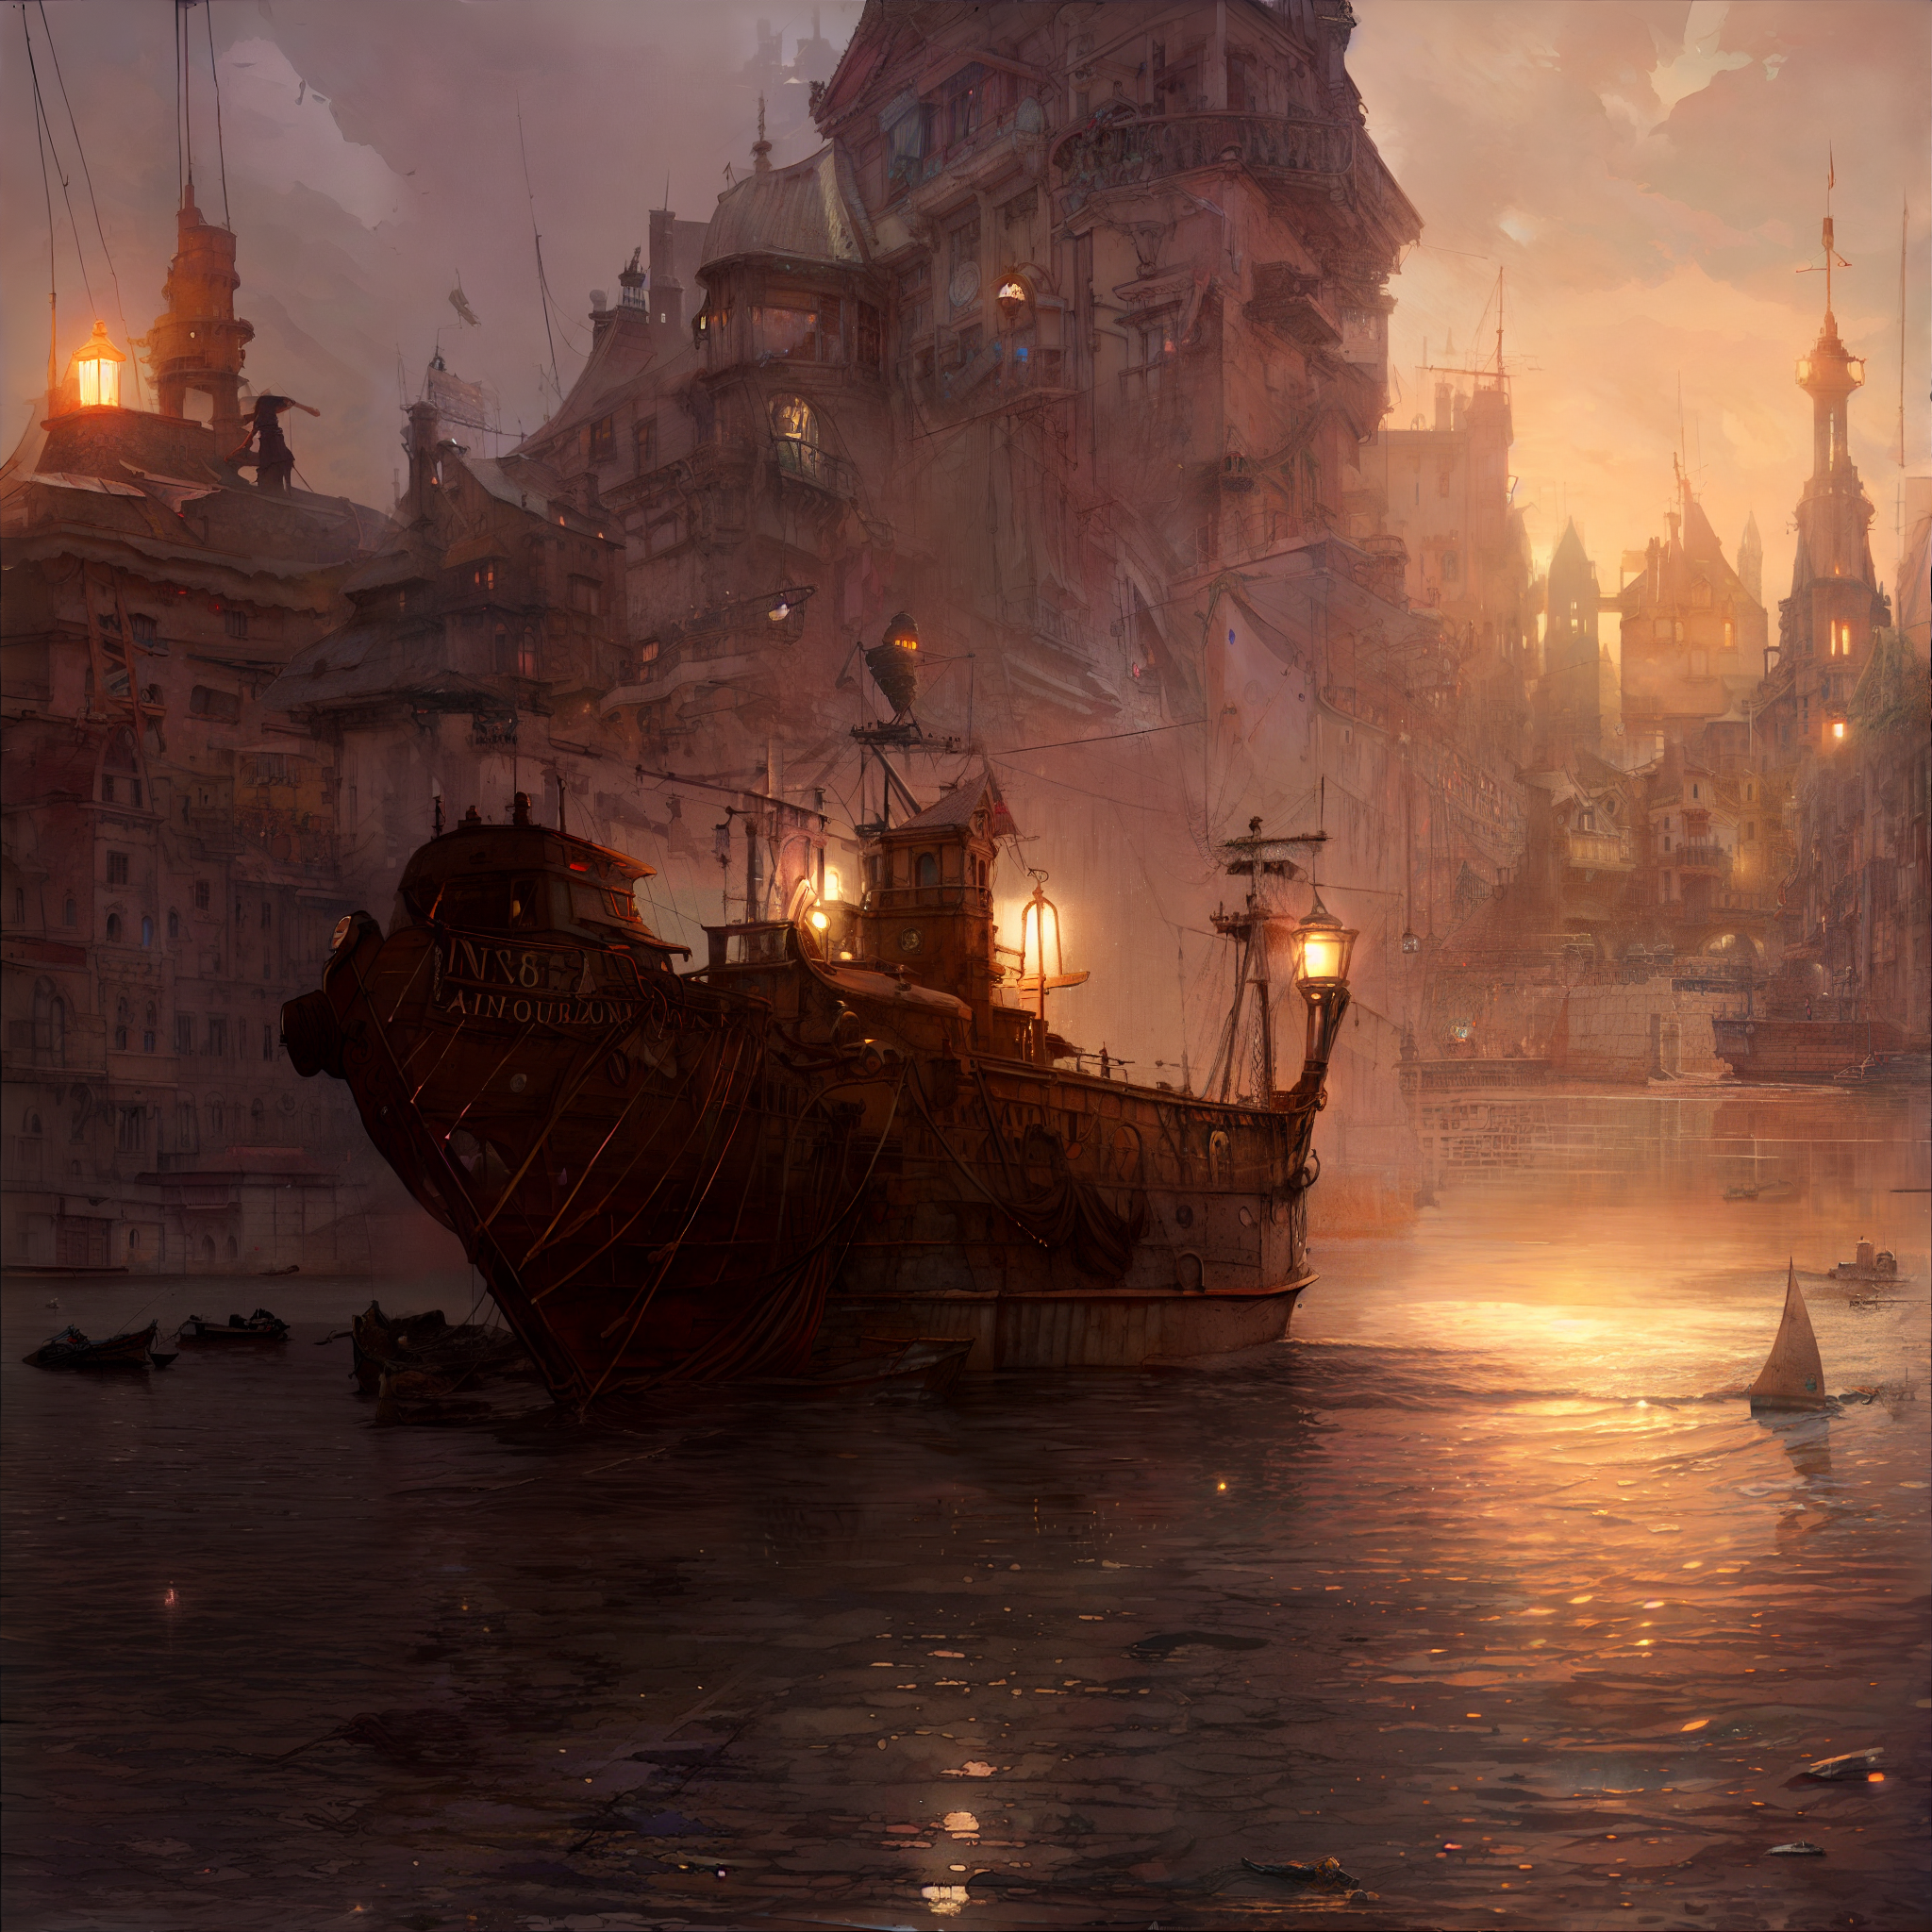
↓Step2~4を2周した結果生成された画像(2048x2048)
Step1の段階では存在しなかった要素が追加され、より綺麗な仕上がりになっていることがわかります。
コード解説
txt2imghd.pyのベースはStable diffusionの大元のリポジトリのtxt2img.py及びimg2img.pyです。
ここではtxt2imghd固有の部分のみ簡単に解説します
以下のコードは474行目からです。
# generated はtxt2imgで生成された画像のファイル名の配列です
for base_filename in generated:
    # opt.passes は「解像度を2倍にする処理を何度行うか」というオプションです
    for _ in trange(opt.passes, desc="Passes"):
        # realesrgan2x()で元の画像を2倍に拡大し、~~~~_u.png のような名前で保存します
        realesrgan2x(opt.realesrgan, os.path.join(sample_path, f"{base_filename}.png"), os.path.join(sample_path, f"{base_filename}u.png"))
        base_filename = f"{base_filename}u"
        source_image = Image.open(os.path.join(sample_path, f"{base_filename}.png"))
        # 分割後の画像サイズは、最初に生成した画像と等しくなります
        og_size = (opt.H,opt.W)
        # grid_slice()で画像を分割します。1024x1024は9枚に、2048x2048は36枚に分割されます
        slices, _ = grid_slice(source_image, opt.gobig_overlap, og_size, False)

        betterslices = []
        for _, chunk_w_coords in tqdm(enumerate(slices), "Slices"):
            # chunkは分割された画像 coord_xとcoord_yはそれらの画像の元画像における位置です
            chunk, coord_x, coord_y = chunk_w_coords
            # ここから下、forループ内部はimg2img.pyと基本的に同じです
            init_image = convert_pil_img(chunk).to(device)
            init_image = repeat(init_image, '1 ... -> b ...', b=batch_size)
            init_latent = model.get_first_stage_encoding(model.encode_first_stage(init_image))  # move to latent space

            sampler.make_schedule(ddim_num_steps=opt.detail_steps, ddim_eta=0, verbose=False)

            assert 0. <= opt.strength <= 1., 'can only work with strength in [0.0, 1.0]'
            t_enc = int(opt.strength * opt.detail_steps)

            with torch.inference_mode():
                with precision_scope("cuda"):
                    with model.ema_scope():
                        for prompts in tqdm(data, desc="data"):
                            uc = None
                            if opt.detail_scale != 1.0:
                                uc = model.get_learned_conditioning(batch_size * [""])
                            if isinstance(prompts, tuple):
                                prompts = list(prompts)
                            c = model.get_learned_conditioning(prompts)

                            # encode (scaled latent)
                            z_enc = sampler.stochastic_encode(init_latent, torch.tensor([t_enc]*batch_size).to(device))
                            # decode it
                            samples = sampler.decode(z_enc, c, t_enc, unconditional_guidance_scale=opt.detail_scale,
                                                    unconditional_conditioning=uc,)

                            x_samples = model.decode_first_stage(samples)
                            x_samples = torch.clamp((x_samples + 1.0) / 2.0, min=0.0, max=1.0)

                            for x_sample in x_samples:
                                x_sample = 255. * rearrange(x_sample.cpu().numpy(), 'c h w -> h w c')
                                # resultsliceがimg2imgで生成された画像です
                                resultslice = Image.fromarray(x_sample.astype(np.uint8)).convert('RGBA')
                                betterslices.append((resultslice.copy(), coord_x, coord_y))
        # ここから分割した画像を結合していきます
        alpha = Image.new('L', og_size, color=0xFF)
        alpha_gradient = ImageDraw.Draw(alpha)
        a = 0
        i = 0
        overlap = opt.gobig_overlap
        shape = (og_size, (0,0))
        while i < overlap:
            alpha_gradient.rectangle(shape, fill = a)
            a += 4
            i += 1
            shape = ((og_size[0] - i, og_size[1]- i), (i,i))
        mask = Image.new('RGBA', og_size, color=0)
        mask.putalpha(alpha)
        finished_slices = []
        for betterslice, x, y in betterslices:
            finished_slice = addalpha(betterslice, mask)
            finished_slices.append((finished_slice, x, y))
        # grid_merge()で画像を結合
        final_output = grid_merge(source_image.convert("RGBA"), finished_slices).convert("RGB")
        # 結合後の画像は ~~~~_ud.png のような名前で保存されます
        final_output.save(os.path.join(sample_path, f"{base_filename}d.png"))
        base_filename = f"{base_filename}d"

        torch.cuda.empty_cache()
        gc.collect()
Google Colabで動かす
![]()
ここからは、私が作成したGoogle Colabを紹介します。リンクから開いてそのまま動かすことができますので是非お試しください。
オリジナルのコードをColabように書き換えた他、GFPGANによる顔パーツの復元も追加しました。
見ていただければわかりますが、基本的な設定は全ていじれるようにしています。
Colabのフリープランでは動かない可能性があります。
特にGFPGANはフリープランでは当たりのGPUであるTeslaT4でも動きません。
Colabのセットアップ
Hugging faceのアクセストークンを発行し、Google Driveにテキストファイルとして保存してください。
アクセストークンの発行に関しては、以下の記事が参考になります。
その後、Install dependencies、Setup pipelines and util functionセクションを実行してください。
Google driveをマウントするのは、tokenをファイルから取得するためです。
Install dependenciesセクションを実行するとセッションがクラッシュしますが、これはpythonパッケージを有効化するための意図的な動作ありエラーではありません。
そのまま次のSetup pipelines and util functionsセクションを実行して問題ありません。
Install dependenciesを再度実行し直す必要はありません
txt2imghdを動かす
各種設定について解説します
| option | 内容 |
|---|---|
| BASEIMAGE_PATH | 既に作成した画像を再利用する際はここに画像へのパスを入力してください 新しい画像を生成する場合は空欄にしてください |
| PROMPT | txt2img, img2imgに使うprompt |
| HEIGHT/WIDTH | 画像の高さ、横幅 |
| STEPS | 数値が高いほど画像のクオリティーが上がりますが、時間がかかります。50がデフォルトです。 |
| IMG_NUM | 生成する画像の枚数 |
| SEED | seedを0にするとランダムな値が使われ、同じpromptでも違う画像が生成されます。0以外の数値を使うと、値に応じて毎回同じ画像が生成されます。 |
| TXT2IMG_GUIDANCE_SCALE | 数値をあげると、画像の品質や多様性を犠牲にする代わりに、よりpromptに一致するようになります |
| IMG2IMG_ETA | 公式曰く、「eta controls the scale of the variance for DDIM Scheduler」とのこと (これは正直よくわかっていないのですが、設定できるものは全部いれてみた次第です) |
| ROOT_DIR | 画像を保存するディレクトリROOT_DIR/original:txt2imgで生成した画像ROOT_DIR/restored/restored_imgs:GFPGANで顔を復元した画像ROOT_DIR/upscaled:Real-ESRGANで拡大&img2imgを適用した画像ROOT_DIR/results:最終的な処理結果 |
| SCALEUP_RATIO | 最終的に何倍まで拡大するか |
| SCALEUP_STEP_BY_STEP | 4倍以上の拡大率を選択した時の挙動が変化します。 チェックを入れると、画像を作成→2倍に拡大→img2img→2倍に拡大→img2imgという流れになります チェックを外すと、画像を作成→一気に4倍に拡大→img2imgという流れになります |
| ESRGAN_MODEL | Real-ESRGANで使用するモデル。通常バージョンとアニメに最適化されたバージョンがあります |
| FP_32 | Real-ESRGANで拡大する際により高精度にするオプション ※ CUDA out of memoryの原因になりやすいです |
| USE_IMG2IMG | チェックを外すとimg2img2を使わず、単純に拡大処理のみ行います |
| IMG2IMG_STRENGTH | 元画像をどの程度変更するか、というimg2imgのオプション |
| IMG2IMG_STEPS | STEPSのimg2img版ですが、こちらは高くするとぼやけた感じになりやすいです |
| IMG2IMG_GUIDANCE_SCALE |
TXT2IMG_GUIDANCE_SCALEのimg2img版 |
| IMG2IMG_ETA |
TXT2IMG_ETAのimg2img版 |
| GFPGAN_BEFORE_SCALEUP GFPGAN_AFTER_SCALEUP |
GFPGANを用いて顔を復元するかどうか 拡大の前後どちらか、または両方でGFPGANを実行できます。 |
参考資料
txt2imghdギャラリー
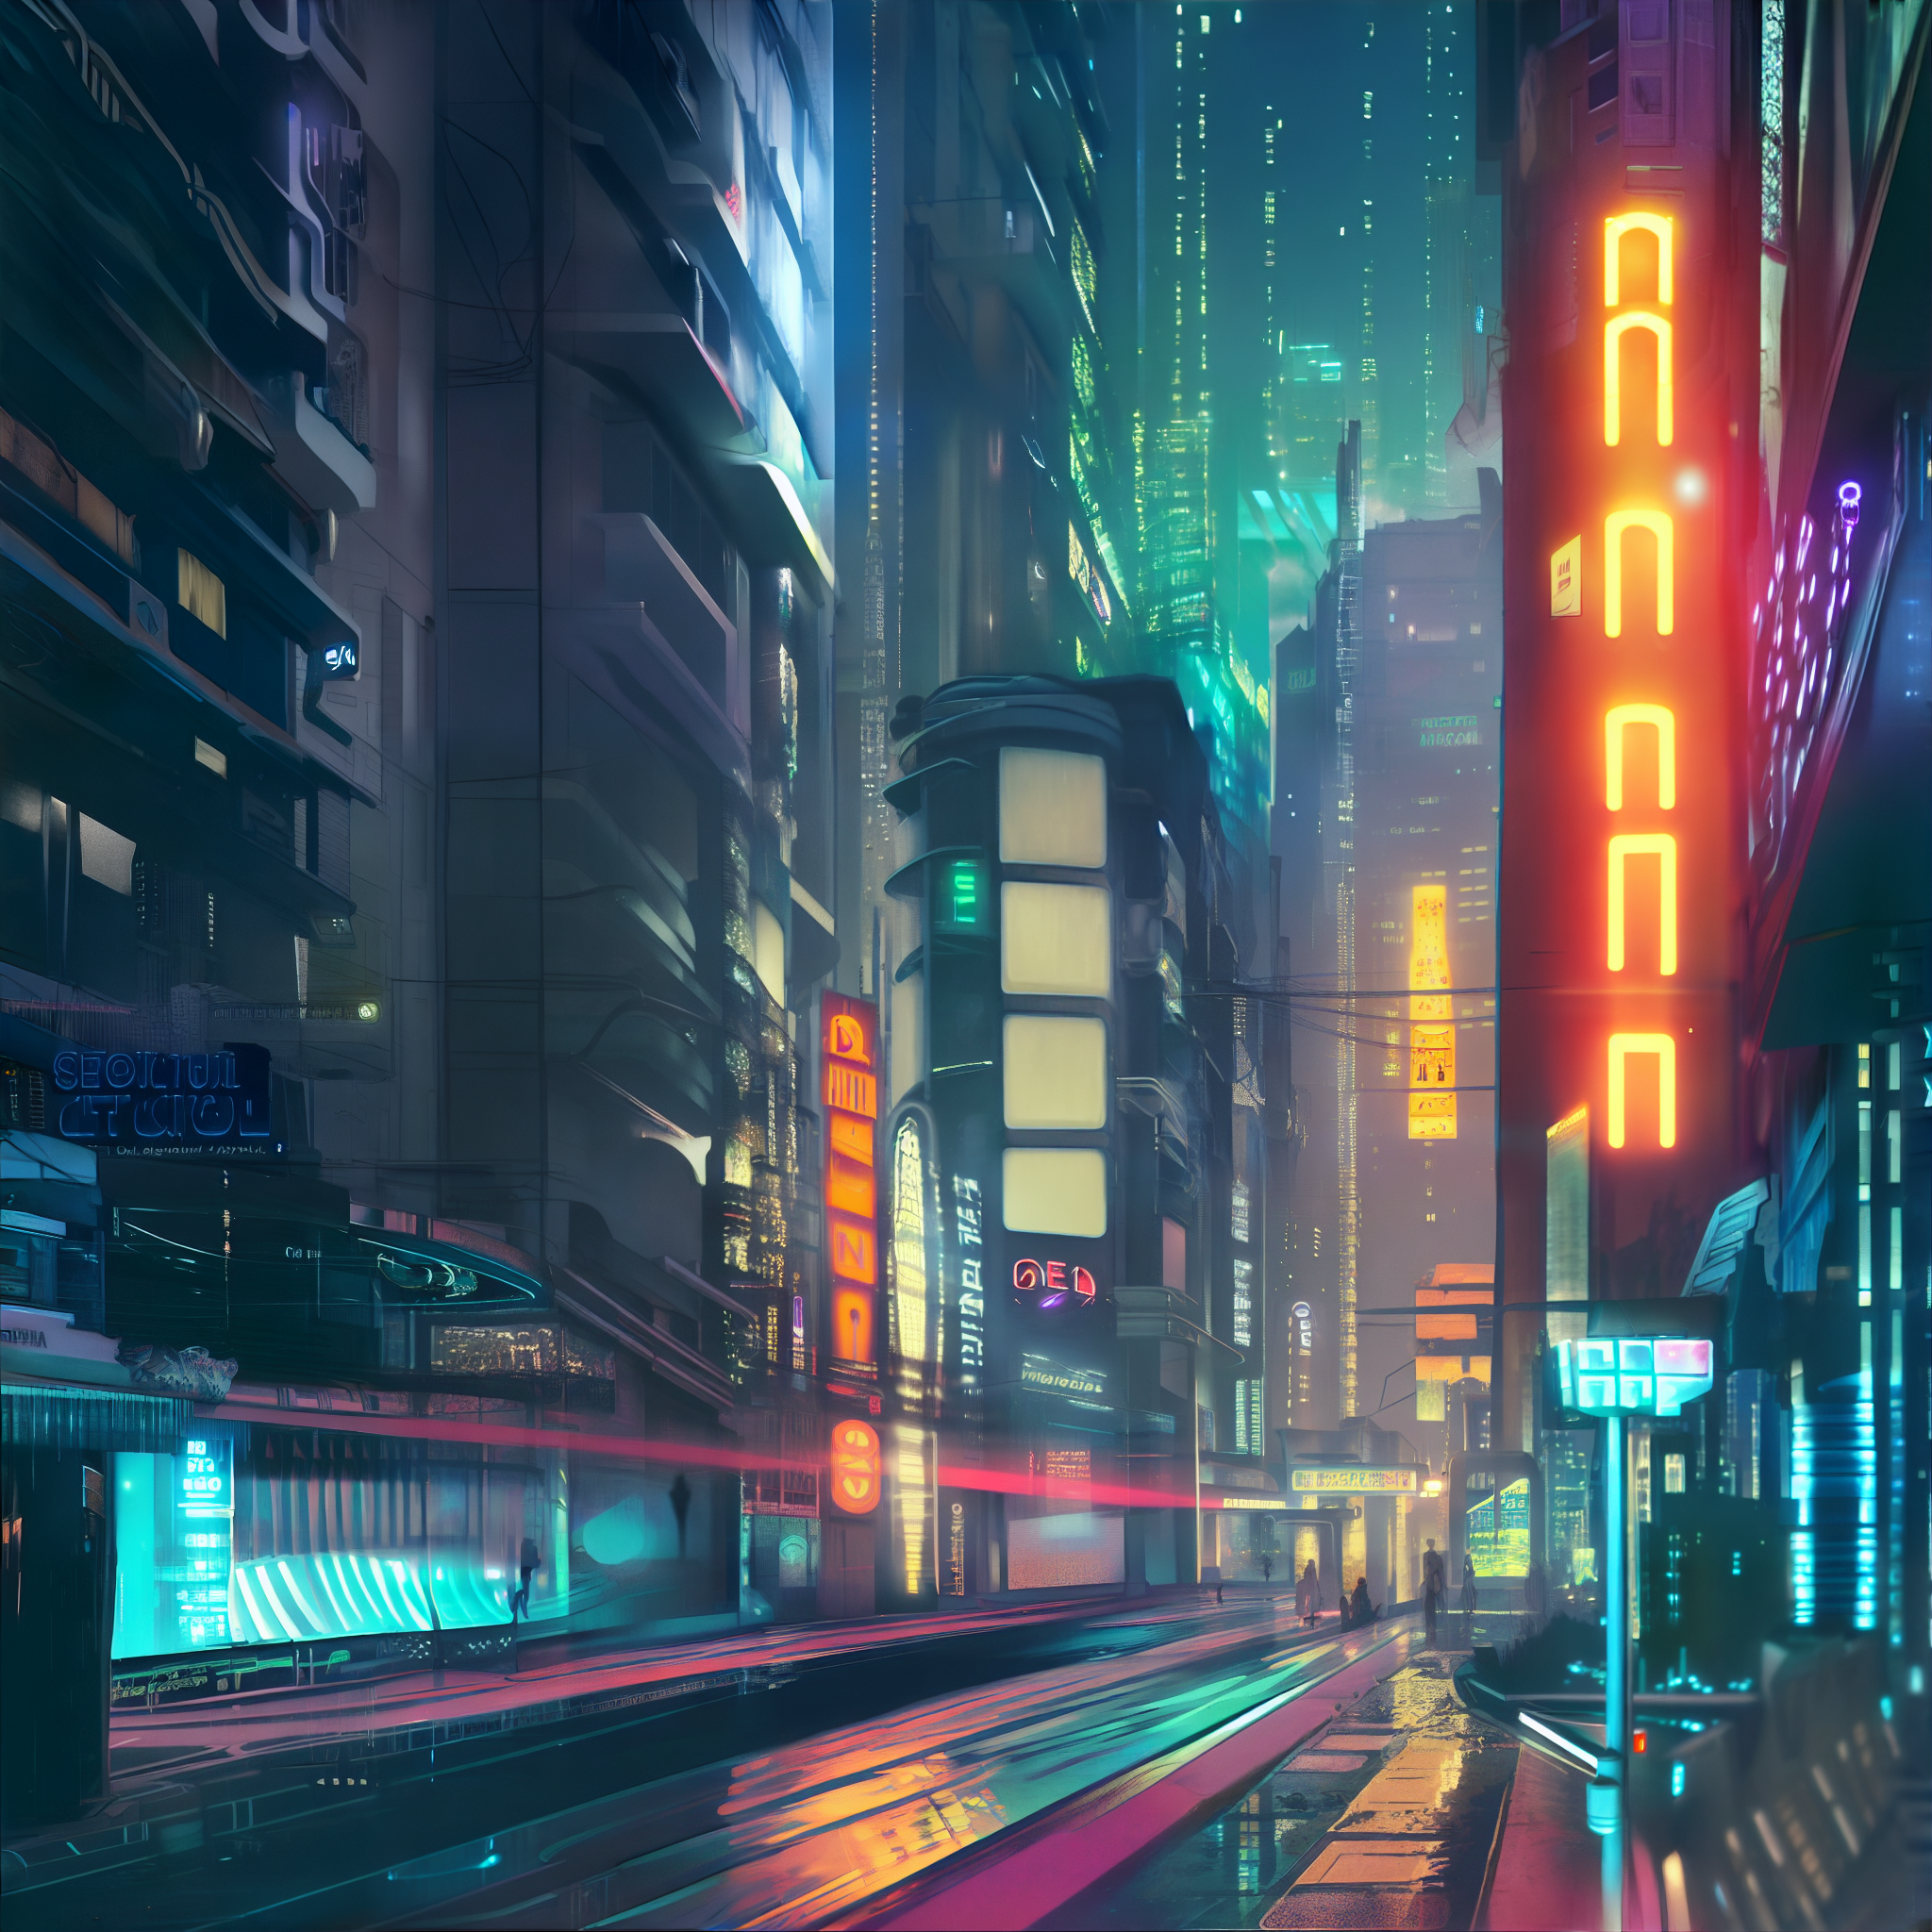
A beautiful neon cyberpunk city street at night, apartment, skyscrapers, by alphonse mucha caravaggio monet ,4K resolution, 8K resolution, a lot of Decoration and embellishments, sci-fi, photorealistic, highly detailed, sharp focus, clean 8k, volumetric lighting, octane render, ceramic
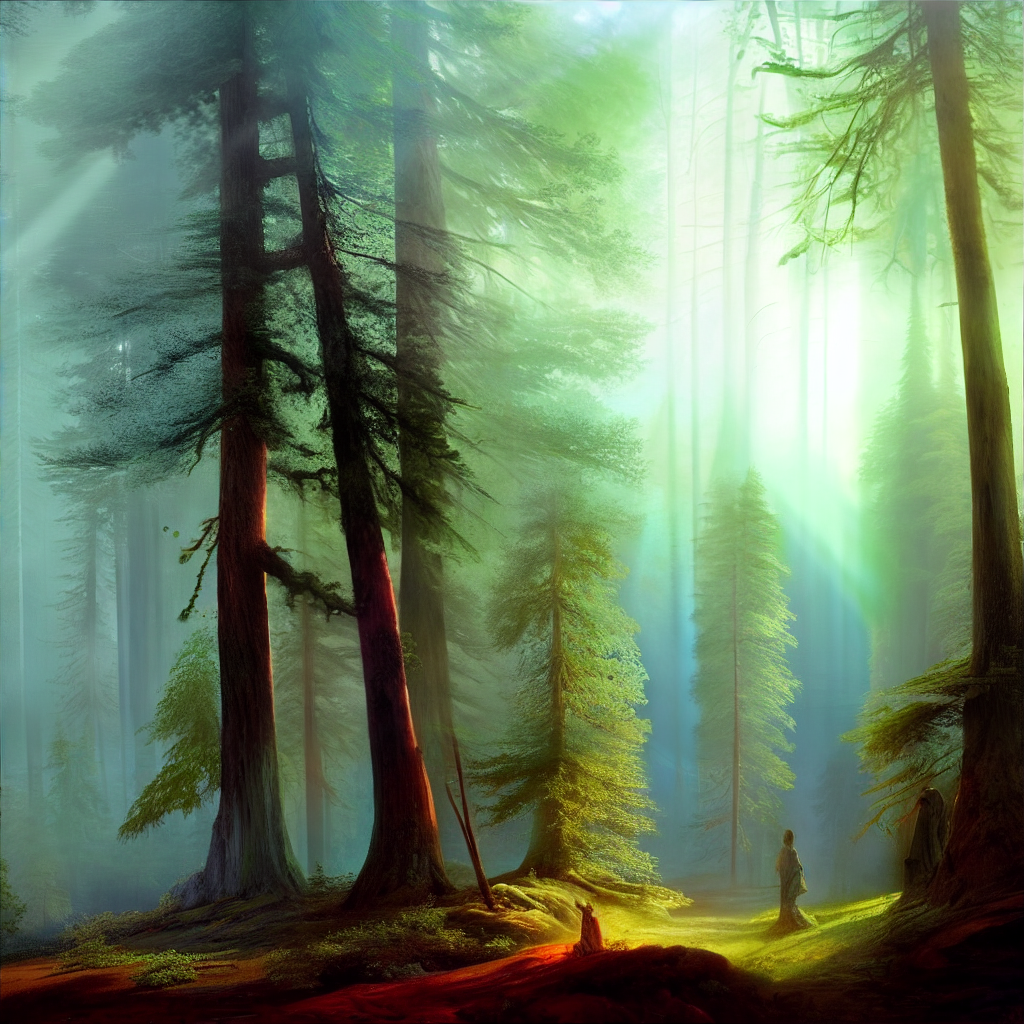
a gloomy fantasy forest with creepy tall trees, god rays coming through the trees, by Frederic Edwin Church & Ivan Aivazovsky, trending on artstation HQ

a anime still of an highly detailed night cyberpunk city life, bladerunner style!! detailed shops, neon lights, ray tracing, advertising everywhere, people and robots walking around. art by satoshi kon and studio ghibli, in the style of ghost in the shell, muted colours, hyperrealism, cinematic lighting, lush detail, award winning, wlop, octane render, trending on artstation