はじめに
こんにちは、やっしです。
この記事はTechCommit AdventCalendar2023の20日目の記事です。
概要
本記事では、Googleカレンダーに登録されている1ヶ月先の特定の予定を、週1でLINEに通知するbotの作成方法ついて述べます。
目次
必要なAPIとツールの概要
- LINE Notify API
- GoogleカレンダーAPI
- GoogleAppsScript(エディタ&定期実行)
LINE Notifyのアクセストークン取得
LINE Notifyのページにアクセスします。
https://notify-bot.line.me/my/
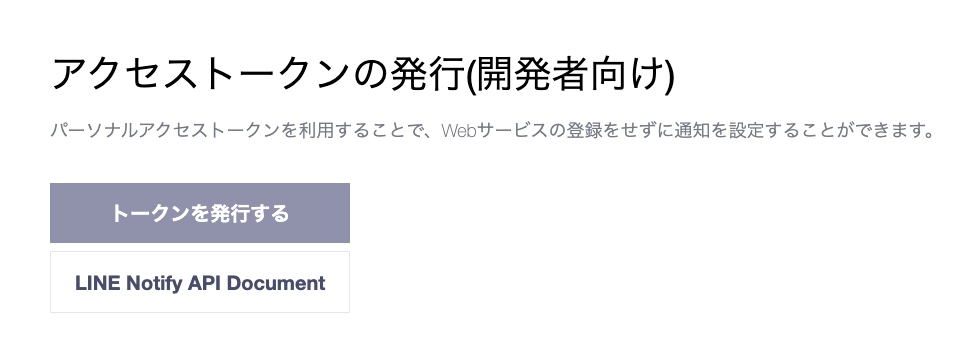
次に、ページ下部のアクセストークンの発行(開発者向け)の「トークンを発行する」をクリックします。
次に、トークン名の入力と、通知したいトークルームの選択を行います。
ここで指定したLINEのトークルームに公式のLINE Notifyを招待しておく必要があります。
トークン名はLINE Notifyから送信されるメッセージの冒頭に表示されますので、通知の目的に沿った名前を付けておくと良いでしょう。私は未確定のGoogleカレンダーの予定を通知させるので、「未確定ナビ」という名前にしました。
画面の指示に従って入力を済ませたら、最後にアクセストークンが表示されるのでそれをメモしておきます。
アクセストークンは外部に漏らさないように注意して保管してください。
GoogleカレンダーIDの取得
Web版のGoogleカレンダーを開きます。通知を行いたいカレンダーの設定ページから、「カレンダーの統合」 > 「カレンダーID」の箇所を参照します。(※画像のIDは適当です)

GoogleカレンダーIDは無闇に外部へ漏らさないようにしてください。
GASによるスクリプトの詳細
スクリプトプロパティの設定
Google Apps Scriptを開きます。
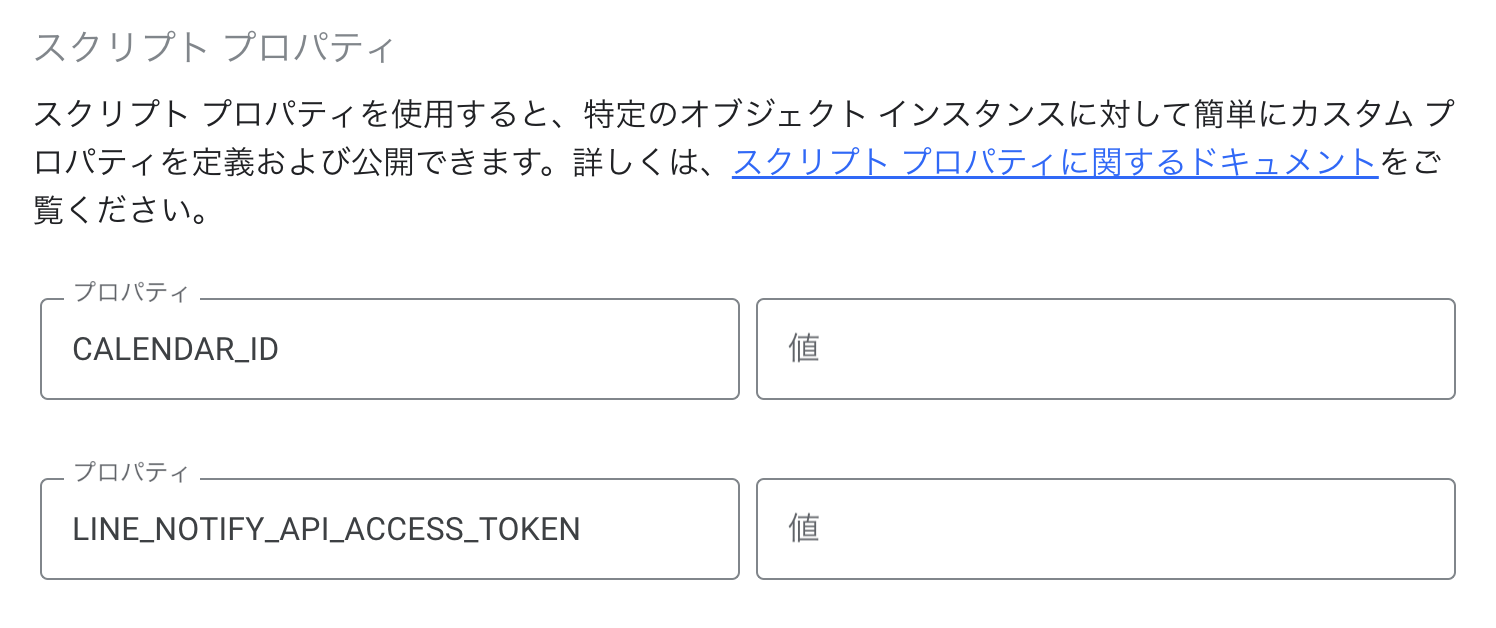
まず、歯車のマークからスクリプトプロパティのところで先ほどメモしたGoogleカレンダーのIDとLINE Notify APIのアクセストークンをセットします。(後述のソースコードでこの値を参照します)
- CALENDAR_ID(GoogleカレンダーのID)
- LINE_NOTIFY_API_ACCESS_TOKEN(LINE Notify APIのアクセストークン)
ソースコードの詳細:GoogleカレンダーとLINE Notifyの連携
エディタを開きます。
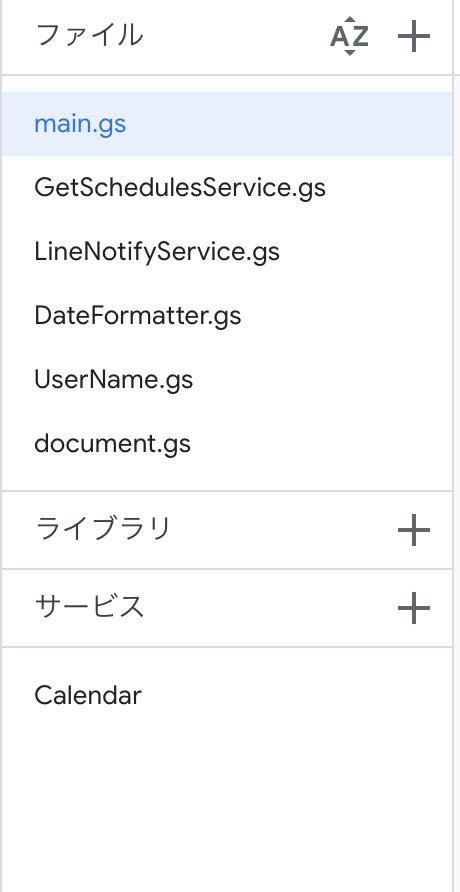
最終的には下記のようなファイル構成になります。(※UserName.gs、DateFormatter.gsはお好みで。)
GoogleカレンダーAPI
サービスの右横の「+」をクリックして、「Calendar」を選択します。これによりGAS上でGoogleカレンダーAPIを扱えるようになります。
詳しい仕様については下記を参考にしてください。
https://developers.google.com/apps-script/advanced/calendar?authuser=0&hl=ja
さて、ここでは4週間先の予定を取得する処理を下記のように実装します。
class GetSchedulesService
{
  /**
   * @param {string} calendarId
   */
  constructor(calendarId) {
    this.calendarId = calendarId;
  }

  /**
   * 直近4週間の予定を取得する
   *
   * @return {Array}
   */
  getSchedules() {
    const now = new Date();
    const fourWeeksFromNow = new Date(now.getTime() + (4 * 7 * 24 * 60 * 60 * 1000));
    const events = Calendar.Events.list(this.calendarId, {
      timeMin: now.toISOString(),
      timeMax: fourWeeksFromNow.toISOString(),
      showDeleted: false,
      singleEvents: true,
      orderBy: 'startTime'
    });

    return events.items || [];
  }
}
LINE Notify API
LINE Notify APIの公式ドキュメント
https://notify-bot.line.me/doc/ja/
ドキュメントによれば、notifyというエンドポイントを使えば良さそうです。
message以外にもリクエストパラメータがありますが、messageのみが必須なので今回はそれだけセットして下記のように実装しました。
class LineNotifyService
{
  /**
   * @param {string} token
   */
  constructor(token) {
    this.token = token;
  }

  /**
   * @param {string} message
   */
  send(message) {
    const options = {
      "method": "POST",
      "payload": {
        "message": message,
      },
      "headers": {
        "Content-Type": "application/x-www-form-urlencoded",
        "Authorization": "Bearer " + this.token,
      },
    };
    let response = UrlFetchApp.fetch('https://notify-api.line.me/api/notify', options);
  }
}
mainの処理
GoogleカレンダーAPIとLINE Notify APIの処理を使ってmain関数を実装していきます。
function main() {
  // スクリプトプロパティからGoogleカレンダーIDとLINE Notifyのトークンを取得します。
  const scriptPropeties = PropertiesService.getScriptProperties();

  const calendarId = scriptPropeties.getProperty('CALENDAR_ID');
  const getSchedulesService = new GetSchedulesService(calendarId);
  const schedules = getSchedulesService.getSchedules();

  const lineToken = scriptPropeties.getProperty('LINE_NOTIFY_API_ACCESS_TOKEN');
  const lineNotifier = new LineNotifyService(lineToken);

  if (schedules.length > 0) {
    // ※メッセージはお好みで。
    lineNotifier.send(`\nお知らせ: 未確定の予約(${String(schedules.length)}件)が近づいています!`);
    schedules.forEach((event) => {
      const startDateObj = new Date(event.start.dateTime || event.start.date);
      const createDateObj = new Date(event.created);
      // UserNameは記事には載せてないですが、emailから名前をマッピングする処理を入れてます。ここはお好みに合わせてください。
      const userName = new UserName(event.creator.email);
      const message = buildMessage(
        event.summary,
        userName.getValue(),
        startDateObj,
        createDateObj
      );

      lineNotifier.send(message);
    });

    lineNotifier.send("\n場所の予約と参加者の都合を確認してください。");
  } else {
    Logger.log('スケジュールはありません。');
  }
}

/**
 * @param {string} summary
 * @param {string} creatorName
 * @param {Date} startDateObj
 * @param {Date} createDateObj
 * @return {string}
 */
function buildMessage(summary, creatorName, startDateObj, createDateObj) {
  const startDateYmd = DateFormatter.toTsukiNichi(startDateObj);
  const createDateYmd = DateFormatter.toTsukiNichi(createDateObj);

  // 【未確定ナビ(トークン名)】、の文言のすぐ右隣にメッセージが表示されるため、改行を入れる。
  let message = "\n";
  message += `予定名:「${summary}」\n`;
  message += `開催日:${startDateYmd}\n`;
  message += `作成者:${creatorName}(${createDateYmd}に作成)`;

  return message;
}
lineNotifier.sendを1回実行するたびに、LINE Notifyから1通メッセージが送られます。
上記の場合、もし該当のスケジュールが2件あれば最初と最後のメッセージとスケジュール2件で合計4通のメッセージが送られます。
DateFormmater(お好みでどうぞ)
class DateFormatter
{
  /**
   * @param {Date} dateObj
   * @return {string} M月d日
   */
  static toTsukiNichi(dateObj) {
    const month = String(dateObj.getMonth() + 1).padStart(2, '0');
    const date = String(dateObj.getDate()).padStart(2, '0');

    return `${month}月${date}日`;
  }
}
定期実行のセットアップ
時間主導型、週ベースのタイマーにして、曜日と時刻を選択します。
これで実装は完了です。
LINE Notifyから送られてくるメッセージは下記のような感じになります:
[未確定ナビ]
お知らせ: 未確定の予約(1件)が近づいています!
[未確定ナビ]
予定名:「この記事を投稿する」
開催日:12月20日
作成者:やっし(11月29日に作成)
[未確定ナビ]
場所の予約と参加者の都合を確認してください。
最後に:次の記事の紹介
21日目の記事はAYAKA TAKEMURAさんです。お楽しみに!