はじめに
諸般の事情があって残念ながら余ってしまった、5,000円で買えるWi-SUNのUSBドングル(UDG-1-WSNE) を使って、Datadogで消費電力の見える化をしたお話です。BP35C2等の通常手に入るUSBドングルはミエルネのそれの4倍近い価格ですが、コマンドリファレンス等しっかりしているので、不意に余ってしまった方以外はそちらを使った方が良いかと思います。(BP35C2とは概ねコマンドは一緒ですが、細部が異なるため、本手順は無加工では動きません)
ちなみに、サーバは頑張りたくないのでRaspberry Pi3@raspbianを使っています。
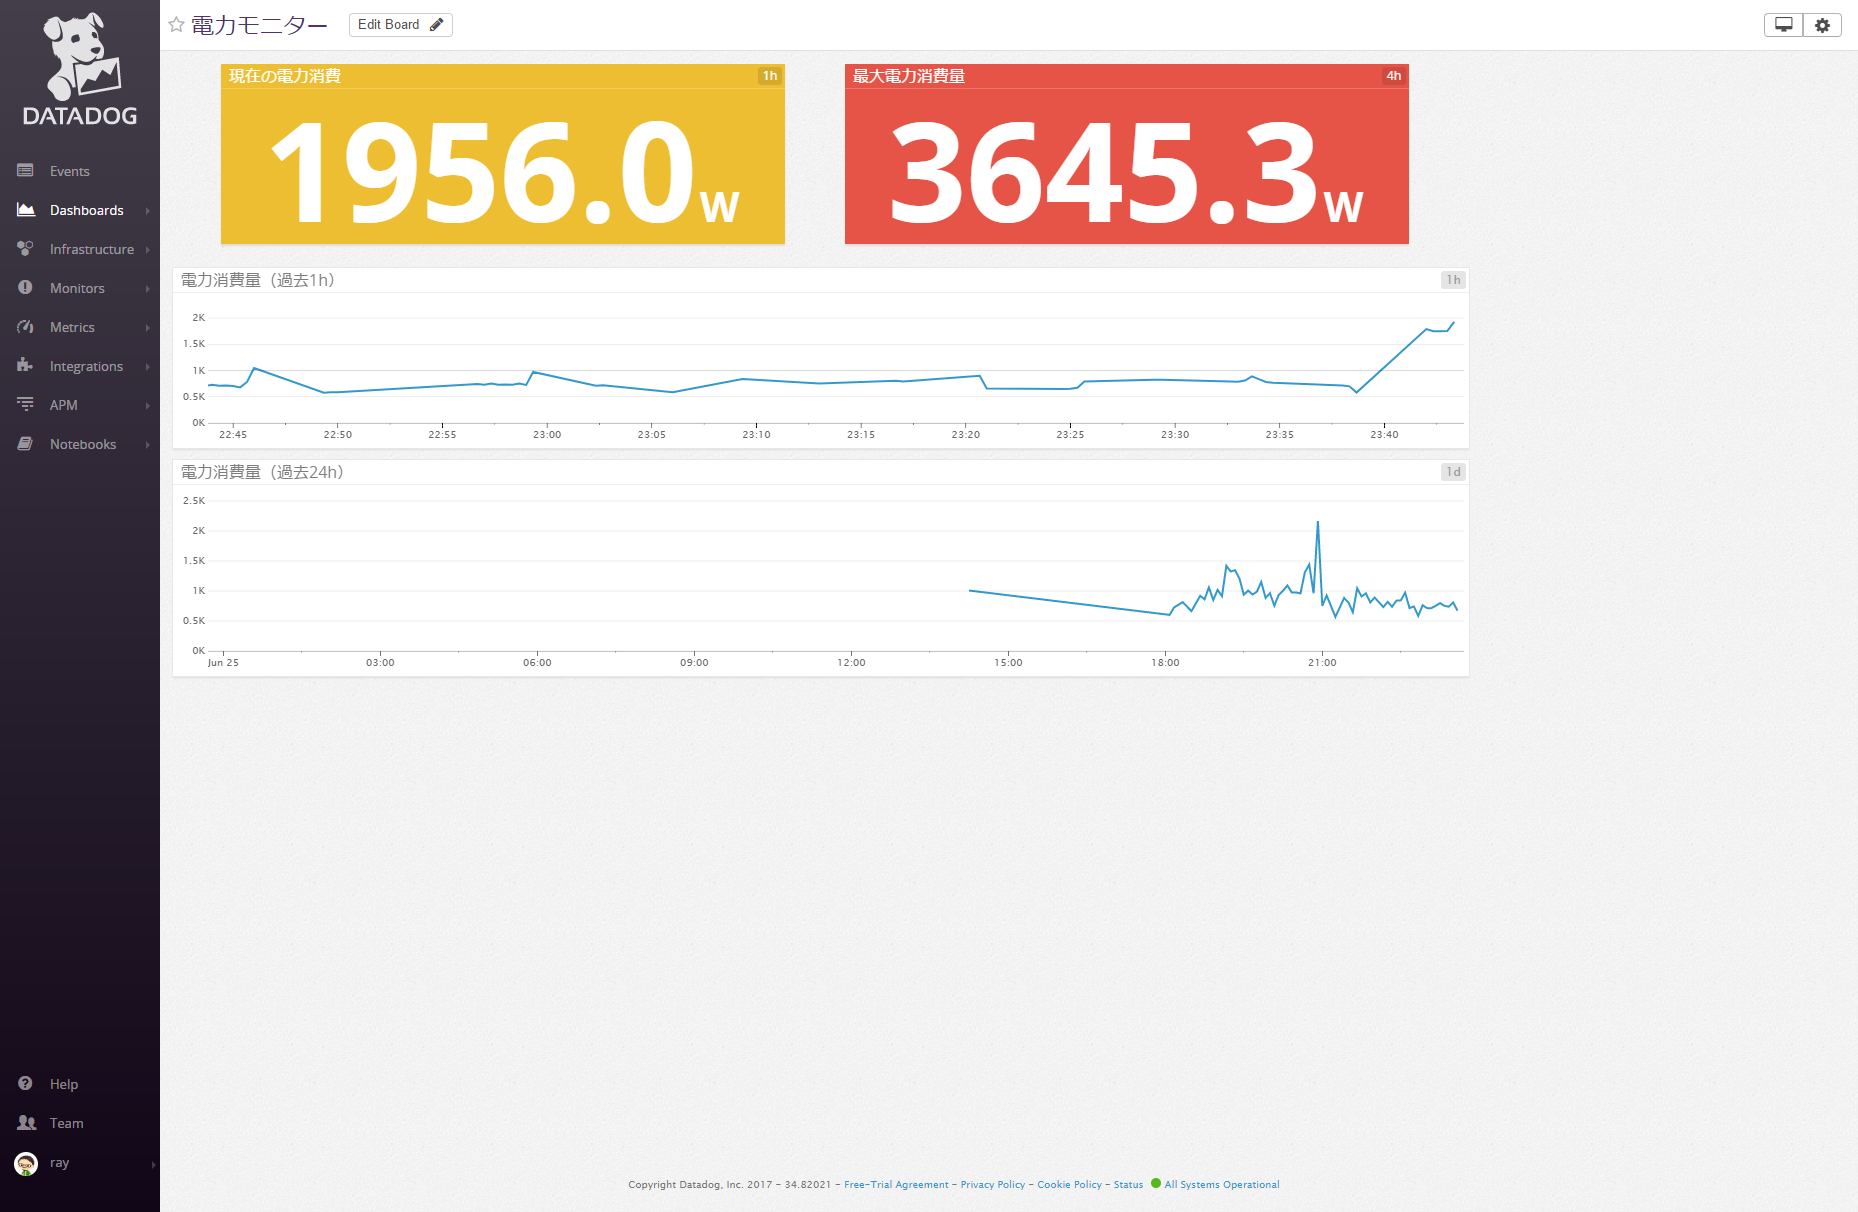
出来上がりイメージ
手順
事前準備
Raspberry Pi3にraspbianを入れて動くようにしておきます。また、グラフ描画にDatadogを使いますので、アカウント開設&エージェントインストールを済ませておきます。Raspberry PiはARMですので、Datadogエージェントの導入はちょっとだけ面倒です。
Raspberry PiへのDatadogエージェント導入
https://help.datadoghq.com/hc/en-us/articles/208163513-Deploying-the-Agent-on-RaspberryPI
その他、スマートメーターに接続するためにはBルートサービスを申し込んでID(郵送)とパスワード(メール)の2つを用意しておく必要があります。
本編
Raspberry Pi3に挿して動作確認
認識しているであろうドングルのデバイス名を取得します
root@raspberrypi:/var/log# lsusb -v -t
/:  Bus 01.Port 1: Dev 1, Class=root_hub, Driver=dwc_otg/1p, 480M
    |__ Port 1: Dev 2, If 0, Class=Hub, Driver=hub/5p, 480M
        |__ Port 1: Dev 3, If 0, Class=Vendor Specific Class, Driver=smsc95xx, 480M
##############
## USBを挿す
##############
root@raspberrypi:/var/log# lsusb -v -t
/:  Bus 01.Port 1: Dev 1, Class=root_hub, Driver=dwc_otg/1p, 480M
    |__ Port 1: Dev 2, If 0, Class=Hub, Driver=hub/5p, 480M
        |__ Port 1: Dev 3, If 0, Class=Vendor Specific Class, Driver=smsc95xx, 480M
        |__ Port 2: Dev 4, If 0, Class=Communications, Driver=cdc_acm, 12M
        |__ Port 2: Dev 4, If 1, Class=CDC Data, Driver=cdc_acm, 12M
root@raspberrypi:/var/log# grep cdc messages
messages:Jun 24 11:41:52 raspberrypi kernel: [    3.640333] cdc_acm 1-1.2:1.0: ttyACM0: USB ACM device
messages:Jun 24 11:41:52 raspberrypi kernel: [    3.641379] usbcore: registered new interface driver cdc_acm
messages:Jun 24 11:41:52 raspberrypi kernel: [    3.641386] cdc_acm: USB Abstract Control Model driver for USB modems and ISDN adapters
こちらの例では/dev/ttyACM0になりました。
あとはscreenコマンドで試してみます。screenは終わった後はCtrl-aしてkで終了です。
root@raspberrypi:/var/log# screen /dev/ttyACM0 115200
SKVER  #打鍵しても表示されないですが、入力してEnter。EVER~OKがレスポンスです
EVER 1.0
OK
スクリプトの取得
こちらに公開してありますので、git cloneしてください
https://github.com/unagi/miruene-datadog
root@raspberrypi:~# cd /opt
root@raspberrypi:/opt# git clone https://github.com/unagi/miruene-datadog
root@raspberrypi:/opt# cd miruene-datadog
root@raspberrypi:/opt/miruene-datadog# pip install -r requirements.txt
root@raspberrypi:/opt/miruene-datadog# cp systemd/smartmeterd.service /etc/systemd/system/smartmeterd.service
root@raspberrypi:/opt/miruene-datadog# systemctl daemon-reload
また、READMEにもありますように、config.iniにデバイス名とBルートサービスの認証情報を記入します。
[General]
com_port = /dev/ttyACM0
interval = 10

[RouteB]
rbid = xxxxxxxxxxxxxxxxxxxxxxxx
rbpwd = xxxxxxxxxxxx
そして起動してみます。
root@raspberrypi:/opt/miruene-datadog# systemctl start smartmeterd.service
● smartmeterd.service - Smartmeterd
   Loaded: loaded (/etc/systemd/system/smartmeterd.service; disabled)
   Active: active (running) since 土 2017-07-01 18:43:38 JST; 16min ago
 Main PID: 11264 (python)
   CGroup: /system.slice/smartmeterd.service
           └─11264 python /opt/miruene-datadog/smartmeter.py

 7月 01 18:55:53 raspberrypi smartmeter.py[11264]: INFO:__main__:瞬時電力計測値:1304[W]
 7月 01 18:56:04 raspberrypi smartmeter.py[11264]: INFO:__main__:瞬時電力計測値:1284[W]
 7月 01 18:56:16 raspberrypi smartmeter.py[11264]: INFO:__main__:瞬時電力計測値:1156[W]
Datadogでダッシュボードの作成
無事、スクリプトが動作すると、Raspberry Piで稼働していたDatadog Agent経由でメトリクスが送信されますので、グラフが作れるようになります。お好みの形でグラフを作って終了です!
あとがき
Wi-SUNには送信休止時間等が規定されていて、Wi-Fiと同じように使う事はできません。
http://sgforum.impress.co.jp/article/1558
こちらのサンプルを使って実際にデータ取得を継続的にされる場合は、そのあたりをよく確認の上、よろしくお願いします!
詳細についてはARIB STD-T108とかでググると出てくるんじゃないかと思います。
