動機
私自身、普段はRuby on Railsでシステムを開発していることもあって、なかなかフロントエンドのモダンなフレームワークに触る機会がありません。
そんな中、ちょうど弊社の開発合宿の時期が来たので
Nuxt.jsを使って練習がてら自分のポートフォリオサイトを作ることにしました。
予定していたページを全て完成させることはできませんでしたが、取り組んだ内容をまとめます。
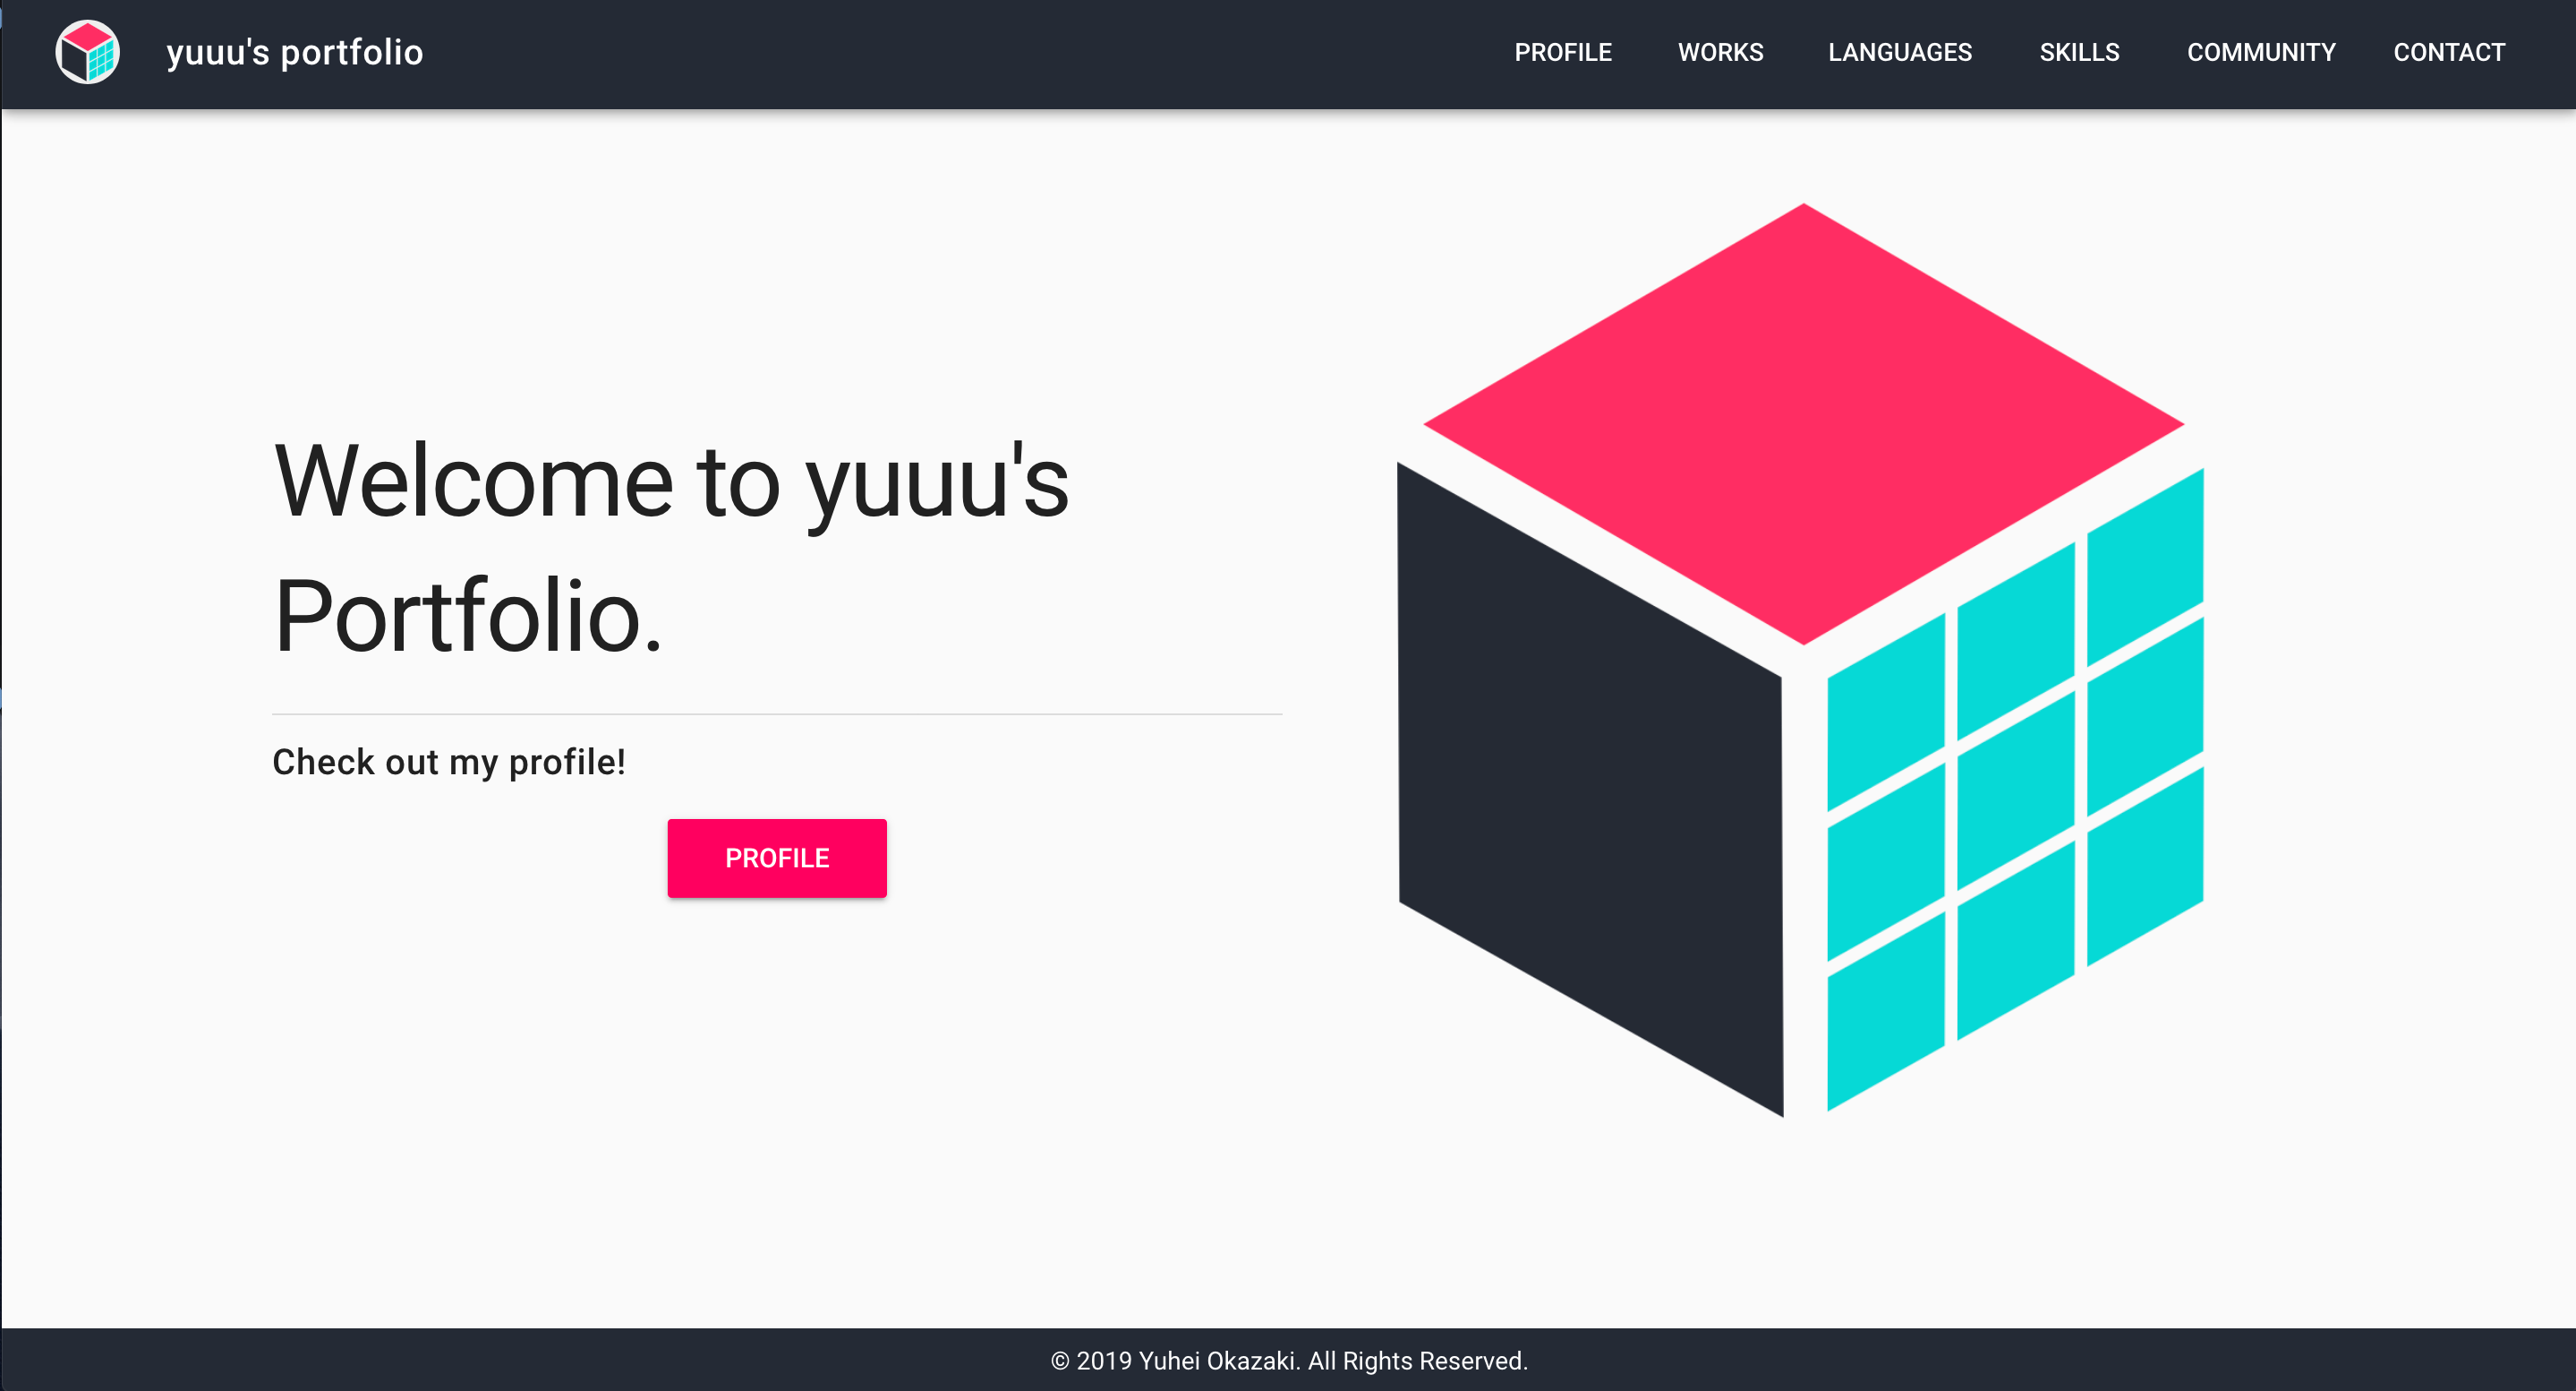
作ったページ
リポジトリ
プロジェクト作成
create-nuxt-app を使ってnuxtプロジェクトを作る
$ npx create-nuxt-app yuuu_portfolio                                                                                                     [~/Documents/develop]
npx: 379個のパッケージを29.271秒でインストールしました。
> Generating Nuxt.js project in /Users/yokazaki/Documents/develop/yuuu_portfolio
? Project name yuuu_portfolio
? Project description yuuu's portfolio web site.
? Use a custom server framework none
? Choose features to install Progressive Web App (PWA) Support, Linter / Formatter, Prettier
? Use a custom UI framework vuetify
? Use a custom test framework none
? Choose rendering mode Universal
? Author name Yuhei Okazaki
? Choose a package manager yarn
さっそく起動してみる
$ cd yuuu_portfolio
$ yarn run dev
リポジトリを作ってgithubへpush
$ git remote add origin git@github.com:yuuu/yuuu_portfolio.git
$ git push -u origin master
リポジトリは以下
https://github.com/yuuu/yuuu_portfolio](https://github.com/yuuu/yuuu_portfolio
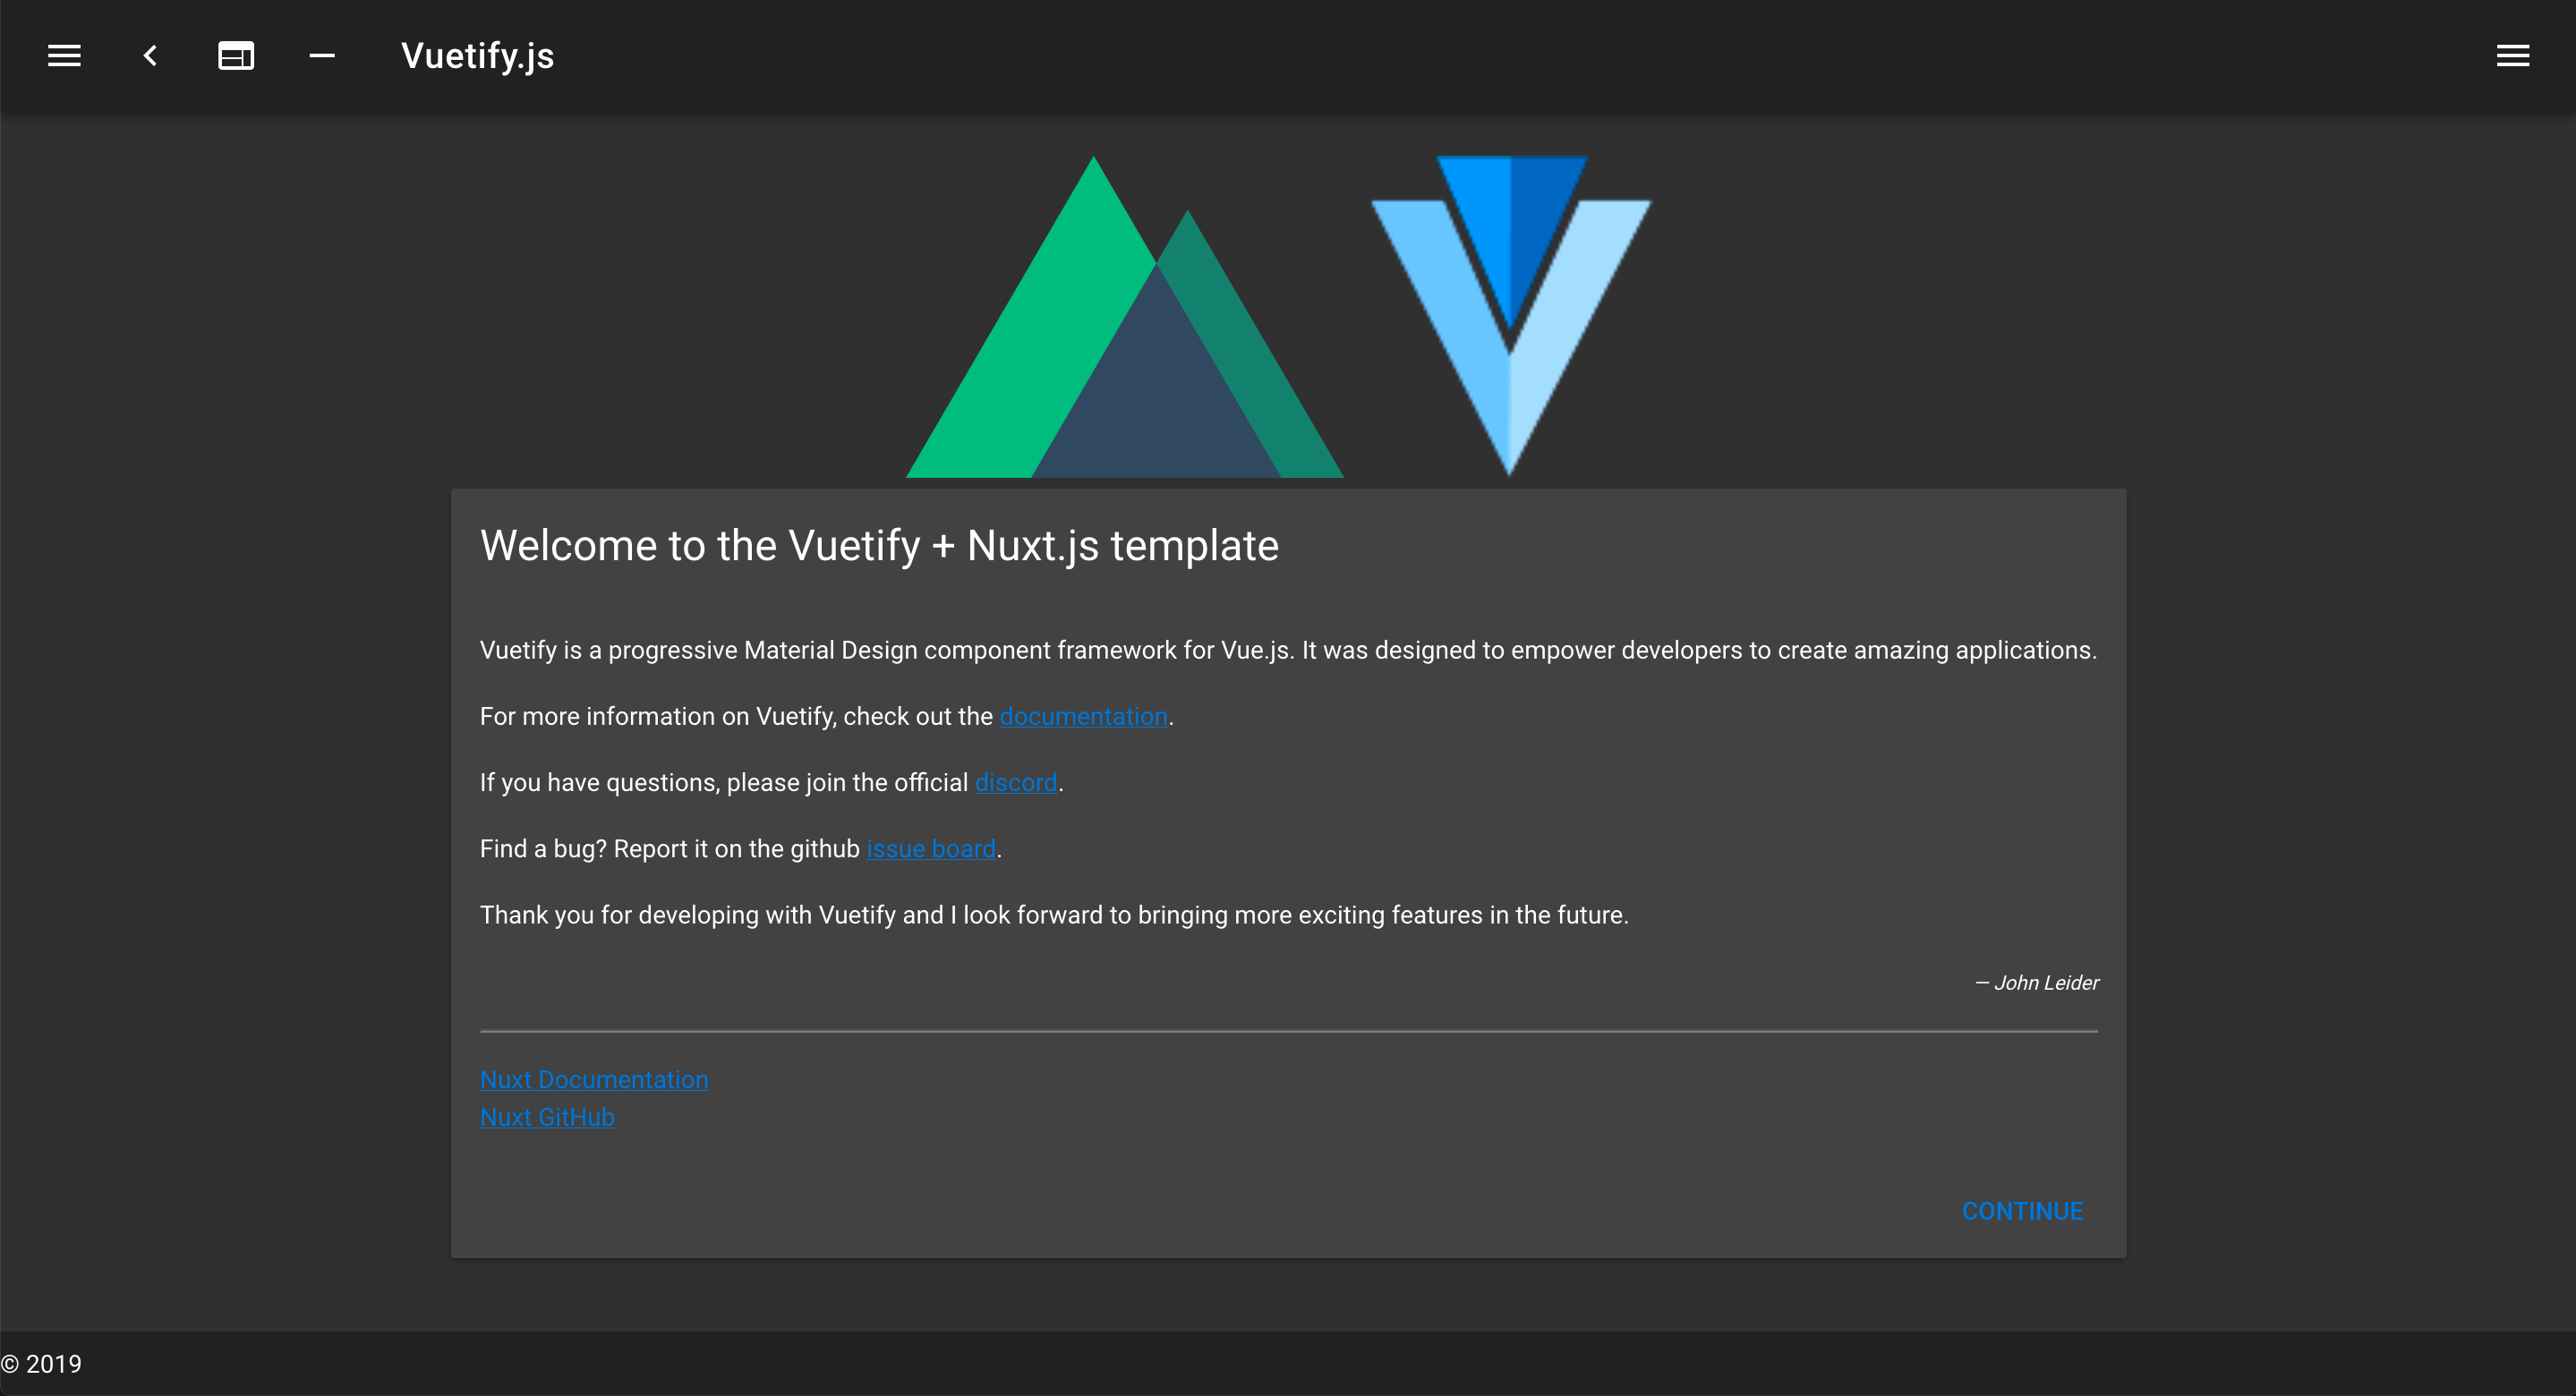
早速アクセスしてみると、既にVuetifyのレイアウトが一通り当たっていて感動。
http://localhost:3000/
Netlifyへデプロイしてみる
https://www.netlify.com/ へアクセスして、Sign upする
今回は、githubアカウントでログインすることに
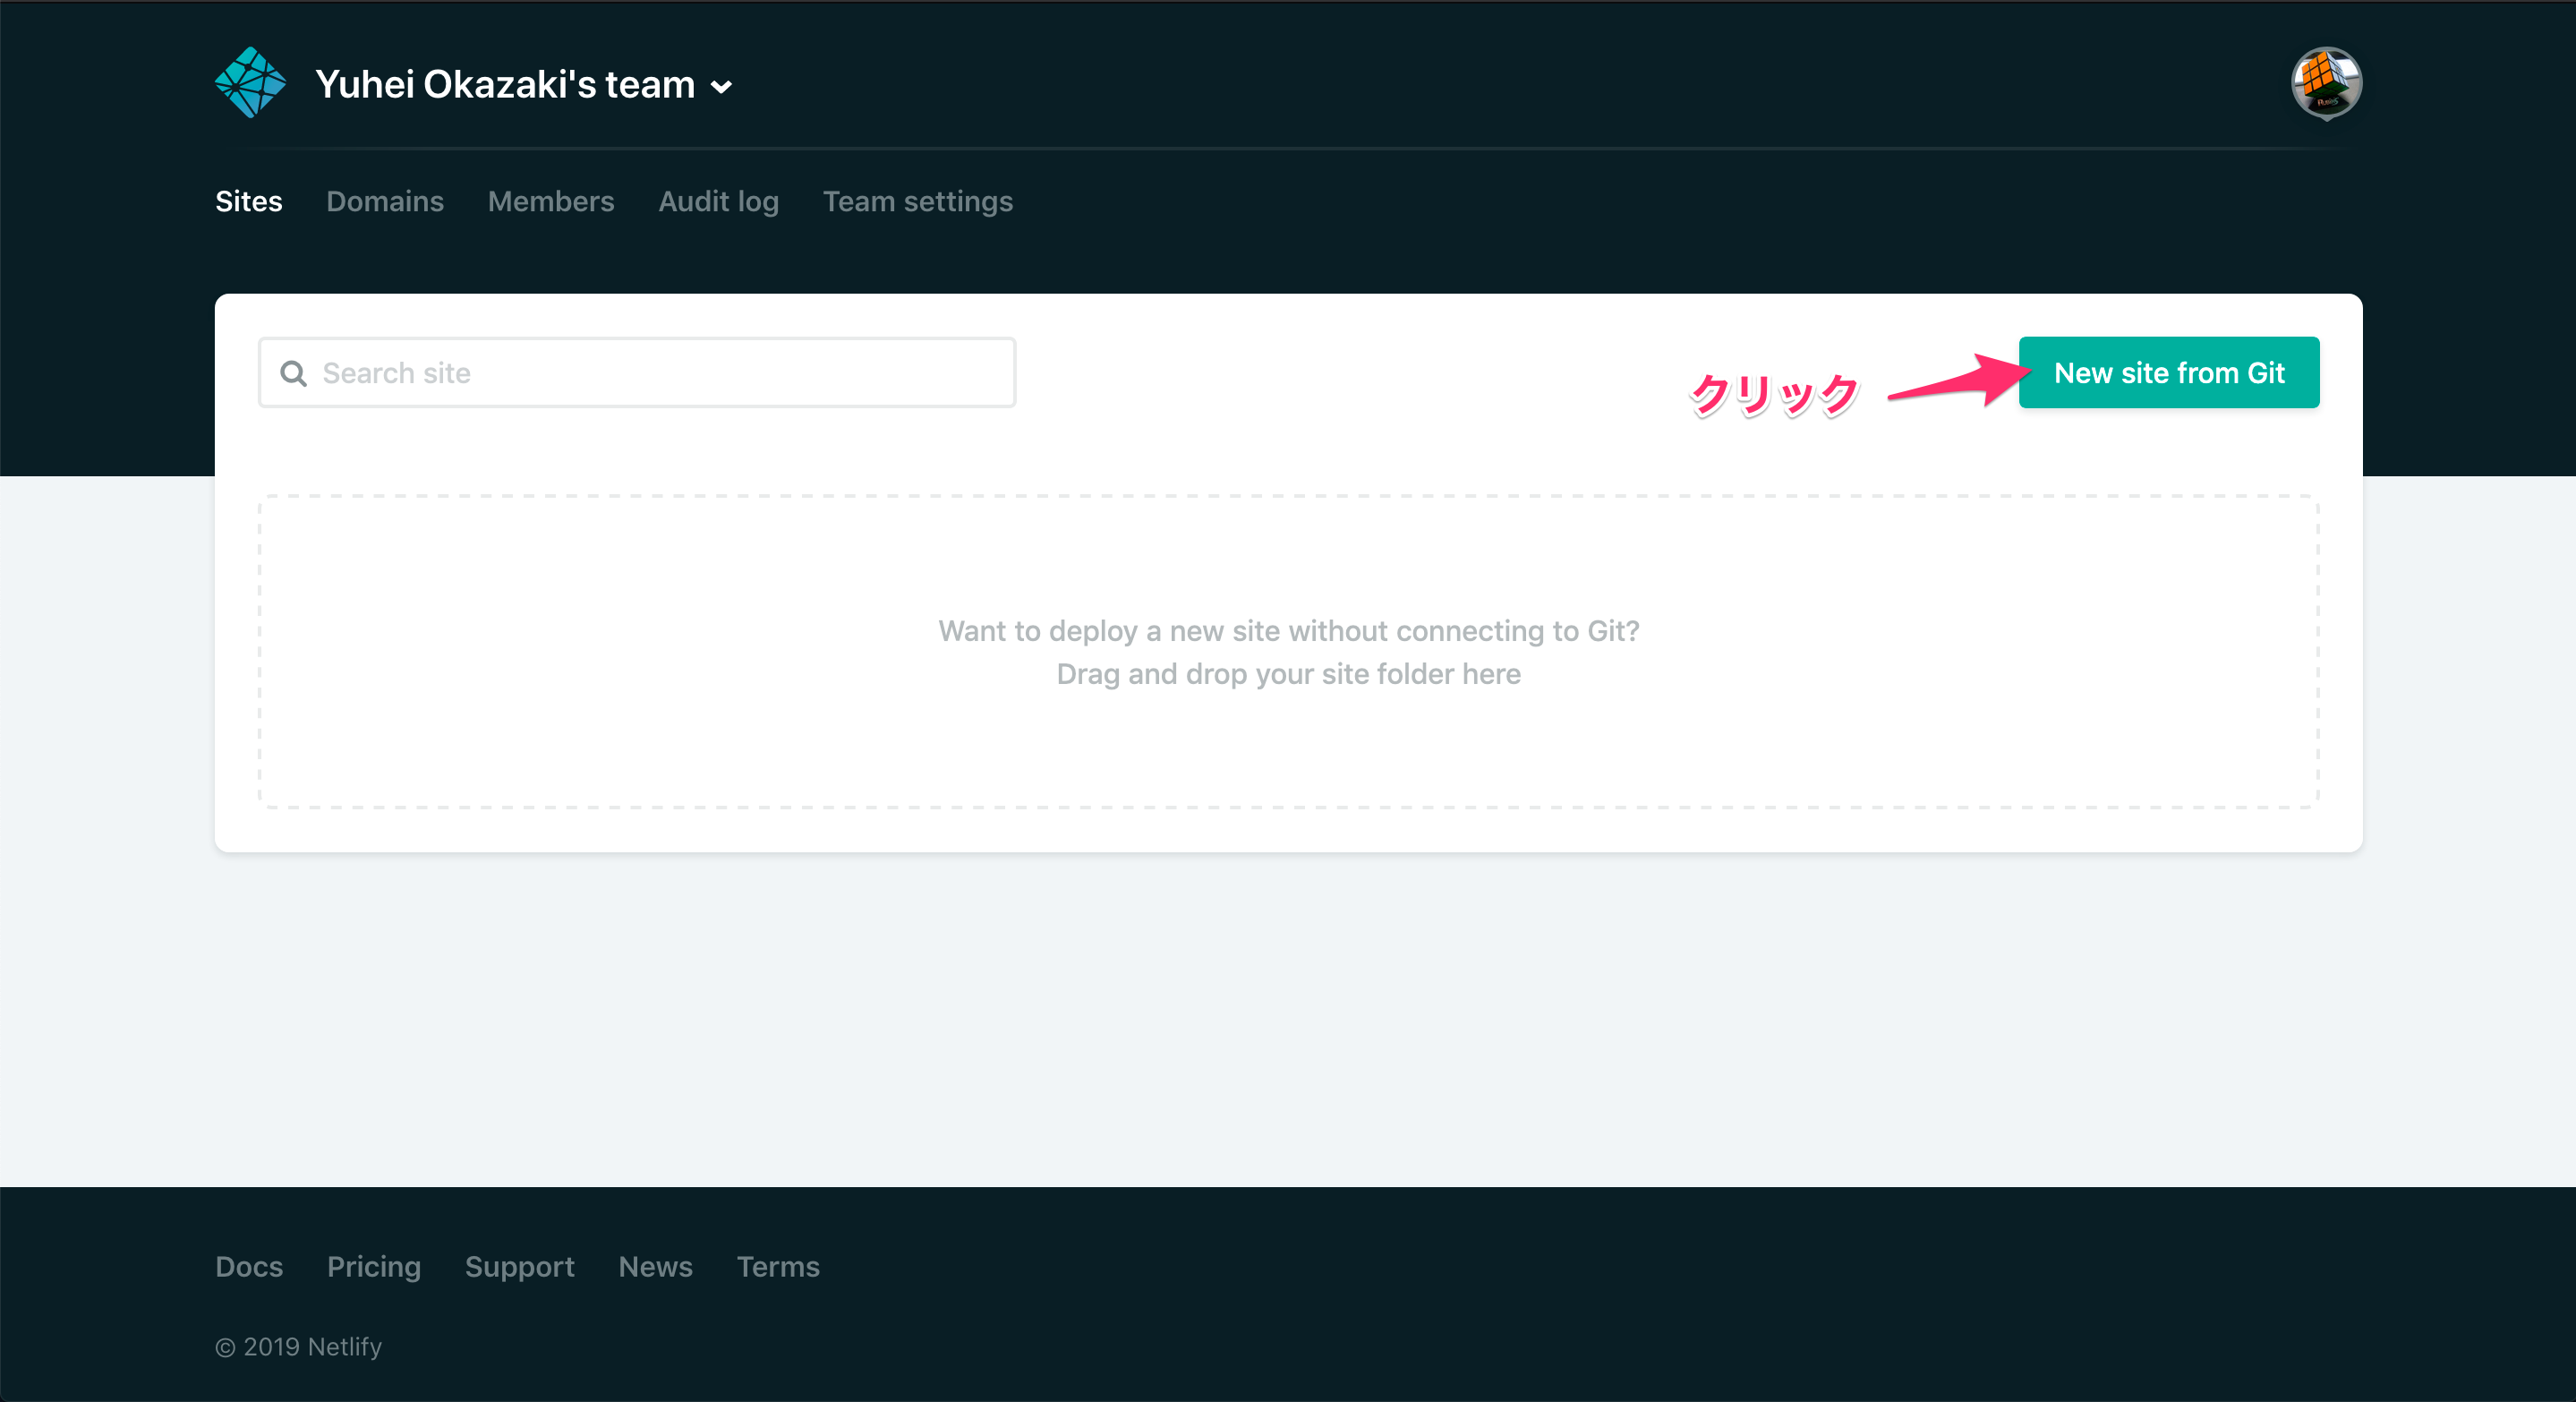
ログインしたら New site from Git をクリック
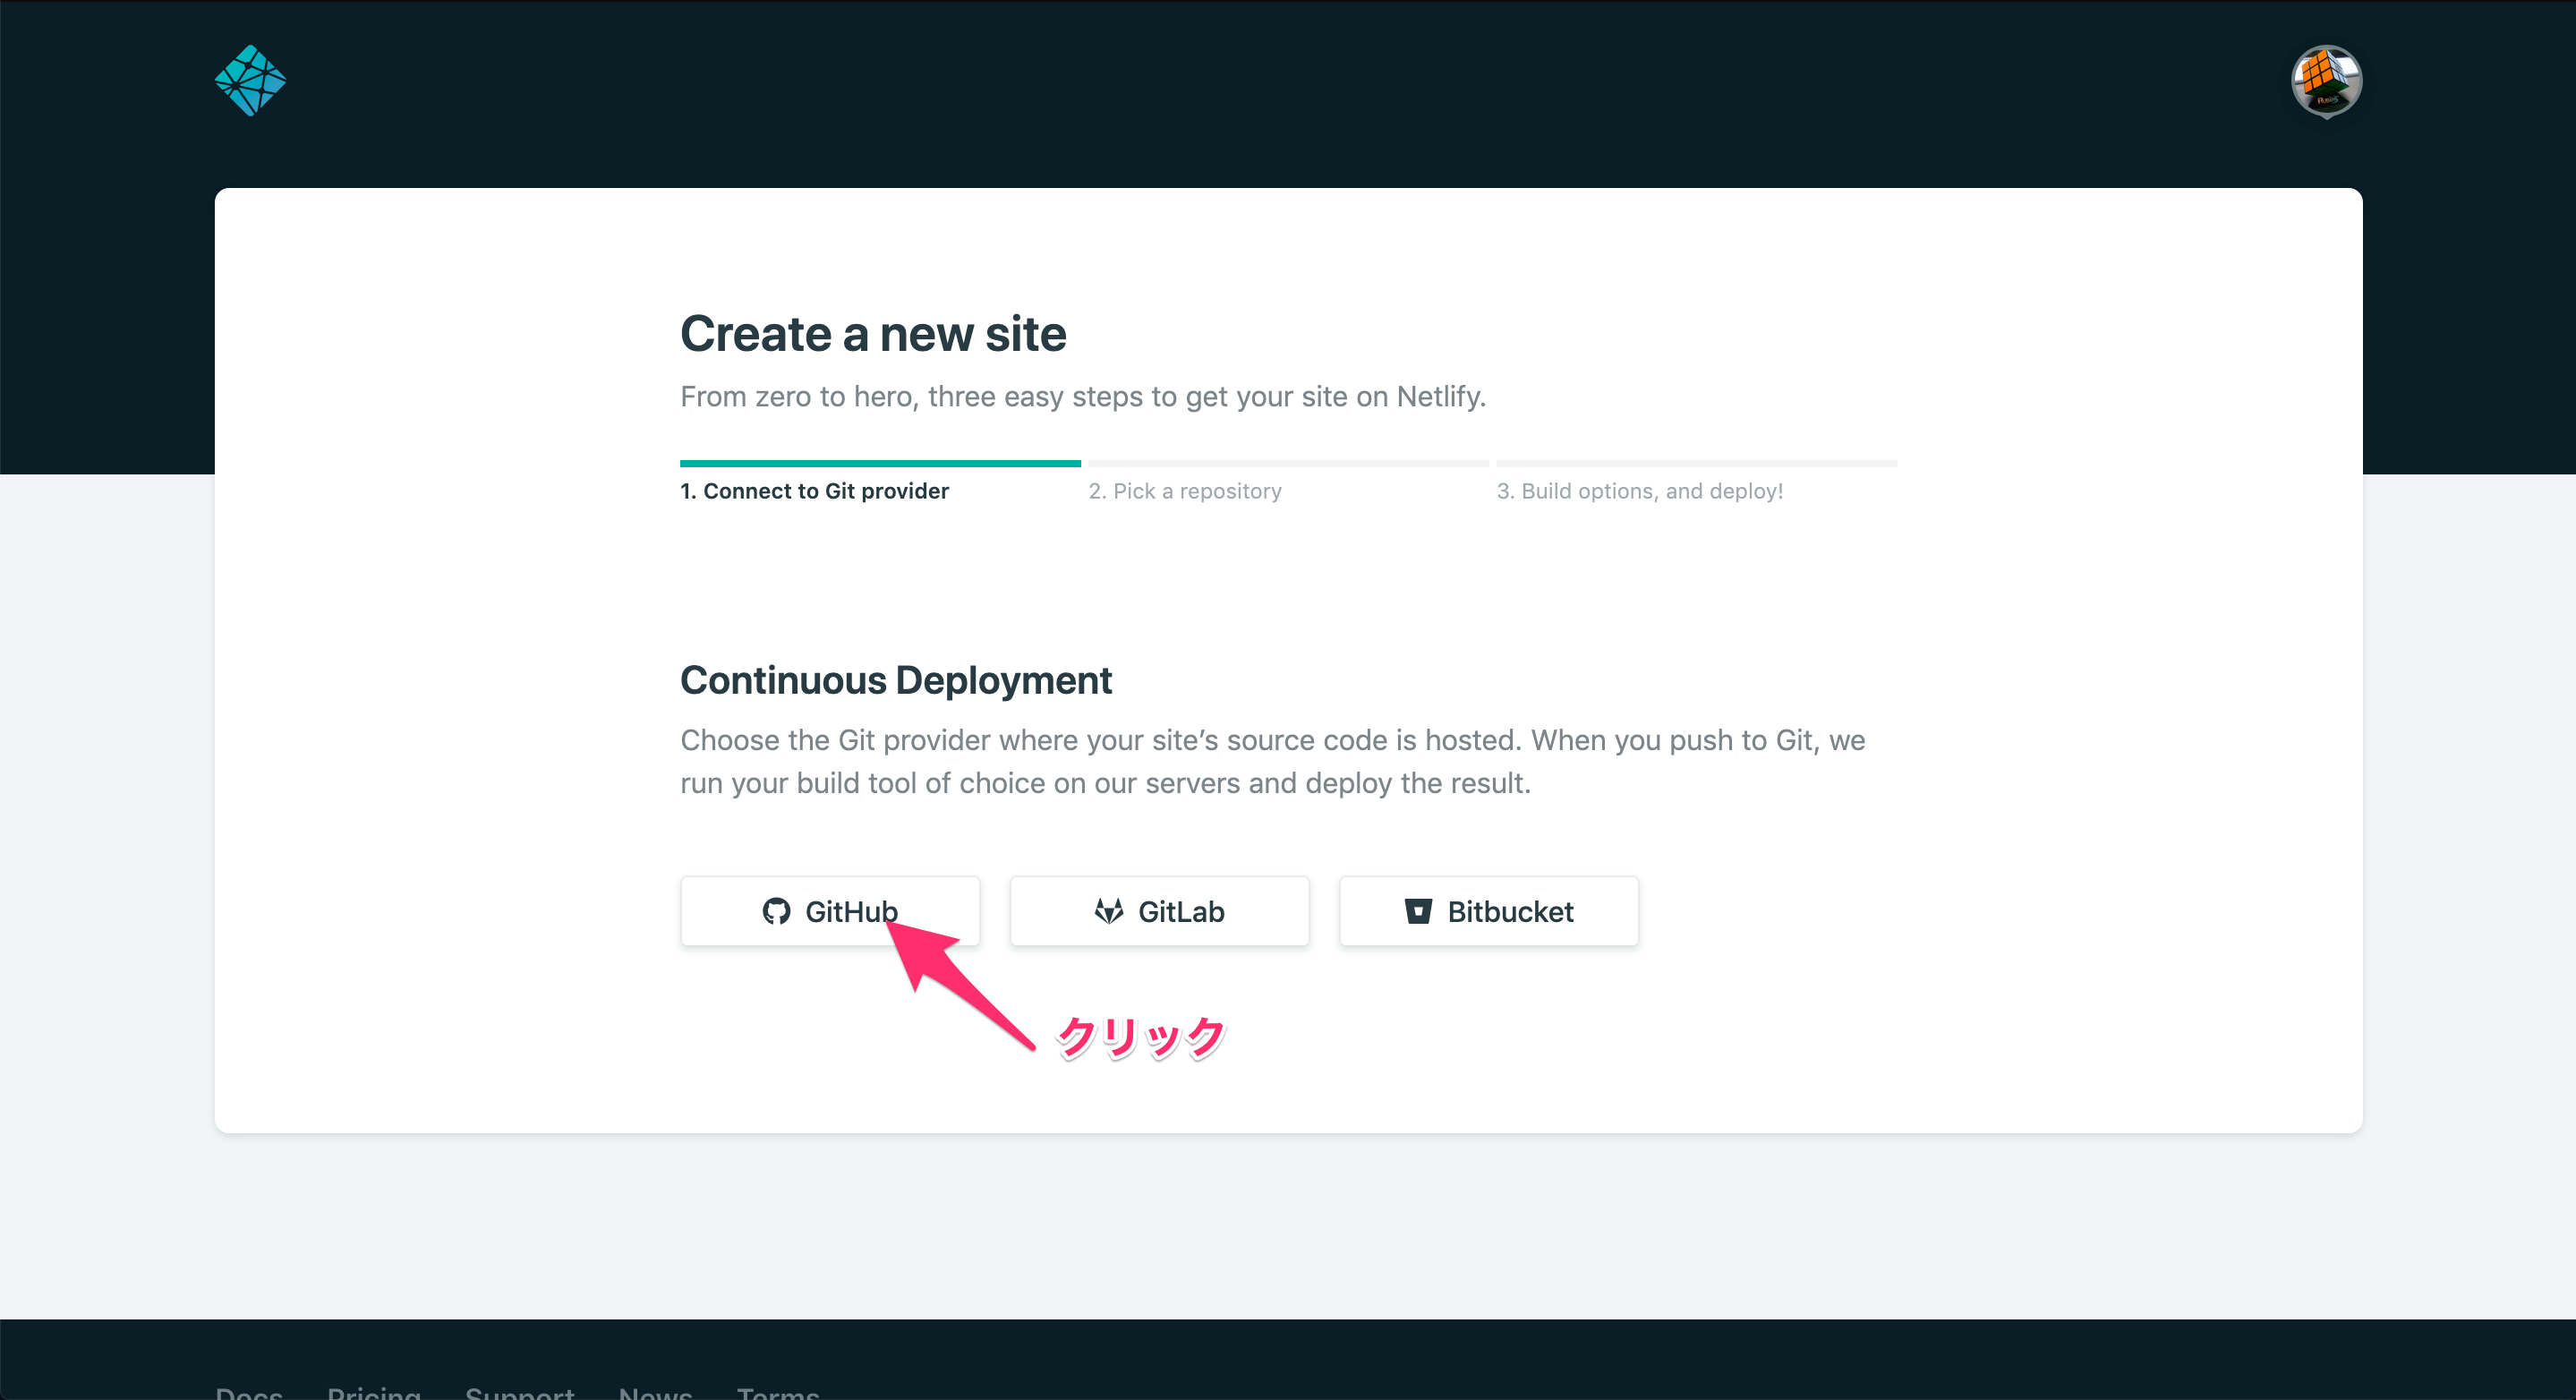
githubにpushしたときに自動デプロイしたいので、 Github をクリック
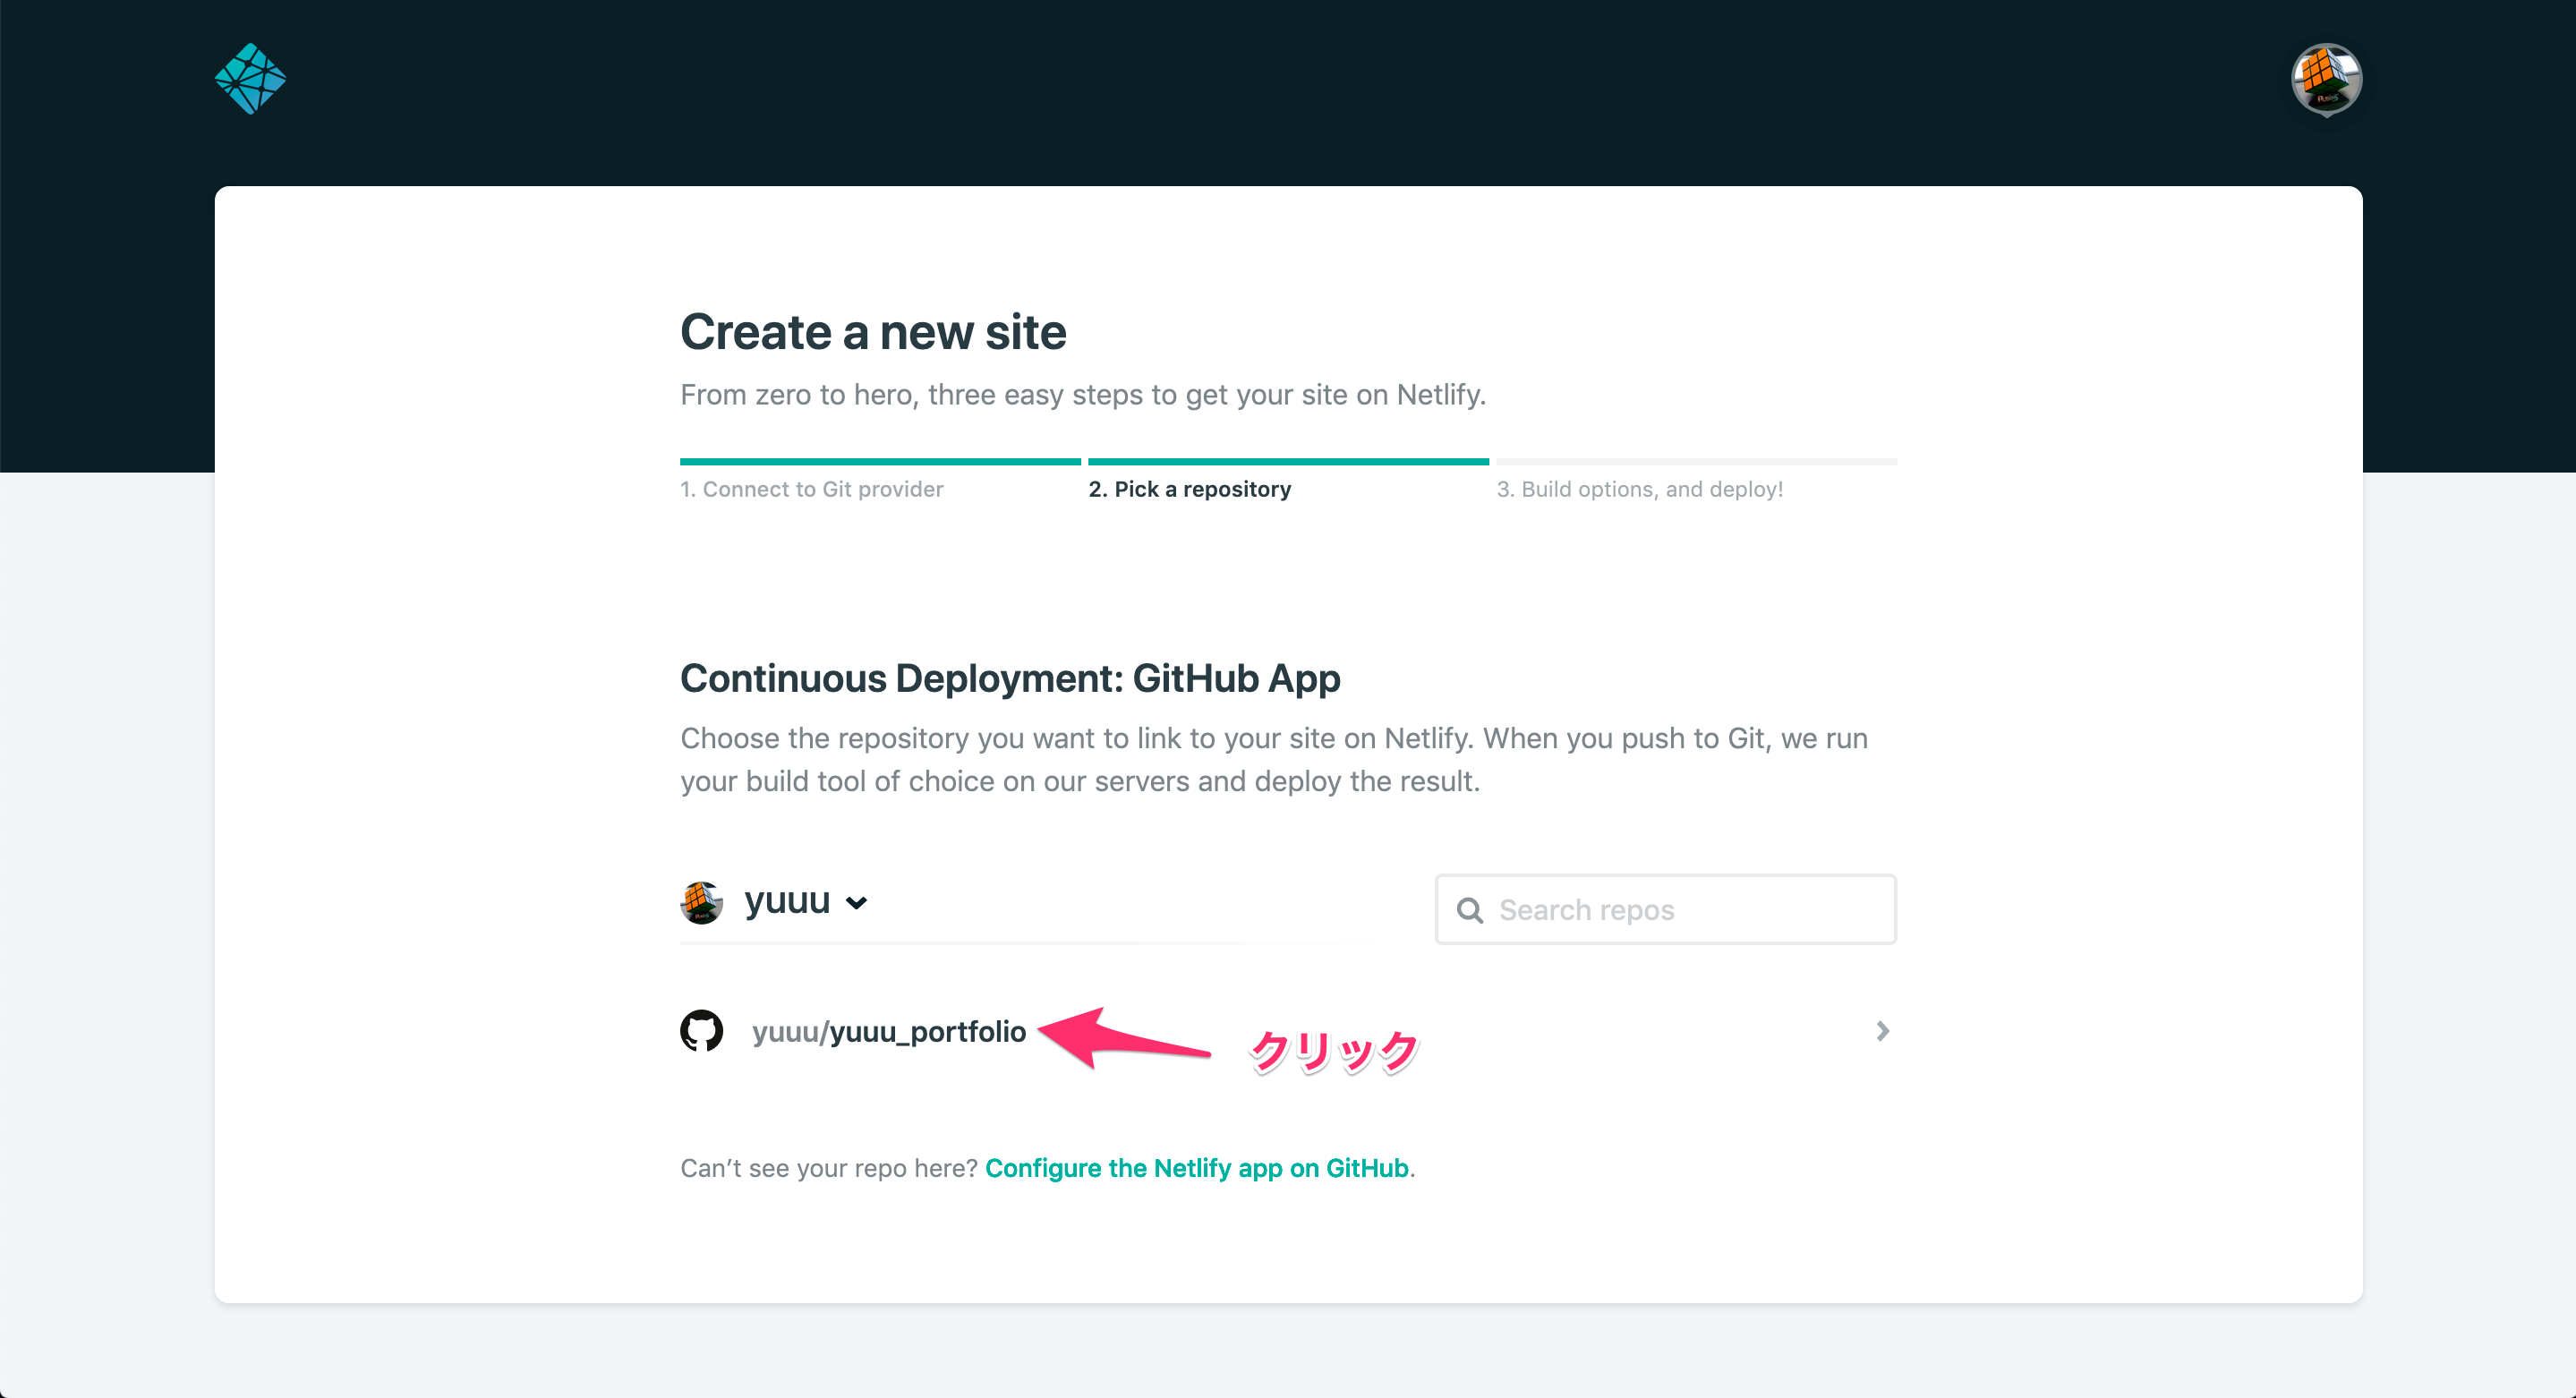
github側で諸々認証すると、リポジトリを選択できるようになる
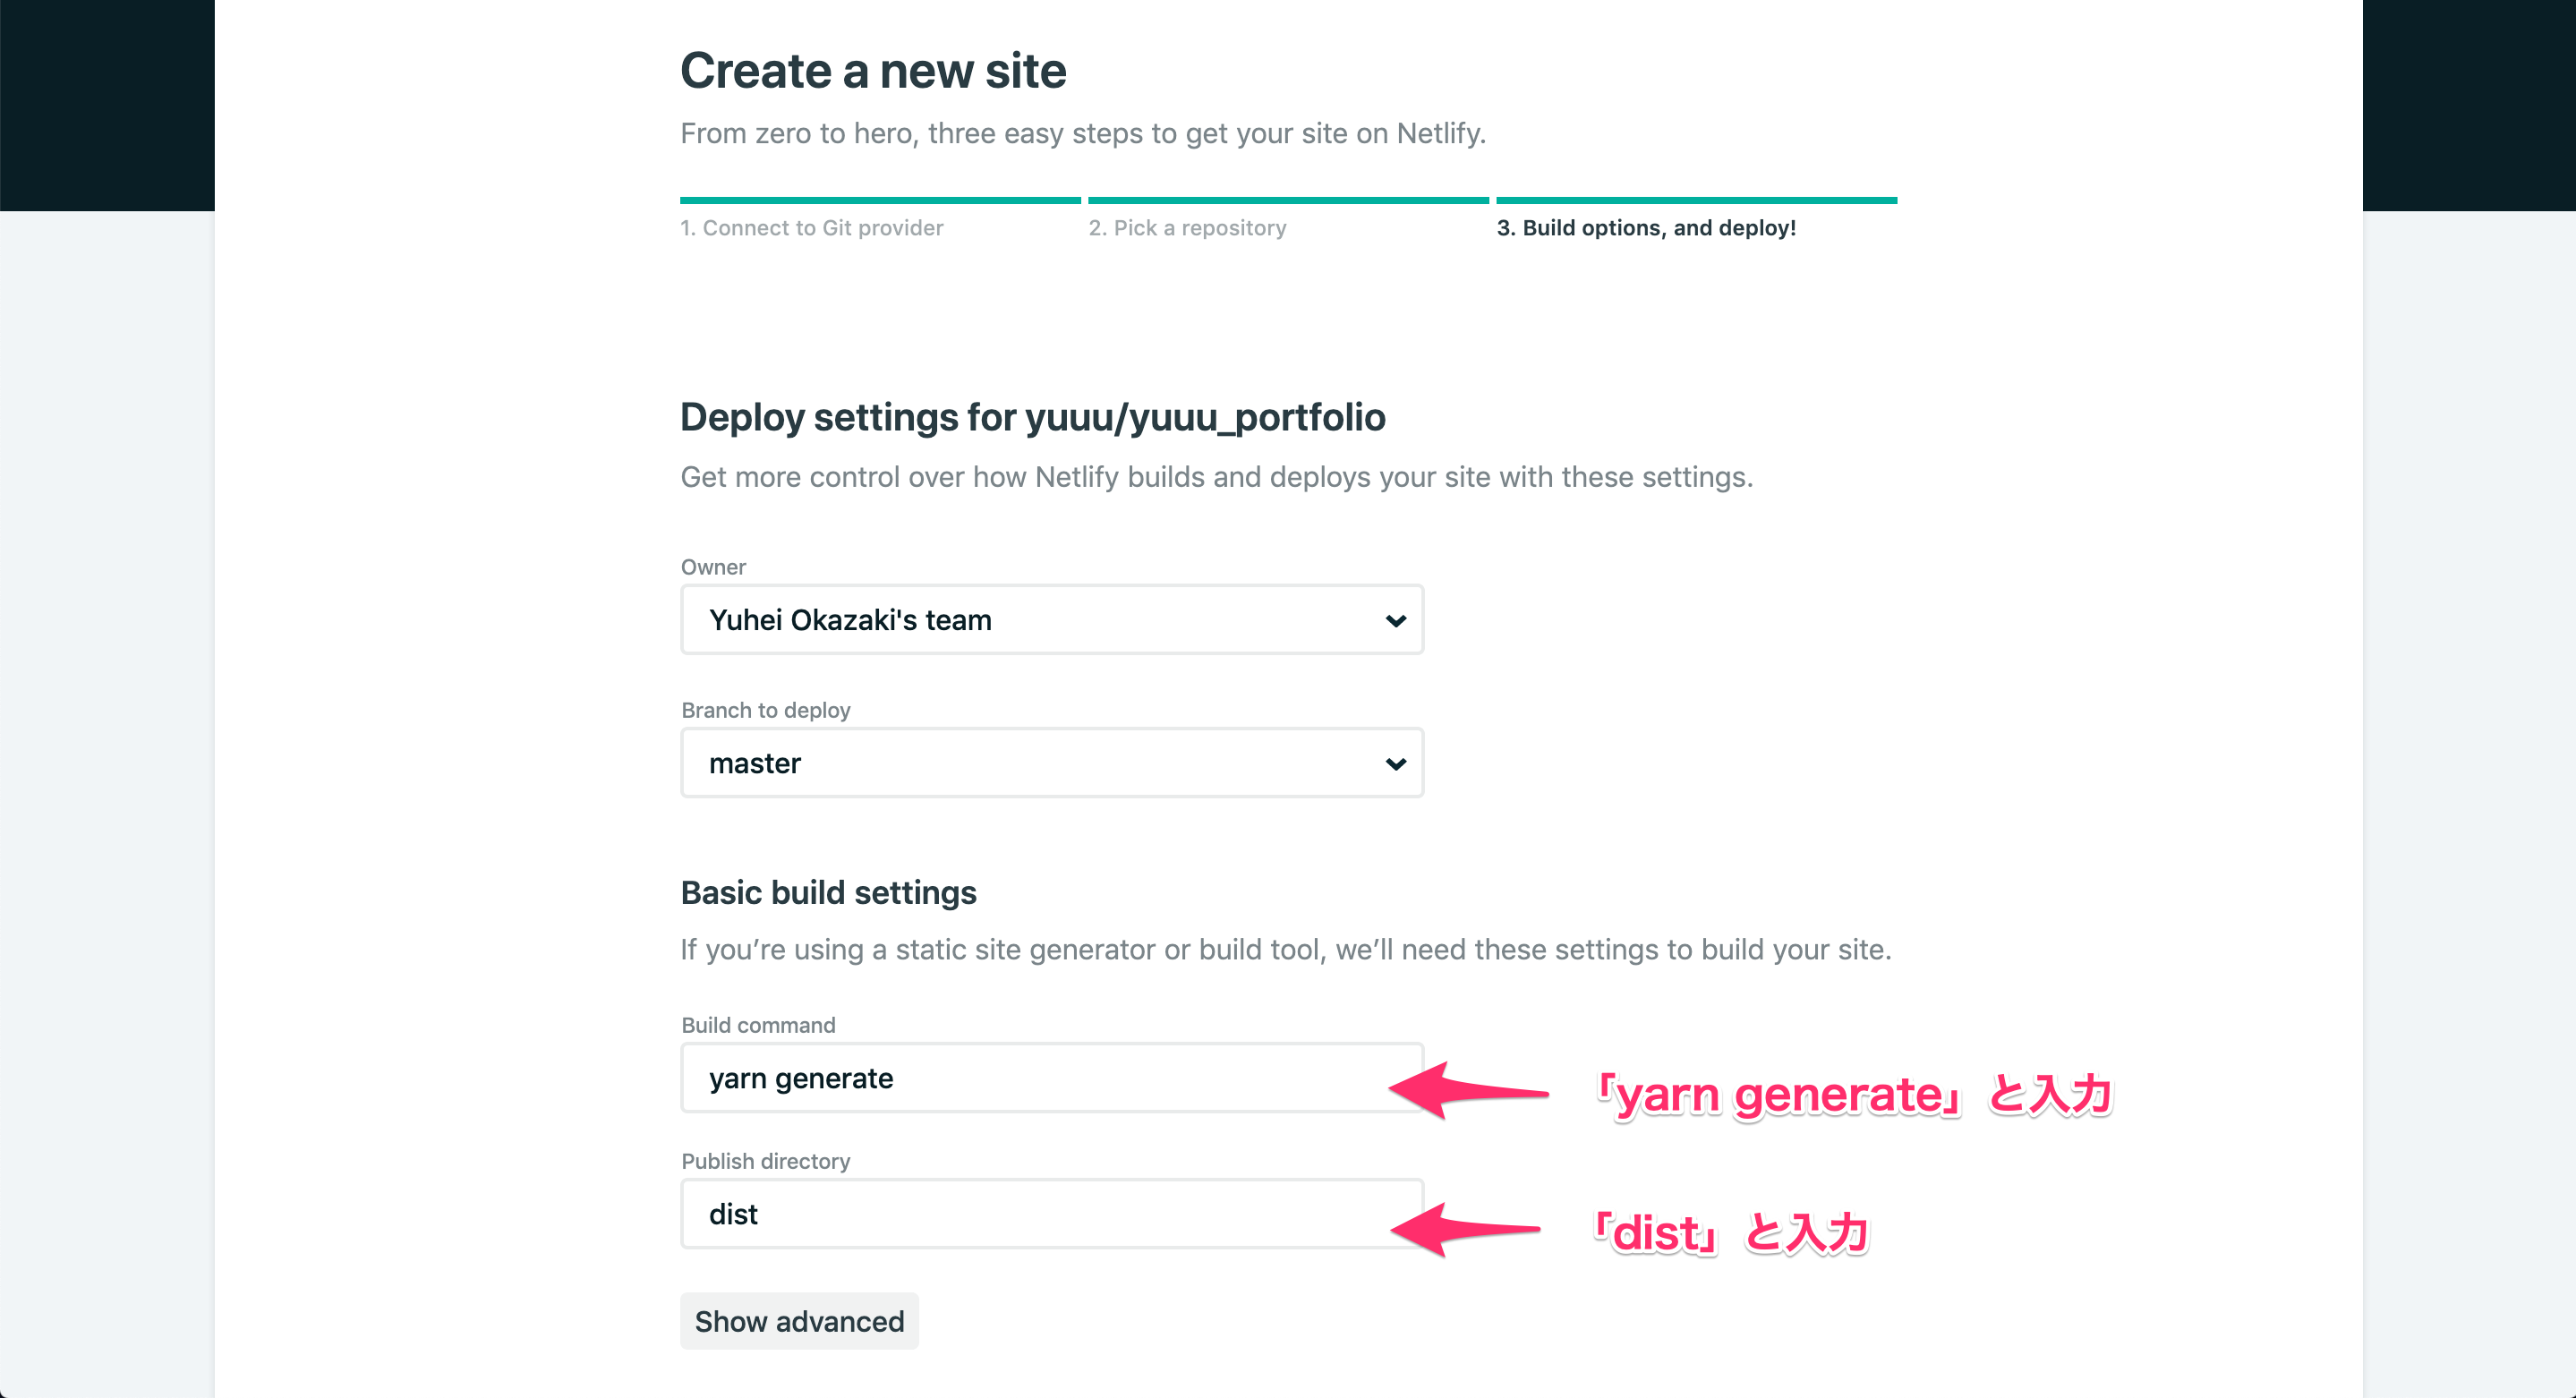
デプロイの設定を記載し、 Deploy site をクリック
デプロイが完了すると、URLが表示され、サイトを確認できる。
https://blissful-neumann-f43d8f.netlify.com/
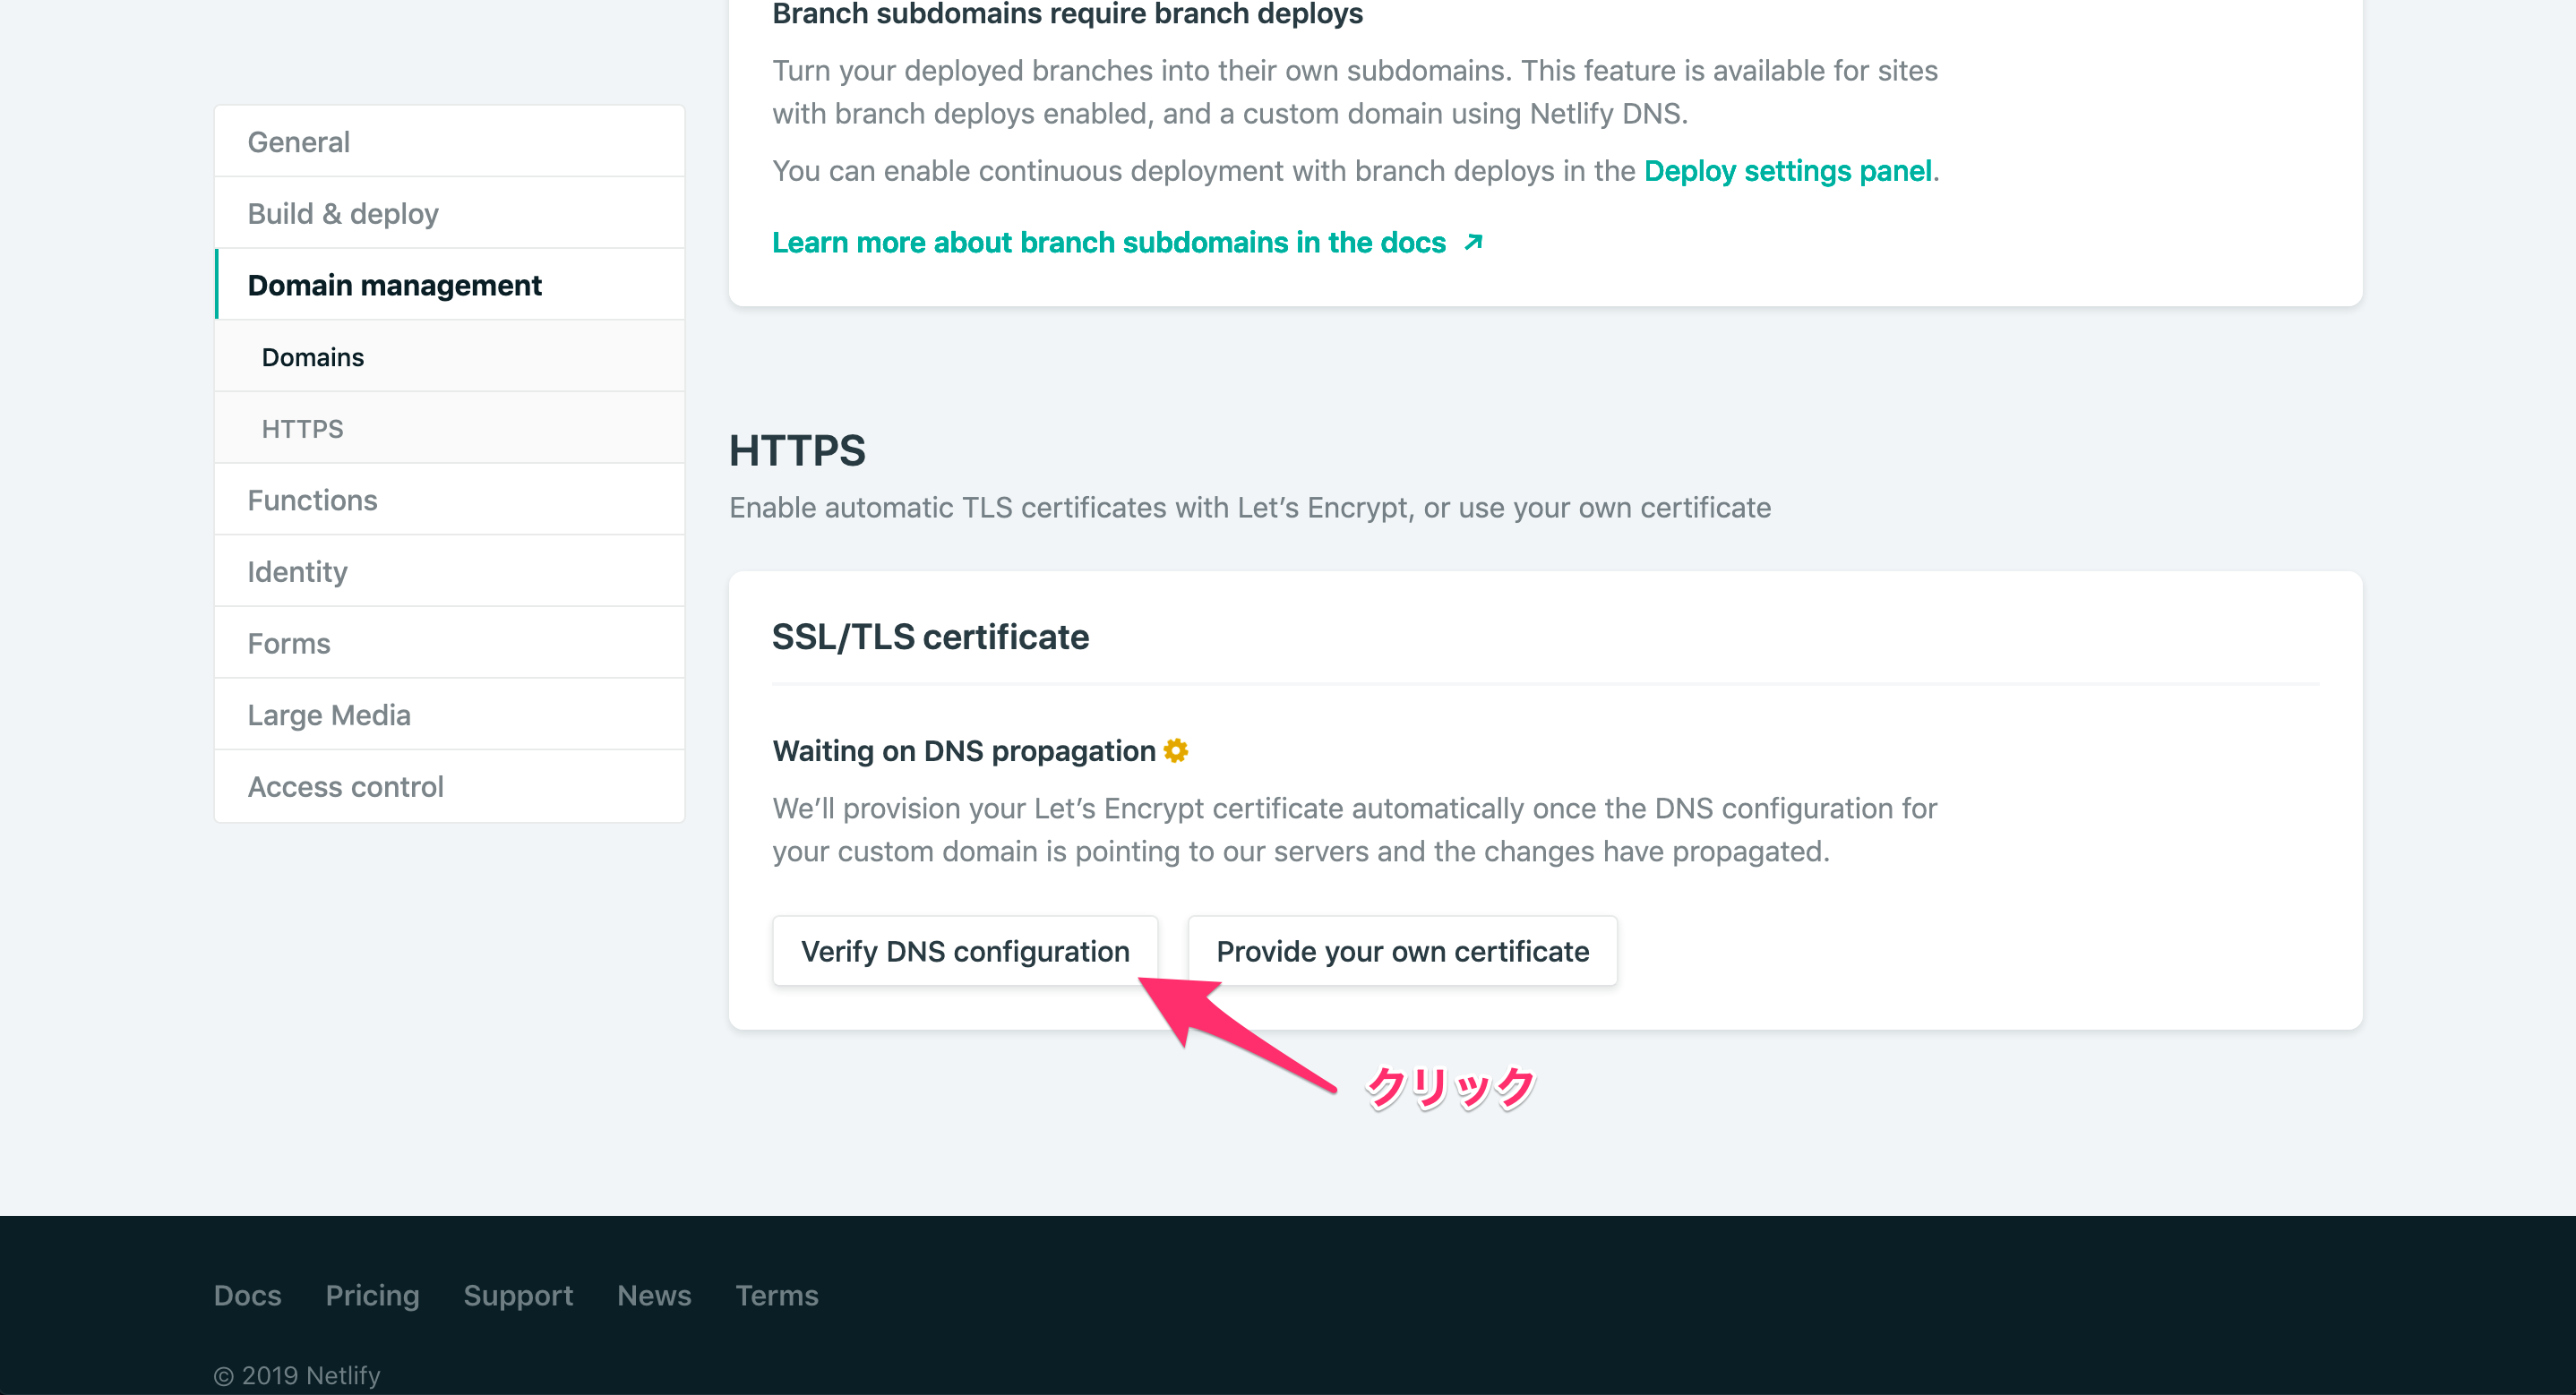
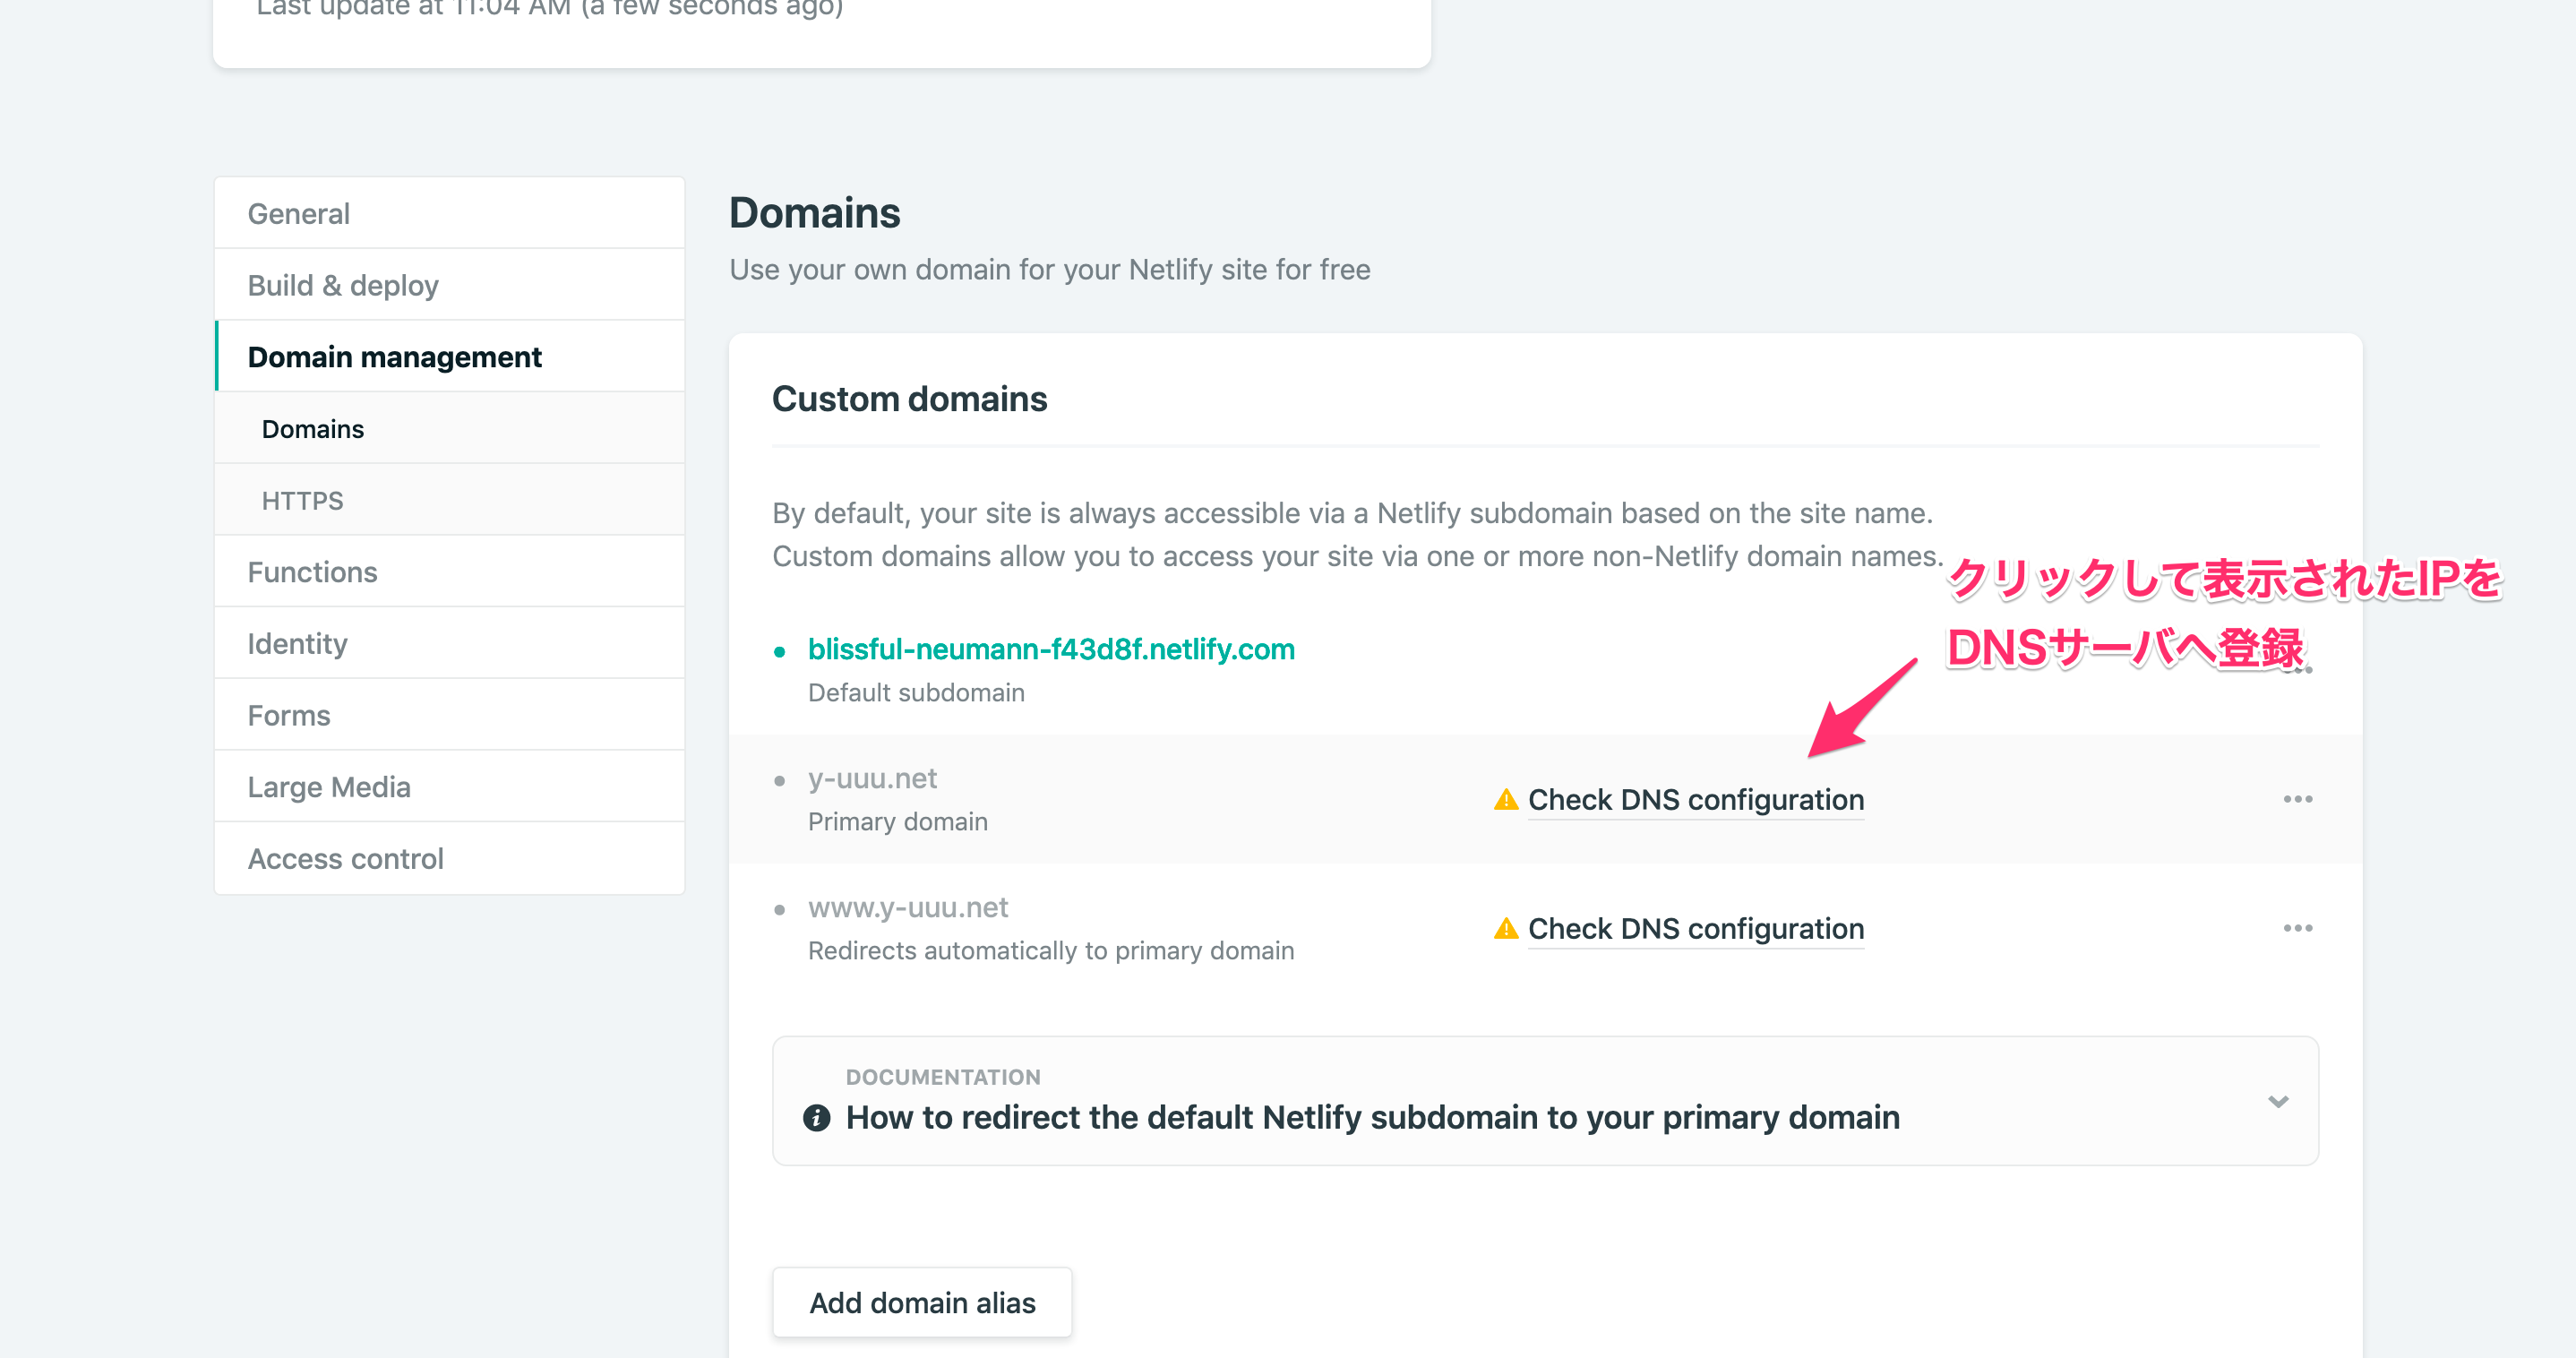
独自ドメインをあてる
DNSサーバの変更が反映されるまでに若干時間がかかるので先にやっておく
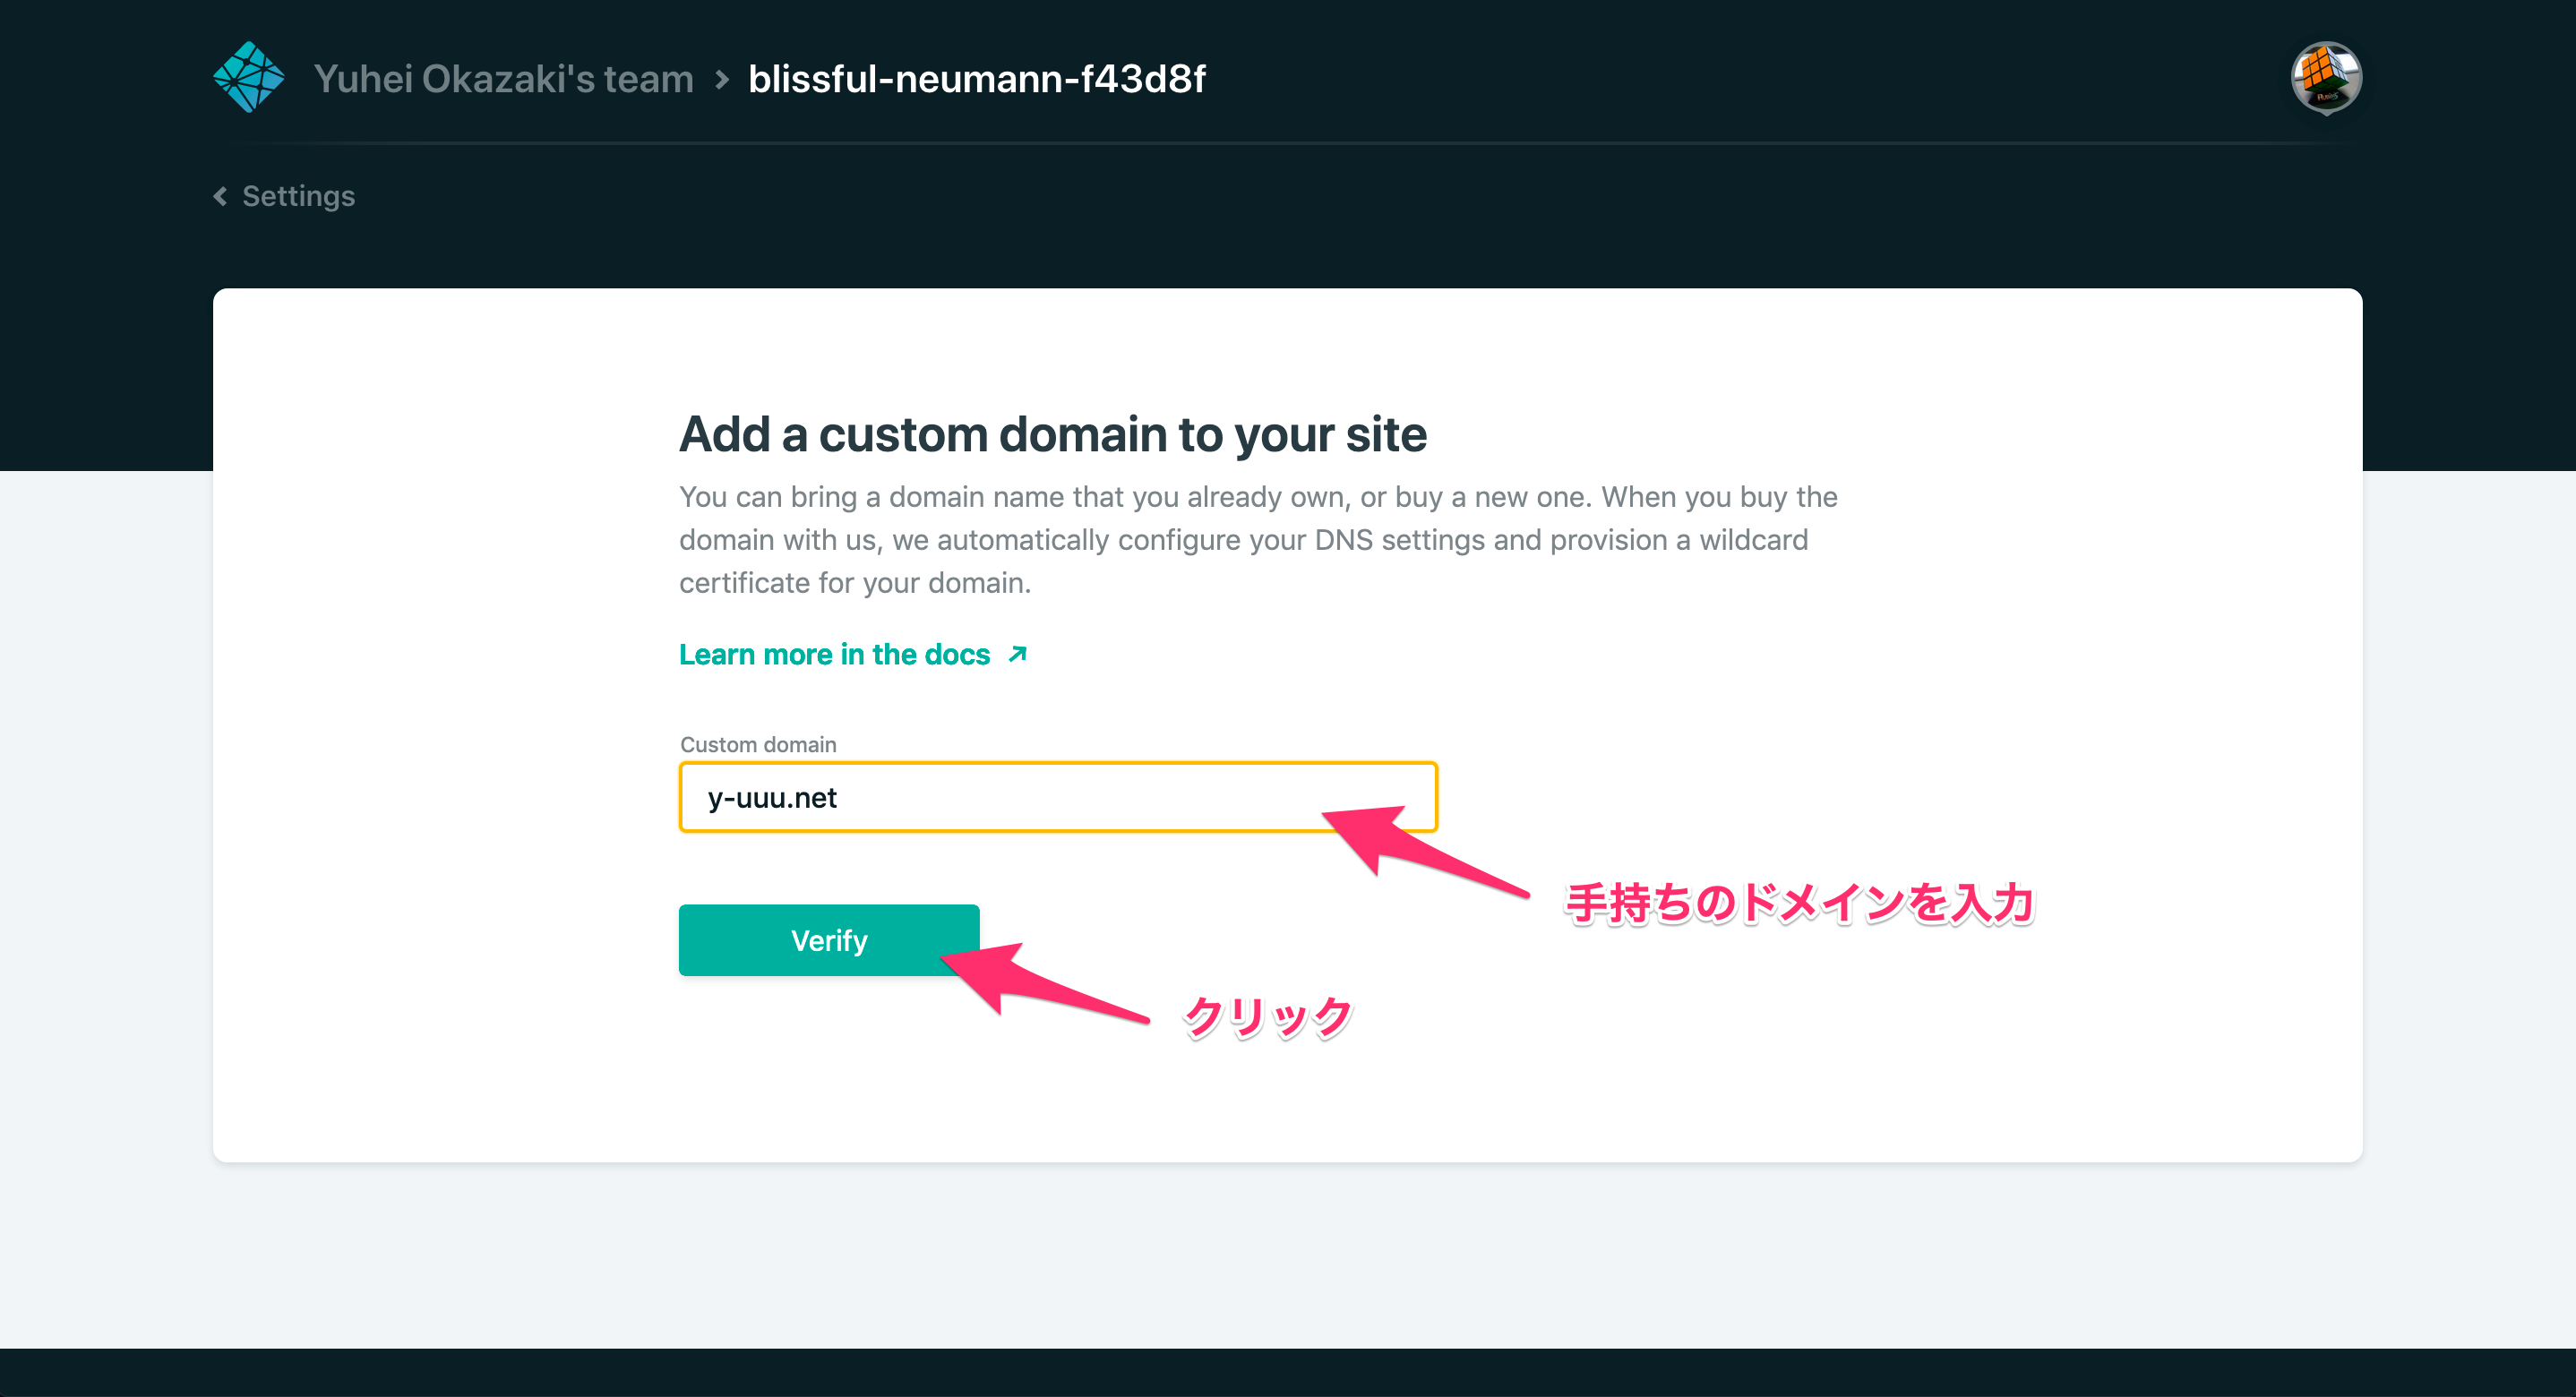
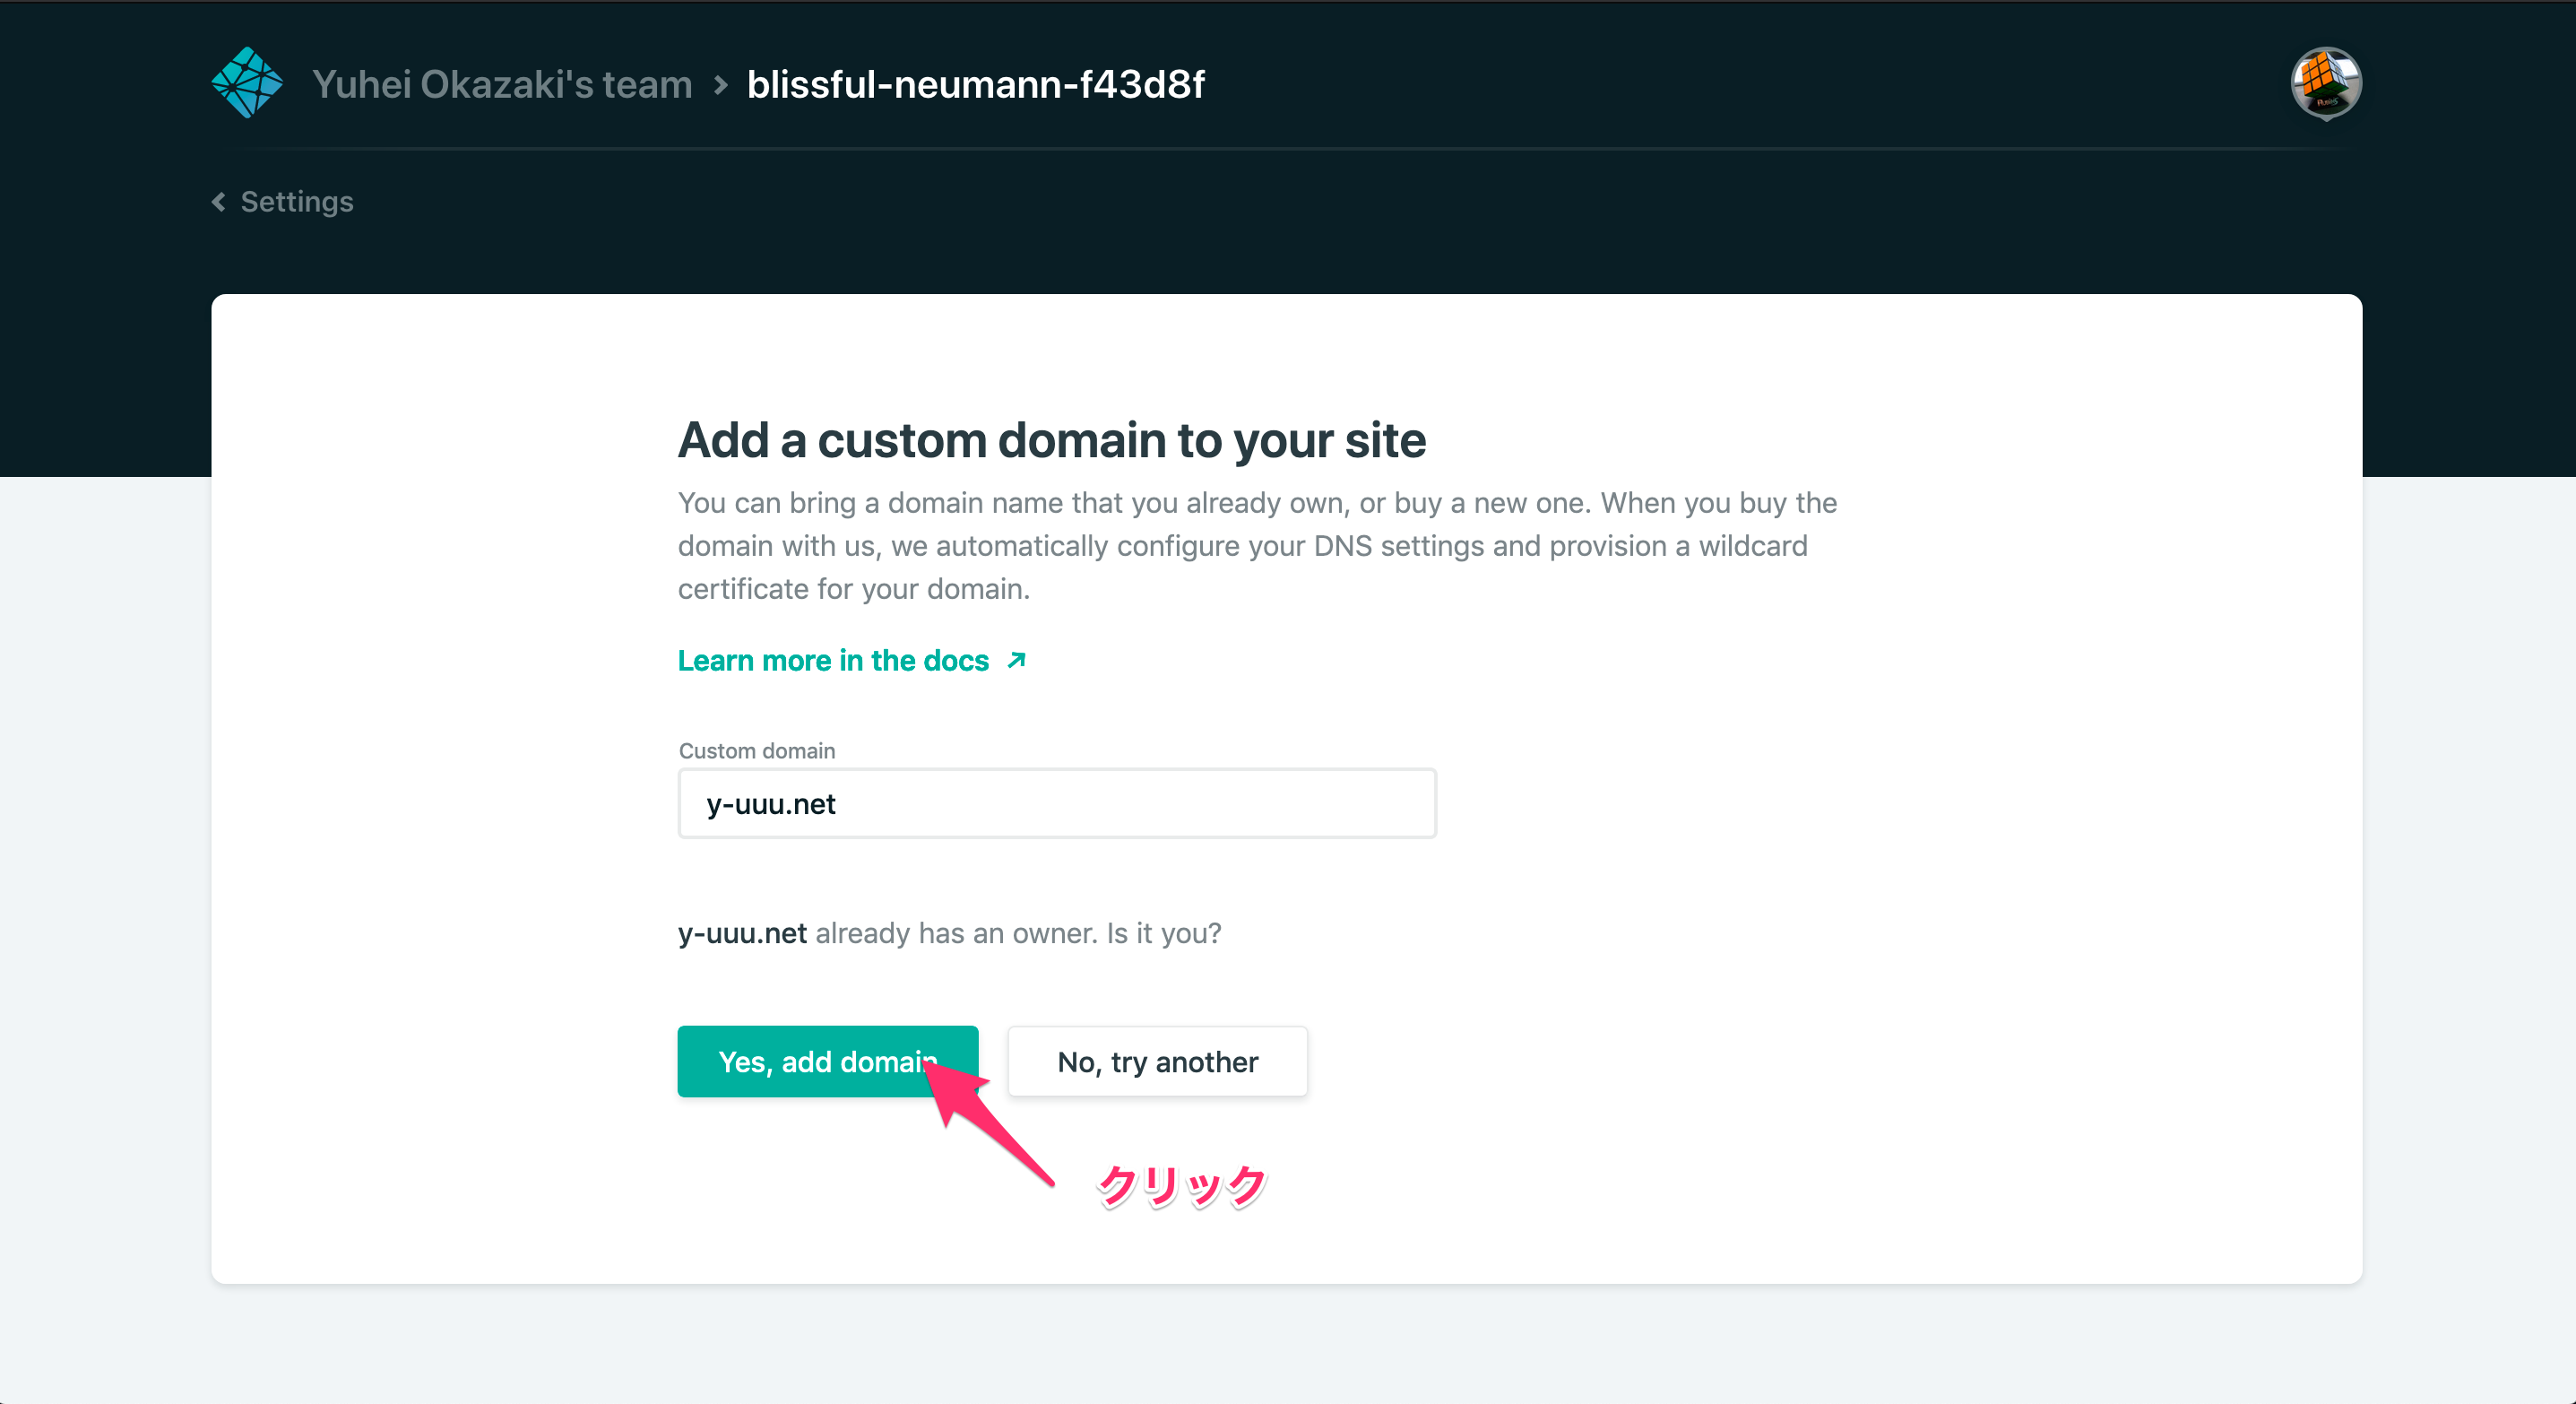
Check DNS configuration をクリックすると設定方法が提示されるので、自分のDNSサーバへ設定する
Vuetifyをカスタマイズ
ベースカラーを変更
plugins/vuetify.js を編集する
nuxt.config.js に追記すると書かれている記事も見かけるが、こちらではないので要注意。
import Vue from 'vue'
import Vuetify from 'vuetify/lib'
import colors from 'vuetify/es5/util/colors'

Vue.use(Vuetify, {
  theme: {
    primary: '#252a34',
    secondary: '#08d9d6',
    accent: '#ff2e63',
    info: colors.teal.lighten1,
    warning: colors.amber.base,
    error: colors.deepOrange.accent4,
    success: colors.green.accent3
  }
})
レイアウトを変更
主にツールバーをカスタマイズ
default.vue
<template>
<v-app>
<v-navigation-drawer
v-model="drawer"
:clipped="clipped"
fixed
app
class="hidden-md-and-up"
>
<v-list>
<v-list-tile
v-for="(item, i) in items"
:key="i"
:to="item.to"
router
exact
>
<v-list-tile-action>
<v-layout justify-center>
<font-awesome-icon :icon="item.icon" style="font-size: 30px;" />
</v-layout>
</v-list-tile-action>
<v-list-tile-content>
<v-list-tile-title v-text="item.title" />
</v-list-tile-content>
</v-list-tile>
</v-list>
</v-navigation-drawer>
<v-toolbar color="primary" fixed app dark>
<v-toolbar-side-icon class="hidden-md-and-up" @click="drawer = !drawer" />
<v-btn icon active-class :to="'/'" color="grey lighten-3">
<v-img src="/logo.png" aspect-ratio="1" />
</v-btn>
<v-toolbar-title to="/" v-text="title" />
<v-spacer />
<v-spacer></v-spacer>
<v-toolbar-items class="hidden-sm-and-down">
<v-btn v-for="(item, i) in items" :key="i" :to="item.to" flat>
{{ item.title }}
</v-btn>
</v-toolbar-items>
</v-toolbar>
<v-content>
<v-container grid-list-md>
<transition name="fade">
<nuxt />
</transition>
</v-container>
</v-content>
<v-footer :fixed="true" color="primary" dark app>
<v-layout justify-center>
<span>© 2019 Yuhei Okazaki. All Rights Reserved.</span>
</v-layout>
</v-footer>
</v-app>
</template>
<script>
import { FontAwesomeIcon } from '@fortawesome/vue-fontawesome'
export default {
components: {
FontAwesomeIcon
},
data() {
return {
clipped: false,
drawer: false,
items: [
{ icon: ['fas', 'user-circle'], title: 'Profile', to: '/profile' },
{ icon: ['fas', 'laptop'], title: 'Works', to: '/works' },
{ icon: ['fas', 'wrench'], title: 'Languages', to: '/languages' },
{ icon: ['fas', 'toolbox'], title: 'Skills', to: '/skills' },
{ icon: ['fas', 'users'], title: 'Community', to: '/community' },
{ icon: ['fas', 'envelope'], title: 'Contact', to: '/contact' }
],
title: "yuuu's portfolio"
}
}
}
</script>
<style>
.fade-enter-active,
.fade-leave-active {
transition: opacity 1s;
}
.fade-enter, .fade-leave-to /* .fade-leave-active below version 2.1.8 */ {
opacity: 0;
}
</style>
TOPページのコンテンツを作成
<template>
<v-layout row wrap justify-center align-center>
<v-flex sm6 md6>
<div class="display-3">
Welcome to yuuu's Portfolio.
</div>
<v-divider class="my-3"></v-divider>
<div class="title mb-3">Check out my profile!</div>
<v-layout justify-center>
<v-btn color="secondary" large to="/profile">profile</v-btn>
</v-layout>
</v-flex>
<v-flex sm6 md6>
<v-img src="/logo.png" aspect-ratio="1" />
</v-flex>
</v-layout>
</template>
Pull Request作成&マージ
上記変更をgithubへpushしてPull Requestを作成すると、Netlifyがビルドを開始する
masterにマージせずともPull Requestの段階で、プレビューを表示でき、とても便利


問題なければ、githubにてmasterへマージする。
感想
普段Ruby on Railsで開発していることもあって、Vue.jsでSPAを作るときに「このファイルってどこのディレクトリへ置くべきなんだろう?」「このモジュールのimportはどこで行うのが一般的なのか?」と迷うことが多々ありました。
Nuxt.jsだと、そのあたりがきちんと規約で決まっていて迷うことが少ないですね。
簡単にPWA対応できたこともGoodな点です。
そして、Netlifyは本当に便利だということを実感しました。
