この記事では、フロントエンドにNext.js、バックエンドにGo言語(gqlgen)を用いて、フロントエンドとバックエンド間のAPIにGraphQLを使ったアプリケーションを構築する方法をまとめます。
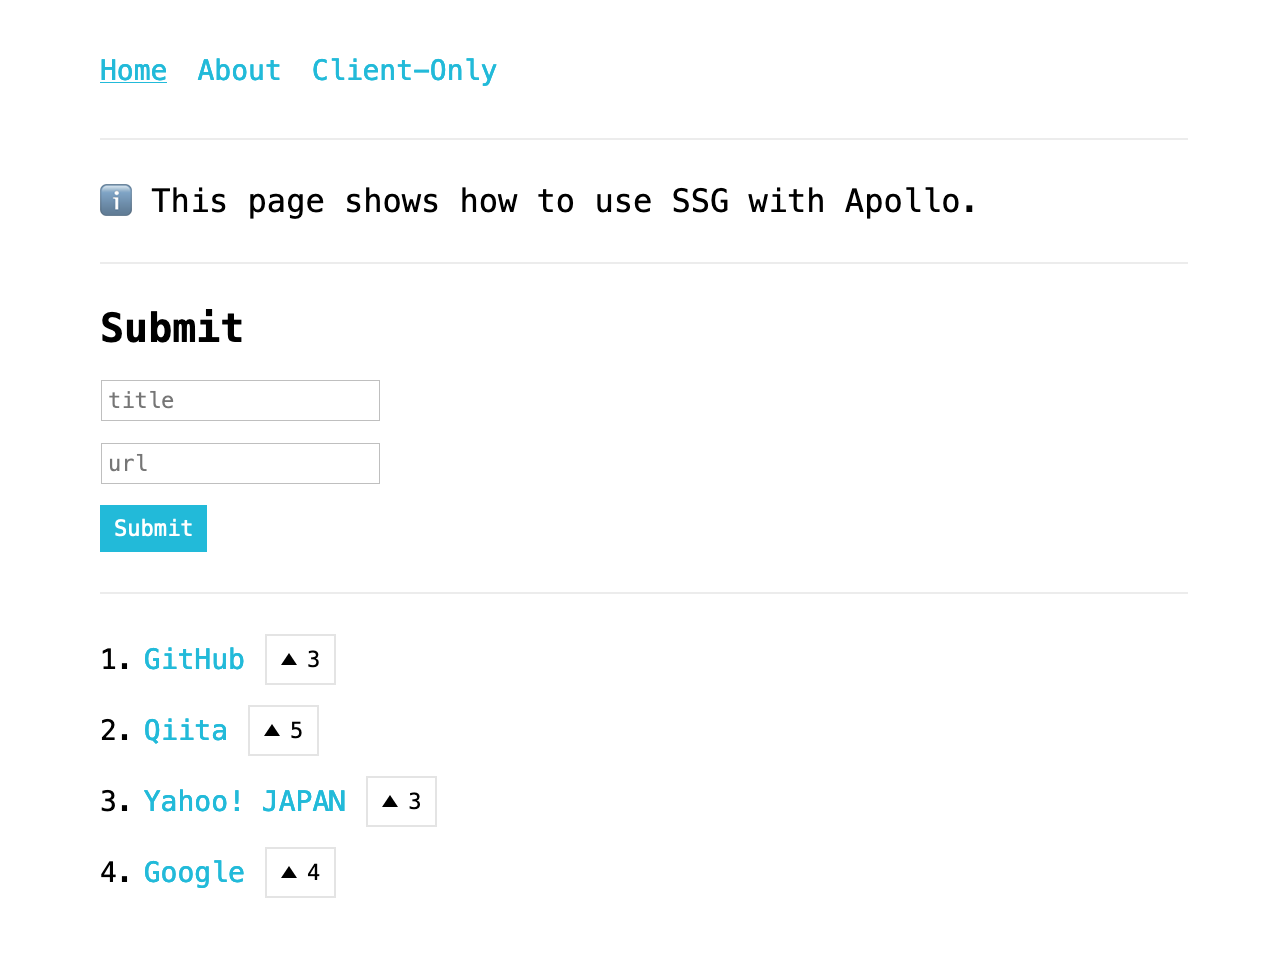
作成したのは以下のような簡易ブクマアプリです。
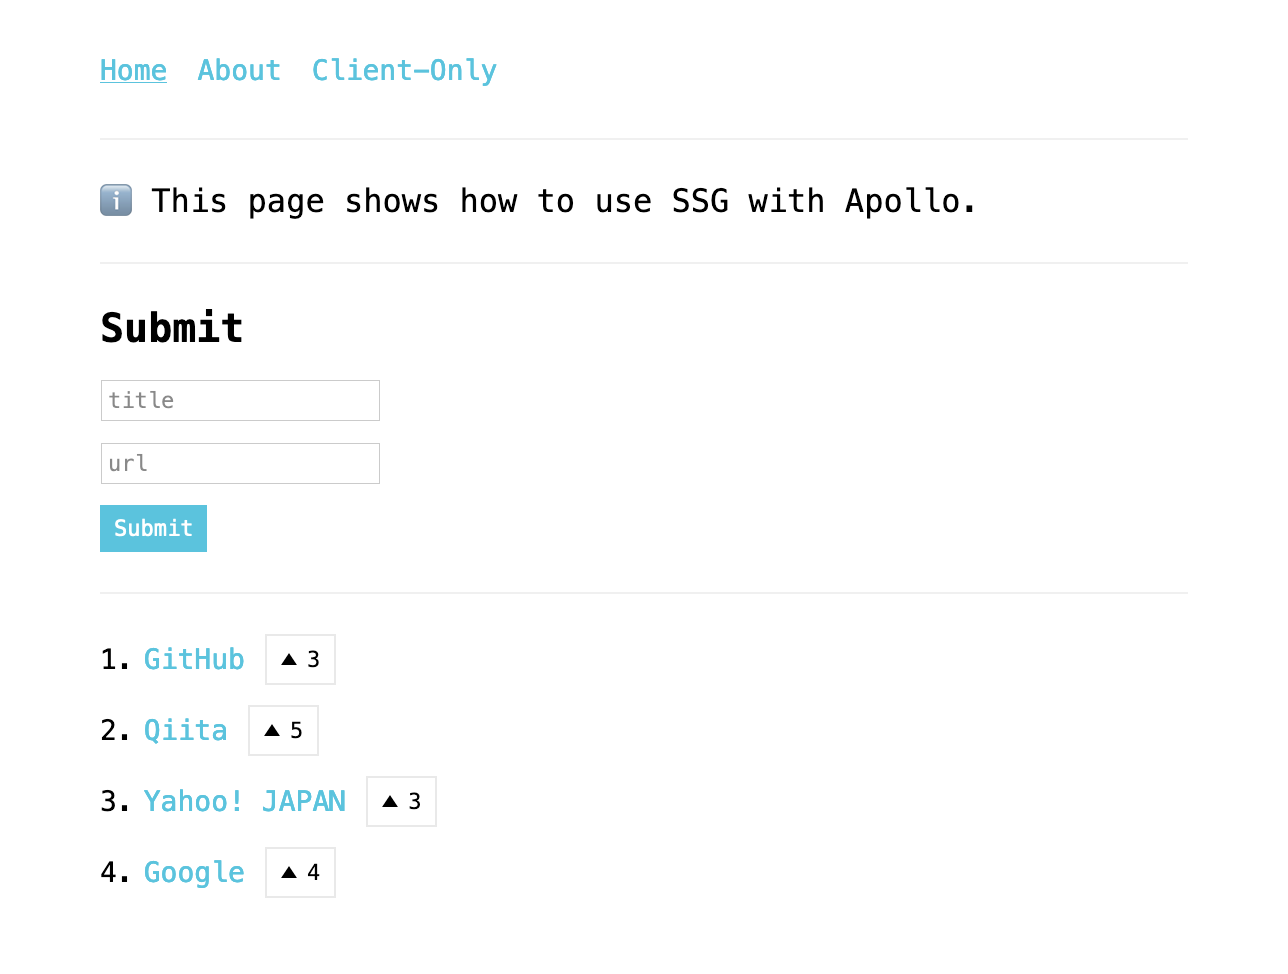
フロントエンドはほぼNext.jsのexamplesのままで、本記事ではバックエンドの実装をメインに解説します。
背景
個人的に、「フロントエンドフレームワークとGo言語の組み合わせで何か開発をしてみたい」と以前から思っていました。
そんな中、ReactのフレームワークであるNext.jsの使い勝手が良さそうという噂を耳にしました。
加えて、Next.jsのexamplesが充実していて、Apolloを使ったアプリケーションのひな形が簡単に作れることを知ったので、今回Go言語のバックエンドと組み合わせて動かしてみることにしました。
構成要素
図に書いてみると思っていた以上に構成要素が多かったので、それぞれの役割を大まかに説明します。
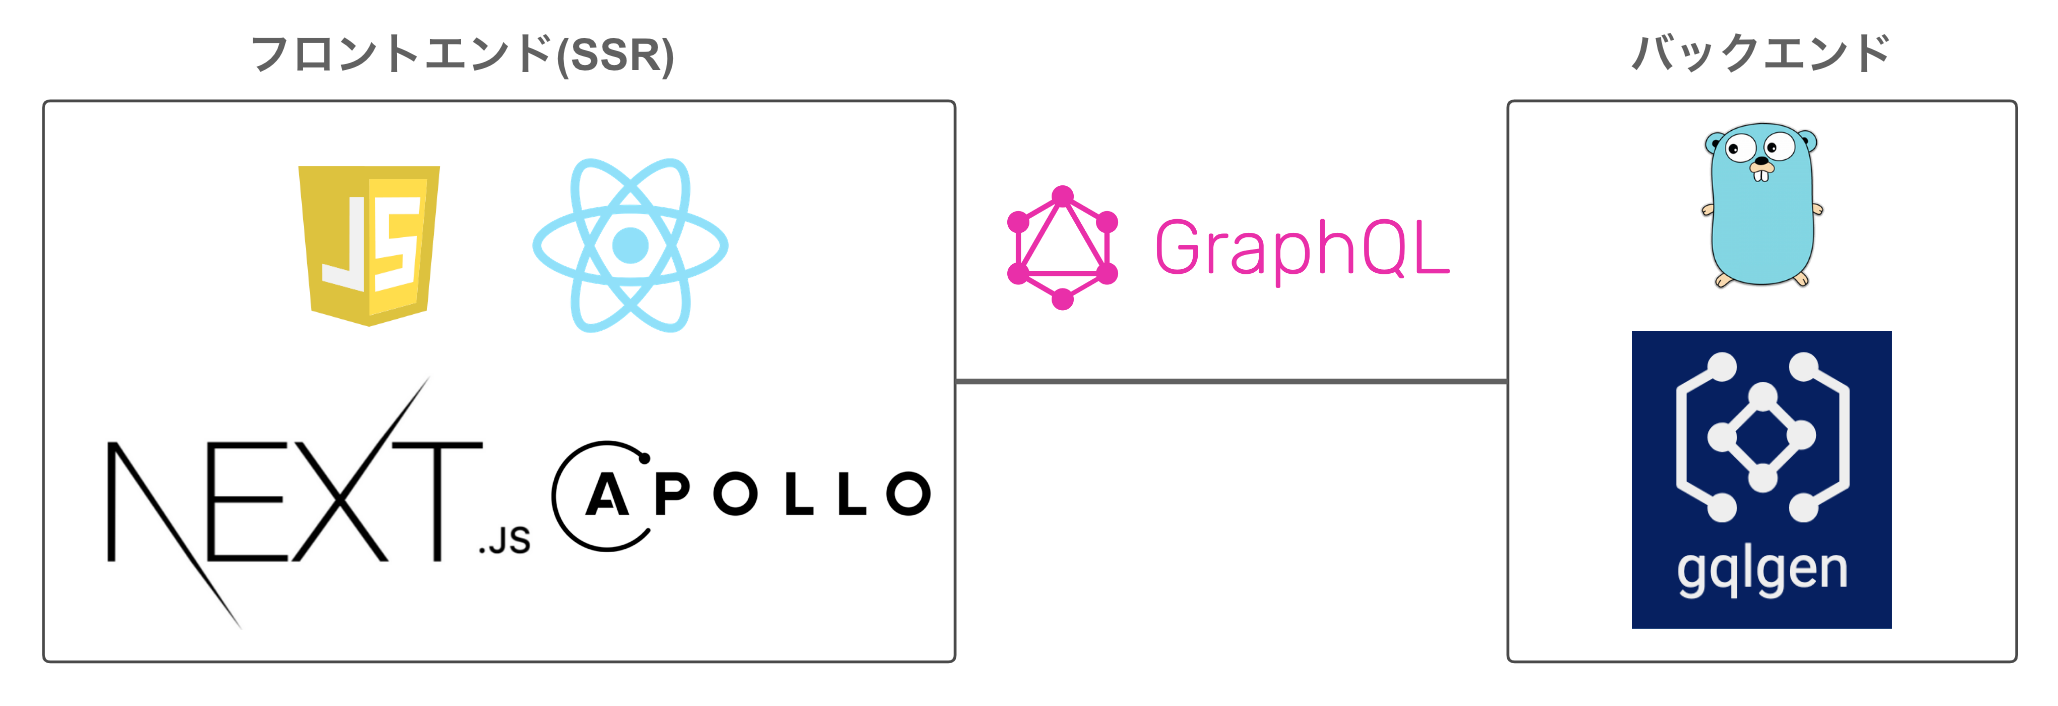
| 名前 | 種別 | 役割 |
|---|---|---|
| JavaScript | プログラミング言語 | 今回のフロントエンドの実装に用いるプログラミング言語 |
| React | ライブラリ | コンポーネントベースでUIを構築できるJavaScriptライブラリ |
| Apollo Client | ライブラリ | GraphQLに対応した状態管理ライブラリ |
| Next.js | フレームワーク | Reactのサーバーサイドレンダリング(SSR)に対応するフレームワーク |
| GraphQL | クエリ言語/ランタイム | API向けに作られたクエリ言語およびランタイム |
| Go言語 | プログラミング言語 | 今回のバックエンドの実装に用いるプログラミング言語, golangと表記されることもある |
| gqlgen | ライブラリ | SchemaベースでGraphQLサーバを構築するためのライブラリ |
UIの構築
まずはNext.jsのexamples/with-apolloをベースにアプリケーションを作ります。
$ yarn create next-app
success Installed "create-next-app@9.4.4" with binaries:
      - create-next-app
✔ What is your project named? … with-apollo-ui
✔ Pick a template › Example from the Next.js repo
✔ Pick an example › with-apollo
Creating a new Next.js app in /Users/yokazaki/src/github.com/yuuu/with-apollo-ui.

# ログ省略

$ cd with-apollo-ui
$ yarn dev
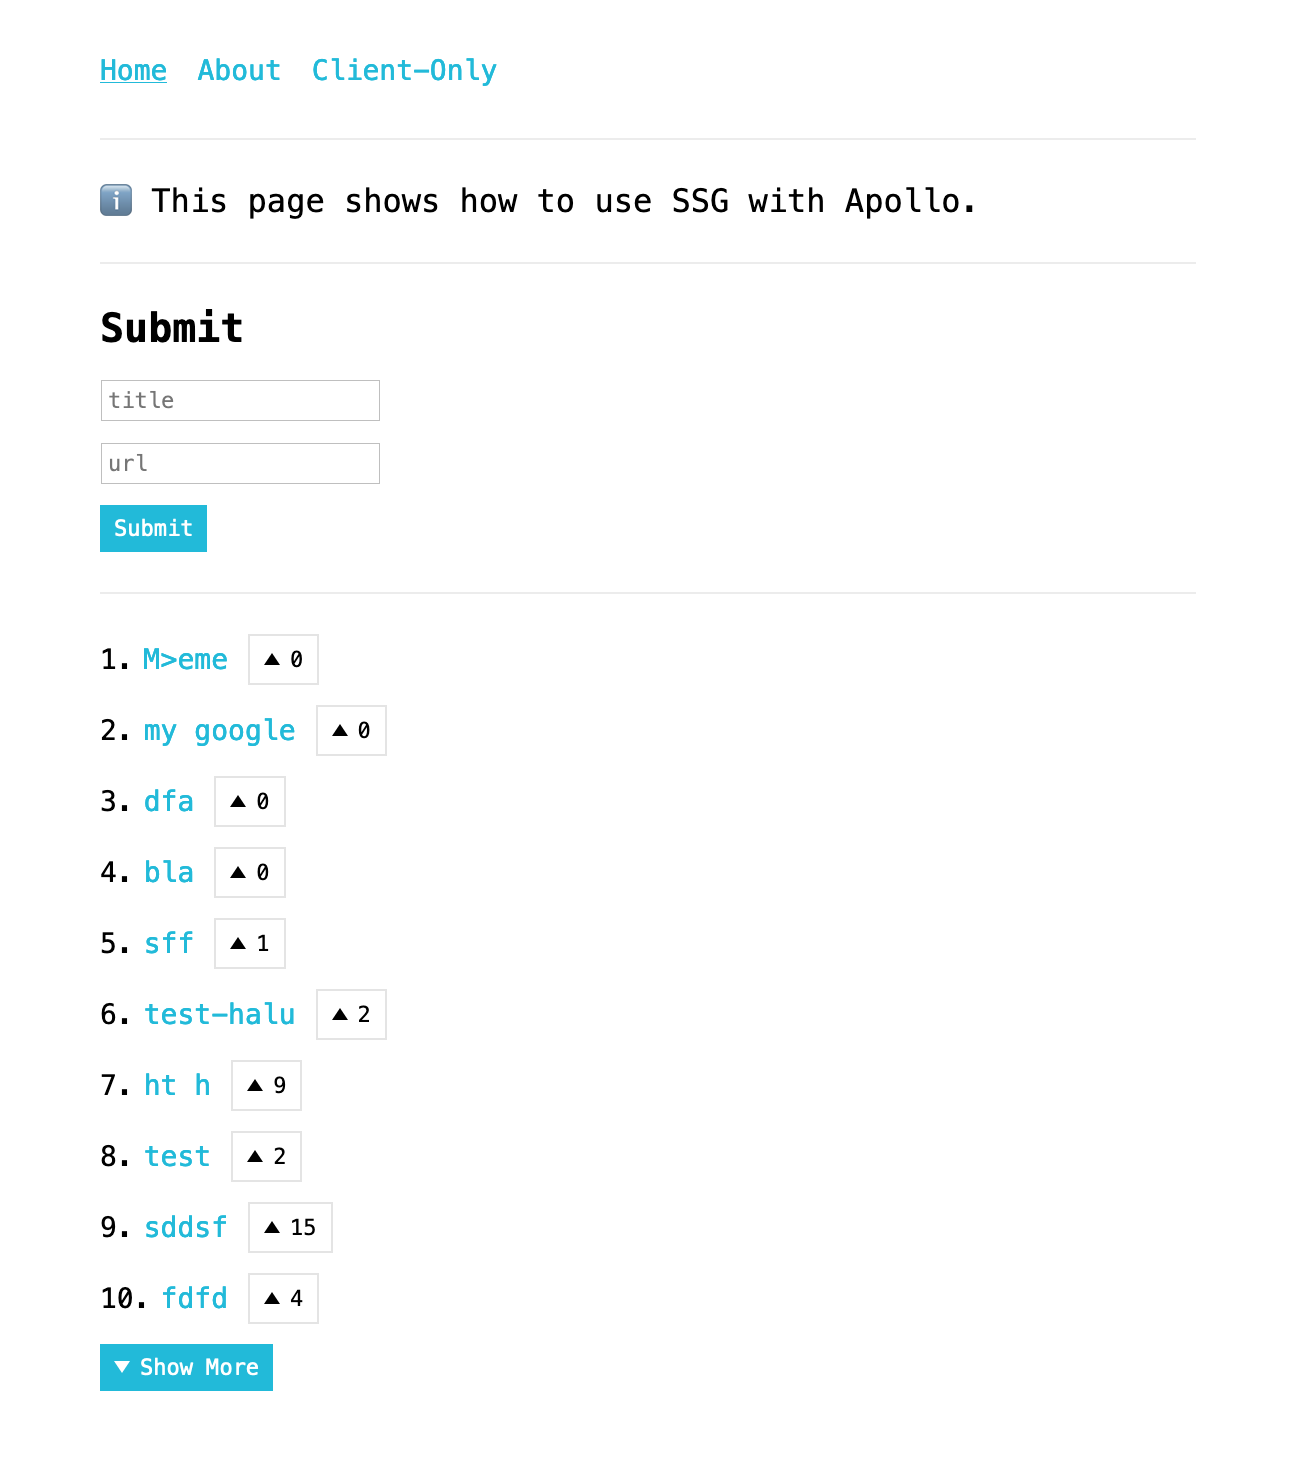
出来上がったアプリケーションは、URLとタイトルをセットで登録・閲覧できる、いわゆる簡易ブクマアプリです。
この時点では、リクエストの送信先となっているバックエンドのGraphQLサーバはインターネット上に公開されているものを利用しています。
このため、列挙されているURLとタイトルは、世界中のユーザが登録したものがそのまま表示されています。
GraphQLサーバの構築
スキーマベースでGraphQLサーバを構築できることと、機能の拡張性を考慮して、以下記事を参考にEcho+gqlgenを使って構築しました。
gqlgen + EchoでgolangなGraphQLサーバを作るチュートリアル
ベース構築
$ mkdir with-apollo-api
$ cd with-apollo-api
$ go mod init github.com/yuuu/with-apollo-api
$ go get github.com/99designs/gqlgen
$ go get github.com/rs/cors

# gqlgenでgraph/schema.graphqlsを生成
$ gqlgen init
スキーマ定義
graph/schema.graphqls にGraphQLのスキーマを記述します。
type Post {
  id: ID!
  title: String!
  votes: Int!
  url: String!
  createdAt: String!
}

type PostsMeta {
  count: Int!
}

type Query {
  allPosts(orderBy: OrderBy, first: Int!, skip: Int!): [Post!]!
  _allPostsMeta: PostsMeta!
}

enum OrderBy {
  createdAt_ASC,
  createdAt_DESC
}

type Mutation {
  createPost(title: String!, url: String!): Post!
  updatePost(id: ID!, votes: Int): Post!
}
スキーマを記述したらソースコードを生成します。
$ rm graph/schema.resolvers.go
$ gqlgen
QueryとMutationを実装
生成された graph/schema.resolvers.go を以下のように変更します。
package graph

// This file will be automatically regenerated based on the schema, any resolver implementations
// will be copied through when generating and any unknown code will be moved to the end.

import (
	"context"
	"fmt"
	"sort"
	"strconv"
	"time"

	"github.com/yuuu/with-apollo-api/graph/generated"
	"github.com/yuuu/with-apollo-api/graph/model"
)

var posts []*model.Post = make([]*model.Post, 0)

func (r *mutationResolver) CreatePost(ctx context.Context, title string, url string) (*model.Post, error) {
	post := model.Post{
		ID:        fmt.Sprintf("%d", len(posts)+1),
		Title:     title,
		URL:       url,
		Votes:     0,
		CreatedAt: time.Now().Format("2006-01-02 15:04:05"),
	}
	posts = append(posts, &post)
	return &post, nil
}

func (r *mutationResolver) UpdatePost(ctx context.Context, id string, votes *int) (*model.Post, error) {
	if votes == nil {
		return nil, nil
	}
	i, _ := strconv.Atoi(id)
	posts[i-1].Votes = *votes
	return posts[i-1], nil
}

func (r *queryResolver) AllPosts(ctx context.Context, orderBy *model.OrderBy, first int, skip int) ([]*model.Post, error) {
	if skip > len(posts) {
		skip = len(posts)
	}
	if (skip + first) > len(posts) {
		first = len(posts) - skip
	}
	sortedPosts := make([]*model.Post, len(posts))
	copy(sortedPosts, posts)
	if orderBy != nil && *orderBy == "createdAt_DESC" {
		sort.SliceStable(sortedPosts, func(i, j int) bool {
			return sortedPosts[i].CreatedAt > sortedPosts[j].CreatedAt
		})
	}
	slicePosts := sortedPosts[skip : skip+first]
	return slicePosts, nil
}

func (r *queryResolver) AllPostsMeta(ctx context.Context) (*model.PostsMeta, error) {
	postsMeta := model.PostsMeta{Count: len(posts)}
	return &postsMeta, nil
}

// Mutation returns generated.MutationResolver implementation.
func (r *Resolver) Mutation() generated.MutationResolver { return &mutationResolver{r} }

// Query returns generated.QueryResolver implementation.
func (r *Resolver) Query() generated.QueryResolver { return &queryResolver{r} }

type mutationResolver struct{ *Resolver }
type queryResolver struct{ *Resolver }
Playgroundで動作確認
以下コマンドでGraphQLサーバを起動します。
$ go run server.go
ブラウザで http://localhost:8080 にアクセスすると、PlayGroundが表示されます。
まずはmutationから動作確認してみましょう。
Yahoo! JAPANを登録してみます。
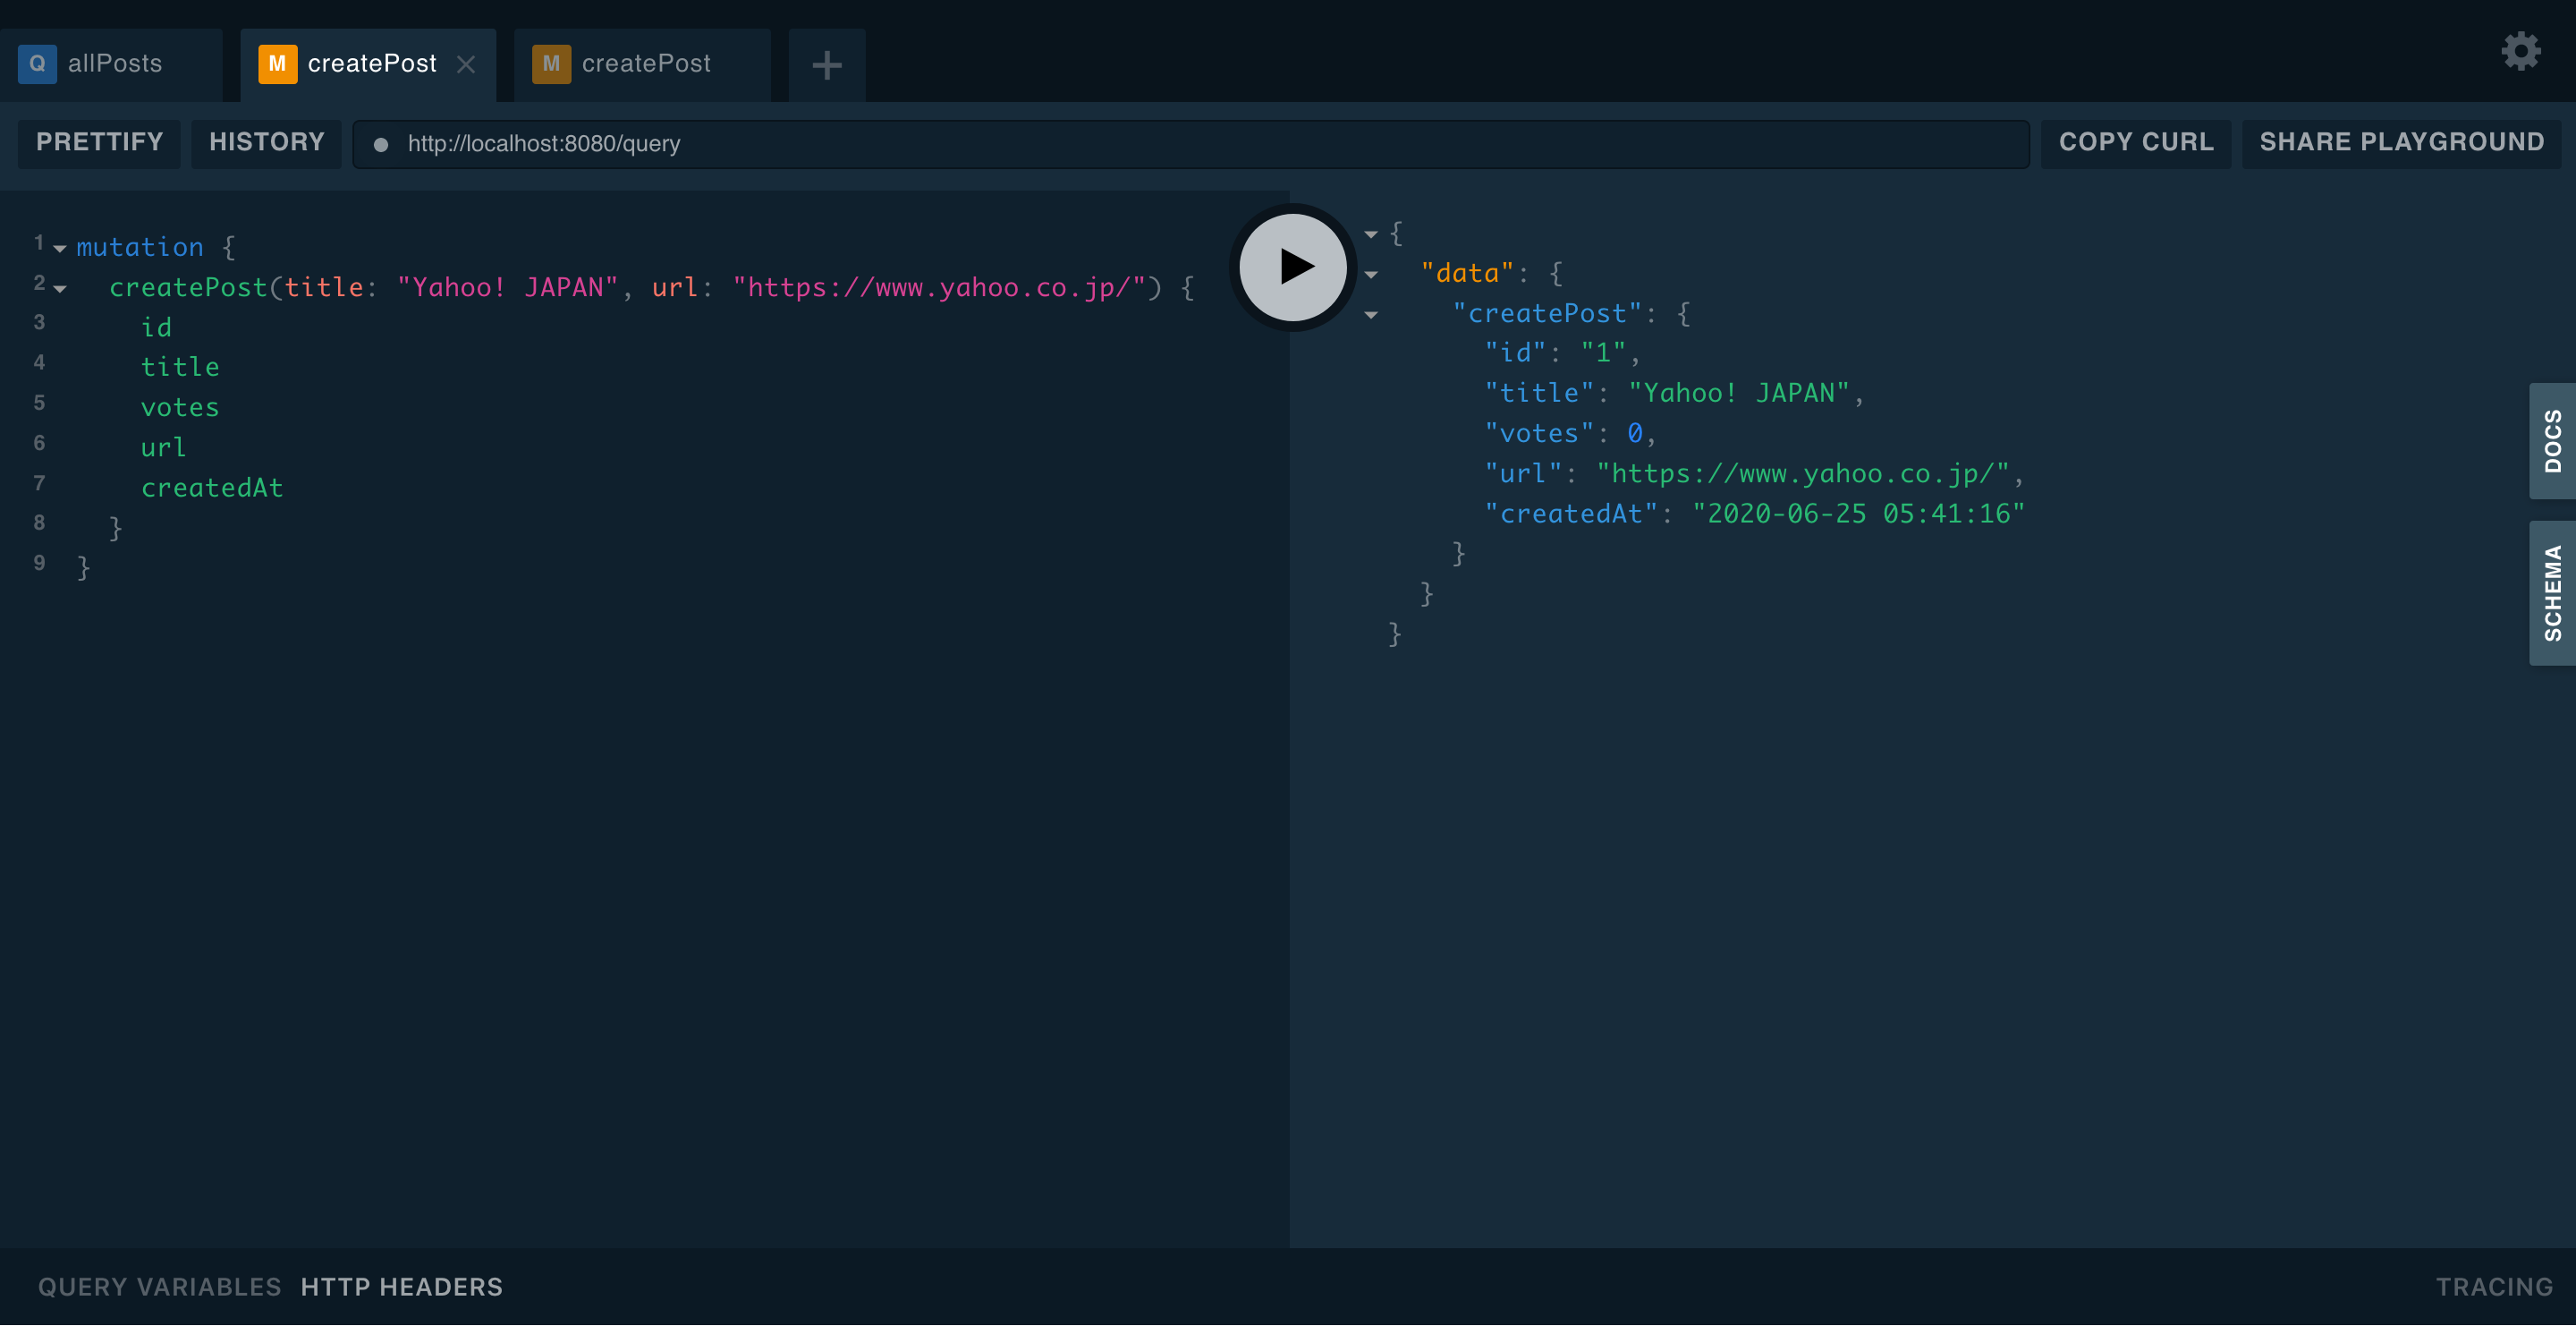
次にGoogleを登録してみます。
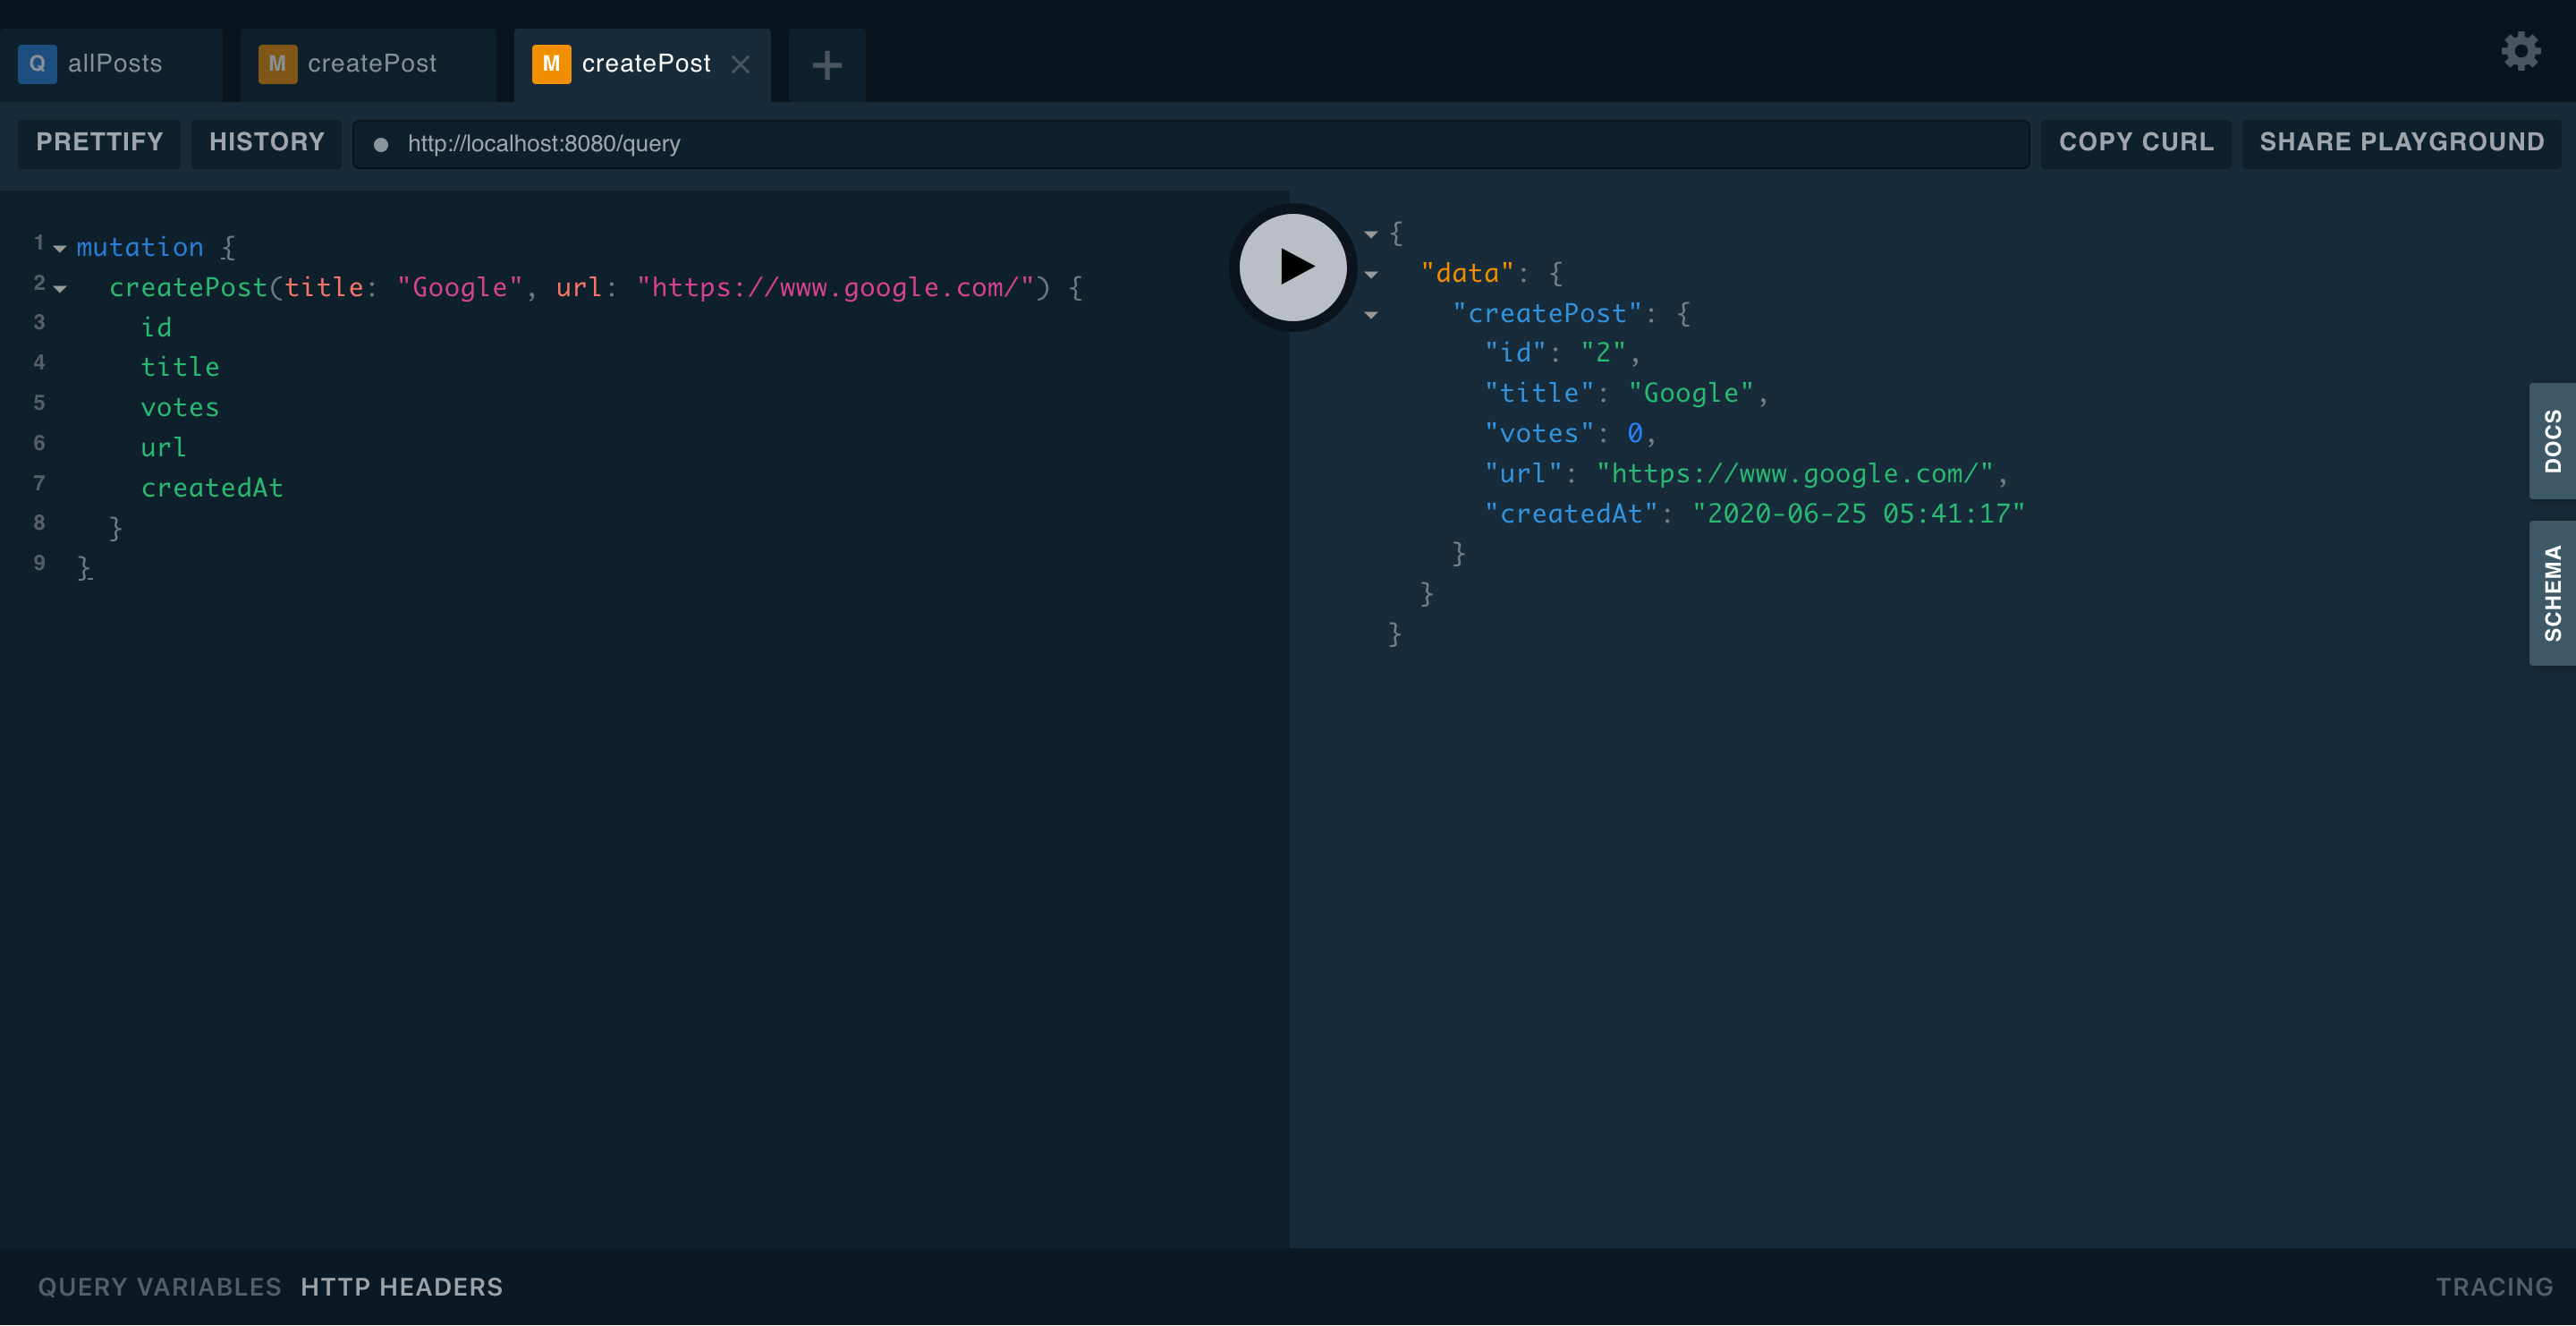
続いてQueryを試してみます。
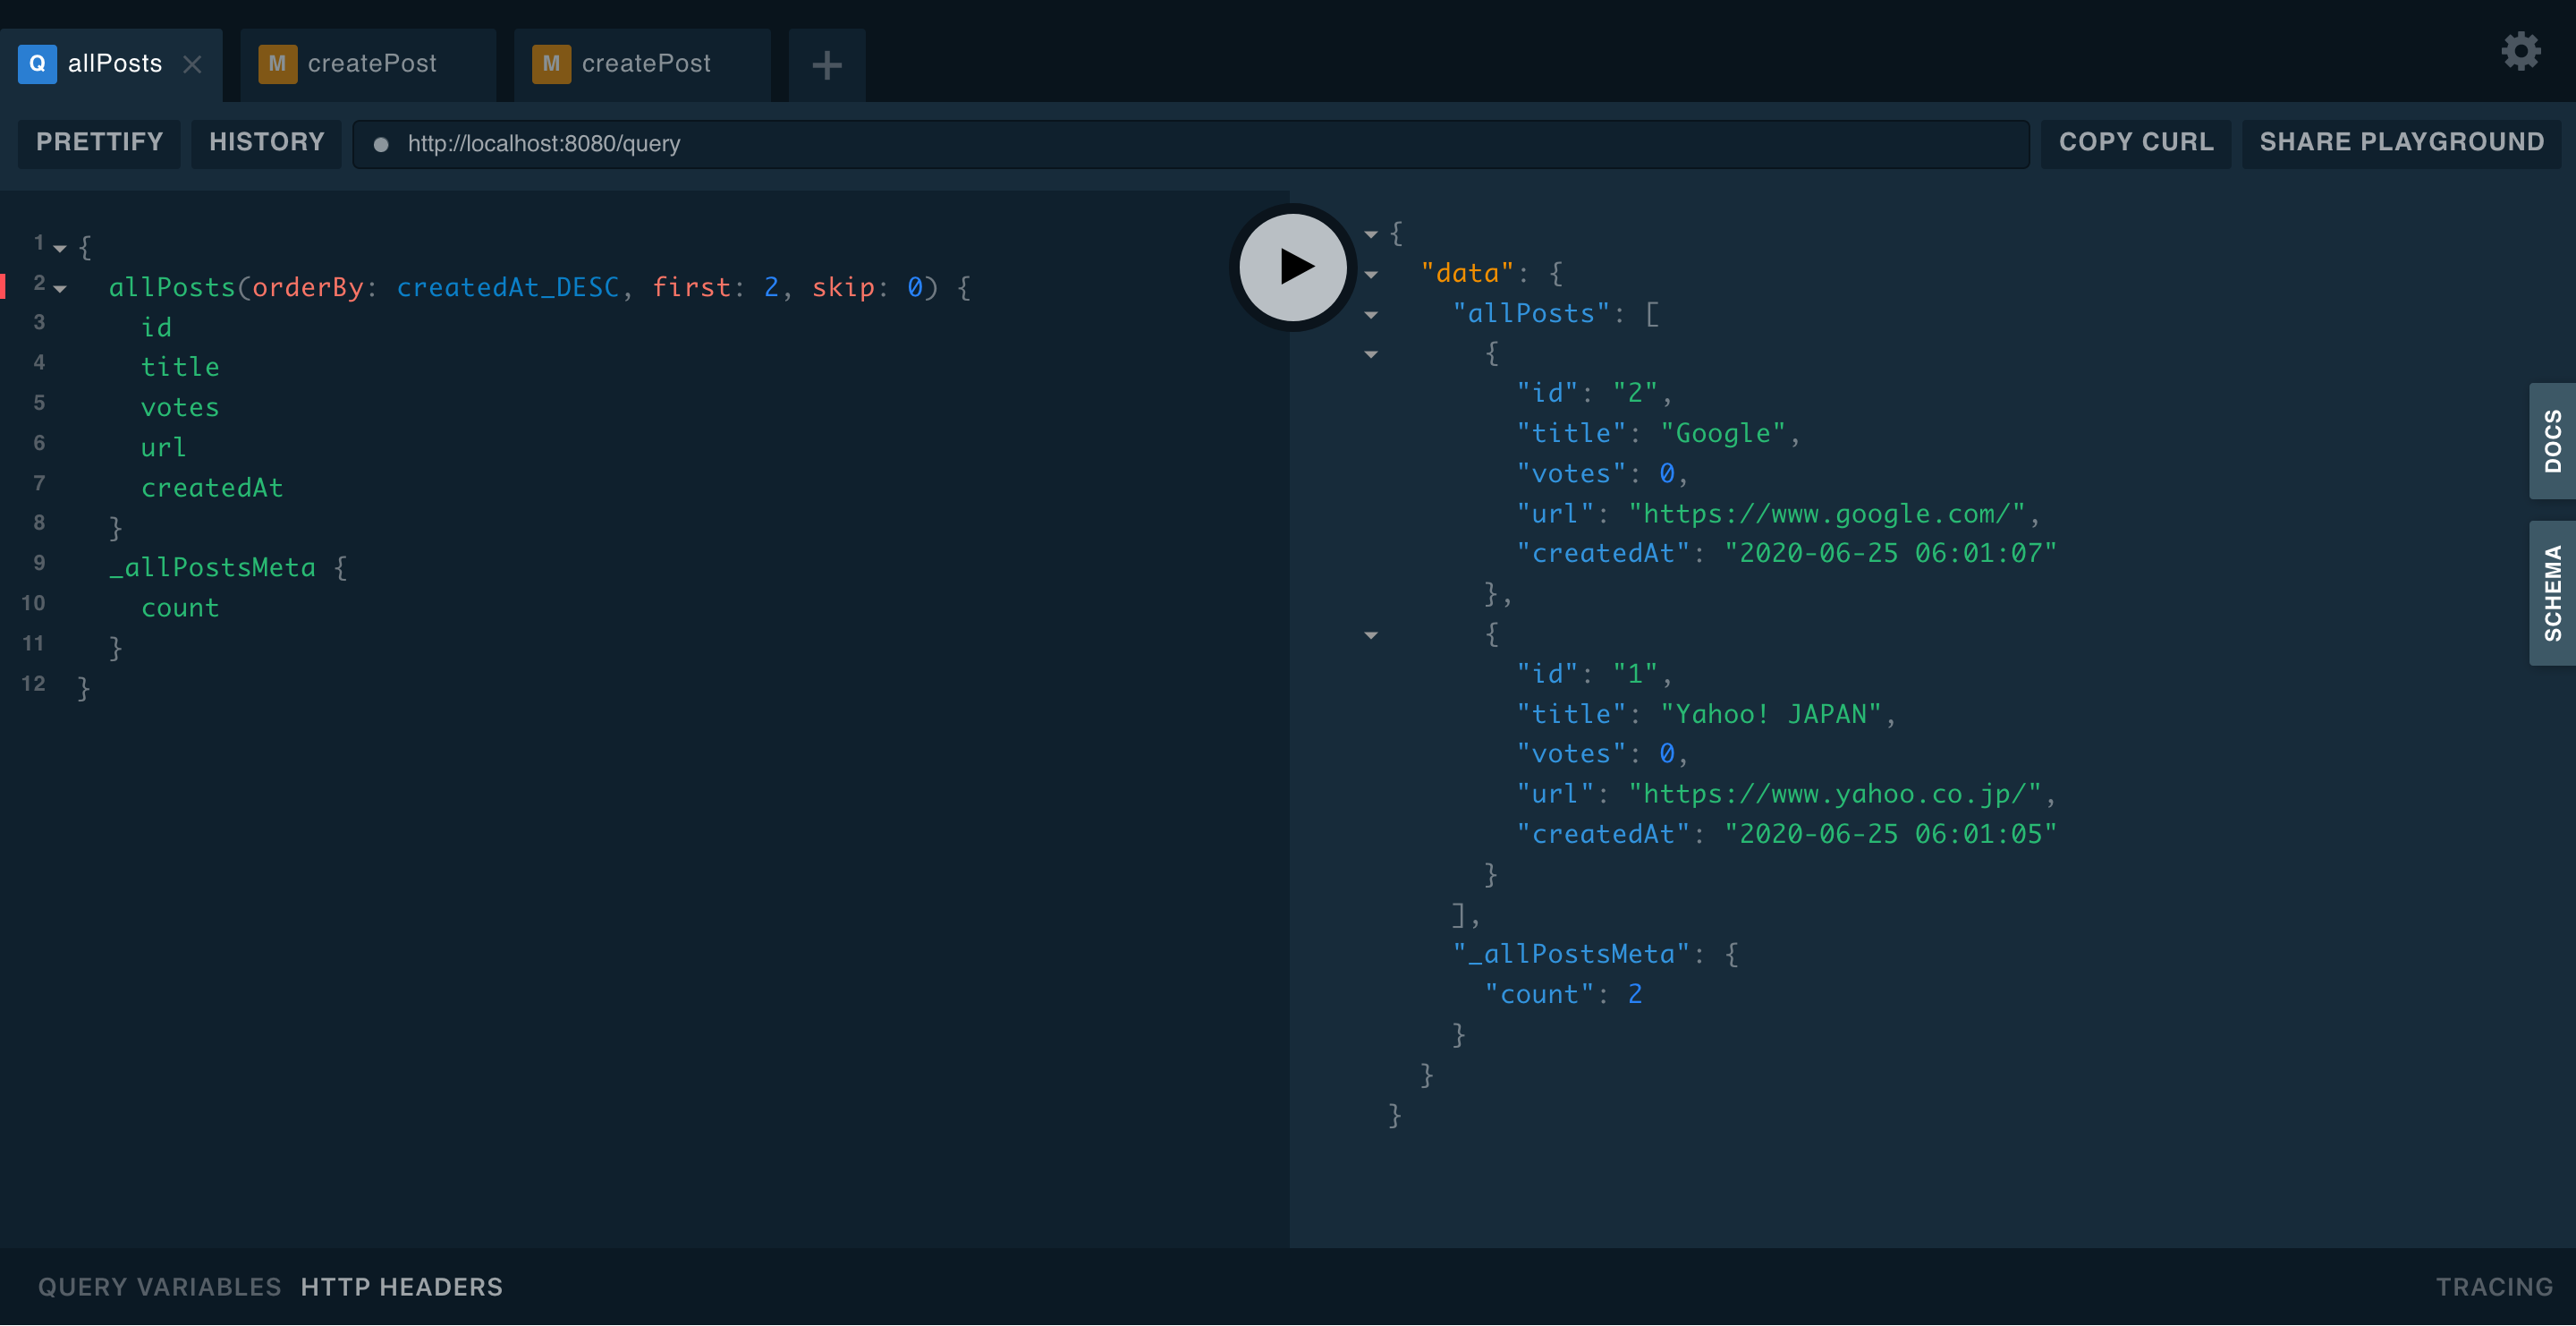
このように、GraphQLの各リクエストが問題なく動作していることがわかります。
UIとGraphQLサーバを組み合わせる
CORS設定
現状、Next.jsが動いているオリジン(http://localhost:3000) とGraphQLサーバのオリジン(http://localhost:8080) が異なるため、このままではGraphQLサーバへのリクエストが失敗します。
server.goを以下のように変更することで、 http://localhost:3000 からの要求を受け付けられるようにします。
package main

import (
	"log"
	"net/http"
	"os"

	"github.com/99designs/gqlgen/graphql/handler"
	"github.com/99designs/gqlgen/graphql/playground"
	"github.com/rs/cors"
	"github.com/yuuu/with-apollo-api/graph"
	"github.com/yuuu/with-apollo-api/graph/generated"
)

const defaultPort = "8080"

func main() {
	port := os.Getenv("PORT")
	if port == "" {
		port = defaultPort
	}

	srv := handler.NewDefaultServer(generated.NewExecutableSchema(generated.Config{Resolvers: &graph.Resolver{}}))

	http.Handle("/", playground.Handler("GraphQL playground", "/query"))

	c := cors.New(cors.Options{
		AllowedOrigins:   []string{"http://localhost:3000", "http://localhost:8080"},
		AllowCredentials: true,
	})

	http.Handle("/query", c.Handler(srv))

	log.Printf("connect to http://localhost:%s/ for GraphQL playground", port)
	log.Fatal(http.ListenAndServe(":"+port, nil))
}
Next.jsのリクエスト先のURLを変更
lib/apolloClient.js のServer URLを http://localhost:8080/query に変更します。
import { useMemo } from 'react'
import { ApolloClient } from 'apollo-client'
import { InMemoryCache } from 'apollo-cache-inmemory'
import { HttpLink } from 'apollo-link-http'

let apolloClient

function createApolloClient() {
  return new ApolloClient({
    ssrMode: typeof window === 'undefined',
    link: new HttpLink({
      uri: 'http://localhost:8080/query', // Server URL (must be absolute)
      credentials: 'same-origin', // Additional fetch() options like `credentials` or `headers`
    }),
    cache: new InMemoryCache(),
  })
}

export function initializeApollo(initialState = null) {
  const _apolloClient = apolloClient ?? createApolloClient()

  // If your page has Next.js data fetching methods that use Apollo Client, the initial state
  // gets hydrated here
  if (initialState) {
    _apolloClient.cache.restore(initialState)
  }
  // For SSG and SSR always create a new Apollo Client
  if (typeof window === 'undefined') return _apolloClient
  // Create the Apollo Client once in the client
  if (!apolloClient) apolloClient = _apolloClient

  return _apolloClient
}

export function useApollo(initialState) {
  const store = useMemo(() => initializeApollo(initialState), [initialState])
  return store
}
動作確認
UIとGraphQLサーバをともに起動します。
$ cd with-apollo-ui # 移動先パスは適宜変更ください
$ yarn dev

# 以下は別のterminalで
$ cd with-apollo-api # 移動先パスは適宜変更ください
$ go run server.go
http://localhost:3000 へアクセスすると、URLの追加や投票が正常に動作することが確認できます。
まとめ
Next.jsのサンプルが充実しているおかげで、簡単にアプリケーションを構築できました。これに認証やバリデーションを追加して、UIを自分好みにカスタマイズすれば簡単にサービスをリリースできそうです。
Next.js・Go言語ともにもっと事例が増えると良いなと思っています。
みなさまも、ぜひお試しください。
