#Javaのフレームワークを使って開発
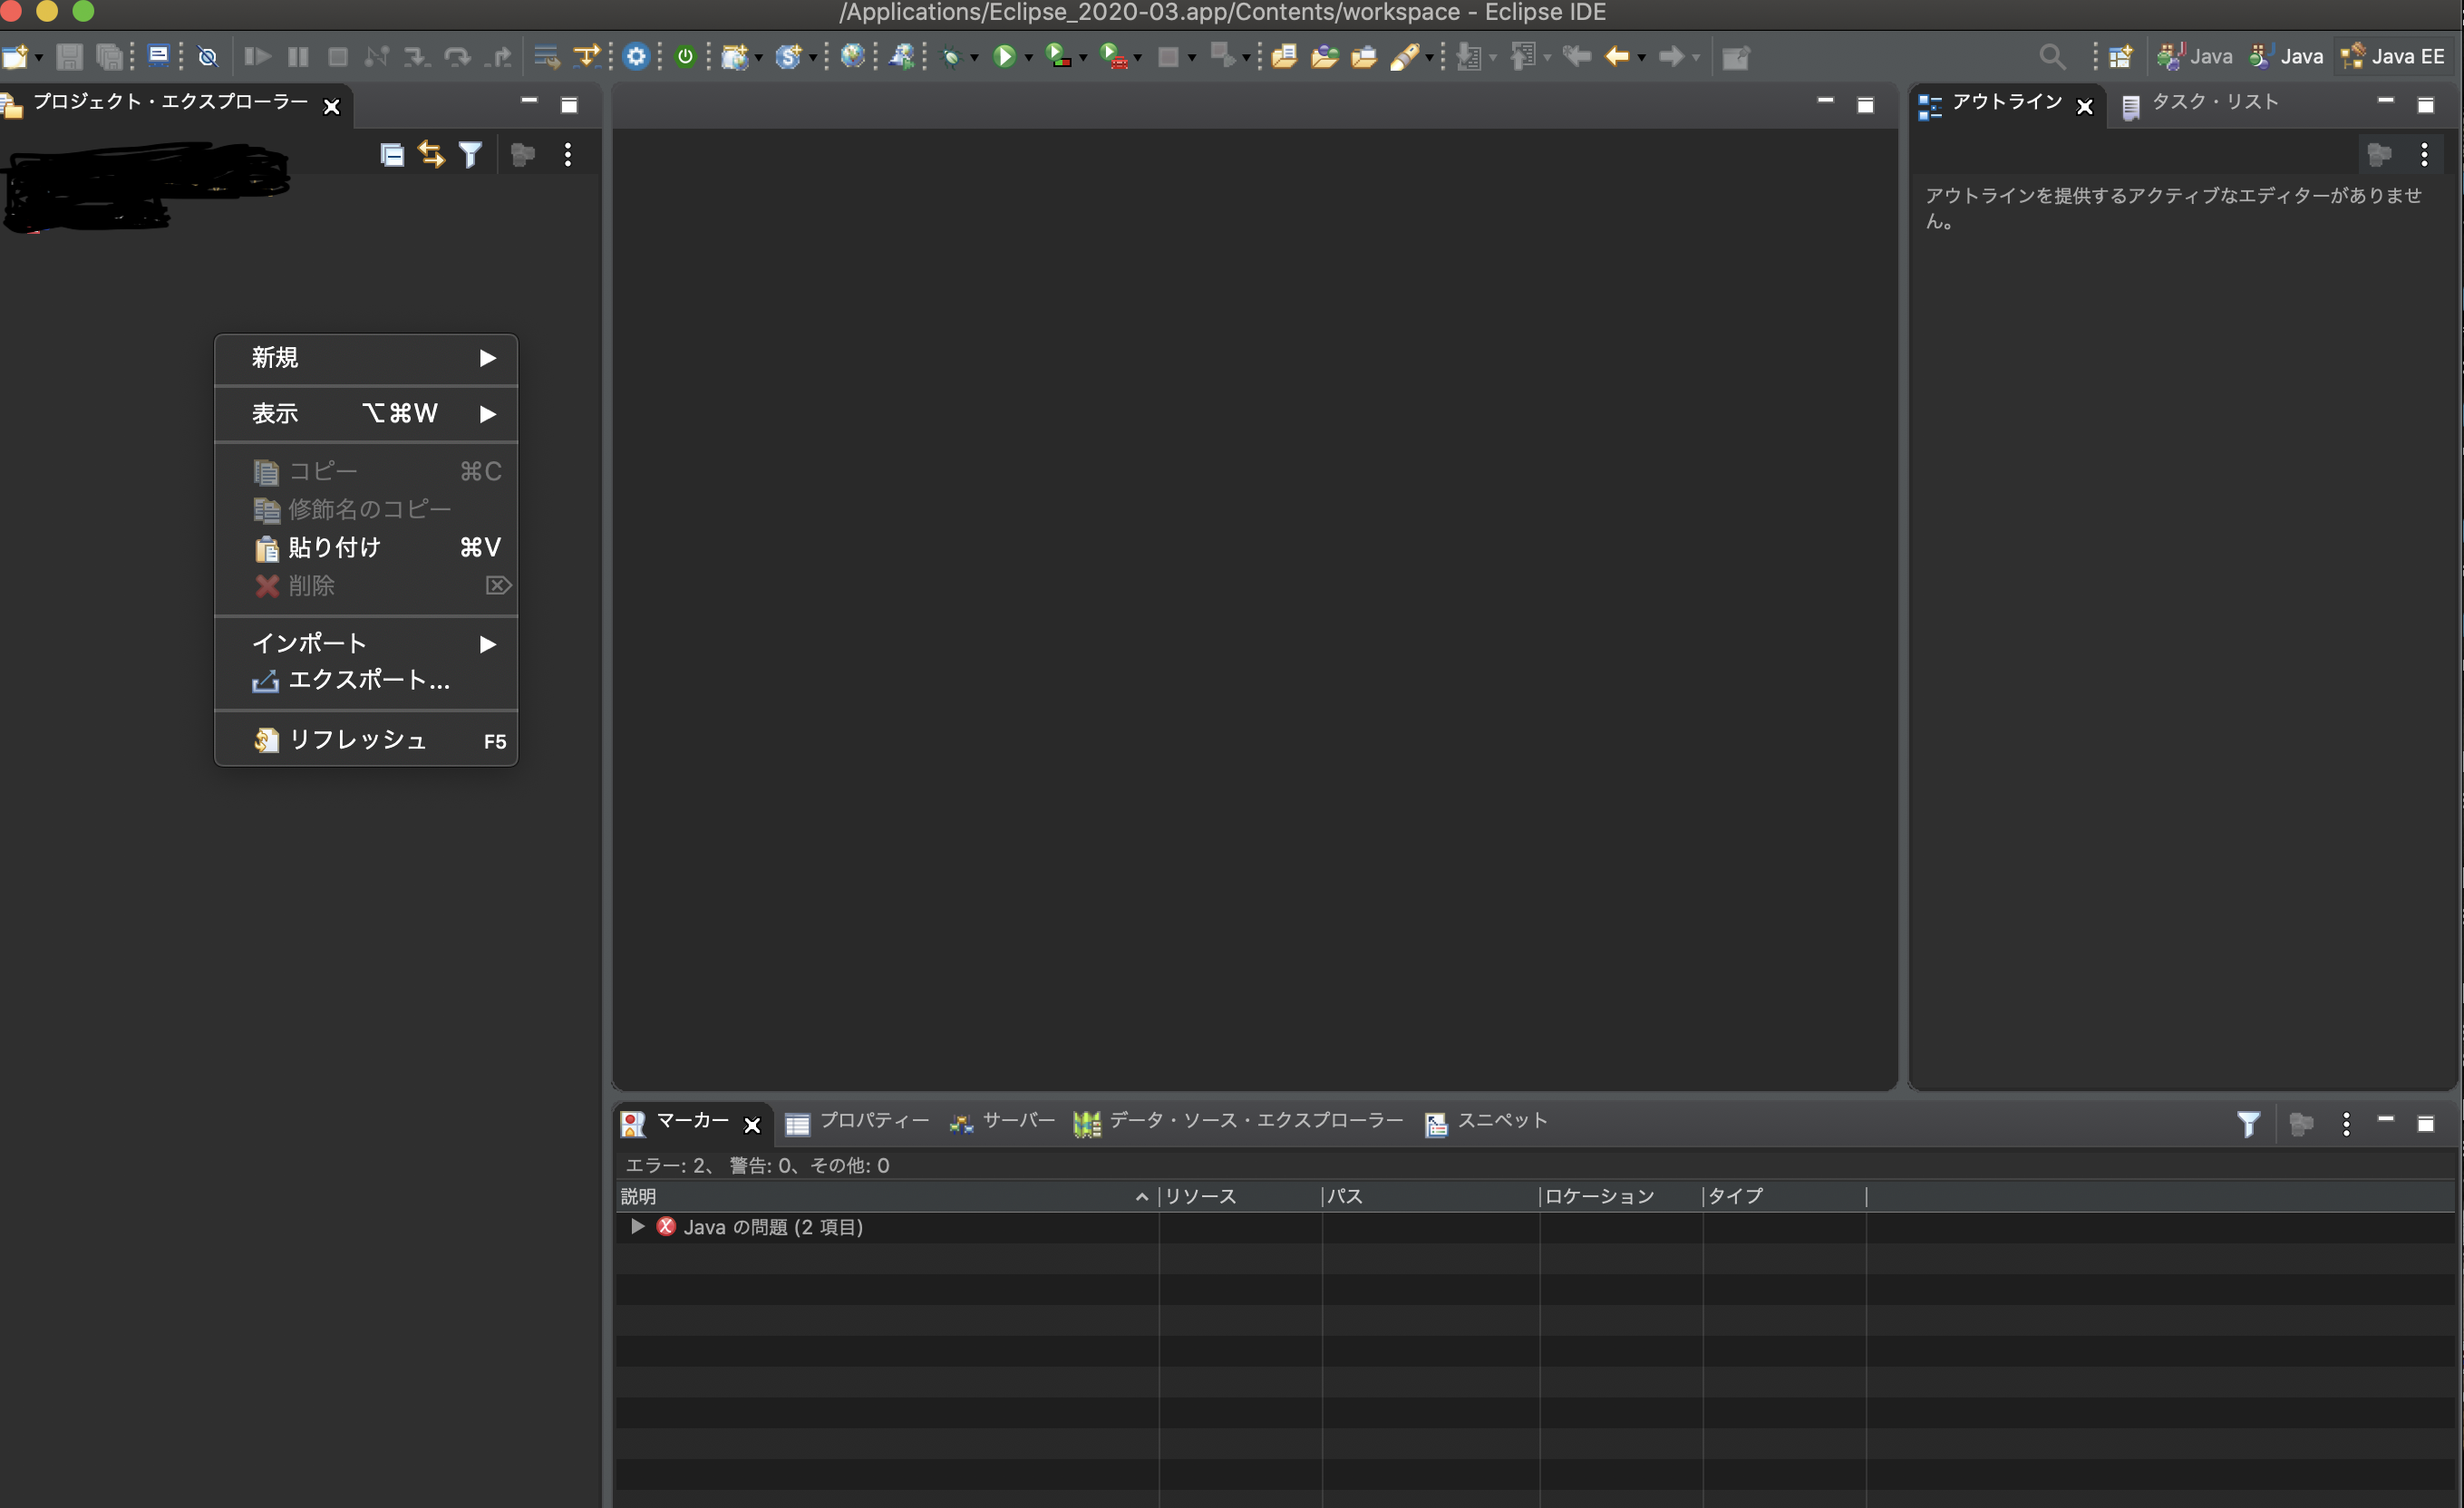
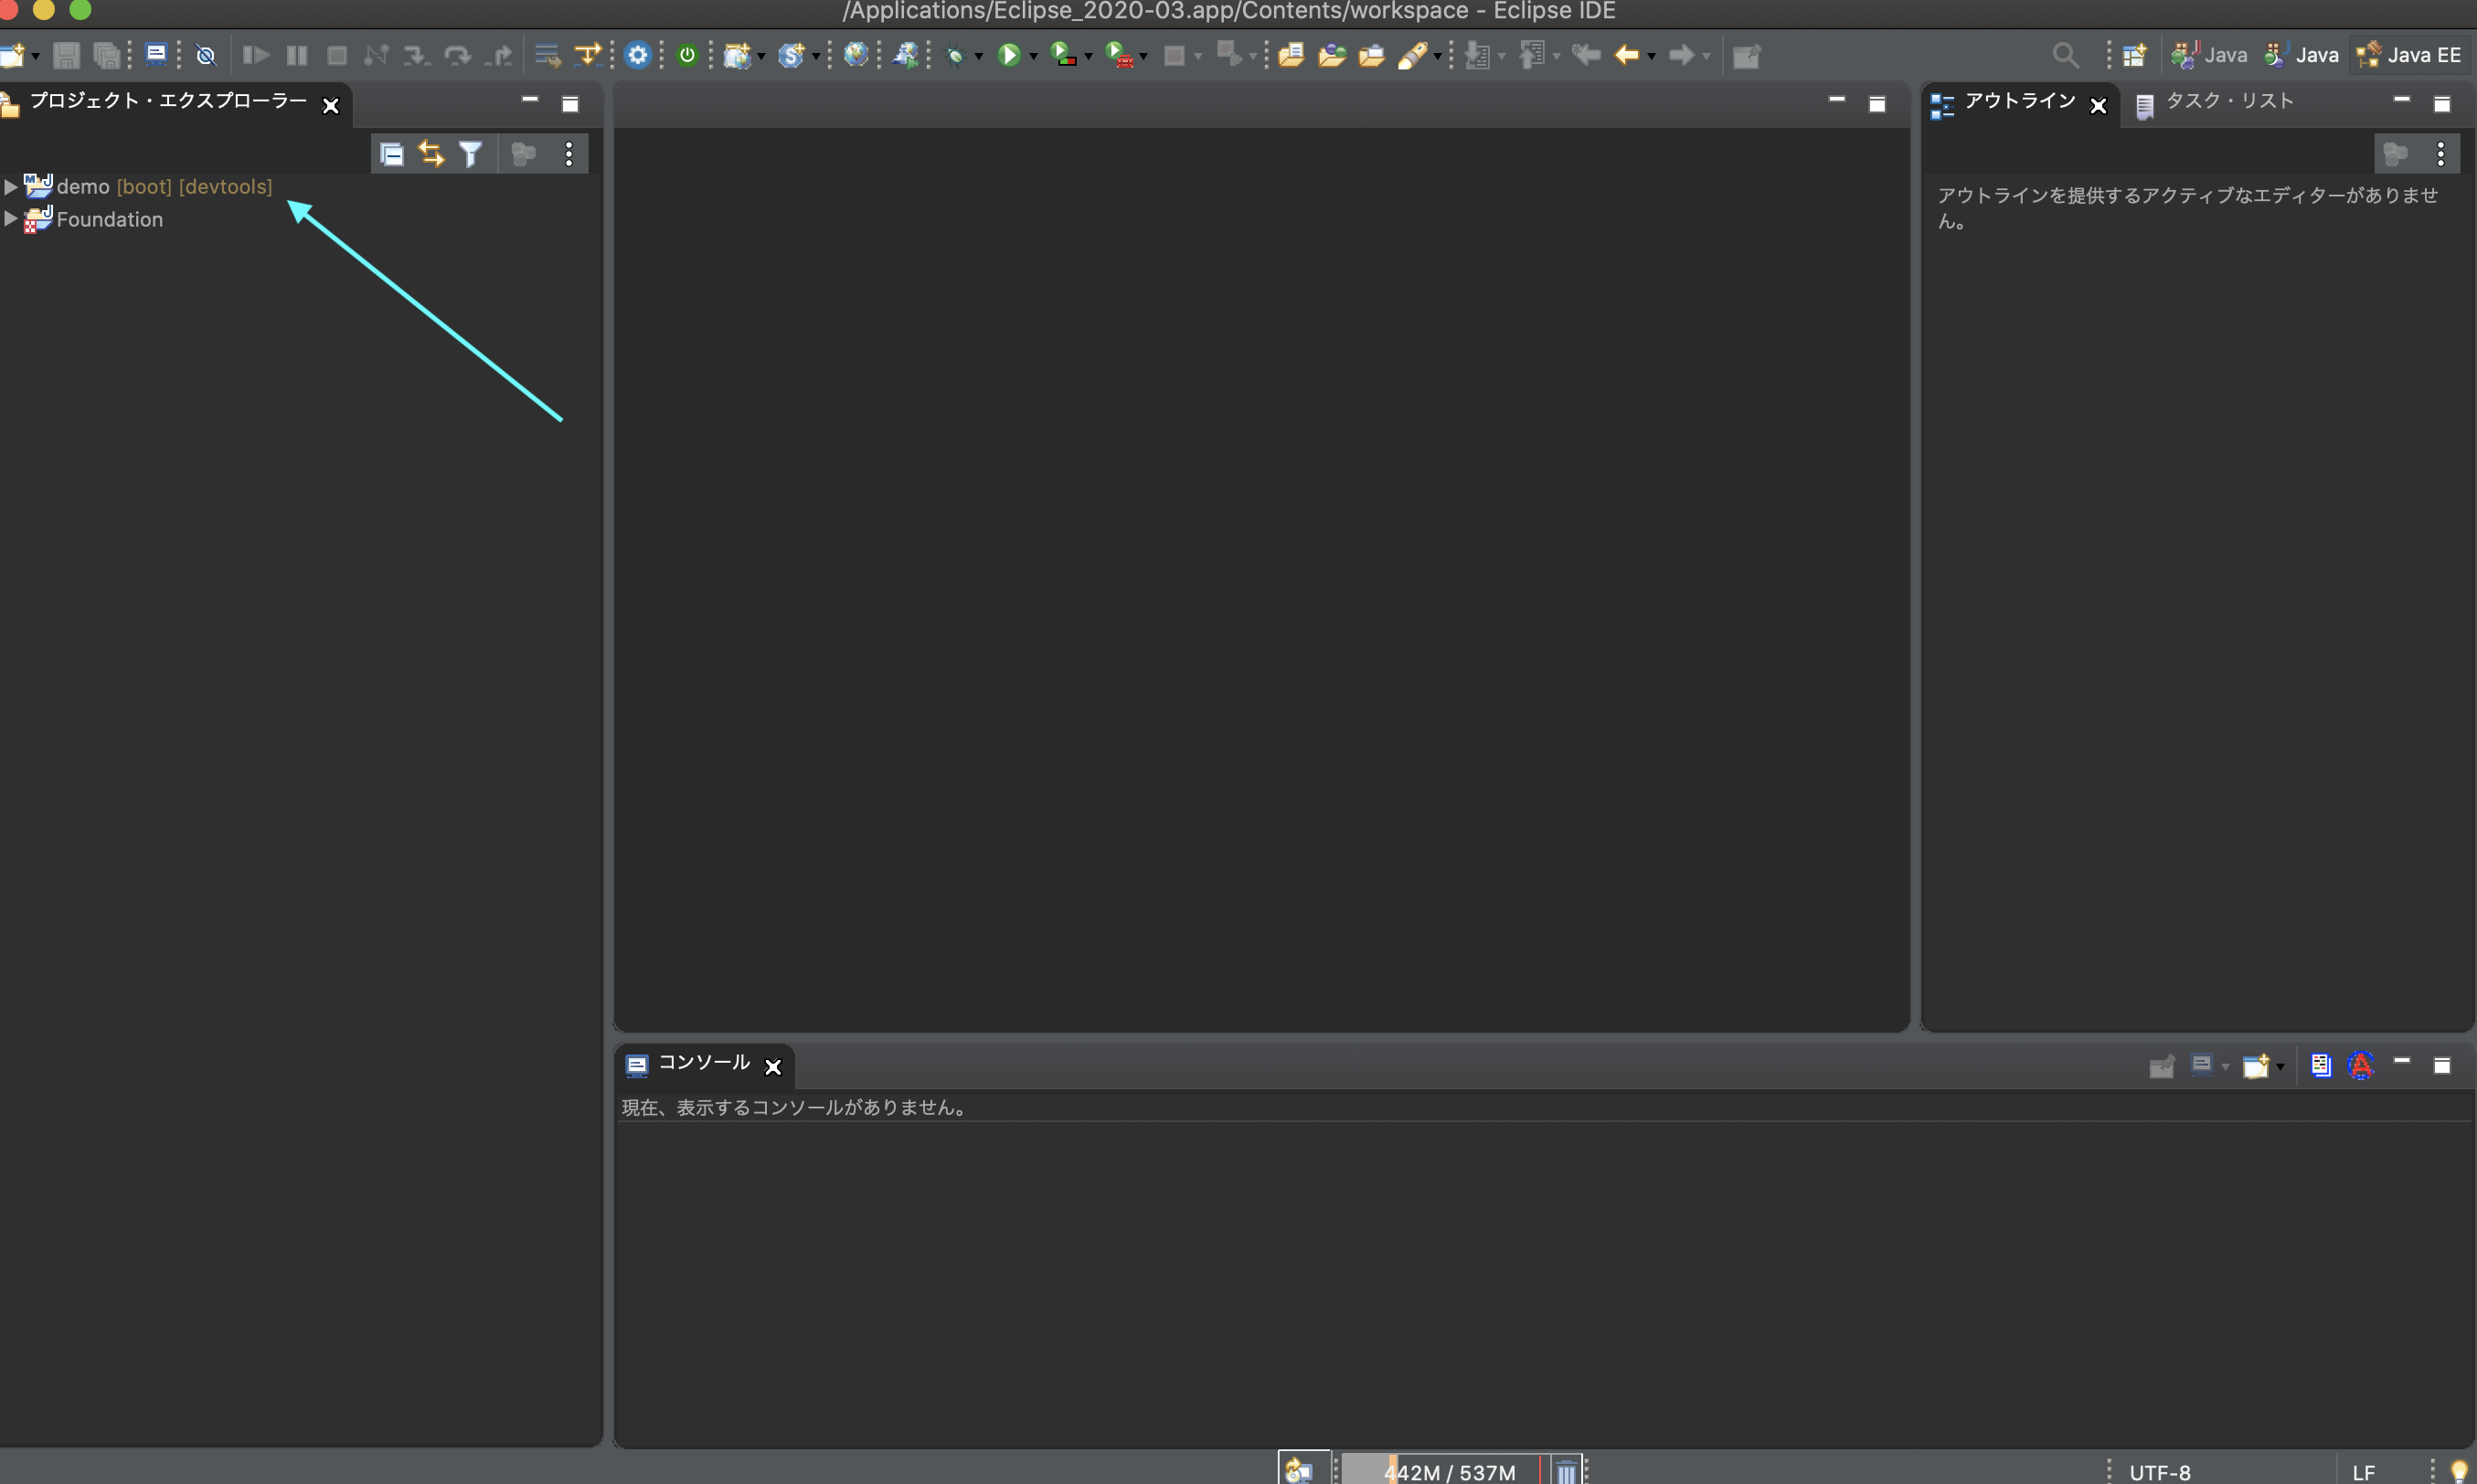
まず初めにこのEclipseの画面を開きます。
![スクリーンショット 2020-07-12 4.36.31.png](https://qiita-user-contents.imgix.net/https%3A%2F%2Fqiita-image-store.s3.ap-northeast-1.amazonaws.com%2F0%2F451004%2Ff19a893f-13e0-14f5-7170-6e7abd3683da.png?ixlib=rb-4.0.0&auto=format&gif-q=60&q=75&s=5faeadc52a7c5f2e70a8005db5bf5359)
黒く塗り潰しているところに、作っていきます。(黒く塗り潰したのは先に作ってしまったので、隠しています...)
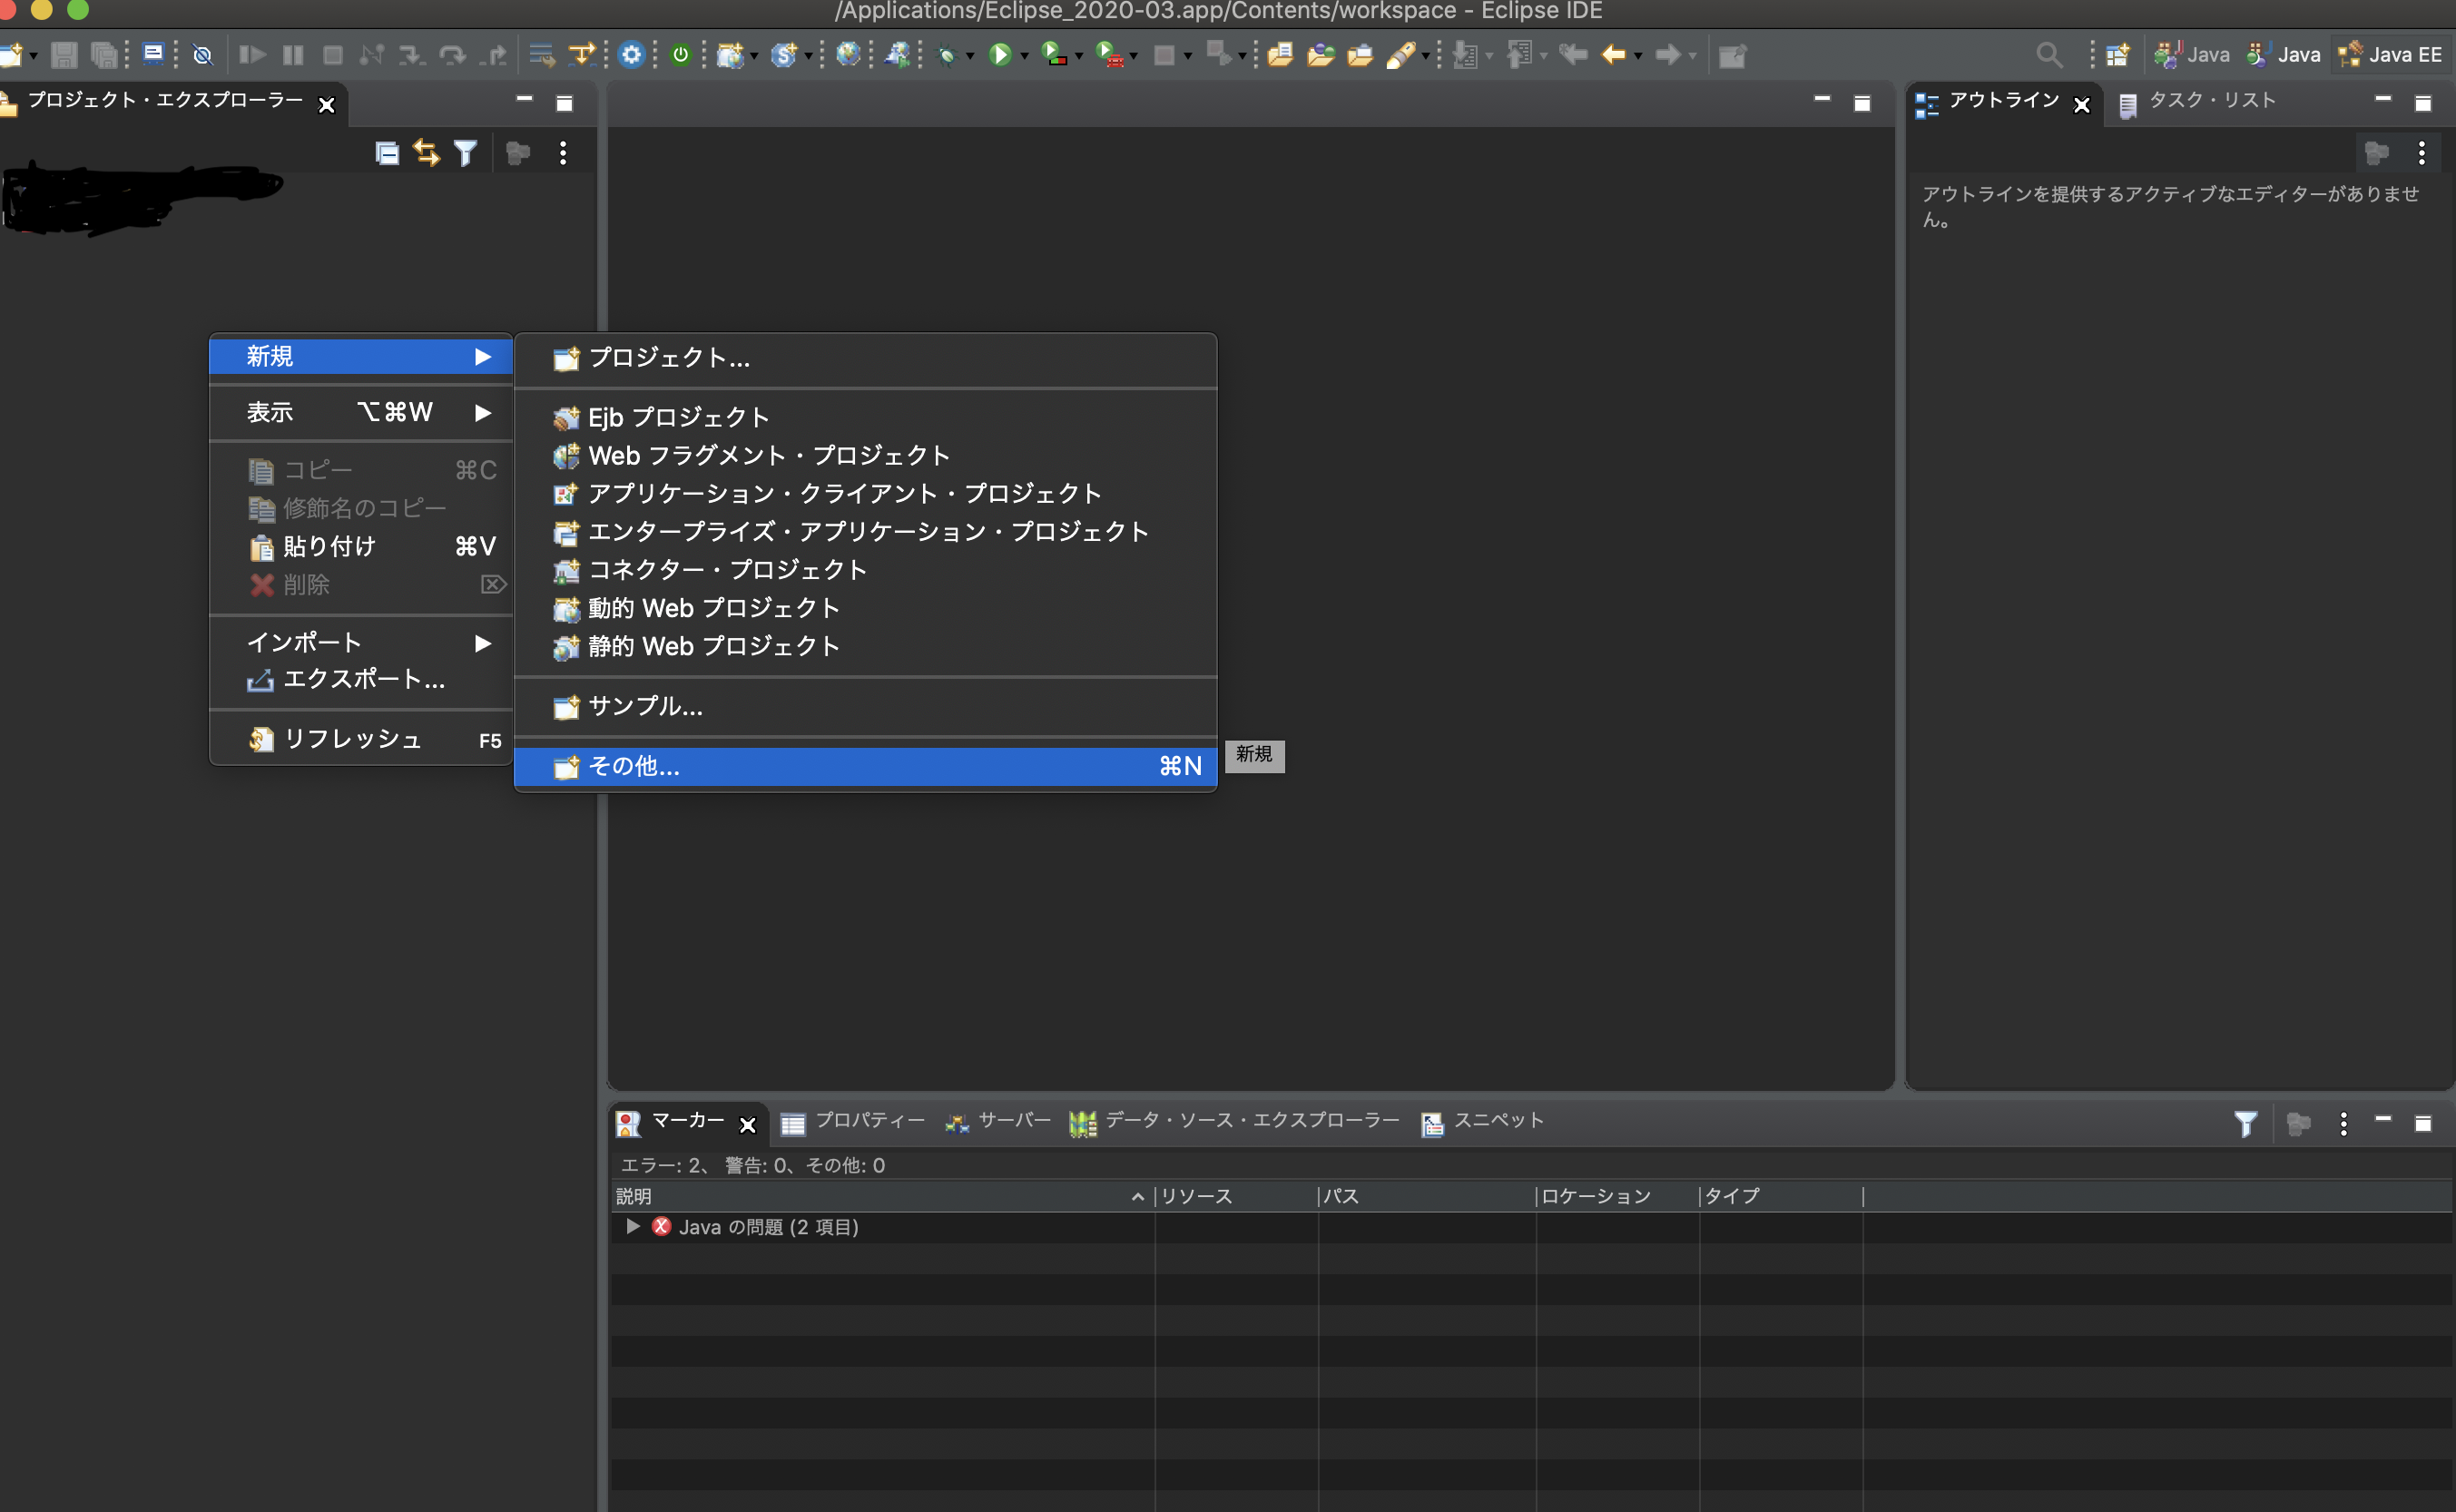
次にプロジェクト・エクリプスローラのところで、右クリックをして新規、その他を選択します。
![スクリーンショット 2020-07-12 4.50.45.png](https://qiita-user-contents.imgix.net/https%3A%2F%2Fqiita-image-store.s3.ap-northeast-1.amazonaws.com%2F0%2F451004%2Fe7d8063b-7833-f38f-3c64-5ea33772aeb2.png?ixlib=rb-4.0.0&auto=format&gif-q=60&q=75&s=91e8717c54837248b897c8a71456753f)
![スクリーンショット 2020-07-12 4.50.54.png](https://qiita-user-contents.imgix.net/https%3A%2F%2Fqiita-image-store.s3.ap-northeast-1.amazonaws.com%2F0%2F451004%2F08d12b4f-23ea-e682-c6fe-54c3927aa444.png?ixlib=rb-4.0.0&auto=format&gif-q=60&q=75&s=e8ba4890a99f10c1f9d6a1cbe14b0eb3)
ウェザードを選択の画面が出てきます。ちなみに今回は、Eclipseの2020
年ヴァージョンを使っています。
![スクリーンショット 2020-07-12 4.51.08.png](https://qiita-user-contents.imgix.net/https%3A%2F%2Fqiita-image-store.s3.ap-northeast-1.amazonaws.com%2F0%2F451004%2F13b97c09-f549-e873-f000-88c650006b5e.png?ixlib=rb-4.0.0&auto=format&gif-q=60&q=75&s=dbfff4f1cb1c225ecacf8312ee220d8c)
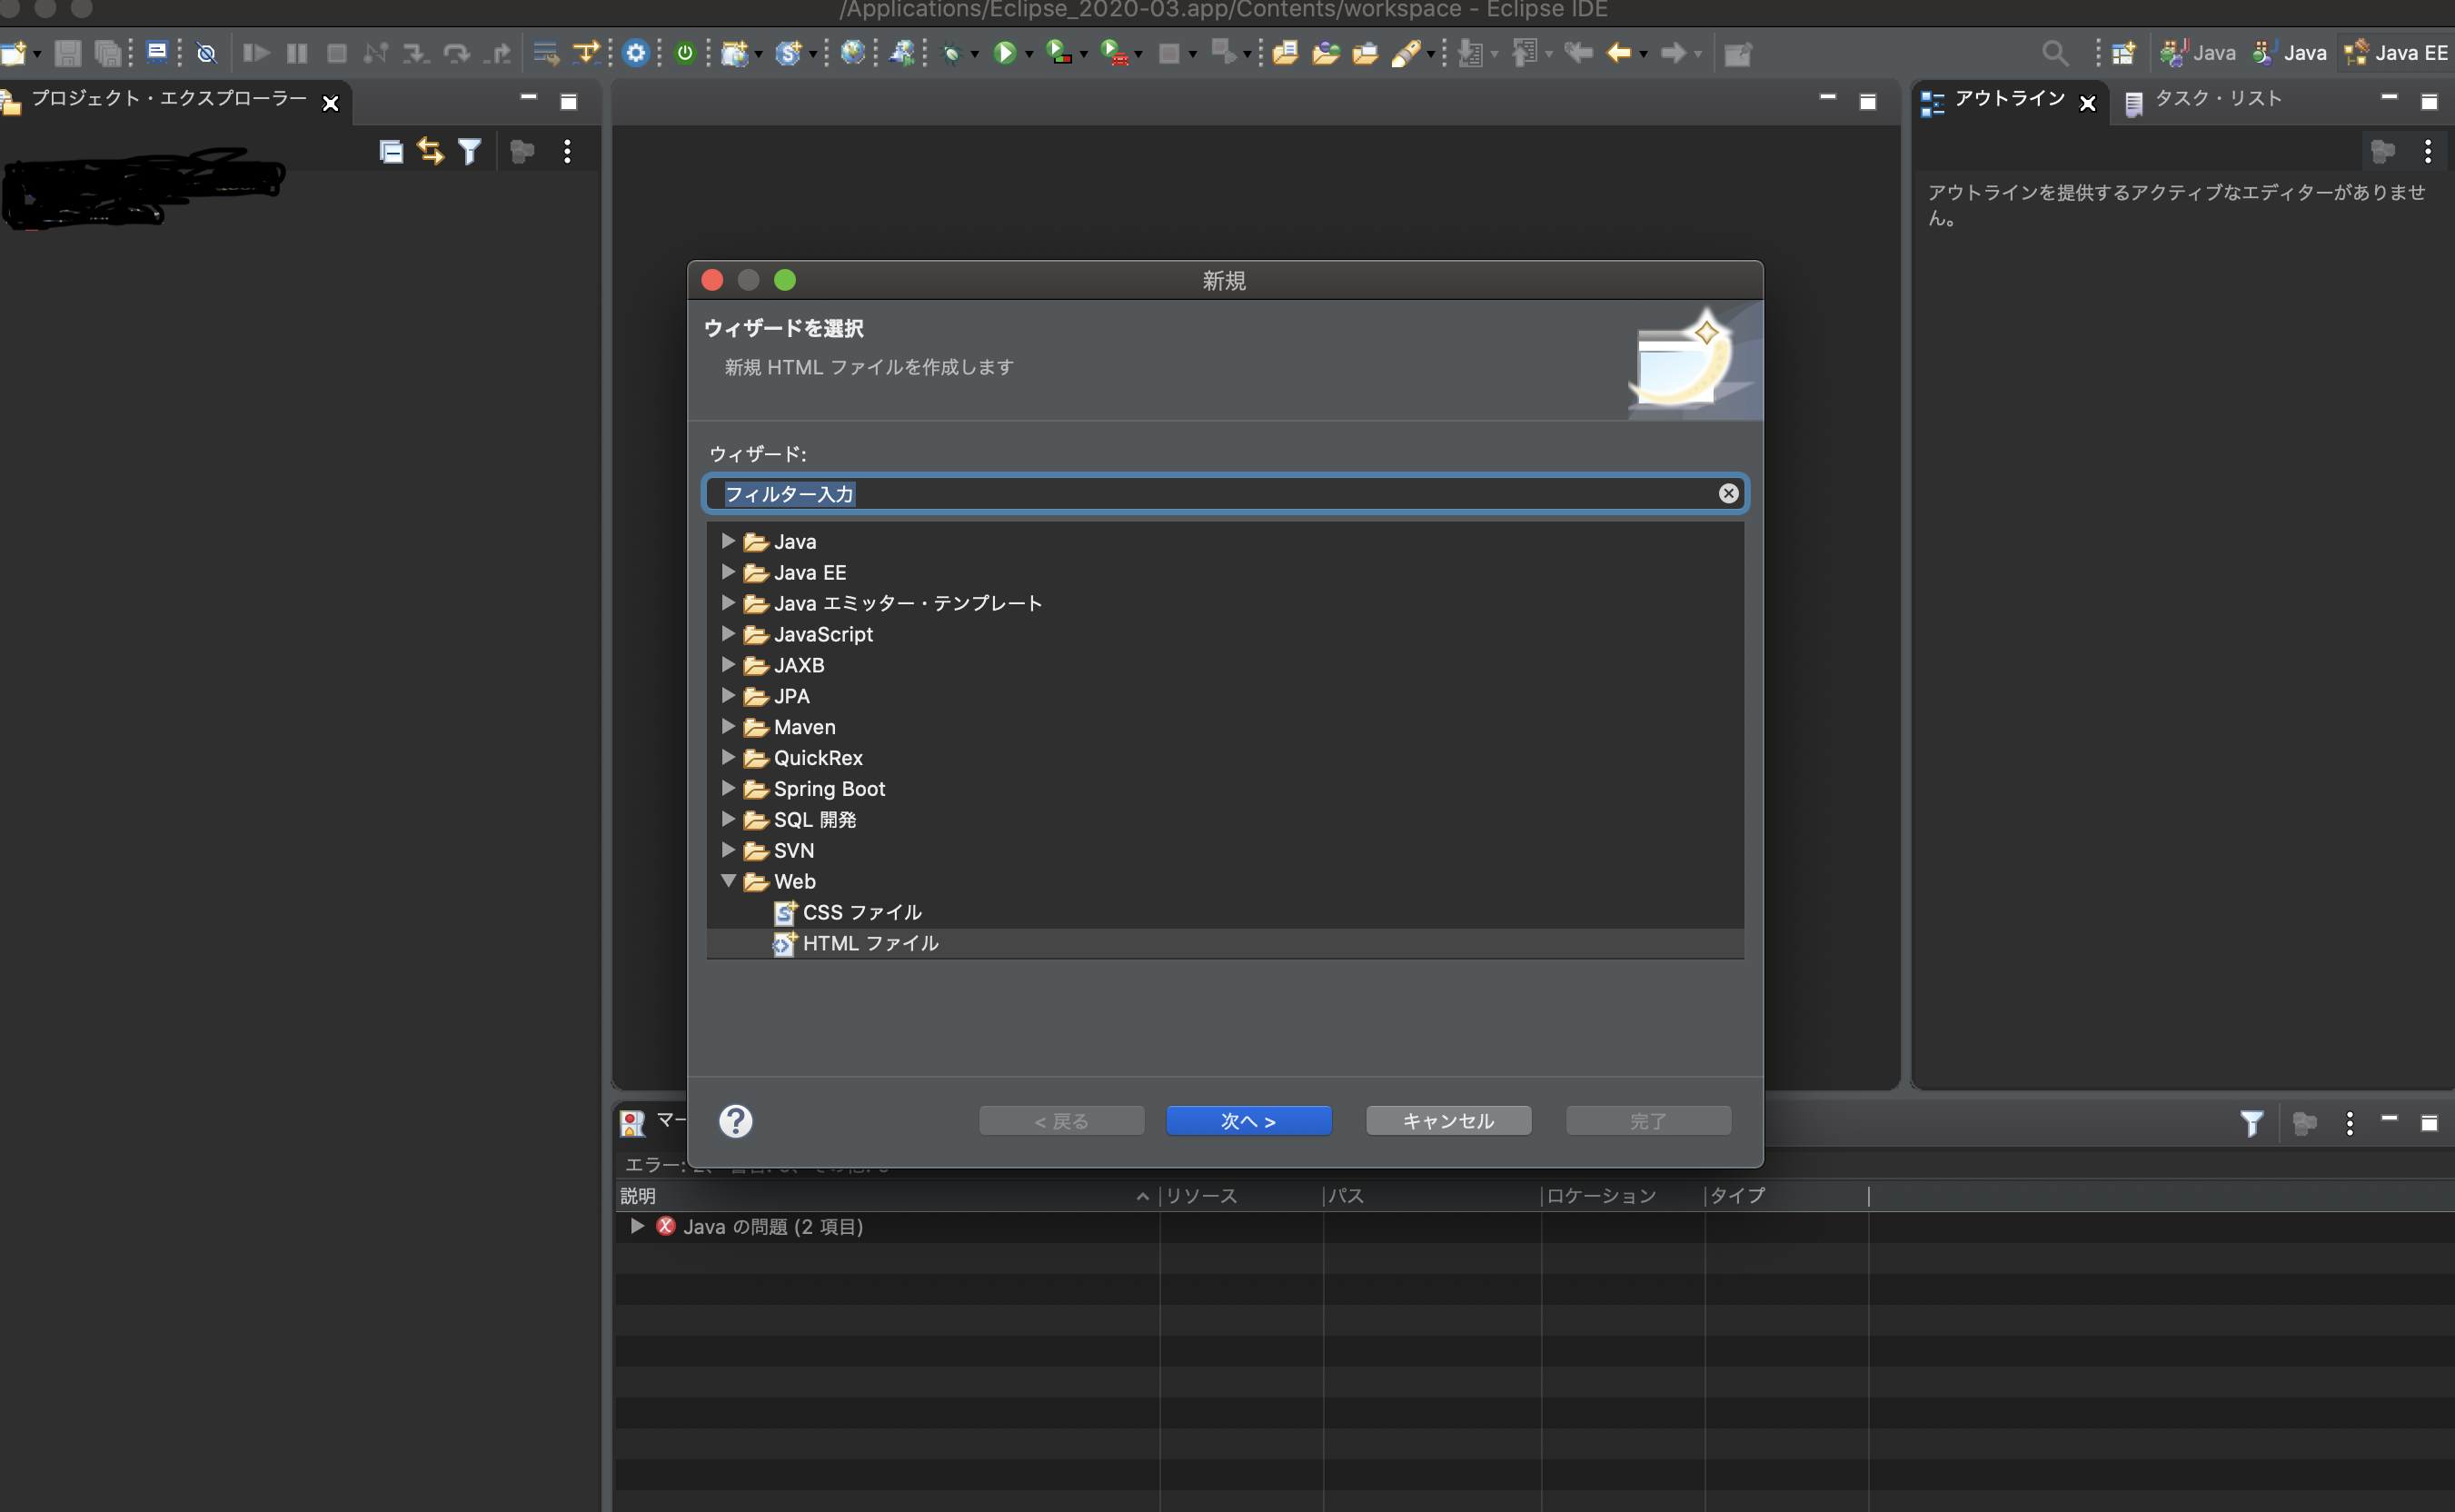
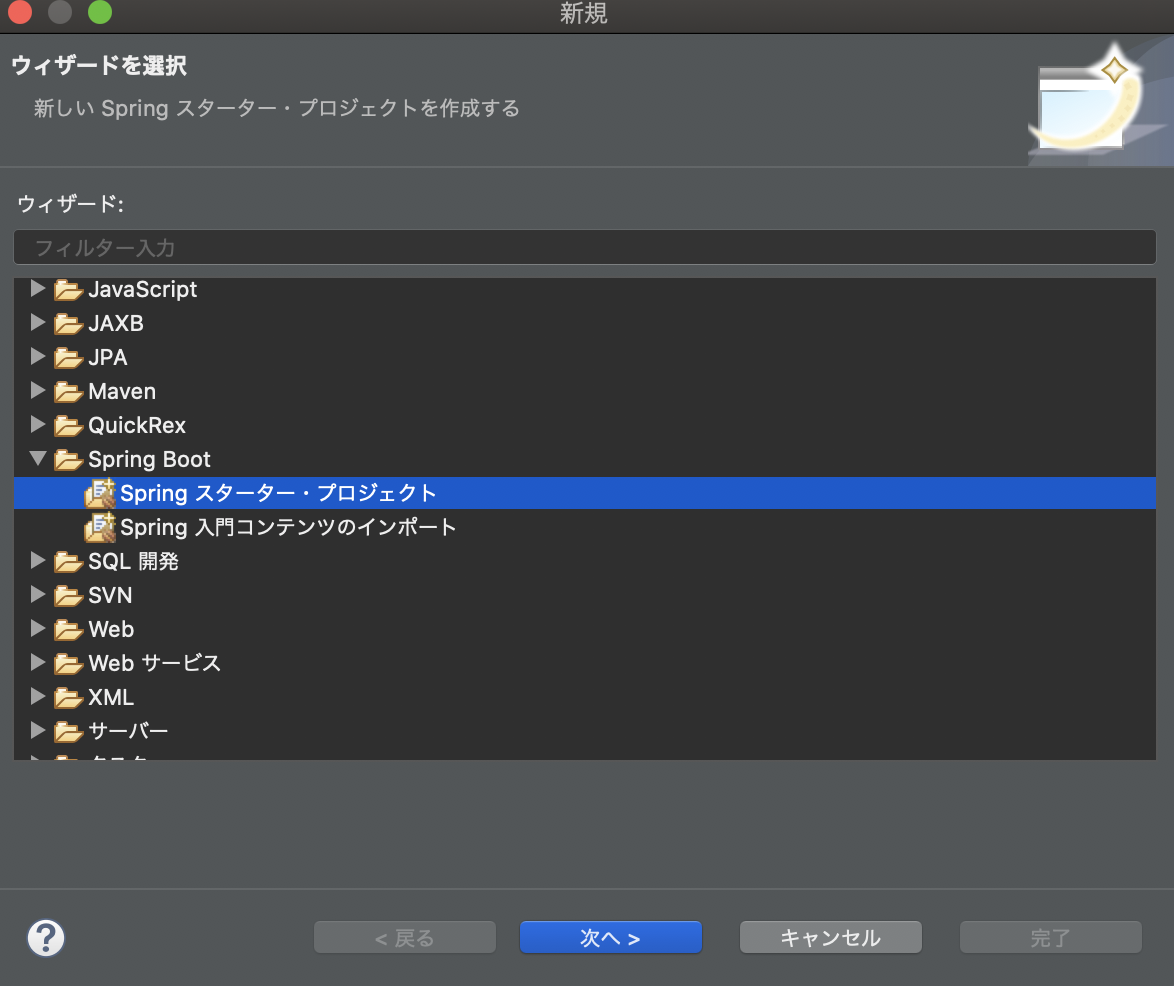
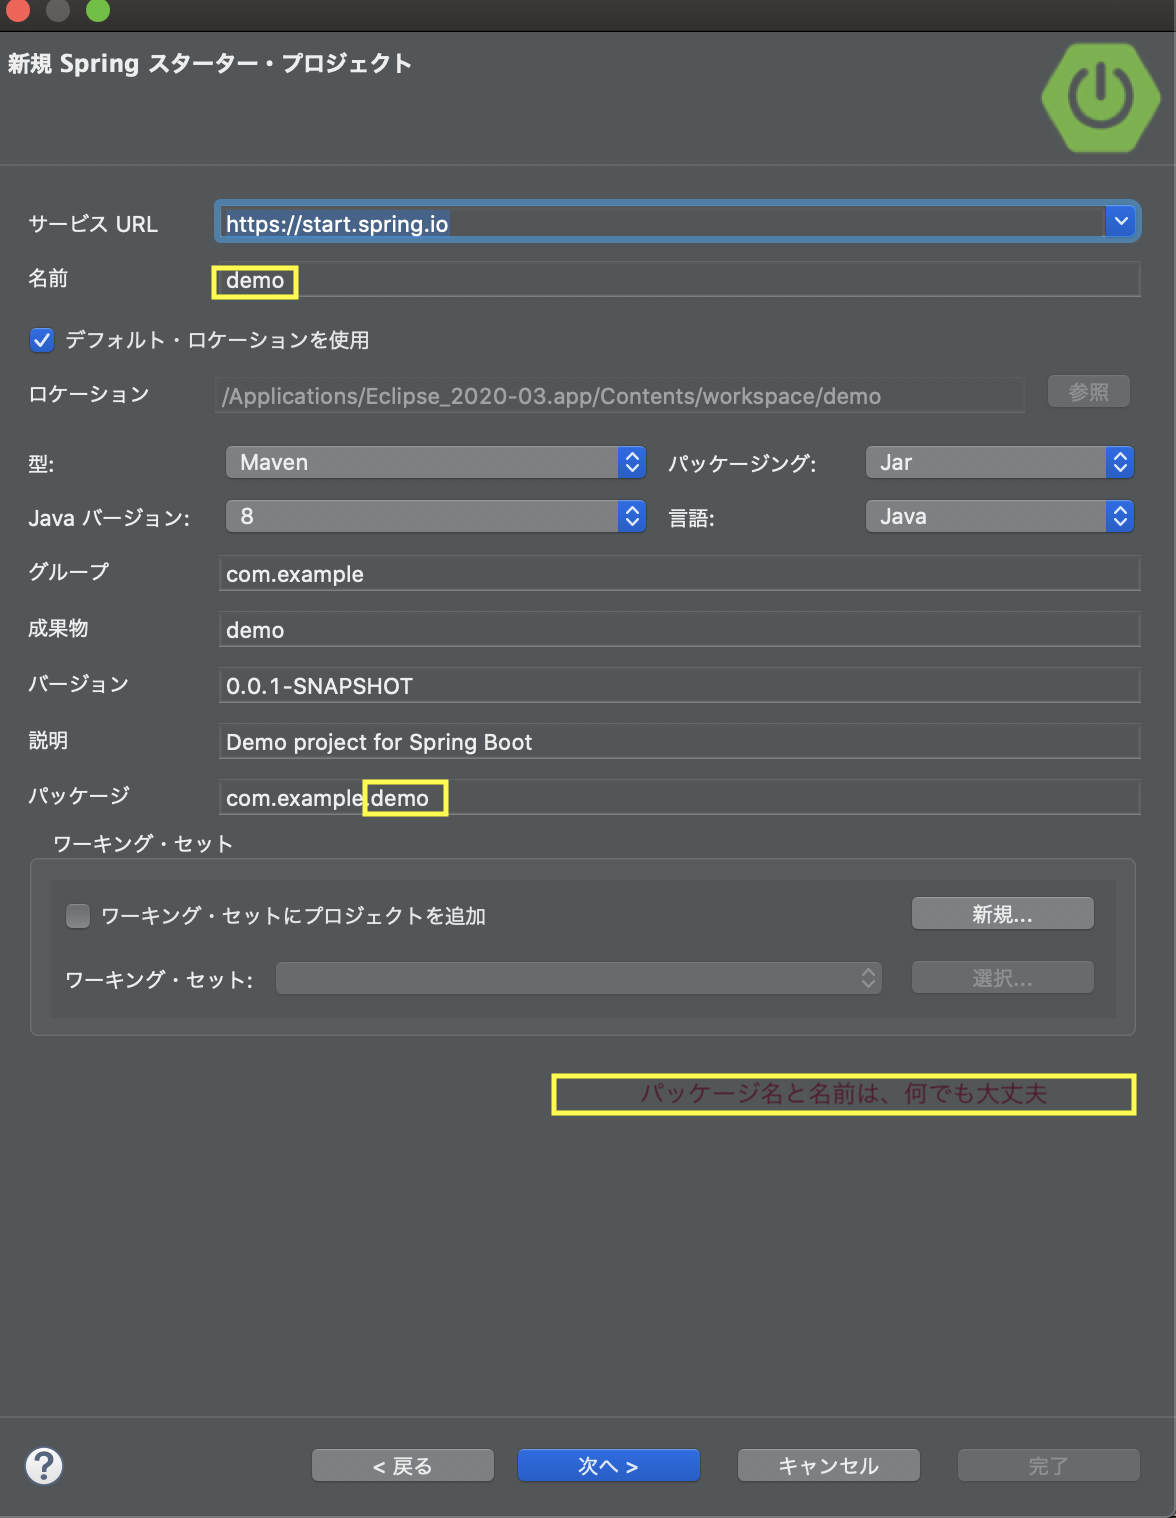
次にSpring スターター・プロジェクトを選択します。
![スクリーンショット 2020-05-24 6.13.45.png](https://qiita-user-contents.imgix.net/https%3A%2F%2Fqiita-image-store.s3.ap-northeast-1.amazonaws.com%2F0%2F451004%2Ff79d294e-2259-0e27-ac08-4e9bdc493ccb.png?ixlib=rb-4.0.0&auto=format&gif-q=60&q=75&s=45c483eed03f5ce9a3ea807fb7dc460d)
パッケージ名と名前を書きます。(パッケージ名と名前は何でも大丈夫!)
![スクリーンショット 2020-05-24 6.14.01.png](https://qiita-user-contents.imgix.net/https%3A%2F%2Fqiita-image-store.s3.ap-northeast-1.amazonaws.com%2F0%2F451004%2Ff8984c38-ec51-94f0-5963-3b5705b8a7a6.png?ixlib=rb-4.0.0&auto=format&gif-q=60&q=75&s=483ce0745bd1105b803990f4aba692cd)
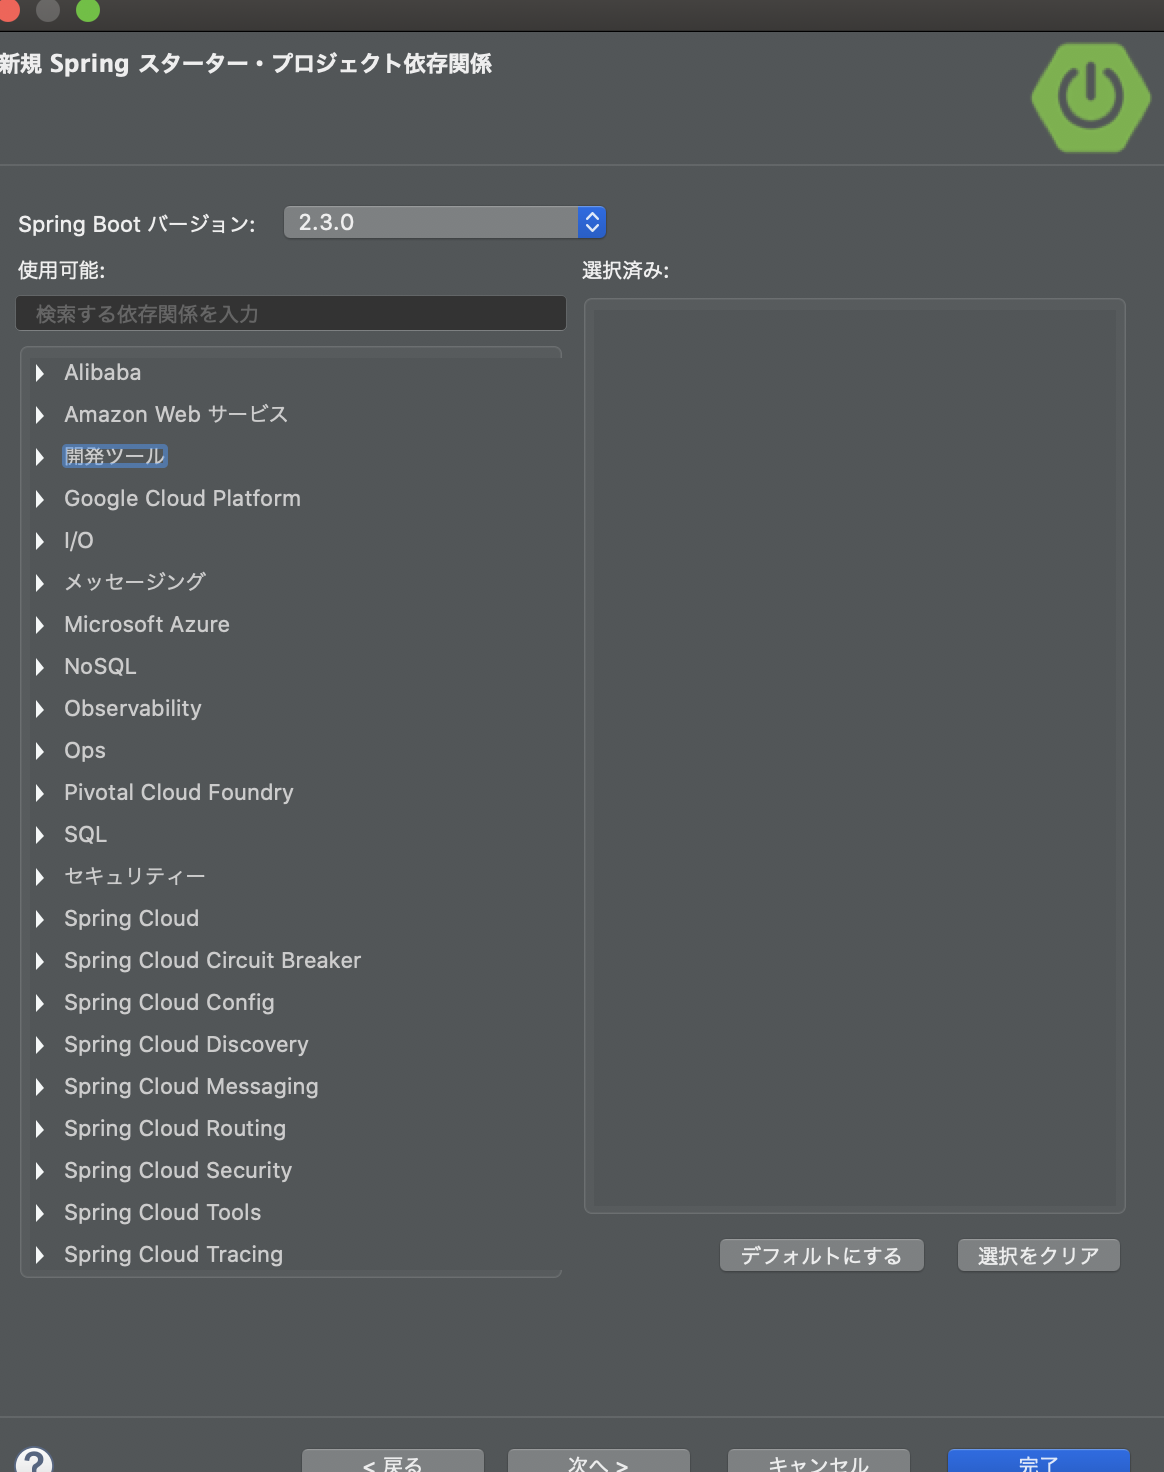
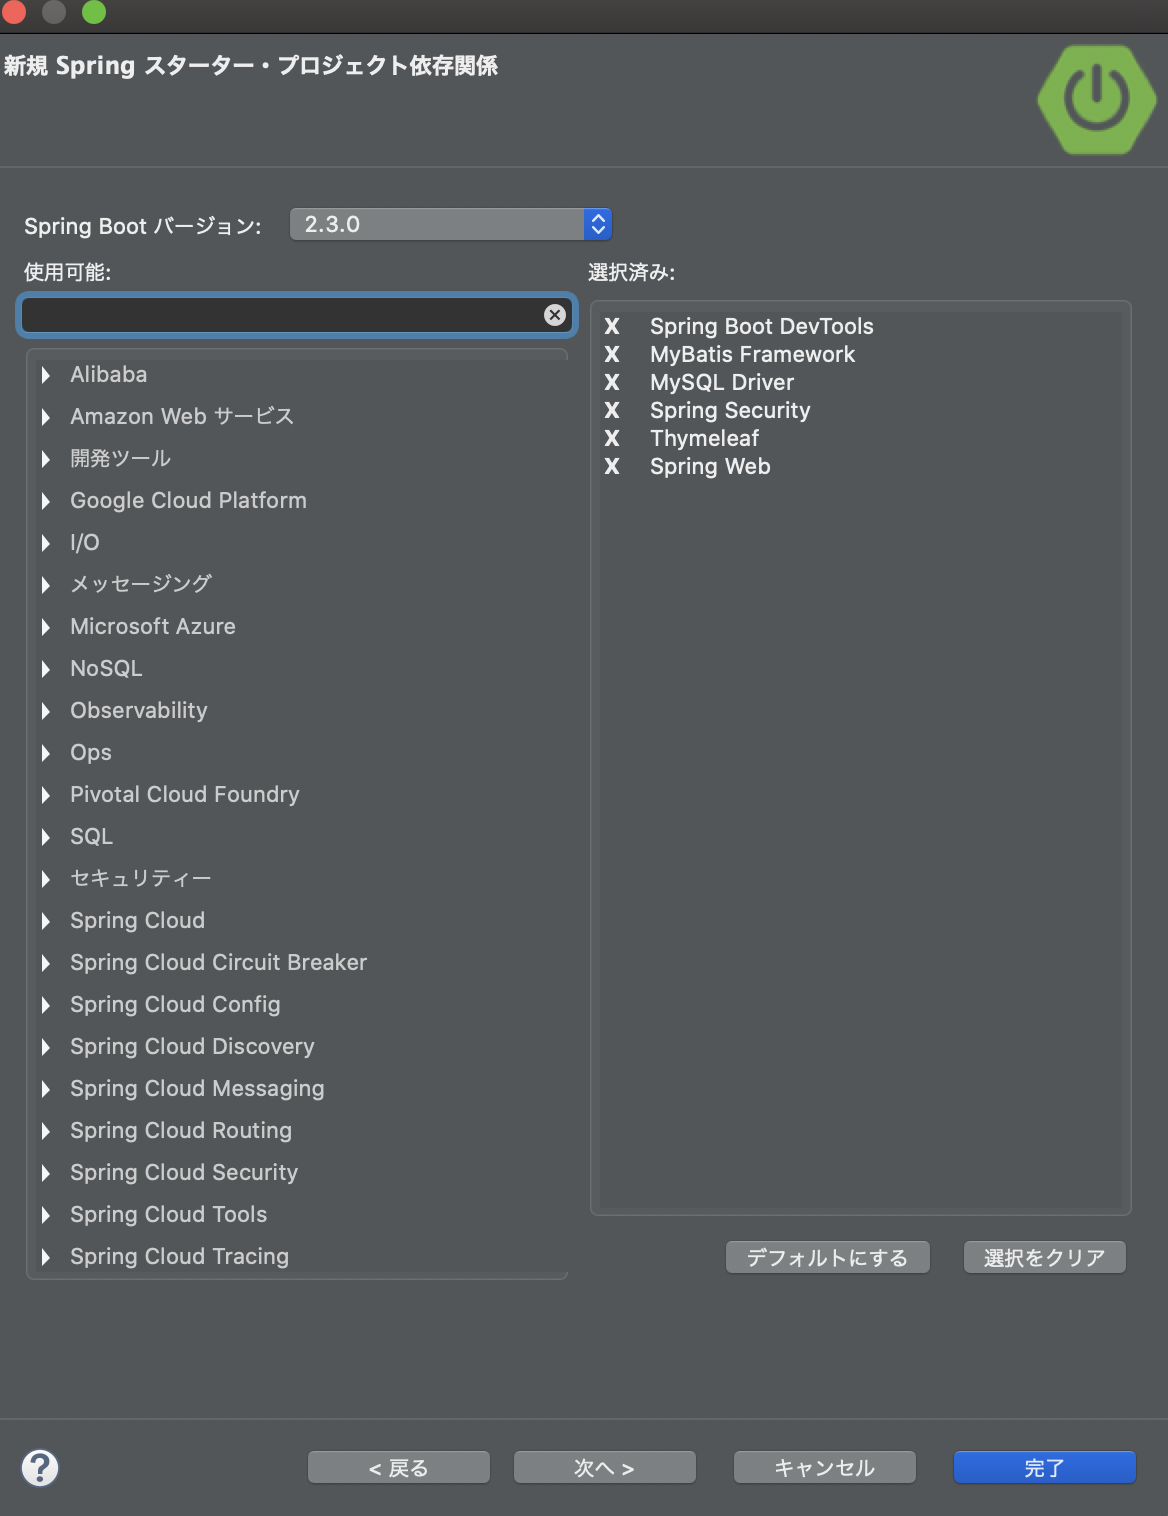
次にSpringスタータ・依存関係に移ります。
![スクリーンショット 2020-05-24 6.16.01.png](https://qiita-user-contents.imgix.net/https%3A%2F%2Fqiita-image-store.s3.ap-northeast-1.amazonaws.com%2F0%2F451004%2F2d16eed2-156c-c5b0-8484-182734595017.png?ixlib=rb-4.0.0&auto=format&gif-q=60&q=75&s=d082948ac2281173af500c471e14b44e)
Spring Boot DevTools
MyBatis Framework
MySQL Driver
Spring Security
Thymeleaf
Spring web
を選択して完了をクリックしてください。
![スクリーンショット 2020-05-24 6.28.10.png](https://qiita-user-contents.imgix.net/https%3A%2F%2Fqiita-image-store.s3.ap-northeast-1.amazonaws.com%2F0%2F451004%2Feafeb20d-df16-f68b-b3f8-f61d0c2662c7.png?ixlib=rb-4.0.0&auto=format&gif-q=60&q=75&s=944b9fceaca5cd65ba5b7a94f284ae23)
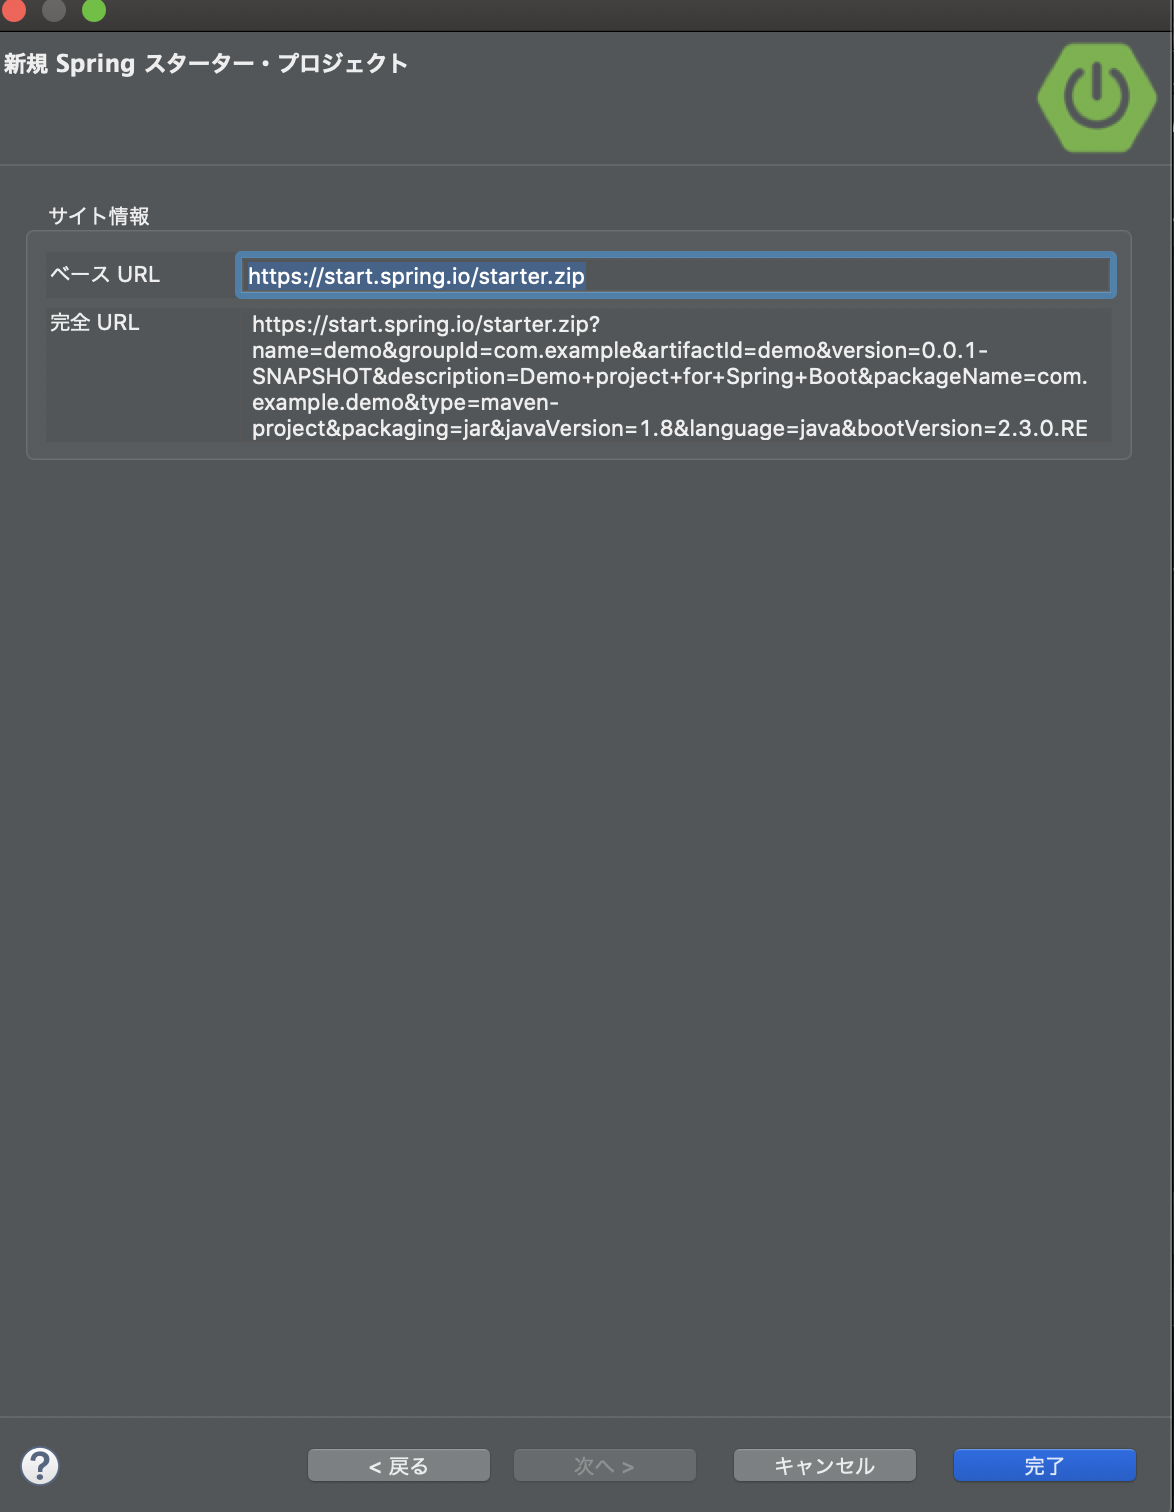
次の画面は、そのまま完了のクリックをしてください。
![スクリーンショット 2020-05-24 6.28.33.png](https://qiita-user-contents.imgix.net/https%3A%2F%2Fqiita-image-store.s3.ap-northeast-1.amazonaws.com%2F0%2F451004%2Fbf4e11e5-f97f-ea3e-e2d9-f6d2bd621a58.png?ixlib=rb-4.0.0&auto=format&gif-q=60&q=75&s=eda6b5f9d4b86bb7ae22581bc7c69775)
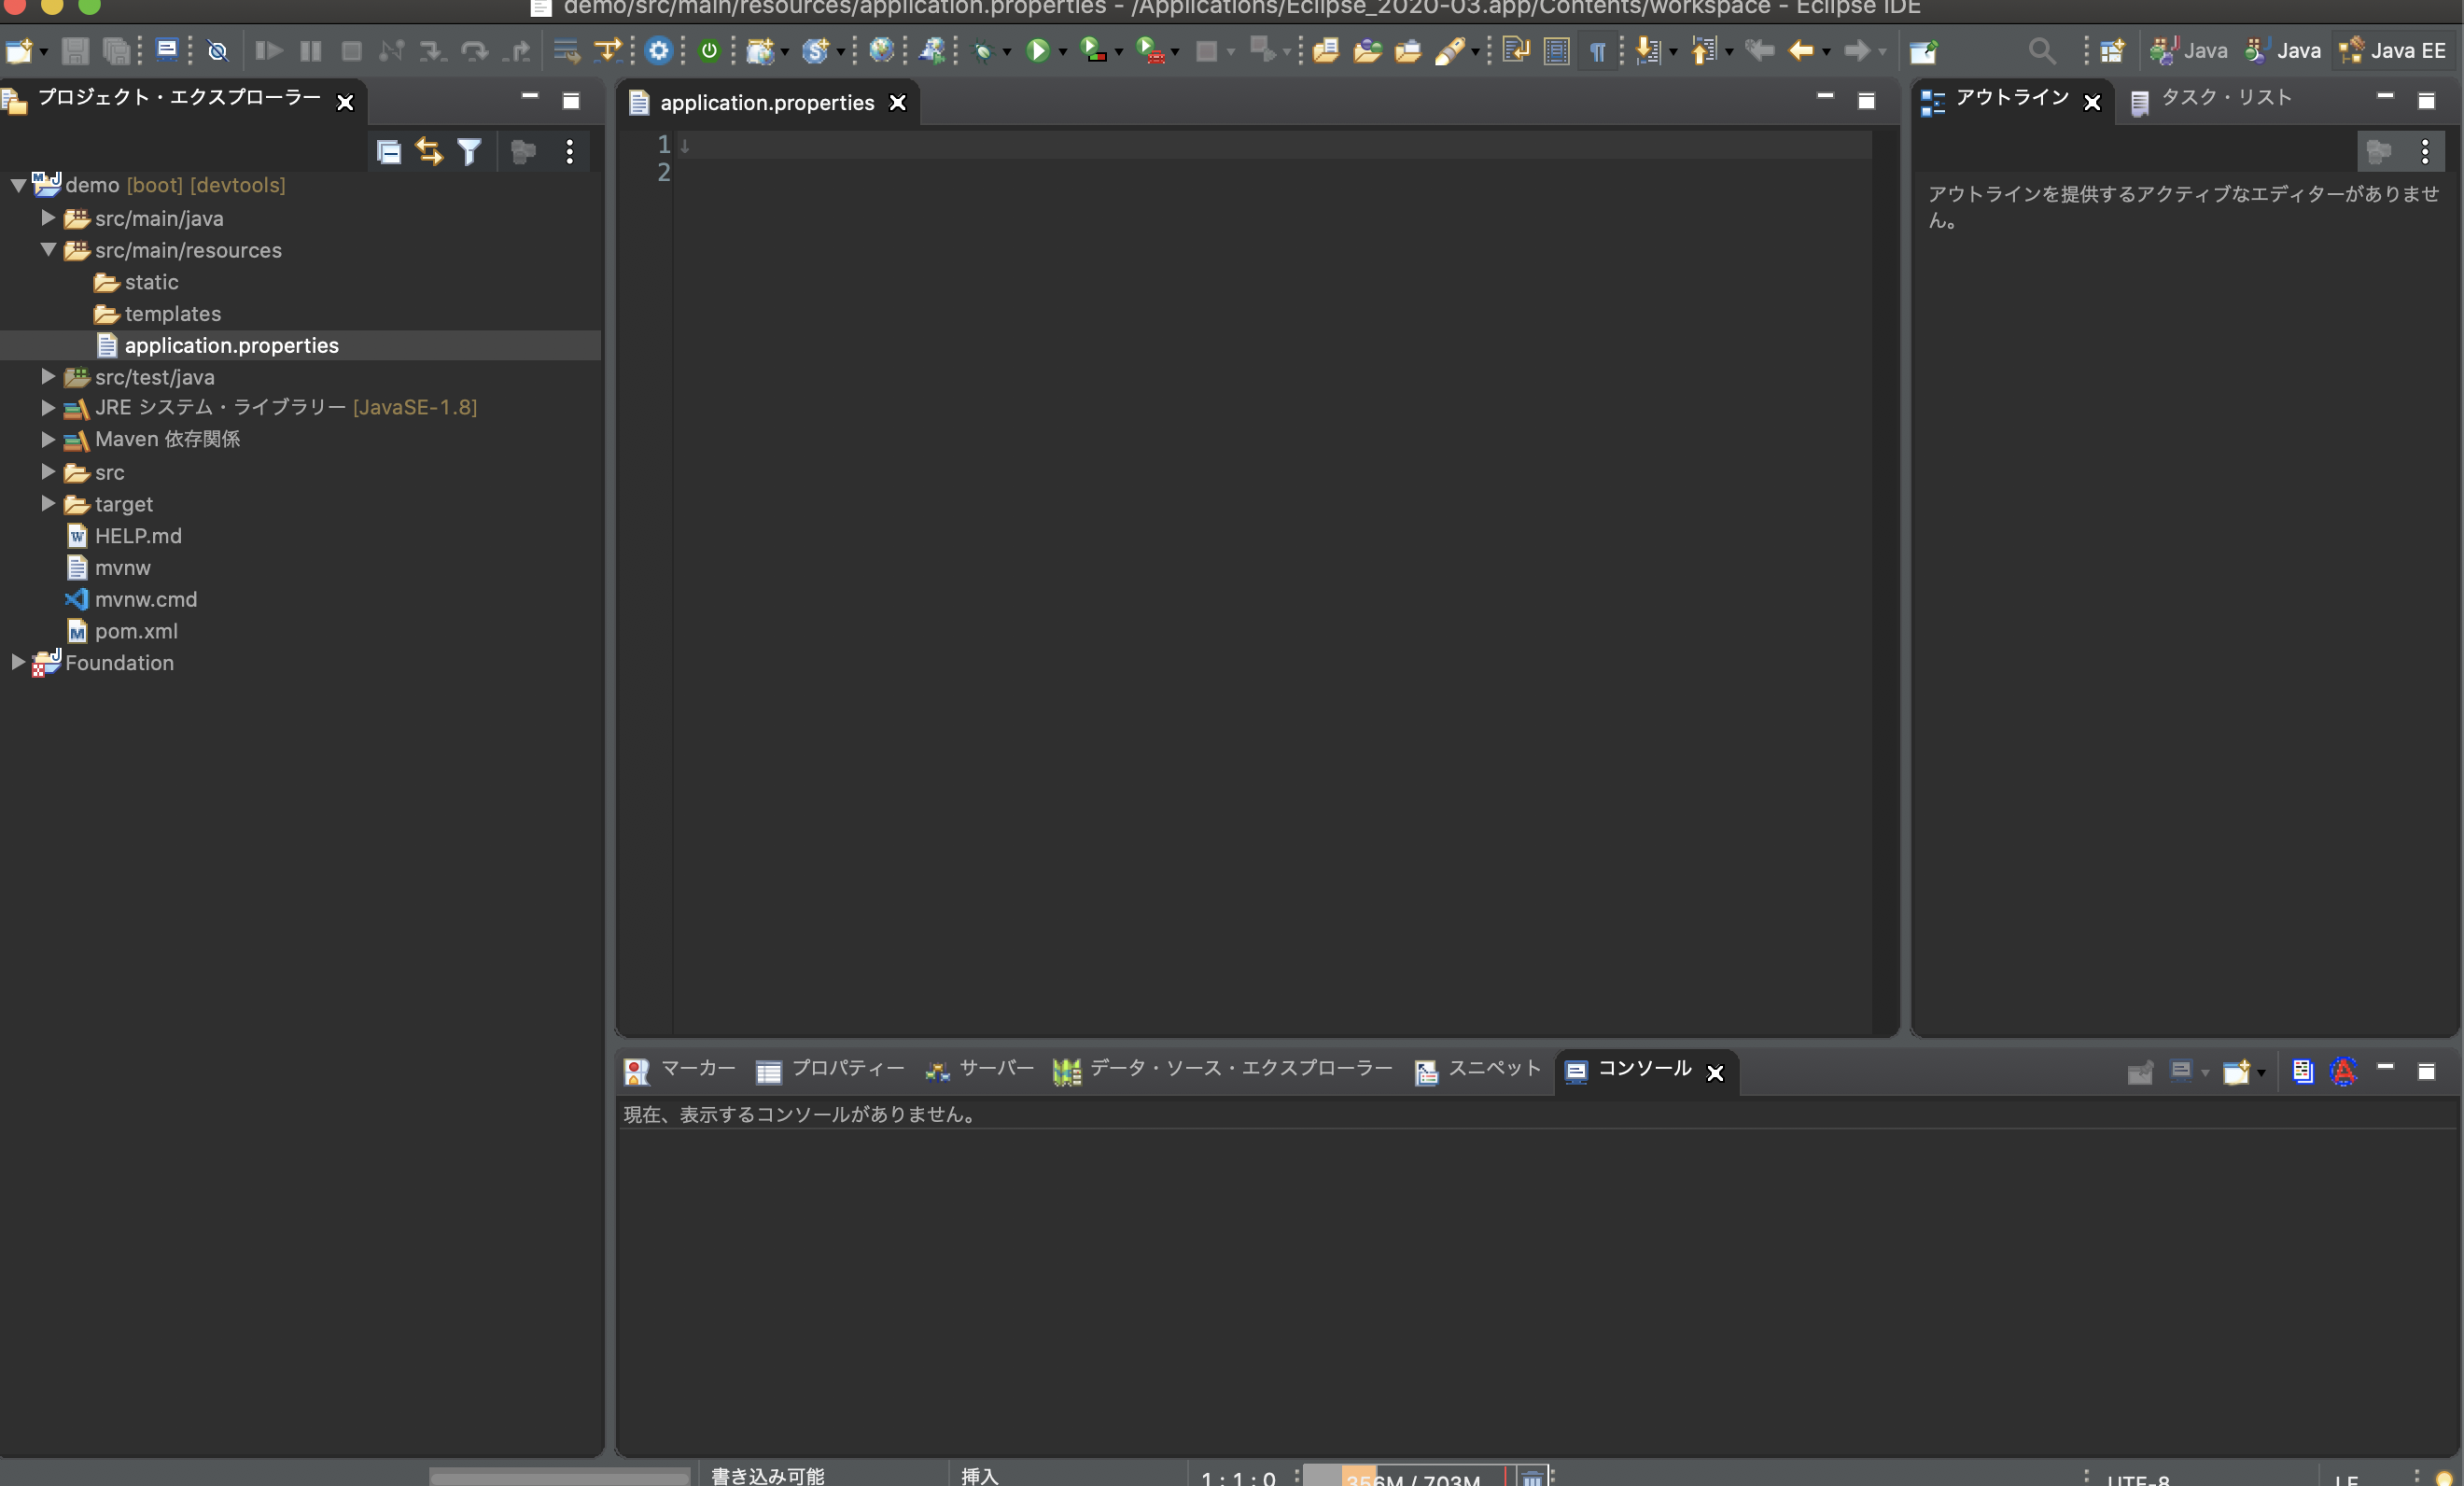
完了したら、最初の画面のプロジェクト・エクスプローラーに、プロジェクトが出来ましたね。
(下のプロジェクトは、関係無いので無視してくださいね。)
![スクリーンショット 2020-07-12 5.53.43.png](https://qiita-user-contents.imgix.net/https%3A%2F%2Fqiita-image-store.s3.ap-northeast-1.amazonaws.com%2F0%2F451004%2F159187c0-955e-1b98-cd06-69f7cd7b760c.png?ixlib=rb-4.0.0&auto=format&gif-q=60&q=75&s=84e0c30e93aa8bd06435934ba9be506a)
Webアプリケーションが起動出来るところまで行きたいので、その前にいくつかの設定をしなければならないので、説明を踏まえて進めて行きます。
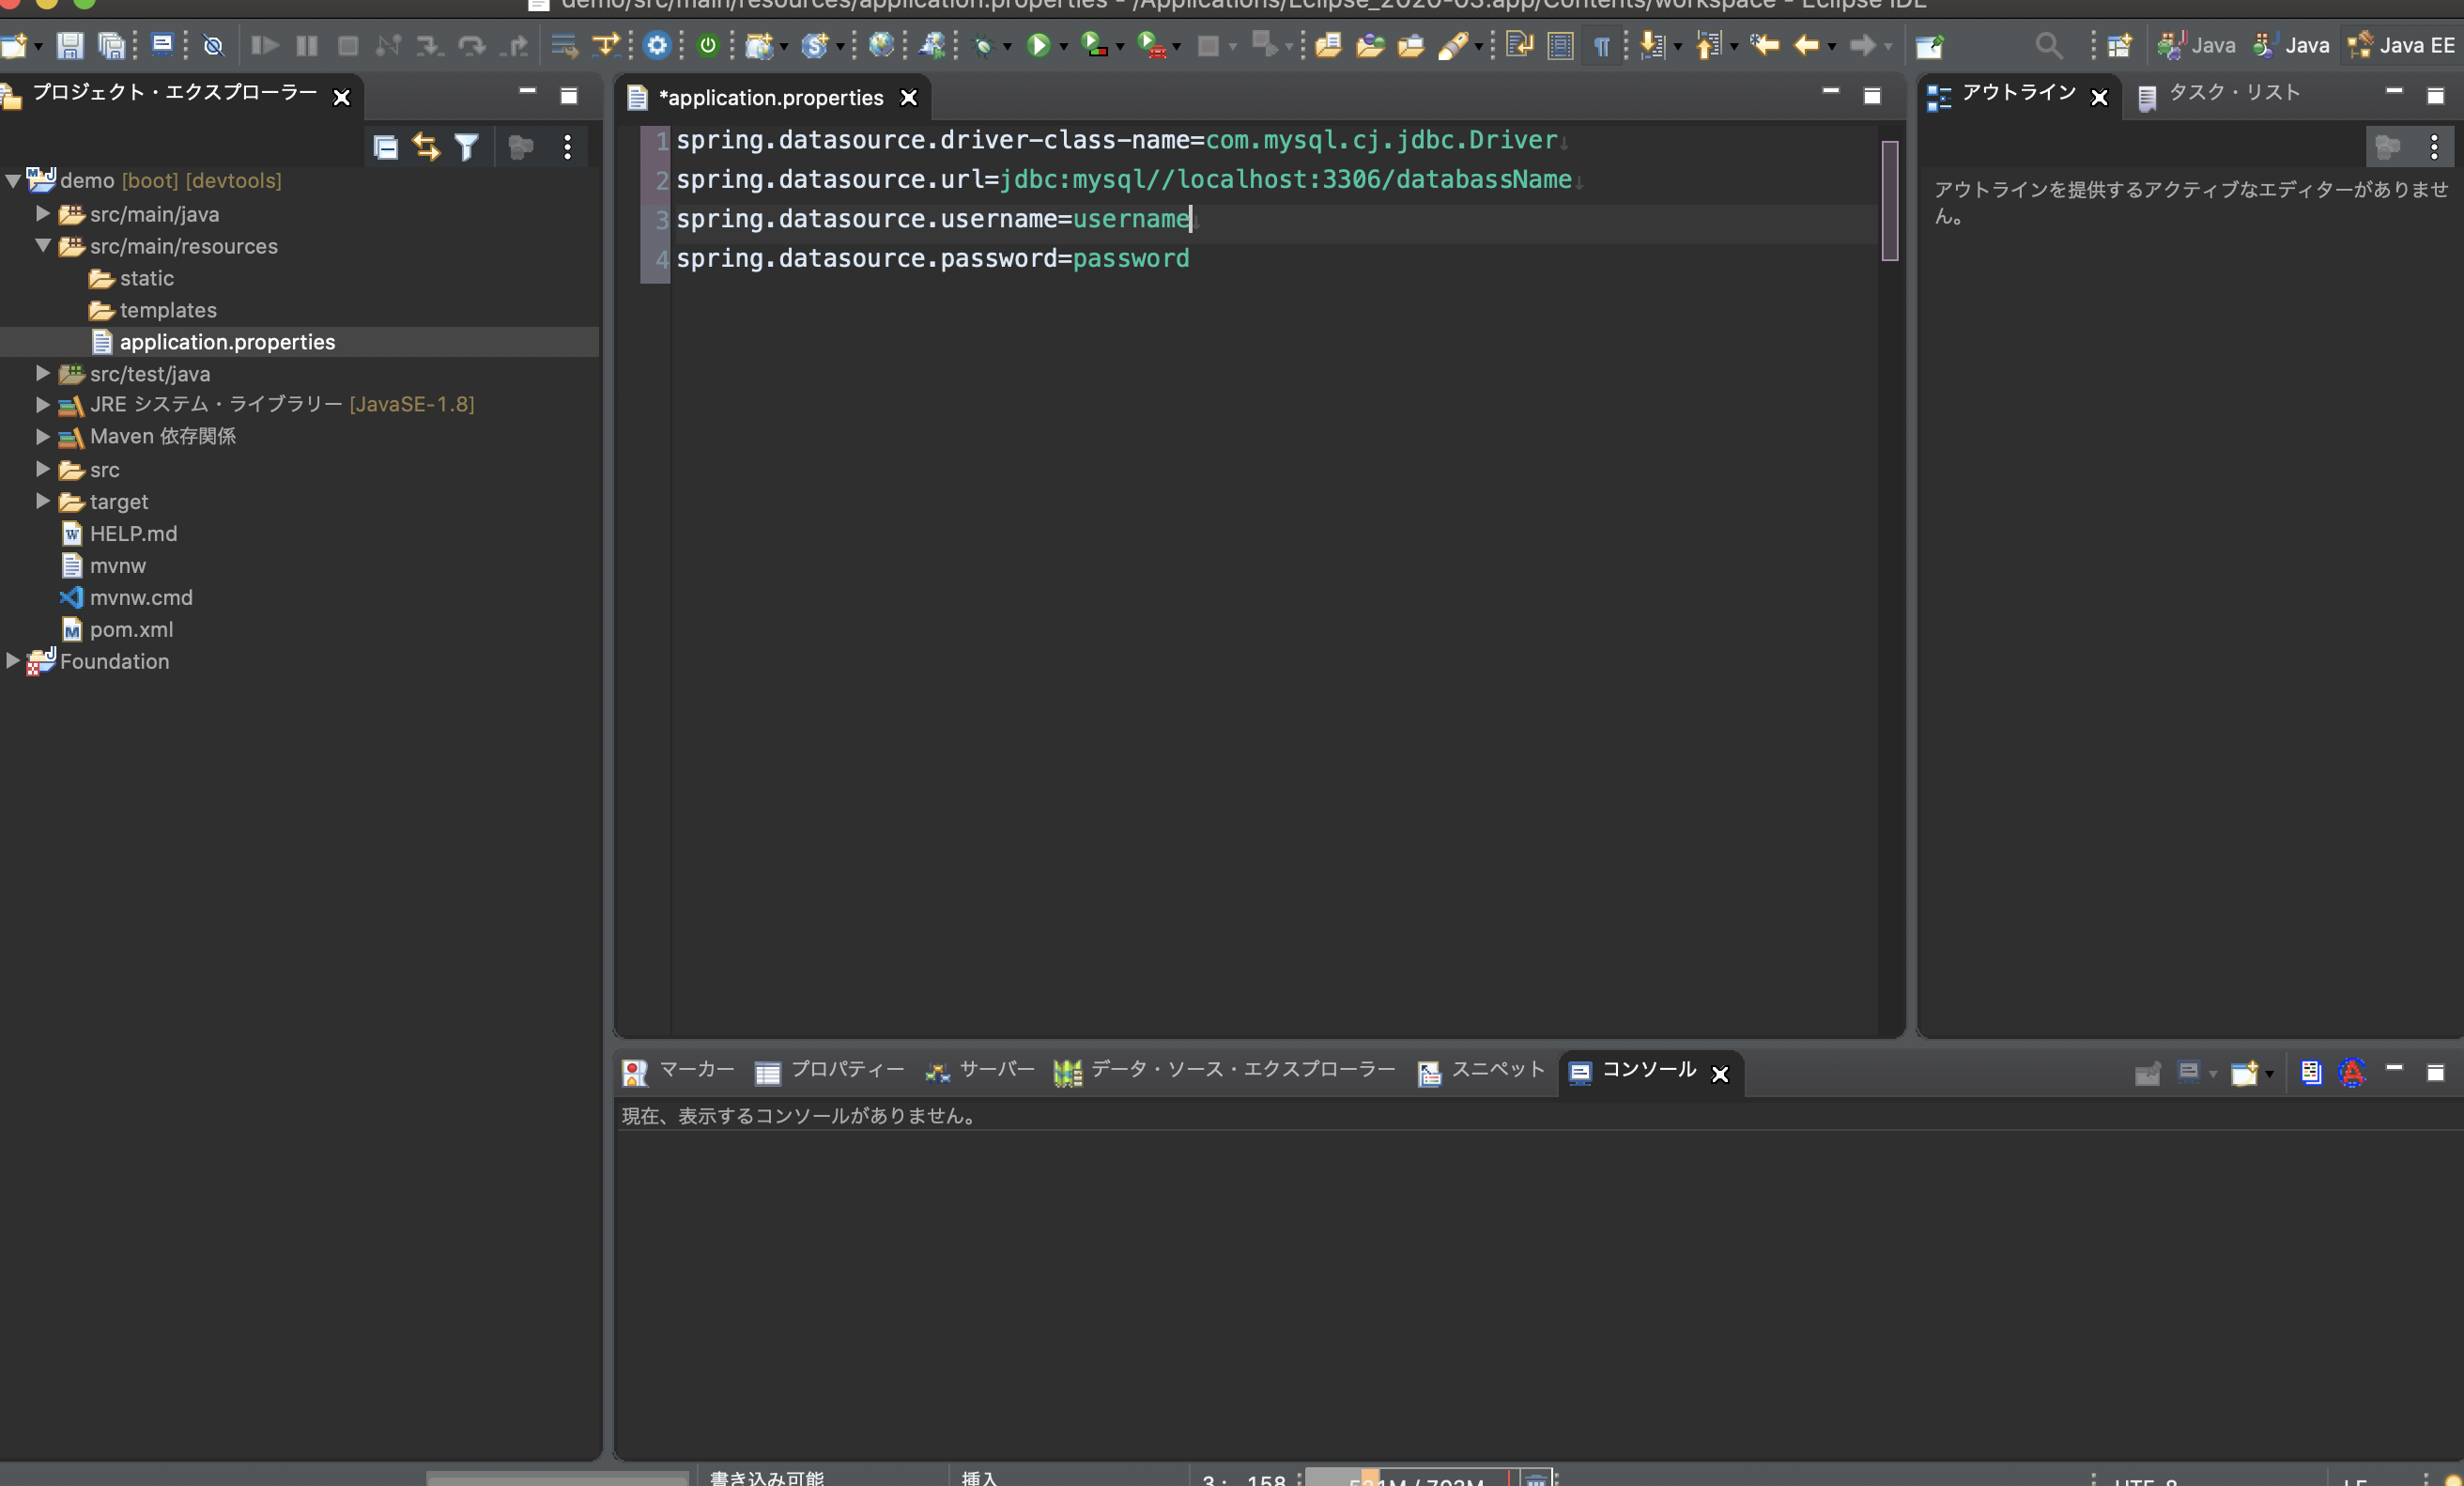
まずは、MySQLとの接続情報をアプリケーションサーバーのTomcatの方に教えてあげないといけないので、Springスタータ・プロジェクトのプロジェクトを作った時点で、すでにソースメインに、リソースイズの配下にアプリケーションプロパティというプロパティファイルがあります。
![スクリーンショット 2020-05-25 4.55.39.png](https://qiita-user-contents.imgix.net/https%3A%2F%2Fqiita-image-store.s3.ap-northeast-1.amazonaws.com%2F0%2F451004%2F609b77a6-2b10-c71b-e3b8-34e23f7a2dd7.png?ixlib=rb-4.0.0&auto=format&gif-q=60&q=75&s=7cf2111cbb9e2cccda34766e1f995d56)
こちらの方にデータベースとの接続設定を記述します。(コードは覚えとく方が良い)
設定は、ご自身の環境設定に合わせて、コードを書いてください。
![スクリーンショット 2020-05-25 5.04.39.png](https://qiita-user-contents.imgix.net/https%3A%2F%2Fqiita-image-store.s3.ap-northeast-1.amazonaws.com%2F0%2F451004%2F01b91bc5-335b-0b6a-4b1a-a1f7699db934.png?ixlib=rb-4.0.0&auto=format&gif-q=60&q=75&s=f490b915aff1d4484b09fa95fe1b4a89)
Springセキュリティの設定もしないといけないので、設定を行わないといけないです。
![スクリーンショット 2020-05-25 5.07.14.png](https://qiita-user-contents.imgix.net/https%3A%2F%2Fqiita-image-store.s3.ap-northeast-1.amazonaws.com%2F0%2F451004%2F1a4b0b77-7728-230e-e64b-e66eba2953ab.png?ixlib=rb-4.0.0&auto=format&gif-q=60&q=75&s=66f68fc57e68361d15bb710a27d59dae)
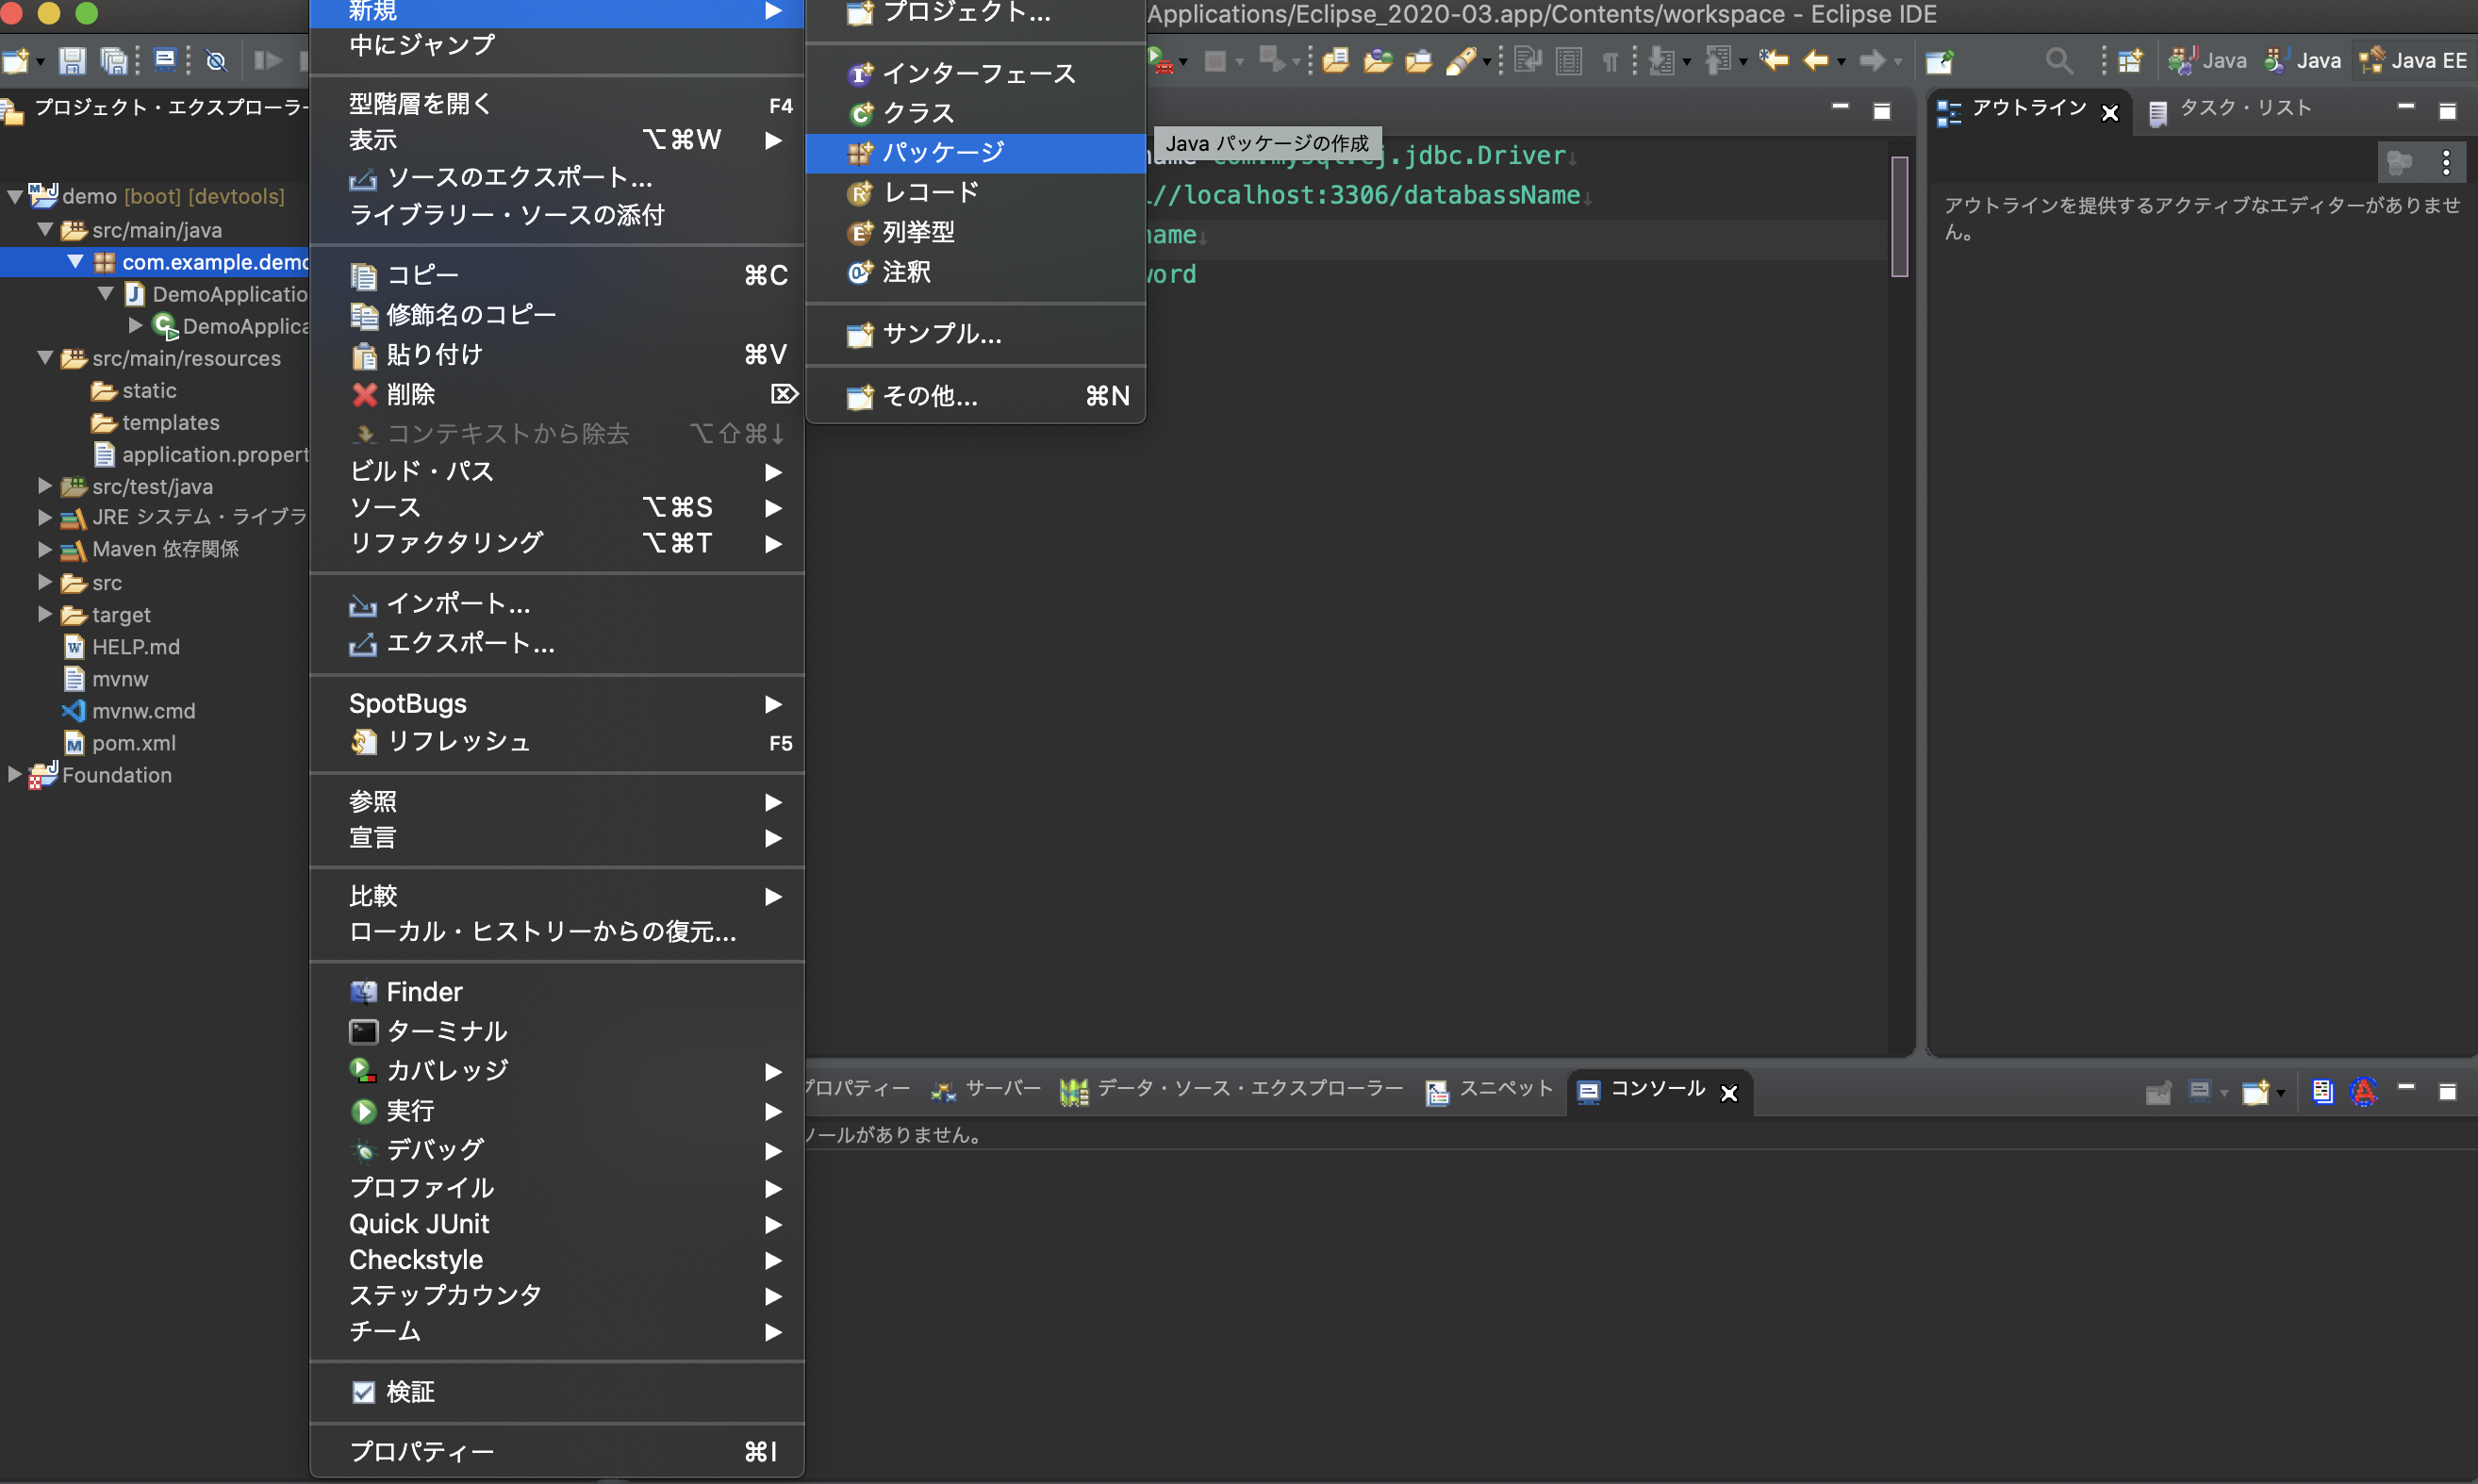
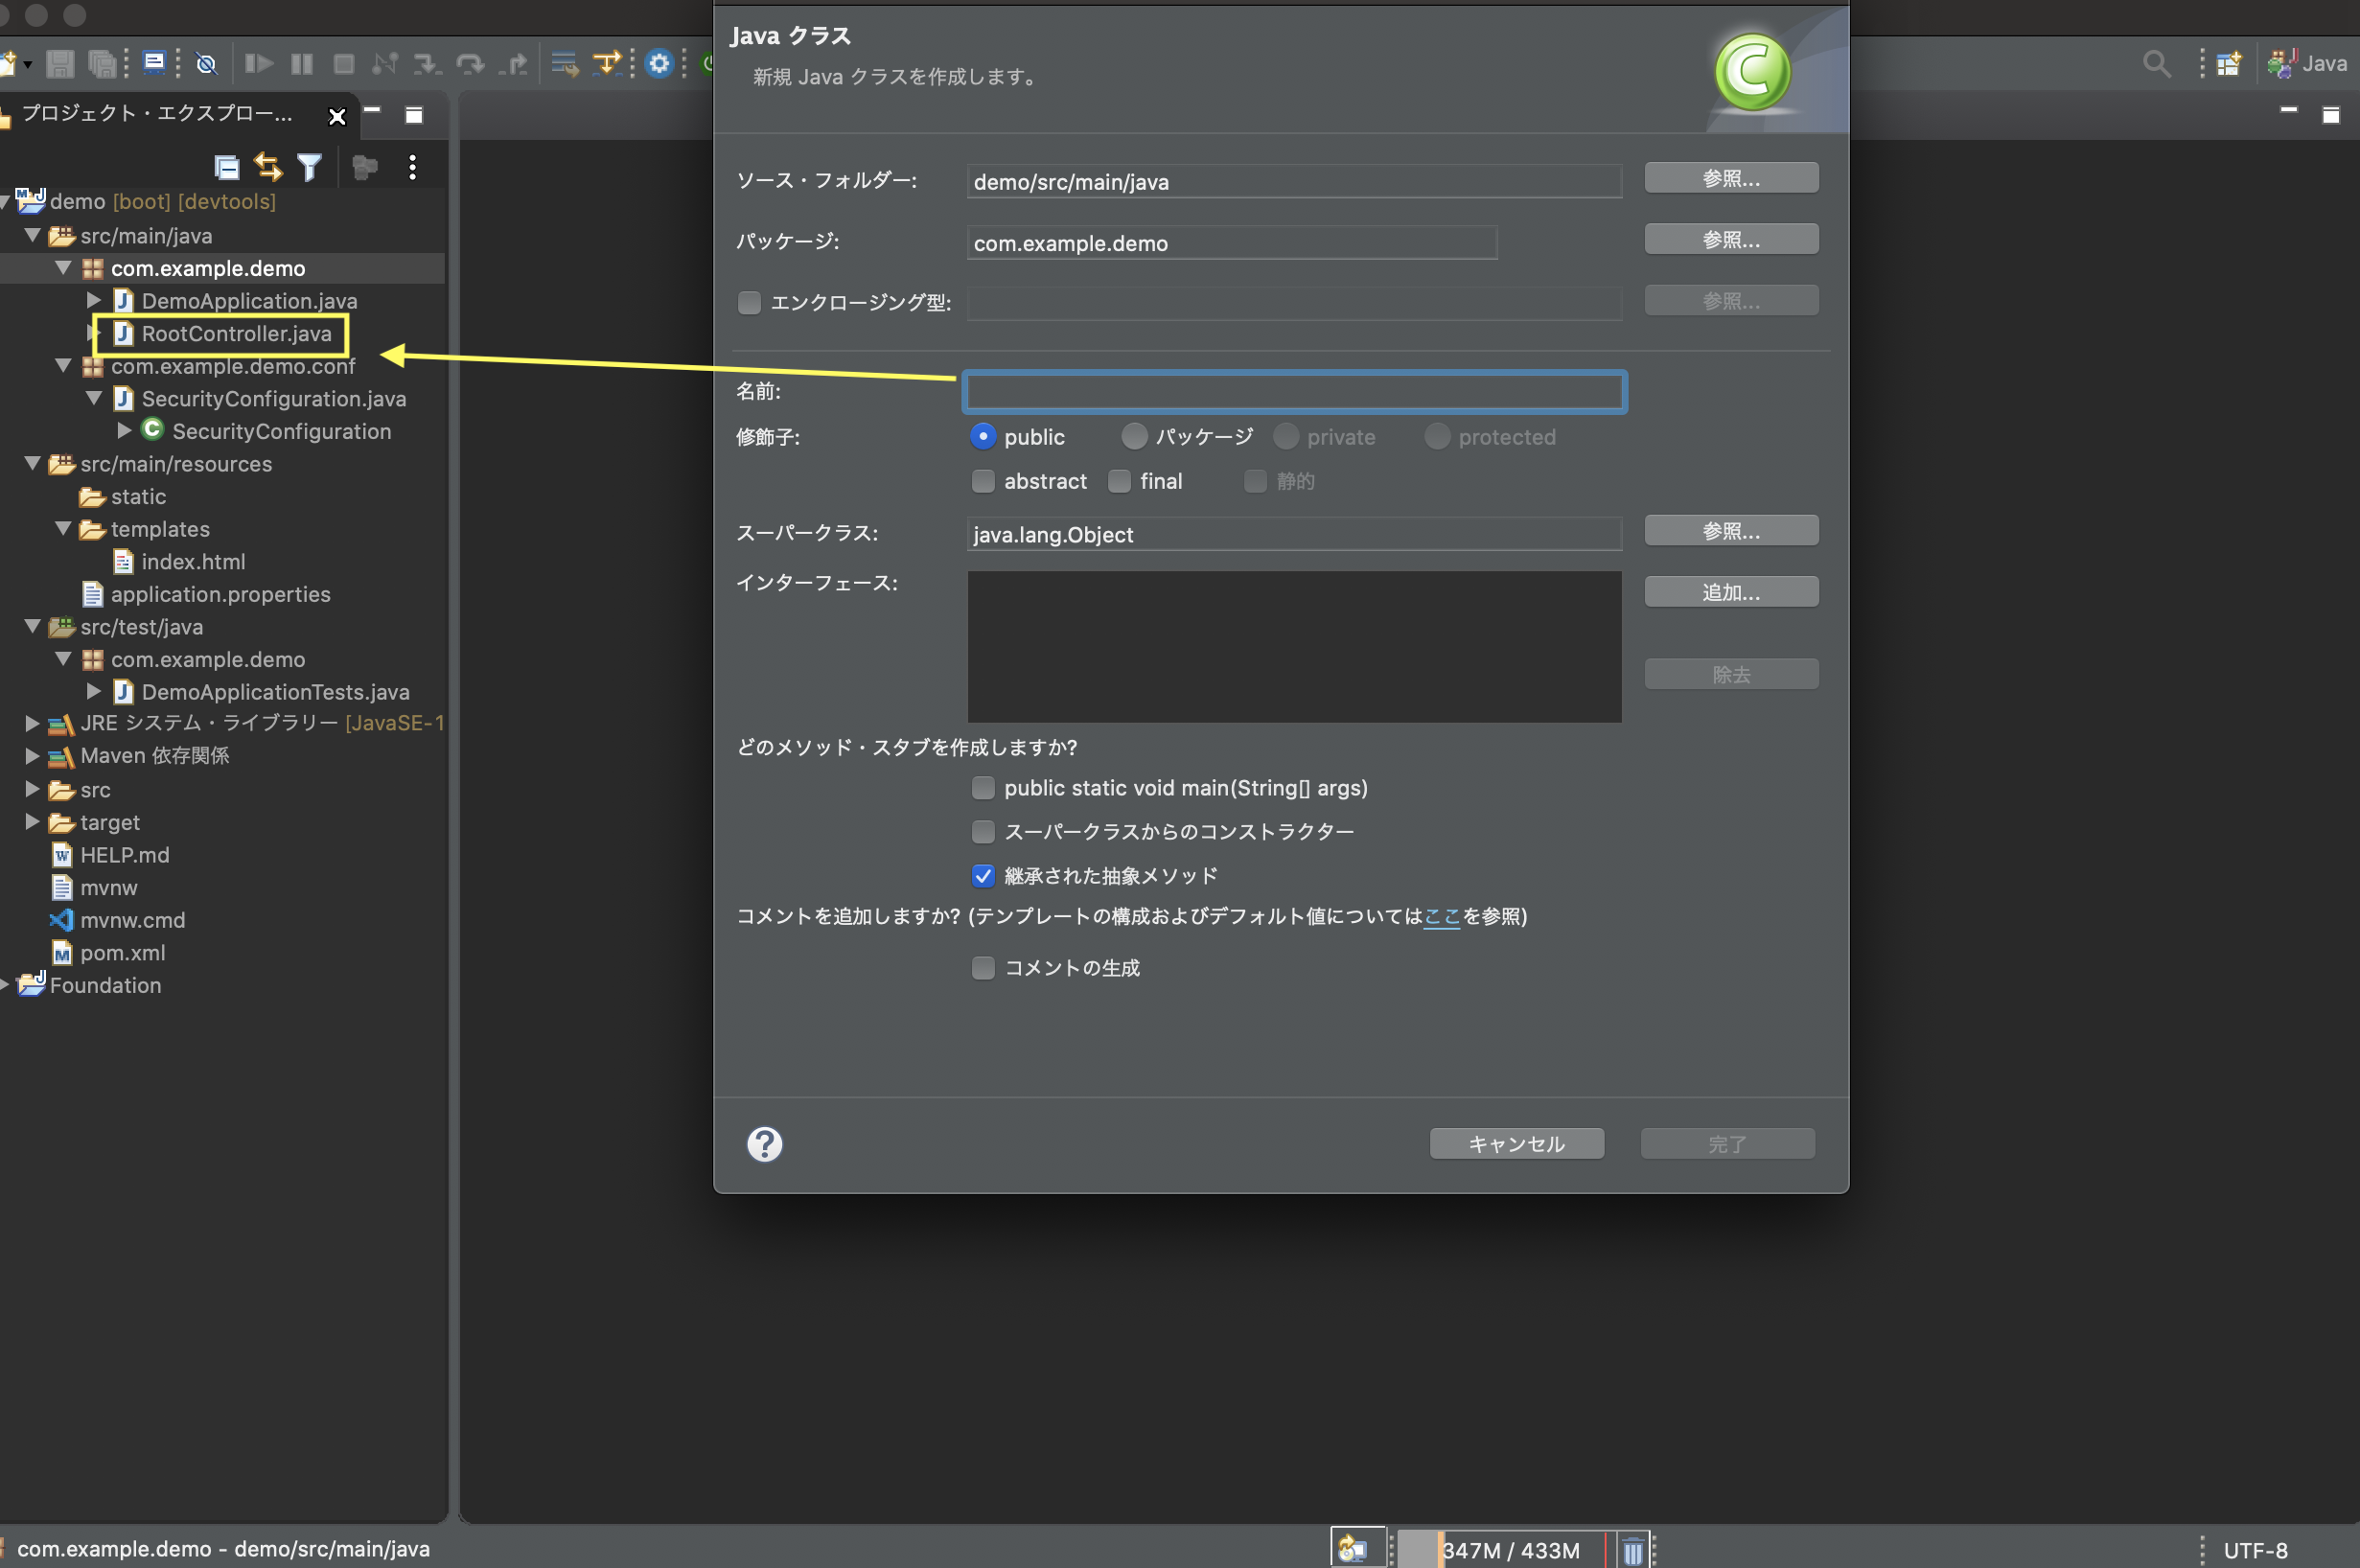
Javaクラスで設定する事が出来るので、その方法を使います。
![スクリーンショット 2020-05-25 5.08.31.png](https://qiita-user-contents.imgix.net/https%3A%2F%2Fqiita-image-store.s3.ap-northeast-1.amazonaws.com%2F0%2F451004%2F3a63bade-d8cf-10a9-ad6b-b382b987d5c9.png?ixlib=rb-4.0.0&auto=format&gif-q=60&q=75&s=daa4c0862824057f36ada1e74be40b14)
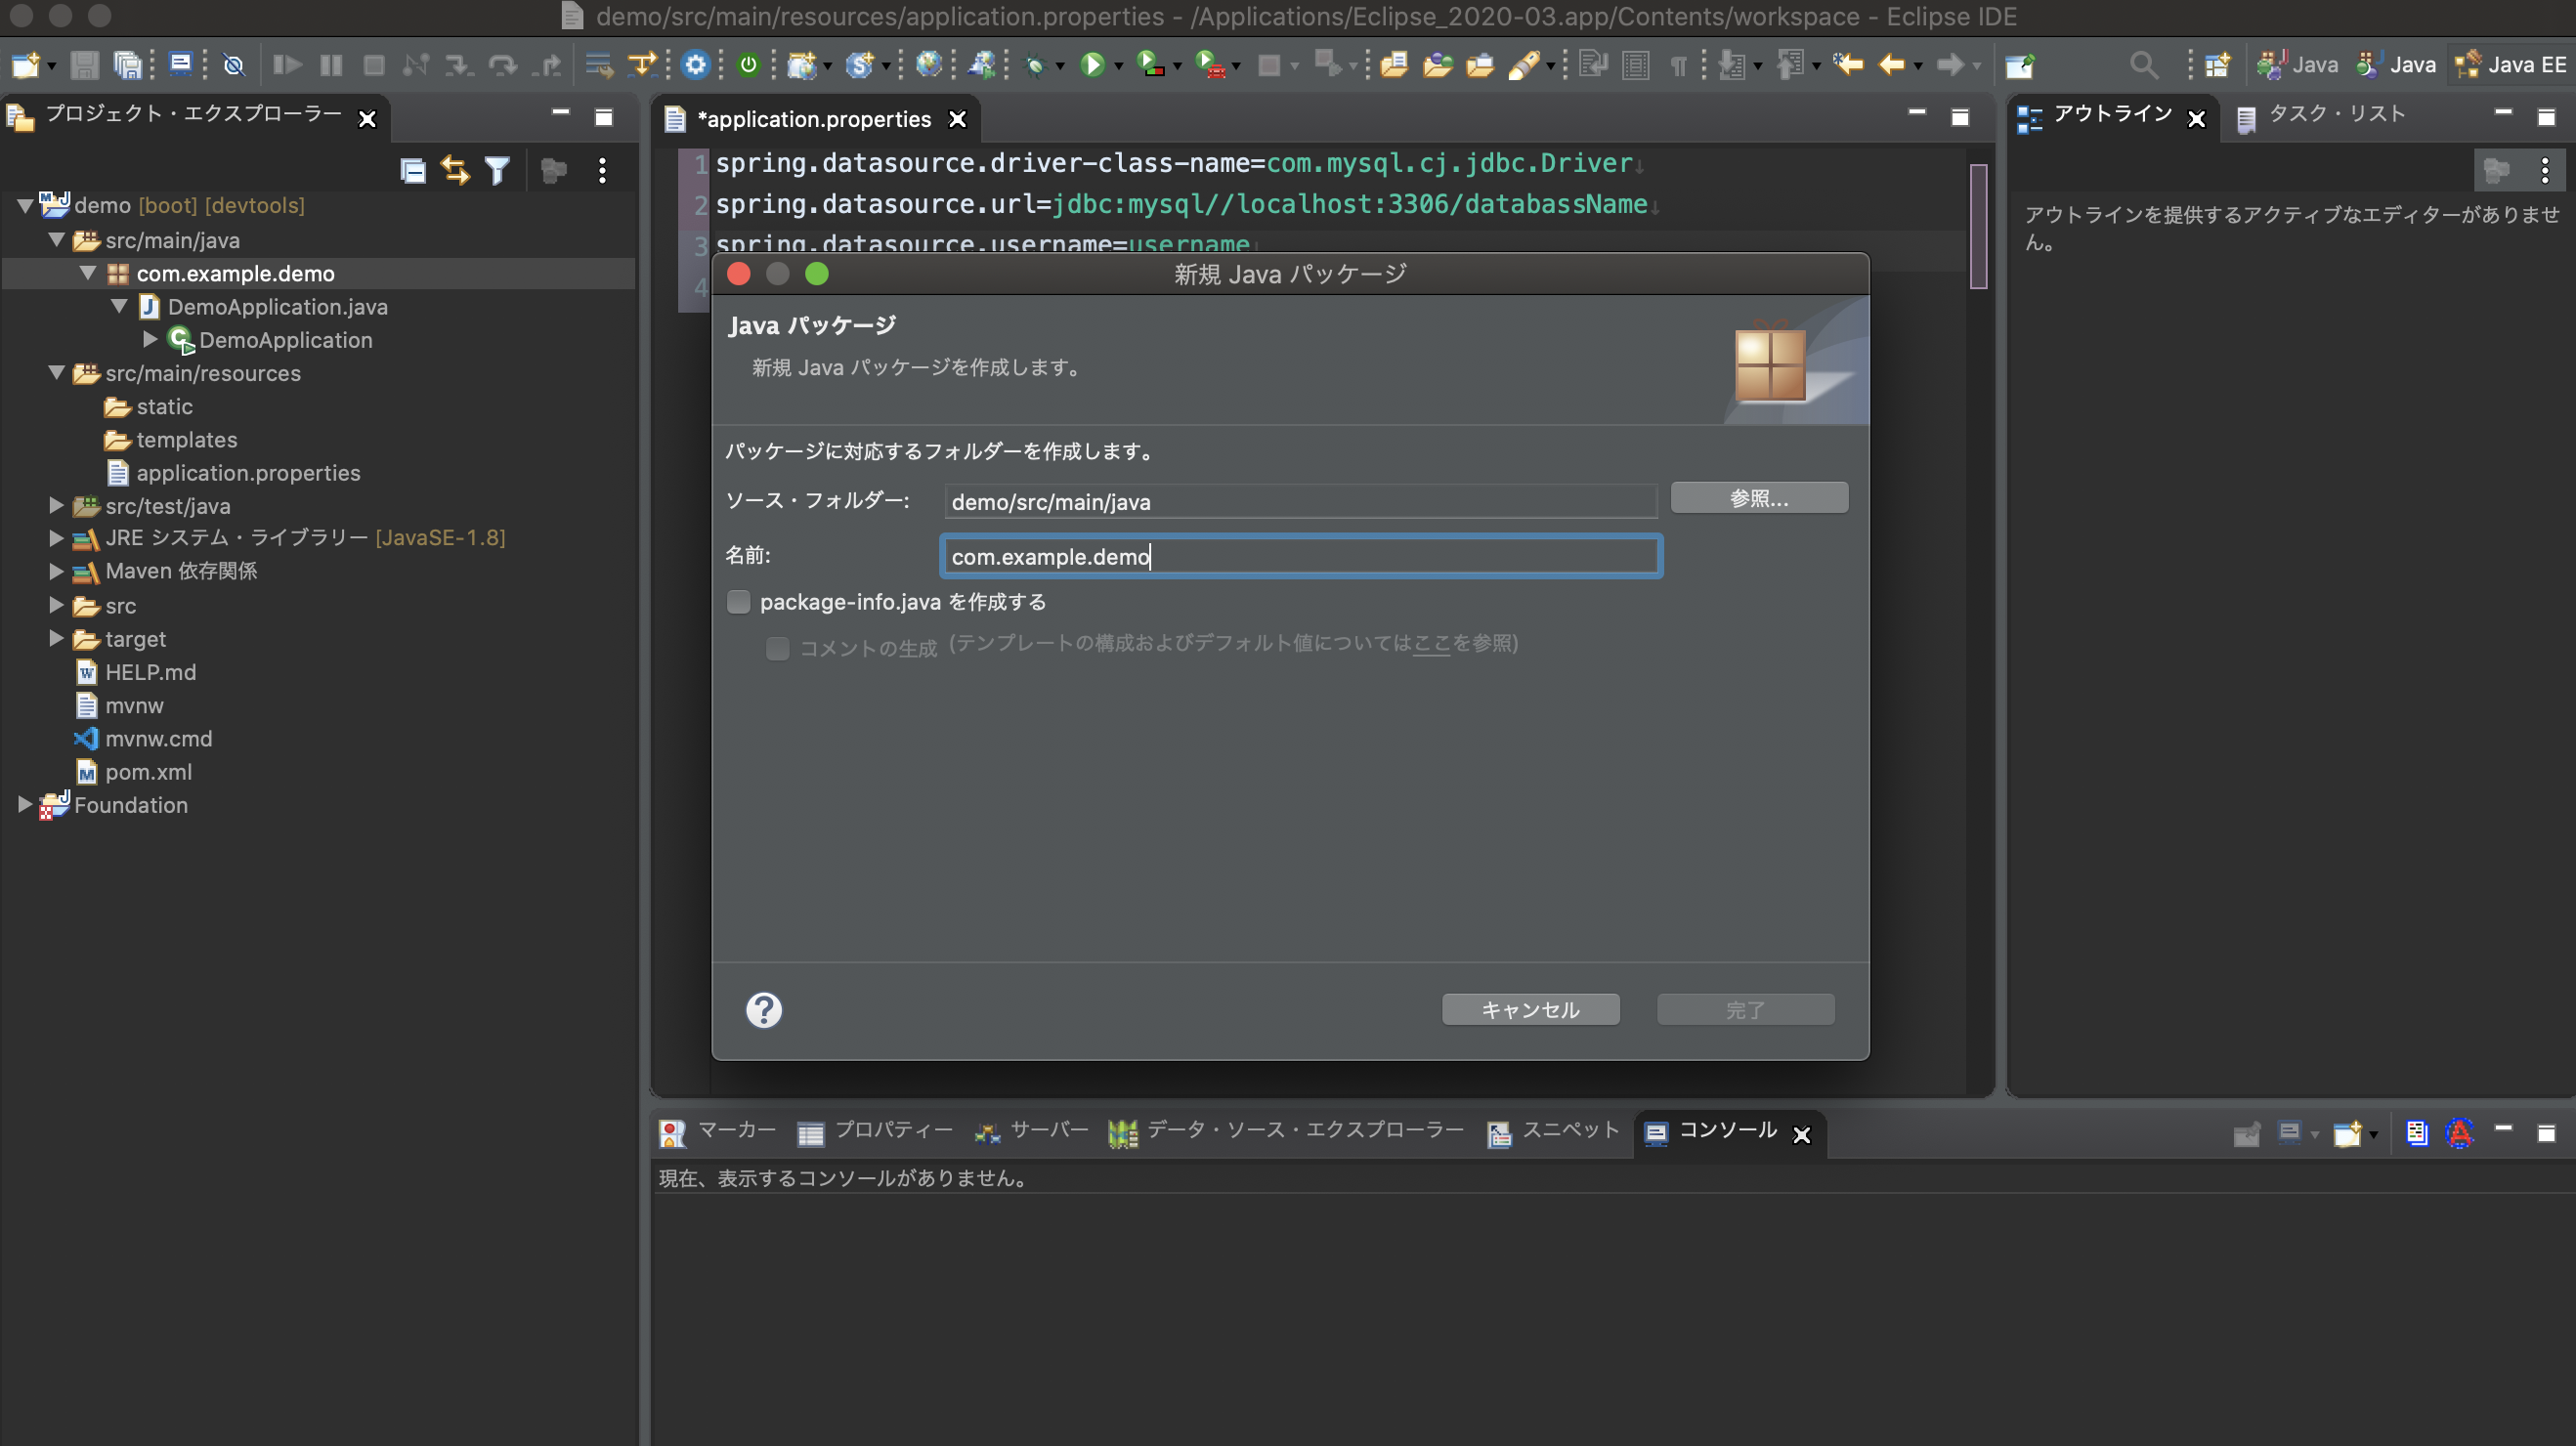
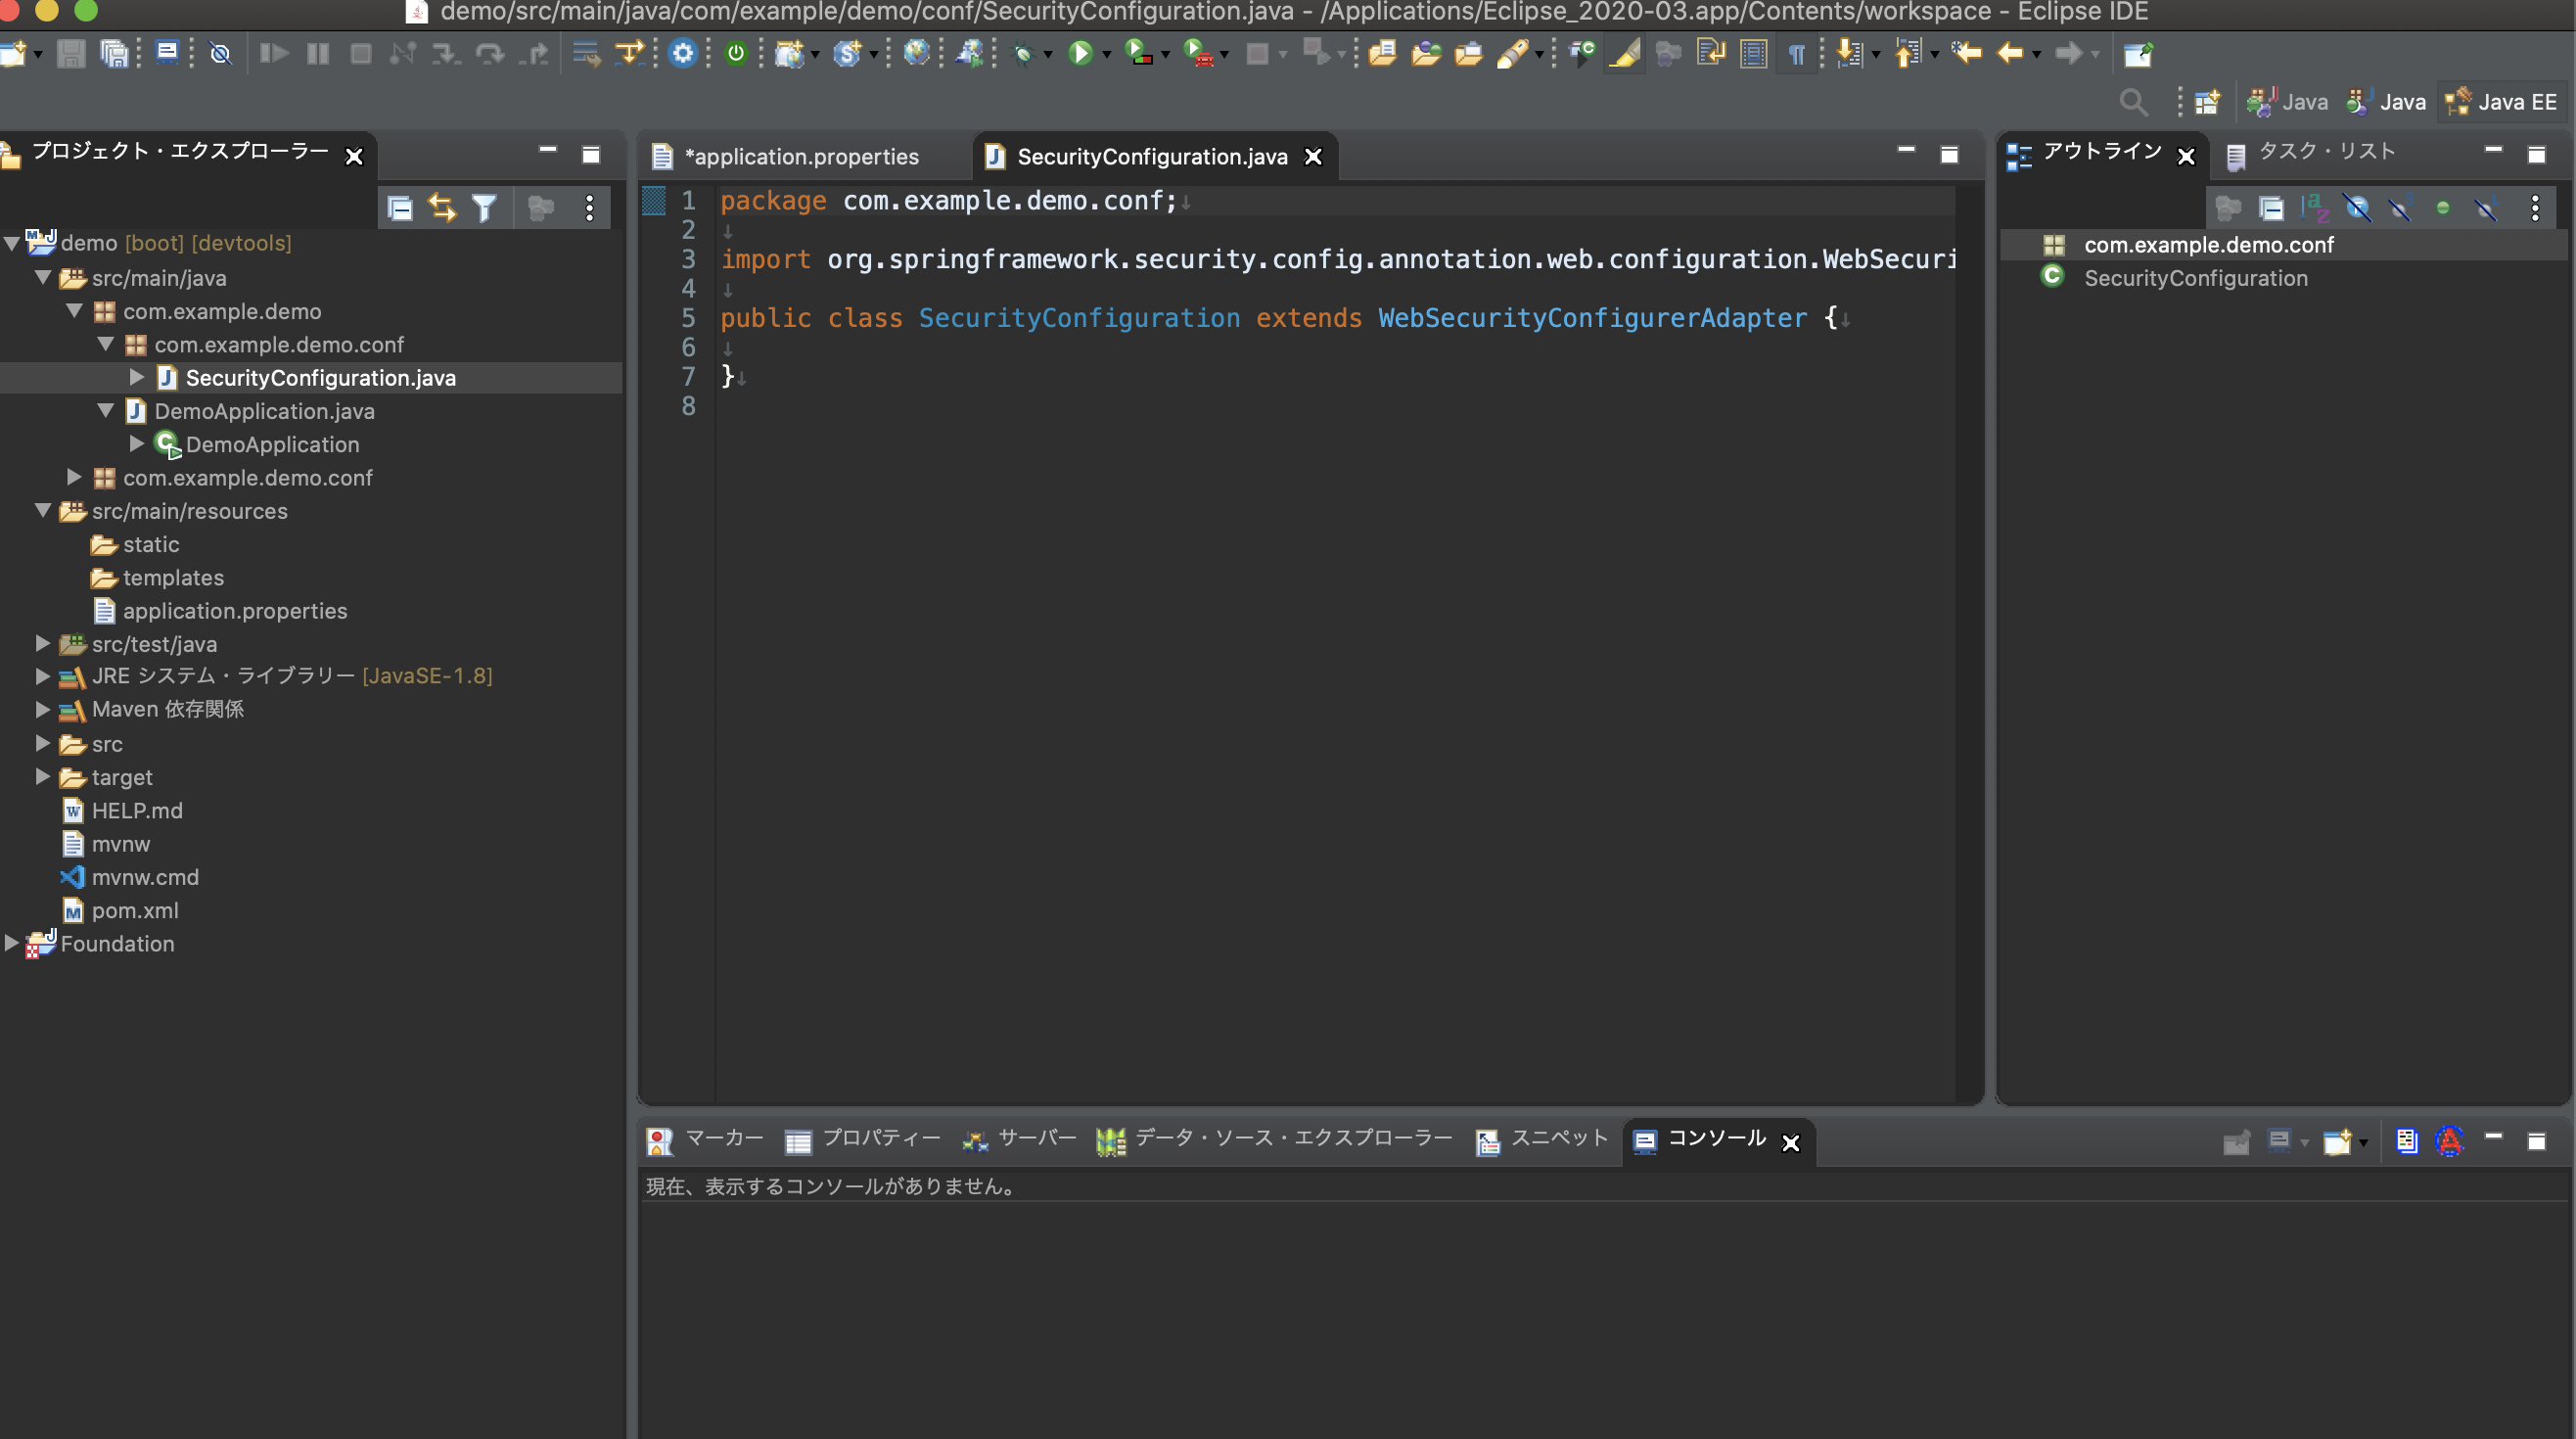
新たにクラスを作るにあたって、クラス名はお好みで決めてあげてください。
![スクリーンショット 2020-05-25 5.09.30.png](https://qiita-user-contents.imgix.net/https%3A%2F%2Fqiita-image-store.s3.ap-northeast-1.amazonaws.com%2F0%2F451004%2Fa7e78446-2029-7960-ff60-c532be105a78.png?ixlib=rb-4.0.0&auto=format&gif-q=60&q=75&s=e327884363b3b1711bd5d84b3f7e47dc)
![スクリーンショット 2020-05-25 5.10.11.png](https://qiita-user-contents.imgix.net/https%3A%2F%2Fqiita-image-store.s3.ap-northeast-1.amazonaws.com%2F0%2F451004%2F66efb1ee-4561-7819-4685-65c4a9f2040b.png?ixlib=rb-4.0.0&auto=format&gif-q=60&q=75&s=0b68c72199d21617d5b64e4e8e544b95)
![スクリーンショット 2020-05-25 5.11.13.png](https://qiita-user-contents.imgix.net/https%3A%2F%2Fqiita-image-store.s3.ap-northeast-1.amazonaws.com%2F0%2F451004%2Ffde68a3c-695c-912f-5f30-7c1461076950.png?ixlib=rb-4.0.0&auto=format&gif-q=60&q=75&s=e9c2eac0b40651bdba5bf3c743e381a3)
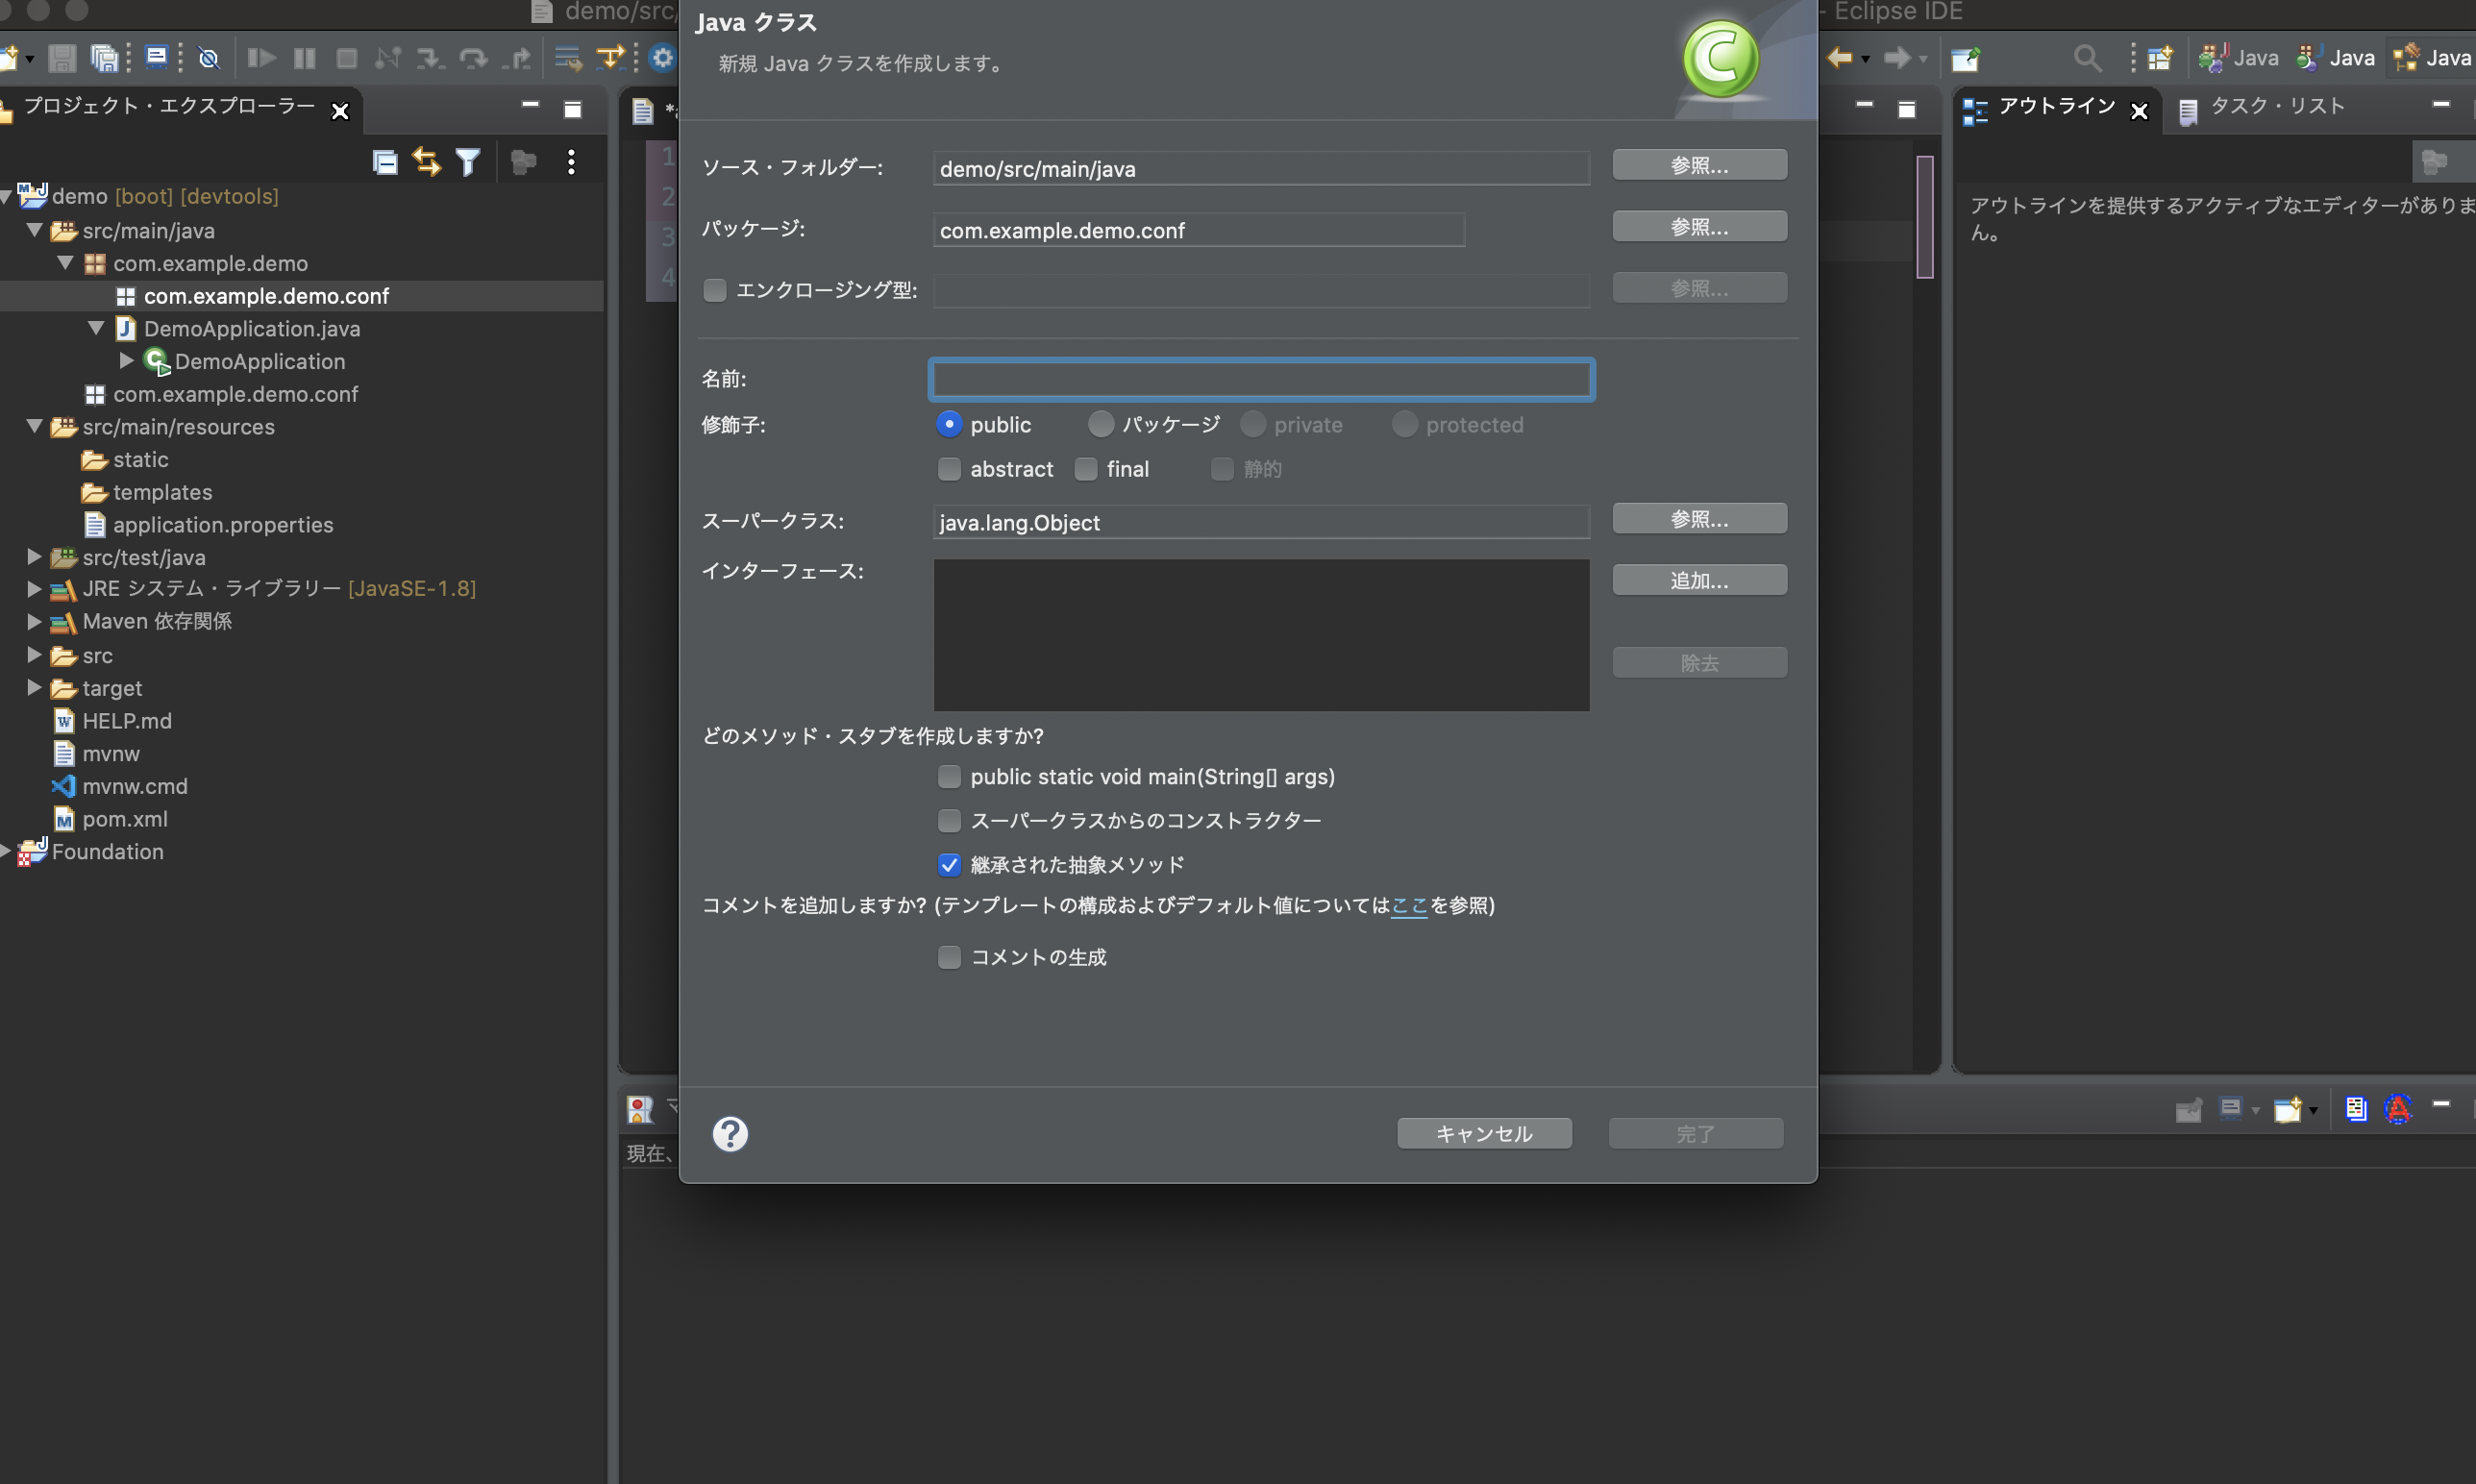
名前を記入したら、スーパークラスの参照をクリックしてください。
![スクリーンショット 2020-05-25 5.11.57.png](https://qiita-user-contents.imgix.net/https%3A%2F%2Fqiita-image-store.s3.ap-northeast-1.amazonaws.com%2F0%2F451004%2Fc068afce-3e00-a259-0852-8f58365d7714.png?ixlib=rb-4.0.0&auto=format&gif-q=60&q=75&s=5882e67bfca6dbde2ced304427753b54)
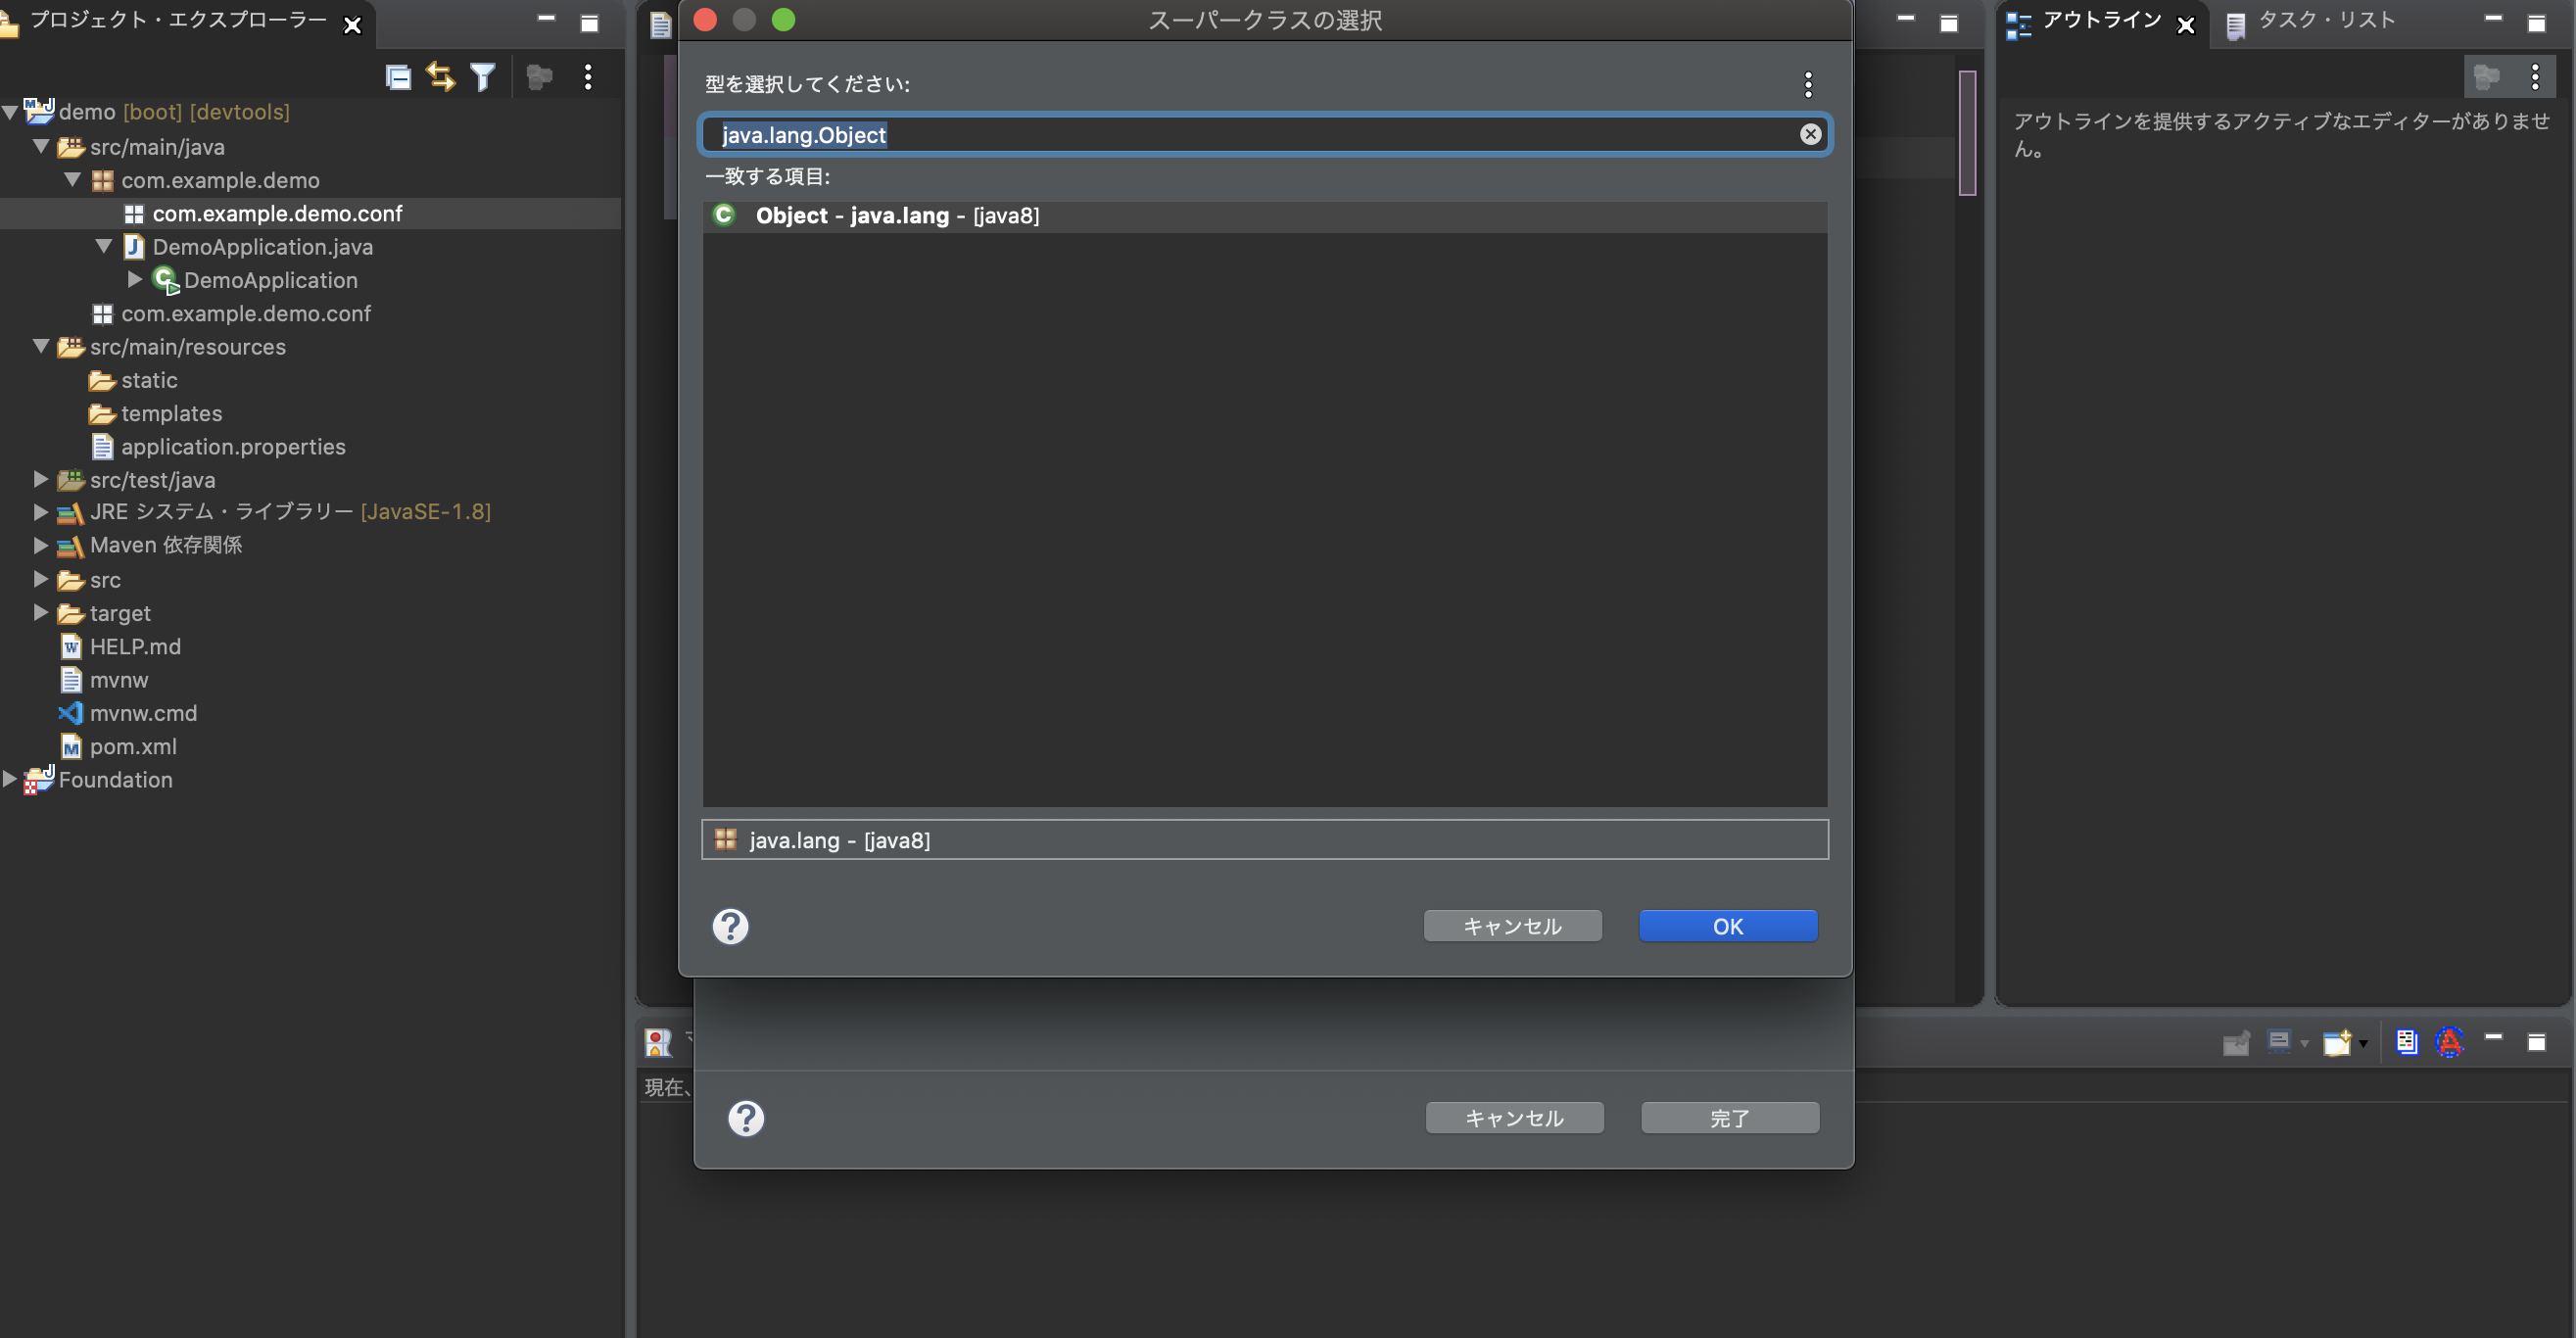
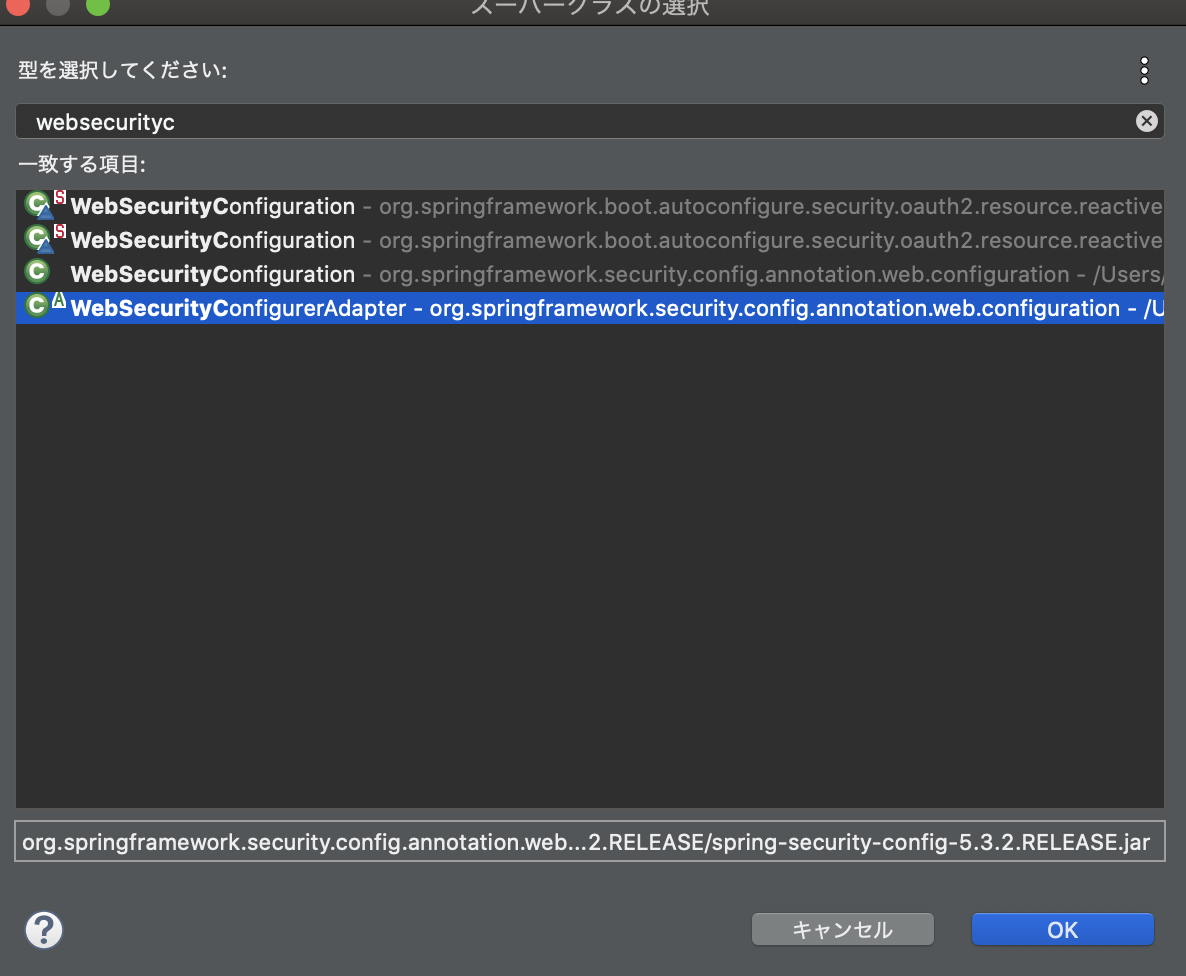
Springの組み込みのウェブセキュリティー、コンフィギアアダプタを継承します。
クリックで選択して、OKをクリックしてください。
![スクリーンショット 2020-05-25 5.13.42.png](https://qiita-user-contents.imgix.net/https%3A%2F%2Fqiita-image-store.s3.ap-northeast-1.amazonaws.com%2F0%2F451004%2F87a58645-7b32-0075-24b2-5f3a50e9a776.png?ixlib=rb-4.0.0&auto=format&gif-q=60&q=75&s=c6804c9930e53555642567548b7b2bf2)
そのまま完了をクリックしてください。
![スクリーンショット 2020-05-25 5.14.23.png](https://qiita-user-contents.imgix.net/https%3A%2F%2Fqiita-image-store.s3.ap-northeast-1.amazonaws.com%2F0%2F451004%2Fc09b9dac-868d-4dc3-27c2-b6d24d327932.png?ixlib=rb-4.0.0&auto=format&gif-q=60&q=75&s=e35800daf5f76f89b01cd6982fdd6493)
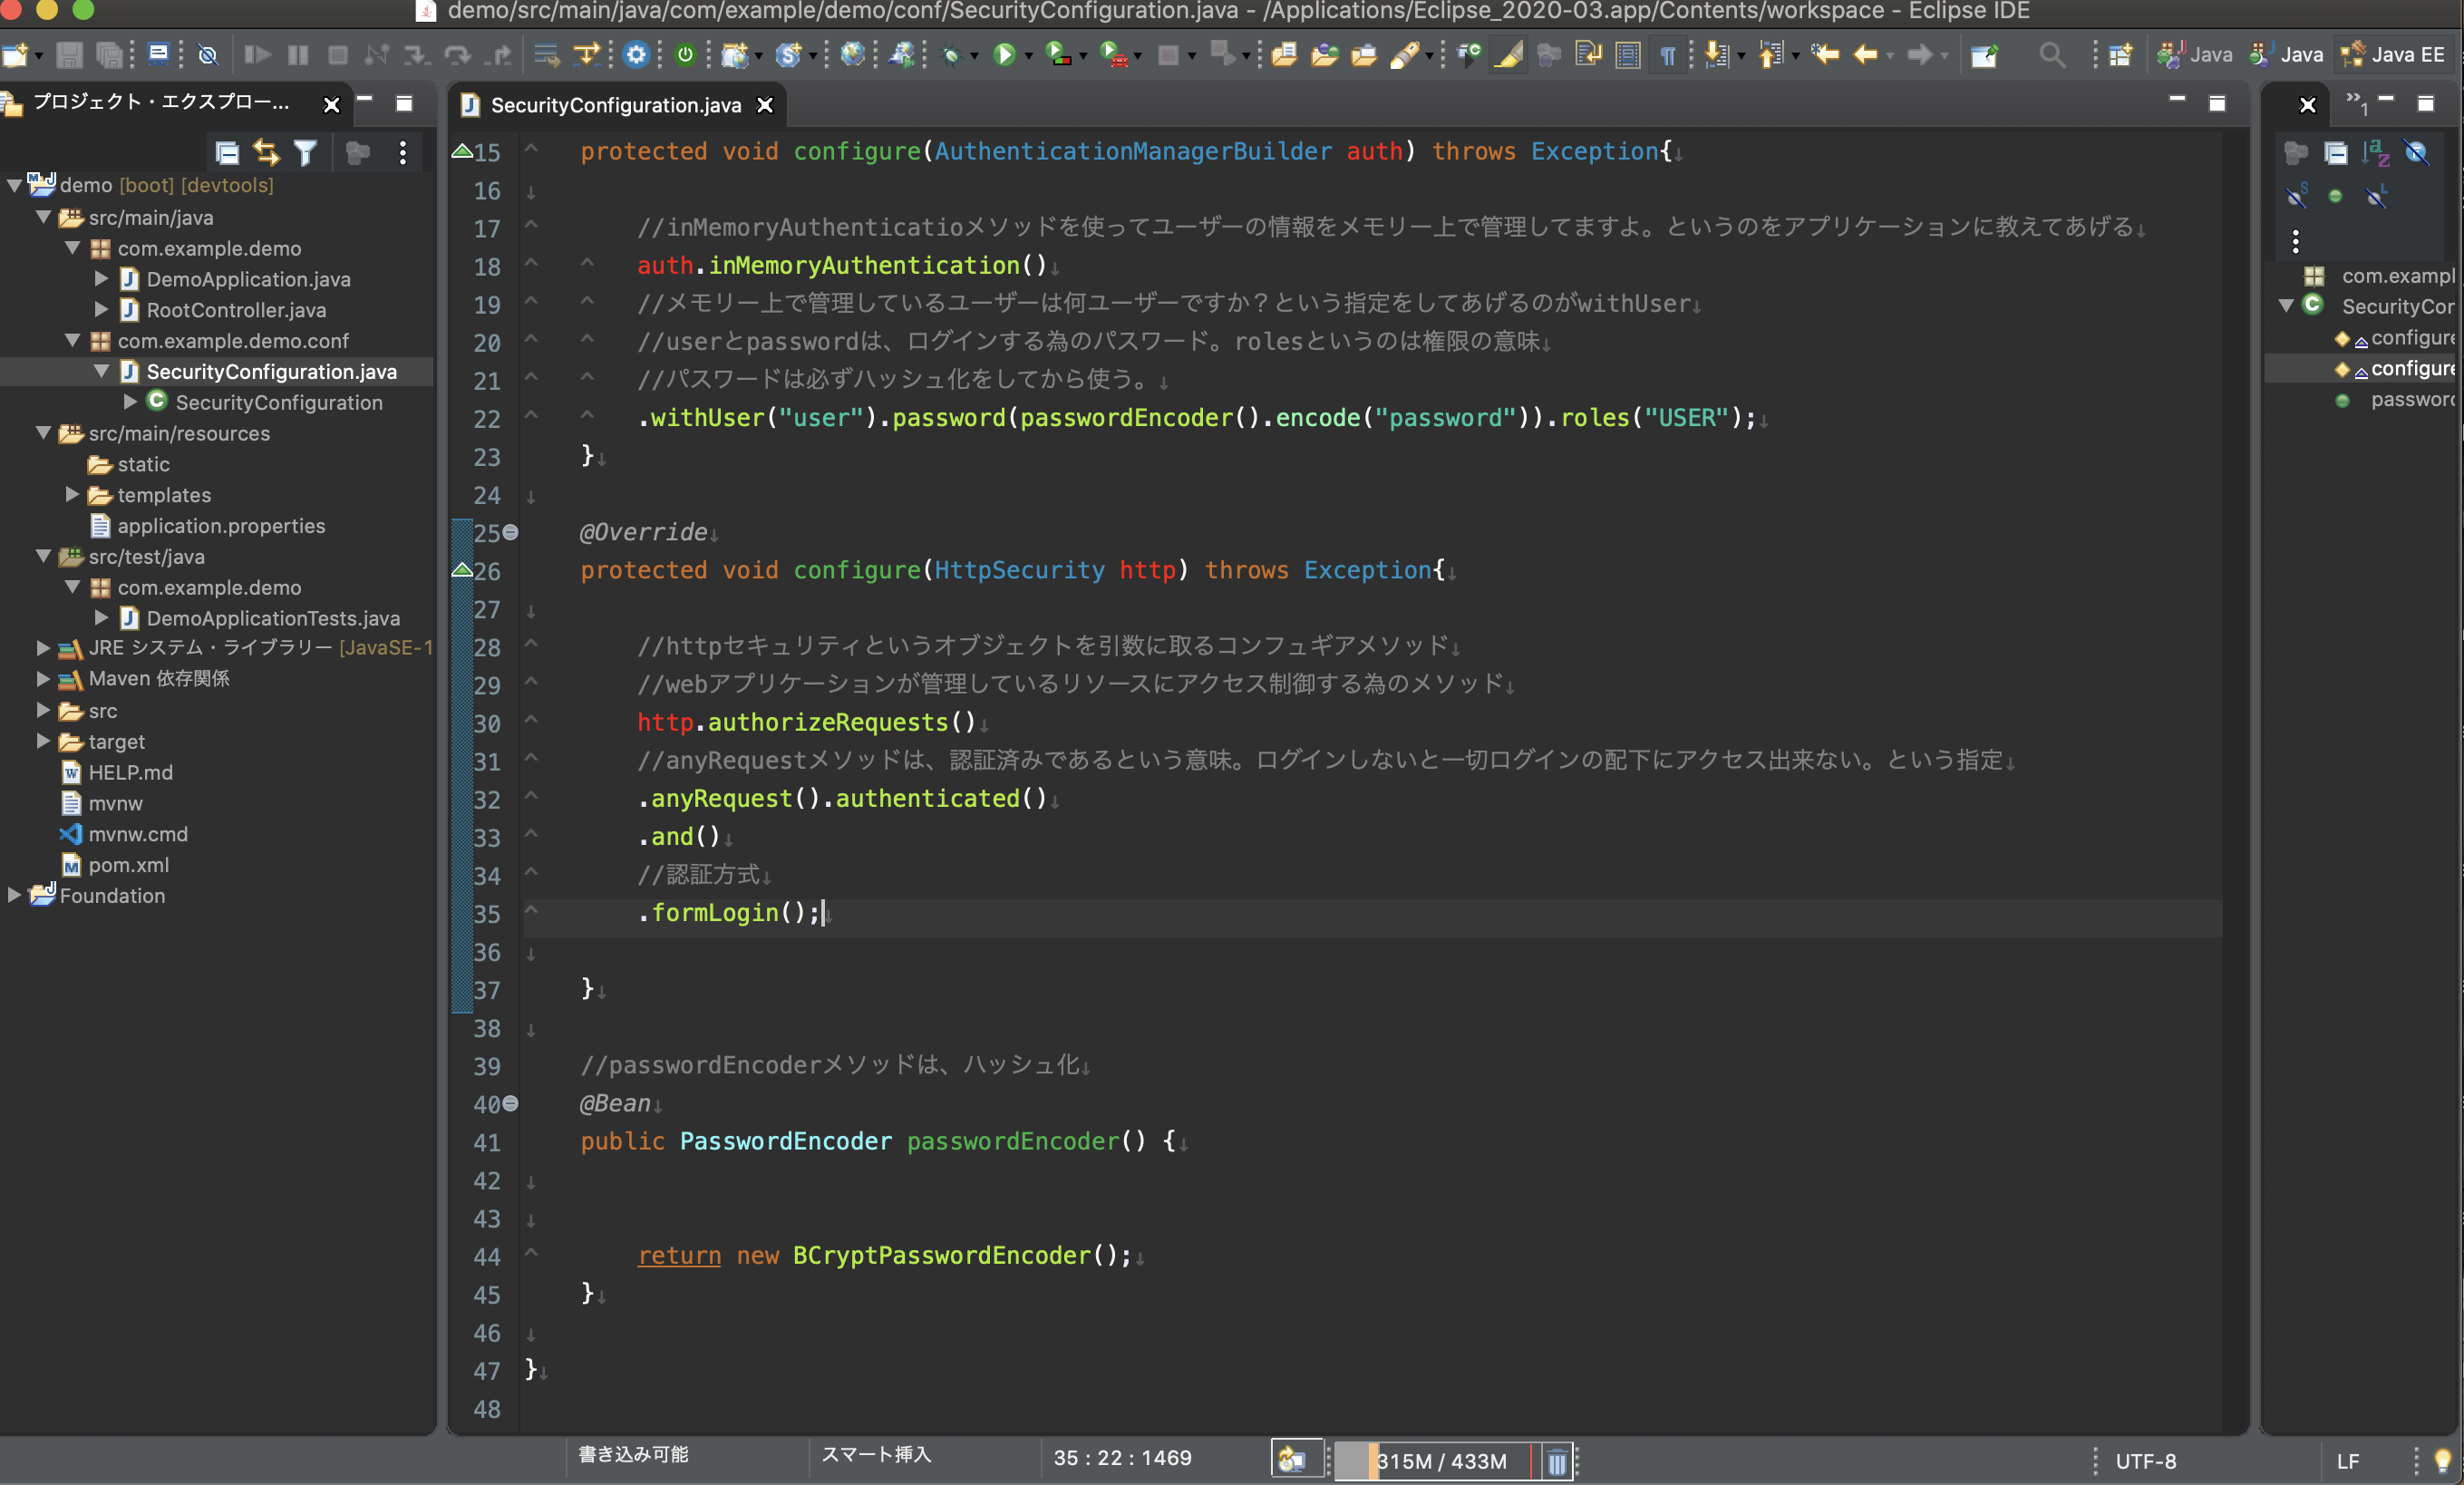
コードに関しては、『こうだ!』という具体的な説明が難しい為に、書きながら覚えて頂く方が良い。
![スクリーンショット 2020-05-25 5.15.02.png](https://qiita-user-contents.imgix.net/https%3A%2F%2Fqiita-image-store.s3.ap-northeast-1.amazonaws.com%2F0%2F451004%2Fb748e15e-a9ab-e770-ed83-fe84a87f5604.png?ixlib=rb-4.0.0&auto=format&gif-q=60&q=75&s=d717185b009d383c3799eed841685007)
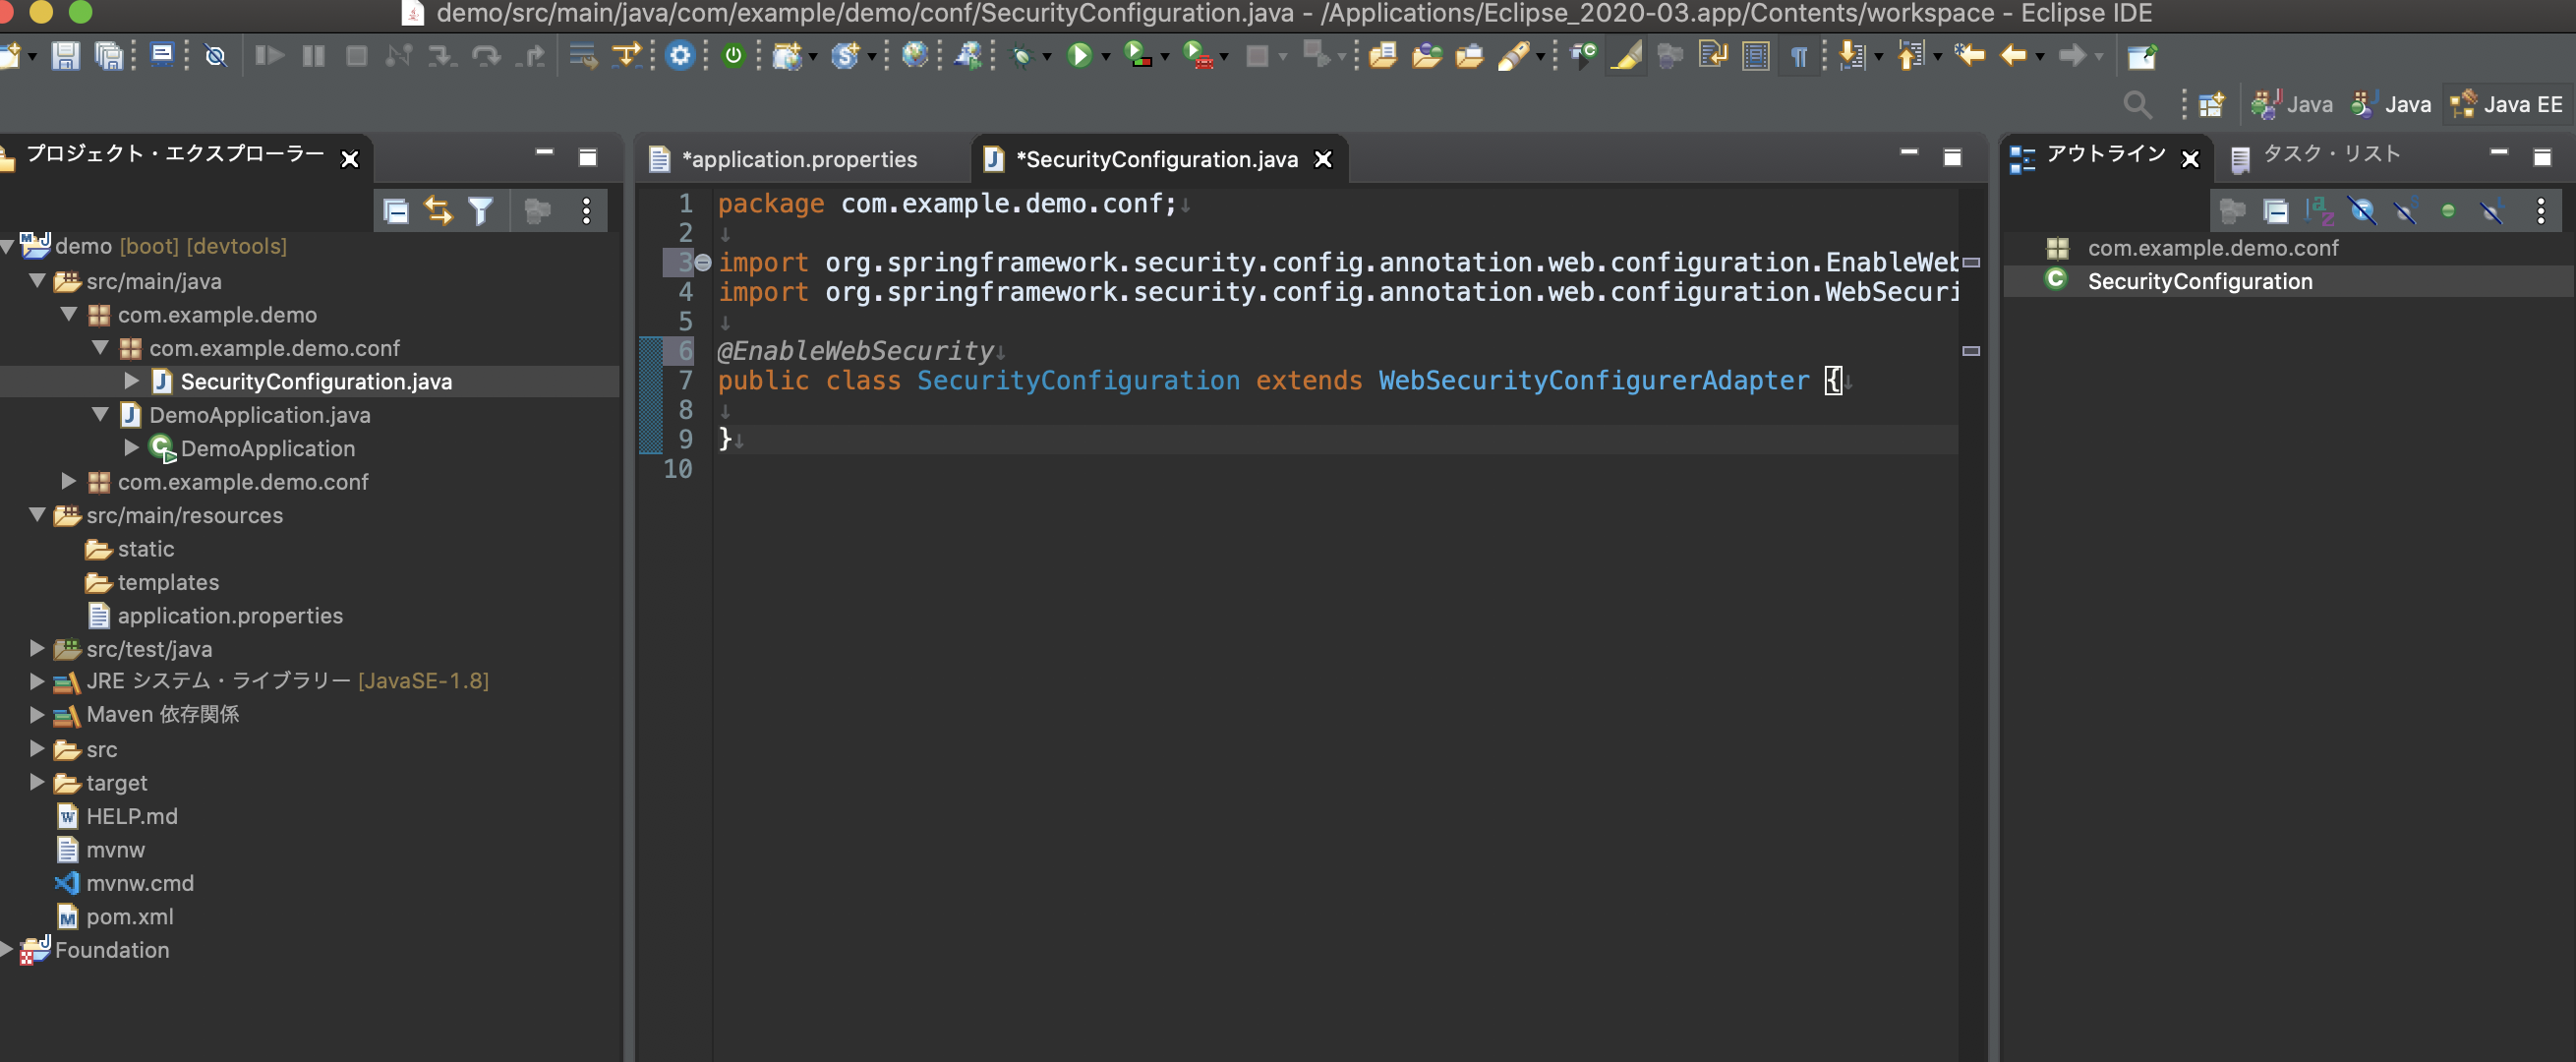
まずは、コンフィギレーションを行うクラスは、イネーブルウェブセキュリティというテーションを付けます。
![スクリーンショット 2020-05-25 5.18.11.png](https://qiita-user-contents.imgix.net/https%3A%2F%2Fqiita-image-store.s3.ap-northeast-1.amazonaws.com%2F0%2F451004%2F56eea8dc-dc10-e6db-17a4-cb7bc8abc471.png?ixlib=rb-4.0.0&auto=format&gif-q=60&q=75&s=64272829616ee1b13fd1541661981b78)
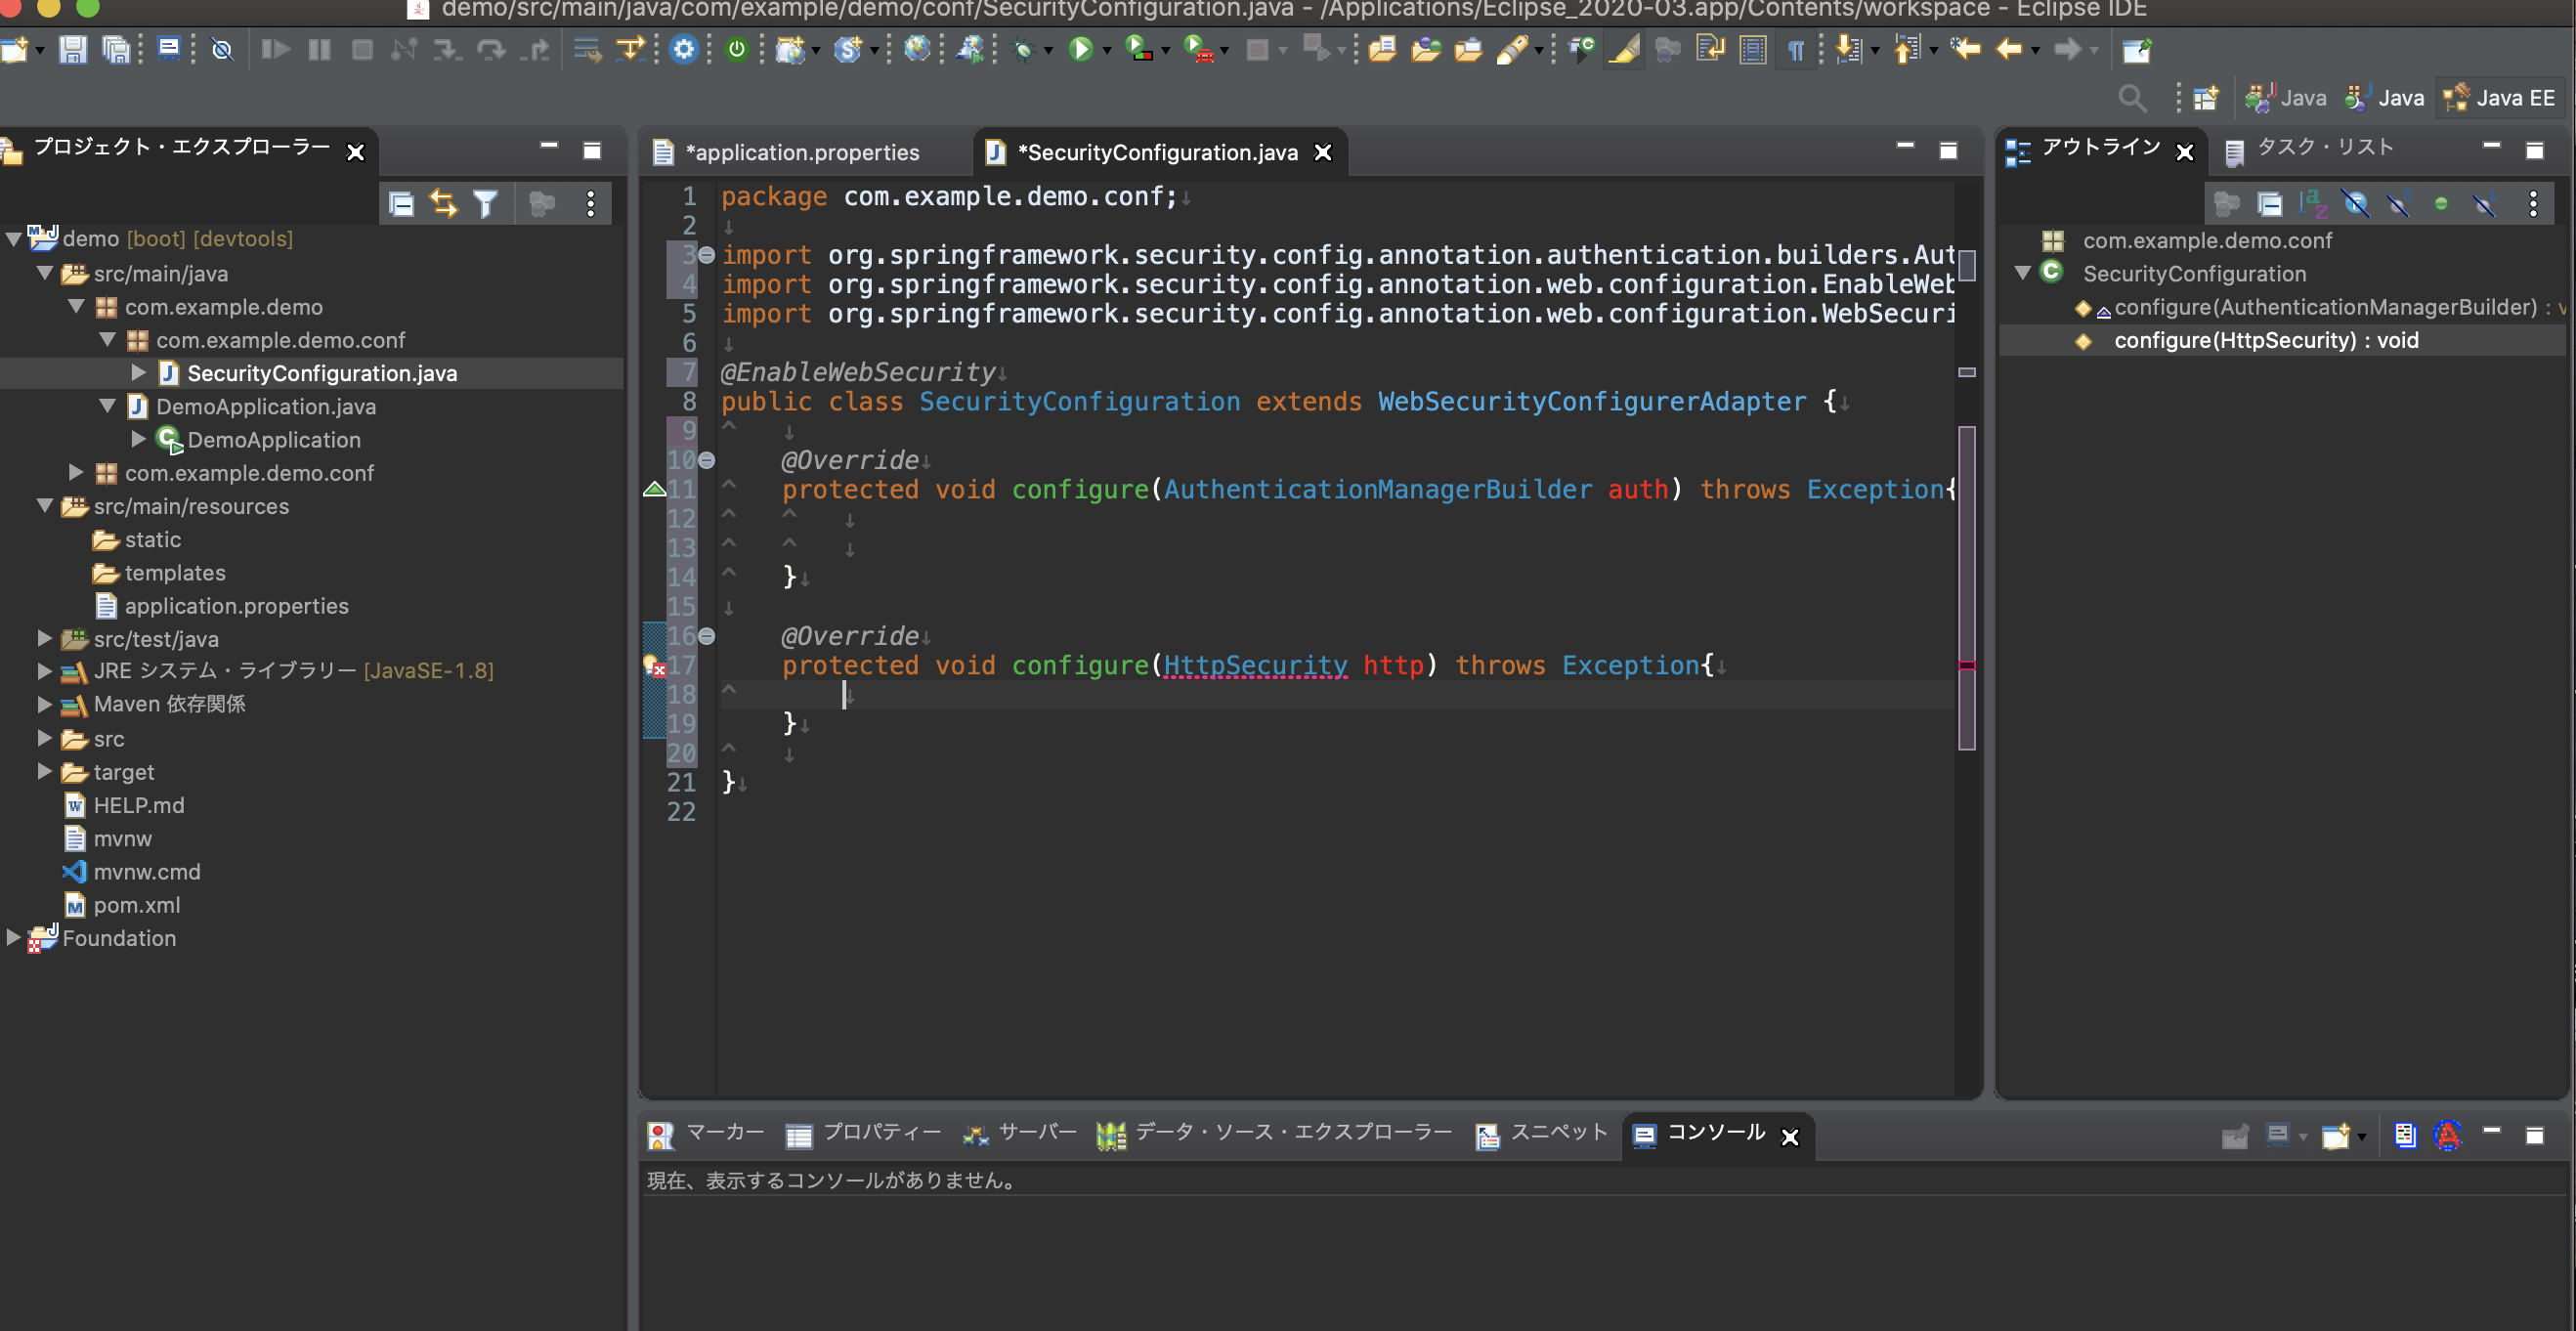
スーパークラスのウェブセキュリティコンフィギアアダプタから、コンフィギアメソッドをオーバーロードをするんですけど、コンフィギアメソッドは、何個かあり用途があるのですが、今回は起動させたいだけなので、オーセンテケーションマネージャービルダーという引数を取る、コンフィギアメソッドとHTTPセキュリティというオブジェクトを引数に取るコンフュギアメソッドの2つをオーバーライドします。
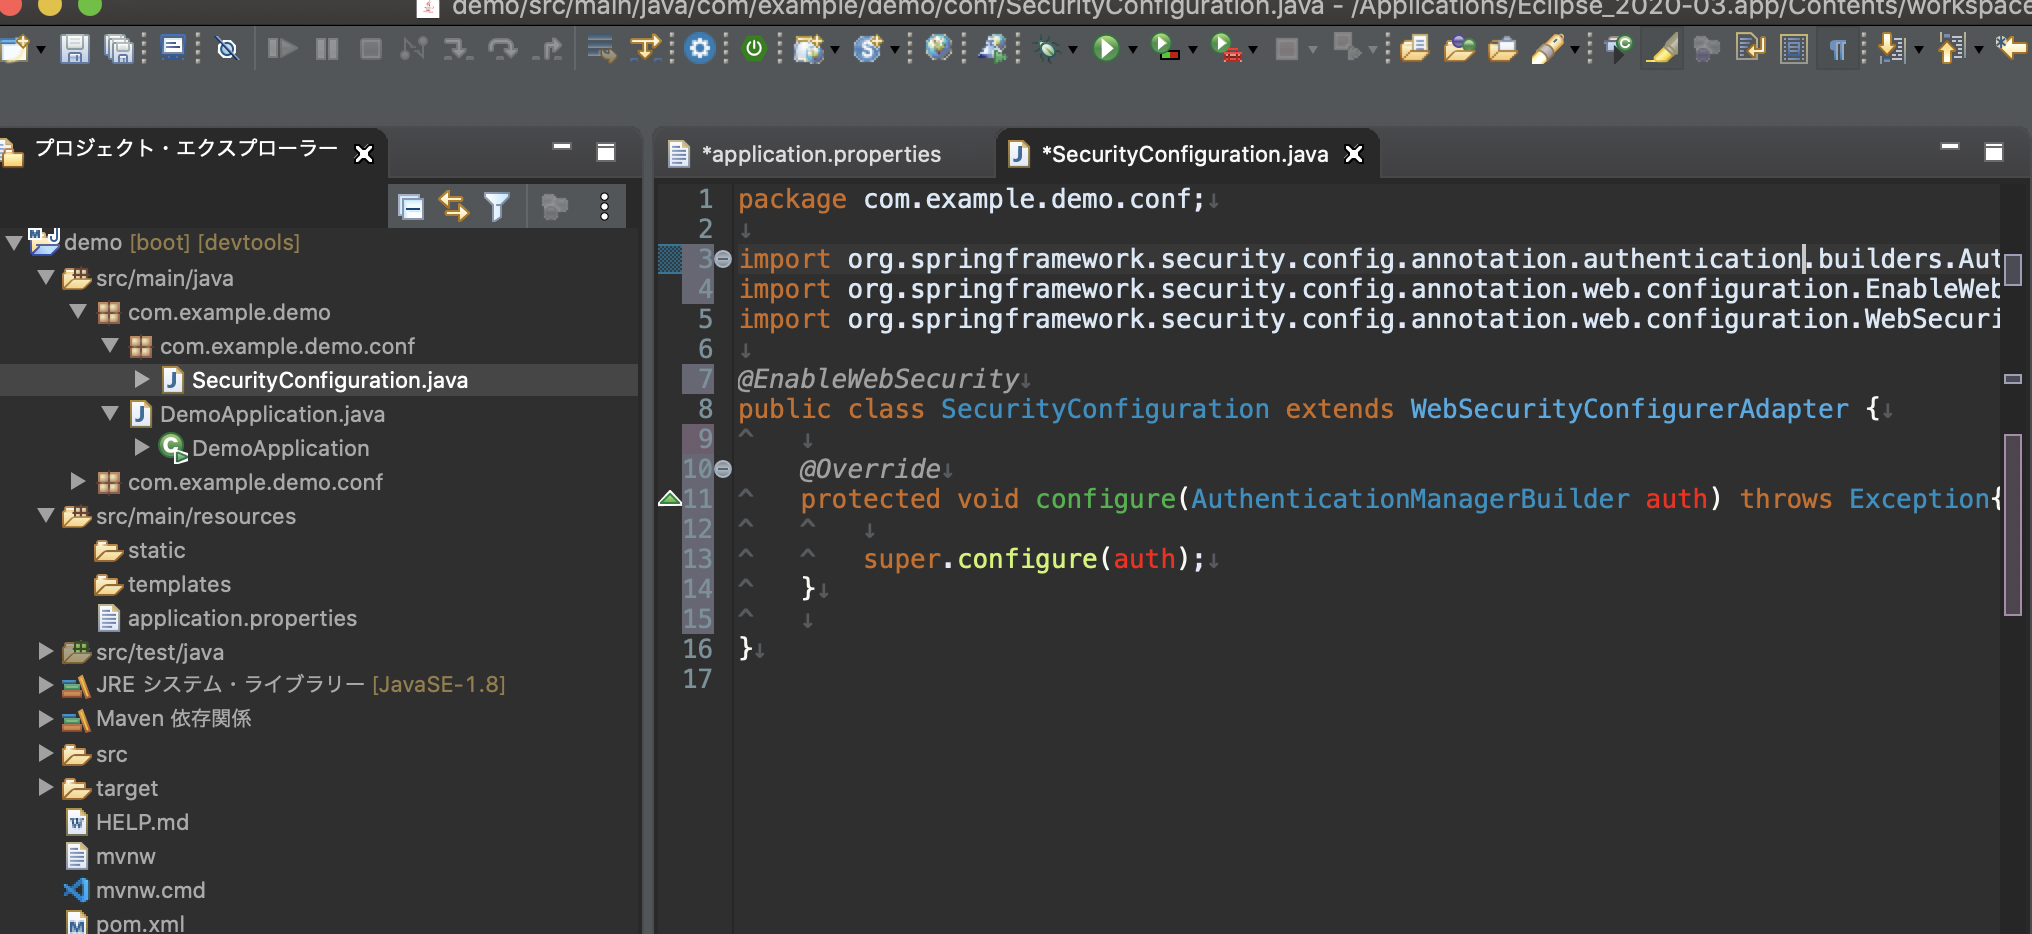
![スクリーンショット 2020-05-25 5.18.11.png](https://qiita-user-contents.imgix.net/https%3A%2F%2Fqiita-image-store.s3.ap-northeast-1.amazonaws.com%2F0%2F451004%2F320c6dc6-7609-79da-7420-43ef9c460be3.png?ixlib=rb-4.0.0&auto=format&gif-q=60&q=75&s=cb9a68d7c30717cfdbeeaf3c483be51d)
![スクリーンショット 2020-05-25 5.35.50.png](https://qiita-user-contents.imgix.net/https%3A%2F%2Fqiita-image-store.s3.ap-northeast-1.amazonaws.com%2F0%2F451004%2Fd38f7715-ed40-77b0-e8d4-82aca290ed8b.png?ixlib=rb-4.0.0&auto=format&gif-q=60&q=75&s=269e0ad771491099a0bd3a38a5a2592f)
これで出来ました。
![スクリーンショット 2020-05-25 5.39.14.png](https://qiita-user-contents.imgix.net/https%3A%2F%2Fqiita-image-store.s3.ap-northeast-1.amazonaws.com%2F0%2F451004%2Fe8ed4558-d2fb-db13-70d5-6acc46e3ab3c.png?ixlib=rb-4.0.0&auto=format&gif-q=60&q=75&s=fdf8915284e87f119e91c5fb63d4ac74)
オーセンテケーションマネージャビルダーというオブジェクトを引数に取る、コンフュギアメソッドはユーザーの認識方式を決定する為のメソッドと考えて頂いたら、問題無いです。
DB(データーベース)を使ったユーザー情報を管理とLDAP(Lightweight Directory Access Protocol)を使った認証方式があるのですが、今回はデータベースの方を使います。
簡単に動作させたいだけなので、インメモリーの方で設定していきます。
![スクリーンショット 2020-07-20 8.25.18.png](https://qiita-user-contents.imgix.net/https%3A%2F%2Fqiita-image-store.s3.ap-northeast-1.amazonaws.com%2F0%2F451004%2F25199a0e-cedc-8cc9-b469-34094c0d5821.png?ixlib=rb-4.0.0&auto=format&gif-q=60&q=75&s=8e5d1085dc5d382143d6fce35d1925d9)
![スクリーンショット 2020-07-20 8.25.29.png](https://qiita-user-contents.imgix.net/https%3A%2F%2Fqiita-image-store.s3.ap-northeast-1.amazonaws.com%2F0%2F451004%2F3ce07f46-49c0-701c-b0f3-5d7b0c43a904.png?ixlib=rb-4.0.0&auto=format&gif-q=60&q=75&s=602af800363ff59c06b0ec054447dd89)
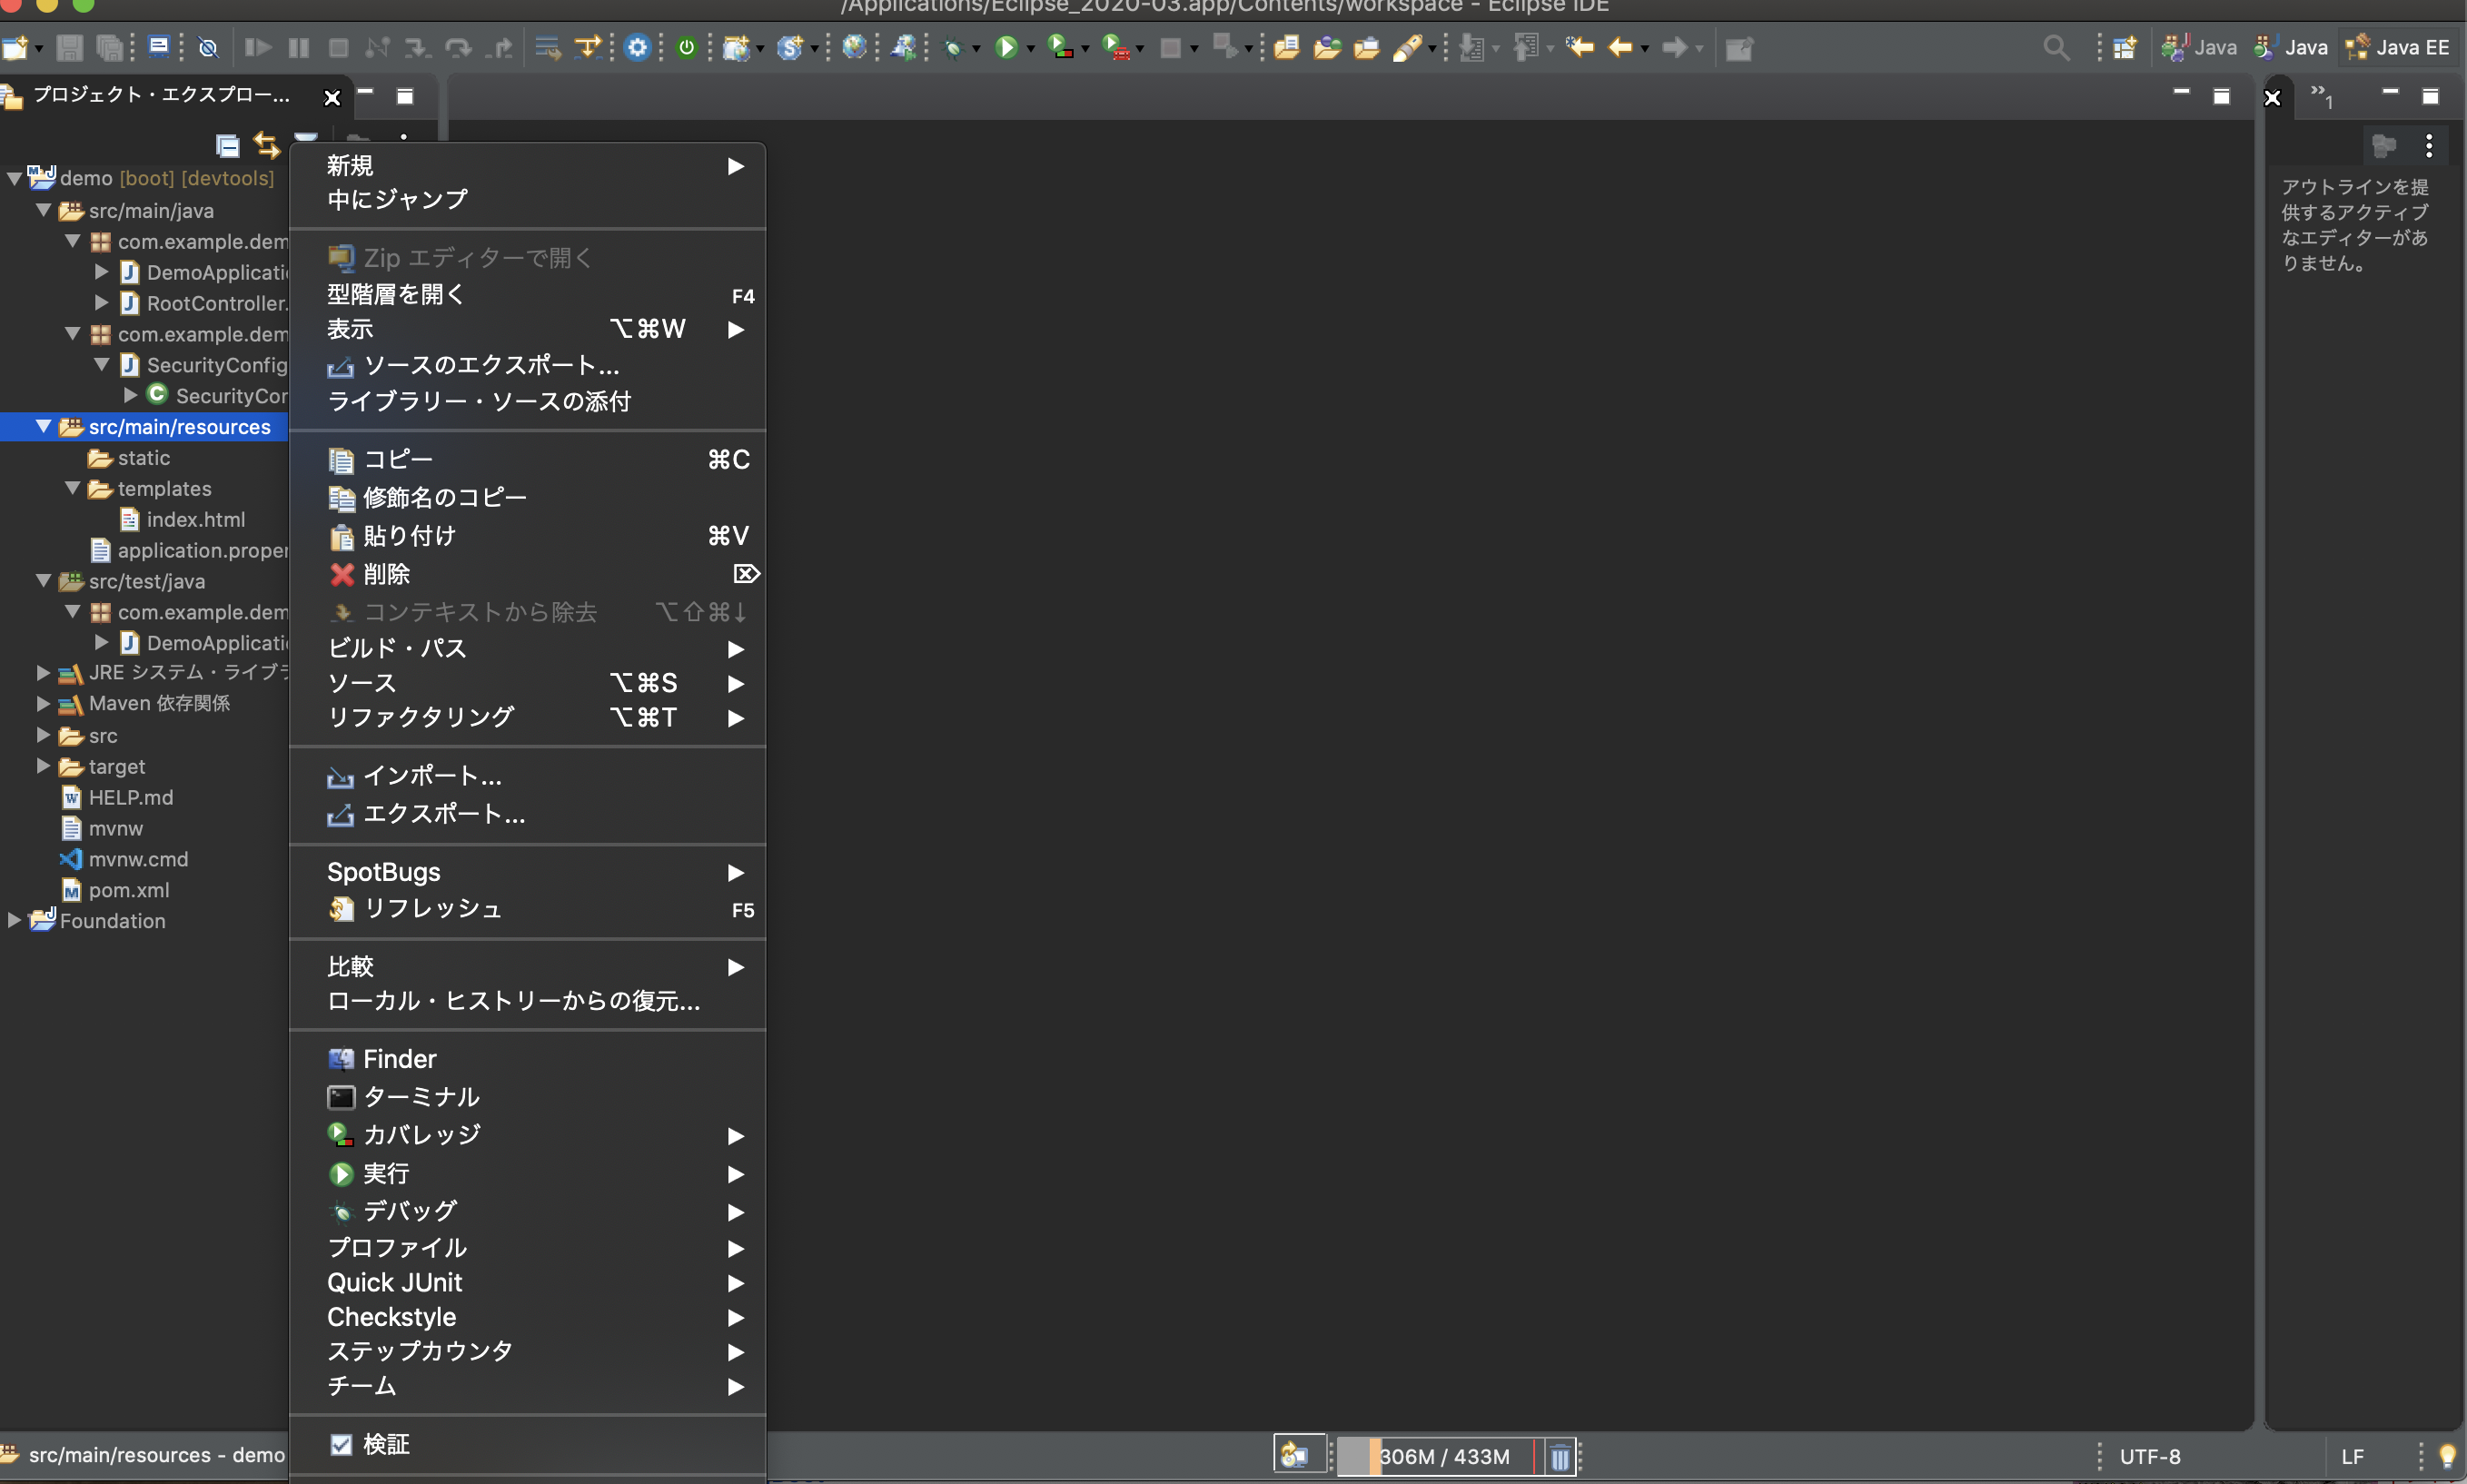
これが出来たら、次にここから新規で、その他でHTMLファイルを作ってください。
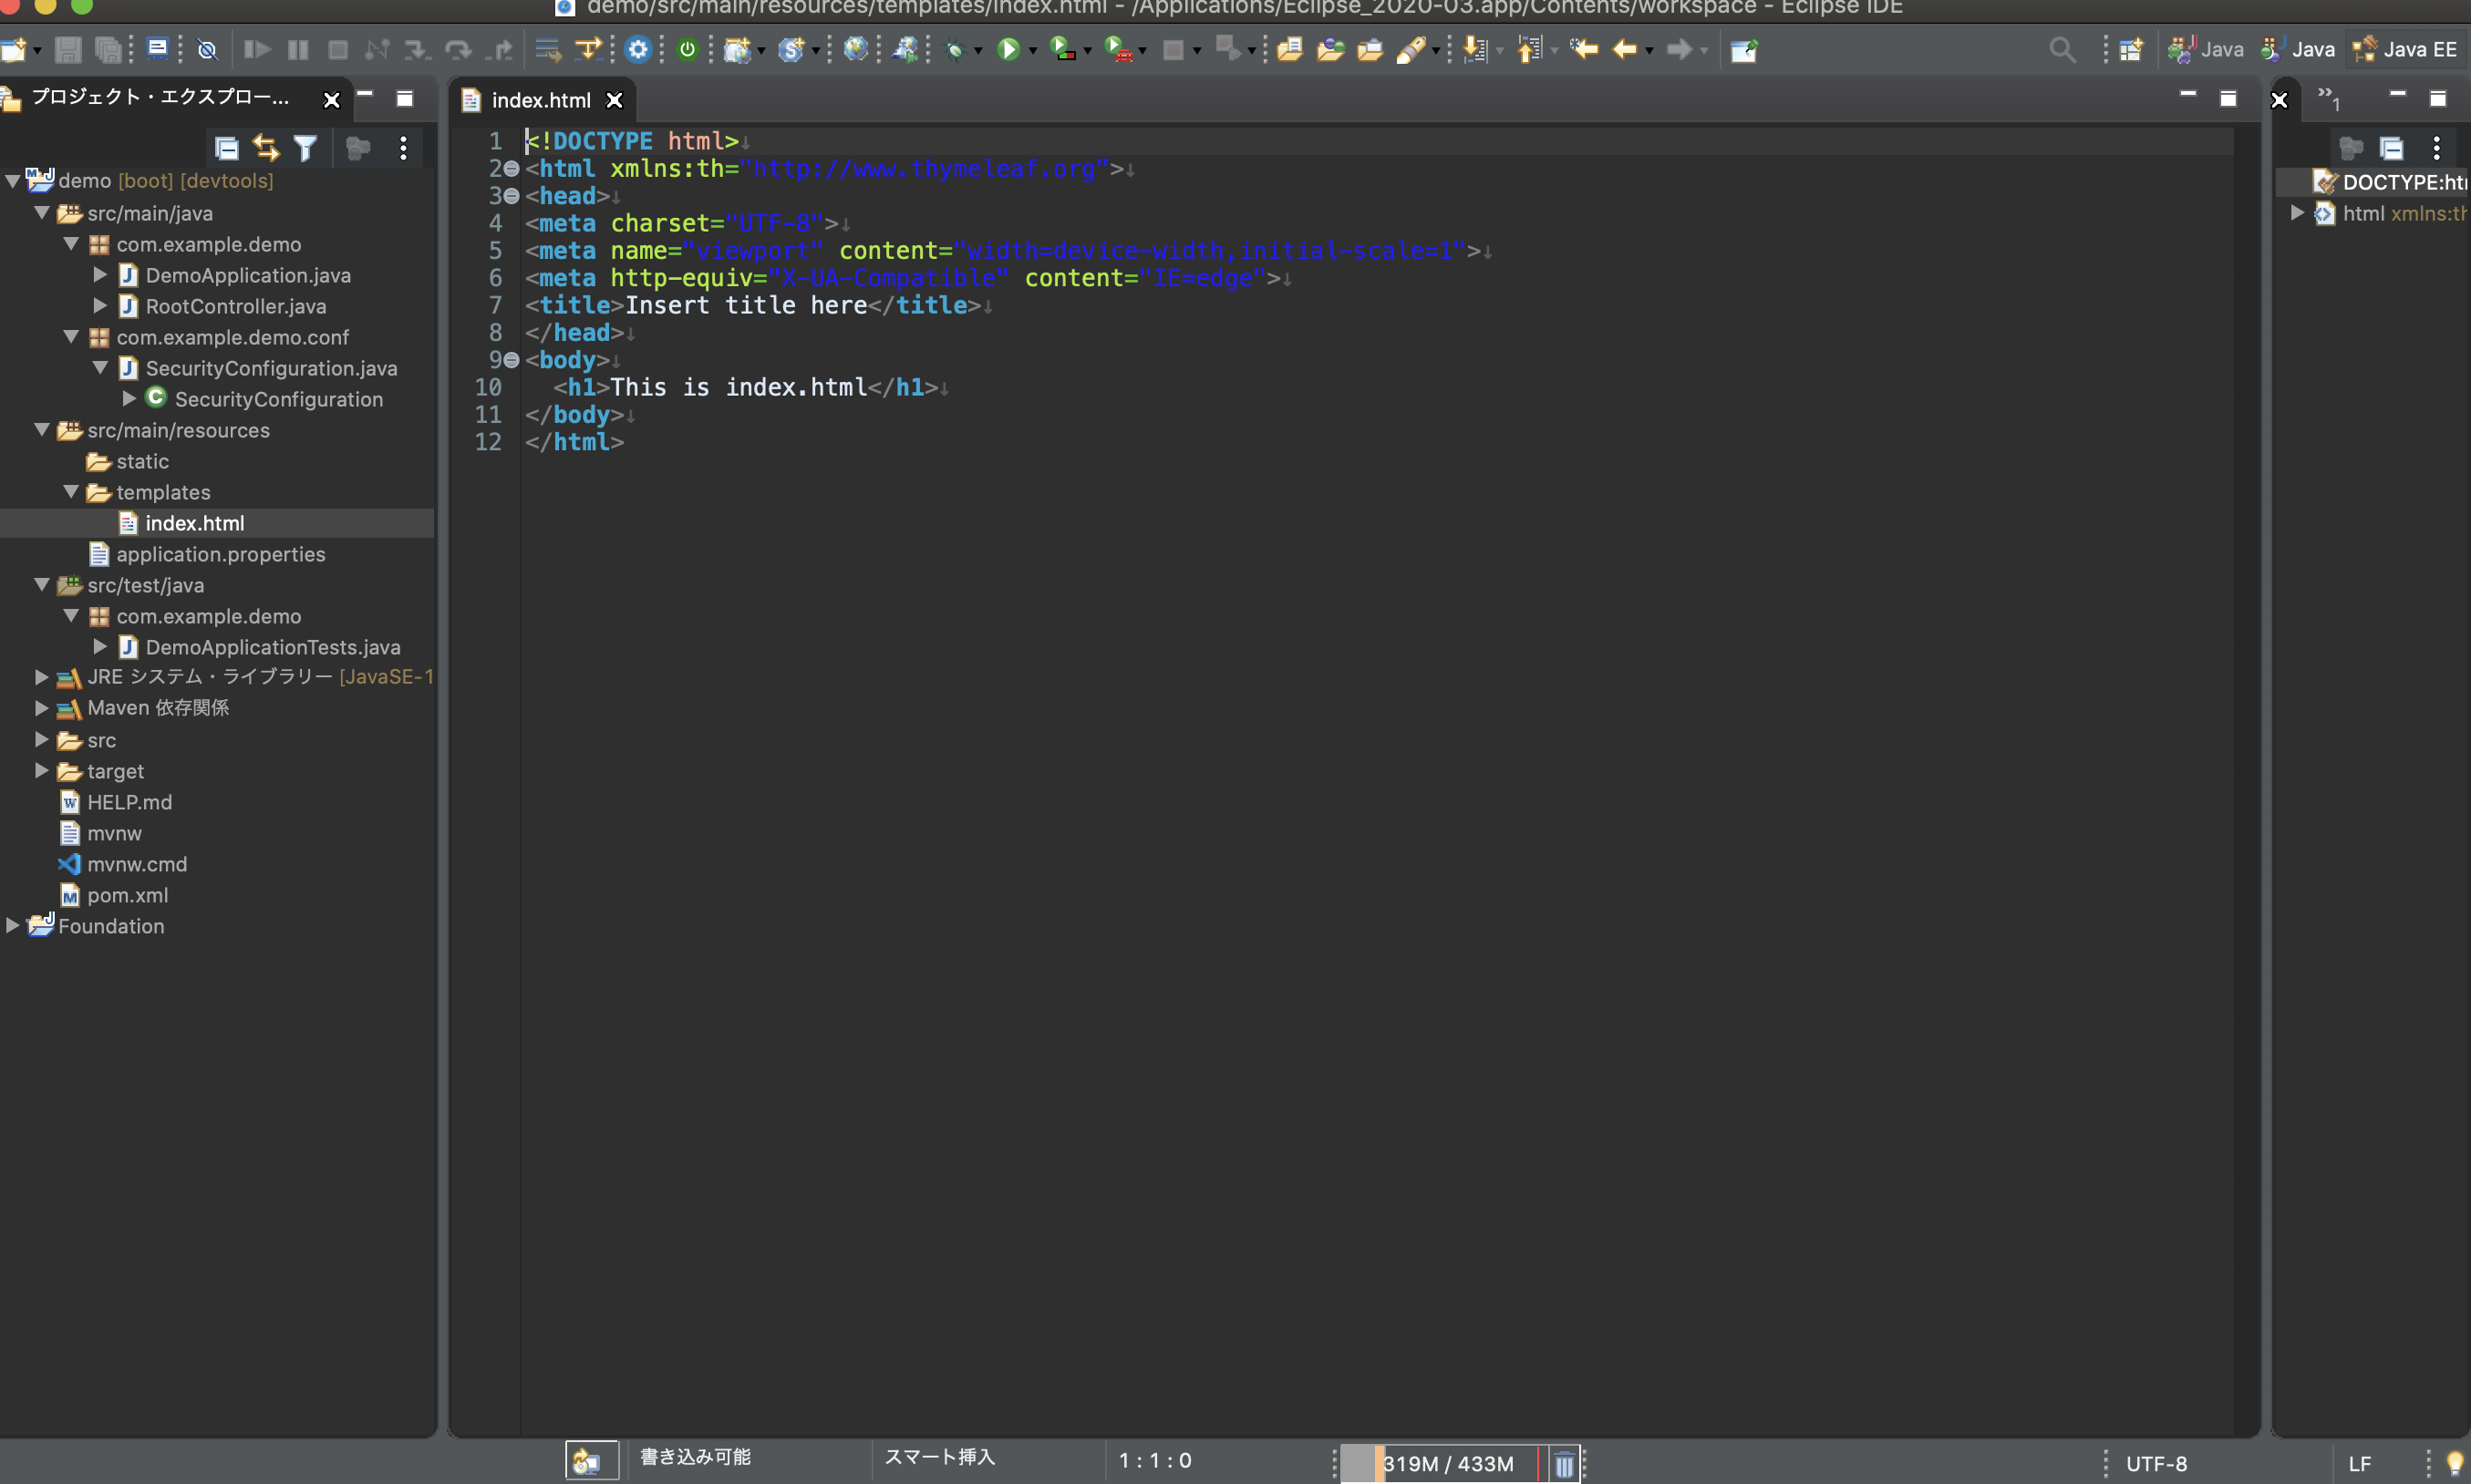
(上手く載せる事が出来なかったので、省略して載せますHTMLファイル名はindex.htmlと付けてください。)
![スクリーンショット 2020-07-20 8.38.53.png](https://qiita-user-contents.imgix.net/https%3A%2F%2Fqiita-image-store.s3.ap-northeast-1.amazonaws.com%2F0%2F451004%2Ffaeae89e-15ae-ff1d-6962-638fc2842951.png?ixlib=rb-4.0.0&auto=format&gif-q=60&q=75&s=2b7e837d10935a41f6488515085d9379)
このように出来ていたらOK
![スクリーンショット 2020-07-20 8.41.30.png](https://qiita-user-contents.imgix.net/https%3A%2F%2Fqiita-image-store.s3.ap-northeast-1.amazonaws.com%2F0%2F451004%2Fa6aaff72-44b2-008a-089f-a1948b2d2b36.png?ixlib=rb-4.0.0&auto=format&gif-q=60&q=75&s=4b809f339b626b406a4ca5c959cfb5b3)
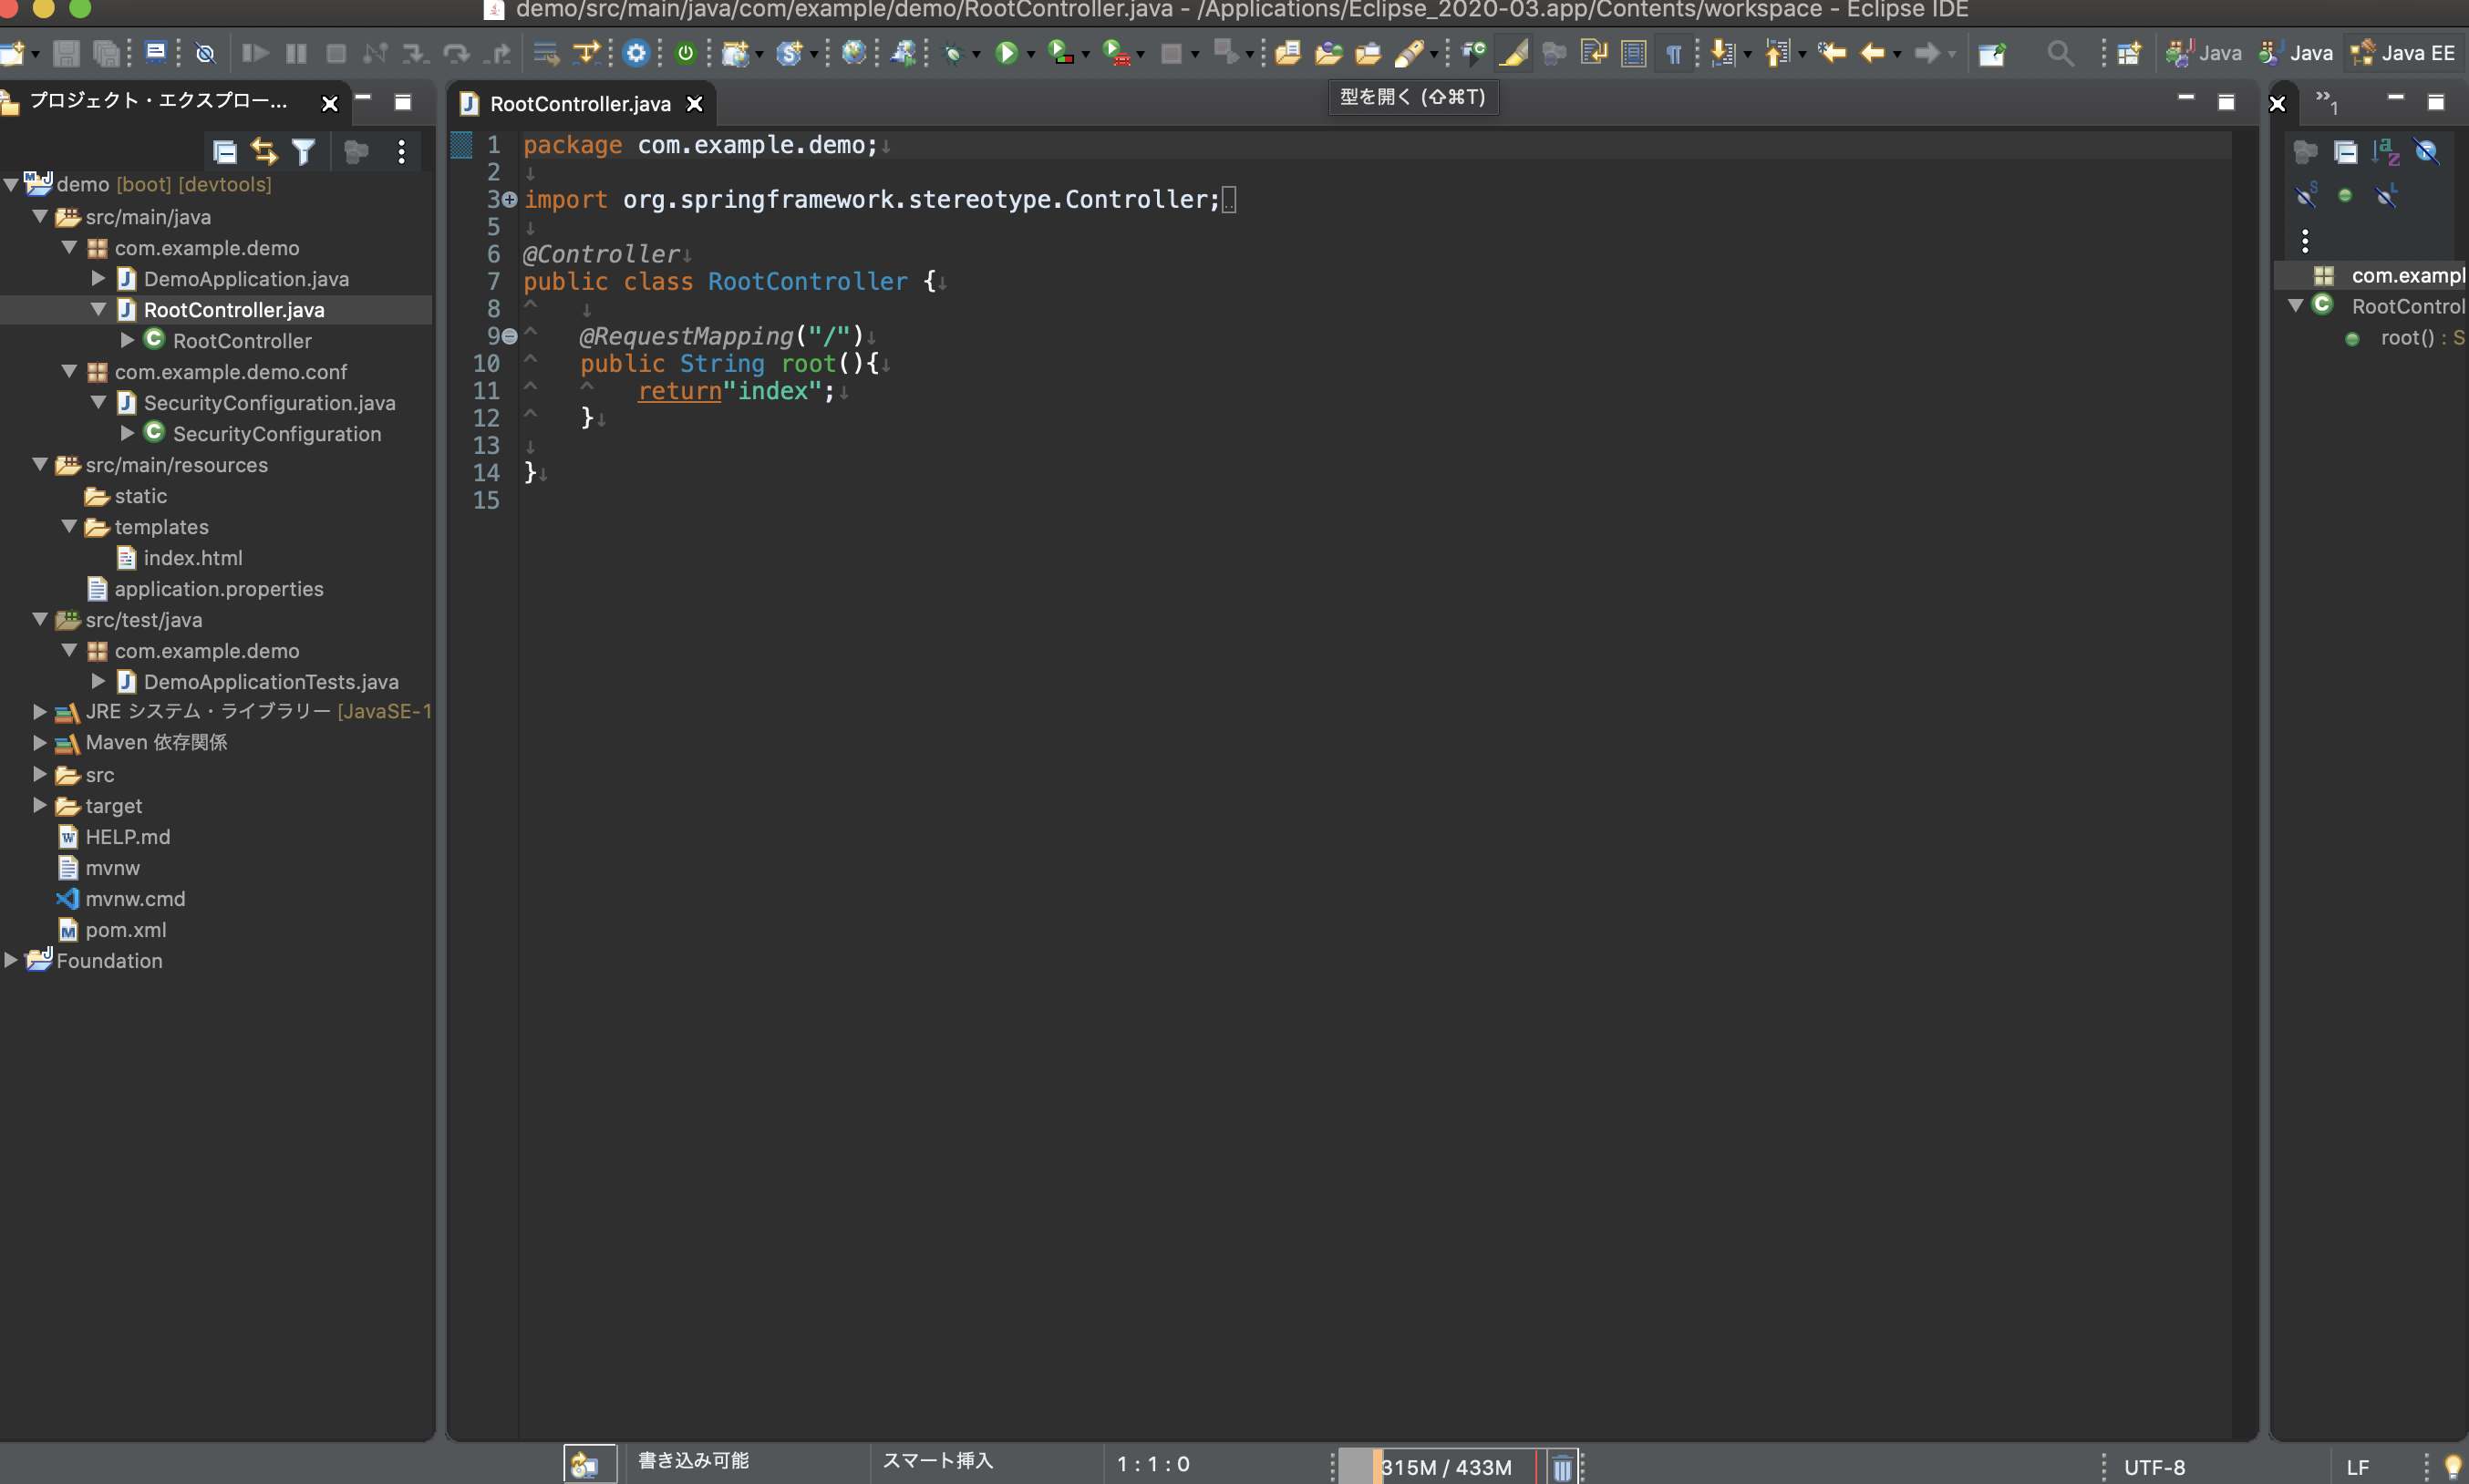
次にコントローラクラスを作ってください。
![スクリーンショット 2020-07-20 8.45.47.png](https://qiita-user-contents.imgix.net/https%3A%2F%2Fqiita-image-store.s3.ap-northeast-1.amazonaws.com%2F0%2F451004%2F756d0f57-2c97-4693-1d0b-00cc65966724.png?ixlib=rb-4.0.0&auto=format&gif-q=60&q=75&s=3036a5d678a2f71d37a2c8eb96d08f98)
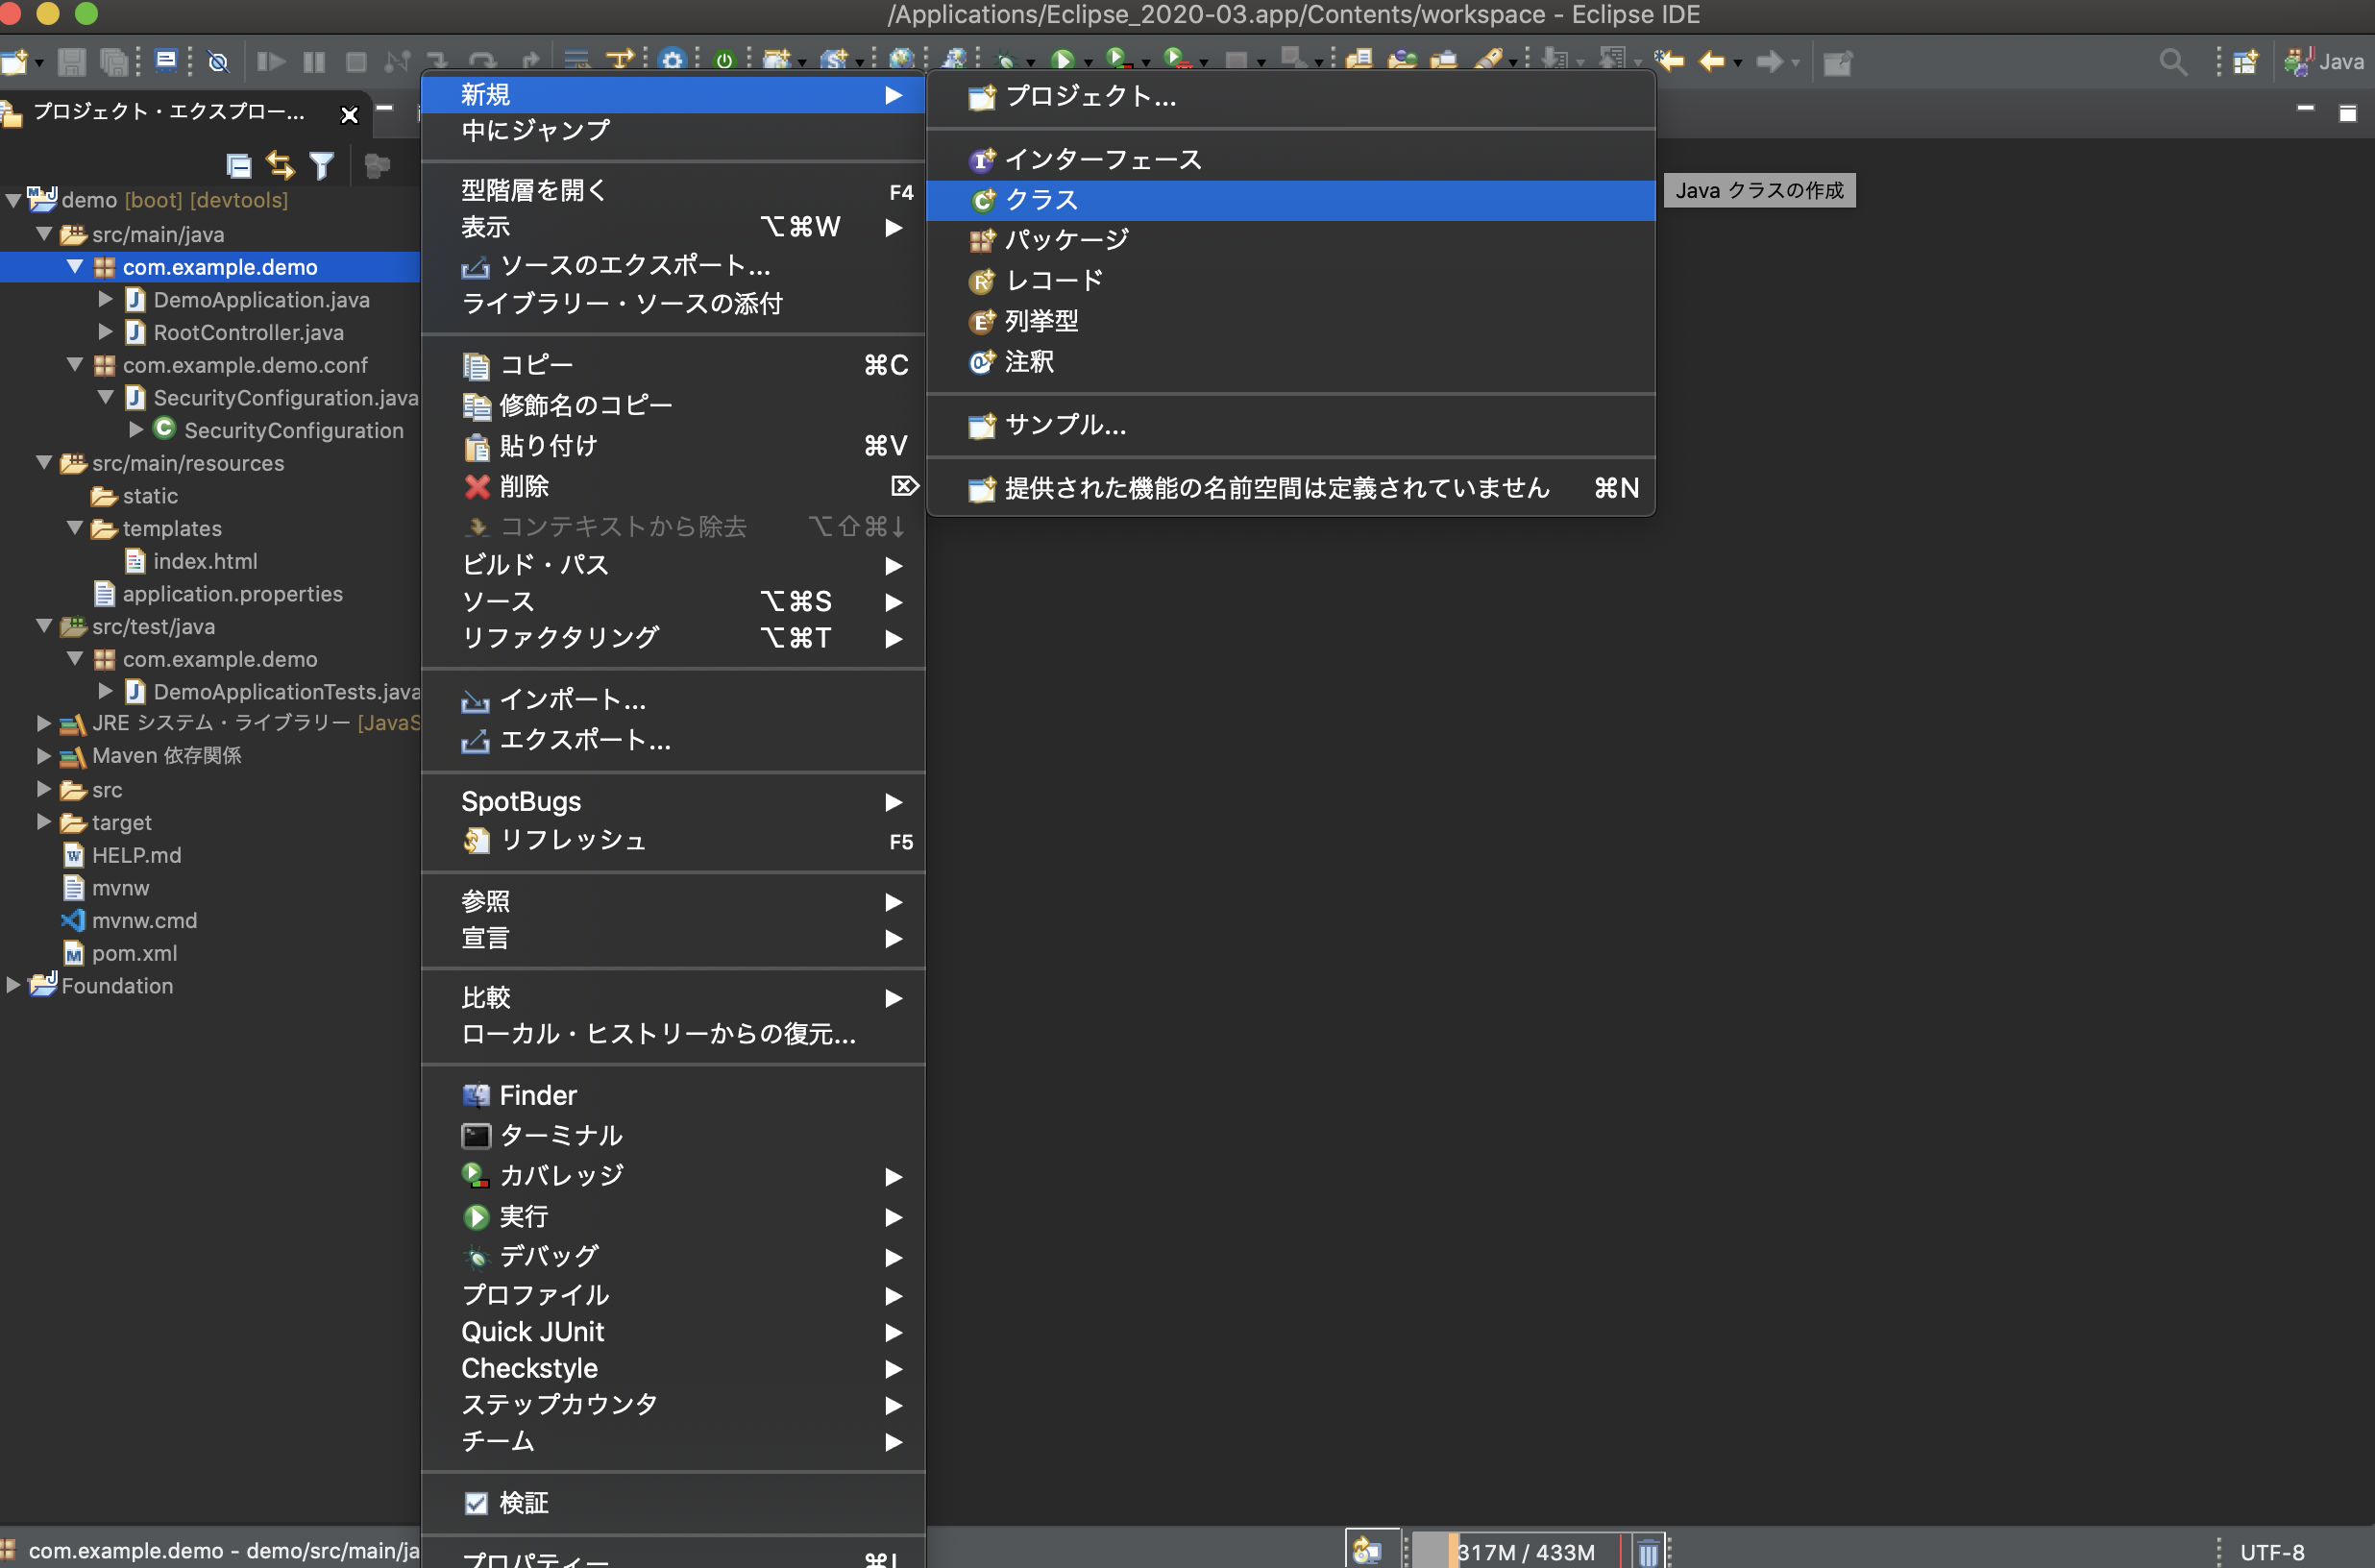
このようにクラス名を付けて作れていたらOk
(先に作っていたので、間違えないように)
![スクリーンショット 2020-07-20 8.46.35.png](https://qiita-user-contents.imgix.net/https%3A%2F%2Fqiita-image-store.s3.ap-northeast-1.amazonaws.com%2F0%2F451004%2F55bb8d74-e929-364a-b48b-d489ab667f43.png?ixlib=rb-4.0.0&auto=format&gif-q=60&q=75&s=9529e9c5ae19c8c08b660200c068111d)
コードもこのように書いたら、とりあえずはWebアプリケーションを起動する準備は整いました。
![スクリーンショット 2020-07-20 8.47.53.png](https://qiita-user-contents.imgix.net/https%3A%2F%2Fqiita-image-store.s3.ap-northeast-1.amazonaws.com%2F0%2F451004%2F77aa950c-16d3-3019-96fa-05f43ba9a597.png?ixlib=rb-4.0.0&auto=format&gif-q=60&q=75&s=23fe96a90ba285f51909edff6f53caee)
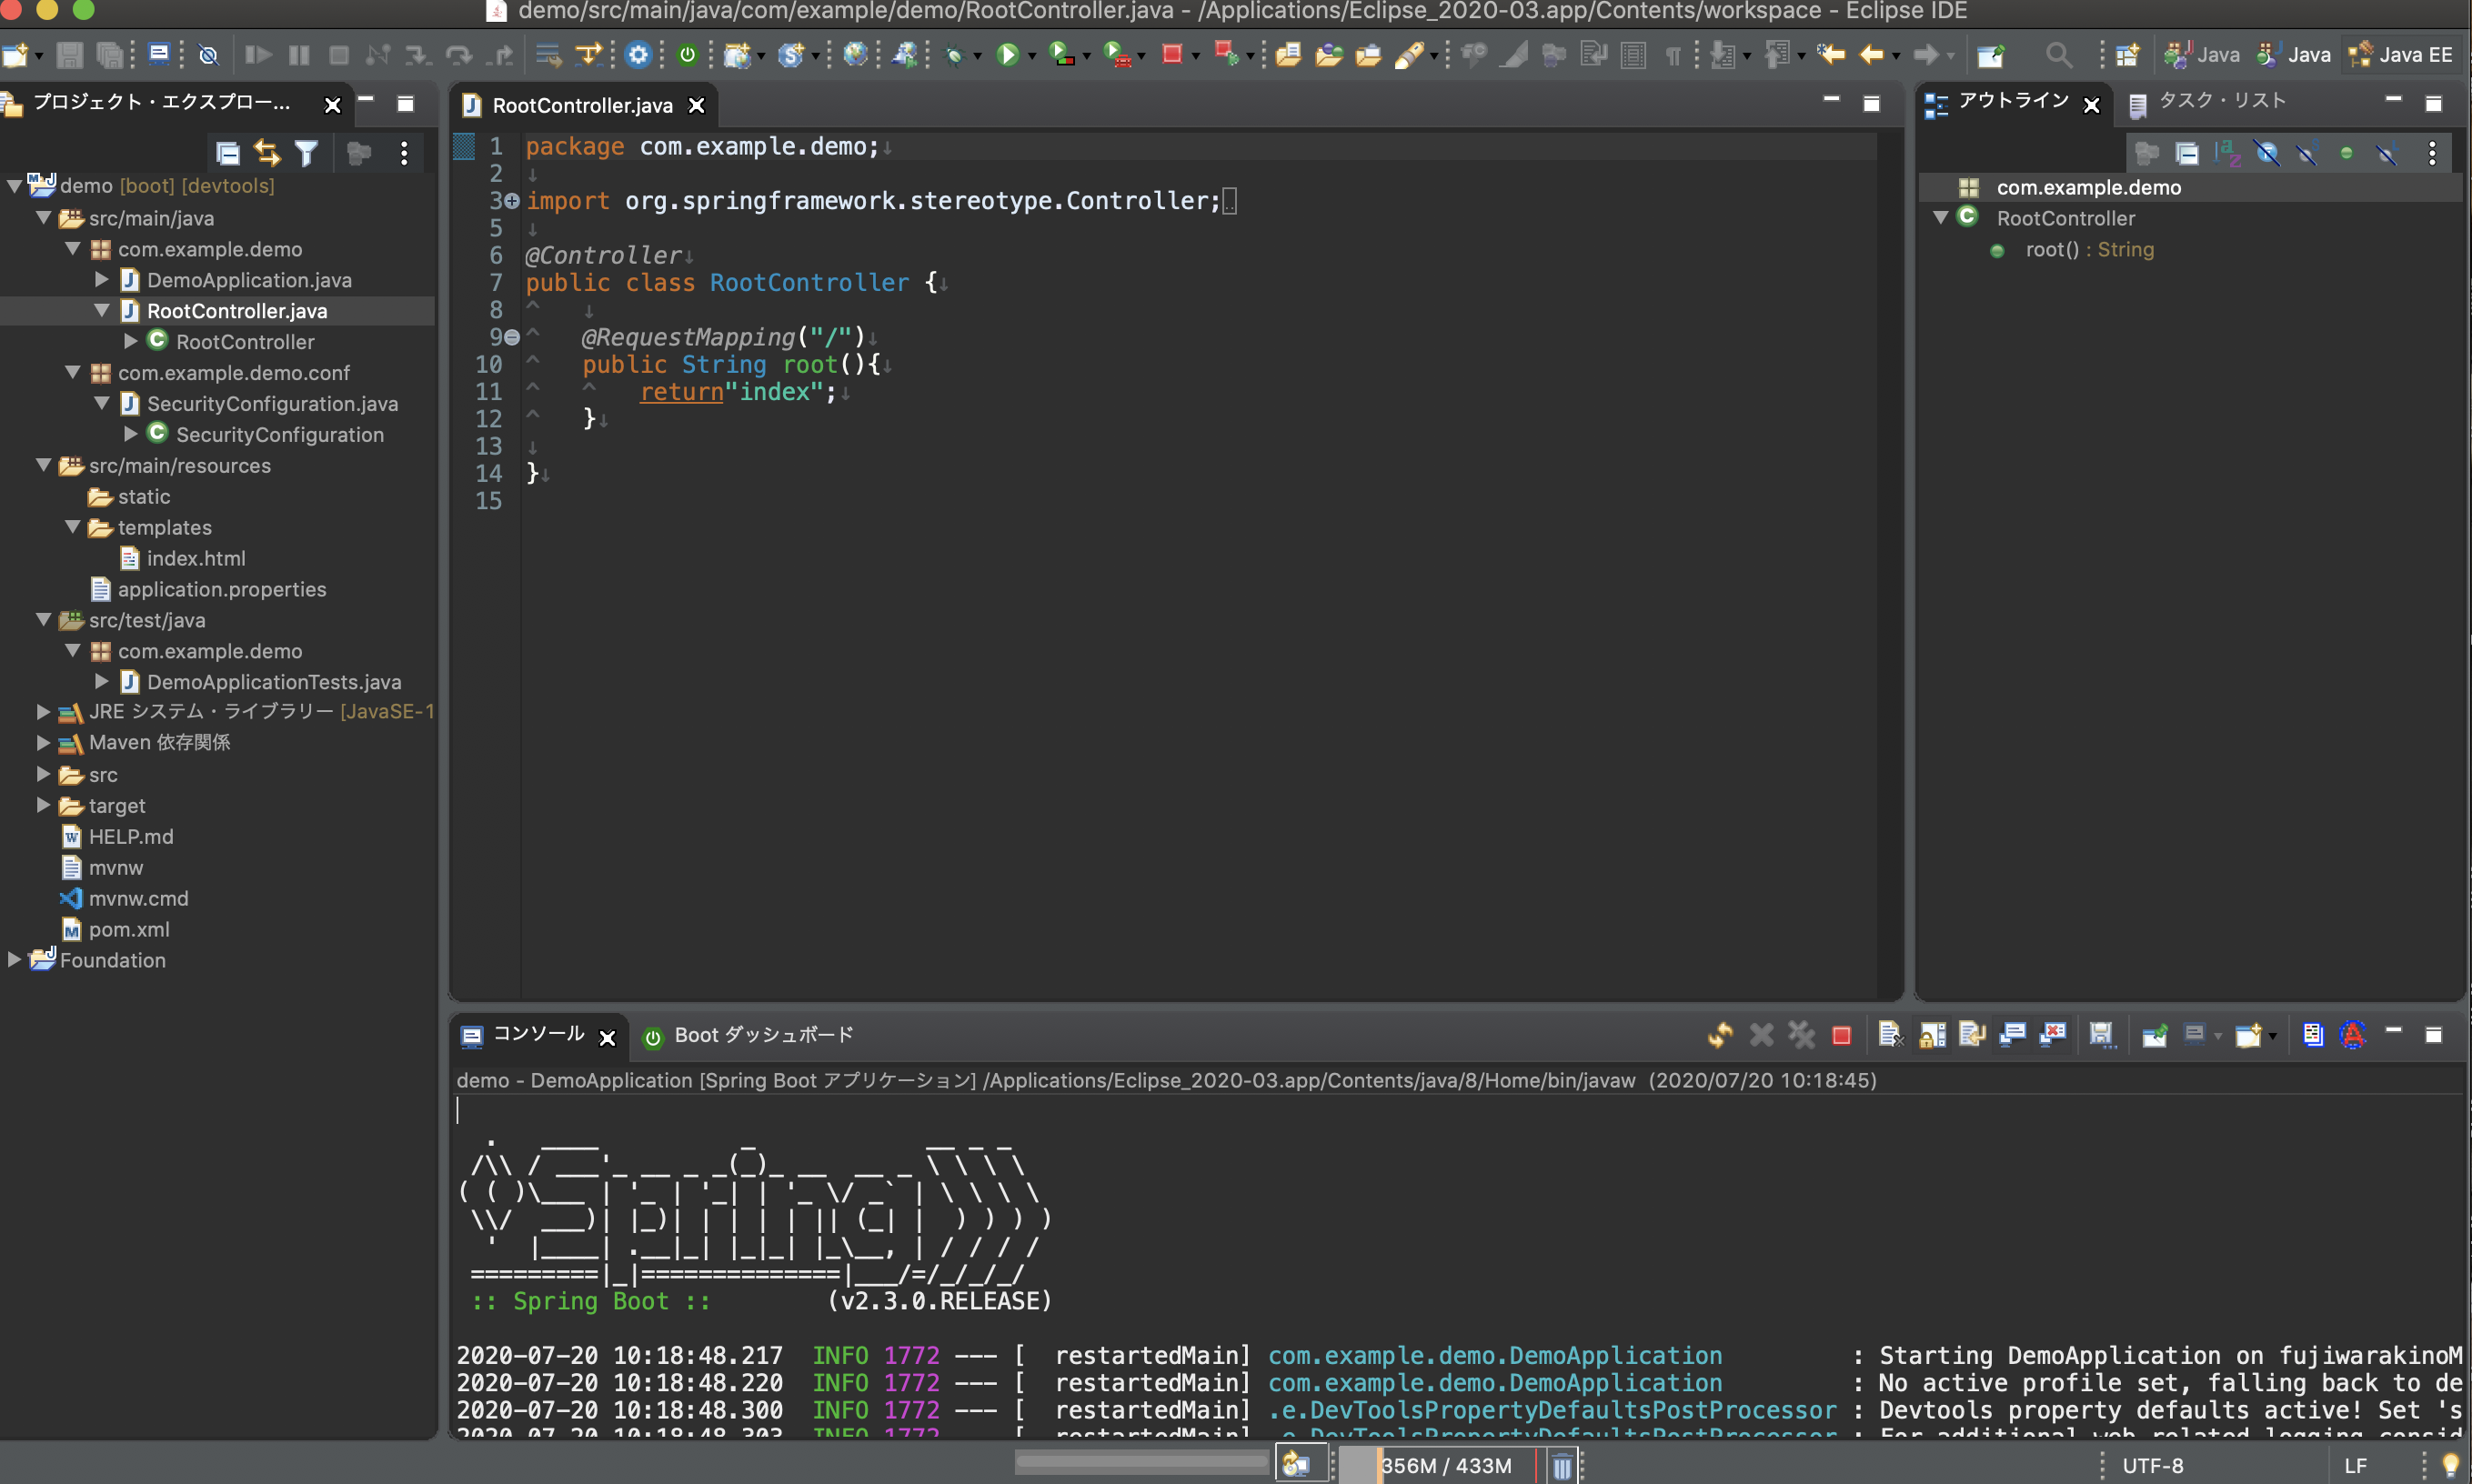
次にSpring bootを使ってアプリケーションを起動させます。
![スクリーンショット 2020-07-20 10.19.15.png](https://qiita-user-contents.imgix.net/https%3A%2F%2Fqiita-image-store.s3.ap-northeast-1.amazonaws.com%2F0%2F451004%2F6402983c-3a45-b8c5-16d0-d84444d45aa9.png?ixlib=rb-4.0.0&auto=format&gif-q=60&q=75&s=f33cbf02e0c612b3785f95f2054cbb9a)
Tomcatが起動しましたね
![スクリーンショット 2020-07-20 10.22.30.png](https://qiita-user-contents.imgix.net/https%3A%2F%2Fqiita-image-store.s3.ap-northeast-1.amazonaws.com%2F0%2F451004%2F88c89179-a1a9-b497-7061-4c45fcd559b4.png?ixlib=rb-4.0.0&auto=format&gif-q=60&q=75&s=f14a47f4c76898de1c52365288bdff4a)
次にブラウザ上で見てみます。
![スクリーンショット 2020-07-20 10.39.17.png](https://qiita-user-contents.imgix.net/https%3A%2F%2Fqiita-image-store.s3.ap-northeast-1.amazonaws.com%2F0%2F451004%2F5eb1f407-419c-3483-bec8-6482a267d32d.png?ixlib=rb-4.0.0&auto=format&gif-q=60&q=75&s=746443f22c062c0adb56355e191b71c7)
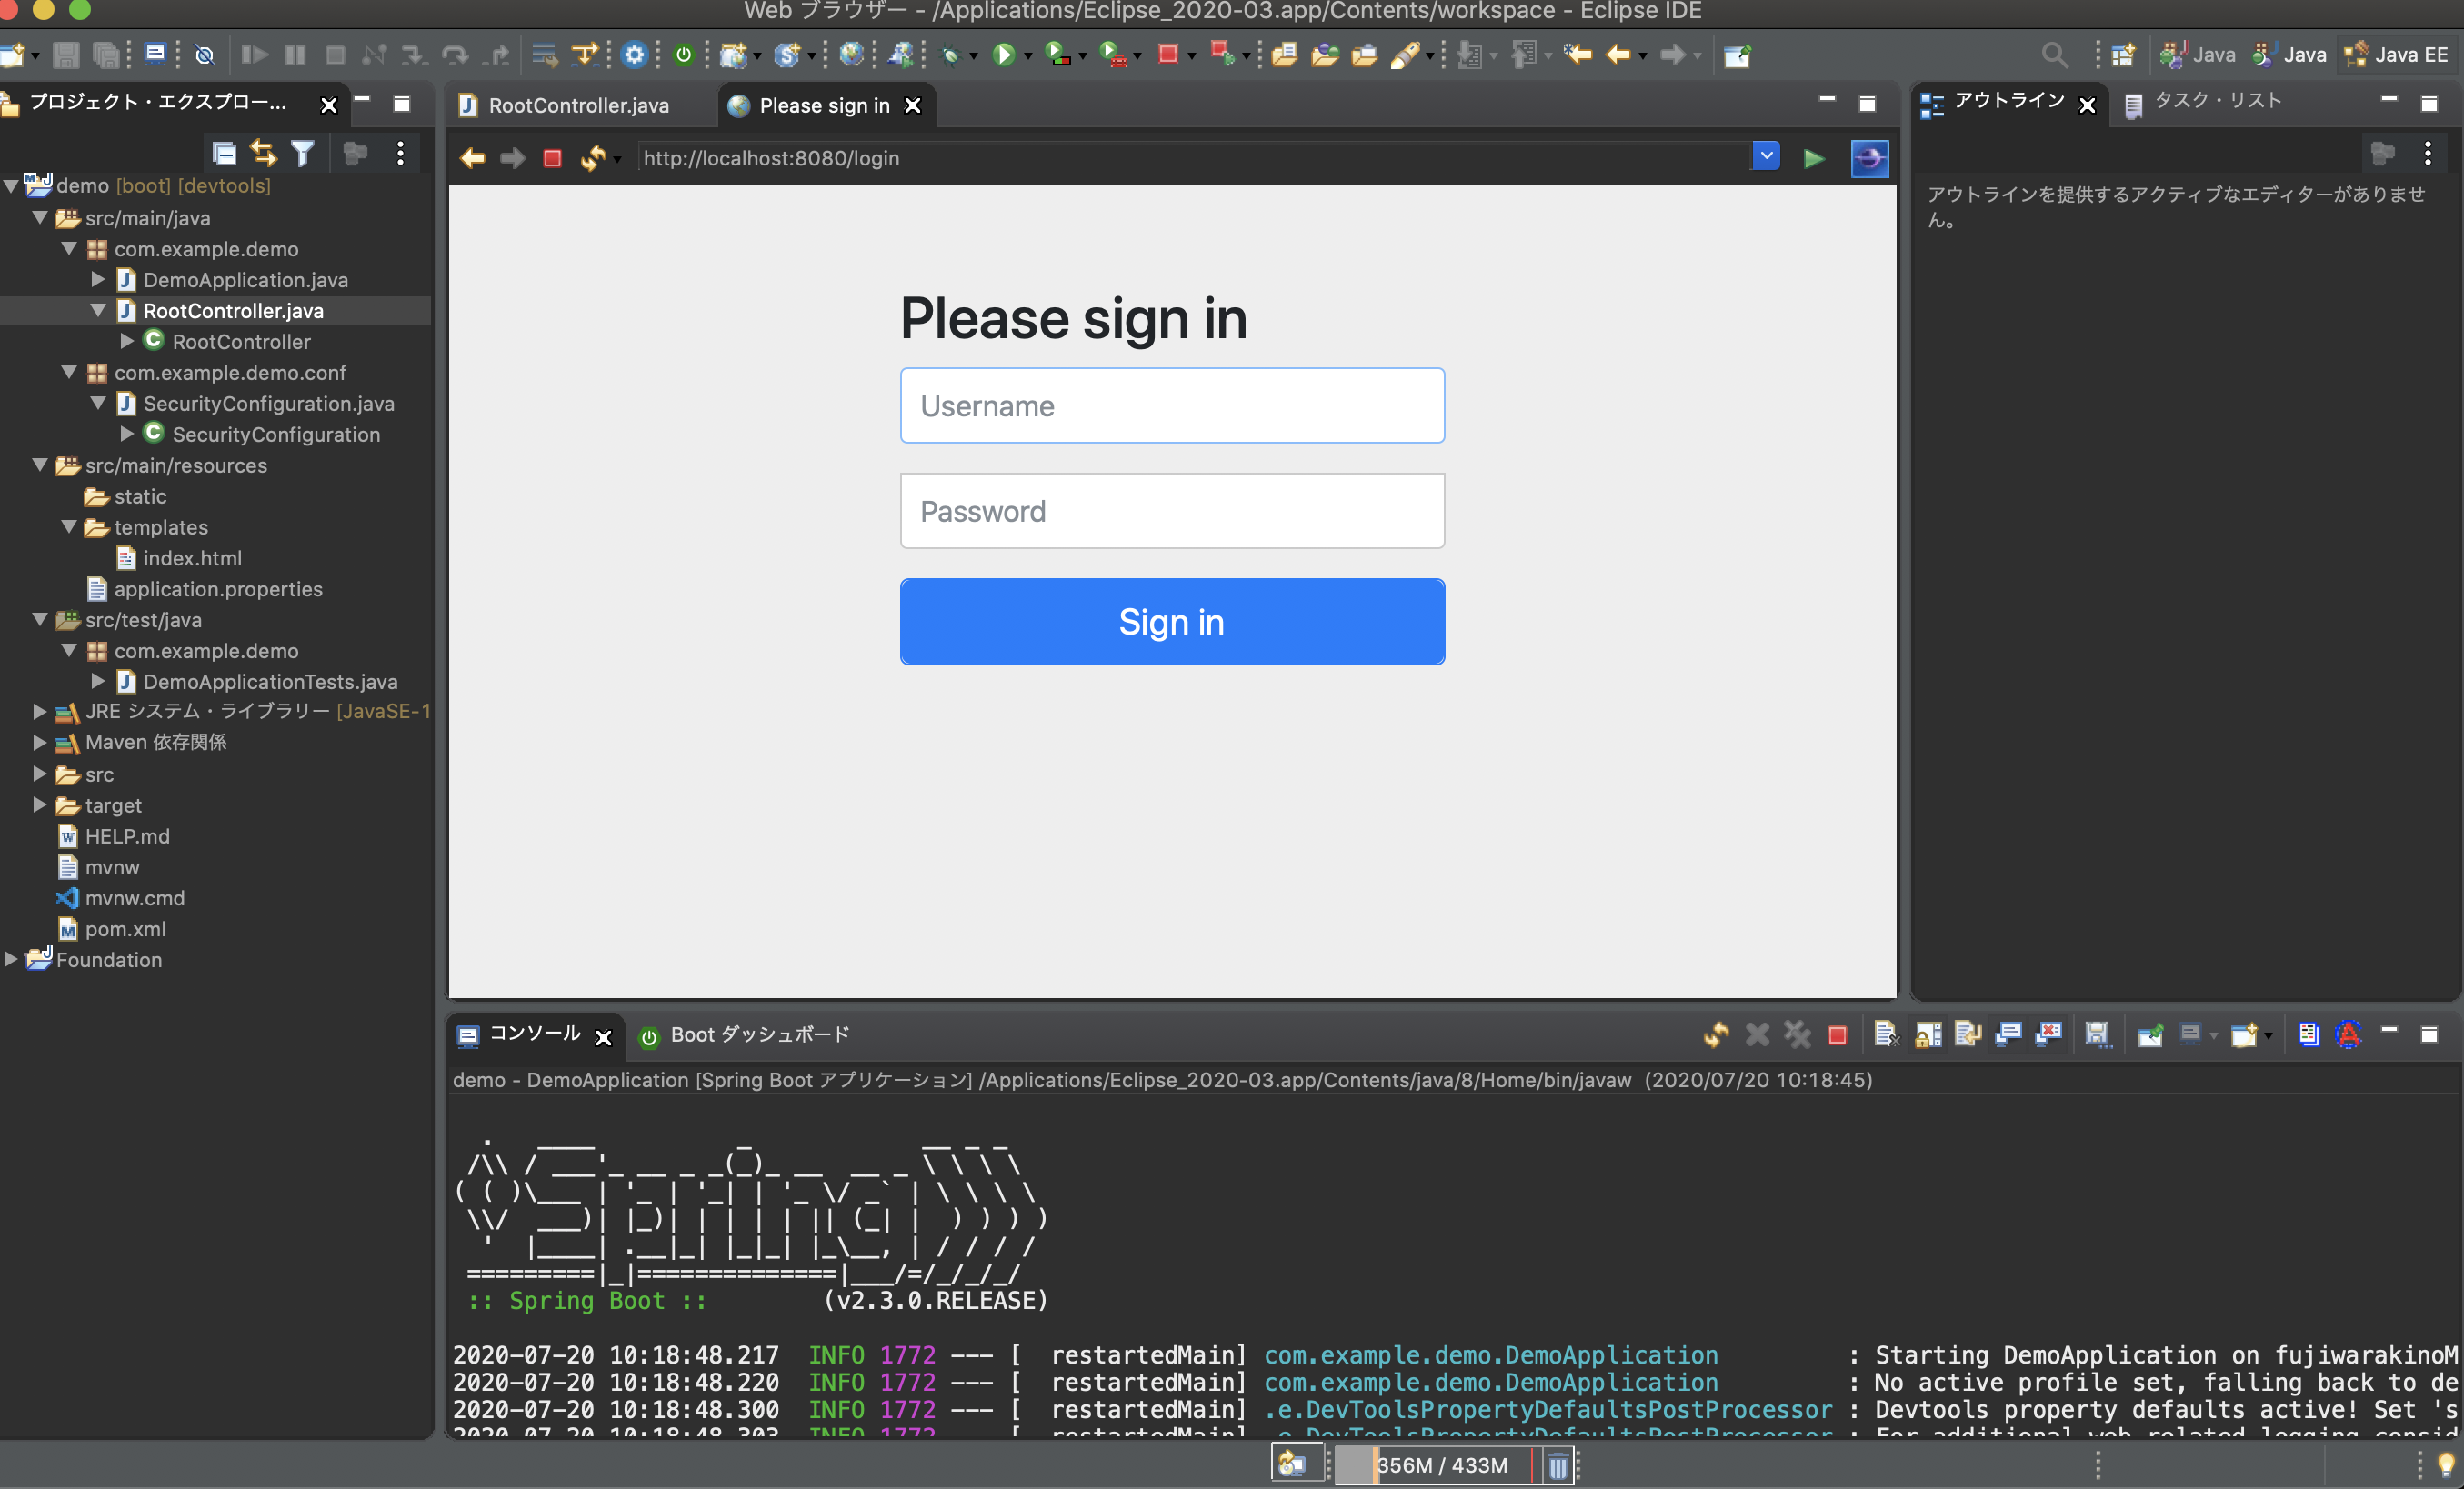
ここに先ほど決めたパスワードを入力していただくと
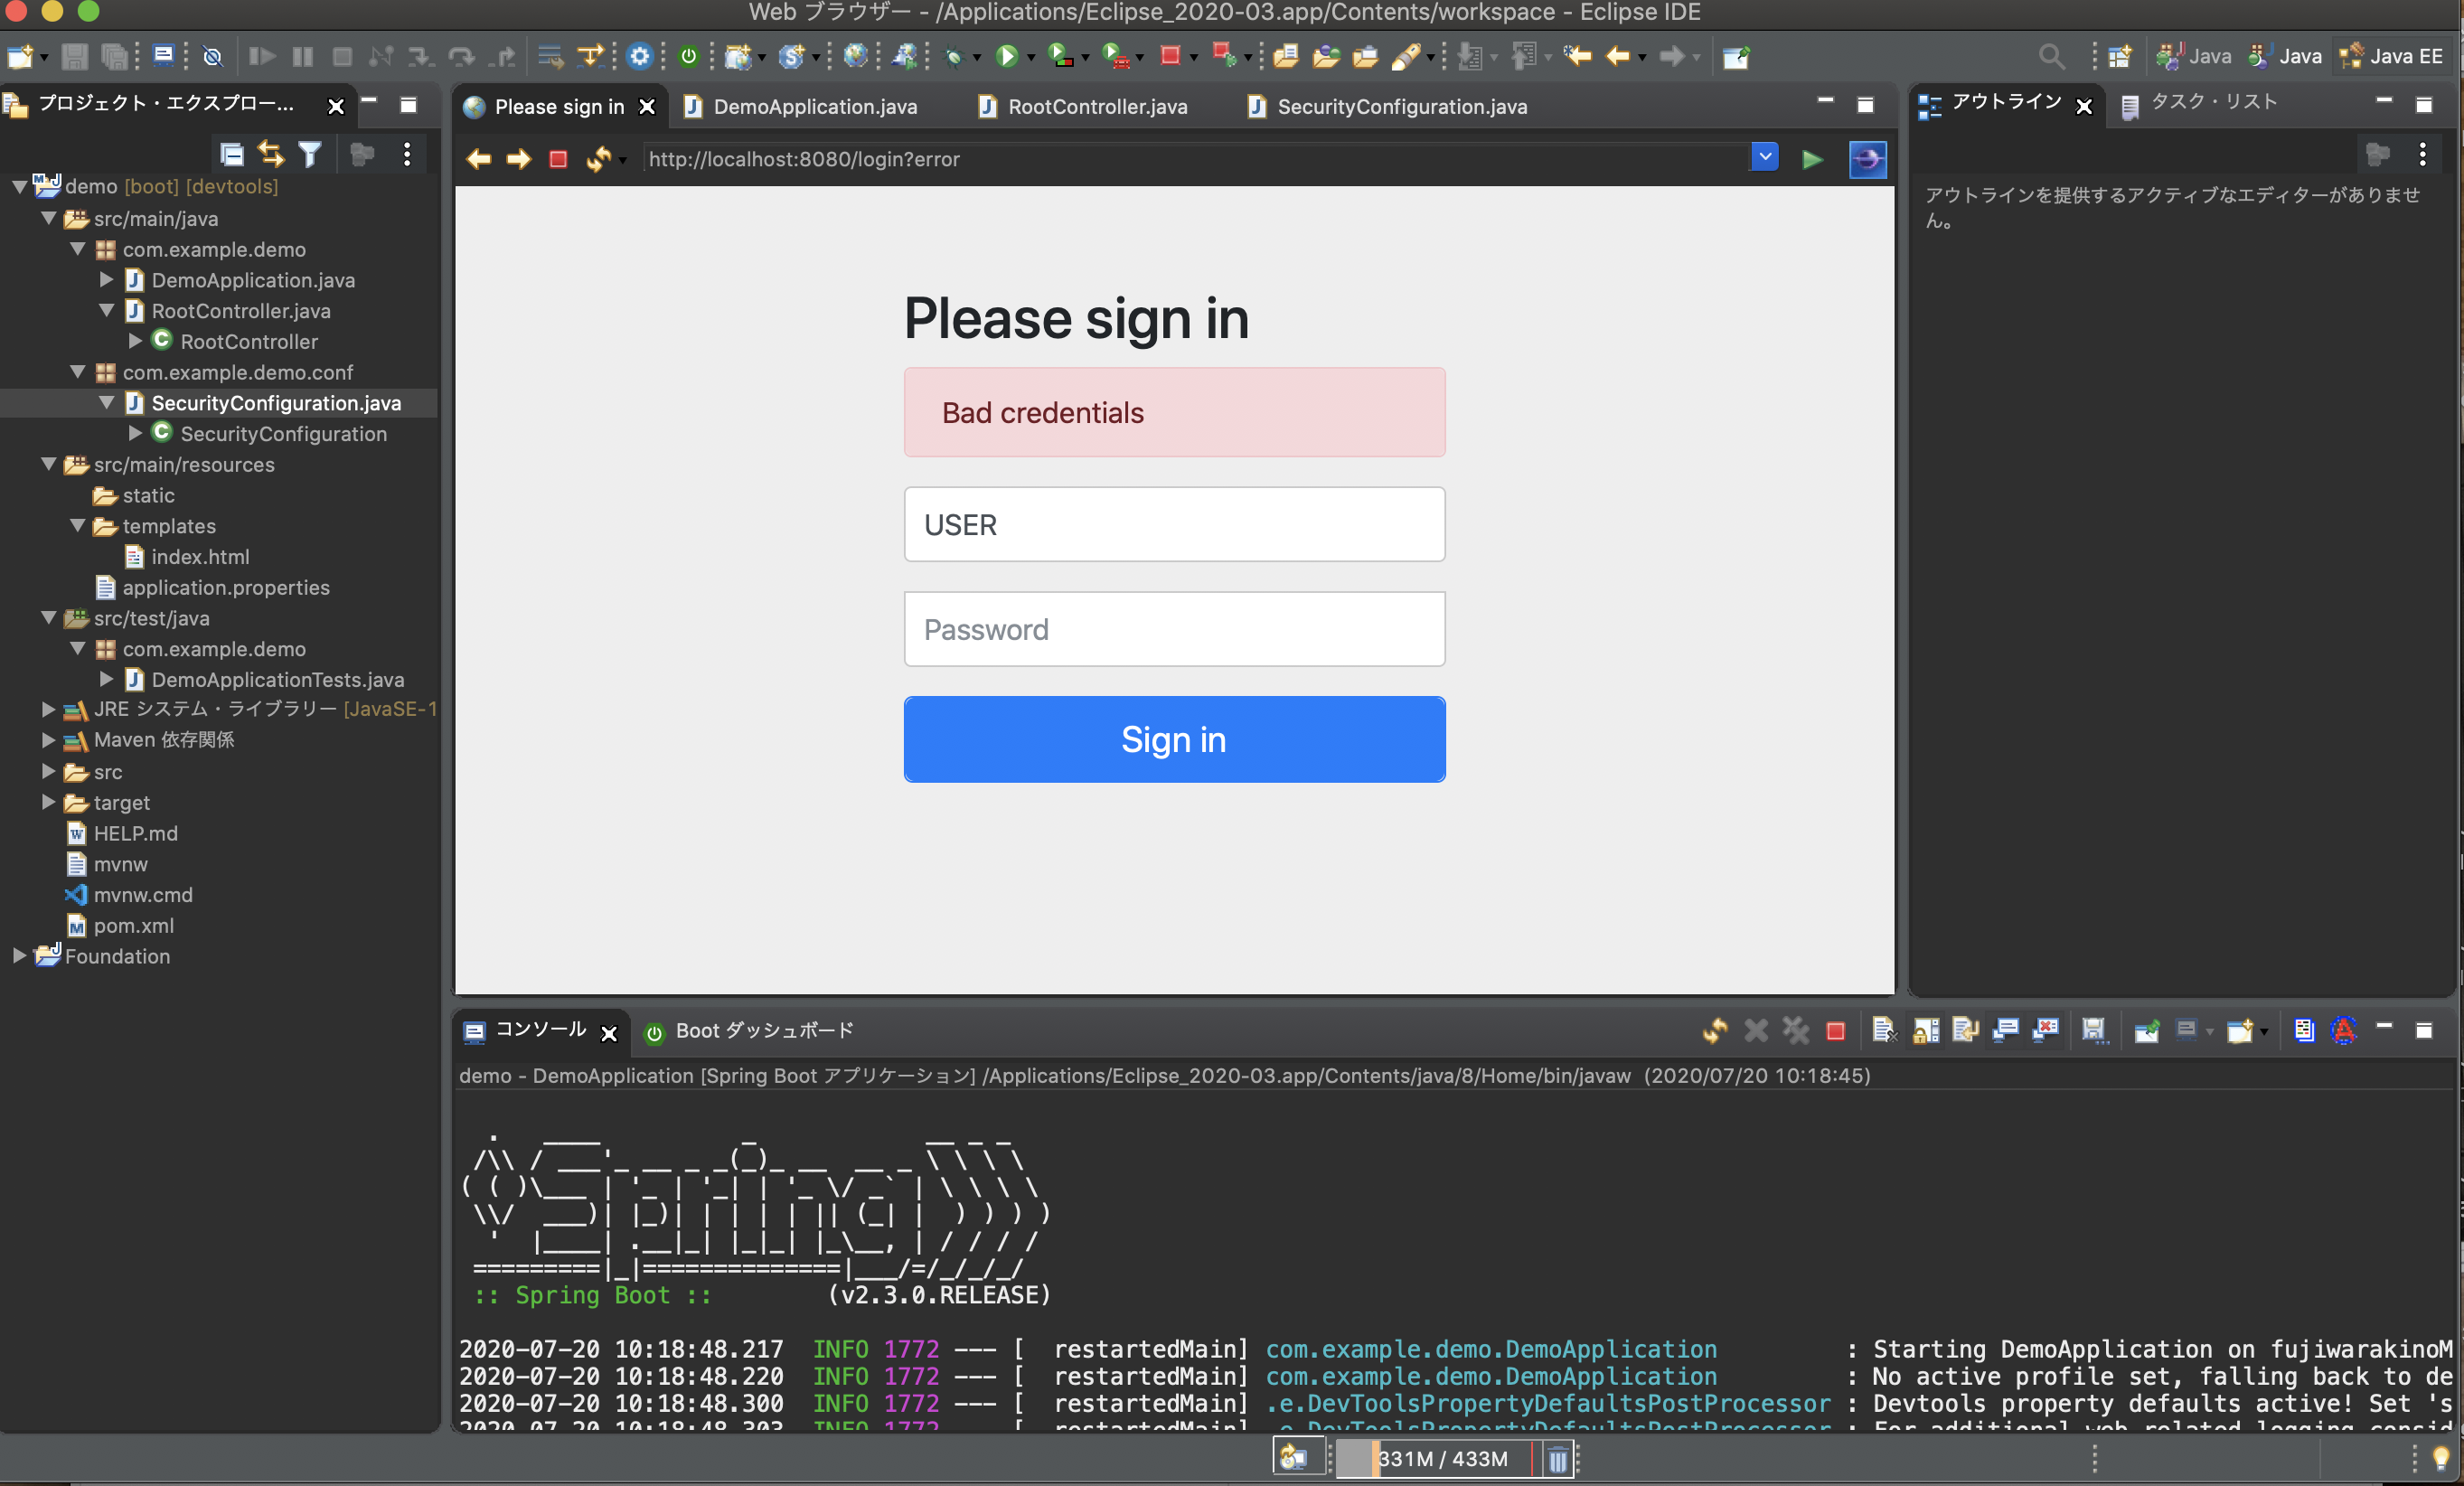
![スクリーンショット 2020-07-20 10.43.17.png](https://qiita-user-contents.imgix.net/https%3A%2F%2Fqiita-image-store.s3.ap-northeast-1.amazonaws.com%2F0%2F451004%2F8ac17e25-124b-a4ac-c41e-7322020b567e.png?ixlib=rb-4.0.0&auto=format&gif-q=60&q=75&s=1bc06b63ef37c7fab8d7646d80ca6944)
このように開きます。
![スクリーンショット 2020-07-20 10.44.15.png](https://qiita-user-contents.imgix.net/https%3A%2F%2Fqiita-image-store.s3.ap-northeast-1.amazonaws.com%2F0%2F451004%2Fd2a60ada-67b9-3f91-ae52-df91fb0d2476.png?ixlib=rb-4.0.0&auto=format&gif-q=60&q=75&s=4ba555edbd27a56d920541df56fffae6)
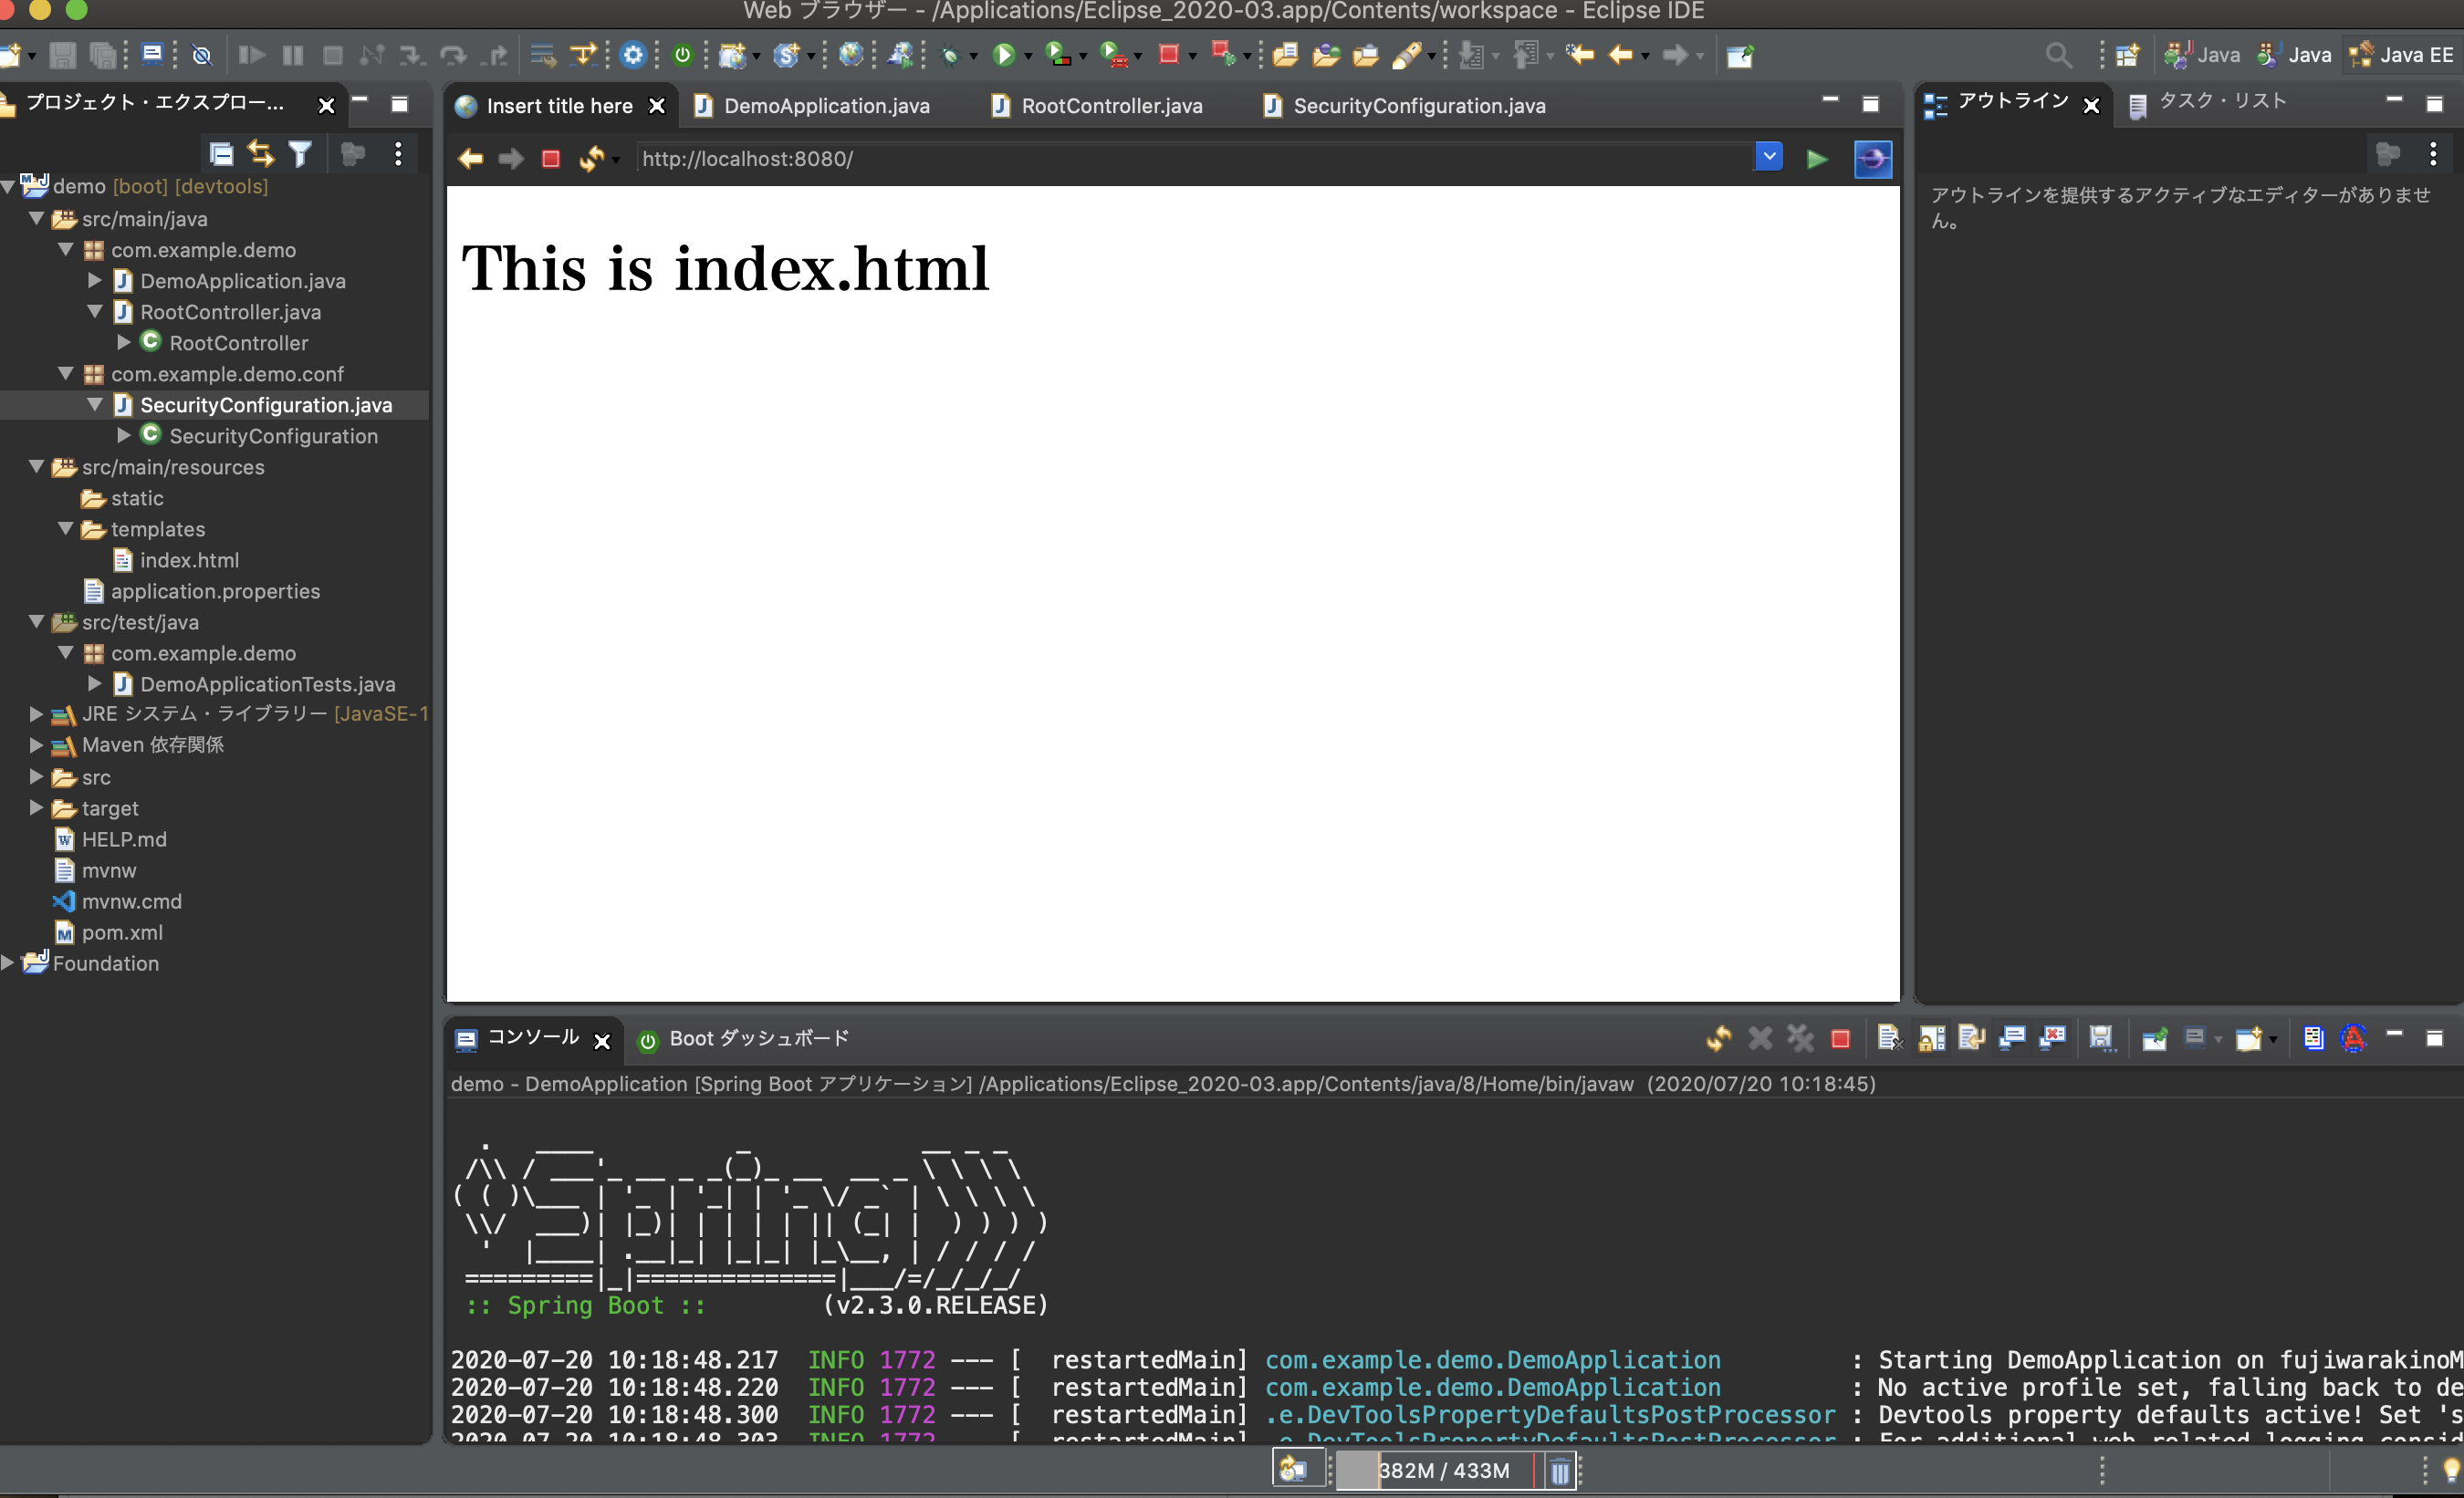
Spring boot と Springセキュリティを絡めて作る事が出来ましたね。
このように書いたのですが、(少し違うかも知れないのですが)参考にして頂いた動画があるので、こちらを見ながら作っていただくと分かりやすいと思います。
YouTube
TechShare チャンネル