今回やること
アンドロイドでカメラに映った映像(画像)をリアルタイムで画像認識するアプリを作る。
PyTorch Mobileを使って学習済みモデルをアンドロイドで動かす。
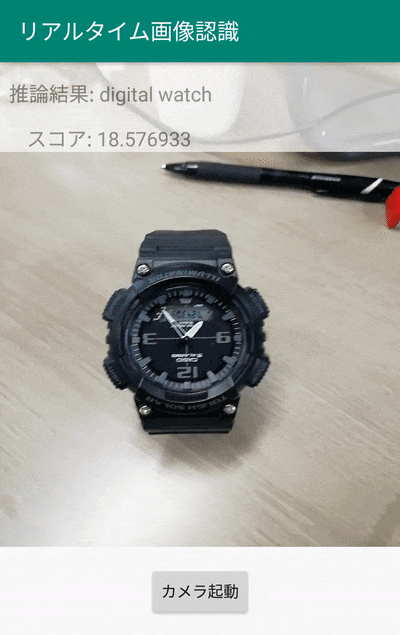
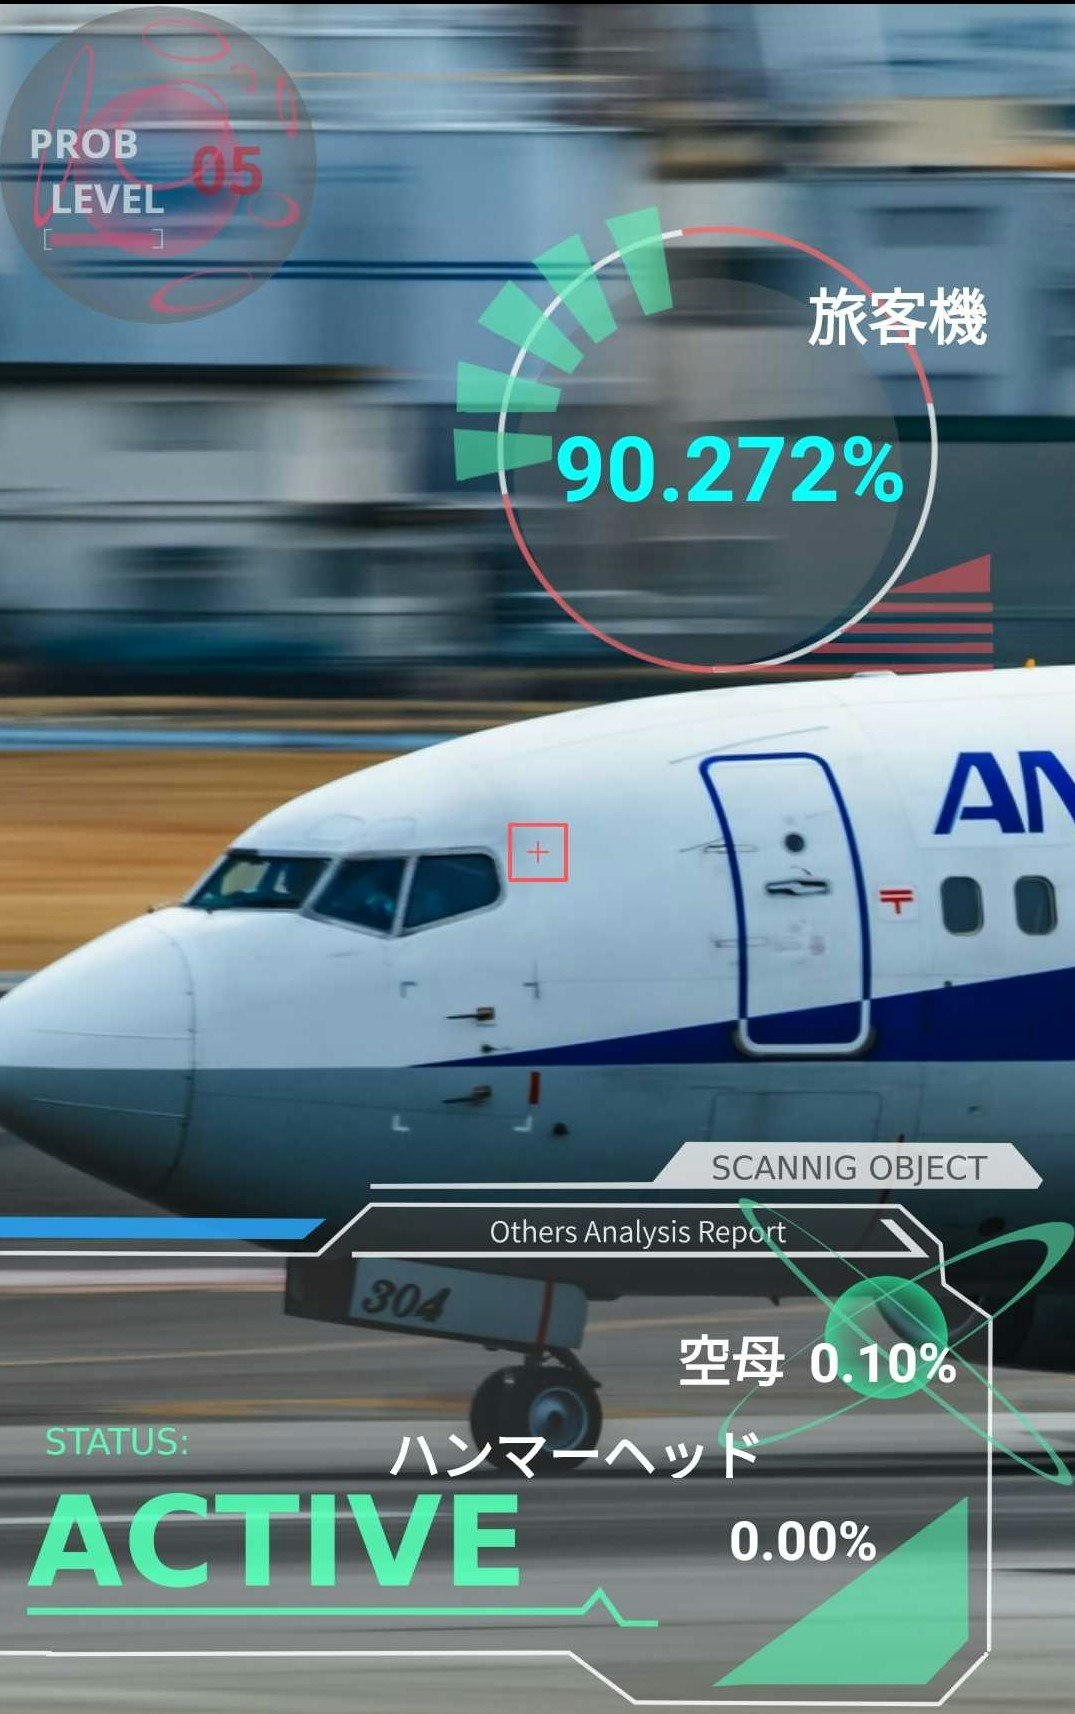
これ↓
追記2020/1/13
CameraXの実装が古くなっているのでpyTorch Mobileの部分だけ参考にしてください。
Tensorflow Liteを使った別記事でCameraXの最新版を使っているのでこちら参考にしてください。
依存関係
まずは依存関係(dependencies)を追加(2020年2月時点)
camera x と pytorch mobile
  def camerax_version = '1.0.0-alpha06'
    implementation "androidx.camera:camera-core:${camerax_version}"
    implementation "androidx.camera:camera-camera2:${camerax_version}"
    implementation 'org.pytorch:pytorch_android:1.4.0'
    implementation 'org.pytorch:pytorch_android_torchvision:1.4.0'
上の方の**android{}**ってあるところの一番最後に以下を追加
    compileOptions {
        sourceCompatibility JavaVersion.VERSION_1_8
        targetCompatibility JavaVersion.VERSION_1_8
    }
Camera Xの実装
依存関係を追加したら続いてCamera Xというアンドロイドで簡単にカメラを扱いやすくなるライブラリを利用して写真を撮る機能を実装する。
以下、公式のCamera Xのチュートリアルを実装していく。詳細は他の記事でも上がっていたりするので省略してコードのみ。
マニフェスト
パーミッションの許可
<uses-permission android:name="android.permission.CAMERA" />
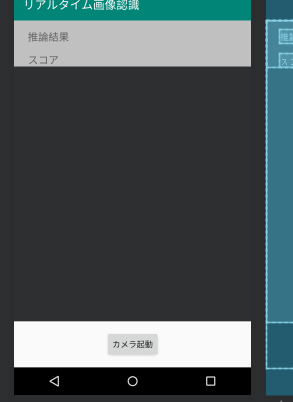
レイアウト
カメラを起動するボタンとプレビュー表示用のtextureView等を配置
<?xml version="1.0" encoding="utf-8"?>
<androidx.constraintlayout.widget.ConstraintLayout xmlns:android="http://schemas.android.com/apk/res/android"
    xmlns:app="http://schemas.android.com/apk/res-auto"
    xmlns:tools="http://schemas.android.com/tools"
    android:layout_width="match_parent"
    android:layout_height="match_parent"
    tools:context=".MainActivity">

    <TextureView
        android:id="@+id/view_finder"
        android:layout_width="0dp"
        android:layout_height="0dp"
        android:layout_marginBottom="16dp"
        app:layout_constraintBottom_toTopOf="@+id/activateCameraBtn"
        app:layout_constraintEnd_toEndOf="parent"
        app:layout_constraintStart_toStartOf="parent"
        app:layout_constraintTop_toTopOf="parent" />

    <androidx.constraintlayout.widget.ConstraintLayout
        android:layout_width="match_parent"
        android:layout_height="wrap_content"
        android:alpha="0.7"
        android:animateLayoutChanges="true"
        android:background="@android:color/white"
        app:layout_constraintEnd_toEndOf="@+id/view_finder"
        app:layout_constraintStart_toStartOf="parent"
        app:layout_constraintTop_toTopOf="@+id/view_finder">

        <TextView
            android:id="@+id/inferredCategoryText"
            android:layout_width="0dp"
            android:layout_height="wrap_content"
            android:layout_marginStart="8dp"
            android:layout_marginTop="16dp"
            android:layout_marginEnd="8dp"
            android:text="推論結果"
            android:textSize="18sp"
            app:layout_constraintEnd_toEndOf="parent"
            app:layout_constraintStart_toStartOf="parent"
            app:layout_constraintTop_toTopOf="parent" />

        <TextView
            android:id="@+id/inferredScoreText"
            android:layout_width="wrap_content"
            android:layout_height="wrap_content"
            android:layout_marginStart="24dp"
            android:layout_marginTop="16dp"
            android:text="スコア"
            android:textSize="18sp"
            app:layout_constraintStart_toStartOf="parent"
            app:layout_constraintTop_toBottomOf="@+id/inferredCategoryText" />
    </androidx.constraintlayout.widget.ConstraintLayout>

    <Button
        android:id="@+id/activateCameraBtn"
        android:layout_width="wrap_content"
        android:layout_height="wrap_content"
        android:layout_marginBottom="16dp"
        android:text="カメラ起動"
        app:layout_constraintBottom_toBottomOf="parent"
        app:layout_constraintEnd_toEndOf="parent"
        app:layout_constraintStart_toStartOf="parent" />

</androidx.constraintlayout.widget.ConstraintLayout>
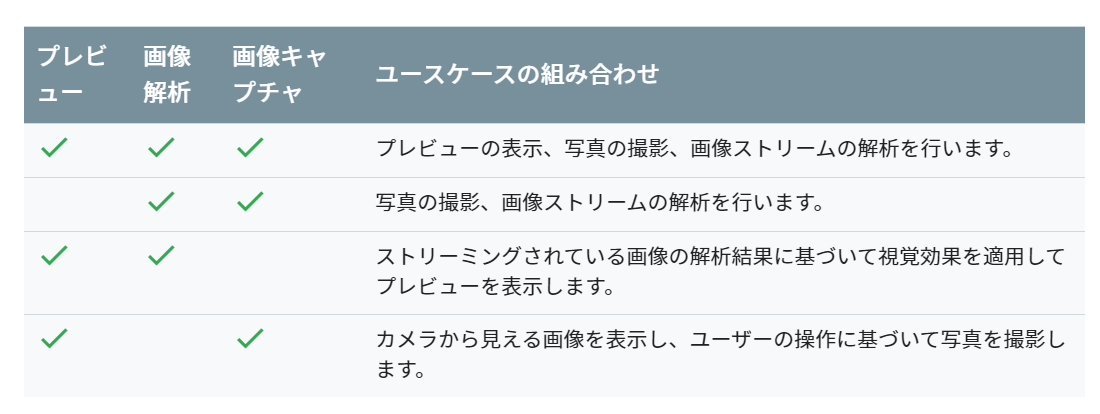
use case
Camera X ではプレビュー、画像キャプチャ、画像解析の3つのuse caseが提供されている。今回はプレビューと画像解析を使っていく。use caseに合わせることでコードがかき分けやすくなる。
ちなみに可能な組み合わせは以下の通り。(公式ドキュメントより)
プレビューuse caseを実装
Camera Xのuse caseのプレビューまで実装していく。
ほぼチュートリアルと同様の内容。
private const val REQUEST_CODE_PERMISSIONS = 10
private val REQUIRED_PERMISSIONS = arrayOf(Manifest.permission.CAMERA)

class MainActivity : AppCompatActivity(), LifecycleOwner {
    private val executor = Executors.newSingleThreadExecutor()
    private lateinit var viewFinder: TextureView

    override fun onCreate(savedInstanceState: Bundle?) {
        super.onCreate(savedInstanceState)
        setContentView(R.layout.activity_main)

        viewFinder = findViewById(R.id.view_finder)

        // カメラ起動
        activateCameraBtn.setOnClickListener {
            if (allPermissionsGranted()) {
                viewFinder.post { startCamera() }
            } else {
                ActivityCompat.requestPermissions(
                    this, REQUIRED_PERMISSIONS, REQUEST_CODE_PERMISSIONS
                )
            }
        }

        viewFinder.addOnLayoutChangeListener { _, _, _, _, _, _, _, _, _ ->
            updateTransform()
        }
    }

    private fun startCamera() {

        //プレビューuseCaseの実装
        val previewConfig = PreviewConfig.Builder().apply {
            setTargetResolution(Size(viewFinder.width, viewFinder.height))
        }.build()

        val preview = Preview(previewConfig)

        preview.setOnPreviewOutputUpdateListener {
            val parent = viewFinder.parent as ViewGroup
            parent.removeView(viewFinder)
            parent.addView(viewFinder, 0)
            viewFinder.surfaceTexture = it.surfaceTexture
            updateTransform()
        }

        /**後でここに画像解析useCaseの実装をする**/

        CameraX.bindToLifecycle(this, preview)
    }

    private fun updateTransform() {
        val matrix = Matrix()
        val centerX = viewFinder.width / 2f
        val centerY = viewFinder.height / 2f

        val rotationDegrees = when (viewFinder.display.rotation) {
            Surface.ROTATION_0 -> 0
            Surface.ROTATION_90 -> 90
            Surface.ROTATION_180 -> 180
            Surface.ROTATION_270 -> 270
            else -> return
        }
        matrix.postRotate(-rotationDegrees.toFloat(), centerX, centerY)

        //textureViewに反映
        viewFinder.setTransform(matrix)
    }

    override fun onRequestPermissionsResult(
        requestCode: Int, permissions: Array<String>, grantResults: IntArray
    ) {
        if (requestCode == REQUEST_CODE_PERMISSIONS) {
            if (allPermissionsGranted()) {
                viewFinder.post { startCamera() }
            } else {
                Toast.makeText(
                    this,
                    "Permissions not granted by the user.",
                    Toast.LENGTH_SHORT
                ).show()
                finish()
            }
        }
    }

    private fun allPermissionsGranted() = REQUIRED_PERMISSIONS.all {
        ContextCompat.checkSelfPermission(
            baseContext, it
        ) == PackageManager.PERMISSION_GRANTED
    }
}
モデルと分類クラスの用意
今回は学習済みのresnet18を使う。
※python pytorchの環境がある方は以下のコードをpythonで実行、ない方はgithubからresnet.ptをダウンロードしてください。
import torch
import torchvision

model = torchvision.models.resnet18(pretrained=True)
model.eval()
example = torch.rand(1, 3, 224, 224)
traced_script_module = torch.jit.trace(model, example)
traced_script_module.save("resnet.pt")
うまく実行できると同じ階層にresnet.ptというファイルが生成される。この学習済みresnet18を使って画像認識していく。
ダウンロードしたモデルをandroid studio のassetフォルダに入れる。(デフォルトでは存在しないのでresフォルダとかを右クリック->新規->フォルダ-> Assetフォルダで作れる)
推論した後にクラス名に変換するためにImageNetクラスをファイルに書いておく。新しくImageNetClasses.ktとかを作って、その中にImageNetの1000クラスを書いておく。
長すぎるのでgithubからコピペしてください。
class ImageNetClasses {
    var IMAGENET_CLASSES = arrayOf(
        "tench, Tinca tinca",
        "goldfish, Carassius auratus",
         //略(githubからコピペしてください)
        "ear, spike, capitulum",
        "toilet tissue, toilet paper, bathroom tissue"
    )
}
画像解析use caseの作成
つづいてCamera Xのuse caseの画像解析を実装していく。
新しくImageAnalyze.ktというファイルを作って画像認識の処理を行う。
流れ的にはモデルをロードして画像解析 use caseでプレビューの画像をpytorch mobileで使えるようにテンソルに変換し先ほどassetフォルダからロードしたモデルに通してその結果を取得する感じ。
あとは、viewに推論結果を反映させるためにインターフェースとかカスタムリスナとかを書いている。(この辺、正しい書き方がイマイチ分からず、我流なのでスマートな書き方があれば教えてください。)
class ImageAnalyze(context: Context) : ImageAnalysis.Analyzer {

    private lateinit var listener: OnAnalyzeListener    // Viewを更新するためのカスタムリスナ
    private var lastAnalyzedTimestamp = 0L
    //ネットワークモデルのモデルのロード
    private val resnet = Module.load(getAssetFilePath(context, "resnet.pt"))

    interface OnAnalyzeListener {
        fun getAnalyzeResult(inferredCategory: String, score: Float)
    }

    override fun analyze(image: ImageProxy, rotationDegrees: Int) {
        val currentTimestamp = System.currentTimeMillis()

        if (currentTimestamp - lastAnalyzedTimestamp >= 0.5) {  // 0.5秒ごとに推論する
            lastAnalyzedTimestamp = currentTimestamp

            // テンソルに変換 (imageのformat調べてみたらYUV_420_888とかいうのだった)
            val inputTensor = TensorImageUtils.imageYUV420CenterCropToFloat32Tensor(
                image.image,
                rotationDegrees,
                224,
                224,
                TensorImageUtils.TORCHVISION_NORM_MEAN_RGB,
                TensorImageUtils.TORCHVISION_NORM_STD_RGB
            )
            // 学習済みモデルで推論する
            val outputTensor = resnet.forward(IValue.from(inputTensor)).toTensor()
            val scores = outputTensor.dataAsFloatArray

            var maxScore = 0F
            var maxScoreIdx = 0
            for (i in scores.indices) { //スコアが最大のインデックスを取得
                if (scores[i] > maxScore) {
                    maxScore = scores[i]
                    maxScoreIdx = i
                }
            }

            // スコアからカテゴリ名を取得
            val inferredCategory = ImageNetClasses().IMAGENET_CLASSES[maxScoreIdx]
            listener.getAnalyzeResult(inferredCategory, maxScore)  // Viewを更新
        }
    }

    //// assetファイルからパスを取得する関数
    private fun getAssetFilePath(context: Context, assetName: String): String {
        val file = File(context.filesDir, assetName)
        if (file.exists() && file.length() > 0) {
            return file.absolutePath
        }
        context.assets.open(assetName).use { inputStream ->
            FileOutputStream(file).use { outputStream ->
                val buffer = ByteArray(4 * 1024)
                var read: Int
                while (inputStream.read(buffer).also { read = it } != -1) {
                    outputStream.write(buffer, 0, read)
                }
                outputStream.flush()
            }
            return file.absolutePath
        }
    }

    fun setOnAnalyzeListener(listener: OnAnalyzeListener){
        this.listener = listener
    }
}
画像がImageProxyとかいうよくわからない型で戸惑ったがformat調べるとYUV_420_888とかでbitmapに変換しなきゃダメかなとか思ってたけど、pytorch mobileにYUV_420からテンソルに変換するメソッドがあり、放り込むだけで簡単に推論できた。
ちなみにコード見た方は思ったかもしれないですが、リアルタイムといってますが、0.5秒刻みです..
画像解析use caseを組み込む
先ほど作ったImageAnalyzeクラスをCamera Xにuse caseとして導入し、最後にImageAnalyzeクラスのインターフェースを無名オブジェクト使ってMainActivityで実装し、viewを更新できるようにして完成。
以下のコードをonCreateの最後に追加する。(上の方で「/後でここに画像解析useCaseの実装をする/ 」とコメントしてあったところ)
        // 画像解析useCaseの実装
        val analyzerConfig = ImageAnalysisConfig.Builder().apply {
            setImageReaderMode(
                ImageAnalysis.ImageReaderMode.ACQUIRE_LATEST_IMAGE
            )
        }.build()

        //インスタンス
        val imageAnalyzer = ImageAnalyze(applicationContext)
        //推論結果を表示
        imageAnalyzer.setOnAnalyzeListener(object : ImageAnalyze.OnAnalyzeListener {
            override fun getAnalyzeResult(inferredCategory: String, score: Float) {
                // メインスレッド以外からviewの変更をする
                viewFinder.post {
                    inferredCategoryText.text = "推論結果: $inferredCategory"
                    inferredScoreText.text = "スコア: $score"
                }
            }
        })
        val analyzerUseCase = ImageAnalysis(analyzerConfig).apply {
            setAnalyzer(executor, imageAnalyzer)
        }

        // useCaseはプレビューと画像解析
        CameraX.bindToLifecycle(this, preview, analyzerUseCase)  // use caseに画像解析を追加
完成!!
ここまでうまく実装出来た方は冒頭のアプリが完成しているはず。いろいろ遊んでみてください。
おわり
今回のコードはgithubに挙げているので適宜参照してください。
Camera X ほんとに便利! pytroch mobileとかと組み合わせて、簡単に画像解析を行ったりできる。少々処理で重くなるのはしょうがないけど。
モデルさえ用意できればカメラ使っていろんな画像認識系のアプリが簡単に作れそう。やっぱり、転移学習とかしてそのモデル使ってなんかアプリ作るのが手っ取り早いのかな。
なんか機械学習系のアプリ作ってリリースしてみたい...
~~近日中にサンプルアプリ作って出す予定です。(今、審査中です) ~~
サンプルアプリ作ってみた
審査を通ったので追記。
この記事に書いた内容をアプリに落とし込んでみた。Play Storeに公開してある。
手っ取り早く体験してみたい方や、ダウンロードしてやってもいいぞとういう方はダウンロードしていただけたら幸いです。
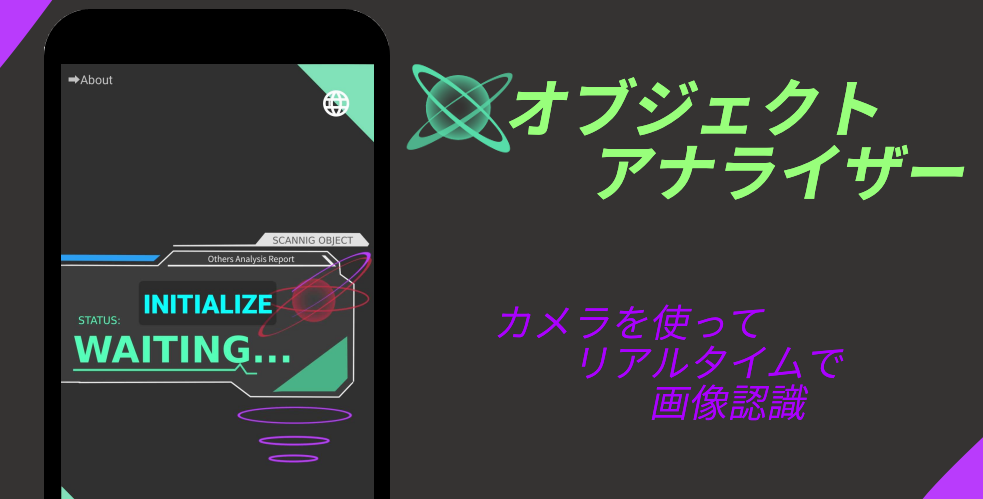
オブジェクトアナライザー
Play Store: オブジェクトアナライザー
英語、日本語対応
正直、判定ができるものとできないもので差が激しい...