最初に一言
スクロールに合わせて消えるあのかっこいいやつやりたい。-> なるほど。CoordinatorLayoutってヤツを使えばできると。-> えっナニコレ、CoordinatorLayoutすごく使いづらいYO、...ってことで、今後のためにCoordinatorLayoutの組み合わせをメモっておこうと思った。
CoordinatorLayoutって?
個人的にはめちゃくちゃ使いづらいレイアウトってイメージ。分類的にはFrameLayoutだとか。
簡単な一からの実装方法はこちらを参考に ドラッグで始める最速CoordinatorLayout
これを使えばどんなことができるのか?
↓こういうよく見るスクロールに合わせて消えるヤツ
今回はCoordinatorlayoutを使ったサンプルをレイアウトファイルに焦点を当て、いくつか紹介してみる。
RecyclerViewやViewPagerの細かい実装は今回は省略。
なおコードはgithubに挙げているのでレイアウトファイル以外を見たい方は適宜参照してほしい。
(※今回のコードはすべてkotlin, android x に対応したものになっています。)
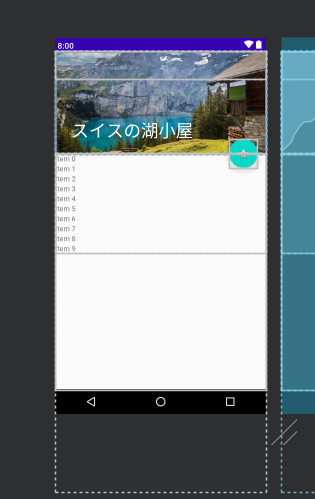
Coordinatorlayout + RecyclerView
一番シンプルなやつ
なお、前提としてアクションバーは非表示のテーマになっているとする。(非表示のやり方は一番下に)


メインのレイアウトファイル
<?xml version="1.0" encoding="utf-8"?>
<androidx.coordinatorlayout.widget.CoordinatorLayout xmlns:android="http://schemas.android.com/apk/res/android"
    xmlns:app="http://schemas.android.com/apk/res-auto"
    android:layout_width="match_parent"
    android:layout_height="match_parent">

    <com.google.android.material.appbar.AppBarLayout
        android:id="@+id/appbar"
        android:layout_width="match_parent"
        android:layout_height="230dp">

        <com.google.android.material.appbar.CollapsingToolbarLayout
            android:layout_width="match_parent"
            android:layout_height="match_parent"
            android:minHeight="?attr/actionBarSize"
            app:contentScrim="?attr/colorPrimary"
            app:layout_scrollFlags="scroll|exitUntilCollapsed"
            app:toolbarId="@+id/toolbar">

            <ImageView
                android:id="@+id/imageView2"
                android:layout_width="wrap_content"
                android:layout_height="wrap_content"
                android:scaleType="centerCrop"
                app:layout_collapseMode="parallax"
                app:srcCompat="@drawable/house" />

            <androidx.appcompat.widget.Toolbar
                android:id="@+id/toolbar"
                android:layout_width="match_parent"
                android:layout_height="?attr/actionBarSize"
                app:layout_collapseMode="pin"
                app:title="スイスの湖小屋" />
        </com.google.android.material.appbar.CollapsingToolbarLayout>
    </com.google.android.material.appbar.AppBarLayout>

    <androidx.core.widget.NestedScrollView
        android:layout_width="match_parent"
        android:layout_height="match_parent"
        app:layout_behavior="com.google.android.material.appbar.AppBarLayout$ScrollingViewBehavior">

        <androidx.recyclerview.widget.RecyclerView
            android:id="@+id/recyclerView"
            android:layout_width="match_parent"
            android:layout_height="match_parent" />
    </androidx.core.widget.NestedScrollView>
</androidx.coordinatorlayout.widget.CoordinatorLayout>
ここで注意が必要なのがCollapsingToolbarLayoutの属性にminHeightを指定しておかないとRecyclerViewの一番下の要素がtoolbarの分だけ表示しきれずに切れてしまう。
また、アクションバー自体も消えるようにしたいときはCollapsingToolbarLayoutの属性を**app:layout_scrollFlags="scroll"**に変更するとアクションバーも隠れるようになる。
こちらのコードはgithubからどうぞ
CoordinatorLayout + RecyclerView + ViewPager
ViewPagerでフラグメントを切り替え、そのフラグメントの中にRecyclerViewが入ってるパターン
なお、前提としてアクションバーは非表示のテーマになっているとする。(非表示のやり方は一番下に)


ViewPagerをNestedScrollViewの中に入れていると、ViewPagerとその中のフラグメントが表示されないので注意。viewPagerを中に入れてると大きさをmatch_parentにしようが、wrap_contentにしようが何故かviewPagerの大きさが0になる。固定値でheight:500dpとか指定したらいけるけど、それじゃぁ、あんまり使えないよね...
メインのレイアウトファイル
<?xml version="1.0" encoding="utf-8"?>
<androidx.coordinatorlayout.widget.CoordinatorLayout xmlns:android="http://schemas.android.com/apk/res/android"
    xmlns:app="http://schemas.android.com/apk/res-auto"
    xmlns:tools="http://schemas.android.com/tools"
    android:layout_width="match_parent"
    android:layout_height="match_parent">

    <com.google.android.material.appbar.AppBarLayout
        android:id="@+id/appbar"
        android:layout_width="match_parent"
        android:layout_height="230dp">

        <com.google.android.material.appbar.CollapsingToolbarLayout
            android:layout_width="match_parent"
            android:layout_height="match_parent"
            app:contentScrim="?attr/colorPrimary"
            app:layout_scrollFlags="scroll|exitUntilCollapsed"
            app:toolbarId="@+id/toolbar">

            <ImageView
                android:id="@+id/imageView"
                android:layout_width="wrap_content"
                android:layout_height="wrap_content"
                android:scaleType="centerCrop"
                app:srcCompat="@drawable/house" />

            <androidx.appcompat.widget.Toolbar
                android:id="@+id/toolbar"
                android:layout_width="match_parent"
                android:layout_height="?attr/actionBarSize"
                app:title="スイスの湖小屋"></androidx.appcompat.widget.Toolbar>
        </com.google.android.material.appbar.CollapsingToolbarLayout>
    </com.google.android.material.appbar.AppBarLayout>

    <androidx.viewpager.widget.ViewPager
        android:id="@+id/viewPager"
        android:layout_width="match_parent"
        android:layout_height="wrap_content"
        app:layout_behavior="com.google.android.material.appbar.AppBarLayout$ScrollingViewBehavior" />
</androidx.coordinatorlayout.widget.CoordinatorLayout>
フラグメントのレイアウトファイル
ViewPagerで表示を切り替えるフラグメント(この中にRecyclerViewが入ってる)


<?xml version="1.0" encoding="utf-8"?>
<androidx.constraintlayout.widget.ConstraintLayout xmlns:android="http://schemas.android.com/apk/res/android"
    xmlns:app="http://schemas.android.com/apk/res-auto"
    xmlns:tools="http://schemas.android.com/tools"
    android:layout_width="match_parent"
    android:layout_height="match_parent"
    tools:context=".ViewPagerFragment" >

    <TextView
        android:id="@+id/positionText"
        android:layout_width="wrap_content"
        android:layout_height="wrap_content"
        android:layout_marginTop="4dp"
        android:text="TextView"
        android:textSize="24sp"
        app:layout_constraintEnd_toEndOf="parent"
        app:layout_constraintStart_toStartOf="parent"
        app:layout_constraintTop_toTopOf="parent" />

    <androidx.recyclerview.widget.RecyclerView
        android:id="@+id/recyclerView"
        android:layout_width="0dp"
        android:layout_height="0dp"
        android:layout_marginTop="8dp"
        app:layout_constraintBottom_toBottomOf="parent"
        app:layout_constraintEnd_toEndOf="parent"
        app:layout_constraintStart_toStartOf="parent"
        app:layout_constraintTop_toBottomOf="@+id/positionText" />
</androidx.constraintlayout.widget.ConstraintLayout>
親のViewPagerでapp:layout_behavior属性を定義しているのでRecyclerViewにapp:layout_behavior属性を追加しなくても動く。
こちらのコードはgithubからどうぞ
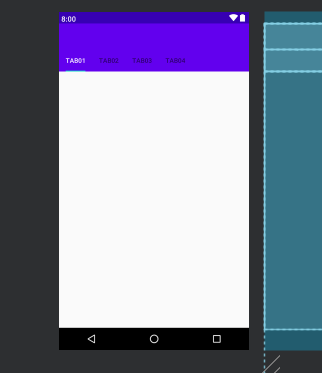
CoordinatorLayout + RecyclerView + ViewPager + TabLayout
toolbarとtabLayoutも消える

なお、前提としてアクションバーは非表示のテーマになっているとする。(非表示のやり方は一番下に)

メインのレイアウトファイル
<?xml version="1.0" encoding="utf-8"?>
<androidx.coordinatorlayout.widget.CoordinatorLayout xmlns:android="http://schemas.android.com/apk/res/android"
    xmlns:tools="http://schemas.android.com/tools"
    xmlns:app="http://schemas.android.com/apk/res-auto"
    android:layout_width="match_parent"
    android:layout_height="match_parent">

    <com.google.android.material.appbar.AppBarLayout
        android:id="@+id/appbar"
        android:layout_width="match_parent"
        android:layout_height="wrap_content">

        <androidx.appcompat.widget.Toolbar
            android:id="@+id/toolbar"
            android:layout_width="match_parent"
            android:layout_height="?attr/actionBarSize"
            app:layout_scrollFlags="scroll|enterAlwaysCollapsed"></androidx.appcompat.widget.Toolbar>

        <com.google.android.material.tabs.TabLayout
            android:id="@+id/tabLayout"
            android:layout_width="match_parent"
            android:layout_height="wrap_content"
            app:layout_collapseMode="parallax"
            app:layout_scrollFlags="scroll|enterAlwaysCollapsed"
            app:tabIndicatorFullWidth="false"
            app:tabMode="scrollable">

            <com.google.android.material.tabs.TabItem
                android:id="@+id/tabItem1"
                android:layout_width="wrap_content"
                android:layout_height="wrap_content"
                android:text="TAB01" />

            <com.google.android.material.tabs.TabItem
                android:id="@+id/tabItem2"
                android:layout_width="wrap_content"
                android:layout_height="wrap_content"
                android:text="TAB02" />

            <com.google.android.material.tabs.TabItem
                android:id="@+id/tabItem3"
                android:layout_width="wrap_content"
                android:layout_height="wrap_content"
                android:text="TAB03" />

            <com.google.android.material.tabs.TabItem
                android:id="@+id/tabItem4"
                android:layout_width="wrap_content"
                android:layout_height="wrap_content"
                android:text="TAB04" />
        </com.google.android.material.tabs.TabLayout>

    </com.google.android.material.appbar.AppBarLayout>

    <androidx.viewpager.widget.ViewPager
        android:id="@+id/viewPager"
        android:layout_width="match_parent"
        android:layout_height="match_parent"
        app:layout_behavior="com.google.android.material.appbar.AppBarLayout$ScrollingViewBehavior" />

</androidx.coordinatorlayout.widget.CoordinatorLayout>
フラグメントのレイアウトファイル
ViewPagerの中身のフラグメント。この中にrecyclerViewが入ってる
上記のCoordinatorLayout + RecyclerView + ViewPagerと同じため省略
こちらのコードはgithubからどうぞ
toolbarだけ消える
上記のtoolbarとtablayoutも消えるとほぼ同じ。
tablayoutのlayout_scrollFlags属性を削除すればできる。
        <com.google.android.material.tabs.TabLayout
            android:id="@+id/tabLayout"
            android:layout_width="match_parent"
            android:layout_height="wrap_content"
            app:layout_collapseMode="parallax"
            app:tabIndicatorFullWidth="false"
            app:tabMode="scrollable">
tabLayoutだけ消える
 なお、前提としてアクションバーは非表示のテーマになっているとする。(非表示のやり方は一番下に)
これも上記の**toolbarとtablayoutも消える**とほぼ同じ
メインのレイアウトファイルを以下のように変更する。フラグメントは変わらず。
なお、前提としてアクションバーは非表示のテーマになっているとする。(非表示のやり方は一番下に)
これも上記の**toolbarとtablayoutも消える**とほぼ同じ
メインのレイアウトファイルを以下のように変更する。フラグメントは変わらず。

 ちょっと無理やりだがこうすればいける
<?xml version="1.0" encoding="utf-8"?>
<androidx.constraintlayout.widget.ConstraintLayout xmlns:android="http://schemas.android.com/apk/res/android"
    xmlns:app="http://schemas.android.com/apk/res-auto"
    xmlns:tools="http://schemas.android.com/tools"
    android:layout_width="match_parent"
    android:layout_height="match_parent">

    <androidx.appcompat.widget.Toolbar
        android:id="@+id/toolbar"
        android:layout_width="match_parent"
        android:layout_height="?attr/actionBarSize"
        android:background="@color/colorPrimary"
        app:layout_constraintEnd_toEndOf="parent"
        app:layout_constraintStart_toStartOf="parent"
        app:layout_constraintTop_toTopOf="parent"
        app:layout_scrollFlags="scroll|enterAlwaysCollapsed"></androidx.appcompat.widget.Toolbar>

    <androidx.coordinatorlayout.widget.CoordinatorLayout
        android:id="@+id/coordinatorLayout"
        android:layout_width="0dp"
        android:layout_height="0dp"
        app:layout_constraintBottom_toBottomOf="parent"
        app:layout_constraintEnd_toEndOf="parent"
        app:layout_constraintStart_toStartOf="parent"
        app:layout_constraintTop_toBottomOf="@+id/toolbar">

        <com.google.android.material.appbar.AppBarLayout
            android:id="@+id/appbar"
            android:layout_width="match_parent"
            android:layout_height="wrap_content">

            <com.google.android.material.tabs.TabLayout
                android:id="@+id/tabLayout"
                android:layout_width="match_parent"
                android:layout_height="wrap_content"
                app:layout_collapseMode="parallax"
                app:layout_scrollFlags="scroll|enterAlwaysCollapsed"
                app:tabIndicatorFullWidth="false"
                app:tabMode="scrollable">

                <com.google.android.material.tabs.TabItem
                    android:id="@+id/tabItem1"
                    android:layout_width="wrap_content"
                    android:layout_height="wrap_content"
                    android:text="TAB01" />

                <com.google.android.material.tabs.TabItem
                    android:id="@+id/tabItem2"
                    android:layout_width="wrap_content"
                    android:layout_height="wrap_content"
                    android:text="TAB02" />

                <com.google.android.material.tabs.TabItem
                    android:id="@+id/tabItem3"
                    android:layout_width="wrap_content"
                    android:layout_height="wrap_content"
                    android:text="TAB03" />

                <com.google.android.material.tabs.TabItem
                    android:id="@+id/tabItem4"
                    android:layout_width="wrap_content"
                    android:layout_height="wrap_content"
                    android:text="TAB04" />
            </com.google.android.material.tabs.TabLayout>

        </com.google.android.material.appbar.AppBarLayout>

        <androidx.viewpager.widget.ViewPager
            android:id="@+id/viewPager"
            android:layout_width="match_parent"
            android:layout_height="match_parent"
            app:layout_behavior="com.google.android.material.appbar.AppBarLayout$ScrollingViewBehavior" />

    </androidx.coordinatorlayout.widget.CoordinatorLayout>
</androidx.constraintlayout.widget.ConstraintLayout>
こちらのコードはgithubからどうぞ
画像入り
 なお、前提としてアクションバーは非表示のテーマになっているとする。(非表示のやり方は一番下に)


メインのレイアウトファイル
<?xml version="1.0" encoding="utf-8"?>
<androidx.coordinatorlayout.widget.CoordinatorLayout xmlns:android="http://schemas.android.com/apk/res/android"
    xmlns:app="http://schemas.android.com/apk/res-auto"
    xmlns:tools="http://schemas.android.com/tools"

    android:layout_width="match_parent"
    android:layout_height="match_parent">

    <com.google.android.material.appbar.AppBarLayout
        android:id="@+id/appbar"
        android:layout_width="match_parent"
        android:layout_height="wrap_content">

        <com.google.android.material.appbar.CollapsingToolbarLayout
            android:layout_width="match_parent"
            android:layout_height="match_parent"
            app:contentScrim="?attr/colorPrimary"
            app:layout_scrollFlags="scroll|exitUntilCollapsed"
            app:toolbarId="@+id/toolbar">

            <ImageView
                android:id="@+id/imageView2"
                android:layout_width="match_parent"
                android:layout_height="200dp"
                android:scaleType="centerCrop"
                app:layout_collapseMode="parallax"
                app:srcCompat="@drawable/house" />

            <androidx.appcompat.widget.Toolbar
                android:id="@+id/toolbar"
                android:layout_width="match_parent"
                android:layout_height="?attr/actionBarSize"
                app:layout_scrollFlags="scroll|enterAlways|enterAlwaysCollapsed"
                app:title="スイスの湖小屋"></androidx.appcompat.widget.Toolbar>

        </com.google.android.material.appbar.CollapsingToolbarLayout>

        <com.google.android.material.tabs.TabLayout
            android:id="@+id/tabLayout"
            android:layout_width="match_parent"
            android:layout_height="wrap_content"
            app:layout_scrollFlags="enterAlwaysCollapsed"
            app:tabIndicatorFullWidth="false"
            app:tabMode="scrollable">

            <com.google.android.material.tabs.TabItem
                android:id="@+id/tabItem1"
                android:layout_width="wrap_content"
                android:layout_height="wrap_content"
                android:text="TAB01" />

            <com.google.android.material.tabs.TabItem
                android:id="@+id/tabItem2"
                android:layout_width="wrap_content"
                android:layout_height="wrap_content"
                android:text="TAB02" />

            <com.google.android.material.tabs.TabItem
                android:id="@+id/tabItem3"
                android:layout_width="wrap_content"
                android:layout_height="wrap_content"
                android:text="TAB03" />

            <com.google.android.material.tabs.TabItem
                android:id="@+id/tabItem4"
                android:layout_width="wrap_content"
                android:layout_height="wrap_content"
                android:text="TAB04" />
        </com.google.android.material.tabs.TabLayout>

    </com.google.android.material.appbar.AppBarLayout>

    <androidx.viewpager.widget.ViewPager
        android:id="@+id/viewPager"
        android:layout_width="match_parent"
        android:layout_height="match_parent"
        app:layout_behavior="com.google.android.material.appbar.AppBarLayout$ScrollingViewBehavior" />

</androidx.coordinatorlayout.widget.CoordinatorLayout>
フラグメントのレイアウトファイル等は上記と変わらず。
こちらのコードはgithubからどうぞ
おまけ
layout_scrollFlagsを組み合わせたりすることで以下のような動きにすることができる。(tabLayoutとtoolbarが出てくるタイミングが異なる)
tabLayoutはスクロールしたらすぐに出てくるが、toolbarは一番上までいかないと出てこない。

CollapsingToolbarLayoutとtabLayoutのlayout_scrollFlagsはこんな感じ
        <com.google.android.material.appbar.CollapsingToolbarLayout
            android:layout_width="match_parent"
            android:layout_height="match_parent"
            android:minHeight="?attr/actionBarSize"
            app:contentScrim="?attr/colorPrimary"
            app:layout_scrollFlags="scroll|enterAlwaysCollapsed"
            app:toolbarId="@+id/toolbar">

            <ImageView
                android:id="@+id/imageView3"
                android:layout_width="match_parent"
                android:layout_height="200dp"
                android:scaleType="centerCrop"
                app:srcCompat="@drawable/house" />

            <androidx.appcompat.widget.Toolbar
                android:id="@+id/toolbar"
                android:layout_width="match_parent"
                android:layout_height="?attr/actionBarSize"
                app:title="スイスの湖小屋"></androidx.appcompat.widget.Toolbar>
        <com.google.android.material.tabs.TabLayout
            android:id="@+id/tabLayout"
            android:layout_width="match_parent"
            android:layout_height="wrap_content"
            app:layout_collapseMode="parallax"
            app:layout_scrollFlags="scroll|enterAlways"
            app:tabIndicatorFullWidth="false"
            app:tabMode="scrollable">
CoordinatorLayout + FloatingActionButton
スクロールに合わせてボタンが消えるヤツ
FloatingActionButtonのついでに戻るボタンとかオプションメニューとかも表示してみる
レイアウトファイル
FloatingActionButtonを設置する。

<?xml version="1.0" encoding="utf-8"?>
<androidx.coordinatorlayout.widget.CoordinatorLayout xmlns:android="http://schemas.android.com/apk/res/android"
    xmlns:app="http://schemas.android.com/apk/res-auto"
    xmlns:tools="http://schemas.android.com/tools"
    android:layout_width="match_parent"
    android:layout_height="match_parent">

    <com.google.android.material.appbar.AppBarLayout
        android:id="@+id/appbar"
        android:layout_width="match_parent"
        android:layout_height="wrap_content">

        <com.google.android.material.appbar.CollapsingToolbarLayout
            android:layout_width="match_parent"
            android:layout_height="match_parent"
            app:contentScrim="?attr/colorPrimary"
            app:layout_scrollFlags="scroll|enterAlwaysCollapsed|exitUntilCollapsed"
            app:toolbarId="@+id/toolbar">

            <ImageView
                android:id="@+id/imageView"
                android:layout_width="match_parent"
                android:layout_height="200dp"
                android:scaleType="centerCrop"
                app:layout_collapseMode="parallax"
                app:srcCompat="@drawable/house" />

            <androidx.appcompat.widget.Toolbar
                android:id="@+id/toolbar"
                android:layout_width="match_parent"
                android:layout_height="?attr/actionBarSize"
                app:layout_collapseMode="pin"
                app:title="スイスの湖小屋"></androidx.appcompat.widget.Toolbar>
        </com.google.android.material.appbar.CollapsingToolbarLayout>
    </com.google.android.material.appbar.AppBarLayout>

    <androidx.core.widget.NestedScrollView
        android:id="@+id/nestedScrollView"
        android:layout_width="match_parent"
        android:layout_height="match_parent"
     app:layout_behavior="com.google.android.material.appbar.AppBarLayout$ScrollingViewBehavior">

        <androidx.recyclerview.widget.RecyclerView
            android:id="@+id/recyclerView"
            android:layout_width="match_parent"
            android:layout_height="wrap_content" />
    </androidx.core.widget.NestedScrollView>

    <com.google.android.material.floatingactionbutton.FloatingActionButton
        android:layout_width="wrap_content"
        android:layout_height="wrap_content"
        android:layout_margin="16dp"
        android:src="@android:drawable/btn_star_big_off"
        app:layout_anchor="@id/appbar"
        app:layout_anchorGravity="bottom|right" />
</androidx.coordinatorlayout.widget.CoordinatorLayout>
toolbarのapp:layout_collapseMode属性はpinにしておかないと戻るボタンとかが表示されなくなる。
floatingActionButtonのlayout_anchorを指定することでappbarが隠れたときにfabも非表示にするようになっている。
また、fabの位置はlayout_anchorGravityで指定可能。普通のlayout_gravityとかじゃないので注意。
とりあえずこれでスクロールに合わせて消えるfabの出来上がり。
戻るボタンの表示
後は戻るボタンとかオプションメニューを表示してみる。
menuフォルダを作って適当にmenuItemを追加(わからない方はoptionMenuの表示の仕方とかで調べてみてください。)
onCreateで戻るボタンとオプションメニューを表示させる。
    override fun onCreate(savedInstanceState: Bundle?) {
        super.onCreate(savedInstanceState)
        setContentView(R.layout.activity_main)
        // toolbar設定
        setSupportActionBar(toolbar)
        //戻るボタンの表示
        supportActionBar?.setDisplayHomeAsUpEnabled(true)

        // recyclerView
        val list = List<String>(20) { "RecyclerView$it" }
        val adapter = RecyclerViewAdapter(list)
        recyclerView.adapter = adapter
        recyclerView.layoutManager = LinearLayoutManager(this)
    }

    // オプションメニューを表示させる
    override fun onCreateOptionsMenu(menu: Menu?): Boolean {
        val inflater = MenuInflater(this)
        inflater.inflate(R.menu.main, menu)
        return true
    }
出来上がり。
こちらのコードはgithubからどうぞ
アクションバーを非表示にする
stylesを少しいじってアクションバー非表示
    <style name="AppTheme" parent="Theme.AppCompat.Light.DarkActionBar">
        <!-- Customize your theme here. -->
        <item name="colorPrimary">@color/colorPrimary</item>
        <item name="colorPrimaryDark">@color/colorPrimaryDark</item>
        <item name="colorAccent">@color/colorAccent</item>
        <item name="windowNoTitle">true</item>
     <!--        アクションバーの文字色-->
        <item name="android:textColorPrimary">@android:color/white</item>
    </style>
アクションバーの設定(※toolbarを自分で作ってそれをアクションバーとして使う場合)
onCreateに以下を加える
setSupportActionBar(toolbar)
おわり
使いづらいと思ってたCoordinatorLayoutとこれを機に仲良くなりたいと思ってまとめてみた。
少しでもアンドロイダーの方々の一助となれば幸いです。
上にスクロールして消えるときにアニメーションとか入れているものを紹介しているサイトがいくつかあって、アニメーションとCoordinatorLayout入れるだけでずいぶん印象変わりそうだなと思った。
スイスにこんな別荘が欲しい...