今回やること
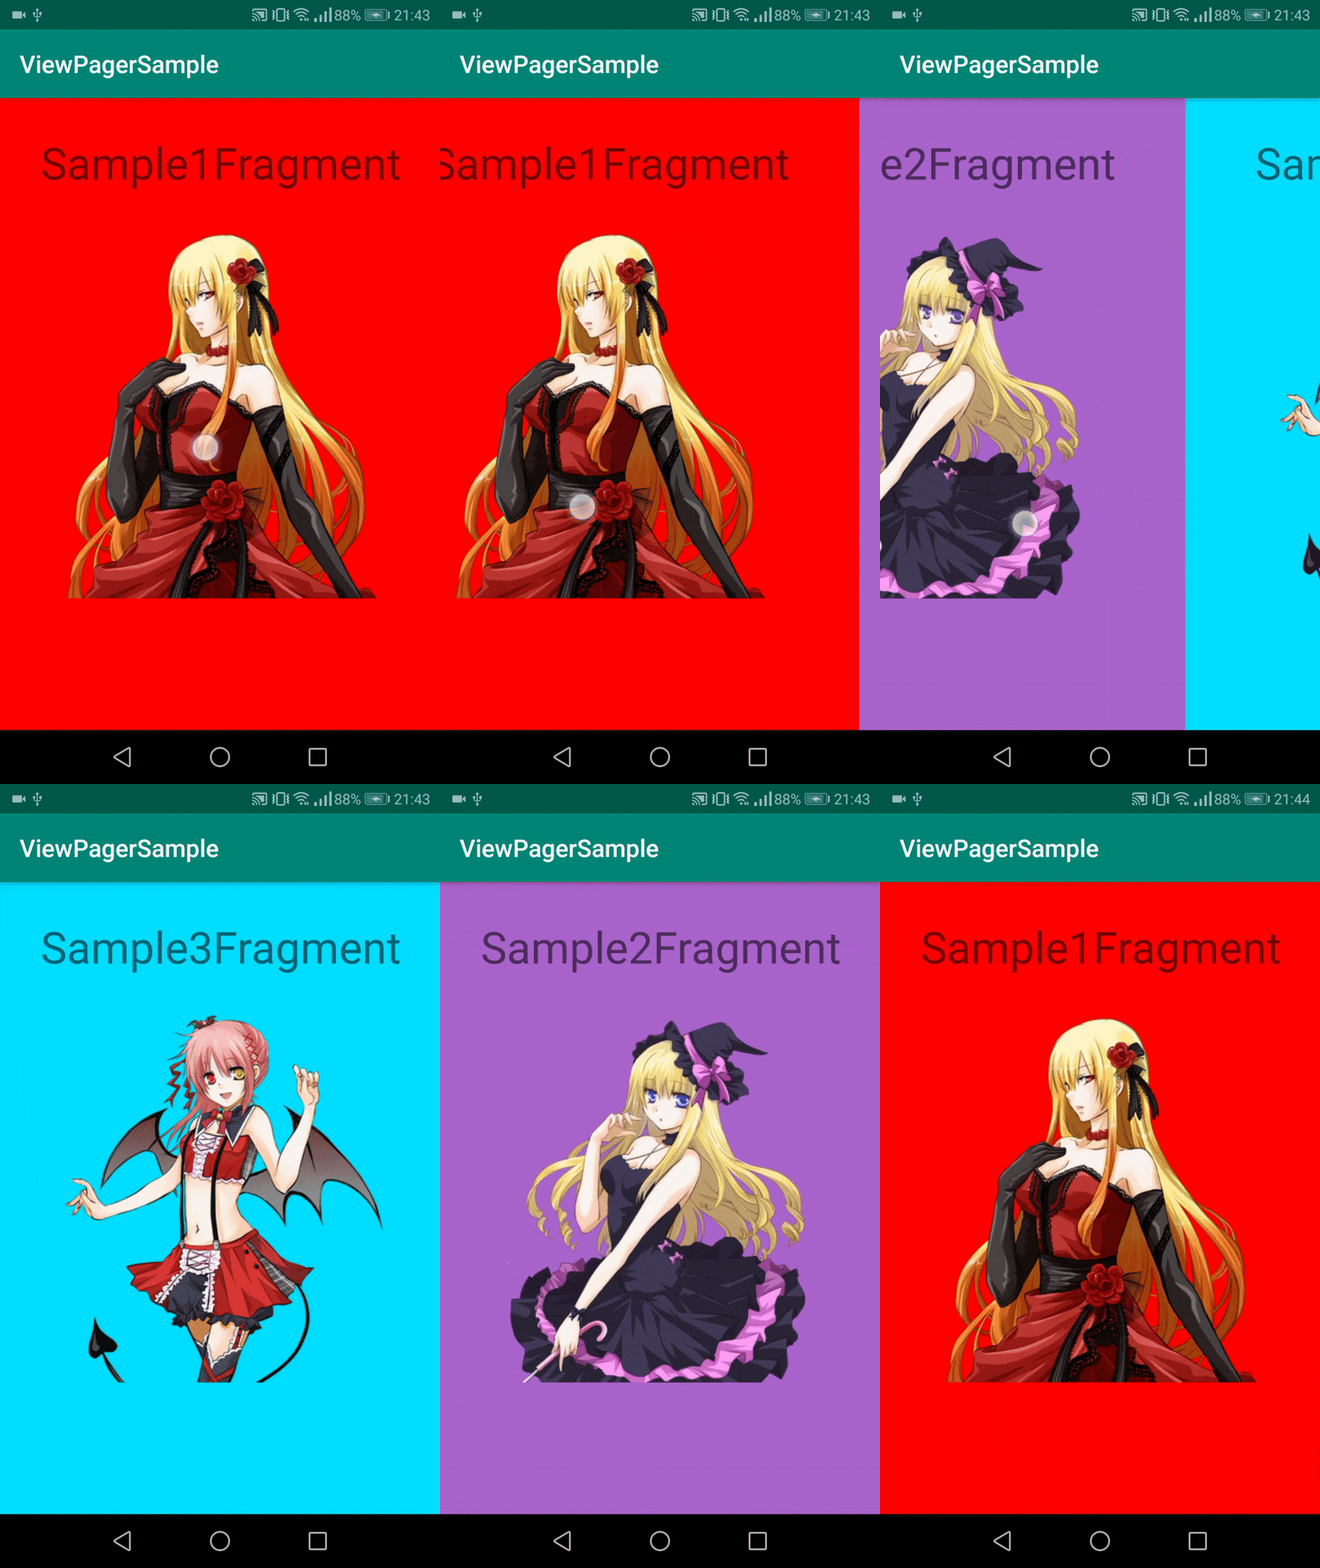
ViewPagerを使ってフラグメントを切り替える。(簡単です!!、あとkotlinで書きます)

↑こんな感じ
作るファイル
| ファイル名 | 内容 |
|---|---|
| MainActivity.kt | 以下のファイルを統合する |
| Sample1Fragment.kt | 表示するフラグメント1 |
| Sample2Fragment.kt | 表示するフラグメント2 |
| Sample3Fragment.kt | 表示するフラグメント3 |
| SamplePagerAdapter.kt | ViewPagerの中身を制御するアダプタ |
| これに加えてSamplePagerAdapter.kt以外の各レイアウトxmlファイルを作ります |
フラグメントの作成
フラグメントを3つ作ります。(android studioのUIを利用して「新規->空のフラグメント」で作るとちょー楽)
フラグメントをUIから作った方はfragment.ktは何もいじらなくて大丈夫です。
レイアウトは何でも大丈夫です。一応以下に自分が作ったSample1Fragment.ktとfragment_sample1.xmlを載せておきます。
class Sample1Fragment : Fragment() {

    override fun onCreateView(
        inflater: LayoutInflater, container: ViewGroup?,
        savedInstanceState: Bundle?
    ): View? {
        // Inflate the layout for this fragment
        return inflater.inflate(R.layout.fragment_sample1, container, false)
    }

}
↑ UIから作って何もいじってません
<?xml version="1.0" encoding="utf-8"?>
<androidx.constraintlayout.widget.ConstraintLayout
    xmlns:android="http://schemas.android.com/apk/res/android"
    xmlns:app="http://schemas.android.com/apk/res-auto"
    xmlns:tools="http://schemas.android.com/tools"
    android:layout_width="match_parent"
    android:layout_height="match_parent"
    android:background="?attr/colorError"
    tools:context=".Sample1Fragment">

    <ImageView
        android:id="@+id/imageView2"
        android:layout_width="300dp"
        android:layout_height="300dp"
        android:scaleType="fitCenter"
        android:src="@drawable/sample1"
        app:layout_constraintBottom_toBottomOf="parent"
        app:layout_constraintEnd_toEndOf="parent"
        app:layout_constraintStart_toStartOf="parent"
        app:layout_constraintTop_toTopOf="parent" />

    <TextView
        android:id="@+id/textView2"
        android:layout_width="wrap_content"
        android:layout_height="wrap_content"
        android:layout_marginBottom="32dp"
        android:text="Sample1Fragment"
        android:textSize="36sp"
        app:layout_constraintBottom_toTopOf="@+id/imageView2"
        app:layout_constraintEnd_toEndOf="parent"
        app:layout_constraintStart_toStartOf="parent" />
</androidx.constraintlayout.widget.ConstraintLayout>
画像とテキストだけのレイアウトです。
これと似たようなやつをほかに2個くらい作ります。(Sample2Fragment,Sample3Fragment)
アダプターの作成
package com.example.viewpagersample

import androidx.fragment.app.Fragment
import androidx.fragment.app.FragmentManager
import androidx.fragment.app.FragmentStatePagerAdapter

class SamplePagerAdapter(fm: FragmentManager, private val fragmentList: List<Fragment>) :
    FragmentStatePagerAdapter(fm, BEHAVIOR_RESUME_ONLY_CURRENT_FRAGMENT) {

    // 表示するフラグメントを制御する
    override fun getItem(position: Int): Fragment {
        return fragmentList[position]
    }

    // viewPagerにセットするコンテンツ(フラグメントリスト)のサイズ
    override fun getCount(): Int {
        return fragmentList.size
    }
}
FragmentStatePagerAdapterを継承してadapterを作ります。コンストラクタにはFragmentManagerを入れてあげます。
ちょっと前まではFragmentManagerだけでよかったのですが、ここ最近(多分API27くらい)になってからコンストラクタにFragmentManagerだけを入れるのはdeprecatedになりました。なのでコンストラクタにBEHAVIOR_RESUME_ONLY_CURRENT_FRAGMENTも入れてあげます。
継承するアダプターはFragmentPagerAdapterを使っても大丈夫です。ただandroid developerでは特に理由がない場合はFragmentStatePagerAdapterの方を使うことが推奨されていたのでこっちを使いました。(メモリの消費が少ないとか)
最後にgetItemとgetCountをimplementsしてあげます。
アダプターをセットする
mainActivityのレイアウト
<?xml version="1.0" encoding="utf-8"?>
<androidx.constraintlayout.widget.ConstraintLayout
    xmlns:android="http://schemas.android.com/apk/res/android"
    xmlns:app="http://schemas.android.com/apk/res-auto"
    xmlns:tools="http://schemas.android.com/tools"
    android:layout_width="match_parent"
    android:layout_height="match_parent"
    tools:context=".MainActivity">

    <androidx.viewpager.widget.ViewPager
        android:id="@+id/viewPager"
        android:layout_width="match_parent"
        android:layout_height="match_parent"
        app:layout_constraintBottom_toBottomOf="parent"
        app:layout_constraintEnd_toEndOf="parent"
        app:layout_constraintStart_toStartOf="parent"
        app:layout_constraintTop_toTopOf="parent" />
</androidx.constraintlayout.widget.ConstraintLayout>
ViewPagerを張り付けるだけです。(UIでは、パレットのcontainersに入ってるViewPagerをドラッグすると楽)
viewPagerというIDでViewPagerを使ってます。
MainActivity
最後にViewPagerで表示するフラグメントのリストを作ってアダプターをセットします。
package com.example.viewpagersample

import androidx.appcompat.app.AppCompatActivity
import android.os.Bundle
import androidx.fragment.app.Fragment
import kotlinx.android.synthetic.main.activity_main.*

class MainActivity : AppCompatActivity() {

    override fun onCreate(savedInstanceState: Bundle?) {
        super.onCreate(savedInstanceState)
        setContentView(R.layout.activity_main)

        /// フラグメントのリストを作成
        val fragmentList = arrayListOf<Fragment>(
            Sample1Fragment(),
            Sample2Fragment(),
            Sample3Fragment()
        )

        /// adapterのインスタンス生成
        val adapter = SamplePagerAdapter(supportFragmentManager, fragmentList)
        /// adapterをセット
        viewPager.adapter = adapter
    }
}
おわり
以上で終わりになります。時間あれば切替をボタンでできるやつとかアニメーションも投稿してみようかな。
今回フリー素材のイラストを利用させていただきました。(三日月アルペジオ)