本日もお疲れ様です。
皆さんは数多のPythonのライブラリを扱いますか?(Go〇gle翻訳風)
数々のライブラリを扱い「あ、久々に〇〇また使おうかな~」となった時、
どんな機能があるかは覚えているものの**「肝心の書き方をイマイチ思い出せないッ…!」**
みたいなこととかありませんか?
僕はあります()
今回はよく使う「tkinter」についてまとめ、
今後そのようなことがあっても困らないようにしておきます。
今回の環境
- Python3.9(2系だと書き方が異なるので注意)
① 好きなアイコンを設定してダイアログを出そう
# ! coding: utf-8

import os
from tkinter import *
from tkinter import ttk

def main():
    root = Tk()
    root.title(u"TKDialog Test")

    img = PhotoImage(file = os.path.join(os.getcwd(), "kuma.gif"))
    root.tk.call('wm', 'iconphoto', root._w, img)

    root.geometry("512x288")

    root.mainloop()

if __name__ == "__main__": main()
● PhotoImage
アイコンにする画像をここで定義します。
次に、 root.tk.call('wm', 'iconphoto', root._w, 〇〇)
に定義した画像を渡すことで、アイコンに設定することが出来ます。
(こちら以外にも iconbitmap でも、アイコンを設定することが可能です)
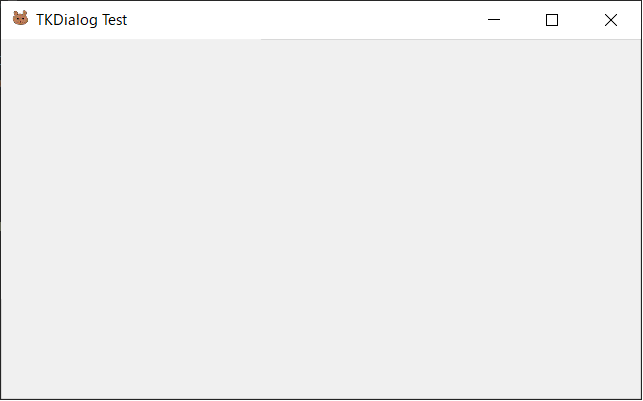
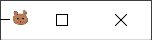
ちっさいですが、デフォルト以外のアイコン(くまさん)を表示することが出来ました。
② ダイアログの最大・最小サイズを設定しよう
先ほどのダイアログですが、自由にサイズを変更することが出来ます。
ウソみたいだろ。ダイアログなんだぜ。これで。
自由すぎるのも考えものなので、最大・最小サイズを以下のように設定して制御しましょう。
    root.minsize(256, 144)
    root.maxsize(1024, 576)
③ 王道・ボタンを配置してみよう
何かと便利なボタンを表示してみます。
def PrintTime():
    print("Push : {}".format(datetime.datetime.now()))

def main():

    # ---一部省略---

    frame = Frame(root, pady = 10)
    frame.pack(anchor = CENTER)

    button = Button(frame, text = u"これぞ王道ッ", relief = RAISED, width = 10, command = PrintTime)
    button.grid(row = 0, column = 0)
実行後↓

● relief
ボタンの見た目を設定するオプションです。
サンプルのRAISED以外にも、以下のような設定があります。
| オプション名 | 外見 |
|---|---|
| FLAT | 平らなボタン |
| SUNKEN | 凹んだボタン |
| SOLID | 太い枠線で囲まれたボタン |
| RIDGE | 枠線が隆起しているボタン |
| GROOVE | 枠線が溝みたいになっているボタン |
| ● command | |
| ボタン押下時に実行される関数を渡します。 |
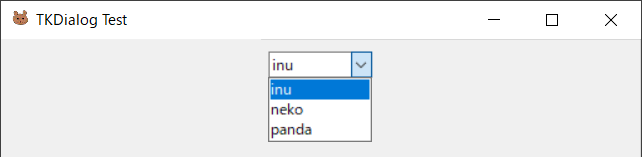
④ リストをコンボボックス化してみよう
ネットでよく見るコンボボックスを表示してみます。
def main():

    # ---一部省略---

    frame = Frame(root, pady = 10)
    frame.pack(anchor = CENTER)

    animals = ["inu", "neko", "panda"]

    combo_box = ttk.Combobox(frame, values = animals, state = 'readonly', width = 10)
    combo_box.set(animals[0])
    combo_box.bind('<<ComboboxSelected>>', lambda e: print(combo_box.get()))
    combo_box.grid(row = 0, column = 0)
実行後↓
-
ttk.Combobox()
この関数に対して表示するリストを渡します。
また「state = 'readonly'」を設定することで、リスト以外の値を受け付けないようにしています。
(この設定を外すとボックス内に値を入力することが出来るようになります。) -
combo_box.bind()
コールバック関数(処理)を設定することが出来ます。
上記のサンプルでは、ボックス内の値を変更したときに、
選択した内容をプリントするようにしてみました。
⑤ ツリービューを表示してみよう
+ボタンをクリックしたら子要素がワッと表示されるアレです。
ファイル一覧を表示する時とかに便利な機能です。
def main():

    # ---一部省略---

    frame = Frame(root, pady = 10)
    frame.pack(anchor = CENTER)

    # ツリービュー
    tree = ttk.Treeview(frame, height = 10, padding = 3, show = 'tree')

    # 横のスクロール
    scroll_h = ttk.Scrollbar(frame, orient = HORIZONTAL, command = tree.xview)
    scroll_h.grid(row = 2, column = 0, sticky = EW)

    # 縦のスクロール
    scroll_v = ttk.Scrollbar(frame, orient = VERTICAL, command = tree.yview)
    scroll_v.grid(row = 1, column = 1, sticky = NS)

    # スクロールバーの設定をビューに反映
    tree.configure(xscrollcommand = scroll_h.set, yscrollcommand = scroll_v.set)
    tree.grid(row = 1, column = 0, sticky = NSEW)

    # こういうファイル構成があったとする
    data_list = ["animals\\inu.txt", "animals\\nako.txt", "animals\\panda.txt",
                "fruits\\ringo.txt", "fruits\\mikan.txt", "fruits\\momo.txt",
                "money\\suidohi.txt", "money\\konetsuhi.txt", "money\\gasudai.txt"]

    # 親要素の名前とIDを紐づけるリスト
    directory_list = {}

    for item in data_list:

        split_path = item.split(os.path.sep)

        # まだ存在しない親要素の場合、親・子要素を挿入する
        if not split_path[0] in directory_list:

            parent_id = tree.insert("", "end", text = split_path[0])
            tree.insert(parent_id, "end", text = split_path[-1])
            directory_list[split_path[0]] = parent_id

        else:

            # 親要素があれば子要素のみ挿入する
            tree.insert(directory_list[split_path[0]], "end", text = split_path[-1])
実行後↓
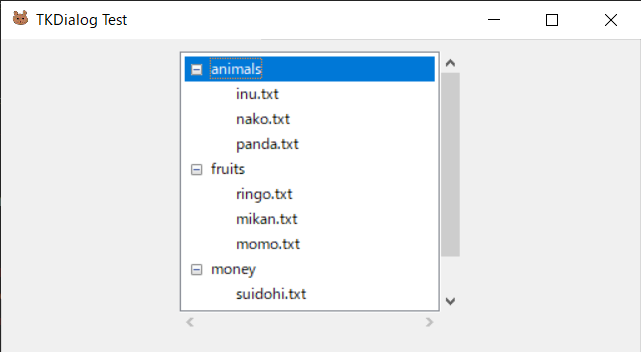
ファイル一覧っぽい感じになりました。
(今回は1段階の階層にしましたが、複数の階層を実装することも可能です。)
色々実装しましたが、要素の挿入自体は tree.insert() のみで行っています。
この関数に渡している内容は以下になります。
-
第1引数
どの親要素に挿入するのかを、親要素のIDで指定します。
指定しない際(親要素を新しく追加する際)はダブルクォートを記入します。 -
第2引数
どの位置に挿入するかを指定します。
末尾に挿入する際は"end"を記入します。 -
第3引数
挿入するアイテムの名前を記入します。
⑥ テキストを入力(表示)できる欄を表示しよう
名前入力とかしてもらい時にあると便利な機能です。
def main():

    # ---一部省略---

    frame = Frame(root, pady = 10)
    frame.pack(anchor = CENTER)

    text = StringVar()
    text_box = Entry(frame, width = 30, textvariable = text)
    text_box.grid(row = 0, column = 0)
実行後↓

● Entry()
テキストボックスを表示する際に使用します。
textvariable に StringVar() を渡すことで、入力した内容を取得することが出来ます。
(上記のサンプルでは、text.get()のようにして取得が出来ます。)
⑦ 長いテキストを入力(表示)できる欄を表示しよう
ログを出したい時とかに便利な機能です。
def main():

    # ---一部省略---

    frame = Frame(root, pady = 10)
    frame.pack(anchor = CENTER)

    # テキスト入力欄
    txt = Text(frame, font = ("Helvetica", "9"), width = 60, height = 12)

    # 横のスクロール
    scroll_h = ttk.Scrollbar(frame, orient = HORIZONTAL, command = txt.xview)
    scroll_h.grid(row = 2, column = 0, sticky = EW)

    # 縦のスクロール
    scroll_v = ttk.Scrollbar(frame, orient = VERTICAL, command = txt.yview)
    scroll_v.grid(row = 1, column = 1, sticky = NS)

    # スクロールバーの設定をビューに反映
    txt.configure(xscrollcommand = scroll_h.set, yscrollcommand = scroll_v.set)
    txt.grid(row = 1, column = 0, sticky = NSEW)
実行後↓
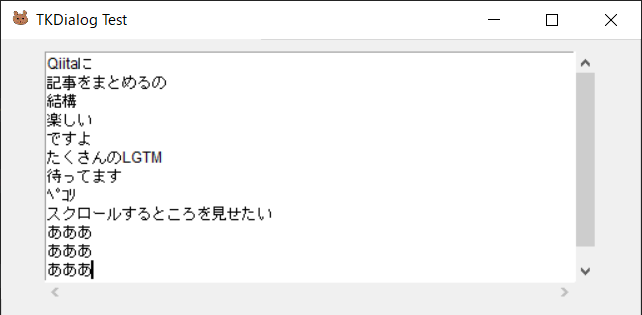
こんな感じになります。
フォントの設定をしていますが、設定しなくても問題ありません。
state='disabled' を設定することで、入力を受け付けなくすることもできます。
(再度入力を可能にする際は、txt.configure(state = 'normal') を実行します。)
プログラムからテキストを入力したい場合は、insert() を使用します。
txt.insert(END, "Aiueooo")
-
第1引数
テキストを挿入する位置を指定します。 -
第2引数
挿入するテキストを指定します。
また、文字の背景色を指定することも可能です。
以下は黄色を指定したものです。
txt.insert(END, "Aiueooo", 'yellow')
txt.tag_configure('yellow', background='yellow')

マーカーを引いたみたいで分かりやすいです。
まとめ
今回は自分が比較的よく扱うものについてまとめてみました。
tkinterに関する記事はたくさんありますが、この記事が何かお役に立てれば幸いです。