はじめに
React公式チュートリアルに挑戦するべく、Railsサーバ上でReactを動作させる環境を構築していこうと思います!
Rails5.1からwebpackerやnpm,yarnなどに対応したため、それらを利用してReactを使えるようにします。
目次
-
- yarnをインストールする
-
- Railsプロジェクトを作成する
-
- Gemfileの編集
-
- webpack,reactをインストールする
-
- 動作確認
前提環境
- cloud9 (amazon linux)
- Ruby 2.6
- Rails 5.1
- node 10.16
実践
1. yarnをインストールする
初めにyarnをインストールしておきます。
$ npm install -g yarn
2. Railsプロジェクトを作成する
おなじみrails newしていきます。
ついでにディレクトリも作成したプロジェクトに変更しておきます。
$ rails new webpack_test --skip-turbolinks && cd webpack_test
turbolinksはJavascriptにおいて不具合の原因になりかねないので使用しません。
3. Gemfileの編集
webpacker gemをインストールするため、作成したプロジェクトフォルダ内のGemfileを編集します
~省略~

gem "webpacker"
Gemfileを保存してからbundle installしてください。
4. webpack,reactをインストールする
webpackとreactをそれぞれインストールしていきます。
$ rails webpacker:install
$ rails webpacker:install:react
そして最後に
HTMLヘッダーを以下のように編集します
javascript_include_tag → javascript_pack_tag
javascriptを呼び出すときwebpackerのヘルパータグで<%=javascript_pack_tag'FILE_NAME'%>と記述します。
<%= javascript_pack_tag 'application' %>
5. 実際に動作させてみよう!
正常にインストールできていれば
app/javascript/hello_react.jsxが作成されていると思います。
reactはjsx内で動作しているので、jsxファイルを呼び出すことでreactを動かします。
試しに、hello_react.jsxを表示させていこうと思います。
まずcontrollerとviewを作成しrouteを割り当てます。
rails g controller react_app index
Rails.application.routes.draw do
  get 'react_app/index'
end
作成したviewでjsxファイルを呼び出します。
<%=javascript_pack_tag 'hello_react'%>
rails サーバを起動して、正常に表示されるか確認します。
rails s
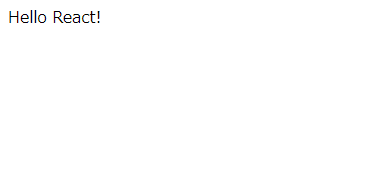
react_app/indexへ接続しHello React!と表示されていればReactの導入は完了です。
6. Reactチュートリアルへの準備
まず、チュートリアル用に新しくjsxファイルを作っていきましょう。
app/javascript/pack/にtutorial.jsxを作成しておきます。
tutorial.jsx内にreactをimportします。
import React from "react"
import ReactDOM from "react-dom"
//ここから下の行にチュートリアルの内容を記述していく
実際にチュートリアルのスターターコードをtutorial.jsxに記述して動作を確かめてみます。
import React from "react"
import ReactDOM from "react-dom"

class Square extends React.Component {
  render() {
    return (
      <button className="square">
        {/* TODO */}
      </button>
    );
  }
}

class Board extends React.Component {
  renderSquare(i) {
    return <Square />;
  }

  render() {
    const status = 'Next player: X';

    return (
      <div>
        <div className="status">{status}</div>
        <div className="board-row">
          {this.renderSquare(0)}
          {this.renderSquare(1)}
          {this.renderSquare(2)}
        </div>
        <div className="board-row">
          {this.renderSquare(3)}
          {this.renderSquare(4)}
          {this.renderSquare(5)}
        </div>
        <div className="board-row">
          {this.renderSquare(6)}
          {this.renderSquare(7)}
          {this.renderSquare(8)}
        </div>
      </div>
    );
  }
}

class Game extends React.Component {
  render() {
    return (
      <div className="game">
        <div className="game-board">
          <Board />
        </div>
        <div className="game-info">
          <div>{/* status */}</div>
          <ol>{/* TODO */}</ol>
        </div>
      </div>
    );
  }
}

// ========================================

ReactDOM.render(
  <Game />,
  document.getElementById('root')
);
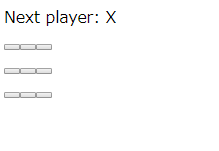
rails sを実行し、react_app/indexにアクセスしてみます。
このままでは、デザインがおかしいのでスターターコードのcssを適応していきます。
body {
  font: 14px "Century Gothic", Futura, sans-serif;
  margin: 20px;
}

ol, ul {
  padding-left: 30px;
}

.board-row:after {
  clear: both;
  content: "";
  display: table;
}

.status {
  margin-bottom: 10px;
}

.square {
  background: #fff;
  border: 1px solid #999;
  float: left;
  font-size: 24px;
  font-weight: bold;
  line-height: 34px;
  height: 34px;
  margin-right: -1px;
  margin-top: -1px;
  padding: 0;
  text-align: center;
  width: 34px;
}

.square:focus {
  outline: none;
}

.kbd-navigation .square:focus {
  background: #ddd;
}

.game {
  display: flex;
  flex-direction: row;
}

.game-info {
  margin-left: 20px;
}
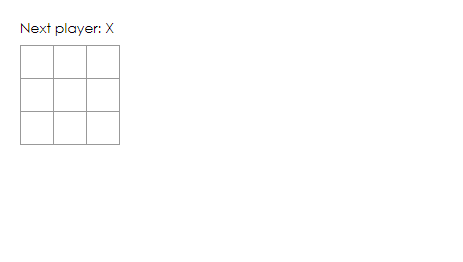
もう一度rails sを実行しreact_app/indexに接続すると
このような画面になっていればチュートリアルの準備は完了です。

あとがき
記事を書く経験が初めてでしたが、思ったより大変でした...。
分かりにくい箇所、至らない箇所があれば修正します。

