やりたいこと
ローカルに立てたgRPCサーバーを無料で公開し、指定ドメインからアクセスできるようにします。
はじめに
ローカルサーバーの公開は自己責任でお願いします。
また、この記事で紹介する方法は、cloudflare公式で下記の通り、
https://developers.cloudflare.com/network/grpc-connections/
Cloudflare Tunnel supports gRPC traffic via private subnet routing. Public hostname deployments are not currently supported.
パブリックホストでのgRPCは現在サポートしていないと明記されています。
突然利用できなくなる可能性がありますのでご注意ください。
目次は次のとおりです。
- Cloudflare Tunnelの設定
- gRPCサーバーの構築
- Nginxの構築
- 動作確認
前提
- マシン
- - macOS 14.6.1(筆者が試した環境)
- 使用するツール
- - brew
- - cloudflared
- - Docker (Compose)
- - grpcurl (動作確認用)
- ドメイン
- - ご自身で作成しておいてください
- ※当記事では「example.com」を所有している程で書いています。
Cloudflare Tunnelの設定
アカウントを持っていない方は適宜作成してください
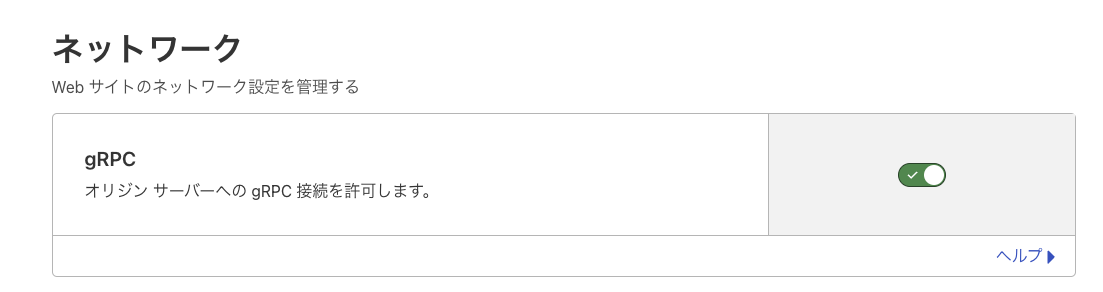
また、作成した後は、gRPCを受け付けられるように下記の設定を更新してください
左ペインの[ネットワーク]から設定できます。
Cloudflared(cli)でtunnelの設定
-
Cloudflare Tunnel CLIのインストール
Cloudflareのトンネルを作成するために、CLIツールcloudflaredをインストールします
-
トンネルの作成
以下のコマンドを実行してトンネルを作成します。<トンネル名>はなんでも良いです。
この記事ではmy-grpc-serverという名前で作成して進めます。cloudflared tunnel create <トンネル名> 例: cloudflared tunnel create my-grpc-server実行結果の例:
Tunnel credentials written to ~/.cloudflared/<トンネルID>.json. cloudflared chose this file based on where your origin certificate was found. Keep this file secret. To revoke these credentials, delete the tunnel. Created tunnel my-grpc-server with id <トンネルID>- 上記の実行後、トンネルの認証情報がJSONファイルとして自動生成されます
-
<トンネルID>はuuid形式で出力されます
-
DNSにトンネルを登録
トンネルIDをDNSに登録します:cloudflared tunnel route dns <トンネルID> <追加したいサブドメイン名>.<所有しているドメイン名> 例: cloudflared tunnel route dns <トンネルID> my-grpc-server.example.com -
config.ymlの作成
/usr/local/etc/cloudflared/config.ymlに以下の内容を記述します:tunnel: <トンネルID> credentials-file: ~/.cloudflared/<トンネルID>.json ingress: - hostname: my-grpc-server.example.com service: https://localhost:443 originRequest: noTLSVerify: true http2Origin: true - service: http_status:404serviceのスキーマはhttpsを指定すること。
また、portはデフォルトでは次の中から設定することができます。- 443
- 2053
- 2083
- 2087
- 2096
- 8443
参考:Cloudflare Network ports
※上記リンクにも記載されていますが、443以外のポートはキャッシュが無効になっています -
トンネルの実行
以下のコマンドを実行してトンネルを起動します:cloudflared --protocol http2 tunnel --loglevel debug run my-grpc-server--loglevel debugは付けなくても良いです。
付けていれば後の動作確認でリクエストを受信できているか確認できます。
Docker Composeの用意
grpcとnginxのコンテナをそれぞれ定義します。
.
├── Dockerfile
├── compose.yml
├── main.go
├── helloworld
│  ┗─ 各pbファイル
├── nginx
│  ┗─ nginx.conf
┗── cert
  ├─ server.crt <- Nginx構築時に作成します
  ┗─ servrt.key <- Nginx構築時に作成します
FROM golang:1.23

RUN go mod download
COPY . .

RUN go build main.go
services:
  grpc-server:
    build: .
#    ports:            # grpc単体で動作確認する場合はコメントアウトを外す
#      - "50051:50051" # grpc単体で動作確認する場合はコメントアウトを外す
    networks:
      - network-grpc

  nginx:
    image: nginx:alpine
    ports:
      - "443:443"
    volumes:
      - ./nginx/nginx.conf:/etc/nginx/nginx.conf:ro
      - ./certs:/etc/nginx/certs:ro
    depends_on:
      - grpc-server
    networks:
      - network-grpc

networks:
  network-grpc:
    driver: bridge
gRPCサーバの構築
こちらのサンプルを借ります
動作確認できるようにリフレクションを追加します。
import (
~~~
	"google.golang.org/grpc"
+	"google.golang.org/grpc/reflection"
~~~
)

~~~ 中略

func main() {
    flag.Parse()
    lis, err := net.Listen("tcp", fmt.Sprintf(":%d", *port))
    if err != nil {
        log.Fatalf("failed to listen: %v", err)
    }
    s := grpc.NewServer()
    pb.RegisterGreeterServer(s, &server{})
+   reflection.Register(s)
    log.Printf("server listening at %v", lis.Addr())
    if err := s.Serve(lis); err != nil {
        log.Fatalf("failed to serve: %v", err)
    }
}
このサンプルサーバーはlocalhost:50051で動作します。
pbファイルやパッケージ名の解決は適宜行なってください。
Nginxの構築
-
nginx.confの編集
nginx.confhttp { server { listen 443 ssl; server_name my-grpc-server.example.com; http2 on; # SSL証明書の設定 ssl_certificate /etc/nginx/certs/server.crt; ssl_certificate_key /etc/nginx/certs/server.key; location / { grpc_pass grpc://grpc-server:50051; # docker-composeで利用しているコンテナ名 # エラーハンドリング error_page 502 = /error502grpc; } location = /error502grpc { internal; default_type application/grpc; return 204; } } } -
証明書はcloudflareコンソールから取得します
下記の「証明書を作成」から証明書を作ります。
左ペインの[SSL/TLS] > [オリジンサーバー]からアクセスできます。
遷移先の画面で、証明書と秘密鍵をコピーして、それぞれ分かりやすいファイル名で保存します。
- sercer.crt: 証明書(
-----BEGIN CERTIFICATE-----から始まる) - server.key: 秘密鍵(
-----BEGIN PRIVATE KEY-----から始まる)
- sercer.crt: 証明書(
動作確認
- docker-coposeを実行します:
docker-compose up - まずはlocalhost経由でつながるか確認(
-insecureで証明書をスキップ)grpcurl -insecure -d '{"name": "HELLO!"}' localhost:443 helloworld.Greeter/SayHello - ドメイン経由で繋がるか確認
grpcurl -d '{"name": "HELLO!"}' my-grpc-server.example.com:443 helloworld.Greeter/SayHello
以上です
参考
Cloudflare Network ports
https://github.com/cloudflare/cloudflared/issues/491
https://github.com/grpc/grpc-go/blob/master/examples/helloworld/greeter_server/main.go
おまけ
gRPCサーバーの方に証明書を読み込ませてportを443にすれば、Nginxをプロキシしなくても動作可能です。