UI Elementsとは
UI Elementsとは従来のエディタ拡張(IMGUI)を置き換える新たなUIシステムで次のような特徴があります。
- システムによって、定義したUIの構造がレンダリングされる
- 描画の内容とタイミングが最適化され、IMGUIよりもパフォーマンスが高い
- 機能のロジックを作る作業とヒエラルキー・スタイリングを行う作業が分離される
本記事ではこのUI Elementsを使ったエディタ拡張のほんの入口をチュートリアル的に解説していきます。
環境
- macOS Catalina 10.15.7
- Unity2020.1.16f1
準備
エディタ拡張のためのC#スクリプトは全てEditorフォルダ内に置く必要があります。
またUXML、USSファイルについては本記事ではAssets/Editor/Resources以下に置くことにしましょう。
Assetsフォルダ内にEditorフォルダを作成し、Editorフォルダ内にScriptsフォルダとResourcesフォルダを作成して下さい。
Assets
└─ Editor
	 ├── Resources
	 └── Scripts
作ってみる
1.まっさらなEditorWindowを作る
まずは最も簡単なものから始めることにして、「中身が空っぽのEditorWindow」を作ってみましょう。
次のようなC#のスクリプトをEditor/Scriptsフォルダ内に作成して下さい。
using UnityEditor;

// EditorWindow を継承したクラスを作成
public class Practice : EditorWindow
{
    // メニューバーに"Practice"という項目と、その中に"Open"という項目が新たに作られ、
    // その"Open"をクリックするとShowWindow()が実行される。
    [MenuItem("Practice/Open")]
    public static void ShowWindow()
    {
        // EditorWindowを作成
        // 型引数にはこのクラスを入れる
        GetWindow<Practice>("Title"); // タイトルを指定
    }
}
そしてメニューバーで

でOpenをクリックすると、
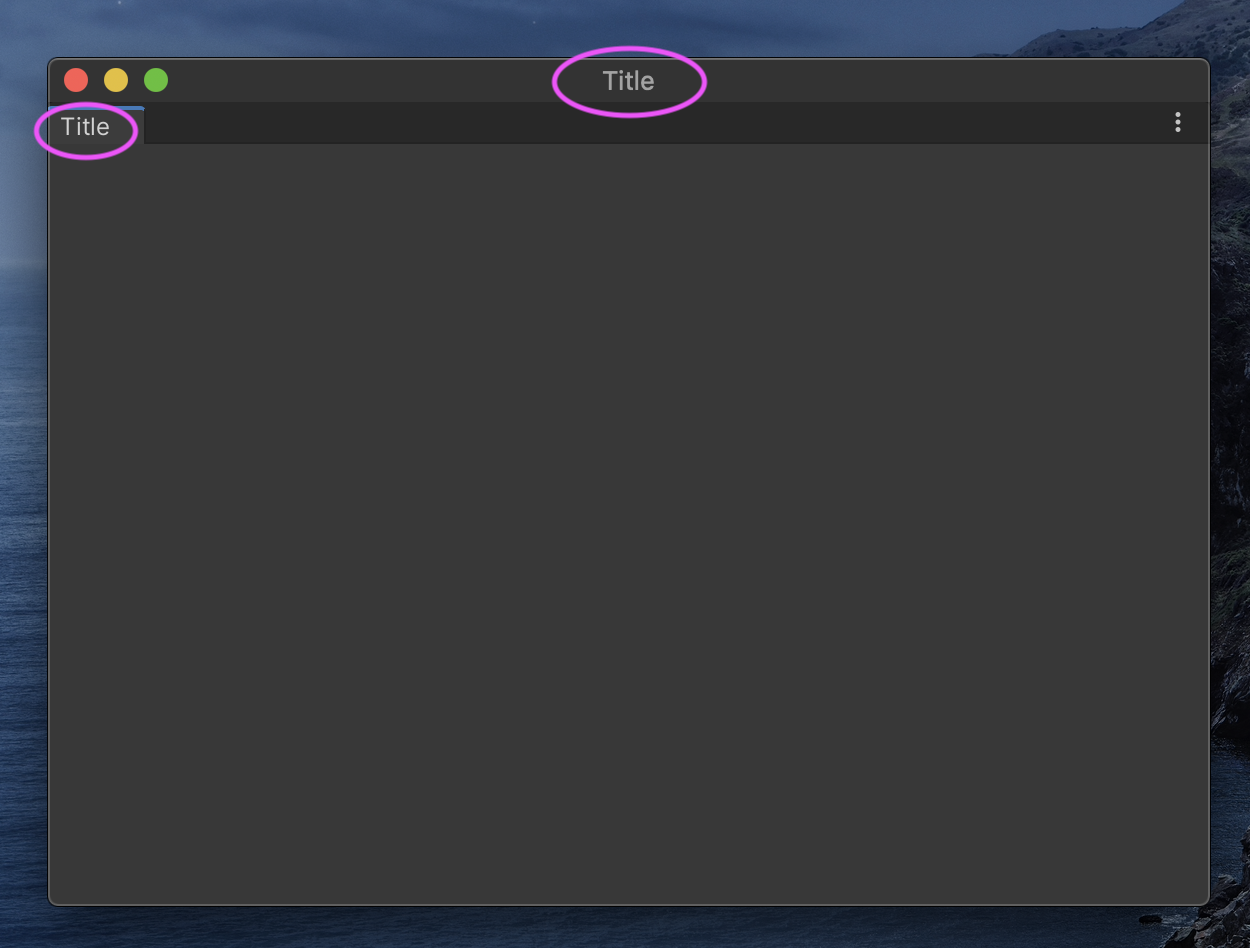
ヌっとこのような中身が空っぽのEidtorWindowが出現します。
タイトルも反映されてますね。
ちなみにここではまだUI Elementsの機能を使っていません。
2.Labelを作る
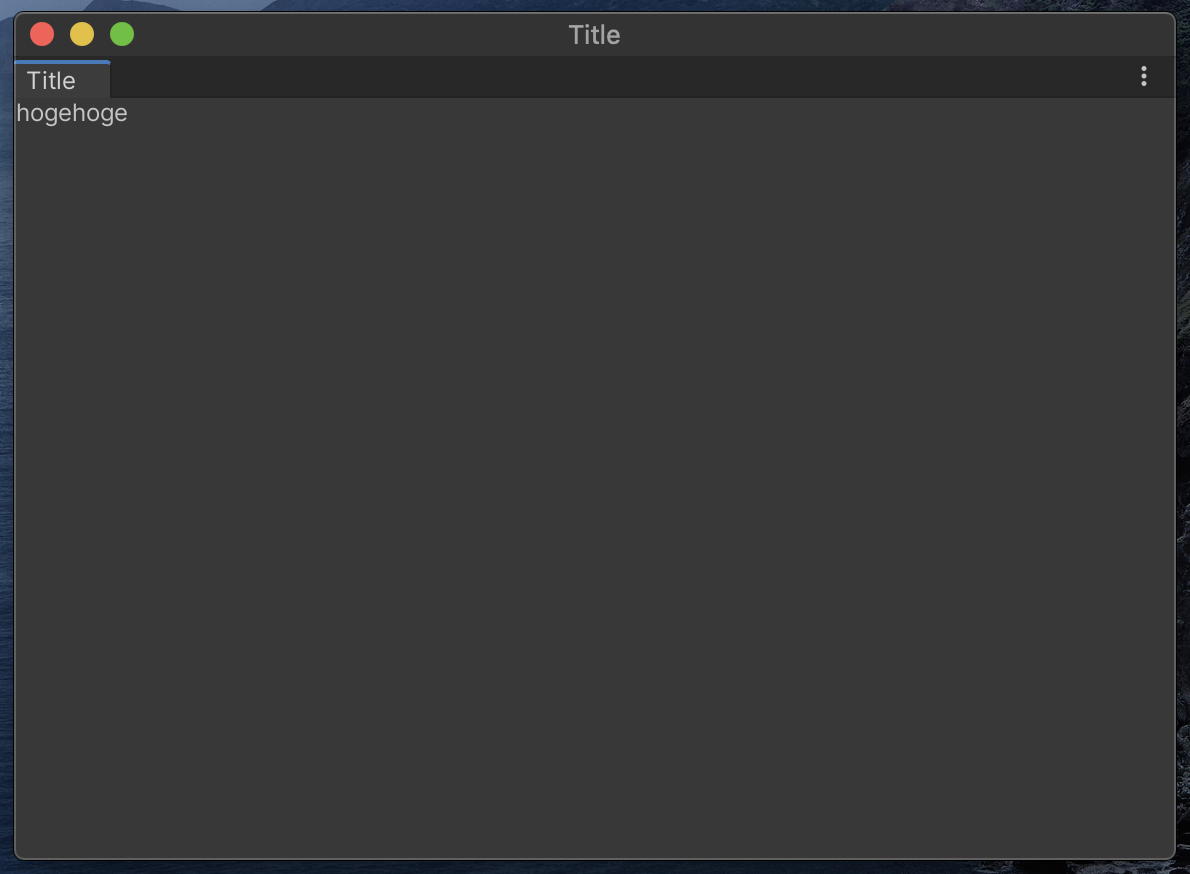
次に先程作成したEditorWindowに"hogehoge"というLabelを1つだけ表示してみましょう。
ここでようやくUI Elementsを使うことになります。
using UnityEditor;
using UnityEngine.UIElements; // UIElementsを使うのでusingする

public class Practice : EditorWindow
{
    [MenuItem("Practice/Open")]
    public static void ShowWindow()
    {
        GetWindow<Practice>("Title");
    }

    // 有効になった時に実行される
    private void OnEnable()
    {
        // ラベルのVisualElement
        var label = new Label("hogehoge");

        // EditorWindowのrootの子としてlabelを追加
        rootVisualElement.Add(label);
    }
}
先程のPracticeクラスに上記のようにOnEnable関数を追加して下さい。
rootVisualElementとは?
UI Elementsでは、全てのUI(ラベル、ボタン、トグル、スライダー、ボックス...)はVisualElementというクラスを継承したクラスによって表されます。
そしてVisualElementは他のVisualElementを子として持つことができ、VisualElement同士で親子関係を形成します。
例えばVisualElement1はVisualElement2とVisualElement3を子として持っていて、VisualElement2はVisualElement4を子として持っていて... というようにVisualElementのインスタンス同士で木構造が作られます。
それら複数のVisualElementによって作られた木構造はVisualTreeなどと呼ばれています。
そしてこのVisualTreeの「根」となっているVisualElementがrootVisualElementです。(上の例だとVisualElement1)
EditorWindowにUIを表示したい場合はこのrootVisualElementに子として追加する必要があります。
今回の例ではrootVisualElementにLabelのインスタンスを子として追加しています。
UXMLファイルを作成する
この例ではC#のみでラベルを定義していましたが、UXMLでも行うことができます。
まず Editor/Resources 内で Create -> UI Toolkit -> UI Document で"Practice"という名前のUXMLファイルを作成しましょう。
生成されたコードの中に
<engine:Label text="hogehoge"/>
を挿入して、
<?xml version="1.0" encoding="utf-8"?>
<engine:UXML
    xmlns:xsi="http://www.w3.org/2001/XMLSchema-instance"
    xmlns:engine="UnityEngine.UIElements"
    xmlns:editor="UnityEditor.UIElements"
    xsi:noNamespaceSchemaLocation="../../../UIElementsSchema/UIElements.xsd"
>
    <!-- ラベルの作成 -->
    <engine:Label text="hogehoge"/>
</engine:UXML>
のようにしてみましょう。
そしてC#のコードを次のように変更します。
using UnityEditor;
using UnityEngine;
using UnityEngine.UIElements;

public class Practice : EditorWindow
{
    [MenuItem("Practice/Open")]
    public static void ShowWindow()
    {
        GetWindow<Practice>("Title");
    }

    private void OnEnable()
    {
        // UXMLファイルを読み込む
        var visualTree = Resources.Load<VisualTreeAsset>("Practice");

        // UXMLで定義したVisualTreeを生成し、そのrootとしてrootVisualElementを設定
        visualTree.CloneTree(rootVisualElement);
    }
}
さっきと同じようにメニューバーからPractice > Open をクリックすると次のように同様に"hogehoge"というLabelが1つだけあるウィンドウが表示されます。

このようにUIの構造に関する情報をC#ではなくUXMLで定義することができます。
3.複数のLabelを作る
複数のLabelを表示してみましょう。
C#のコードはさっきと同じで、UXMLを次の様に書き換えます。
<?xml version="1.0" encoding="utf-8"?>
<engine:UXML
    xmlns:xsi="http://www.w3.org/2001/XMLSchema-instance"
    xmlns:engine="UnityEngine.UIElements"
    xmlns:editor="UnityEditor.UIElements"
    xsi:noNamespaceSchemaLocation="../../../UIElementsSchema/UIElements.xsd"
>
    <!-- 複数のラベルの作成 -->
    <engine:Label text="hogehoge"/>
    <engine:Label text="あいうえお"/>
    <engine:Label text="ABCDE"/>
    <engine:Label text="12345"/>
    <engine:Label text="テストテスト"/>
</engine:UXML>

このように複数のLabelを表示できます。
4.Boxを作る
今作った複数のLabelをBoxで囲ってみましょう。
<?xml version="1.0" encoding="utf-8"?>
<engine:UXML
    xmlns:xsi="http://www.w3.org/2001/XMLSchema-instance"
    xmlns:engine="UnityEngine.UIElements"
    xmlns:editor="UnityEditor.UIElements"
    xsi:noNamespaceSchemaLocation="../../../UIElementsSchema/UIElements.xsd"
>
    <!-- Boxを作成 -->
    <engine:Box >
        <engine:Label text="hogehoge"/>
        <engine:Label text="あいうえお"/>
        <engine:Label text="ABCDE"/>
        <engine:Label text="12345"/>
        <engine:Label text="テストテスト"/>
    </engine:Box>
</engine:UXML>
先程のUXMLをこのように変更し、5つのLabelをBoxの子に設定すると、これらのLabelを囲むBoxが作られます。

5.Buttonを作る
UXMLファイルを次のように変更して下さい。
<?xml version="1.0" encoding="utf-8"?>
<engine:UXML
    xmlns:xsi="http://www.w3.org/2001/XMLSchema-instance"
    xmlns:engine="UnityEngine.UIElements"
    xmlns:editor="UnityEditor.UIElements"
    xsi:noNamespaceSchemaLocation="../../../UIElementsSchema/UIElements.xsd"
>
    <engine:Button text="OK"/>
</engine:UXML>
するとこのようなButtonが作られます。
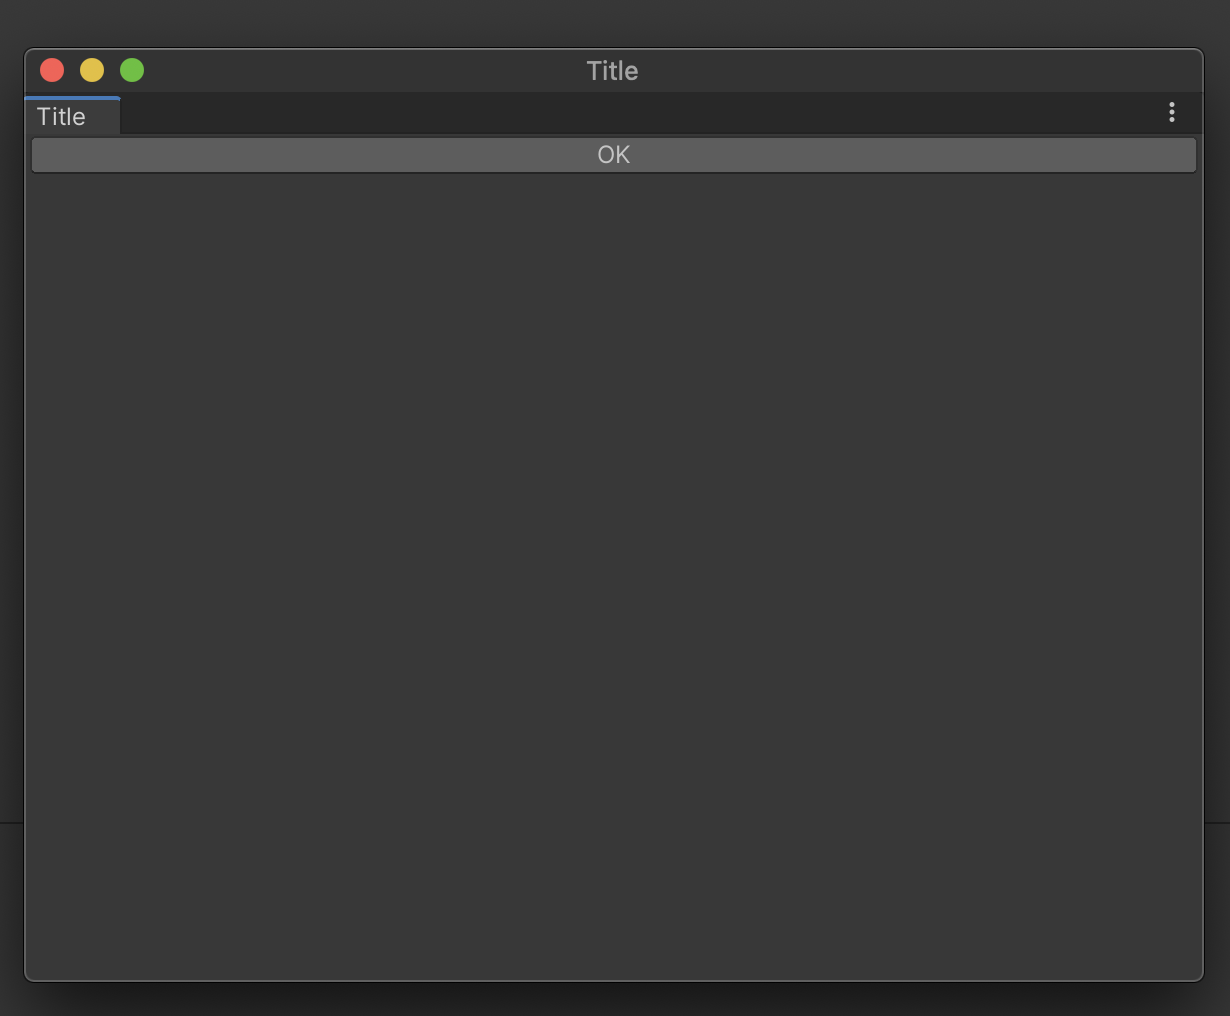
この時点ではButtonをポチポチ押すこと自体はできますが、押しただけでは何の処理も実行されません。
Buttonのクリック時の処理を登録する
UXMLの方を次のように少しだけ変更し、先程作成したButtonに名前を設定しましょう。
<?xml version="1.0" encoding="utf-8"?>
<engine:UXML
    xmlns:xsi="http://www.w3.org/2001/XMLSchema-instance"
    xmlns:engine="UnityEngine.UIElements"
    xmlns:editor="UnityEditor.UIElements"
    xsi:noNamespaceSchemaLocation="../../../UIElementsSchema/UIElements.xsd"
>
    <engine:Button text="OK" name="OKButton"/> <!-- nameを設定する -->
</engine:UXML>
name="OKButton"で名前を設定しています。
そしてC#の方を次のように変更して下さい。
using UnityEditor;
using UnityEngine;
using UnityEngine.UIElements;

public class Practice : EditorWindow
{
    [MenuItem("Practice/Open")]
    public static void ShowWindow()
    {
        GetWindow<Practice>("Title");
    }

    private void OnEnable()
    {
        var visualTree = Resources.Load<VisualTreeAsset>("Practice");
        visualTree.CloneTree(rootVisualElement);

        // 型と名前を指定してButtonを取得
        var button = rootVisualElement.Q<Button>("OKButton");

        if (button != null)
        {
            // Buttonを押した時の処理を登録
            button.clickable.clicked += () => Debug.Log("OK");
        }
    }
}
はい、これでOKButtonを押したときに
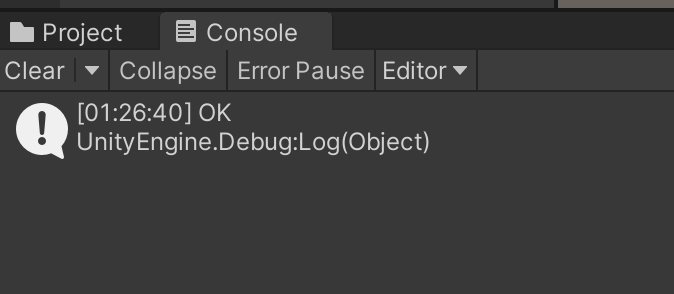
このようにログが出るはずです。
6.Buttonのサイズを変更する
今作ったButton、ちょっと横に長過ぎる感じがするのでサイズを変更しましょう。
まずはUXMLを次のように変更し、先程作成した"OKButton"に対して新たにclassを定義します。
<?xml version="1.0" encoding="utf-8"?>
<engine:UXML
    xmlns:xsi="http://www.w3.org/2001/XMLSchema-instance"
    xmlns:engine="UnityEngine.UIElements"
    xmlns:editor="UnityEditor.UIElements"
    xsi:noNamespaceSchemaLocation="../../../UIElementsSchema/UIElements.xsd"
>
    <engine:Button text="OK" name="OKButton" class="OKButton"/> <!-- classを定義する -->
</engine:UXML>
そして、Editor/Resources 内で Create > UI Toolkit > Style Sheet により"PracticeStyle.uss"を作成して下さい。
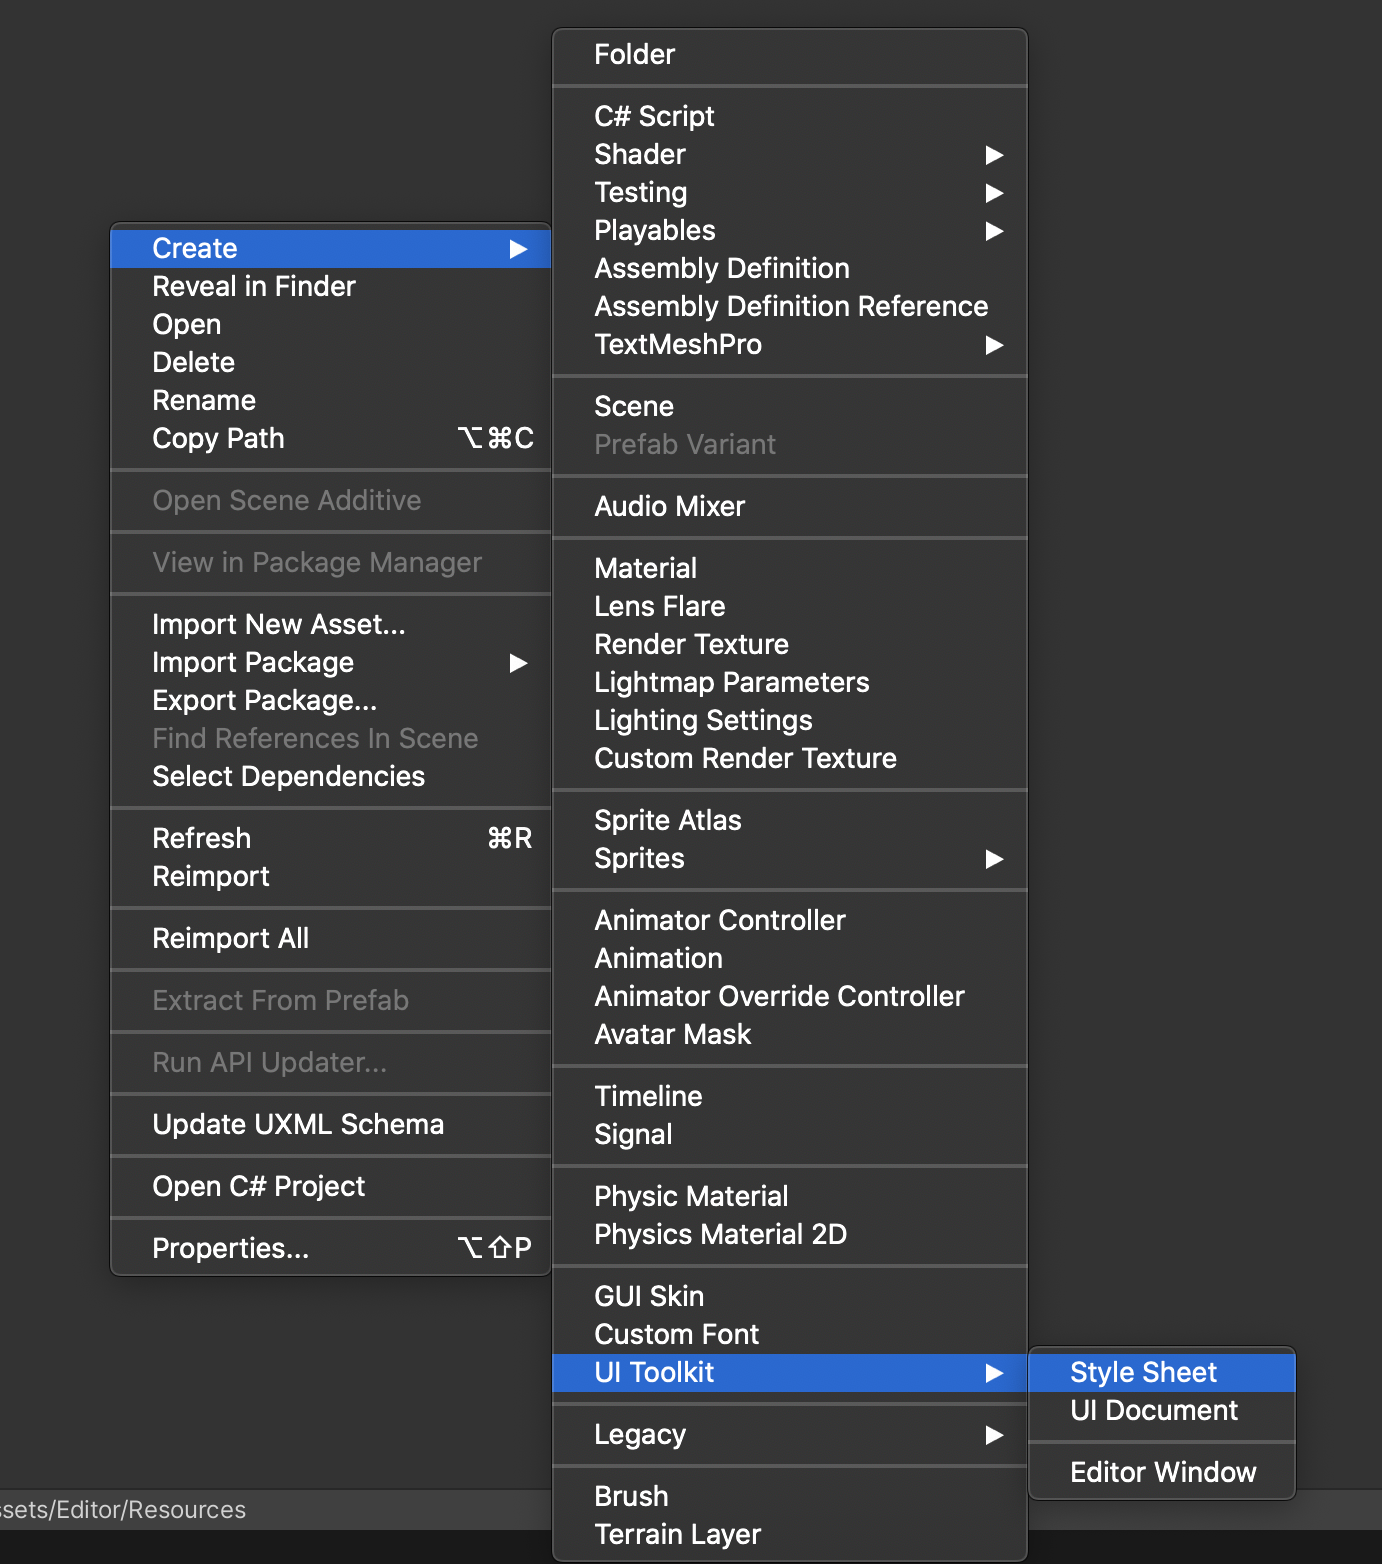
テンプレートのコードを削除し、次のように変更して下さい。
.OKButton {
    width: 50px;
    height: 50px;
}
C#のコードにも次のように、USSファイルを読み込んで設定する処理を追加して下さい。
using UnityEditor;
using UnityEngine;
using UnityEngine.UIElements;

public class Practice : EditorWindow
{
    [MenuItem("Practice/Open")]
    public static void ShowWindow()
    {
        GetWindow<Practice>("Title");
    }

    private void OnEnable()
    {
        var visualTree = Resources.Load<VisualTreeAsset>("Practice");
        visualTree.CloneTree(rootVisualElement);

        // USSファイルを読み込む
        var styleSheet = Resources.Load<StyleSheet>("PracticeStyle");
        // USSファイルをVisualTreeに設定
        rootVisualElement.styleSheets.Add(styleSheet);

        var button = rootVisualElement.Q<Button>("OKButton");

        if (button != null)
        {
            button.clickable.clicked += () => Debug.Log("OK");
        }
    }
}
設定完了です。ウィンドウを開くと...?

Buttonのサイズがちゃんと変わってますね。USSで設定したように、縦50px、横50pxになっているはずです。
USSの意味
今回用いたPracticeStyle.uss
.OKButton {
    width: 50px;
    height: 50px;
}
は"OKButton"という名前のクラスが付いているUIの横と縦の長さを50pxにする」という意味になります。
ここでは.OKButtonと.から始まっているのですが、.で始まる場合はその後に続けて書くのはUXMLで定義したクラス名でなければなりません。
他にもパターンがあり、#から始まる場合はUXMLで定義したVisualElementのnameを続けて書く必要があります。
今回の場合はVisualElementのnameも"OKButton"だったので
# OKButton {
    width: 50px;
    height: 50px;
}
これで同様にスタイルが適用されます。
また、.も#も付けない場合はUIのC#におけるクラス名を書く必要があります。今回の場合はButtonなので
Button {
    width: 50px;
    height: 50px;
}
となります。
ただし、他にもButtonが存在する場合はそれらにも同じスタイルが適用されてしまうので注意が必要です。
UIのスタイルを変える場合はこんな感じでUSSで設定することができます。他にも文字の色やフォントサイズを変えたりと色々なことができるようです。(Unity - Manual: Styles and Unity style sheets)
まとめ
UI Elementsでは、UXMLでUIの構造を、USSでUIのスタイルを、C#でロジックをそれぞれ定義することによりUIを作成することができます。
参考にさせて頂いたサイト
本記事を執筆には以下のサイトを参考にさせて頂きました。ありがとうございました。
- Unity - Manual: UI Toolkit
- 【Unity】UIElements入門 - 概念~基本的な使い方まとめ - LIGHT11
- UIElements Tutorial for Unity: Getting Started | raywenderlich.com
- UIElements: First Steps - Unity Learn
- Unity UIElementsとUIBuilder – 10ANTZ Developers Blog
- Unity 2019.1 の UIElements の新機能
最後に
DeNA では今年、以下の 3種 のアドベントカレンダーを書いてます!それぞれ違った種類なのでぜひ見てみてください。
- DeNA Advent Calendar 2020:DeNA エンジニアによるアドベントカレンダー
- DeNA 20 新卒 Advent Calendar 2020:DeNA 20 新卒エンジニアによるアドベントカレンダー
- DeNA 21 新卒 Advent Calendar 2021:DeNA 21 内定者エンジニアによるアドベントカレンダー
この記事を読んで「面白かった」「学びがあった」と思っていただけた方、よろしければ Twitter や facebook、はてなブックマークにてコメントをお願いします!
また DeNA 公式 Twitter アカウント @DeNAxTech では、 Blog記事だけでなく色々な勉強会での登壇資料も発信してます。ぜひフォローして下さい!
Follow @DeNAxTech
