ゴール
前回までに、「ユーザが入力した場所にピンを刺す」が可能になった。今回は、現在地を示しつつ、目的地としてユーザが選択した場所をピンで刺すようにしたい。
また、ボタンひとつで、目的地・現在地間のカメラの切り替えを行えるようにする。
→目的地、現在地の取得が目的
実装
現在地の取得を追加するっていうのを、以下のコードで実装した。(参考)
XCodeのsimulatorで現在地をロンドンとして実行。するとなぜか全然関係ない場所に。。。
func locationManager(_ manager: CLLocationManager, didUpdateLocations locations: [CLLocation]) {
    let userLocation = locations.last

    camera = GMSCameraPosition.camera(withLatitude: userLocation!.coordinate.latitude,longitude: userLocation!.coordinate.latitude,zoom: ZOOM)
    self.mapView.animate(to: camera)
    locationManager.stopUpdatingLocation()
}
カメラに座標を渡す部分を、緯度経度に分けずにWithTargetにCLLocationCoordinate2D型のまま渡すと、ちゃんとロンドンを向くように。原因は不明だがひとまず解決。
func locationManager(_ manager: CLLocationManager, didUpdateLocations locations: [CLLocation]) {
    let userLocation = locations.last

    camera = GMSCameraPosition.camera(withTarget: userLocation!.coordinate,zoom: ZOOM)
    self.mapView.animate(to: camera)
    locationManager.stopUpdatingLocation()
}
locationManager.stopUpdatingLocation()は見た感じいらなそうだけど、まだ外で試せてないから一応おいておく。
ちなみに、現在地の青丸はViewDidLoadで以下を呼ぶことで実現可能。mapViewはGMSMapView型のインスタンス。
mapView.isMyLocationEnabled = true
次に、前回に実装した場所検索→検索した場所にピンを刺すのタイミングで、ボタンが表示されるようにする。
ボタンは少しかっこよくなるように、色・形を調整。(角丸、ボーダー色)
// ボタンを生成
func makeButton() {
    goButton = UIButton(frame: CGRect(x: 10, y: 70, width: 120, height: 40))
    goButton.backgroundColor = .white
    goButton.layer.cornerRadius = 5.0
    goButton.layer.borderColor = UIColor.orange.cgColor
    goButton.layer.borderWidth = 1.0
    goButton.setTitle("目的地へ行く", for: .normal)
    goButton.setTitleColor(.orange, for: .normal)
    goButton.addTarget(self, action: #selector(changeCam), for: .touchUpInside)
    // ボタンを隠す
    goButton.isHidden = true;
    self.view.addSubview(goButton)
}
// ボタンが押された時のアクション
@objc func changeCam(_ button: UIButton) {
    // 目的地を向いているカメラを現在地に向ける
    self.mapView.animate(to: GMSCameraPosition.camera(withTarget: myPos, zoom: ZOOM))
    // ボタンを隠す
    goButton.isHidden = true
}
// 検索した座標にピンを刺す
func PointPlace(pos: CLLocationCoordinate2D, title: String?) {
    camera = GMSCameraPosition.camera(withTarget: pos, zoom: ZOOM)

    // 現在地を向いているカメラを目的地に向ける
    self.mapView.animate(to: camera)

    marker.position = pos
    marker.title = title
    marker.map = mapView

    // ボタンを表示する
    goButton.isHidden = false
}
これで実行してみる。初期表示の画面も作ってみた。(LaunchScreenから設定)
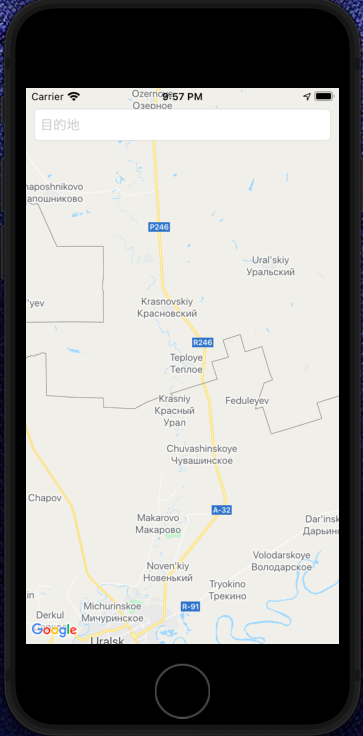
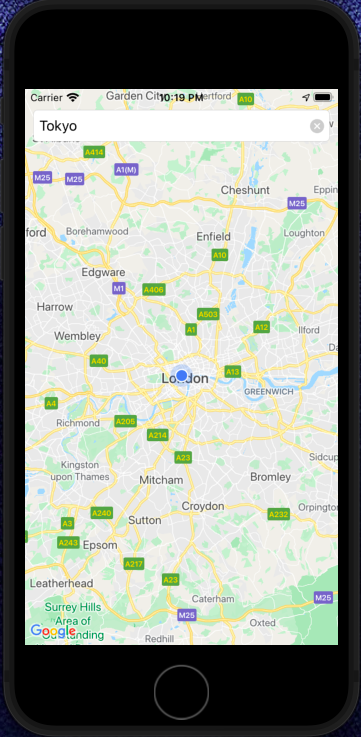
現在地が表示(本当にロンドンだったらいいのに。。。)
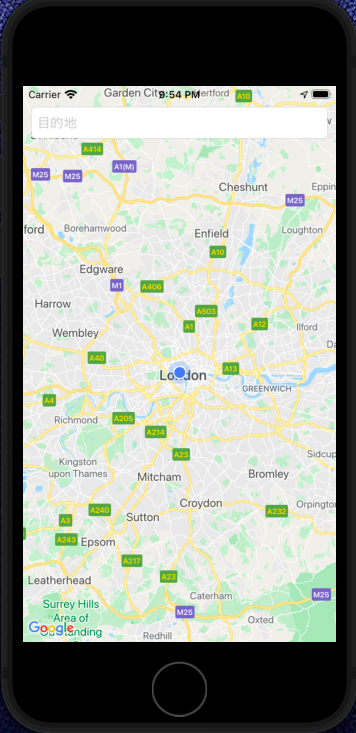
テキストフィールドをタップして、Tokyoを目的地として選択。
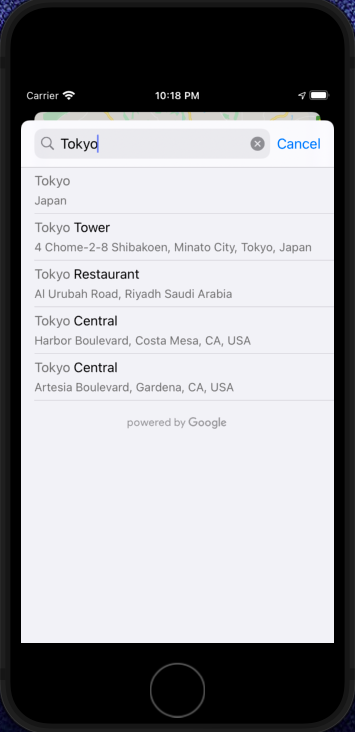
ピンが東京に刺さり、"目的地へ行く"ボタンが出現。

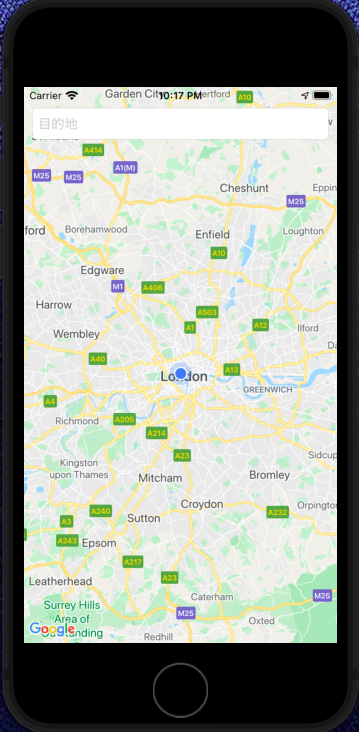
"目的地へ行く"ボタンを押すと、カメラが現在地を向き、ボタンが消える。
次回
現在地の取得、目的地の取得ができた。目的地の検索から、ボタン押下で案内開始のロジックもできた。
次回は、ピンを刺すところでルート検索を行えるように実装する。