この記事はOpenCV Advent Calendar 2023の9日目の記事です。
概要
例年以上に今年の年末は忙しくてネタが思いつきませんでした。
そういえばUnity(Barracuda、Sentis、TensorFlow Lite)では散々実装していたけどOpenCVではやってなかったなとふと思ったので、YOLOXによるオブジェクト検出をOpenCVのdnnモジュールで試してみることにします。
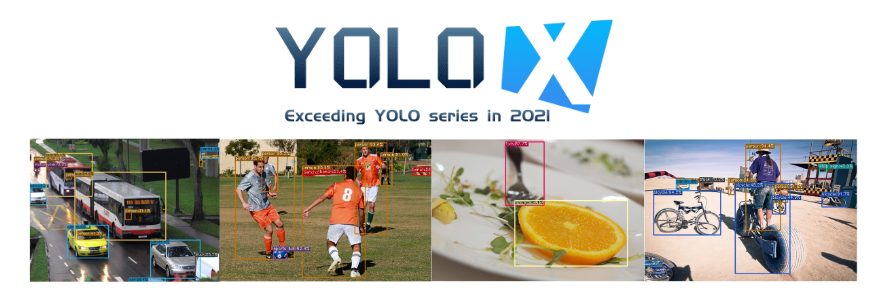
YOLOX
YOLOXは精度と速度のバランスに優れたオブジェクト検出モデルです。
公式実装のリポジトリも学習、推論、エクスポートの使い勝手がよく整備されています。
商用で扱いやすいライセンスなこともあり、現在も広く利用されている印象です。
サンプルプログラム
サンプルプログラムは以下で公開しています。*1
yolox.py
import cv2
import numpy as np

# detection model class for yolox
class DetectionModel:
    # constructor
    def __init__(self, weight, input_size = (640, 640)):
        self.__initialize(weight, input_size)

    # initialize
    def __initialize(self, weight, input_size):
        self.net = cv2.dnn.readNet(weight)
        self.input_size = input_size

        self.setPreferableBackend(cv2.dnn.DNN_BACKEND_OPENCV)
        self.setPreferableTarget(cv2.dnn.DNN_TARGET_CPU)

        strides = [8, 16, 32]
        self.grids, self.expanded_strides = self.__create_grids_and_expanded_strides(strides)

    # create grids and expanded strides
    def __create_grids_and_expanded_strides(self, strides):
        grids = []
        expanded_strides = []

        hsizes = [self.input_size[0] // stride for stride in strides]
        wsizes = [self.input_size[1] // stride for stride in strides]

        for hsize, wsize, stride in zip(hsizes, wsizes, strides):
            xv, yv = np.meshgrid(np.arange(hsize), np.arange(wsize))
            grid = np.stack((xv, yv), 2).reshape(1, -1, 2)
            grids.append(grid)
            shape = grid.shape[:2]
            expanded_strides.append(np.full((*shape, 1), stride))

        grids = np.concatenate(grids, 1)
        expanded_strides = np.concatenate(expanded_strides, 1)

        return grids, expanded_strides

    # set preferable backend
    def setPreferableBackend(self, backend):
        self.net.setPreferableBackend(backend)

    # set preferable target
    def setPreferableTarget(self, target):
        self.net.setPreferableTarget(target)

    # detect objects
    def detect(self, image, score_threshold, iou_threshold):
        self.image_shape = image.shape
        input_blob, resize_ratio = self.__preprocess(image)
        output_blob = self.__predict(input_blob)
        boxes, scores, class_ids = self.__postprocess(output_blob, resize_ratio)
        boxes, scores, class_ids = self.__nms(boxes, scores, class_ids, score_threshold, iou_threshold)

        return class_ids, scores, boxes

    # preprocess
    def __preprocess(self, image):
        resize_ratio = min(self.input_size[0] / self.image_shape[0], self.input_size[1] / self.image_shape[1])
        resized_image = cv2.resize(image, dsize=None, fx=resize_ratio, fy=resize_ratio)

        padded_image = np.ones((self.input_size[0], self.input_size[1], 3), dtype=np.uint8) * 114
        padded_image[: resized_image.shape[0], : resized_image.shape[1]] = resized_image

        input_blob = cv2.dnn.blobFromImage(padded_image, 1.0, self.input_size, (0.0, 0.0, 0.0), True, False)

        return input_blob, resize_ratio

    # predict
    def __predict(self, input_blob):
        self.net.setInput(input_blob)

        output_layer = self.net.getUnconnectedOutLayersNames()[0] # "output"
        output_blob = self.net.forward(output_layer)

        return output_blob

    # postprocess
    def __postprocess(self, output_blob, resize_ratio):
        output_blob[..., :2] = (output_blob[..., :2] + self.grids) * self.expanded_strides
        output_blob[..., 2:4] = np.exp(output_blob[..., 2:4]) * self.expanded_strides

        predictions = output_blob[0]

        boxes = predictions[:, :4]
        boxes_xywh = np.ones_like(boxes)
        boxes_xywh[:, 0] = boxes[:, 0] - boxes[:, 2] * 0.5
        boxes_xywh[:, 1] = boxes[:, 1] - boxes[:, 3] * 0.5
        boxes_xywh[:, 2] = (boxes[:, 0] + boxes[:, 2] * 0.5) - boxes_xywh[:, 0]
        boxes_xywh[:, 3] = (boxes[:, 1] + boxes[:, 3] * 0.5) - boxes_xywh[:, 1]
        boxes_xywh /= resize_ratio

        scores = predictions[:, 4:5] * predictions[:, 5:]
        class_ids = scores.argmax(1)
        scores = scores[np.arange(len(class_ids)), class_ids]

        return boxes_xywh, scores, class_ids

    # non maximum suppression
    def __nms(self, boxes, scores, class_ids, score_threshold, iou_threshold):
        indices = cv2.dnn.NMSBoxesBatched(boxes, scores, class_ids, score_threshold, iou_threshold) # OpenCV 4.7.0 or later

        keep_boxes = []
        keep_scores = []
        keep_class_ids = []
        for index in indices:
            keep_boxes.append(boxes[index])
            keep_scores.append(scores[index])
            keep_class_ids.append(class_ids[index])

        if len(keep_boxes) != 0:
            keep_boxes = np.vectorize(int)(keep_boxes)

        return keep_boxes, keep_scores, keep_class_ids
使い方
OpenCVのdnnモジュールのHight Level APIっぽいインターフェースでクラスにまとめました。
中身が知りたい人はyolox.pyを読んでください。ここでは使い方を掻い摘んでざっくり説明します。
・インポート
yolox.pyで実装されているDetectionModelクラスをインポートします。
このクラスでYOLOXの推論機能を提供します。
from yolox import DetectionModel
・クラスのインスタンス生成
クラスのインスタンスを生成します。
学習済みモデルのONNXファイルのパスのほかに、入力レイヤーの形状(幅、高さ)を渡します。
OpenCVのdnnモジュールで入力レイヤーの形状を取得できないのでこのような仕様になっています。(誰か教えて
# create detection model class for yolox
weight = "yolox_s.onnx"
input_size = (640, 640)
model = DetectionModel(weight, input_size)
・オブジェクトを検出
detect()メソッドに画像、信頼度の閾値、IoUの閾値を渡してオブジェクトを検出します。
戻り値はクラスID、信頼度、バウンディングボックスのリストです。
バウンディングボックスは(x, y, width, height)の形式です。
# detect objects
score_threshold = 0.6
iou_threshold = 0.4
class_ids, scores, boxes = model.detect(image, score_threshold, iou_threshold)
・オブジェクトを描画
検出したオブジェクトを描画します。
バウンディングボックスはOpenCVのRectと同じ形式になっています。
そのため、そのままcv.rectangle()に渡して描画することができます。
for box, score, class_id in zip(boxes, scores, class_ids):
    color = (0, 0, 255)
    thickness = 2
    line_type = cv2.LINE_AA
    cv2.rectangle(image, box, color, thickness, line_type)
結果
-
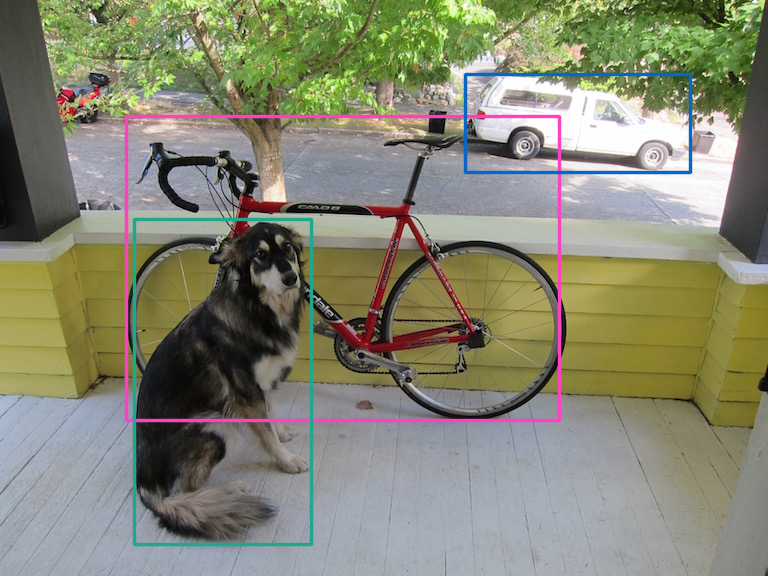
Official YOLOX Pre-Trained Model *2
YOLOXの公式リポジトリで配布されている学習済みモデルで試してみた結果です。
-
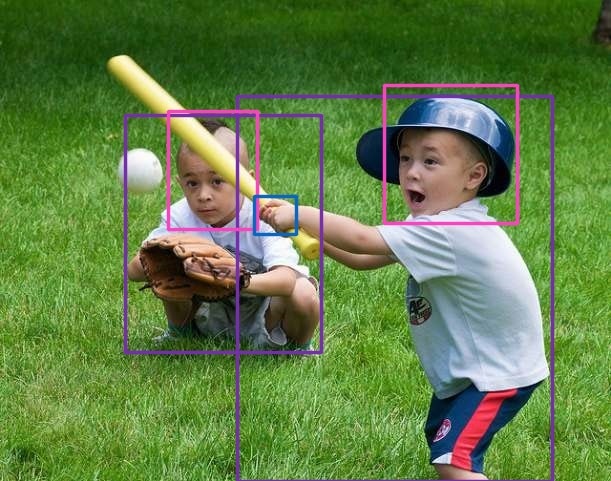
PINTO_model_zoo YOLOX Pre-Trained Model for Body/Head/Hand *3 *4
PINTOさんが作成したYOLOXで身体、頭、手を検出する学習済みモデルで試してみた結果です。
まとめ
この記事ではOpenCVのdnnモジュールでYOLOXによるオブジェクト検出を試してみました。
公式のONNX Runtimeでの実装とあまり変わり映えしないけど、OpenCV 4.7.0あたりで追加されたマルチクラス対応のNMSのAPI(cv.dnn.NMSBoxesBatched())が用意されているのは少し楽かもしれない。
*1 ちゃちゃっと実装したのでモデルの入力形状のアスペクト比が1:1でないと上手く動かないかも
*2 画像引用:https://github.com/Megvii-BaseDetection/YOLOX/blob/main/assets/dog.jpg
*3 画像引用:https://www.flickr.com/photos/83863691@N00/3704144136
*4 ポストプロセスが統合されていないONNXを使ってください