ESP8266開発環境の設定
Arduino IDEのバージョンが2.3.3の場合を追記します。- 20250301
ESP8266記事一覧
ハードウェア
- 秋月電商にて以下のモジュールを購入しました。
Wi-Fiモジュール ESP-WR00M-02 - Wi-Fi モジュールを取り付ける基板は昨年Maker Faire で購入しました。
Universal ESPduino - USB変換モジュール(FT232RLチップ使用)
DEV-09873
半田付け & 実装
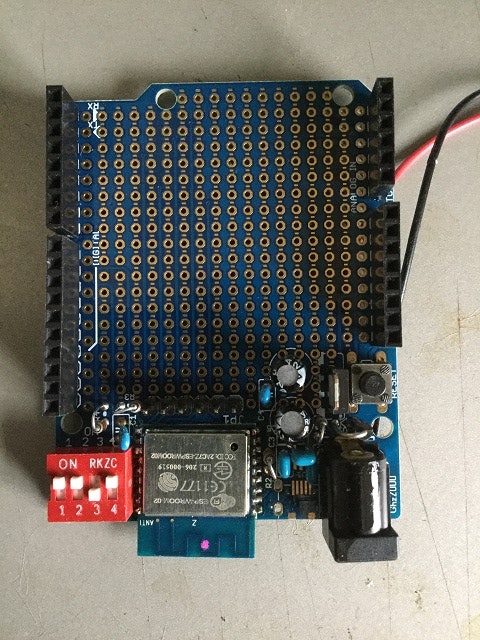
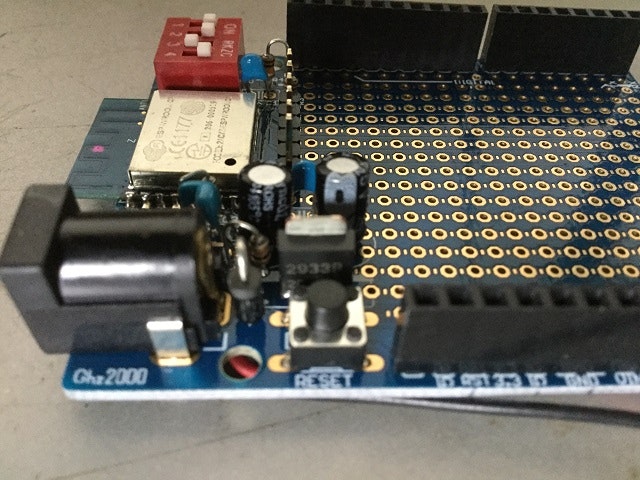
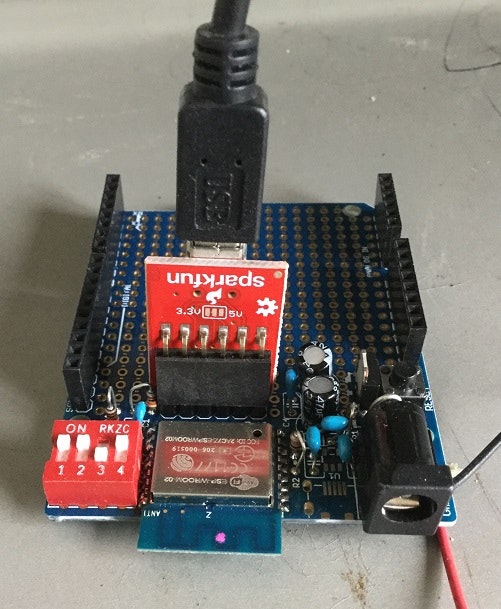
ESP-WR00M-02をESPduinoに半田付けすします。ESPduinoには、USB変換モジュールを接続するピンが装備されていますので、そこにDEV-09873を差込ます。
何枚か写真を提示します。
Arduino IDEにボードを追加
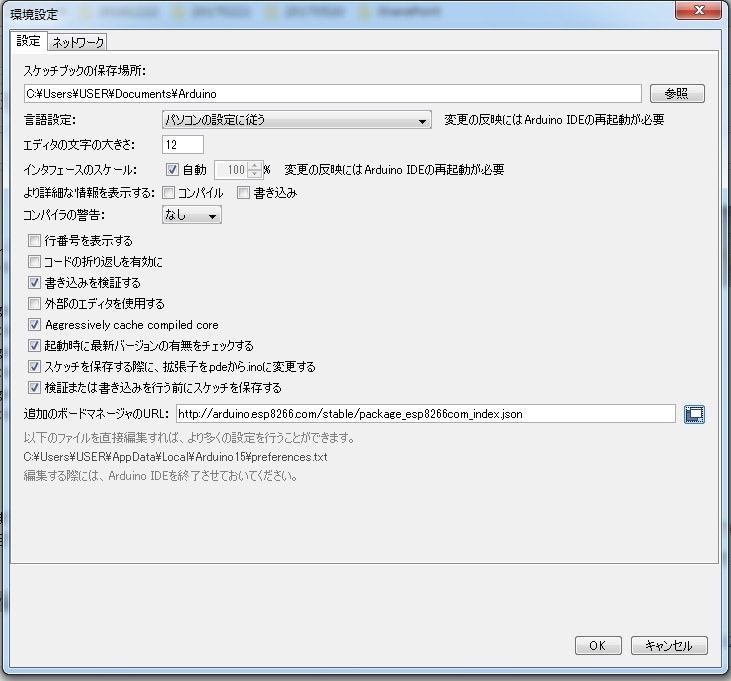
Arduino IDE はVer 1.8.2 を使っています。1.0.x ではボードの追加のメニューができないようです。「ファイルメニュー」から「環境設定」を選択、追加のボードマネージャに以下のURLをコピーします。その後OKを押します。
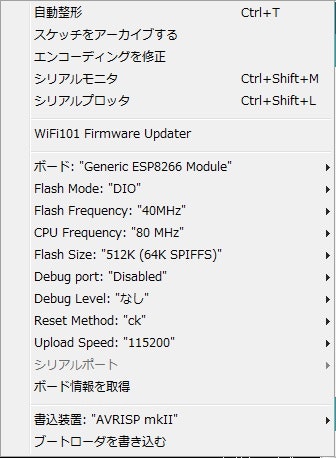
「ツールメニュー」⇒「ボード」を選択
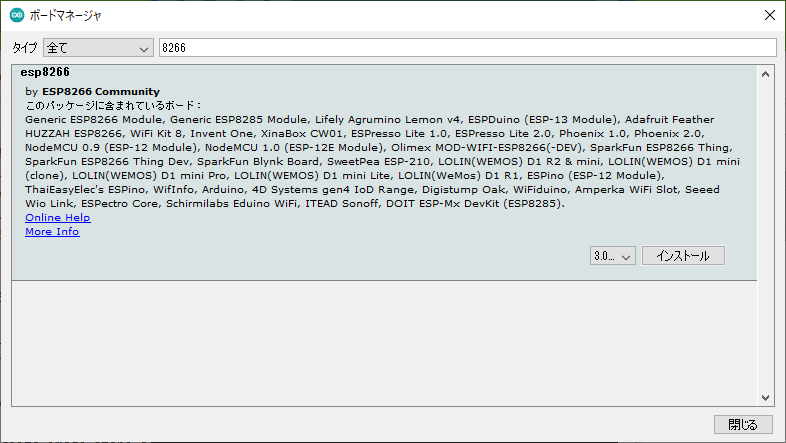
esp8266 を探して、バージョンを選択⇒2.2.0 3.0
インストールを押します。
- 2019/1/21 現在、version 2.5.0 -beta2 というバージョンをダウンロードしました。
- 2021/7/29 現在、version 3.0 というバージョンをダウンロードしました。
最後に「ツールメニュー」⇒「ボード」から"Generic ESP8226 Module"を選択すればOKです。
ドライバーのインストール
USB変換モジュールを使うためにドライバー(VCP Driver)をインストールします。
VCP Driver
私の環境では、Windows X86(32bit) 2.12.26 というドライバーでした。インストーラが付いて無いので、手動インストールが必要です。
テストプログラム
GPIO0,1,2,3,4,5 をトグル動作をさせるプログラムを以下に示します。
void setup() {
  // initialize digital pin LED_BUILTIN as an output.
    pinMode(0, OUTPUT);
    pinMode(1, OUTPUT);
    pinMode(2, OUTPUT);
    pinMode(3, OUTPUT);
    pinMode(4, OUTPUT);
    pinMode(5, OUTPUT);
}

// the loop function runs over and over again forever
void loop() {
  digitalWrite(0, HIGH);   // turn the LED on (HIGH is the voltage level)
  digitalWrite(1, HIGH);   // turn the LED on (HIGH is the voltage level)
  digitalWrite(2, HIGH);   // turn the LED on (HIGH is the voltage level)
  digitalWrite(3, HIGH);   // turn the LED on (HIGH is the voltage level)
  digitalWrite(4, HIGH);   // turn the LED on (HIGH is the voltage level)
  digitalWrite(5, HIGH);   // turn the LED on (HIGH is the voltage level)
  delay(10);                       // wait for a second
  digitalWrite(0, LOW);    // turn the LED off by making the voltage LOW
  digitalWrite(1, LOW);    // turn the LED off by making the voltage LOW
  digitalWrite(2, LOW);    // turn the LED off by making the voltage LOW
  digitalWrite(3, LOW);    // turn the LED off by making the voltage LOW
  digitalWrite(4, LOW);    // turn the LED off by making the voltage LOW
  digitalWrite(5, LOW);    // turn the LED off by making the voltage LOW
  delay(10);                       // wait for a second
}
スケッチの書き込みとリセット
- 書き込みの時にはディップスイッチが、HHLH です。
- リセットの時にはディップスイッチを、HLHH としてからリセットボタンを押します。
IDE2.3.2の場合
ボードマネージャー(BOARDS MANAGER)を使うことで、各種ボードがインストールできます。

Board選択のメニューにesp8266が追加されます。いくつかのボード名が表示されます。ここでは、Genetec ESP8266 Moduleを選択します。
