GamePad Extension を作る
先の投稿で、Scratch 3.0用のMIDI Extensionの使い方を紹介しました。このページでは、Web APIを使ったExtensionの作り方を説明します。例に取るのは GamePad APIを使ったGamepad Extension です。
なお、作り方は、Scratch Japan Wiki Scratch_3.0の拡張機能を作ってみよう を参考にさせていただきました。
準備
Windows10 home 32bit で開発しています。
node が必要になりますので、インストールしておきます。
私の環境には、node v8.16.0 がインストールされています。
MITのGithub から2つのリポジトリをクローンします。
> git clone --depth 1 https://github.com/llk/scratch-vm.git
> git clone --depth 1 https://github.com/llk/scratch-gui.git
アイコンの準備
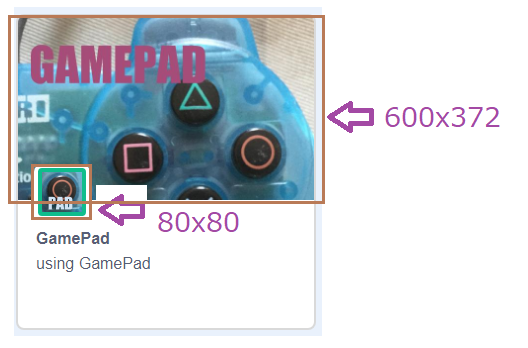
Extension を読み出すアイコン2つ準備します。
- 600x370
- 80x80
それぞれ下のように表示されます。80x80 他にも使われているかもしれません。(不明)
ファイル名をそれぞれ、
- gamepadext.png
- gamepadextmin.png
としました。gamepadというホルダーを作って、この2つのファイルを中に保存します。
scratch-gui\src\lib\libraries\extensions\gamepad
このextensions フォルダーには、もともと付属しているExtensionのアイコンも入っています。
index.jsxの編集
追加したアイコンのファイルをindex.jsxに登録します。
scratch-gui\src\lib\libraries\extensions\index.jsx
ファイルの先頭に、import している行が並んでいますので、いずれかに以下2行を追加します。
import gamepadIconURL from './gamepad/gamepadext.png';
import gamepadInsetIconURL from './gamepad/gamepadextmin.png';
export default [
の中に以下の情報を追加します。
    {
        name: (
            <FormattedMessage
                defaultMessage="GamePad"
                description="Name for the 'GamePad' extension"
                id="gui.extension.gamepad.name"
            />
        ),
        extensionId: 'gamepad',
        iconURL: gamepadIconURL,
        insetIconURL: gamepadInsetIconURL,
        description: (
            <FormattedMessage
                defaultMessage="using GamePad"
                description="Description for the 'GamePad' extension"
                id="gui.extension.gamepad.description"
            />
        ),
        featured: true
    },
ブロックアイコン
ブロックの左隅に表示するアイコンを作成します。
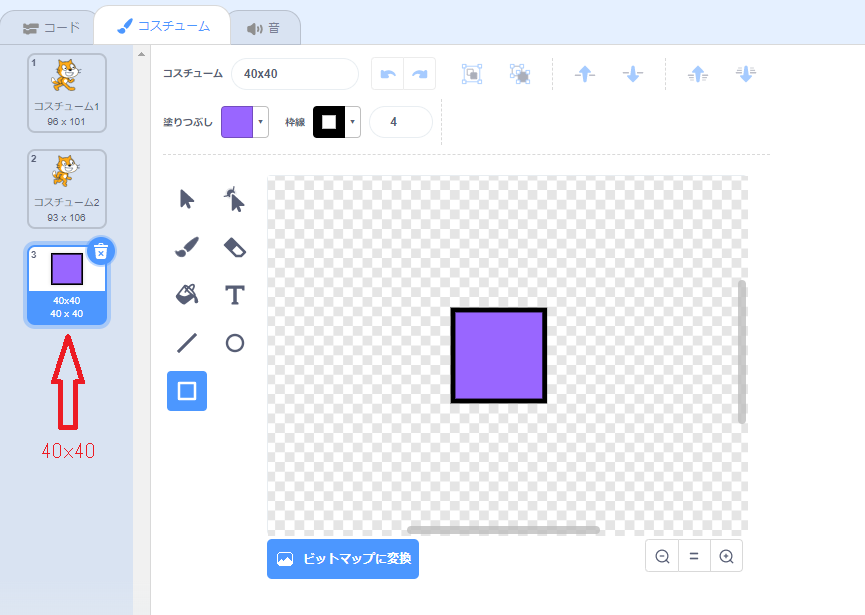
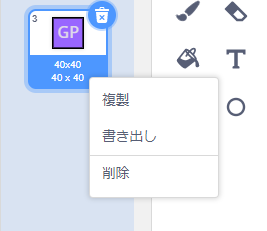
Scratchのペイントエディター(コスチュームの描画)を使って、ベクターモードで40x40 のアイコンを作製します。
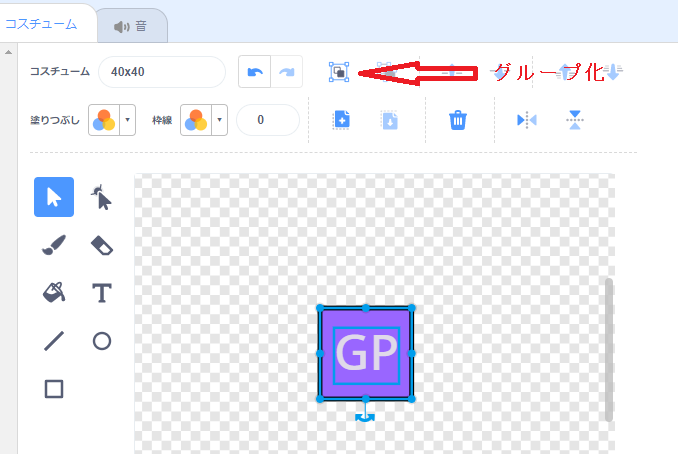
描画をグループ化して、svg形式で保存します。
アイコンを右クリックし、「書き出し」を選択すると、ローカルにsvgファイルが保存できます。
保存した後は、ここなどでbase64形式に変換します。data:image/svg+xml;base64,で始まる文字列をコピーしておきます。
Extension 本体のプログラム
scratch3_gamepadフォルダーを作成します。
scratch-vm\src\extensions\scratch3_gamepad
このフォルダーに、index.jsを作成します。
const ArgumentType = require('../../extension-support/argument-type');
const BlockType = require('../../extension-support/block-type');
const Cast = require('../../util/cast');
const log = require('../../util/log');
const formatMessage = require('format-message');

/**
 * Icon svg to be displayed at the left edge of each extension block, encoded as a data URI.
 * @type {string}
 */
// eslint-disable-next-line max-len
const blockIconURI = 'data:image/svg+xml;base64,PHN2ZyB2ZXJzaW9uPSIxLjEiIHhtbG5zPSJodHRwOi8vd3d3LnczLm9yZy8yMDAwL3N2ZyIgeG1sbnM6eGxpbms9Imh0dHA6Ly93d3cudzMub3JnLzE5OTkveGxpbmsiIHdp...
dGFydCIgc3R5bGU9Im1peC1ibGVuZC1tb2RlOiBub3JtYWwiPjx0c3BhbiB4PSIwIiBkeT0iMCI+R1A8L3RzcGFuPjwvdGV4dD48L2c+PC9nPjwvc3ZnPg==';

/**
 * Icon svg to be displayed in the category menu, encoded as a data URI.
 * @type {string}
 */
// eslint-disable-next-line max-len
const menuIconURI = 'data:image/svg+xml;base64,PHN2ZyB2ZXJzaW9uPSIxLjEiIHhtbG5zPSJodHRwOi8vd3d3LnczLm9yZy8yMDAwL3N2ZyIgeG1sbnM6eGxpbms9Imh0dHA6Ly93d3cudzMub3JnLzE5OTkveGxpbmsiIHdp...
dGFydCIgc3R5bGU9Im1peC1ibGVuZC1tb2RlOiBub3JtYWwiPjx0c3BhbiB4PSIwIiBkeT0iMCI+R1A8L3RzcGFuPjwvdGV4dD48L2c+PC9nPjwvc3ZnPg==';
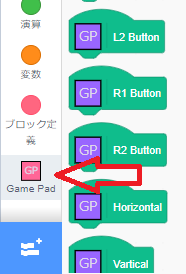
blockIconURIとmenuIconURIは中身同じものにしました。menuIconURIは、次の絵のように左端のメニューに表示されます。
GamePad API の追加
index.jsにGamePad APIを起動するプログラムを追加します。
var mPad=null;

function mStartGamePad()
{
	window.requestAnimationFrame(mStartGamePad);
    var gamepad_info = '';
	var gamepads = navigator.getGamepads();
	var gamepad_num =gamepads.length;
	mPad = new Array(gamepad_num);

	for (var i=0; i<gamepad_num; i++) {
		if(gamepads[i]!=null) mPad[i] = gamepads[i];
	}
}
ブロックの追加
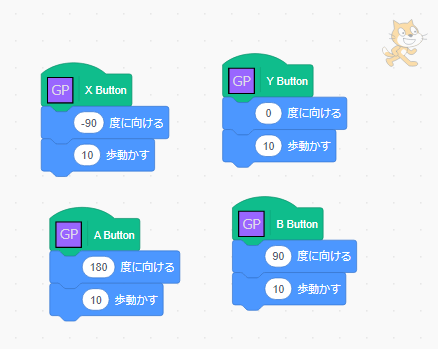
index.jsに、ここでは、ゲームパッド右側のXYABの4つのボタンを、HAT BLOCK で検知するブロック4つを追加しています。
class Scratch3GamePad {

    constructor (runtime) {
        /**
         * The runtime instantiating this block package.
         * @type {Runtime}
         */
        this.runtime = runtime;

		window.requestAnimationFrame(mStartGamePad);

        //this._onTargetCreated = this._onTargetCreated.bind(this);
        //this.runtime.on('targetWasCreated', this._onTargetCreated);
    }

    /**
     * @returns {object} metadata for this extension and its blocks.
     */
	getInfo () {
		return {
			id: 'gamepad',

            name: formatMessage({
                id: 'Game Pad for Scratch3',
                default: 'Game Pad',
                description: 'Label for the game pad extension category'
            }),

			menuIconURI: menuIconURI,
			blockIconURI: blockIconURI,

			blocks: [
				{
					opcode: 's_X_Button',
					text: 'X Button',
					blockType: BlockType.HAT,
				},
				{
					opcode: 's_Y_Button',
					text: 'Y Button',
					blockType: BlockType.HAT,
				},
				{
					opcode: 's_A_Button',
					text: 'A Button',
					blockType: BlockType.HAT,
				},
				{
					opcode: 's_B_Button',
					text: 'B Button',
					blockType: BlockType.HAT,
				},

			],
            menus: {
            }
		};
	}

/* ================================	*/
// BUTTON X- Y- A- B-
	s_X_Button() {
		return mPad[0].buttons[2].pressed;
	};

	s_Y_Button() {
		return mPad[0].buttons[3].pressed;
	};

	s_A_Button() {
		return mPad[0].buttons[0].pressed;
	};

	s_B_Button() {
		return mPad[0].buttons[1].pressed;
	};

}
module.exports = Scratch3GamePad;
Exmansion Manager の修正
scratch-vm\src\extension-support\extension-manager.js
に1行追加します。
gamepad: () => require('../extensions/scratch3_gamepad')
使用例
ローカルでの実行
制作したExtenshionをローカルで実行するには、コンソールで次のように立ち上げます。
ディレクトリはscratch-vmに居るものとします。
scratch-vm > npm rm -g scratch-vm
scratch-vm > npm i
scratch-vm > npm link
scratch-vm > cd ..\scratch-gui
scratch-gui > npm i
scratch-gui > npm link scratch-vm
scratch-gui > npm start
これで、Scratchがローカルサーバで起動します。
ウェッブブラウザーで http://localhost:8601 にアクセスすると、Scratchを試すことができます。
アプリケーション
このExtensionはGuthub URLで使えます。お試し下さい。
私は、Playstationのゲームパッドをアダプターを介してUSBでPCにつないでいます。
