はじめに
Cloud9にChromeとSeleniumを入れようと思ったときに、検索して出てくる記事が結構古かったりしたので今試した内容を記載します。
注意
- AWSアカウントの作成とかは省略します
- 仮想環境化はしません
- Webdriver Managerはあえて使用しません
手順
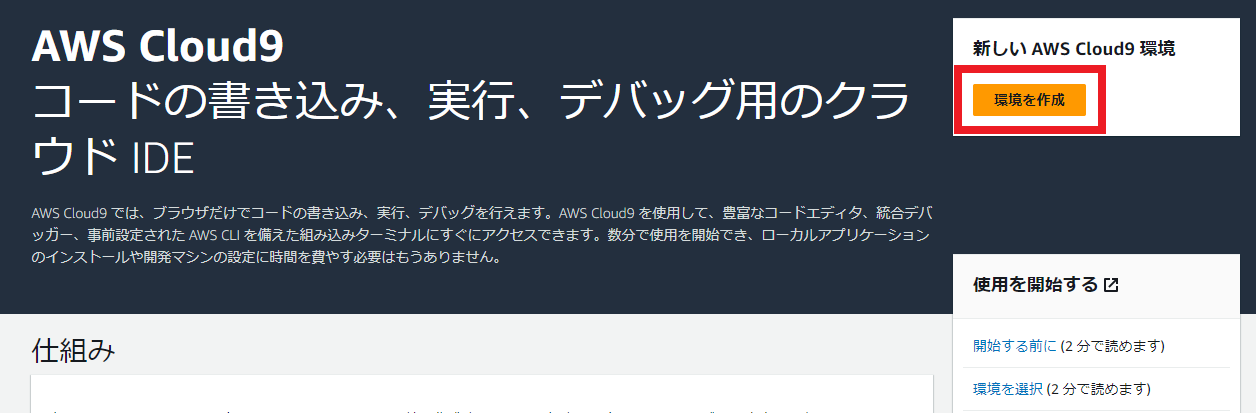
Cloud9構築
- Cloud9のコンソール→「環境を作成」
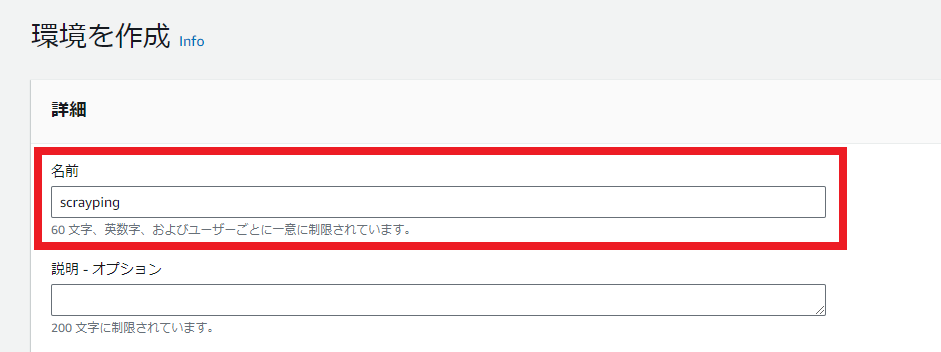
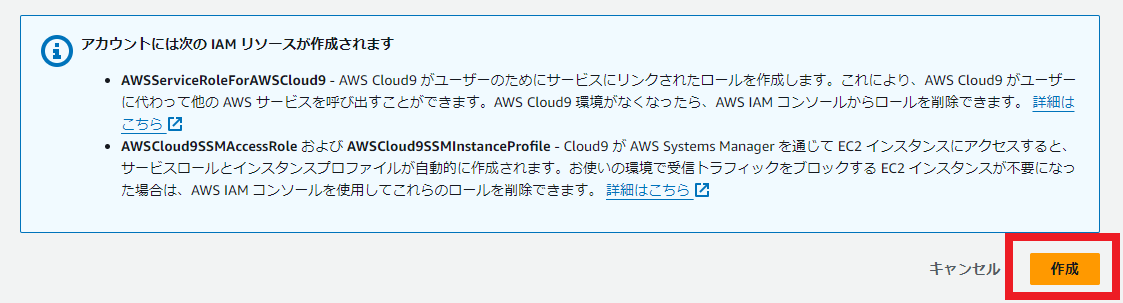
- 名前を入れ、他はデフォルトで「作成」
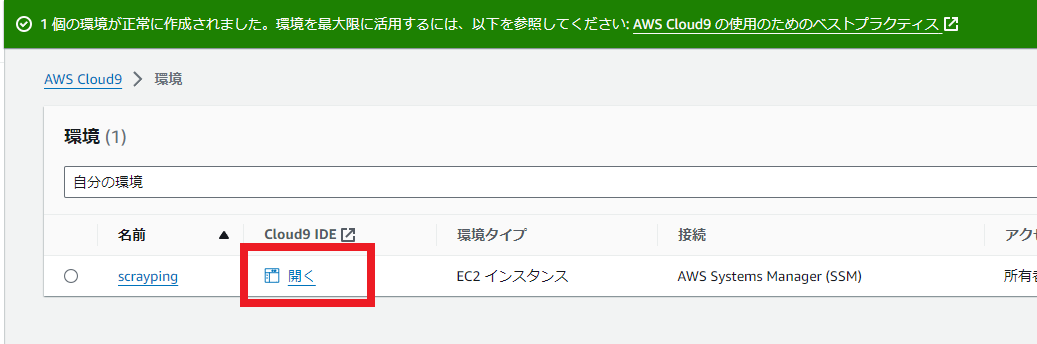
- 環境ができるまで数分待つ
- 環境ができたら
Cloud9 IDEの「開く」→sudo yum update -y

pythonアップデート
まずpipをアップデート
pip install --upgrade pip
pyenv導入
git clone https://github.com/pyenv/pyenv.git ~/.pyenv

vi ~/.bashrc
# 以下を末尾に追記
export PATH="$HOME/.pyenv/bin:$PATH"
eval "$(pyenv init -)"
# ここまで

# 反映
source ~/.bashrc

# 確認
pyenv --version
> pyenv 2.3.36-4-g02e1d4a2
pyenvでpythonの任意バージョンをインストール
# インストール可能なバージョン一覧を確認
pyenv install --list | grep -E '^  3'
> ...
> 3.11.8
> 3.12.0
> 3.12-dev
> 3.12.1
> 3.12.2
> 3.13.0a3
> 3.13-dev
今回は3.12.2をインストールする
# 無いとエラーになるのでbzip2-develを入れる
sudo yum install -y bzip2-devel

pyenv install 3.12.2
# インストールに数分かかります
# 進捗も表示されないのでCtrl + Cでキャンセルしたりしないように

# 切り替え
pyenv global 3.12.2
# 確認
python --version
> Python 3.12.2
Chrome, Chrome Driverインストール
まずChrome
# --insecureはあんまり良くないが...
curl --insecure https://intoli.com/install-google-chrome.sh | bash

# 確認
yum info google-chrome-stable
> Amazon Linux 2023 repository                                                                                                                                                                                         49 MB/s |  24 MB     00:00
> Amazon Linux 2023 Kernel Livepatch repository                                                                                                                                                                       652 kB/s | 165 kB     00:00
> google-chrome                                                                                                                                                                                                        12 kB/s | 3.6 kB     00:00
> Installed Packages
> Name         : google-chrome-stable
> Version      : 122.0.6261.69
> Release      : 1
> Architecture : x86_64
> Size         : 324 M
> Source       : google-chrome-stable-122.0.6261.69-1.src.rpm
> Repository   : @System
> From repo    : google-chrome
> Summary      : Google Chrome
> URL          : https://chrome.google.com/
> License      : Multiple, see https://chrome.google.com/
> Description  : The web browser from Google
>              :
>              : Google Chrome is a browser that combines a minimal design with sophisticated technology to make the web faster, safer, and easier.
次にDriver
公式に書いてあるとおり、Chrome Version 115以降の場合はこちら1、115未満の場合はこちら2に置いてある
今回は122.0.6261.69なので前者
wget https://storage.googleapis.com/chrome-for-testing-public/122.0.6261.69/linux64/chromedriver-linux64.zip
unzip chromedriver-linux64.zip
Seleniumインストール
pip install selenium
スクレイピングコード作成
vi scrayping.py
scrayping.py
from selenium import webdriver
from selenium.webdriver.chrome.service import Service
from selenium.webdriver.chrome.options import Options

serv = Service(executable_path=r'./chromedriver-linux64/chromedriver')

opt = Options()
opt.add_argument("--headless")

try:
  with webdriver.Chrome(service=serv, options=opt) as driver:
    driver.get("https://www.google.com")
    print(driver.page_source)
except Exception as e:
    print(e)
python scrayping.py
これでHTMLが出力されれば成功
参考