本記事作成に至った経緯(Background)
Railsを使ってみたいと思っていてもどこから始めればいいの?であったり、現場で使われているRailsってどんな感じなの?ということを聞くことがあるので、現場でよく使われているようなセットアップで環境構築をして最低限ここまでやればRails開発がスタートできますという部分をやっていきます。
![]() RubyのバージョンやRailsのバージョンを安定板の最新版に合わせてください。今回は
RubyのバージョンやRailsのバージョンを安定板の最新版に合わせてください。今回はruby-3.4.3とRails8.0.2でやっていきます。
前提
今回はAPIモードでrails newします。理由は、昨今のRails周りの構成ではFrontendをNext.jsで作りBackendをRailsで作ることが多いからです。
Dockerを使うのでセットアップは各自でお願いします。また今回はWindowsのwsl上でコマンド実行していきます。
現場ではGithubを使うことが多いと思うのでリポジトリも作られたうえで実施すると良いかなと思います。
それでは本題に移って始めます。
本題
1. Railsの起動に必要なファイル作成
まず用意するファイルは6つです。
Gemfile、Gemfile.lock、Dockerfile、Dockerfile.dev、entrypoint.sh、compose.yaml
source 'https://rubygems.org'
gem 'rails', '~> 8.0', '>= 8.0.2'
Gemfileを作成。Railsの8系を使っていきます。
空のGemfile.lockを作成。
FROM ruby:3.4.3

WORKDIR /docbase_rails
COPY . .
RUN bundle install

RUN apt-get update -qq && \
    apt-get install --no-install-recommends -y \
    build-essential default-libmysqlclient-dev git pkg-config \
    vim curl

COPY entrypoint.sh /usr/bin/
RUN chmod +x /usr/bin/entrypoint.sh
ENTRYPOINT ["entrypoint.sh"]
EXPOSE 3000

CMD ["rails", "server", "-b", "0.0.0.0"]
Dockerfileを作成。
FROM ruby:3.4.3

WORKDIR /docbase_rails
COPY . .
RUN bundle install

RUN apt-get update -qq && \
    apt-get install --no-install-recommends -y \
    build-essential default-libmysqlclient-dev git pkg-config \
    vim curl

COPY entrypoint.sh /usr/bin/
RUN chmod +x /usr/bin/entrypoint.sh
ENTRYPOINT ["entrypoint.sh"]
EXPOSE 3000

CMD ["rails", "server", "-b", "0.0.0.0"]
先ほど作ったDockerfileと内容同じと思ったかもしれません、これはrails newコマンドの実行でDockerfileがproduction用に自動で上書きされるためDockerfile.devも用意しています。
vimなどをインストールしてますが、不要なら削って大丈夫です
#!/bin/sh

set -e

rm -f /docbase_rails/tmp/pids/server.pid

exec "$@"
entrypoint.shを作成。
services:
  db:
    image: mysql:8.0
    volumes:
      - mysql_volume:/var/lib/mysql
    environment:
      LANG: C.UTF-8
      TZ: Asia/Tokyo
      MYSQL_ROOT_PASSWORD: root
    ports:
      - "3306:3306"
  web:
    build:
      context: .
      dockerfile: Dockerfile.dev
    volumes:
      - .:/docbase_rails
    ports:
      - "3000:3000"
    depends_on:
      - db

volumes:
  mysql_volume:
    driver: local
compose.yamlを作成。
これで準備は完了です。それではrailsアプリを作っていきましょう。
2. rails newの実行
$ docker compose run --rm --no-deps web rails new . --force --database=mysql --skip-
test --skip-ci --skip-kamal --skip-thruster --skip-solid --api
[+] Creating 2/1
 ✔ Network docbase_rails_default        Created                                                                 0.1s
 ✔ Volume "docbase_rails_mysql_volume"  Created                                                                 0.0s
[+] Building 33.1s (12/12) FINISHED                                                                   docker:default
 => [web internal] load build definition from Dockerfile.dev                                                    0.0s
 => => transferring dockerfile: 414B                                                                            0.0s
 => [web internal] load metadata for docker.io/library/ruby:3.4.3                                               0.0s
 => [web internal] load .dockerignore                                                                           0.0s
 => => transferring context: 2B                                                                                 0.0s
 => [web 1/7] FROM docker.io/library/ruby:3.4.3                                                                 0.0s
 => [web internal] load build context                                                                           0.0s
 => => transferring context: 30.86kB                                                                            0.0s
 => CACHED [web 2/7] WORKDIR /docbase_rails                                                                     0.0s
 => [web 3/7] COPY . .                                                                                          0.1s
 => [web 4/7] RUN bundle install                                                                               22.5s
 => [web 5/7] RUN apt-get update -qq &&     apt-get install --no-install-recommends -y     build-essential def  9.5s
 => [web 6/7] COPY entrypoint.sh /usr/bin/                                                                      0.1s
 => [web 7/7] RUN chmod +x /usr/bin/entrypoint.sh                                                               0.3s
 => [web] exporting to image                                                                                    0.5s
 => => exporting layers                                                                                         0.5s
 => => writing image sha256:c0806fda6a38daefdea83c5e2c5da2470af771844a93732e738726027d969986                    0.0s
 => => naming to docker.io/library/docbase_rails-web                                                            0.0s
Based on the specified options, the following options will also be activated:

  --skip-javascript [due to --api]
  --skip-hotwire [due to --skip-javascript]
  --skip-asset-pipeline [due to --api]

       exist
       force  README.md
      create  Rakefile
      create  .ruby-version
      create  config.ru
      create  .gitignore
      create  .gitattributes
       force  Gemfile
         run  git init -b main from "."
warning: re-init: ignored --initial-branch=main
Reinitialized existing Git repository in /docbase_rails/.git/
      create  app
      create  app/assets/stylesheets/application.css
      create  app/controllers/application_controller.rb
      create  app/helpers/application_helper.rb
      create  app/jobs/application_job.rb
      create  app/mailers/application_mailer.rb
      create  app/models/application_record.rb
      create  app/views/layouts/application.html.erb
      create  app/views/layouts/mailer.html.erb
      create  app/views/layouts/mailer.text.erb
      create  app/views/pwa/manifest.json.erb
      create  app/views/pwa/service-worker.js
      create  app/assets/images
      create  app/assets/images/.keep
      create  app/controllers/concerns/.keep
      create  app/models/concerns/.keep
      create  bin
      create  bin/brakeman
      create  bin/dev
      create  bin/rails
      create  bin/rake
      create  bin/rubocop
      create  bin/setup
      force  Dockerfile
      create  .dockerignore
      create  bin/docker-entrypoint
      create  .rubocop.yml
      create  config
      create  config/routes.rb
      create  config/application.rb
      create  config/environment.rb
      create  config/cable.yml
      create  config/puma.rb
      create  config/storage.yml
      create  config/environments
      create  config/environments/development.rb
      create  config/environments/production.rb
      create  config/environments/test.rb
      create  config/initializers
      create  config/initializers/assets.rb
      create  config/initializers/content_security_policy.rb
      create  config/initializers/cors.rb
      create  config/initializers/filter_parameter_logging.rb
      create  config/initializers/inflections.rb
      create  config/initializers/new_framework_defaults_8_0.rb
       create  config/locales
      create  config/locales/en.yml
      create  config/master.key
      append  .gitignore
      create  config/boot.rb
      create  config/database.yml
      create  db
      create  db/seeds.rb
      create  lib
      create  lib/tasks
      create  lib/tasks/.keep
      create  log
      create  log/.keep
      create  public
      create  public/400.html
      create  public/404.html
      create  public/406-unsupported-browser.html
      create  public/422.html
      create  public/500.html
      create  public/icon.png
      create  public/icon.svg
      create  public/robots.txt
      create  script
      create  script/.keep
      create  tmp
      create  tmp/.keep
      create  tmp/pids
      create  tmp/pids/.keep
      create  vendor
      create  vendor/.keep
      create  storage
      create  storage/.keep
      create  tmp/storage
      create  tmp/storage/.keep
      remove  app/assets
      remove  app/helpers
      remove  test/helpers
      remove  app/views/layouts/application.html.erb
      remove  app/views/pwa
      remove  public/400.html
      remove  public/404.html
      remove  public/406-unsupported-browser.html
      remove  public/422.html
      remove  public/500.html
      remove  public/icon.png
      remove  public/icon.svg
      remove  config/initializers/assets.rb
      remove  app/assets/stylesheets/application.css
      remove  config/initializers/content_security_policy.rb
      remove  config/initializers/new_framework_defaults_8_0.rb
         run  bundle install --quiet
         run  bundle lock --add-platform=x86_64-linux
Writing lockfile to /docbase_rails/Gemfile.lock
         run  bundle binstubs bundler
ファイルが生成されました。rails8の詳細なコマンドは公式を確認してください。
https://railsguides.jp/v8.0/command_line.html
skipオプションをもっと付与してもいいと思いますが、一旦このくらいでやります。
またrails7からrails8の変更点としてsolid cacheなど多くの機能が追加されましたが今回はスキップしました。各自使いたい機能を考えてrails newのオプションを実行して頂ければと思います。
3. localhost:3000にアクセスするまで
railsファイルが生成できたので続いて起動まで進めていきます。
DB接続情報の変更
default: &default
  adapter: mysql2
  encoding: utf8mb4
  pool: <%= ENV.fetch("RAILS_MAX_THREADS") { 5 } %>
  username: root
  password: root
  host: db

development:
  <<: *default
  database: docbase_rails_development

test:
  <<: *default
  database: docbase_rails_test

production:
  <<: *default
  database: docbase_rails_production
  username: docbase_rails
  password: <%= ENV["DOCBASE_RAILS_DATABASE_PASSWORD"] %>
ハードコーディングしてますが後々環境変数にしましょう。
停止コマンド
$ docker compose -f compose.yaml down
初回buildコマンド
$ docker compose -f compose.yaml build
起動コマンド
$ docker compose -f compose.yaml up
DB周りのコマンド
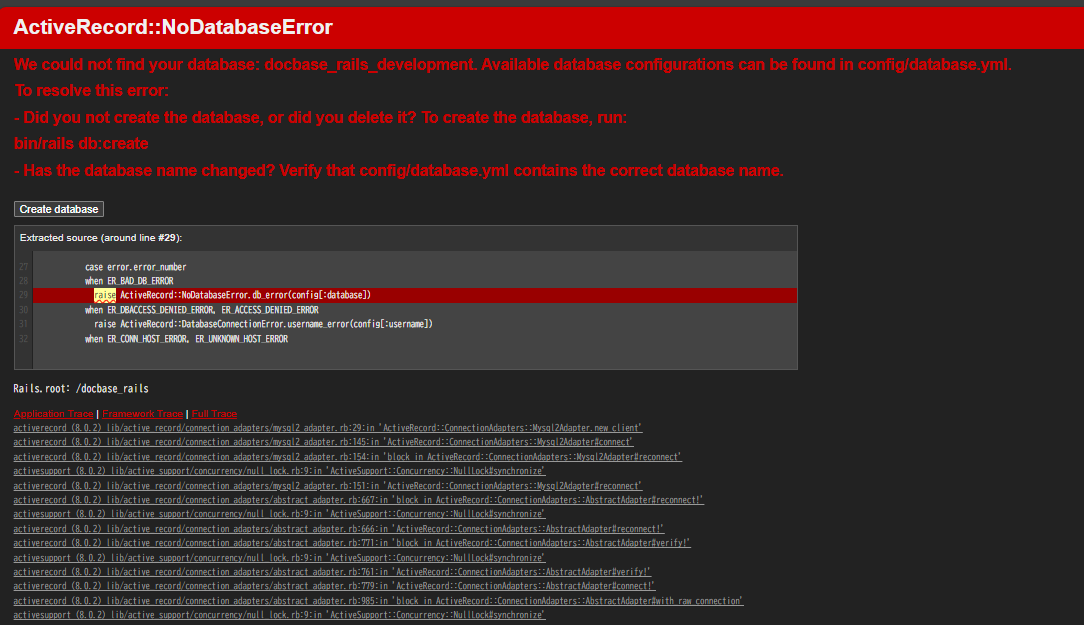
起動後に http://localhost:3000 にアクセスして画像のようにNoDatabaseErrorになった場合はdb:createコマンドを実施しましょう。
$ docker compose -f compose.yaml run --rm web rake db:create
[+] Creating 1/0
 ✔ Container docbase_rails-db-1  Running                                                                                                                                                                  0.0s
Created database 'docbase_rails_development'
Created database 'docbase_rails_test'
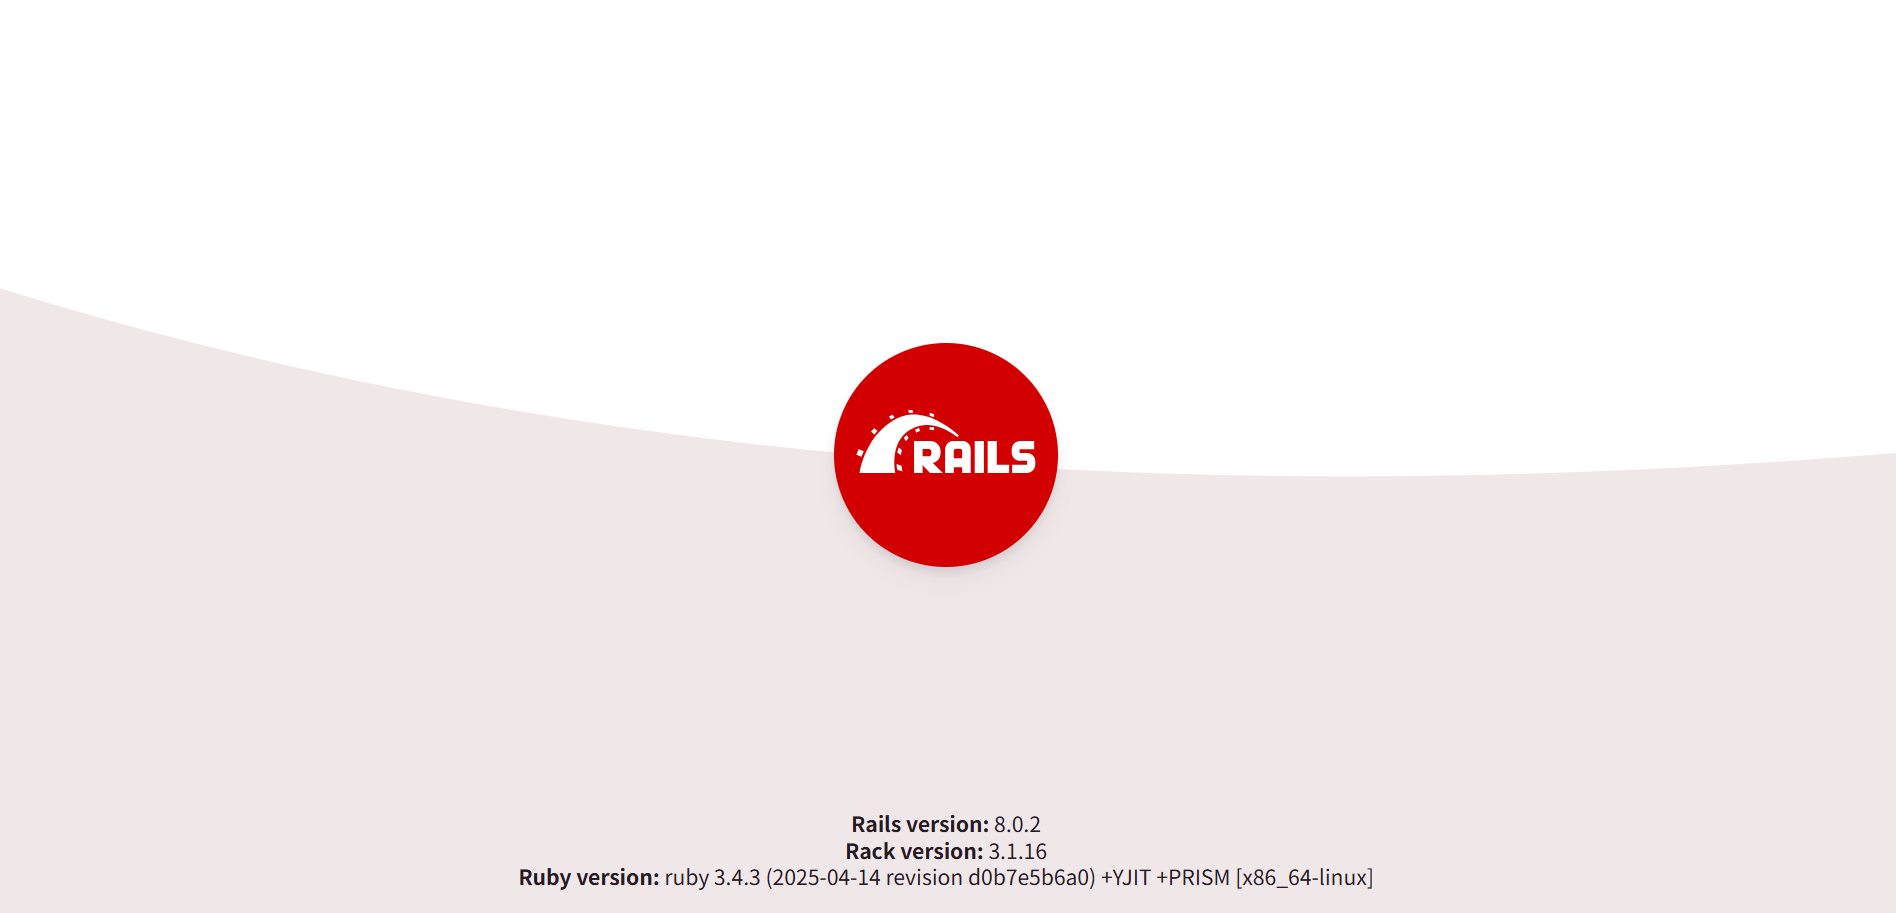
DBが用意されて http://localhost:3000 の画面をリロードすると上記のような画面に切り替わっていると思います。これでセットアップ完成です。
【補足】
$ docker compose -f compose.yaml run --rm web rake db:migrate:reset
[+] Creating 1/0
 ✔ Container docbase_rails-db-1  Running                                                                                                                                                                  0.0s
Dropped database 'docbase_rails_development'
Dropped database 'docbase_rails_test'
Created database 'docbase_rails_development'
Created database 'docbase_rails_test'
db:createの他にもdb:migrateやdb:migrate:resetやdb:dropなどコマンドは多くあるので、適宜使ってみてください。
rspecのGem導入
railsアプリでよく使われるGemが本当に多くありますが、今回は最低限としてrspecの準備をしていきます。これを選んだ理由は、実際の現場ではテストを書くことが多いからです。
ⅰ. gem追加
group :development, :test do
  gem 'rspec-rails'
  gem 'factory_bot_rails'
  gem 'faker'
end
rspec-railsと一緒に良く使われるGemです。一緒にインストールしてください。
ⅱ. Gemfileをインストール
$ docker compose -f compose.yaml build
#or
$ docker compose -f compose.yaml run --rm web bundle install
Bundle complete! 25 Gemfile dependencies, 123 gems now installed.
Use `bundle info [gemname]` to see where a bundled gem is installed.
Dockerfileの記述があるので、私はGemfile変更する時はbuildし直しています。
ⅲ. RSpecインストール
$ docker compose -f compose.yaml run --rm web rails generate rspec:install
[+] Creating 1/0
 ✔ Container rails_research-db-1  Running                                                  0.0s
      create  .rspec
      create  spec
      create  spec/spec_helper.rb
      create  spec/rails_helper.rb
rspecで利用するファイル群が生成されました。ここからrspecが利用可能になります。
この後サンプルでAPIを作ってみるところセクションでrspecを使ってみます。
サンプルでAPIを作ってみる
では実際にrailsを使ってAPIを作ってみましょう。本当に簡単なCRUDをやっていきます。
$ docker compose -f compose.yaml run --rm web rails g model Prefecture
[+] Creating 1/0
 ✔ Container docbase_rails-db-1  Running                                                                                                                                                         0.0s
      invoke  active_record
      create    db/migrate/20250611095055_create_prefectures.rb
      create    app/models/prefecture.rb
      invoke    rspec
      create      spec/models/prefecture_spec.rb
      invoke      factory_bot
      create        spec/factories/prefectures.rb
Prefectureテーブルを作成しました。
class CreatePrefectures < ActiveRecord::Migration[8.0]
  def change
    create_table :prefectures do |t|
      t.timestamps
    end
  end
end
db/migrate配下にファイルができていますね。。
これを以下に修正します。
class CreatePrefectures < ActiveRecord::Migration[8.0]
  def change
    create_table :prefectures, comment: '都道府県マスタ' do |t|
      t.string :prefecture_cd, null: false, limit: 2, comment: '都道府県コード'
      t.string :name, null: false, comment: '都道府県名'
      t.timestamps
    end
  end
end
変更しました。migrationファイルの書き方は以下で確認してください。
Active Record マイグレーション
$ docker compose -f compose.yaml run --rm web rake db:migrate
[+] Creating 1/0
 ✔ Container docbase_rails-db-1  Running                                                                                                                                                         0.0s
== 20250611095055 CreatePrefectures: migrating ================================
-- create_table(:prefectures, {comment: "都道府県マスタ"})
   -> 0.0549s
== 20250611095055 CreatePrefectures: migrated (0.0550s) =======================
マイグレーションが完了しました。
次にモデルファイルに制約を書いておきましょう。
今回はnameが必須でprefecture_cdも必須かつ最大2文字までというDB上の制約を加えてます。
class Prefecture < ApplicationRecord
  validates :name, presence: true
  validates :prefecture_cd, presence: true, length: { maximum: 2 }
end
上記によってアプリケーションのモデルにバリデーション制約を付与できました。
実際の現場だと、prefecture_cdは半角数字のみの2文字という制約を加えるかもですね。
(そもそも都道府県は固定で決まっているのでマスタデータとしてseedで投入になることが多く、こういったファイルは作らないと思いますが)
バリデーション制約に関しては、公式のバリデーションの使い方を確認しましょう。
次にroutesファイルを編集します。
Rails.application.routes.draw do
  # Define your application routes per the DSL in https://guides.rubyonrails.org/routing.html

  # Reveal health status on /up that returns 200 if the app boots with no exceptions, otherwise 500.
  # Can be used by load balancers and uptime monitors to verify that the app is live.
  get "up" => "rails/health#show", as: :rails_health_check

  # Defines the root path route ("/")
  # root "posts#index"
  namespace 'api' do
    namespace 'v1' do
      resources :prefectures
    end
  end
end
RailsをAPIモードで実装していく場合、namespaceでapi/v1と切ることが多いので今回はそれに合わせてサンプル作っていきます。
^CGracefully stopping... (press Ctrl+C again to force)
[+] Stopping 2/2
 ✔ Container docbase_rails-web-1  Stopped                                                                                                                                                        0.2s
 ✔ Container docbase_rails-db-1   Stopped                                                                                                                                                        0.9s
canceled
$ docker compose -f compose.yaml up
再起動します。
$ docker compose -f compose.yaml run --rm web rails routes
[+] Creating 1/0
 ✔ Container docbase_rails-db-1  Running                                                                                                                                                         0.0s
                                  Prefix Verb   URI Pattern                                                                                       Controller#Action
                      rails_health_check GET    /up(.:format)                                                                                     rails/health#show
                      api_v1_prefectures GET    /api/v1/prefectures(.:format)                                                                     api/v1/prefectures#index
                                         POST   /api/v1/prefectures(.:format)                                                                     api/v1/prefectures#create
                       api_v1_prefecture GET    /api/v1/prefectures/:id(.:format)                                                                 api/v1/prefectures#show
                                         PATCH  /api/v1/prefectures/:id(.:format)                                                                 api/v1/prefectures#update
                                         PUT    /api/v1/prefectures/:id(.:format)                                                                 api/v1/prefectures#update
                                         DELETE /api/v1/prefectures/:id(.:format)                                                                 api/v1/prefectures#destroy
rails routesでエンドポイントがあることを確認しました。
次にコントローラーの実装です。
module Api
  module V1
    class PrefecturesController < ApplicationController
      # 参考: before_actionの使い方とオプションについて(https://pikawaka.com/rails/before_action)
      before_action :set_prefecture, only: [ :show, :update, :destroy ]

      def index
        prefectures = Prefecture.order(created_at: :desc)
        render json: { status: "SUCCESS", message: "Loaded prefectures", data: prefectures }
      end

      def show
        render json: { status: "SUCCESS", message: "Loaded the prefecture", data: @prefecture }
      end

      def create
        prefecture = Prefecture.new(prefecture_params)
        if prefecture.save
          render json: { status: "SUCCESS", data: prefecture }
        else
          render json: { status: "ERROR", data: prefecture.errors }
        end
      end

      def update
        if @prefecture.update(prefecture_params)
          render json: { status: "SUCCESS", message: "Updated the prefecture", data: @prefecture }
        else
          render json: { status: "SUCCESS", message: "Not updated", data: @prefecture.errors }
        end
      end

      def destroy
        @prefecture.destroy
        render json: { status: "SUCCESS", message: "Deleted the prefecture", data: @prefecture }
      end

      private

      def set_prefecture
        @prefecture = Prefecture.find_by(id: params[:id])
        return render json: { status: "ERROR", message: "prefecture not found" } unless @prefecture
      end

      def prefecture_params
        params.require(:prefecture).permit(:prefecture_cd, :name)
      end
    end
  end
end
Railsのscaffoldで生成するとnewやeditメソッドもできると思います。今回は間引きます。
ファイル上部のmoduleやclassの書き方は最初はもしかしたら分からないかもしれませんが、routesファイルに記載したnamespaceの単位でapi、v1をmoduleとして書いて、resourcesのprefecturesをPredecturesControllerのように書くようなものだと基本理解して頂けると実務でスムーズに対応できるかなと思います。
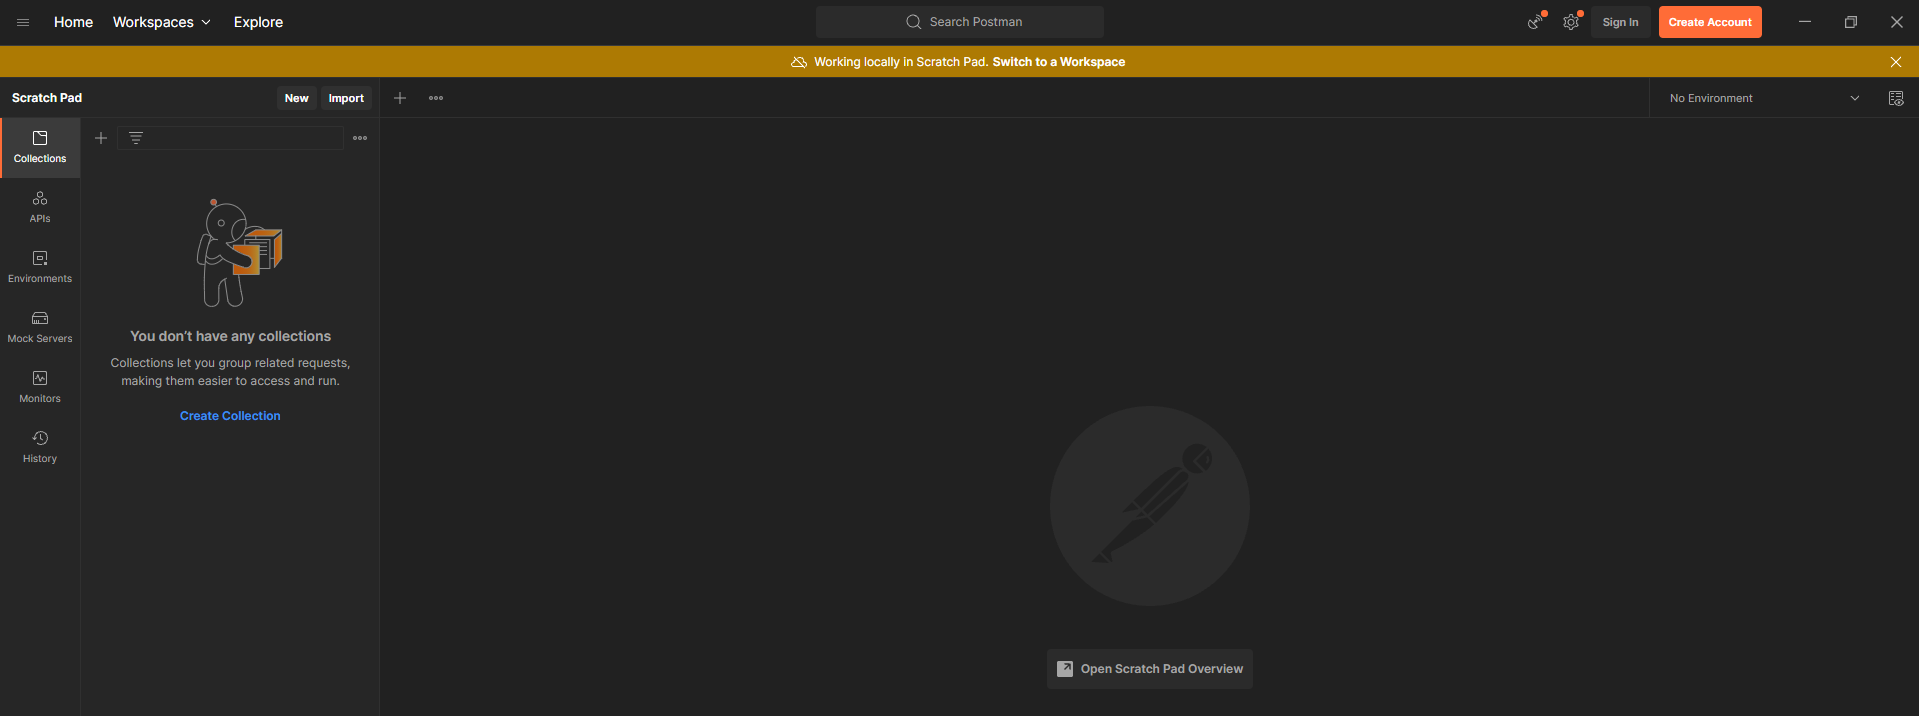
さて動作確認です。今回はPostmanを使い実装が上手くできているか確認します。
![]() Postmanのダウンロードはこちらから https://www.postman.com/
Postmanのダウンロードはこちらから https://www.postman.com/
postmanを開きます。私の方でピンクの線を引きました。この+を押してください。
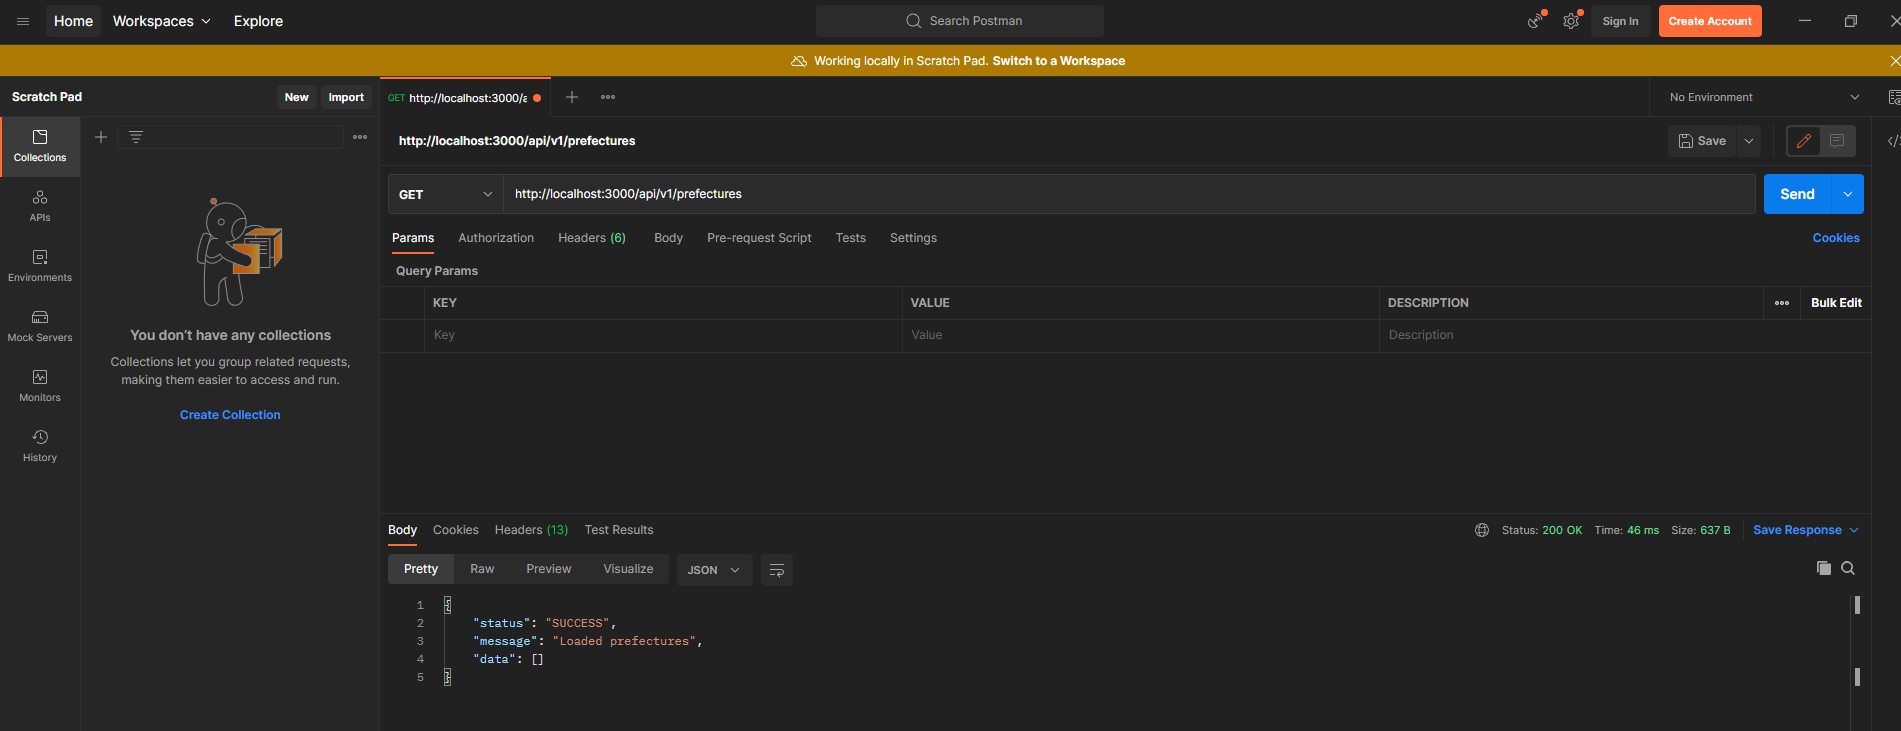
http://localhost:3000/api/v1/prefectures を入れてSendボタンを押すと下にSUCCESSとかLoaded prefecturesが表示されていれば成功です。上手く行ってない場合は実装でタイプミスしていたり、docker compose -f compose.yaml upされてない可能性があるかなと思いますので、確認してください。
最初はデータがないです。せっかくcreateメソッドを書いてあるのでデータを作ってみましょう。http://localhost:3000/api/v1/prefectures の横のGETをPOSTに変更します。またBodyをクリックし、rawを選択し以下をコピペしてください。
{
  "name": "東京都",
  "prefecture_cd": "13"
}
入力出来たら、Sendボタンを押し下にSUCCESSが表示されていれば成功です。
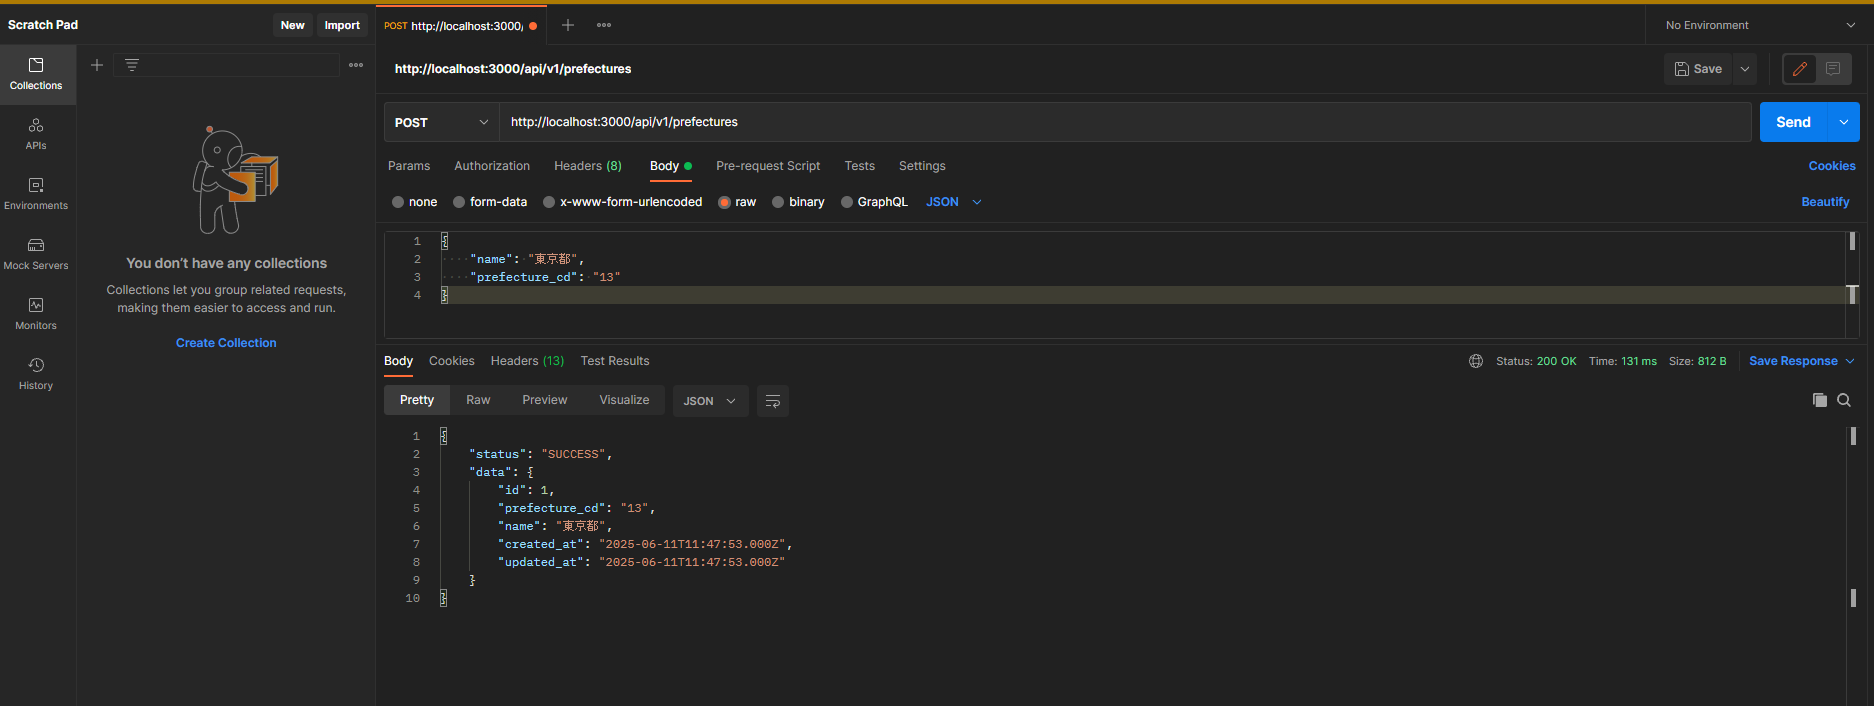
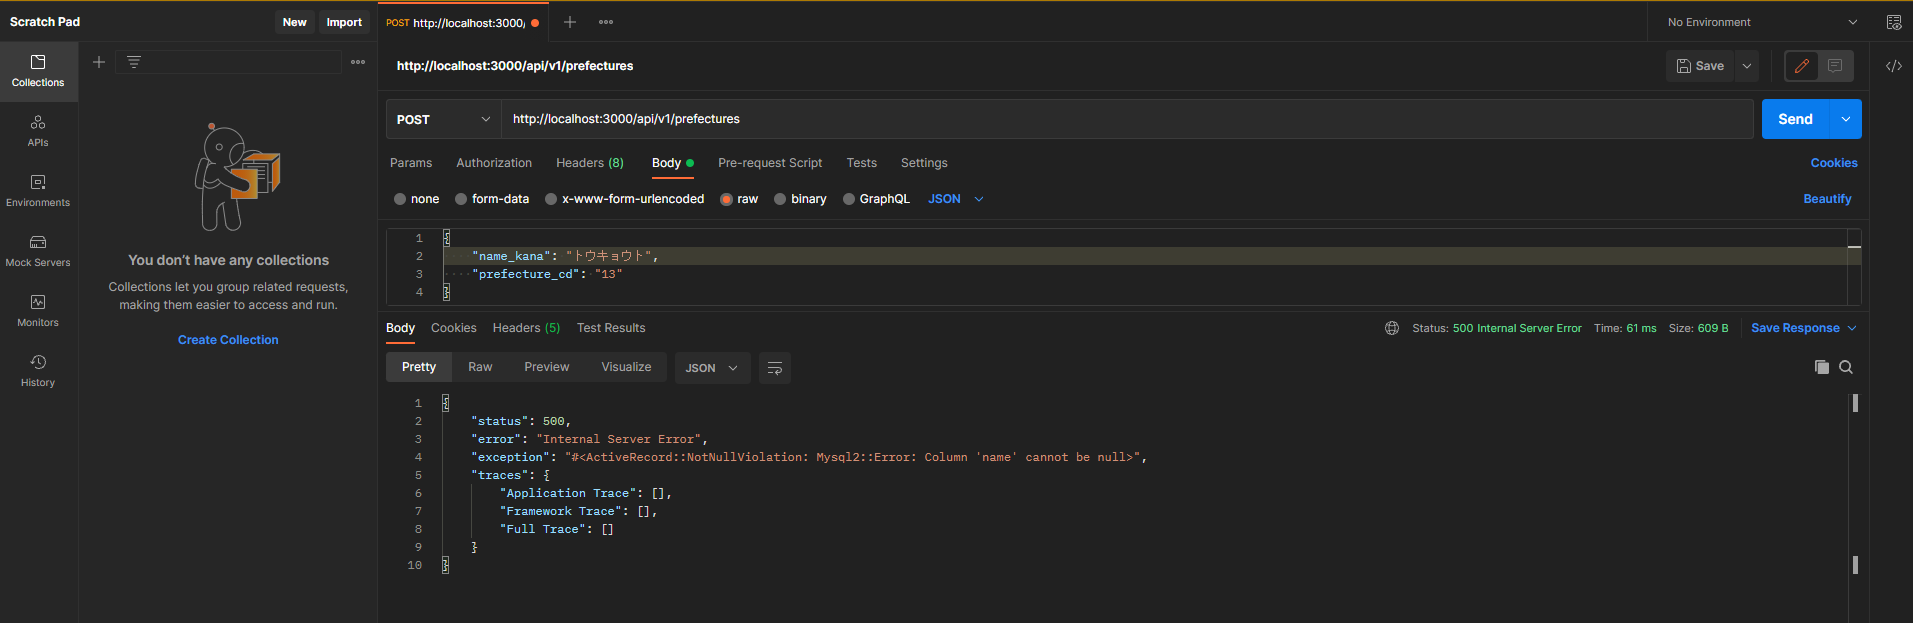
URLはrails routesで表示した内容のPOST /api/v1/prefectures(.:format) api/v1/prefectures#create に対応していることが分かるかと思います。またrawのjsonの記述はcontrollerのparamsで書いたカラムになっています。
def prefecture_params
  params.require(:prefecture).permit(:prefecture_cd, :name)
end
なので、ここでname_kanaなど存在しないカラムなどを指定して作成しようとすると画像のようにエラーになります。
ここで先ほど一覧画面のGetをしましたが、データが存在するか確認してみましょう。
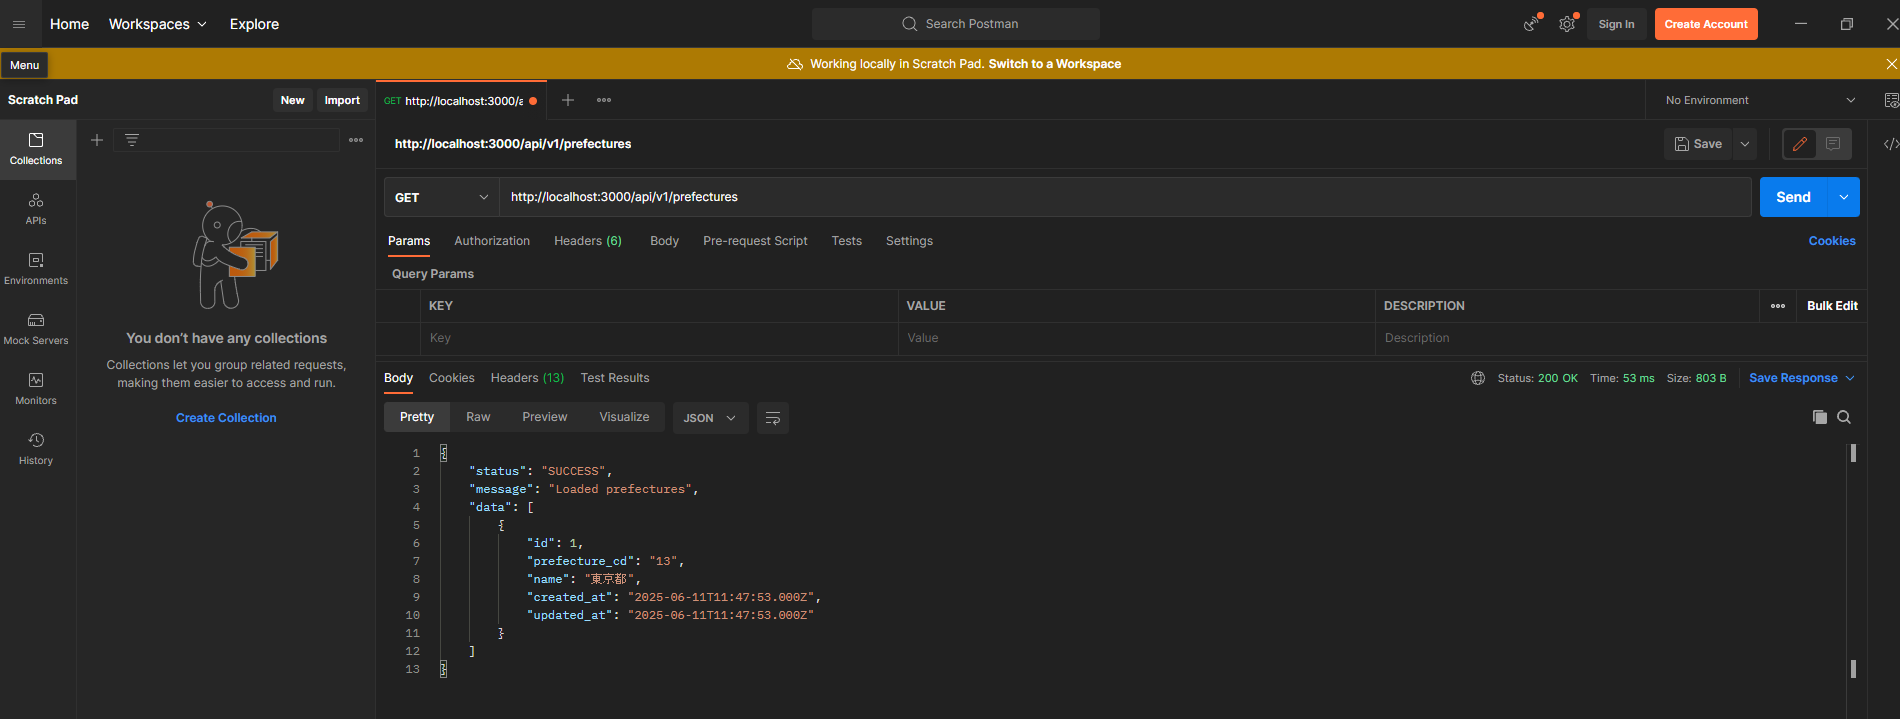
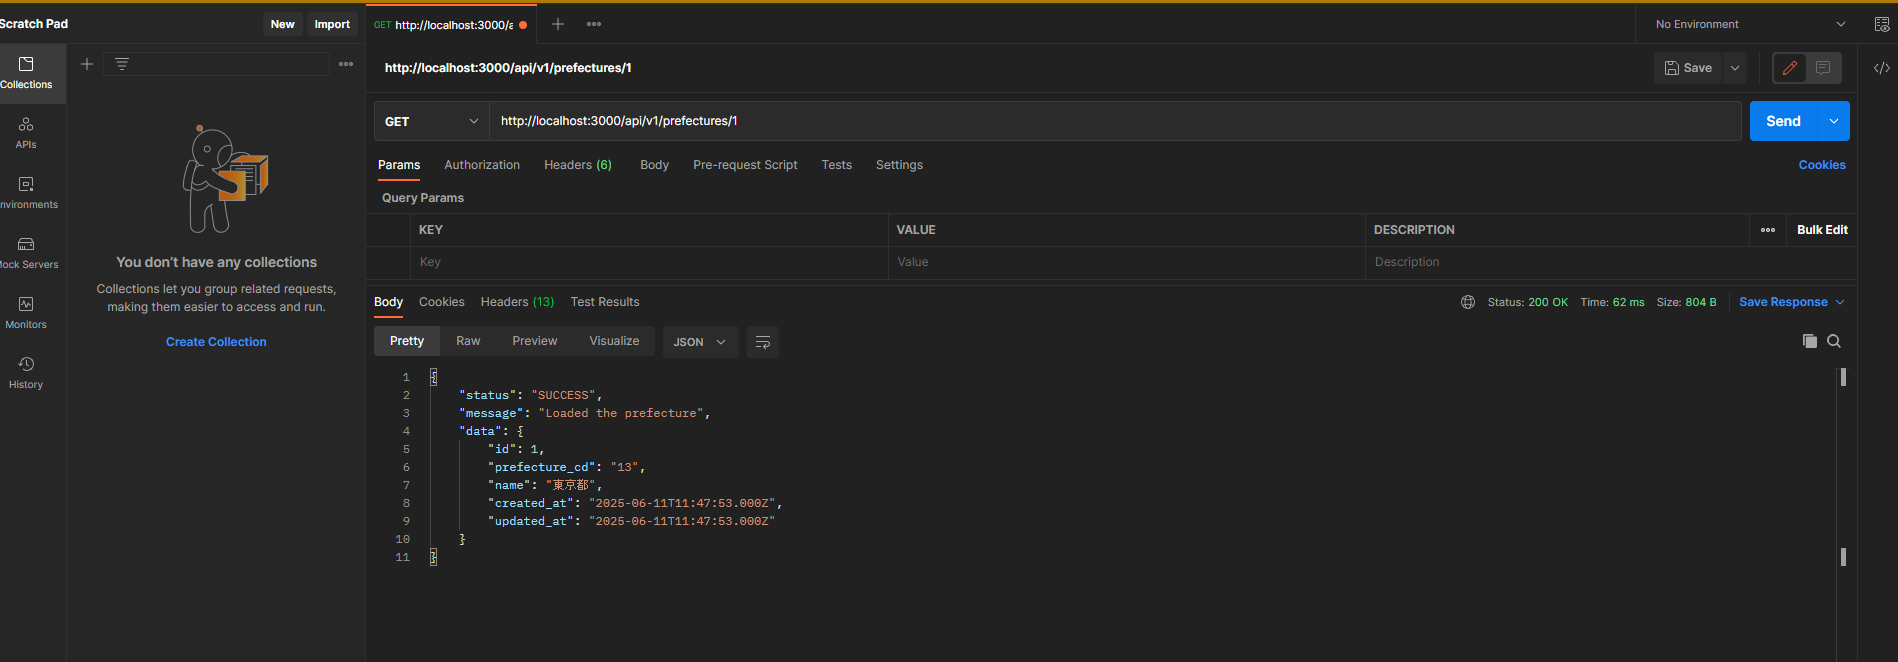
http://localhost:3000/api/v1/prefectures を入れてSendボタンを押すと下にSUCCESSとかLoaded prefecturesが表示されているのは最初と同じです。ただdataの中に先ほど作ったデータが含まれていますね。ついでに詳細を見てみましょう。
http://localhost:3000/api/v1/prefectures/1 の1はdataのidを指定しています。ここを存在するデータにすることでそのデータの詳細データを取得することができます。今回はあまり一覧の表示要素と違いがないかもしれませんが、ここは現場だと必要なカラムデータのみを返す処理を加えるのが一般的かなと思います。
またデータは1件しか作りませんでしたのでhttp://localhost:3000/api/v1/prefectures/2 は存在しないはずですね。試してみましょう。
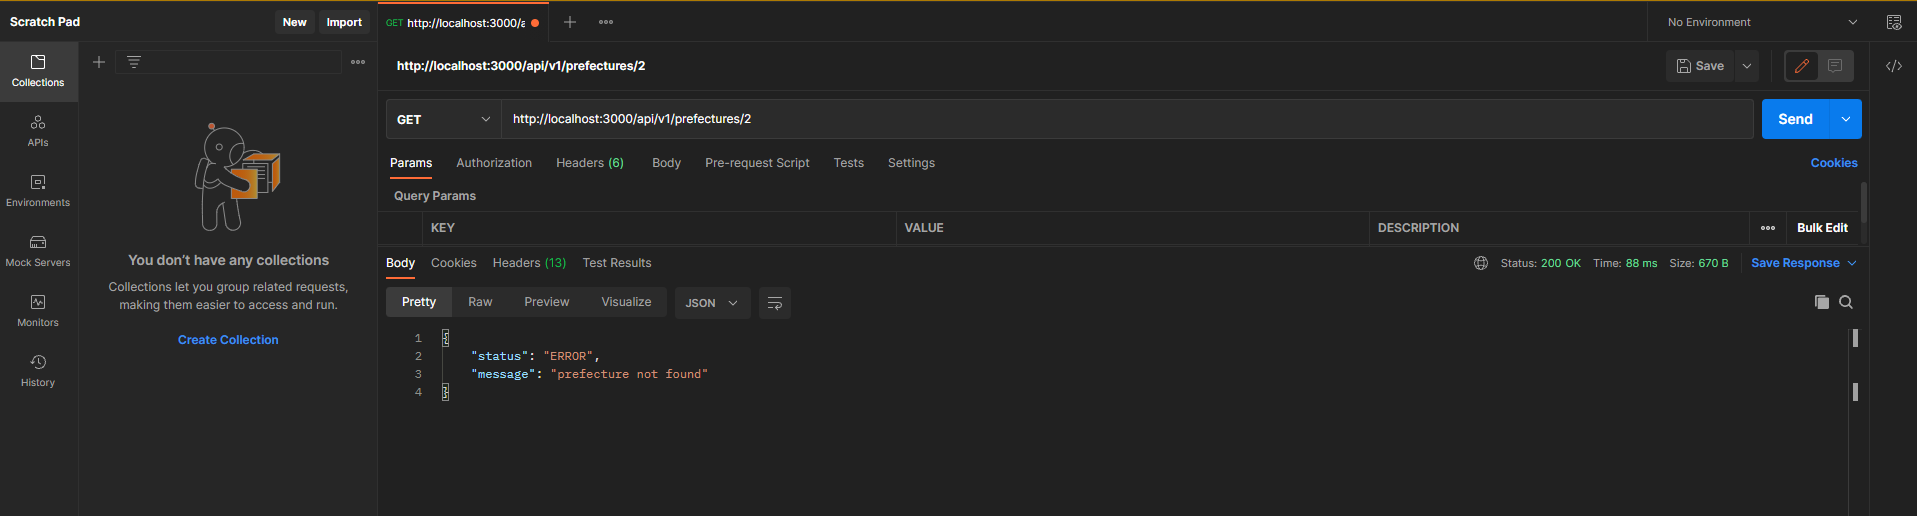
http://localhost:3000/api/v1/prefectures/1 の結果とは異なりデータが見つかりませんでしたね。他にもdeleteメソッドなど任意に試してみてください。
以上でサンプルを終わります。
rspecの作成
実装ができましたが、ここで終わりではありません。
業務ではテストを書くことが通常のルールかなと思っております。一部書いてみましょう。
まずはGemfileにFakerを入れたのでそれを試してみましょう。
FactoryBot.define do
  factory :prefecture do
    name { Faker::Book.title }
    prefecture_cd { "13" }
  end
end
nameの横のFaker::Book.title はなに??と思うかもしれません。こちらはFakerで用意してくれている実装になります。
https://github.com/faker-ruby/faker/blob/main/doc/books/book.md
またprefecture_cdの13のようにハードコーディングすることもできます。一旦は簡単に説明のためにこうしておきます。rails cで実行してみましょう
$ docker compose -f compose.yaml run --rm web rails c
[+] Creating 1/0
 ✔ Container docbase_rails-db-1  Running                                                                          0.0s
Loading development environment (Rails 8.0.2)
docbase-rails(dev)> FactoryBot.create(:prefecture)
  TRANSACTION (0.5ms)  BEGIN /*application='DocbaseRails'*/
  Prefecture Create (6.5ms)  INSERT INTO `prefectures` (`prefecture_cd`, `name`, `created_at`, `updated_at`) VALUES ('13', 'Carrion Comfort', '2025-06-11 12:11:32.276846', '2025-06-11 12:11:32.276846') /*application='DocbaseRails'*/
  TRANSACTION (8.8ms)  COMMIT /*application='DocbaseRails'*/
=>
#<Prefecture:0x0000796431c11ec0
 id: 2,
 prefecture_cd: "13",
 name: "Carrion Comfort",
 created_at: "2025-06-11 12:11:32.276846000 +0000",
 updated_at: "2025-06-11 12:11:32.276846000 +0000">
docbase-rails(dev)>
実行結果が上記になります。nameにはCarrion Comfort という謎の文字列が入っています。これがFakerにより自動で作られる値になります。ハードコーディングした13 も当て込まれてますね。factoryの記述は実際にテストで呼び出す時にテーブルの一意制約やモデルのバリデーションに注意して作りましょう。
次にモデルのテストです。
require 'rails_helper'

RSpec.describe Prefecture, type: :model do
  describe 'create' do
    let(:prefecture) { FactoryBot.build(:prefecture) }
    # 正常系のテスト
    context 'with valid attributes' do
      it 'is valid with a name and prefecture_cd' do
        expect(prefecture).to be_valid
      end
    end

    # 異常系のテスト
    context 'with invalid attributes' do
      it 'is invalid without a name' do
        prefecture.name = nil
        expect(prefecture).to be_invalid
      end

      # prefecture_cdがない場合のテスト
      it 'is invalid without a prefecture_cd' do
        prefecture.prefecture_cd = nil
        expect(prefecture).to be_invalid
      end

      # prefecture_cdが3文字以上の場合のテスト
      it 'is invalid with a prefecture_cd that has more than 3 characters' do
        prefecture.prefecture_cd = '123'
        expect(prefecture).to be_invalid
      end
    end
  end
end
modelファイルのバリデーションの境界値チェックなどすると良いかなと思っております。
テストを実行してみましょう。
$ docker compose -f compose.yaml run --rm web rails spec
[+] Creating 1/0
 ✔ Container docbase_rails-db-1  Running                                                  0.0s
/usr/local/bin/ruby -I/usr/local/bundle/gems/rspec-core-3.13.4/lib:/usr/local/bundle/gems/rspec-support-3.13.4/lib /usr/local/bundle/gems/rspec-core-3.13.4/exe/rspec --pattern spec/\*\*\{,/\*/\*\*\}/\*_spec.rb
....

Finished in 0.26719 seconds (files took 0.71844 seconds to load)
4 examples, 0 failures
テストが成功しました!
最後にコントローラーのテストです。
コントローラーのテストはspec/requests配下に作ることが多いです。
require 'rails_helper'

RSpec.describe 'Api::V1::Prefectures', type: :request do
  let!(:prefecture) { create(:prefecture, name: 'Tokyo', prefecture_cd: '01') }
  let(:valid_attributes) { { name: 'Osaka', prefecture_cd: '02' } }
  let(:invalid_attributes) { { name: '', prefecture_cd: '' } }

  describe 'GET /api/v1/prefectures' do
    it 'returns all prefectures' do
      get api_v1_prefectures_path
      json_response = JSON.parse(response.body)

      expect(response).to have_http_status(:success)
      expect(json_response['data'].size).to eq(Prefecture.count)
    end
  end

  describe 'POST /api/v1/prefectures' do
    context 'with valid attributes' do
      it 'creates a new prefecture' do
        expect {
          post api_v1_prefectures_path, params: { prefecture: valid_attributes }
        }.to change(Prefecture, :count).by(1)

        json_response = JSON.parse(response.body)
        expect(response).to have_http_status(:success)
        expect(json_response['data']['name']).to eq('Osaka')
      end
    end

    context 'with invalid attributes' do
      it 'returns an error' do
        post api_v1_prefectures_path, params: { prefecture: invalid_attributes }
        json_response = JSON.parse(response.body)

        expect(response).to have_http_status(:unprocessable_entity)
        expect(json_response['status']).to eq('ERROR')
      end
    end
  end

  describe 'PUT /api/v1/prefectures/:id' do
    context 'with valid attributes' do
      it 'updates the prefecture' do
        put api_v1_prefecture_path(prefecture), params: { prefecture: { name: 'Kyoto' } }
        json_response = JSON.parse(response.body)

        expect(response).to have_http_status(:success)
        expect(json_response['data']['name']).to eq('Kyoto')
      end
    end

    context 'with invalid attributes' do
      it 'returns an error' do
        put api_v1_prefecture_path(prefecture), params: { prefecture: invalid_attributes }
        json_response = JSON.parse(response.body)

        expect(response).to have_http_status(:unprocessable_entity)
        expect(json_response['status']).to eq('ERROR')
      end
    end
  end

  describe 'DELETE /api/v1/prefectures/:id' do
    it 'deletes the prefecture' do
      expect {
        delete api_v1_prefecture_path(prefecture)
      }.to change(Prefecture, :count).by(-1)

      json_response = JSON.parse(response.body)
      expect(response).to have_http_status(:success)
      expect(json_response['message']).to eq('Deleted the prefecture')
    end
  end
end
実行してみましょう。
$ docker compose -f compose.yaml run --rm web rails spec
[+] Creating 1/0
 ✔ Container docbase_rails-db-1  Running                                                  0.0s
/usr/local/bin/ruby -I/usr/local/bundle/gems/rspec-core-3.13.4/lib:/usr/local/bundle/gems/rspec-support-3.13.4/lib /usr/local/bundle/gems/rspec-core-3.13.4/exe/rspec --pattern spec/\*\*\{,/\*/\*\*\}/\*_spec.rb
......F.F.

Failures:

  1) Api::V1::Prefectures POST /api/v1/prefectures with invalid attributes returns an error
     Failure/Error: expect(response).to have_http_status(:unprocessable_entity)
       expected the response to have status code :unprocessable_entity (422) but it was :ok (200)
     # ./spec/requests/api/v1/prefectures_spec.rb:36:in 'block (4 levels) in <main>'

  2) Api::V1::Prefectures PUT /api/v1/prefectures/:id with invalid attributes returns an error
     Failure/Error: expect(response).to have_http_status(:unprocessable_entity)
       expected the response to have status code :unprocessable_entity (422) but it was :ok (200)
     # ./spec/requests/api/v1/prefectures_spec.rb:58:in 'block (4 levels) in <main>'

Finished in 0.86106 seconds (files took 1.09 seconds to load)
10 examples, 2 failures

Failed examples:

rspec ./spec/requests/api/v1/prefectures_spec.rb:32 # Api::V1::Prefectures POST /api/v1/prefectures with invalid attributes returns an error
rspec ./spec/requests/api/v1/prefectures_spec.rb:54 # Api::V1::Prefectures PUT /api/v1/prefectures/:id with invalid attributes returns an error

/usr/local/bin/ruby -I/usr/local/bundle/gems/rspec-core-3.13.4/lib:/usr/local/bundle/gems/rspec-support-3.13.4/lib /usr/local/bundle/gems/rspec-core-3.13.4/exe/rspec --pattern spec/\*\*\{,/\*/\*\*\}/\*_spec.rb failed
エラーで落ちましたね。どうやら新規作成と更新処理でHTTPレスポンスエラーになってるとのことです。実装を確認してみましょう。
def create
  prefecture = Prefecture.new(prefecture_params)
  if prefecture.save
    render json: { status: "SUCCESS", data: prefecture }
  else
    render json: { status: "ERROR", data: prefecture.errors }
  end
end

def update
  if @prefecture.update(prefecture_params)
    render json: { status: "SUCCESS", message: "Updated the prefecture", data: @prefecture }
  else
    render json: { status: "SUCCESS", message: "Not updated", data: @prefecture.errors }
  end
end
ここの処理ですね。
テストで指摘されたunprocessable_entity(HTTPステータスコード422)を明記する必要がある理由は、リクエストがサーバーに到達したものの、リクエスト内容がサーバー側で処理できない場合に適切なエラーレスポンスを返すためです。
具体的には、リクエストのデータが不正である場合(例えば、必須フィールドが欠けている、またはフォーマットが正しくない場合)に、クライアントにその情報を伝えるために使用されます。現在の実装では、失敗時にHTTPステータスコード200(成功)を返しているため、クライアントがエラーを正しく認識できていませんでした。
実装を修正してみましょう。
def create
  prefecture = Prefecture.new(prefecture_params)
  if prefecture.save
    render json: { status: "SUCCESS", data: prefecture }
  else
    render json: { status: "ERROR", data: prefecture.errors }, status: :unprocessable_entity
  end
end

def update
  if @prefecture.update(prefecture_params)
    render json: { status: "SUCCESS", message: "Updated the prefecture", data: @prefecture }
  else
    render json: { status: "SUCCESS", message: "Not updated", data: @prefecture.errors }, status: :unprocessable_entity
  end
end
実装を直しました。再度テストを実行してみましょう。
$ docker compose -f compose.yaml run --rm web rails spec
[+] Creating 1/0
 ✔ Container docbase_rails-db-1  Running                                                  0.0s
/usr/local/bin/ruby -I/usr/local/bundle/gems/rspec-core-3.13.4/lib:/usr/local/bundle/gems/rspec-support-3.13.4/lib /usr/local/bundle/gems/rspec-core-3.13.4/exe/rspec --pattern spec/\*\*\{,/\*/\*\*\}/\*_spec.rb
........F.

Failures:

  1) Api::V1::Prefectures PUT /api/v1/prefectures/:id with invalid attributes returns an error
     Failure/Error: expect(json_response['status']).to eq('ERROR')

       expected: "ERROR"
            got: "SUCCESS"

       (compared using ==)
     # ./spec/requests/api/v1/prefectures_spec.rb:59:in 'block (4 levels) in <main>'

Finished in 0.81308 seconds (files took 0.80466 seconds to load)
10 examples, 1 failure

Failed examples:

rspec ./spec/requests/api/v1/prefectures_spec.rb:54 # Api::V1::Prefectures PUT /api/v1/prefectures/:id with invalid attributes returns an error

/usr/local/bin/ruby -I/usr/local/bundle/gems/rspec-core-3.13.4/lib:/usr/local/bundle/gems/rspec-support-3.13.4/lib /usr/local/bundle/gems/rspec-core-3.13.4/exe/rspec --pattern spec/\*\*\{,/\*/\*\*\}/\*_spec.rb failed
createのテストは通るようになりましたが、まだupdateのテストがエラーですね。今度はERRORという文字を期待しているが、SUCCESSが返ってくるとなっています。実装を見てみましょう。
def update
  if @prefecture.update(prefecture_params)
    render json: { status: "SUCCESS", message: "Updated the prefecture", data: @prefecture }
  else
    render json: { status: "SUCCESS", message: "Not updated", data: @prefecture.errors }, status: :unprocessable_entity
  end
end
statusの文字が"SUCCESS"になっていますね。これも実装の間違えで正しくは"ERROR"ですね。
def update
  if @prefecture.update(prefecture_params)
    render json: { status: "SUCCESS", message: "Updated the prefecture", data: @prefecture }
  else
    render json: { status: "ERROR", message: "Not updated", data: @prefecture.errors }, status: :unprocessable_entity
  end
end
実装を直して、再度テストをします。
$ docker compose -f compose.yaml run --rm web rails spec
[+] Creating 1/0
 ✔ Container docbase_rails-db-1  Running                                                  0.0s
/usr/local/bin/ruby -I/usr/local/bundle/gems/rspec-core-3.13.4/lib:/usr/local/bundle/gems/rspec-support-3.13.4/lib /usr/local/bundle/gems/rspec-core-3.13.4/exe/rspec --pattern spec/\*\*\{,/\*/\*\*\}/\*_spec.rb
..........

Finished in 0.67078 seconds (files took 0.75677 seconds to load)
10 examples, 0 failures
おめでとうございます。テストがすべて通りましたね。
このようにして実装とテストを見比べて品質向上をしていきます。
以上で、この記事を終わります。
ありがとうございました。
補足
railsコマンド等で生成されたファイルが権限の理由で上書きできないなどの場合は以下を実行してみてください。
$ sudo chown -R あなたのシステムの名前:あなたのシステムの名前 .