バーチャルマシンを ARM対応の Terraform を使ってプロビジョンしてみる
HashiCorp の Terraform が、Azure Resource Managerのプロバイダをリリースしたので、初めて Terraform を触る人のために、Terraform を使って、仮想マシンをプロビジョンするところまでの方法をシェアしてみたいと思います。

Terraform は、VM を含めたインフラストラクチャの構成をコード化するのに便利です。Azureを使っている人にとっては、大抵は、ARM(Azure Resource Manager)で事足りますが、Terraformに慣れている人や複数のクラウド環境をサポートする必要のある人は、Terraform で統一できると便利かもしれません。またTerraform は、GO言語で書かれているので、Linux / Mac / Windowsのどれでも動作して、インストールも簡単なところが素敵です。
では、よくあるユースケースである、VMをプロビジョンして、Chefをインストールするところまでをコード化してみたいと思います。
- インストール
Terraform のインストールは大変簡単です。
のページから、自分の環境にあったバイナリを落として、ディレクトリにパスを通せば終了です。他に何も必要ありません。
Terraform の実行自体には必要ありませんが、後で出てくるサービスプリンシパル認証用の設定を行うため、Azure SDKを
このページのCommaind-line tools のところにある、インストーラーをOS環境に合わせて落としておくとよいでしょう。今回はWindowsで実施しましたが、Macでも同じ手順で可能かと思います。
- サービスプリンシパル認証のための設定
真壁さんの書いておられるTerraformをAzure ARMで使う時の認証の手順が一番楽ちんに設定できます。(ここで、先ほどの、Azure CLIを使います)
説明は真壁さんのエントリに譲って、具体的な設定の手順だけシェアします。具体的にはAzureのActive Directoryに対して、アプリケーションを登録して、アクセス許可を与えます。
2.1. ログイン
Azure へのログインを行います。
> azure login
info:    Executing command login
|info:    To sign in, use a web browser to open the page https://aka.ms/devicelogin. Enter the code <Some Code> to authenticate.
コマンドラインで示されているとおり、https://aka.ms.devicelogin のページをブラウザで開いて、<Some Code>のところに表示されているコードを入力して、その後ご自分のAzureアカウントでログインしてください。ログインが終了したら、今度は、Azure CLIのモードを変えておきます。Azureは、Azure Service Managerという古いモードと、Azure Resource Managerという新しいモードがありますので、当然新しいモードにしておきます。
> azure config mode arm
2.2. アプリケーションをActive Directory に登録
サービスプリンシプルは最初は面倒に感じるのですが、一旦次のオペレーションをすると本当に楽ちんです!最初の一回だけなので、楽しんでいきましょう。
次のコマンドで、認証のために、あなたのTerraformを、AzureのActive Directoryに登録するようなことをします。
home pageや、identifier-uris は、あなたの持っているブログとか何かのURLで結構です。他の人とかぶりがないものであればよいでしょう。
ホームページとか登録とか「なんでやねん」と思いますが、サービスプリンプル認証では、「アプリケーションを登録」することになっているので本当にそのようなケースでは必要になります。今回は我々は単にAzure にTerraformでアクセスしたいだけなので、必須項目として入れる必要があるので入れているという程度の認識で結構です。 このコマンドを発行すると、
> azure ad app create --name "My Terraform" --home-page "http://simplearchitect.hatenablog.com/" --identifier-uris "http://simplearchitect.hatenablog.com/" --password <Your Password>
info:    Executing command ad app create
+ Creating application My Terraform
data:    AppId:                   <Some AppId>
data:    ObjectId:                <Some App ObjectId>
data:    DisplayName:             My Terraform
data:    IdentifierUris:          0=http://simplearchitect.hatenablog.com/
data:    ReplyUrls:
data:    AvailableToOtherTenants:  False
info:    ad app create command OK
ここで生成された、<Some AppId> を使って今度は、サービスプリンシパルを作成します。Active Directoryでは、認証が可能なエンティティはすべて、プリンシパルとして表されます。ユーザやアプリケーションもプリンシパルです。アプリケーションが目的のサービスにアクセスするのに、サービスプリンシパルが使われます。
Azure にアクセスするための、Terraform用のサービスプリンシプルを作成します。先ほどアプリケーションを登録した時にGetした、アプリケーションのIdを使います。これでサービスプリンシプルができました。
> azure ad sp create <Some AppId>
info:    Executing command ad sp create
+ Creating service principal for application <Some AppId>
data:    Object Id:               <Some Principle Object Id>
data:    Display Name:            My Terraform
data:    Service Principal Names:
data:                             <Some AppId>
data:                             http://simplearchitect.hatenablog.com/
info:    ad sp create command OK
これで、Azureへのアクセスをするためのサービスプリンシパルが作成されました。次に、アクセス権を設定するため、ロール(役割)を割り当てます。
ここでは、ContributorというAzureのサブスクリプションに対する権限を与えています。<Your Subsciption Id>にあなたのAzureのサブスクリプションを記入しましょう。ちなみに、Azure CLIから azure account listコマンドで、あなたが現在使っているサブスクリプションIDがわかると思います。
> azure role assignment create --objectId <Some Principle Object Id> -o Contributor -c /subscriptions/<Your Subscription Id>
info:    Executing command role assignment create
+ Finding role with specified name
-data:    RoleAssignmentId     : /subscriptions/<Your subscription Id>/providers/Microsoft.Authorization/roleAssignments/<Your role assignment Id>
data:    RoleDefinitionName   : Contributor
data:    RoleDefinitionId     : <Your role defininition Id>
data:    Scope                : /subscriptions/<Your subscription Id>
data:    Display Name         : My Terraform
data:    SignInName           :
data:    ObjectId             : <Some Principle Object Id>
data:    ObjectType           : ServicePrincipal
data:
+
info:    role assignment create command OK
これで設定完了。この後必要なtenant_idを取得するために、次のコマンドを発行しましょう。すると、ご使用のサブスクリプションのIDのところにTenantIdが表示されます。テナントとは、何かを所有する人という意味です。
> azure  account list --json
[
  {
    "id": "<Your subsctiption Id>",
    "name": "<Your subsctiption name>",
    "user": {
      "name": "<Your e-mail address>",
      "type": "user"
    },
    "tenantId": "<Your tenantId>",
    "state": "Enabled",
    "isDefault": true,
    "registeredProviders": [],
    "environmentName": "AzureCloud"
  }
   :
- Terraform コンフィギュレーションファイルの作成
次にTerraform のコンフィグレーションファイルを作成します。いわゆるInfrastructre as Codeですね。
全体のコードは、Gistにあげておきました。Terraform configurations for Azure ARM template](https://gist.github.com/TsuyoshiUshio/6abf201db0ab23dde83acd0c86636b12)
このファイルを、terraform.tf 等の名前で保存します。さらに、次のように、terraform.tfvarというファイルを作ります。
ちなみに、client_secret は、2.2.のazure ad app createで指定したパスワードです。<OS User Name> は、この場合、Ubuntuですが、Ubuntuのデフォルト
の、sudoユーザの名前のことです。パスワードも同じくですね。
terraform.tfvars
default_user = "<OS User Name>"
default_password = "<OS User password>"
subscription_id = "<Your subscription Id>"
client_id       = "<Some AppId>"
client_secret   = "<Your Password>"
tenant_id       = "<Your tenantId>"
Gistにおいた、terraform.tfの中身の解説は、AZURERM_VIRTUAL_MACHINEあたりを読むと理解できると思います。実際のところ、Azure Resource Managerと一緒ですので、一旦、Azure Resource Managerを触っておくと、理解が進みます。
Azure Resource Managerの解説としては、次の安納さんのブログのエントリが一番わかりやすくて好きです。
- Terraform を使ったプロビジョニング
tfファイルとtfvarsのファイルがそろっていることを確認します。tfvarsのファイル名は、terraform.tfvarsである必要があるので注意してください。
>dir
 :
2016/04/30  12:41               667 terraform.tf
2016/04/30  12:40                58 terraform.tfvars
terraform plan コマンドterraformの実行計画を作成します。こんな構成で、インフラ作りますというような情報が表示されます。コマンド実行後は、terraform.tfstate というファイルが作成されます。
> terraform plan
その後、実際にプロビジョニングしたい場合は、terraform apply コマンドを実行すれば実際にAzure 上にChefがインストールされた、Ubuntu VM が作成されます。ちなみに、連続でプロビジョニングをしたい場合は、次のTipsをご参照ください。はまりどころがありますので整理しておきました。
> terraform apply
 :
azurerm_virtual_machine.test (remote-exec): Thank you for installing Chef!
azurerm_virtual_machine.test: Creation complete

Apply complete! Resources: 8 added, 0 changed, 0 destroyed.

The state of your infrastructure has been saved to the path
below. This state is required to modify and destroy your
infrastructure, so keep it safe. To inspect the complete state
use the `terraform show` command.

State path: terraform.tfstate

C:\Users\tsushi\Codes\Terraform>
- Terraform with Azure ARM の Tips
Terraform with Azure ARM の Tips をあげておきます。はまりどころとかもありますので、ご注意ください。
5.1. 2回以上プロビジョニングする場合は、Storage accountの名前を変えること
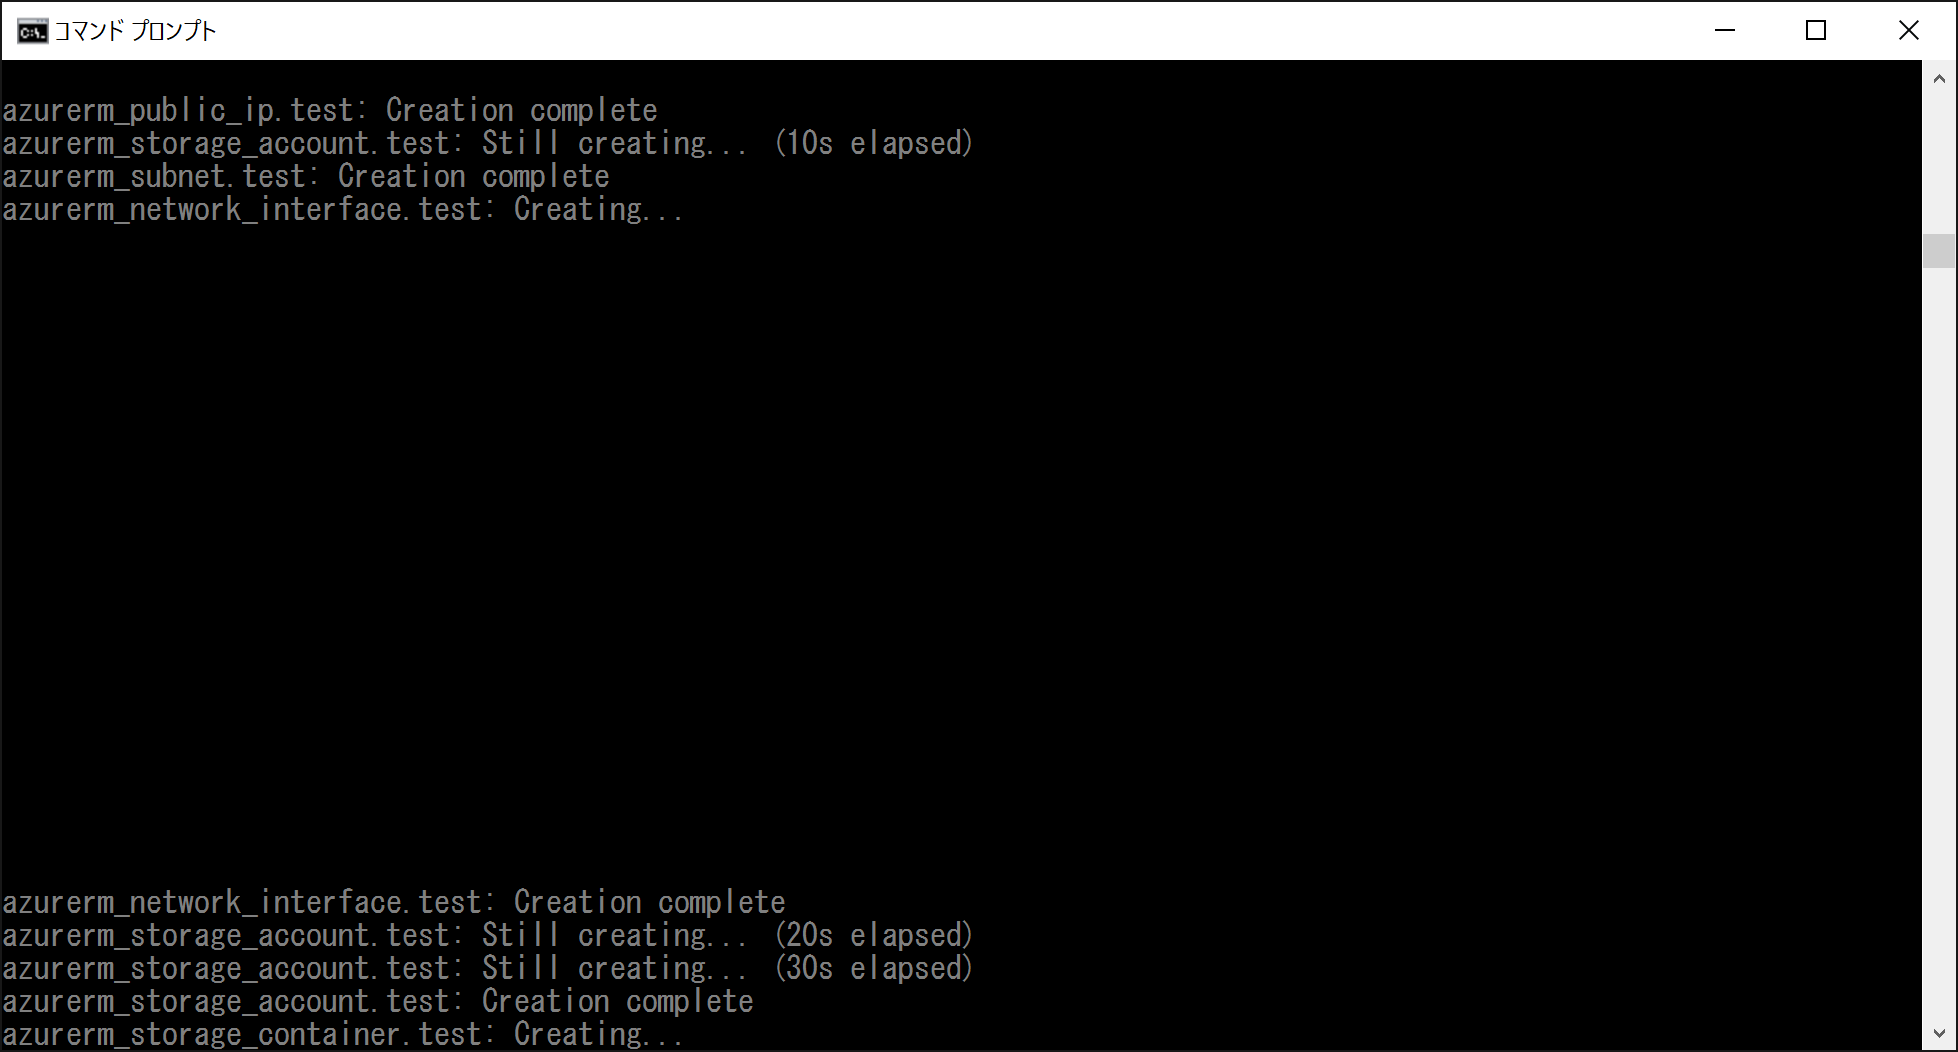
これが最大のはまりどころです。Terraform configurationをいろいろ試したくて、何回もプロビジョニングする場合に、いったんリソースグループを削除して、terraform applyを再実行すると、ストレージアカウントが作成されなくなります。途中でこのような表示がでて終わりません。
azurerm_storage_account.test: Still creating... (10s elapsed)
azurerm_storage_account.test: Still creating... (20s elapsed)
azurerm_storage_account.test: Still creating... (30s elapsed)
azurerm_storage_account.test: Still creating... (40s elapsed)
azurerm_storage_account.test: Still creating... (51s elapsed)
azurerm_storage_account.test: Still creating... (1m1s elapsed)
azurerm_storage_account.test: Still creating... (1m11s elapsed)
azurerm_storage_account.test: Still creating... (1m21s elapsed)
azurerm_storage_account.test: Still creating... (1m31s elapsed)
azurerm_storage_account.test: Still creating... (1m41s elapsed)
azurerm_storage_account.test: Still creating... (1m51s elapsed)
   :
これは推測なのですが、ストレージアカウント名は、ARMの時代になっても、リソースグループ単位ではなく、Azureでかぶっているとダメなようです。
しかも、一旦これを削除しても、その名前がどうやらしばらくは生きている様子です。(多分後でバッチで消える)ですので、削除したストレージアカウントを次の日だと使えるケースもあり、使えないケースもある、、、という雰囲気(私の実験による)という感じなので、ストレージアカウントを削除して再作成したい場合は、違う名前に変更するのが無難です。
だからだと思うのですが、Azure Resource Manager のテンプレートでは、uniqueString というfunction で、ストレージアカウントの名前を定義するのが、標準になっています。この件に関しては、TerraformのGitHubのIssueに報告しておきました。
Creating Azure ARM strage account at the second time fails #6412
これに関しても師匠からのコメントがあったので、共有しておきます!
@tmak_tw それが、destroyでも私が試したときはあかんかったですわ。なんか違うのかなー。
— TsuyoshiUshio (@sandayuu) 2016年4月30日
5.2. Terraform のコマンドが上手く動かないときは、terraform.tfstateとバックアップを削除する
terraformのコマンドを実行してもうまく動作しないケースがあります。これは、まだ、ARMのProviderができて間もないこともあります。
ただ、その場合、terraform plan や、terraform applyでできる下記のファイルを消せばいい感じで動作するようになります。
2016/04/30  12:13            12,268 terraform.tfstate
2016/04/30  12:11               197 terraform.tfstate.backup
5.3. VMのリソースは、VM作成中は参照できない
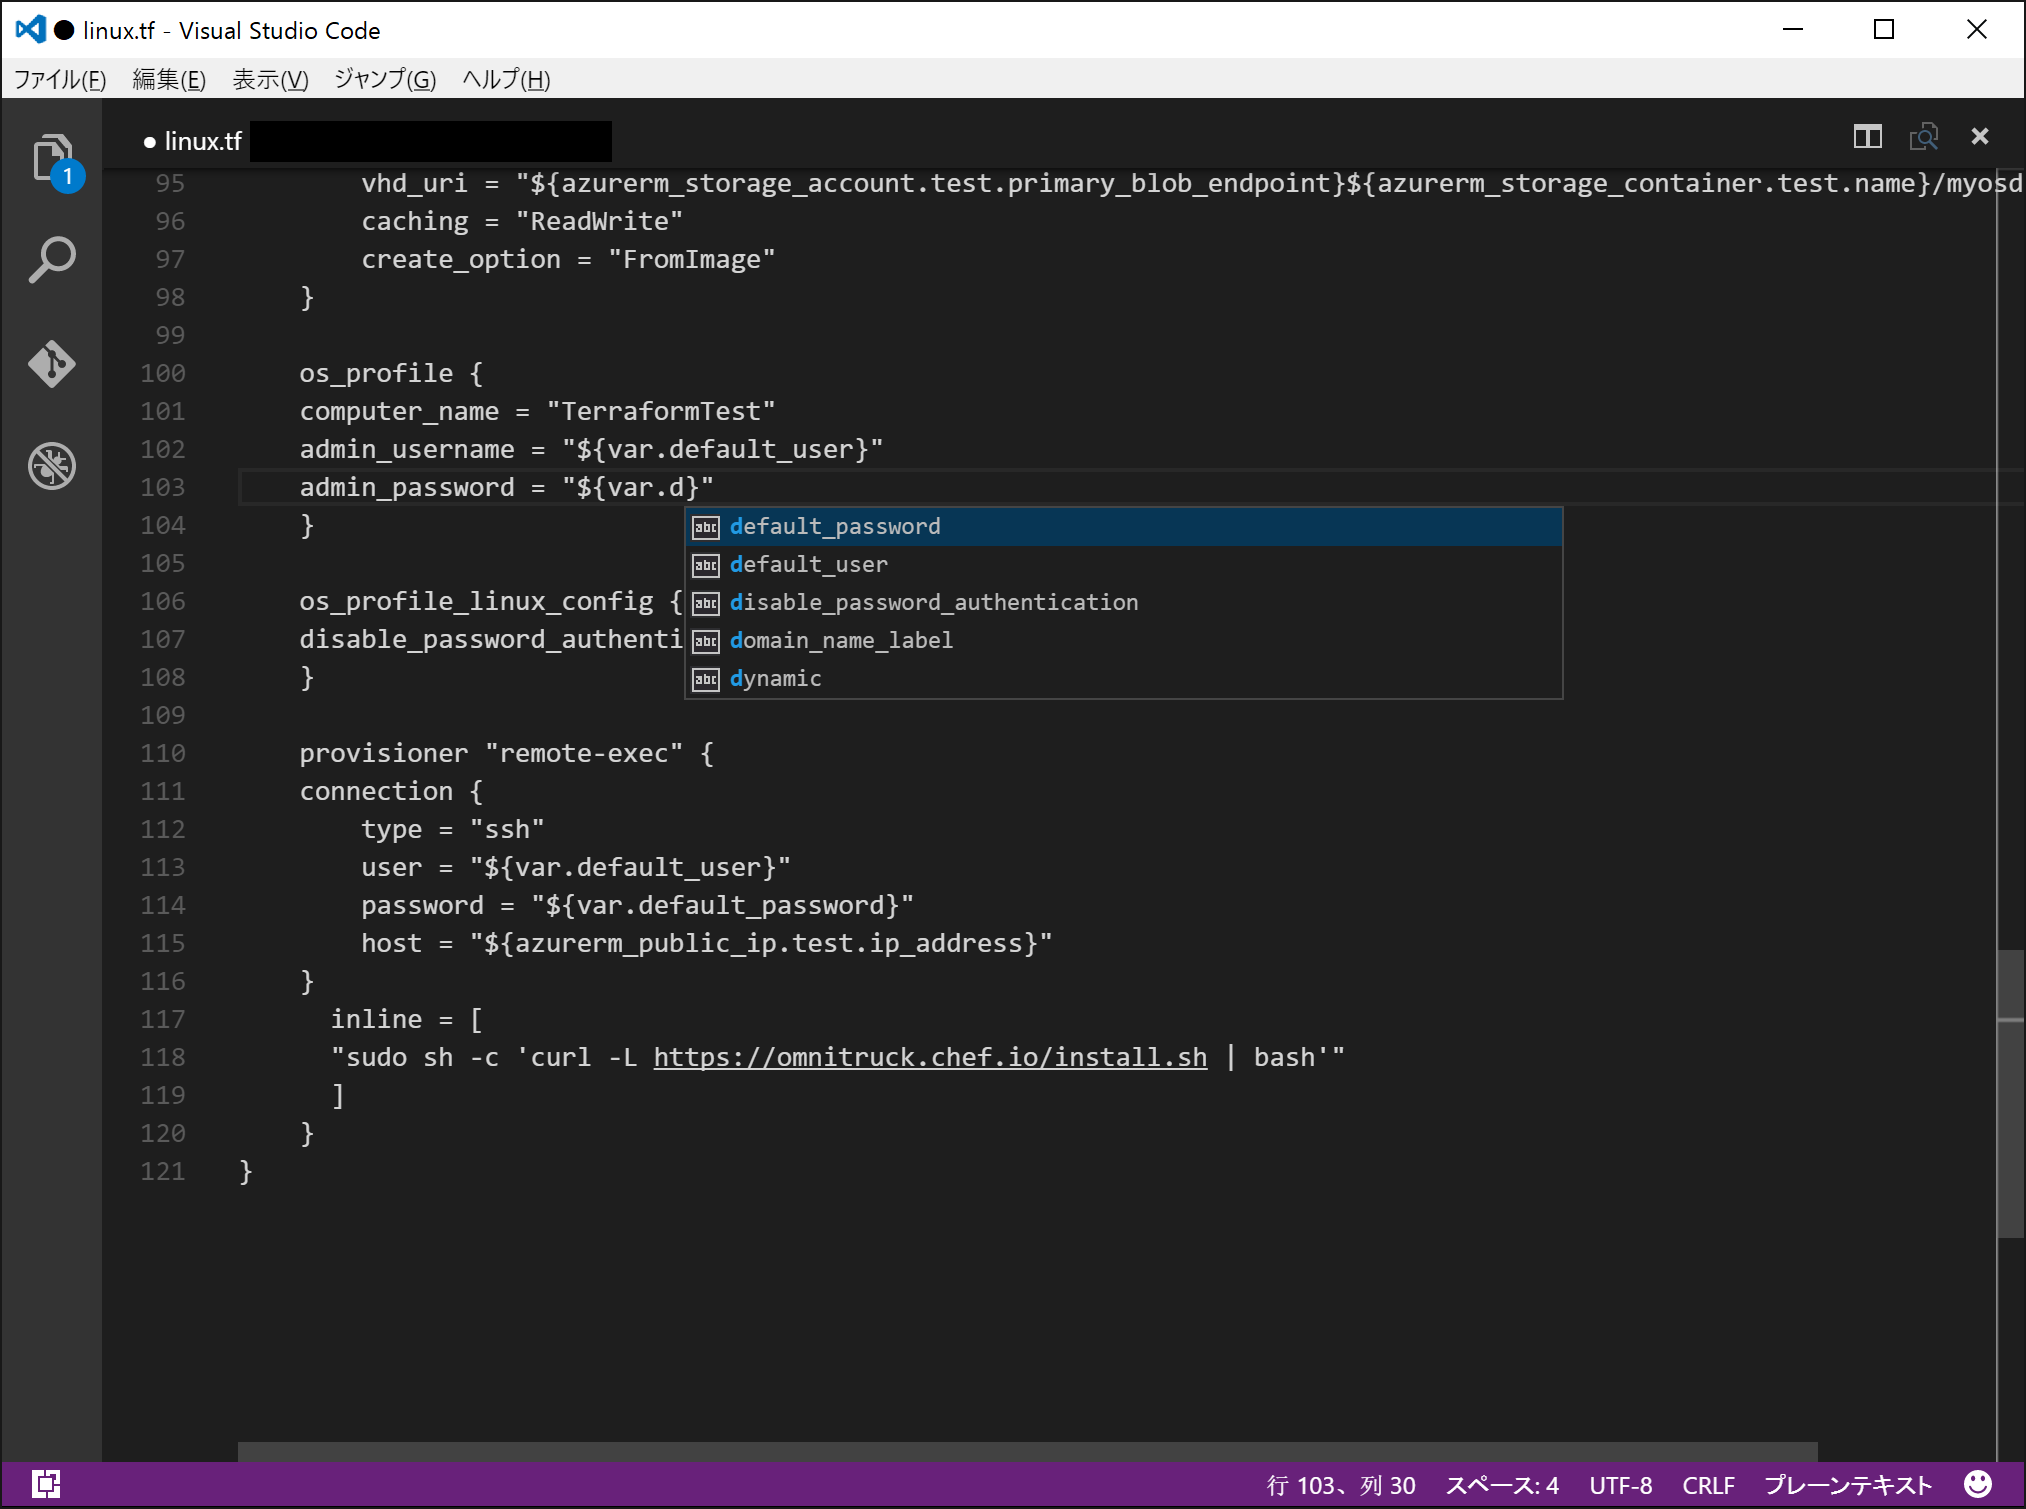
次のように、Virtual Machine のリソースでは、os_profileの部分と、connectionの部分に、同じ、ユーザとパスワードを指定するため、当初は、connectionの部分は、${self.os_profile.*.admin_password}みたいな感じでデータを共有しようとしましたができませんでした。おそらく、VMが出来上がってしまうと、そのような参照ができるのでしょうが、この段階ではVMを作成している途中なのでそれらの値が参照できないのでは?と推測しています。ですので、次の部分で解説する、varをメカニズムを使うとすっきり書けます。
resource "azurerm_virtual_machine" "test" {
    name = "TerraformVM01"
    location = "Japan East"
    resource_group_name = "${azurerm_resource_group.test.name}"
    network_interface_ids = ["${azurerm_network_interface.test.id}"]
    vm_size = "Standard_A0"

    storage_image_reference {
    publisher = "Canonical"
    offer = "UbuntuServer"
    sku = "14.04.2-LTS"
    version = "latest"
    }

    storage_os_disk {
        name = "myosdisk1"
        vhd_uri = "${azurerm_storage_account.test.primary_blob_endpoint}${azurerm_storage_container.test.name}/myosdisk1.vhd"
        caching = "ReadWrite"
        create_option = "FromImage"
    }

    os_profile {
    computer_name = "TerraformTest"
    admin_username = "${var.default_user}"
    admin_password = "${var.default_password}"
    }

    os_profile_linux_config {
    disable_password_authentication = false
    }

    provisioner "remote-exec" {
    connection {
        type = "ssh"
        user = "${var.default_user}"
        password = "${var.default_password}"
        host = "${azurerm_public_ip.test.ip_address}"
    }
      inline = [
      "sudo sh -c 'curl -L https://omnitruck.chef.io/install.sh | bash'"
      ]
    }
}
5.4. サブスクリプションや、パスワードを一元管理し、外だしする
パスワードとか、サブスクリプションは、公開するファイルには書きたくないですよね?その場合は、次のvariablesのメカニズムを使うと便利です。
外だしのファイル名は、terraform.tfvars に固定なので、違う名前にしないでくださいね!tfファイルは違う名前でもOKです。
terraform.tf での定義と使用例です。ちなみに、terraform.tfvarsを用意しない場合、terraform planでて入力が求められます。
variable "default_user" {}
variable "default_password" {}
variable "subscription_id" {}
variable "client_id" {}
variable "client_secret" {}
variable "tenant_id" {}

provider "azurerm" {
  subscription_id = "${var.subscription_id}"
  client_id       = "${var.client_id}"
  client_secret   = "${var.client_secret}"
  tenant_id       = "${var.tenant_id}"
}
terraform.tfvars
default_user = "<OS User Name>"
default_password = "<OS User password>"
subscription_id = "<Your subscription Id>"
client_id       = "<Some AppId>"
client_secret   = "<Your Password>"
tenant_id       = "<Your tenantId>"
5.5. VMがブートした後、何かをプロビジョンしたい場合は、Remote Exec等を使う
下記の部分ですね。このコマンドは、リモートでシェルを実行するコマンドの場合です。この例では、chefをワンライナーでインストールしています。他にもいろんなプロビジョナーがあるので、ご参照ください。
    provisioner "remote-exec" {
    connection {
        type = "ssh"
        user = "${var.default_user}"
        password = "${var.default_password}"
        host = "${azurerm_public_ip.test.ip_address}"
    }
      inline = [
      "sudo sh -c 'curl -L https://omnitruck.chef.io/install.sh | bash'"
      ]
    }
5.6. コンソールの黒い隙間には実は文字がある
terraform applyを実施して、コマンドプロンプトを見るとこんな感じになります。なぜか表示されているラインの間隔があります。
この間隔の部分をコピー&ペースとしてみると、実は何らかの文字が出力されています。黒くて見えないだけです。
azurerm_virtual_machine.test: Creating...
  availability_set_id:                                                "" => "<computed>"
  license_type:                                                       "" => "<computed>"
  location:                                                           "" => "japanwest"
  name:                                                               "" => "TerraformVM01w"
  network_interface_ids.#:                                            "" => "1"
  network_interface_ids.3726743223:                                   "" => "/subscriptions/<Your subscription id and more>"
  os_profile.#:                                                       "" => "1"
  os_profile.3526563767.admin_password:                               "" => "<Your password>"
  os_profile.3526563767.admin_username:                               "" => "azureuser"
  os_profile.3526563767.computer_name:                                "" => "TerraformTestw"
  os_profile.3526563767.custom_data:                                  "" => "<computed>"
  os_profile_linux_config.#:                                          "" => "1"
  os_profile_linux_config.2972667452.disable_password_authentication: "" => "0"
  os_profile_linux_config.2972667452.ssh_keys.#:                      "" => "0"
  plan.#:                                                             "" => "<computed>"
追記:我がHashiCorp 師匠がコメントくださりました。
@sandayuu windowsのターミナルからterraformコマンドを打つ時は "-no-color"オプションがオススメです https://t.co/nrRn6IPjC1
— Toru Makabe (@tmak_tw) 2016年4月30日
5.6. Visual Studio Code をtfファイルの編集に使うと便利
Visual Studio Codeが最近めっきりお気に入りです。Mac / Win の両刀使いの私にとって、同じように動くのはうれしいです。
あと、軽いのに、コード保管があるのはうれしいです。実際これで書くと、tfファイルを書いていると補完してくれるので楽でした。:)
おわりに
今回はTerraform の Azure Resource Manager のプロバイダーを使ってVMをブートして、何かをプロビジョニングするというユースケースを試してみました。まだまだ使えるリソースが少ないとかの問題はありますが、DSLも書きやすいし、ARMのテンプレートまでデプロイできるし、なかなかいい感じです。
現状では、まだまだ、Azureだけを使うなら、便利さでAzure Resource Manager Templateに軍配が上がると思いますが、今後どんどん便利になってくると思うので要注目です。さらに、Win / Mac / Linux のどこでも安定して動くのは気持ちいですね!
以上です。楽しいHashiCorp with Azure ライフを。