準備
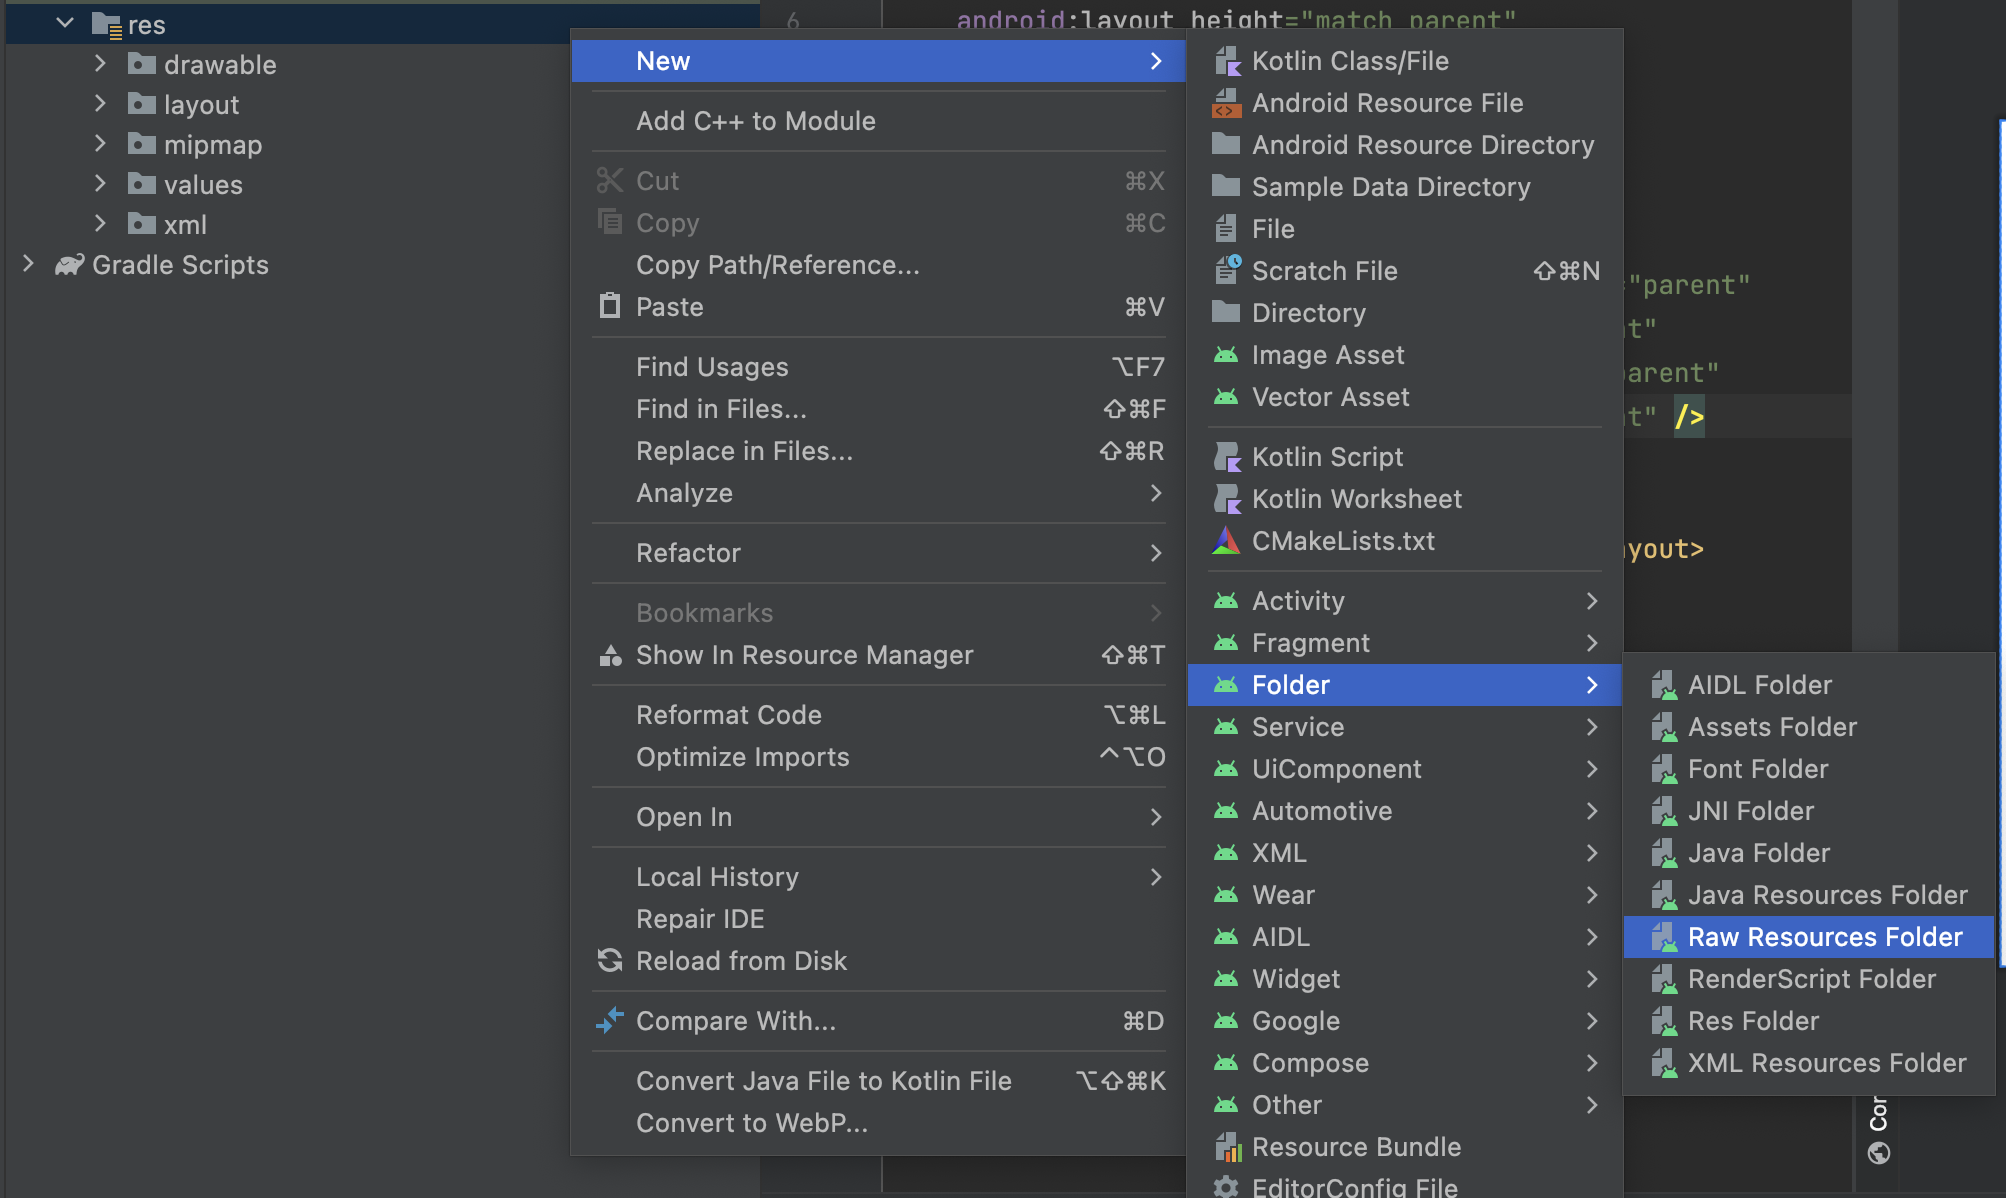
resを右クリック→ New → Folder → Raw Resources Folder でrawファイルを作成し、鳴らしたい音のファイルを作成します。
作成したファイルに音声ファイル(soundと命名)を追加します。
また、layout上に音を鳴らす条件となるボタンを作っておきます
activity.main.xml
<androidx.constraintlayout.widget.ConstraintLayout xmlns:android="http://schemas.android.com/apk/res/android"
    xmlns:app="http://schemas.android.com/apk/res-auto"
    xmlns:tools="http://schemas.android.com/tools"
    android:layout_width="match_parent"
    android:layout_height="match_parent"
    tools:context=".MainActivity">

    <Button
        android:id="@+id/button"
        android:layout_width="wrap_content"
        android:layout_height="wrap_content"
        app:layout_constraintBottom_toBottomOf="parent"
        app:layout_constraintEnd_toEndOf="parent"
        app:layout_constraintStart_toStartOf="parent"
        app:layout_constraintTop_toTopOf="parent" />

</androidx.constraintlayout.widget.ConstraintLayout>
ボタンを押したら音が鳴るようにする
MainActivity.kt
        val button: Button = findViewById<Button>(R.id.button)  // 1

        val soundPool = SoundPool(                               // 2
            10, AudioManager.STREAM_MUSIC, 0
        )

        val soundId: Int = soundPool.load(this, android.R.raw.sound)  // 3

        button.setOnClickListener {                                   // 4
            soundPool.play(soundId, 1.0f, 1.0f, 0, 0, 1.0f)
        }
それぞれ解説していきます。
1.Buttonの ID を取得
2.SoundPoolオブジェクトを作成 (第一引数には音源の最大同時再生数、音を制御するためのAudioManagerの種類、サンプルレート コンバーターの品質とありますが、現在は使われていないのでデフォルトで0を設定)
3.soundPool.load()で流したいリソースを読み込むと非同期で読み込みが開始され、再生用に使うIDが返ってくるので、のちにこれを使用するために変数にする
4.ボタンが押された時の動きにsoundPool.play()で第一引数から ロードしたID(3で変数にしたもの), 左音量, 右音量, 優先度, ループ, 再生速度の順に入れていく
音をループさせたい場合は第五引数に-1を設定層でない場合は0を設定する
参考