この記事は 岩手県立大学 Advent Calendar 2020 の 18 日目です。
本当は、19 日にやりたかったのですが(誕生日なので)21 歳最後の日に書くことにしました。
日付超えてしまって 22 歳になってしまいました…
今週、謎に用事が詰まっており投稿が遅くなってしまいました… すいません 😢
ちなみに私は学部 4 年で無事に大学院へ進学が決まっている人間なので、来年以降も岩手で生きていきたいなと思っています。
よろしくお願いします!
はじめに
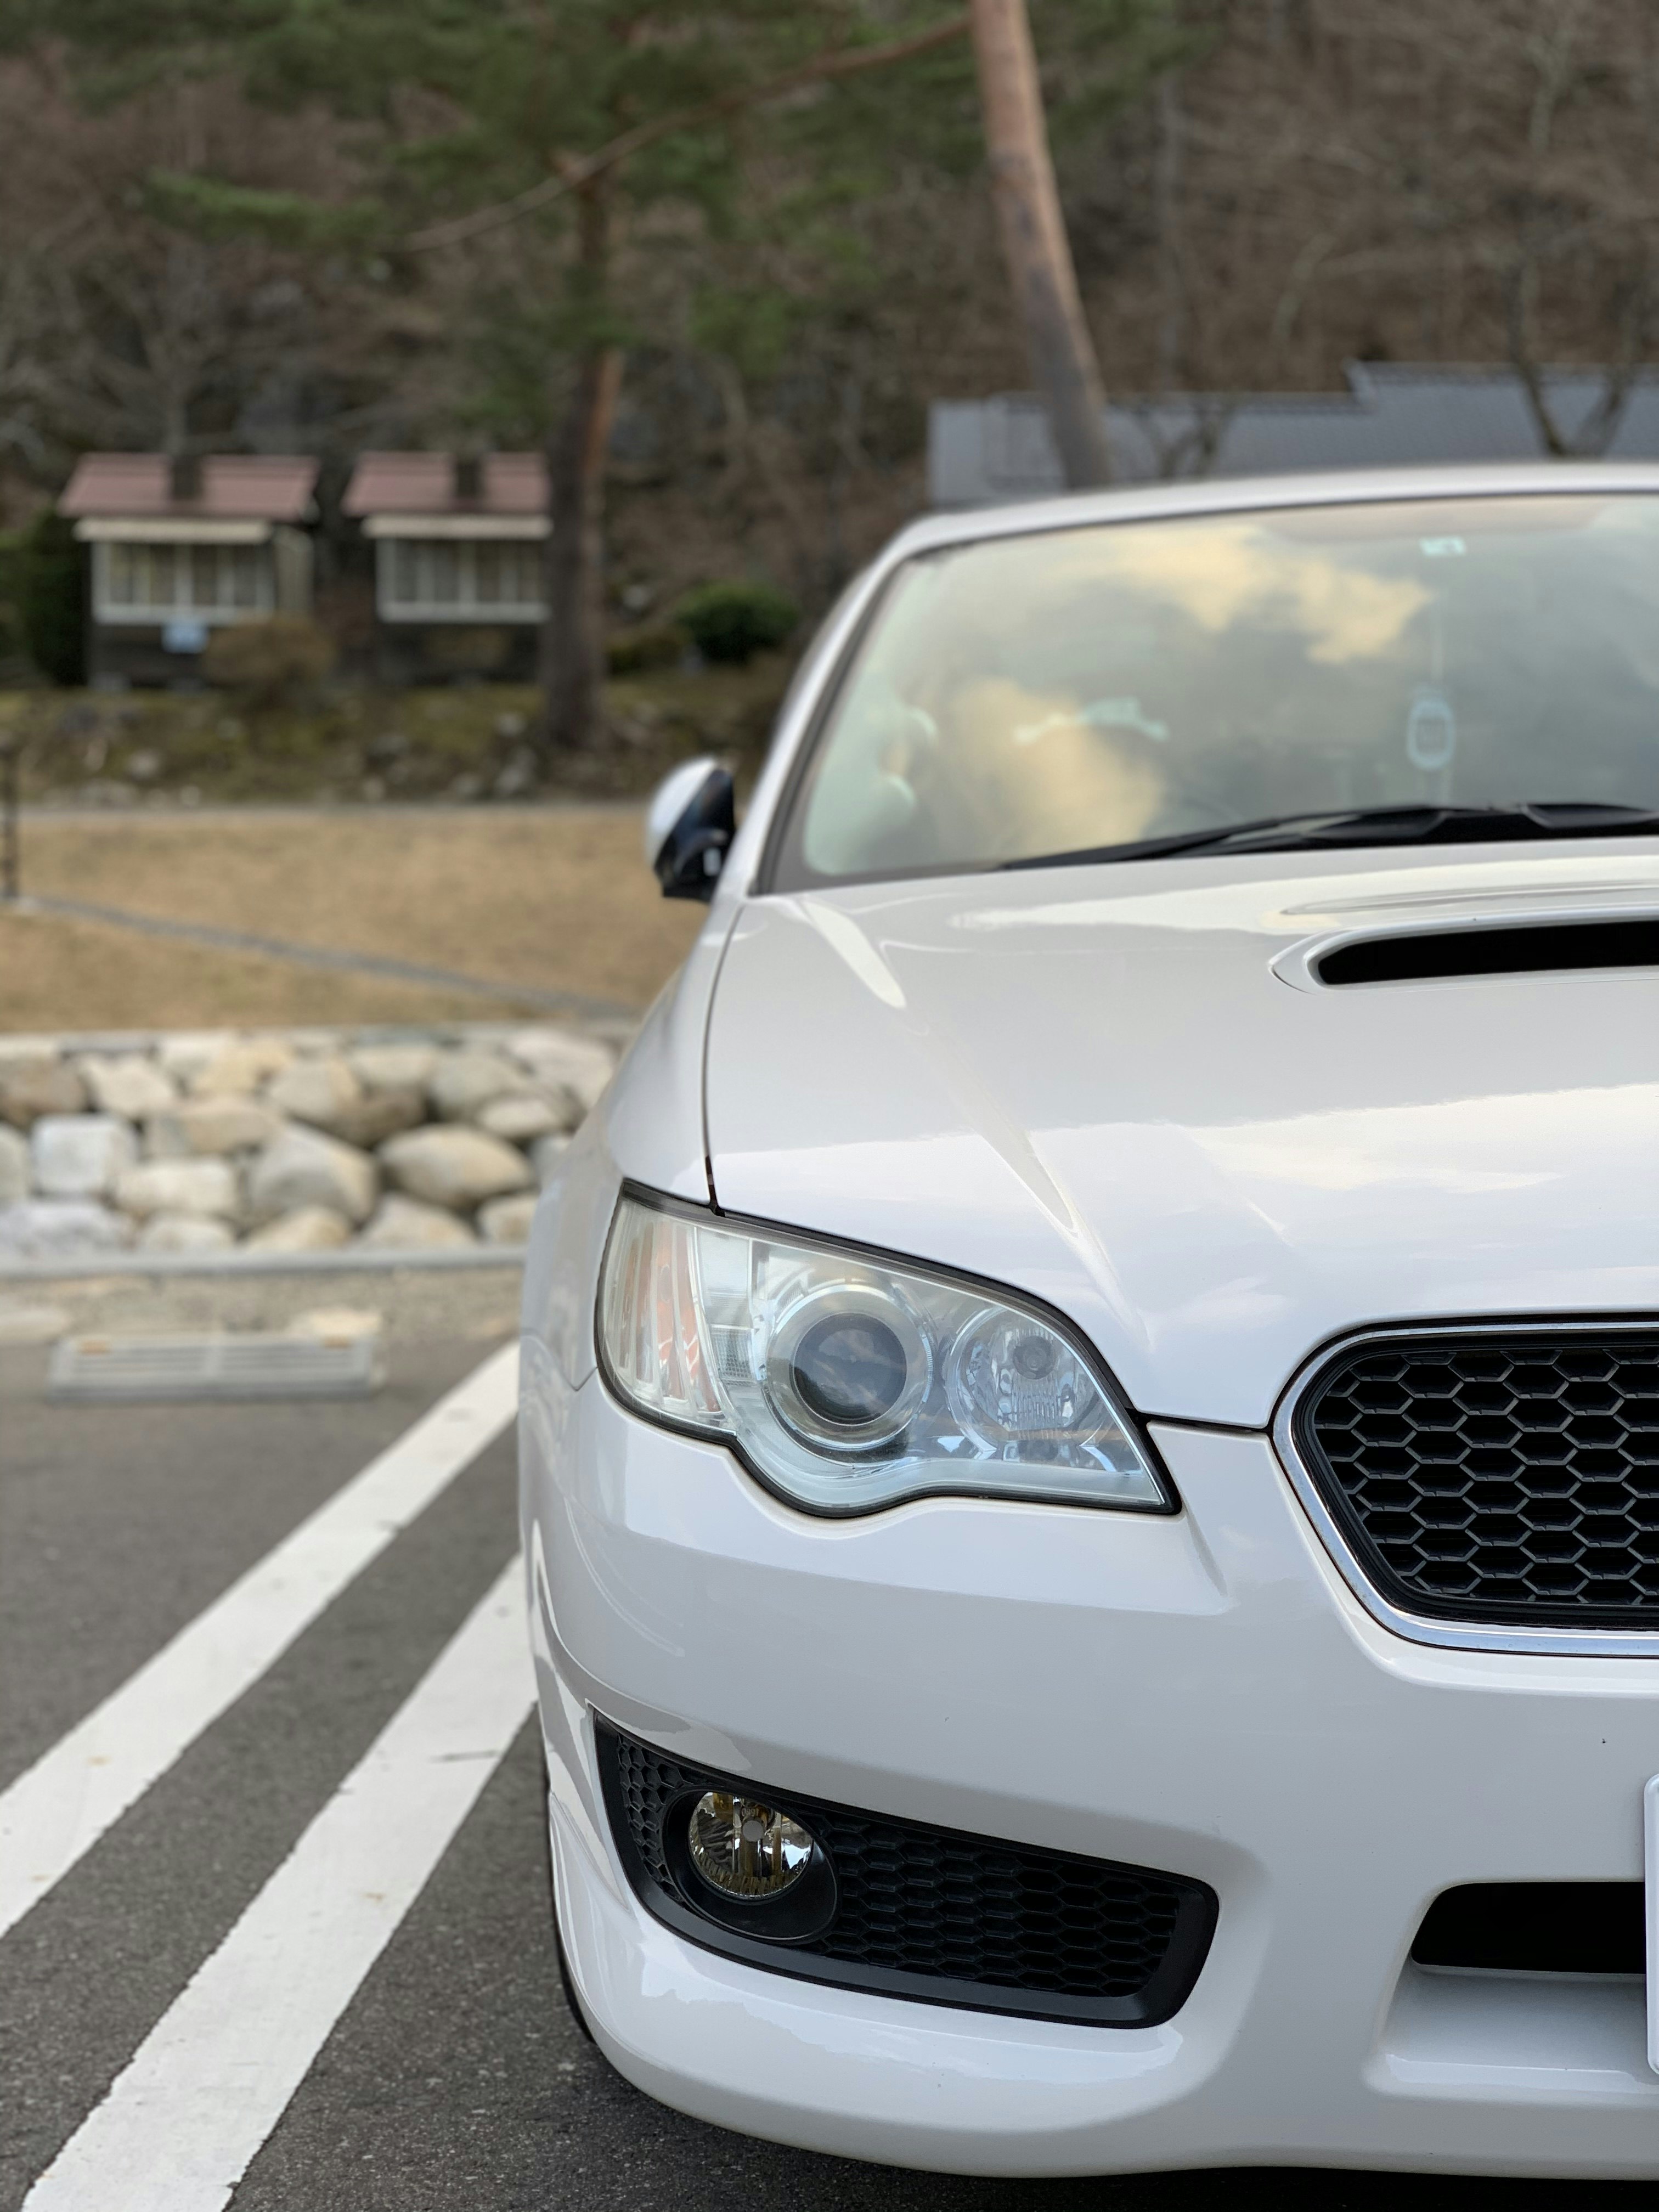
小さい頃から車が大好きで、学部 3 年時にお金をためて車を買いました。
以下、「かっこいい」自分の車の画像を貼っておきます🚘 ↓


このように、車の画像を撮影し SNS などで共有しているのですが、ナンバーをいちいち塗りつぶし加工をしてアップロードするのが面倒だなあと思っていました。
みんカラアプリ、インスタなどでも使えるナンバープレート隠し機能を無料提供 のようにサービスも提供されていますが、どうも自分の使い方とは合わず、結局自分で画像加工しています。
アドベントカレンダーのネタもほしいことですし、カメラで撮影、予め選択した画像をアップロードするとナンバーを隠してくれる いい感じのサービスを作ってみようと思います。
やりたいこと
- カメラで撮影 or 予め選択した画像を選択する
- 画像をアップロードするとナンバーがいい感じに隠れた画像を出力される
- 加工された画像はダウンロードできる(自動ダウンロード)
ソースコード全文(需要ないかもだけどせっかく書いたので…)
今回はこのソースを使いながら説明をします。
Github にソースをあげてありますので、そちらでも大丈夫です。
(追記 20201219):JS のソースに CSS のソースを貼っていたので直しました。
HTML
<!DOCTYPE html>
<html lang="ja">
<head>
    <meta charset="UTF-8">
    <meta name="viewport" content="width=device-width,initial-scale=1">
    <title>License Plate Eraser</title>

    <!-- StyleSheets -->
    <link rel="stylesheet" href="https://cdnjs.cloudflare.com/ajax/libs/materialize/1.0.0/css/materialize.min.css">
    <link rel="stylesheet" href="./assets/stylesheets/index.css">

    <!-- JavaScripts -->
    <script src="https://cdnjs.cloudflare.com/ajax/libs/materialize/1.0.0/js/materialize.min.js"></script>
    <script src="./assets/javascripts/main.js" defer></script>
</head>
<body>
<div id="file-field-wrapper">
    <div class="file-field input-field">
        <div class="btn">
            <span>File</span>

            <!-- Google Cloud Vision API だと JPEG、PNG、WebP などに対応している -->
            <!-- 今回はすべてのブラウザでサポートしている JPEG と PNG を使用する -->
            <input type="file" id="input-image" accept="image/jpeg,image/png">
        </div>
        <div class="file-path-wrapper">
            <input class="file-path validate" type="text">
        </div>
    </div>
</div>

<div id="canvas-field-wrapper">
    <canvas id="canvas"></canvas>
</div>
</body>
</html>
CSS
@charset "UTF-8";

html {
    height: 100%;
}

body {
    display: flex;
    height: 100%;
    width: 100vw;
    flex-direction: column;
    justify-content: center;
    align-items: center;
}

# file-field-wrapper {
    box-sizing: border-box;
    width: 100%;
    max-width: 360px;
    padding: 16px;
}

# canvas-field-wrapper {
    display: none;
    box-sizing: border-box;
    width: 100%;
    max-width: 1240px;
    padding: 16px;
    justify-content: center;
    align-items: center;
}
JavaScript
(() => {
    const fileFieldWrapper = document.getElementById('file-field-wrapper');
    const canvasFieldWrapper = document.getElementById('canvas-field-wrapper');
    const inputImageElement = document.getElementById('input-image');
    const canvas = document.getElementById('canvas');
    const ctx = canvas.getContext('2d');

    inputImageElement.addEventListener('change', async (e) => {
        // e.target.files で選択されたファイルの概要が取得できる
        const file = e.target.files[0];

        // 画像を base64 に変換する
        // reader.readAsDataURL で変換できるが、非同期処理なので async/await を使用していい感じに書く
        const base64Image = await new Promise((resolve) => {
            const reader = new FileReader();

            reader.onload = () => {
                resolve(reader.result);
            };

            reader.readAsDataURL(file);
        });

        // 画像を Canvas 上に表示する
        await new Promise((resolve) => {
            const image = new Image();
            image.src = base64Image;

            image.onload = () => {
                let w = image.width;
                let h = image.height;
                let scale = 1;

                // 画像サイズを小さくする
                if (w >= (document.documentElement.clientWidth * 0.8)) {
                    scale = (document.documentElement.clientWidth * 0.8) / w;
                    w = w * scale;
                    h = h * scale;
                }

                if (h >= (document.documentElement.clientHeight * 0.8)) {
                    scale = (document.documentElement.clientHeight * 0.8) / h;
                    w = w * scale;
                    h = h * scale;
                }

                // 画面サイズに合わせて表示する
                // TODO: 解像度が落ちてしまうので対処法を考える
                canvas.width = w;
                canvas.height = h;
                ctx.drawImage(image, 0, 0, w, h);

                fileFieldWrapper.style.display = 'none';
                canvasFieldWrapper.style.display = 'flex';

                resolve();
            };
        });

        // 画像を GCP 上にアップロードし、ナンバープレートを検出する
        const GOOGLE_API_KEY = 'YOUR API KEY';
        const GOOGLE_CLOUD_VISION_API_URL = `https://vision.googleapis.com/v1/images:annotate?key=${GOOGLE_API_KEY}`;

        // GCP にアップロードするには base64 の先頭部分を取り除いた文字列が必要 -> /9j/... の文字列を作成する
        const sendBase64Image = (file.type === 'image/jpeg') ? base64Image.substr(23) : base64Image.substr(22);

        const requests = {
            "requests": [
                {
                    "image": {
                        "content": sendBase64Image
                    },
                    "features": [
                        {
                            "type": "OBJECT_LOCALIZATION"
                        }
                    ]
                }
            ]
        };

        const response = await fetch(GOOGLE_CLOUD_VISION_API_URL, {
            method: 'POST',
            redirected: true,
            body: JSON.stringify(requests),
            headers: {
                'Content-Type': 'application/json'
            }
        });

        const result = await response.json();

        // localizedObjectAnnotations 内に推定結果が格納されている
        if ('localizedObjectAnnotations' in result['responses'][0]) {
            // ナンバーの推定結果が存在しているか調べる
            const localizedObjectAnnotations = result['responses'][0]['localizedObjectAnnotations'];
            const licensePlateIndex = localizedObjectAnnotations.findIndex((e) => e.name === 'License plate');

            // -1 が返ってきたらナンバーが推定されなかった
            if (licensePlateIndex !== -1) {
                // バウンディングボックス は左上から時計回りに返ってくる
                // 正則化された値が返ってくるので実際の座標データに変換する
                // とりあえず、左上が分かれば大丈夫なのでその部分だけ取り出す
                const plateStartX = Math.round(canvas.width * localizedObjectAnnotations[licensePlateIndex]['boundingPoly']['normalizedVertices'][0]['x']);
                const plateStartY = Math.round(canvas.height * localizedObjectAnnotations[licensePlateIndex]['boundingPoly']['normalizedVertices'][0]['y'])
                const plateWidth = Math.round(canvas.width * localizedObjectAnnotations[licensePlateIndex]['boundingPoly']['normalizedVertices'][1]['x']) - Math.round(canvas.width * localizedObjectAnnotations[licensePlateIndex]['boundingPoly']['normalizedVertices'][0]['x']);
                const plateHeight = Math.round(canvas.height * localizedObjectAnnotations[licensePlateIndex]['boundingPoly']['normalizedVertices'][3]['y']) - Math.round(canvas.height * localizedObjectAnnotations[licensePlateIndex]['boundingPoly']['normalizedVertices'][0]['y']);

                // 色判定を行う
                // 指定範囲内の色情報を抜き出す
                const imageDataArray = ctx.getImageData(plateStartX, plateStartY, Math.round(plateWidth / 2), Math.round(plateHeight / 2)).data;
                const imageDataRgbaArray = imageDataArray.reduce((a, c, i) => i % 4 ? a : [...a, imageDataArray.slice(i, i + 4)], []);

                // 一般的に普通車のナンバーは白か黄色なのでそれを判別する
                // ナンバーの半分で色は判別できそうなので範囲を狭くする
                const colorClassifiedArray = imageDataRgbaArray.reduce((a, rgba) => {
                    const whiteRgb = [255, 255, 255];
                    const yellowRgb = [255, 255, 0];

                    const whiteEuclideanDistance = Math.hypot((rgba[0] - whiteRgb[0]), (rgba[1] - whiteRgb[1]), (rgba[2] - whiteRgb[2]));
                    const yellowEuclideanDistance = Math.hypot((rgba[0] - yellowRgb[0]), (rgba[1] - yellowRgb[1]), (rgba[2] - yellowRgb[2]));

                    // 白に似ている場合
                    // しきい値は適当に設定しているので確認が必要かも
                    if (whiteEuclideanDistance < yellowEuclideanDistance && whiteEuclideanDistance <= 150) {
                        a.white.push(rgba);
                    }

                    // 黄色に似ている場合
                    else if (yellowEuclideanDistance <= 150) {
                        a.yellow.push(rgba);
                    }

                    return a;
                }, {
                    white: [],
                    yellow: []
                });

                // 色の平均を取る関数
                const licensePlateRgb = (array) => {
                    const r = Math.round(array.reduce((a, c) => a + c[0], 0) / array.length);
                    const g = Math.round(array.reduce((a, c) => a + c[1], 0) / array.length);
                    const b = Math.round(array.reduce((a, c) => a + c[2], 0) / array.length);

                    return [r, g, b];
                };

                // 色の平均を取って自然なナンバー色にする
                const color = (colorClassifiedArray.white.length > colorClassifiedArray.yellow.length)
                    ? licensePlateRgb(colorClassifiedArray.white)
                    : licensePlateRgb(colorClassifiedArray.yellow);

                ctx.fillStyle = `rgb(${color[0]}, ${color[1]}, ${color[2]})`;
                ctx.fillRect(plateStartX, plateStartY, plateWidth, plateHeight);

                // 自動ダウンロードされるようにする
                const link = document.createElement("a");

                if (link.download !== undefined) {
                    const downloadBase64Image = canvas.toDataURL('image/png');
                    const fileName = `${new Date().toDateString().replace(/\\s+/g, "")}_${Math.round(Math.random() * 1000000000)}.png`;
                    link.setAttribute("href", downloadBase64Image);
                    link.setAttribute("download", fileName);
                    link.style.visibility = 'hidden';
                    document.body.appendChild(link);
                    link.click();
                    document.body.removeChild(link);
                }
            }

            // ナンバーが検出できなかったので通知する
            else {
                alert('ナンバーが検出出来ませんでした…');
            }
        }
    });
})();
1. カメラで撮影 or 予め選択した画像を選択する
UI を作成する
今回は HTML、CSS、JavaScript(DOM)で作成していきます。
React.js でやる時間はなかった
UI 部分は Documentation - Materialize をつかってサボりつつ、それっぽいデザインにします。
body 内には ファイル選択機能 と 画像プレビュー機能 を入れておきます。
画像ファイルをアップロードするために、Camera API を使用します。input タグに accept="image/*" を指定すると、画像のみをアップロードすることが出来ます。
<input type="file" id="input-image" accept="image/jpeg,image/png">
今回は、Google Cloud Vision API (以下、Vision API)を使用してナンバーの判別を行います。
Vision API では 、
- PNG
- PNG8
- PNG24
- GIF
- アニメーション GIF(最初のフレームのみ)
- BMP
- RAW
- ICO
- TIFF
をサポートしています。
今回は、画像ファイルとして一般的な JPEG と PNG に条件を絞り、画像加工を行います。
読み込んだ画像は Canvas タグを使用して描画します。
画像をエンコードし、Canvas に描画する
input タグを通じて、ファイルが指定されるとイベントが呼ばれます。
e.target.files でファイル情報を取得できるのでそちらを使用します。
// e.target.files で選択されたファイルの概要が取得できる
const file = e.target.files[0];
読み込んだ画像を base64 形式にエンコードします。
FileReader API を使用することで、エンコードを行うことができるので処理します。
// 画像を base64 に変換する
// reader.readAsDataURL で変換できるが、非同期処理なので async/await を使用していい感じに書く
const base64Image = await new Promise((resolve) => {
    const reader = new FileReader();

    reader.onload = () => {
        resolve(reader.result);
    };

    reader.readAsDataURL(file);
});
base64 形式にエンコードされたデータはそのまま Canvas に表示することができるので使用します。
カメラ画像そのままのサイズを描画すると非常にサイズが大きく見づらいので、ちょうどよいサイズに変換します。
今回は、画像サイズが大きい場合に画面サイズの小さい辺の 8 割のサイズで描画するように調整しました。
一発で加工後の画像が描画されてもいいかなとも思ったのですが、せっかくなのでちゃんと加工されているという部分が見えたほうがいいかなと思い、一度描画しています。
// 画像を Canvas 上に表示する
await new Promise((resolve) => {
    const image = new Image();
    image.src = base64Image;

    image.onload = () => {
        let w = image.width;
        let h = image.height;
        let scale = 1;

        // 画像サイズを小さくする
        if (w >= (document.documentElement.clientWidth * 0.8)) {
            scale = (document.documentElement.clientWidth * 0.8) / w;
            w = w * scale;
            h = h * scale;
        }

        if (h >= (document.documentElement.clientHeight * 0.8)) {
            scale = (document.documentElement.clientHeight * 0.8) / h;
            w = w * scale;
            h = h * scale;
        }

        // 画面サイズに合わせて表示する
        // TODO: 解像度が落ちてしまうので対処法を考える
        canvas.width = w;
        canvas.height = h;
        ctx.drawImage(image, 0, 0, w, h);

        fileFieldWrapper.style.display = 'none';
        canvasFieldWrapper.style.display = 'flex';

        resolve();
    };
});
画像をアップロードするとナンバーがいい感じに隠れた画像を出力される
画像をアップロードし、ナンバーを検出する
描画した画像を Vision API にかけてナンバーを検出します。
Vision API を使用するには API キーが必要です。試す場合は、自分で準備をしてから使いましょう。
(リクエスト数によって料金が発生するので使いすぎには注意!!)
Visoin API には、Fetch API を使用してアクセスします。
画像データはリモートやローカル問わずに使用することが出来ます。
今回は、ローカル画像を使用するので base64 形式でリクエストを作成します。
ただし、そのままのエンコードデータでは動作しないので、先頭部分を削除し( data:image/jpeg;base64,9j/... から /9j/... となる)、データを作成します。
Vision API には、様々な機能 があり
- 顔検出
- ランドマーク検出
- ラベル検出
- テキスト検出
- ドキュメント テキスト検出(高密度テキスト、手書き)
- 画像プロパティ
- オブジェクトのローカライズ
- クロップヒント検出
- ウェブ エンティティとページ
- セーフサーチ
が使用できます。
今回は、オブジェクトのローカライズ を使用するので type に OBJECT_LOCALIZATION を指定します。
その後、application/json 形式でリクエストを送ることでデータが取得できます。
// 画像を GCP 上にアップロードし、ナンバープレートを検出する
const GOOGLE_API_KEY = 'YOUR API KEY';
const GOOGLE_CLOUD_VISION_API_URL = `https://vision.googleapis.com/v1/images:annotate?key=${GOOGLE_API_KEY}`;

// GCP にアップロードするには base64 の先頭部分を取り除いた文字列が必要 -> /9j/... の文字列を作成する
const sendBase64Image = (file.type === 'image/jpeg') ? base64Image.substr(23) : base64Image.substr(22);

const requests = {
    "requests": [
        {
            "image": {
                "content": sendBase64Image
            },
            "features": [
                {
                    "type": "OBJECT_LOCALIZATION"
                }
            ]
        }
    ]
};

const response = await fetch(GOOGLE_CLOUD_VISION_API_URL, {
    method: 'POST',
    redirected: true,
    body: JSON.stringify(requests),
    headers: {
        'Content-Type': 'application/json'
    }
});

const result = await response.json();
ナンバーを塗りつぶす
さて、一番キモとなる部分の実装を行います。
返ってくるデータ配列の中の localizedObjectAnnotations がローカライズされたラベルが格納された部分になります。
なんと、Vision API では 車のナンバーもしっかりと検出することが出来ます。( Licence plate という値で返ってくる)
なのでそれを使っていきます。
ナンバーが検出できたら、座標データをもとに塗りつぶしを行います。
result['responses'][0]['localizedObjectAnnotations'] には、ラベル情報とバウンディングボックスの各頂点座標の値が格納されています。
array.findIndex() で Licence plate を含む配列データが存在すれば、ナンバーの検出が出来ていることになります。
バウンディングボックスの各頂点座標は、正則化された値が格納されているので Canvas 上で使用できる座標データに変換します。
ctx.fillReact(開始 x 座標, 開始 y 座標, 横幅のサイズ, 縦幅のサイズ) で四角形を描画し、画像の上へ塗りつぶしを行います。
今回は、rgb(255, 255, 255) の白色で塗りつぶします。
// localizedObjectAnnotations 内に推定結果が格納されている
if ('localizedObjectAnnotations' in result['responses'][0]) {
    // ナンバーの推定結果が存在しているか調べる
    const localizedObjectAnnotations = result['responses'][0]['localizedObjectAnnotations'];
    const licensePlateIndex = localizedObjectAnnotations.findIndex((e) => e.name === 'License plate');

    // -1 が返ってきたらナンバーが推定されなかった
    if (licensePlateIndex !== -1) {
        // バウンディングボックス は左上から時計回りに返ってくる
        // 正則化された値が返ってくるので実際の座標データに変換する
        // とりあえず、左上が分かれば大丈夫なのでその部分だけ取り出す
        const plateStartX = Math.round(canvas.width * localizedObjectAnnotations[licensePlateIndex]['boundingPoly']['normalizedVertices'][0]['x']);
        const plateStartY = Math.round(canvas.height * localizedObjectAnnotations[licensePlateIndex]['boundingPoly']['normalizedVertices'][0]['y'])
        const plateWidth = Math.round(canvas.width * localizedObjectAnnotations[licensePlateIndex]['boundingPoly']['normalizedVertices'][1]['x']) - Math.round(canvas.width * localizedObjectAnnotations[licensePlateIndex]['boundingPoly']['normalizedVertices'][0]['x']);
        const plateHeight = Math.round(canvas.height * localizedObjectAnnotations[licensePlateIndex]['boundingPoly']['normalizedVertices'][3]['y']) - Math.round(canvas.height * localizedObjectAnnotations[licensePlateIndex]['boundingPoly']['normalizedVertices'][0]['y']);

        ctx.fillStyle = 'rgb(255, 255, 255)';
        ctx.fillRect(plateStartX, plateStartY, plateWidth, plateHeight);
    }

    // ナンバーが検出できなかったので通知する
    else {
        alert('ナンバーが検出出来ませんでした…');
    }
}
 |
|---|
画像は 【徹底レビュー】「スズキアルトラパン」かわいい軽自動車の代名詞、そのスタイルから使い勝手まで | カルモマガジン から拝借させていただきました。
しっかりとナンバーの位置を塗りつぶせていますね。
でも、軽自動車なのに白で塗られてしまうと違和感がありませんか?
なのでナンパーの色に合わせて塗りつぶす色が変わるようにします。
ナンバーの色に合わせて塗りつぶす
ナンバーは
| 色 | 用途 |
|---|---|
| 白 | 普通車(自家用) |
| 黄色 | 軽自動車(自家用) |
| 緑 | 普通車(商用車) |
| 黒 | 軽自動車(商用車) |
の 4 種類が存在します。
個人的には 白 と 黄色 の 2 種類が判別できれば問題なさそうなので、そこを判別します。
Canvas では、ctx.getImageData(開始 x 座標, 開始 y 座標, 横幅のサイズ, 横幅のサイズ).data で指定した範囲のピクセルデータである ImageData オブジェクトを取得できます。
ImageData オブジェクトは、rgba のデータが 1 次元の配列として格納されています。( imageDataArray )
そのままでも使用できますが、わかりやすいように 4 つで 1 つの rgba の配列となるように加工しています。( imageDataRgbaArray )
その後、ナンバーが 白 と 黄色 のどちらかに近い色かを判別します。
| 色 | rgb 値 |
|---|---|
| 白 | 255, 255, 255 |
| 黄色 | 255, 255, 0 |
を基準に各値のユークリッド距離を算出し、距離が近い方に分類します。
適当にしきい値を決め、1px 内の色情報から 白 と 黄色 に分けていきます。
その後、類似している色(配列内の数が多い方)の平均を取って最終的な色を算出します。
// localizedObjectAnnotations 内に推定結果が格納されている
if ('localizedObjectAnnotations' in result['responses'][0]) {
    // ナンバーの推定結果が存在しているか調べる
    const localizedObjectAnnotations = result['responses'][0]['localizedObjectAnnotations'];
    const licensePlateIndex = localizedObjectAnnotations.findIndex((e) => e.name === 'License plate');

    // -1 が返ってきたらナンバーが推定されなかった
    if (licensePlateIndex !== -1) {
        // バウンディングボックス は左上から時計回りに返ってくる
        // 正則化された値が返ってくるので実際の座標データに変換する
        // とりあえず、左上が分かれば大丈夫なのでその部分だけ取り出す
        const plateStartX = Math.round(canvas.width * localizedObjectAnnotations[licensePlateIndex]['boundingPoly']['normalizedVertices'][0]['x']);
        const plateStartY = Math.round(canvas.height * localizedObjectAnnotations[licensePlateIndex]['boundingPoly']['normalizedVertices'][0]['y'])
        const plateWidth = Math.round(canvas.width * localizedObjectAnnotations[licensePlateIndex]['boundingPoly']['normalizedVertices'][1]['x']) - Math.round(canvas.width * localizedObjectAnnotations[licensePlateIndex]['boundingPoly']['normalizedVertices'][0]['x']);
        const plateHeight = Math.round(canvas.height * localizedObjectAnnotations[licensePlateIndex]['boundingPoly']['normalizedVertices'][3]['y']) - Math.round(canvas.height * localizedObjectAnnotations[licensePlateIndex]['boundingPoly']['normalizedVertices'][0]['y']);

        // 色判定を行う
        // 指定範囲内の色情報を抜き出す
        const imageDataArray = ctx.getImageData(plateStartX, plateStartY, Math.round(plateWidth / 2), Math.round(plateHeight / 2)).data;
        const imageDataRgbaArray = imageDataArray.reduce((a, c, i) => i % 4 ? a : [...a, imageDataArray.slice(i, i + 4)], []);

        // 一般的に普通車のナンバーは白か黄色なのでそれを判別する
        // ナンバーの半分で色は判別できそうなので範囲を狭くする
        const colorClassifiedArray = imageDataRgbaArray.reduce((a, rgba) => {
            const whiteRgb = [255, 255, 255];
            const yellowRgb = [255, 255, 0];

            const whiteEuclideanDistance = Math.hypot((rgba[0] - whiteRgb[0]), (rgba[1] - whiteRgb[1]), (rgba[2] - whiteRgb[2]));
            const yellowEuclideanDistance = Math.hypot((rgba[0] - yellowRgb[0]), (rgba[1] - yellowRgb[1]), (rgba[2] - yellowRgb[2]));

            // 白に似ている場合
            // しきい値は適当に設定しているので確認が必要かも
            if (whiteEuclideanDistance < yellowEuclideanDistance && whiteEuclideanDistance <= 150) {
                a.white.push(rgba);
            }

            // 黄色に似ている場合
            else if (yellowEuclideanDistance <= 150) {
                a.yellow.push(rgba);
            }

            return a;
        }, {
            white: [],
            yellow: []
        });

        // 色の平均を取る関数
        const licensePlateRgb = (array) => {
            const r = Math.round(array.reduce((a, c) => a + c[0], 0) / array.length);
            const g = Math.round(array.reduce((a, c) => a + c[1], 0) / array.length);
            const b = Math.round(array.reduce((a, c) => a + c[2], 0) / array.length);

            return [r, g, b];
        };

        // 色の平均を取って自然なナンバー色にする
        const color = (colorClassifiedArray.white.length > colorClassifiedArray.yellow.length)
            ? licensePlateRgb(colorClassifiedArray.white)
            : licensePlateRgb(colorClassifiedArray.yellow);

        ctx.fillStyle = `rgb(${color[0]}, ${color[1]}, ${color[2]})`;
        ctx.fillRect(plateStartX, plateStartY, plateWidth, plateHeight);
    }

    // ナンバーが検出できなかったので通知する
    else {
        alert('ナンバーが検出出来ませんでした…');
    }
}
 |
|---|
それっぽくなりましたね 🤗
3. 加工された画像はダウンロードできる(自動ダウンロード)
画像が加工し終わったら、自動で画像をダウンロードできるようにします。
new Date().toDateString().replace(/\\s+/g, "") と Math.round(Math.random() * 1000000000) を組み合わせ、適当なファイル名を設定し、ダウンロードが開始されるようにします。
// 自動ダウンロードされるようにする
const link = document.createElement("a");

if (link.download !== undefined) {
    const downloadBase64Image = canvas.toDataURL('image/png');
    const fileName = `${new Date().toDateString().replace(/\\s+/g, "")}_${Math.round(Math.random() * 1000000000)}.png`;
    link.setAttribute("href", downloadBase64Image);
    link.setAttribute("download", fileName);
    link.style.visibility = 'hidden';
    document.body.appendChild(link);
    link.click();
    document.body.removeChild(link);
}
 |
|---|
これで一通りの実装は終了です 👌
まとめ
本当は、違う内容の記事を書こうと思っていたのでめちゃめちゃ急ピッチの実装になってしまいましたが、それっぽい動作を実装できてよかったです 😅
まだまだ問題点もいっぱいある(正面しか対応していない、ナンバーの検出はできるが斜めの線が引けないなど)ので暇を見つけて修正していきたいなと思っています。
それにしても、GCP の機能はすごいですね!
自分で学習モデルを作成しなくても、ある程度の精度でサービスを運用できちゃうところにいつ使っても驚かされます。
OCR 機能 や 顔の表情 なども機能として存在しているので、皆さんも遊んでみてはいかがでしょうか。
何番煎じ感もある内容になってしまいましたが、最後まで読んでいただき、ありがとうございました!