はじめに
どうも!生産技術部で製品の検査工程を担当しているエンジニアです。脱Excel Elastic Stack(docker-compose)でcsvログを分析・可視化 - Elastic Stackとはの続きになります。
対象読者
この記事では、Elastic Stackをそもそも知らない方、これから試そうと思っている方を対象としています。
この記事の内容
docker-composeで、Elastic Stackを立ち上げるために必要なことをまとめました。GitLabに設定ファイル一式を置いておきましたので参考にしてください。
リポジトリはこちら -> elastic-stack
ファイル構成
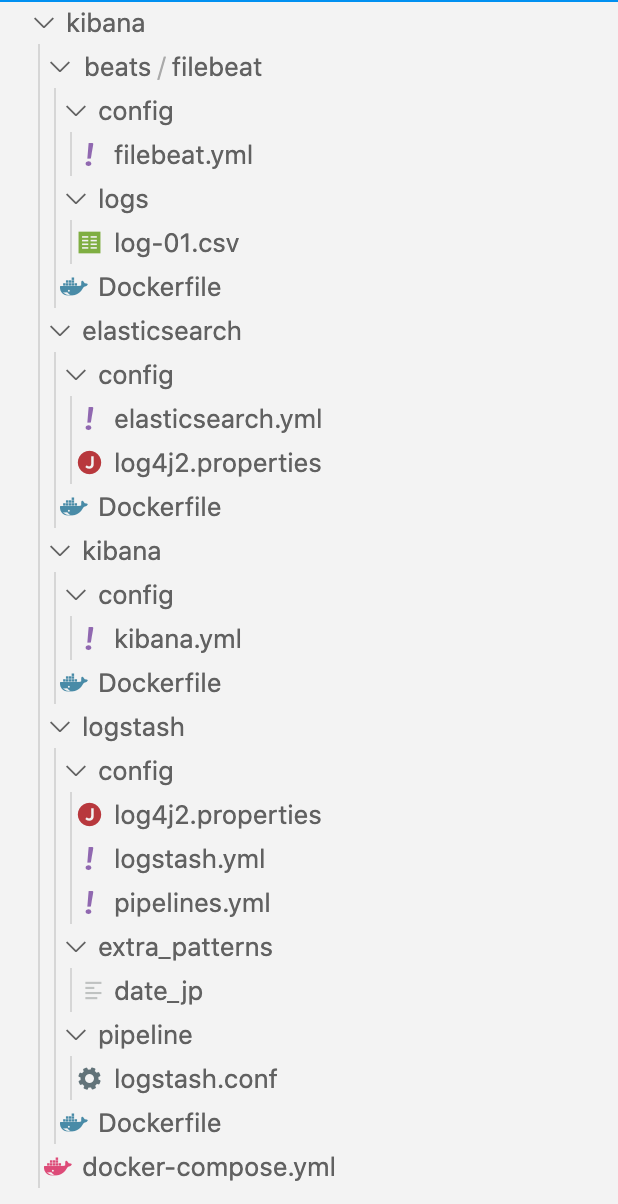
Kibana,Elasticsearch,Logstash,Filebeatの4つのDockerをDocker-composeでまとめて立ち上げます。各ディレクトリにconfigフォルダを作成し、各種設定を用意しました。
docker-composeの設定内容
- Elasticsearch
公式に記載されているdocker-composeを参考にします。 - Kibana
公式に記載されているdocker-composeを参考にします。 - Logstash
公式のGitHubにあるlogstash-dockerを参考にします。config内の設定ファイル一式もこのリポジトリを参考にしました。logstashリポジトリの設定を参考にしたほうがよかった気はします。 - Filebeat
設定ファイルは、公式のGitHubを参考にします。
version: '3.7'
services:
  es01:
    build: ./elasticsearch
    container_name: es01
    environment:
      - node.name=es01
      - "ES_JAVA_OPTS=-Xms512m -Xmx512m"
    ulimits:
      memlock:
        soft: -1
        hard: -1
    volumes:
      # データを永続化したい場合は、コメントアウトを外す
      #- esdata01:/usr/share/elasticsearch/data
      - ./elasticsearch/config/elasticsearch.yml:/usr/share/elasticsearch/config/elasticsearch.yml
      - ./elasticsearch/config/log4j2.properties:/usr/share/elasticsearch/config/log4j2.properties
    # 9200にアクセスしたい場合は、コメントアウトを外す
    #ports:
    #  - 9200:9200
    networks:
      - esnet

  kibana01:
    build: ./kibana
    container_name: kibana01
    links:
      - es01:elasticsearch
    ports:
      - 5601:5601
    networks:
      - esnet

  logstash01:
    build: ./logstash
    container_name: logstash01
    links:
      - es01:elasticsearch
    volumes:
      - ./logstash/config/logstash.yml:/usr/share/logstash/config/logstash.yml
      - ./logstash/config/log4j2.properties:/usr/share/logstash/config/log4j2.properties
      - ./logstash/config/pipelines.yml:/usr/share/logstash/config/pipelines.yml
      - ./logstash/pipeline/logstash.conf:/usr/share/logstash/pipeline/logstash.conf
      - ./logstash/extra_patterns/date_jp:/opt/logstash/extra_patterns
    networks:
      - esnet

  filebeat01:
    build: ./beats/filebeat
    container_name: filebeat01
    links:
      - logstash01:logstash
    volumes:
      - ./beats/filebeat/config/filebeat.yml:/usr/share/filebeat/filebeat.yml
      - ./beats/filebeat/logs/:/var/log/
    networks:
      - esnet

# データを永続化したい場合は、コメントアウトを外す
# volumes:
#  esdata01:
#    driver: local

networks:
  esnet:
    driver: bridge
Elasticsearch起動前の準備
立ち上げ前にvm.mem_map_countの設定を追加する必要があります。カーネルパラメータが正しく反映されない場合は以下を実行してください。
$ sudo sysctl --system
設定せずに起動すると以下のエラーが出て立ち上がりません。
max virtual memory areas vm.max_map_count [65530] is too low, increase to at least [262144]
logstashの設定
log4j2.properties
log4j2.propertiesファイルは、起動時、起動中ログの設定のため必要に応じて設定すればよいと思います。正しく設定されていると、セットアップがスムーズにできるように思います。
pipeline.yml
logstashは、入力(input)->加工(filter)->出力(output)を一つのパイプラインとしていますが、様々なログを入力したい時に、filterの工程では、if-elseを用いて分岐して加工する必要があります。multipipelineの設定を追加しておくことで、if-elseを使う必要がなく、複数のパイプラインを用意することができます。
logstash.conf
ここに具体的な加工を記述します。input,filter,outputの3つのプラグインの中に実施したい内容を記述します。
extra_patterns/date_jp
grokフィルタを用いるときに、カスタムなパターンを追加したい時に使います。公式のcustom_patternsを確認してください。date_jpは適当に着けたファイル名なので、わかりやすい名前で構いません。
filebeatの設定
filebeat.yml
csvファイルを読み込みたい時の設定でenabledをtrueにして、*.csvとすることで実現できます。
filebeat.inputs:

# Each - is an input. Most options can be set at the input level, so
# you can use different inputs for various configurations.
# Below are the input specific configurations.

- type: log

  # Change to true to enable this input configuration.
  enabled: true

  # Paths that should be crawled and fetched. Glob based paths.
  paths:
    - /var/log/*.csv
filebeatは、通常ファイルの中身を1行ずつ転送しますが、multilineの設定を追加することで設定したルールに基づいて複数行を\n区切りで、まとめて転送することが出来ます。Filebeatで複数行を扱うMultiline設定まとめを参考にさせていただきました。
 ### Multiline options

  # Multiline can be used for log messages spanning multiple lines. This is common
  # for Java Stack Traces or C-Line Continuation

  # The regexp Pattern that has to be matched. The example pattern matches all lines starting with [
  #multiline.pattern: ^\[
  multiline.pattern: (End)

  # Defines if the pattern set under pattern should be negated or not. Default is false.
  #multiline.negate: false
  multiline.negate: true

  # Match can be set to "after" or "before". It is used to define if lines should be append to a pattern
  # that was (not) matched before or after or as long as a pattern is not matched based on negate.
  # Note: After is the equivalent to previous and before is the equivalent to to next in Logstash
  #multiline.match: after
  multiline.match: before
logsフォルダ
テスト用のサンプルログを投入するためのフォルダです。
起動
dockerを起動ししばらくたってからhttp://localhost:5601にアクセスすることでkibanaの起動を確認できます。kibanaの起動ログを眺めていると起動したことが確認できると思います。
$ sudo docker-compose up -d
データの確認
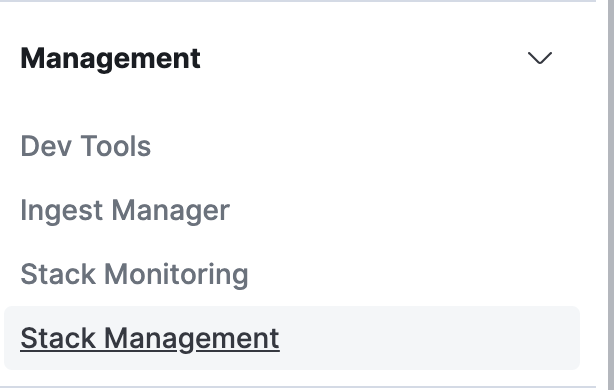
インデックスのManagement->Stack Managementを選択する。
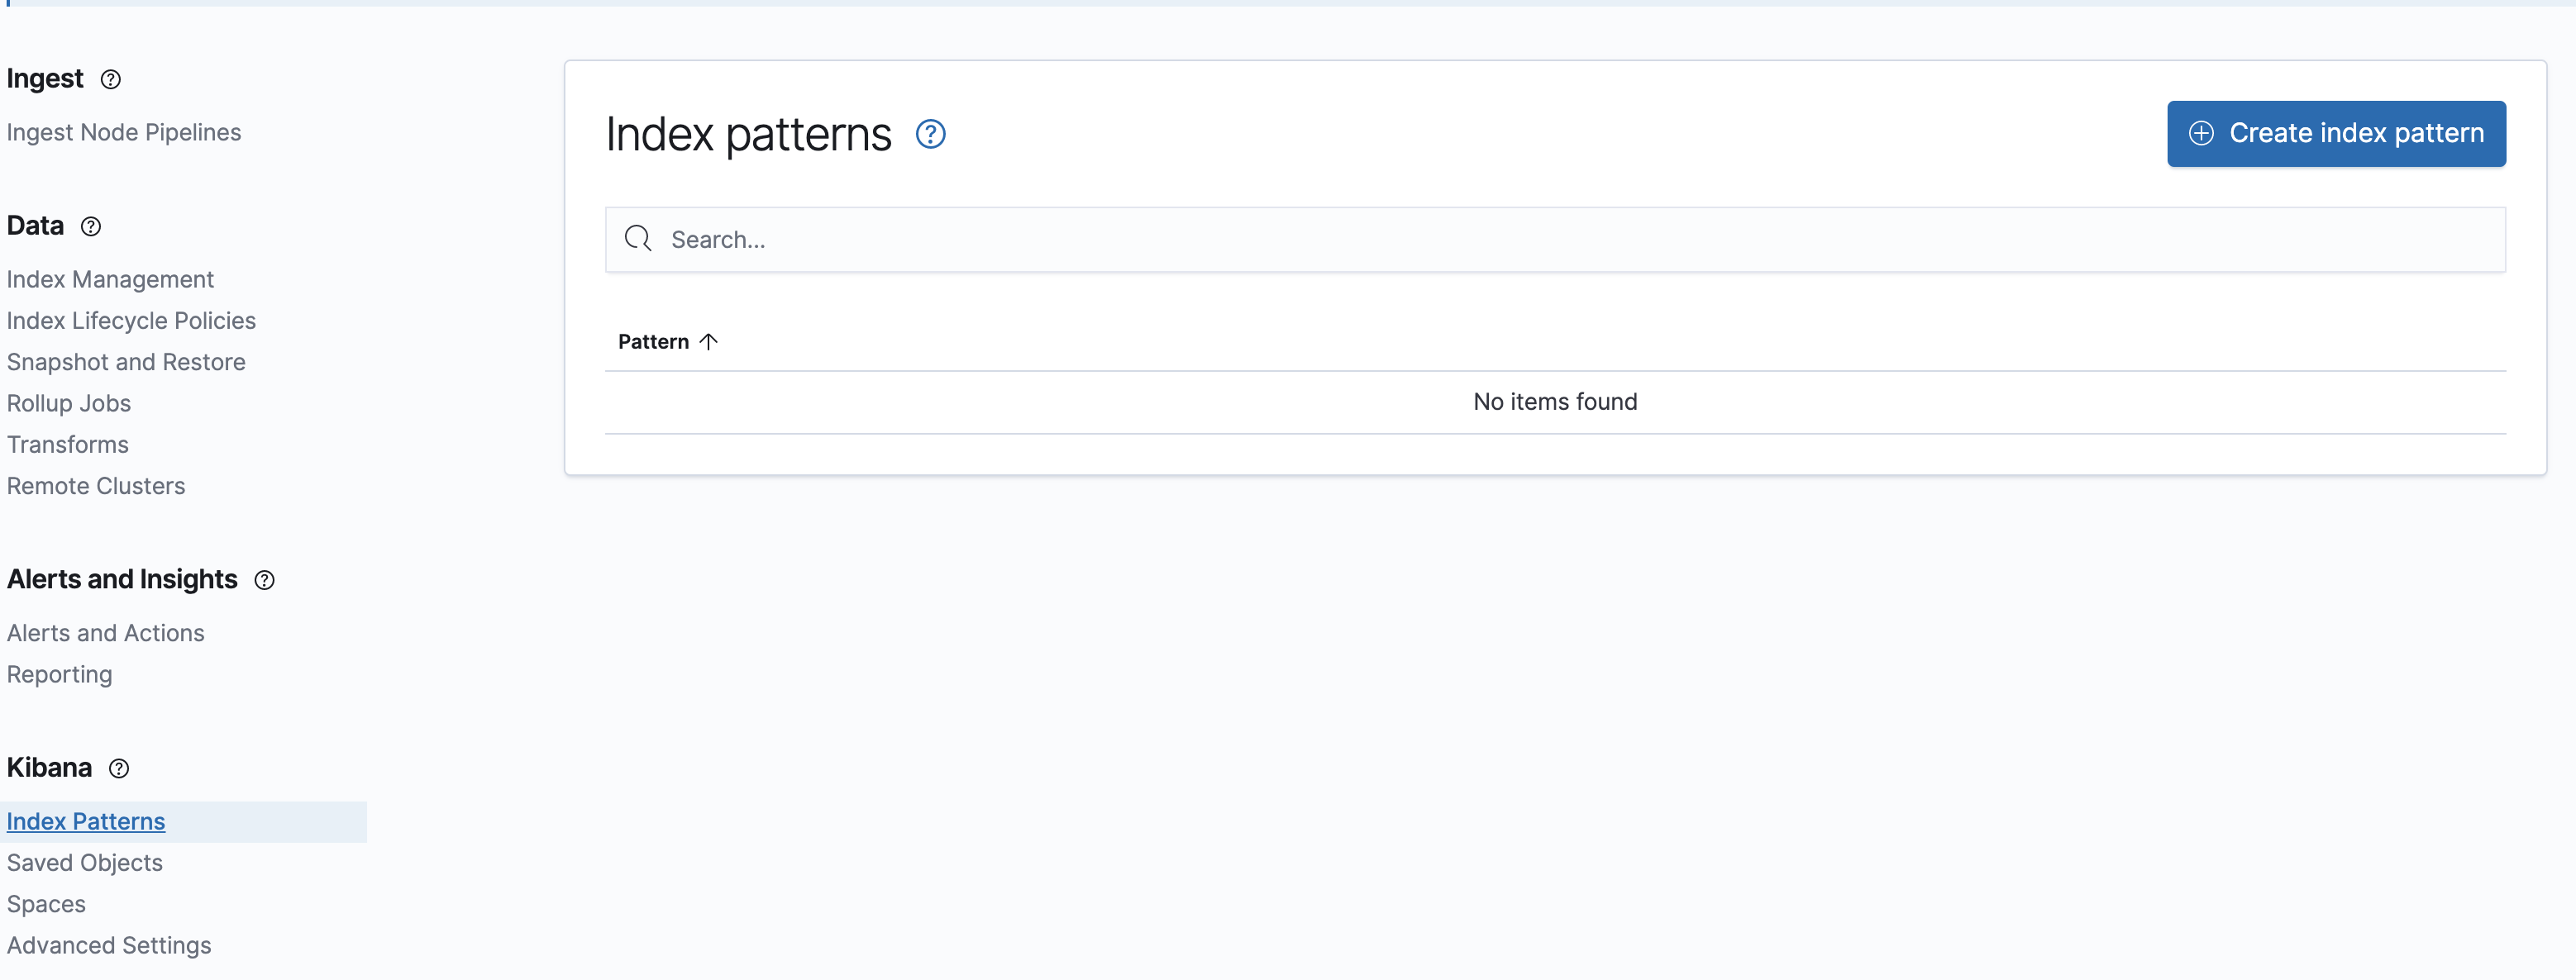
Kibana->Index PatternsからIndex Patternを追加する。
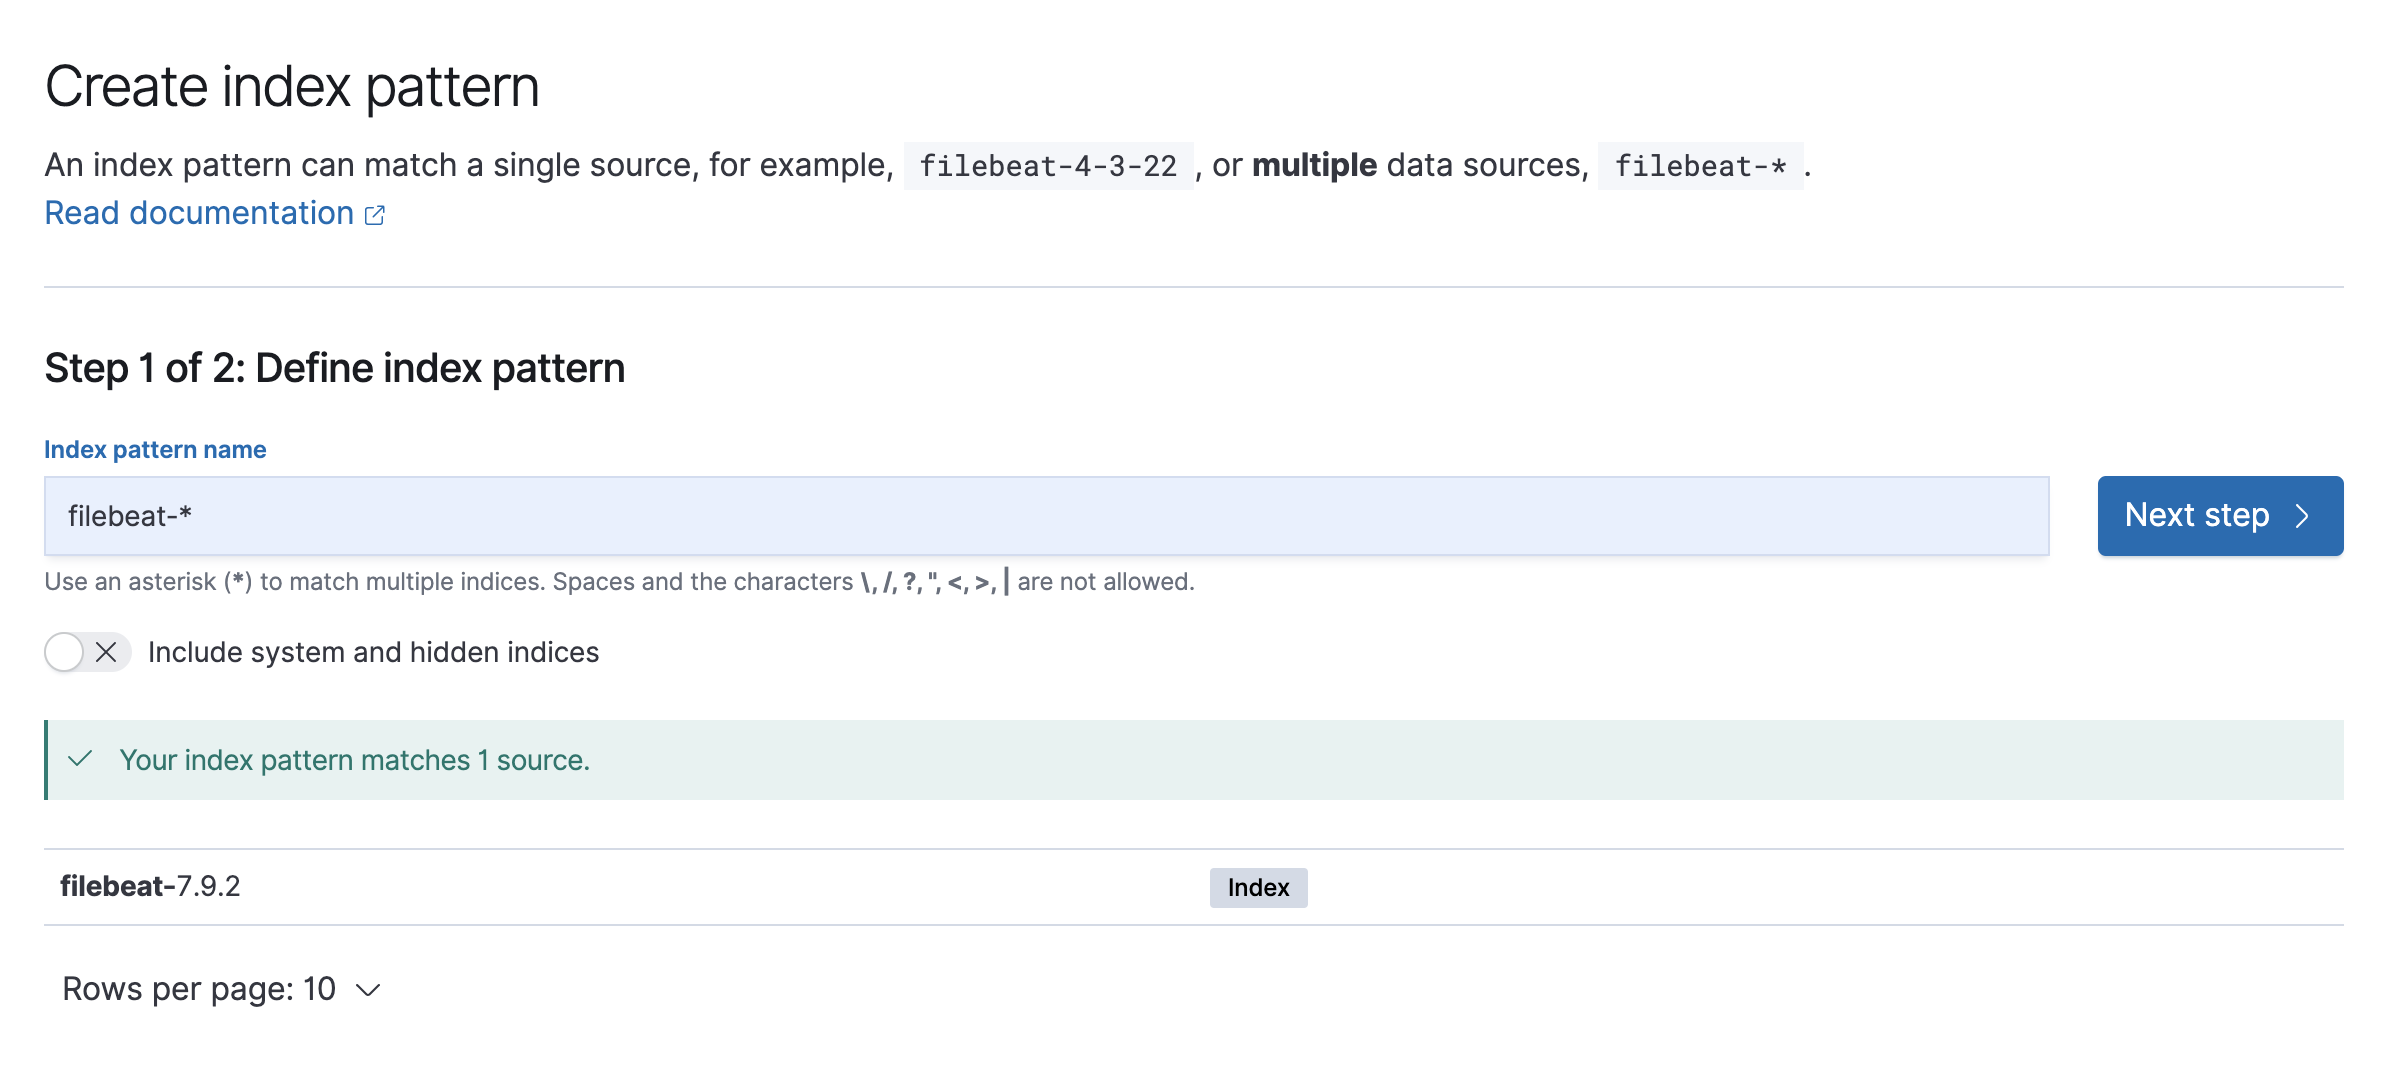
filebeatによって取り込まれたデータは、filebeat-7.9.2なので、index pattern nameにfilebeat-*などと入力すると、Index Patternに取り込まれたデータを追加できます。アスタリスクを用いることで複数のデータソースを含んだIndex Patternを作ることができます。
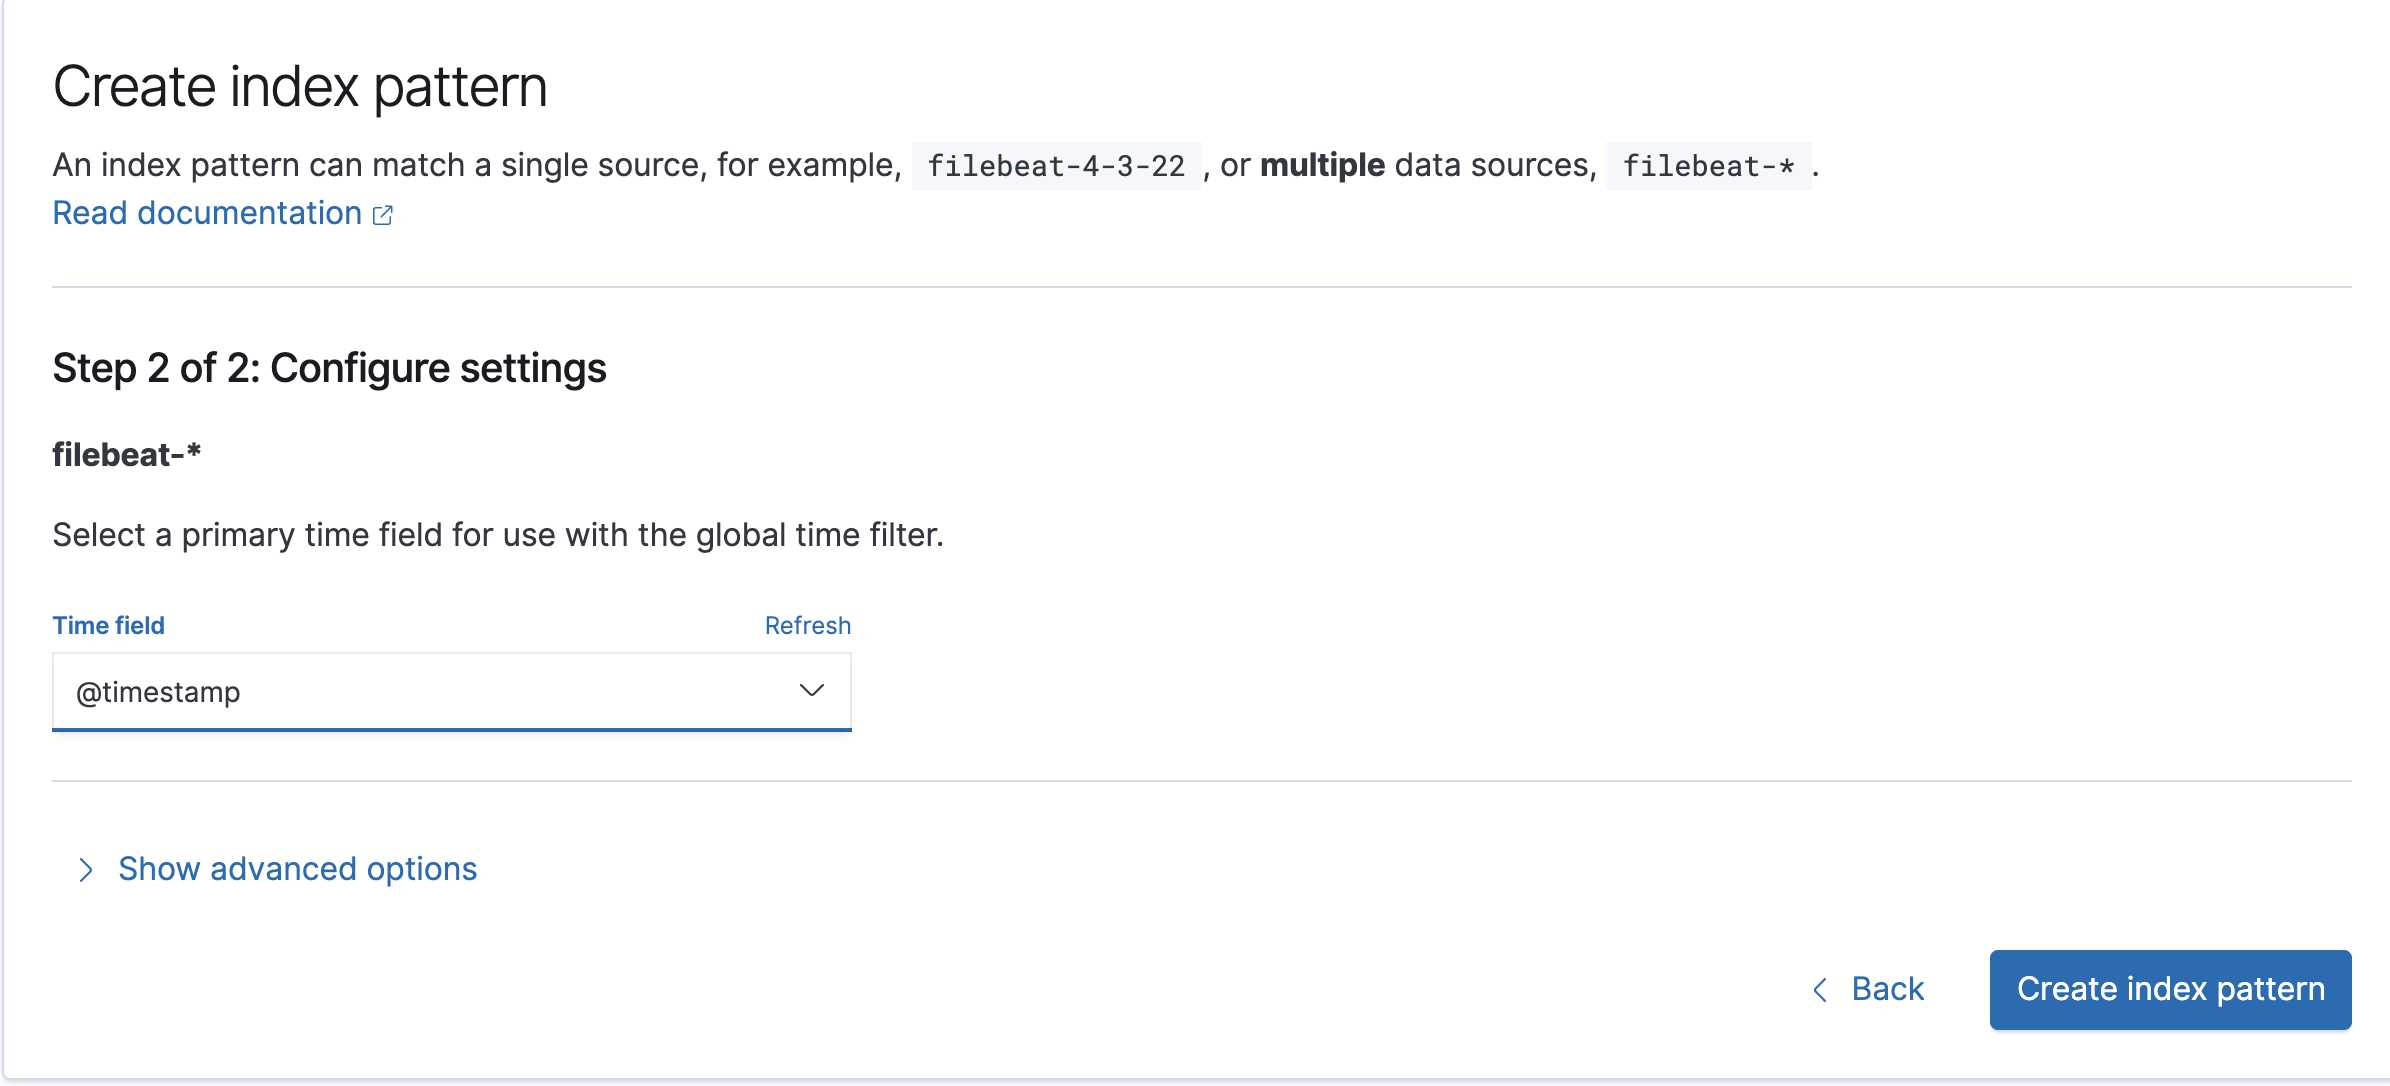
timeフィールドに使うフィールドを選択します。@timestampがデフォルトのタイムスタンプになります。logstashなどで@timestampを加工していなければ、ログを取り込んだ時刻が自動的に設定されています。
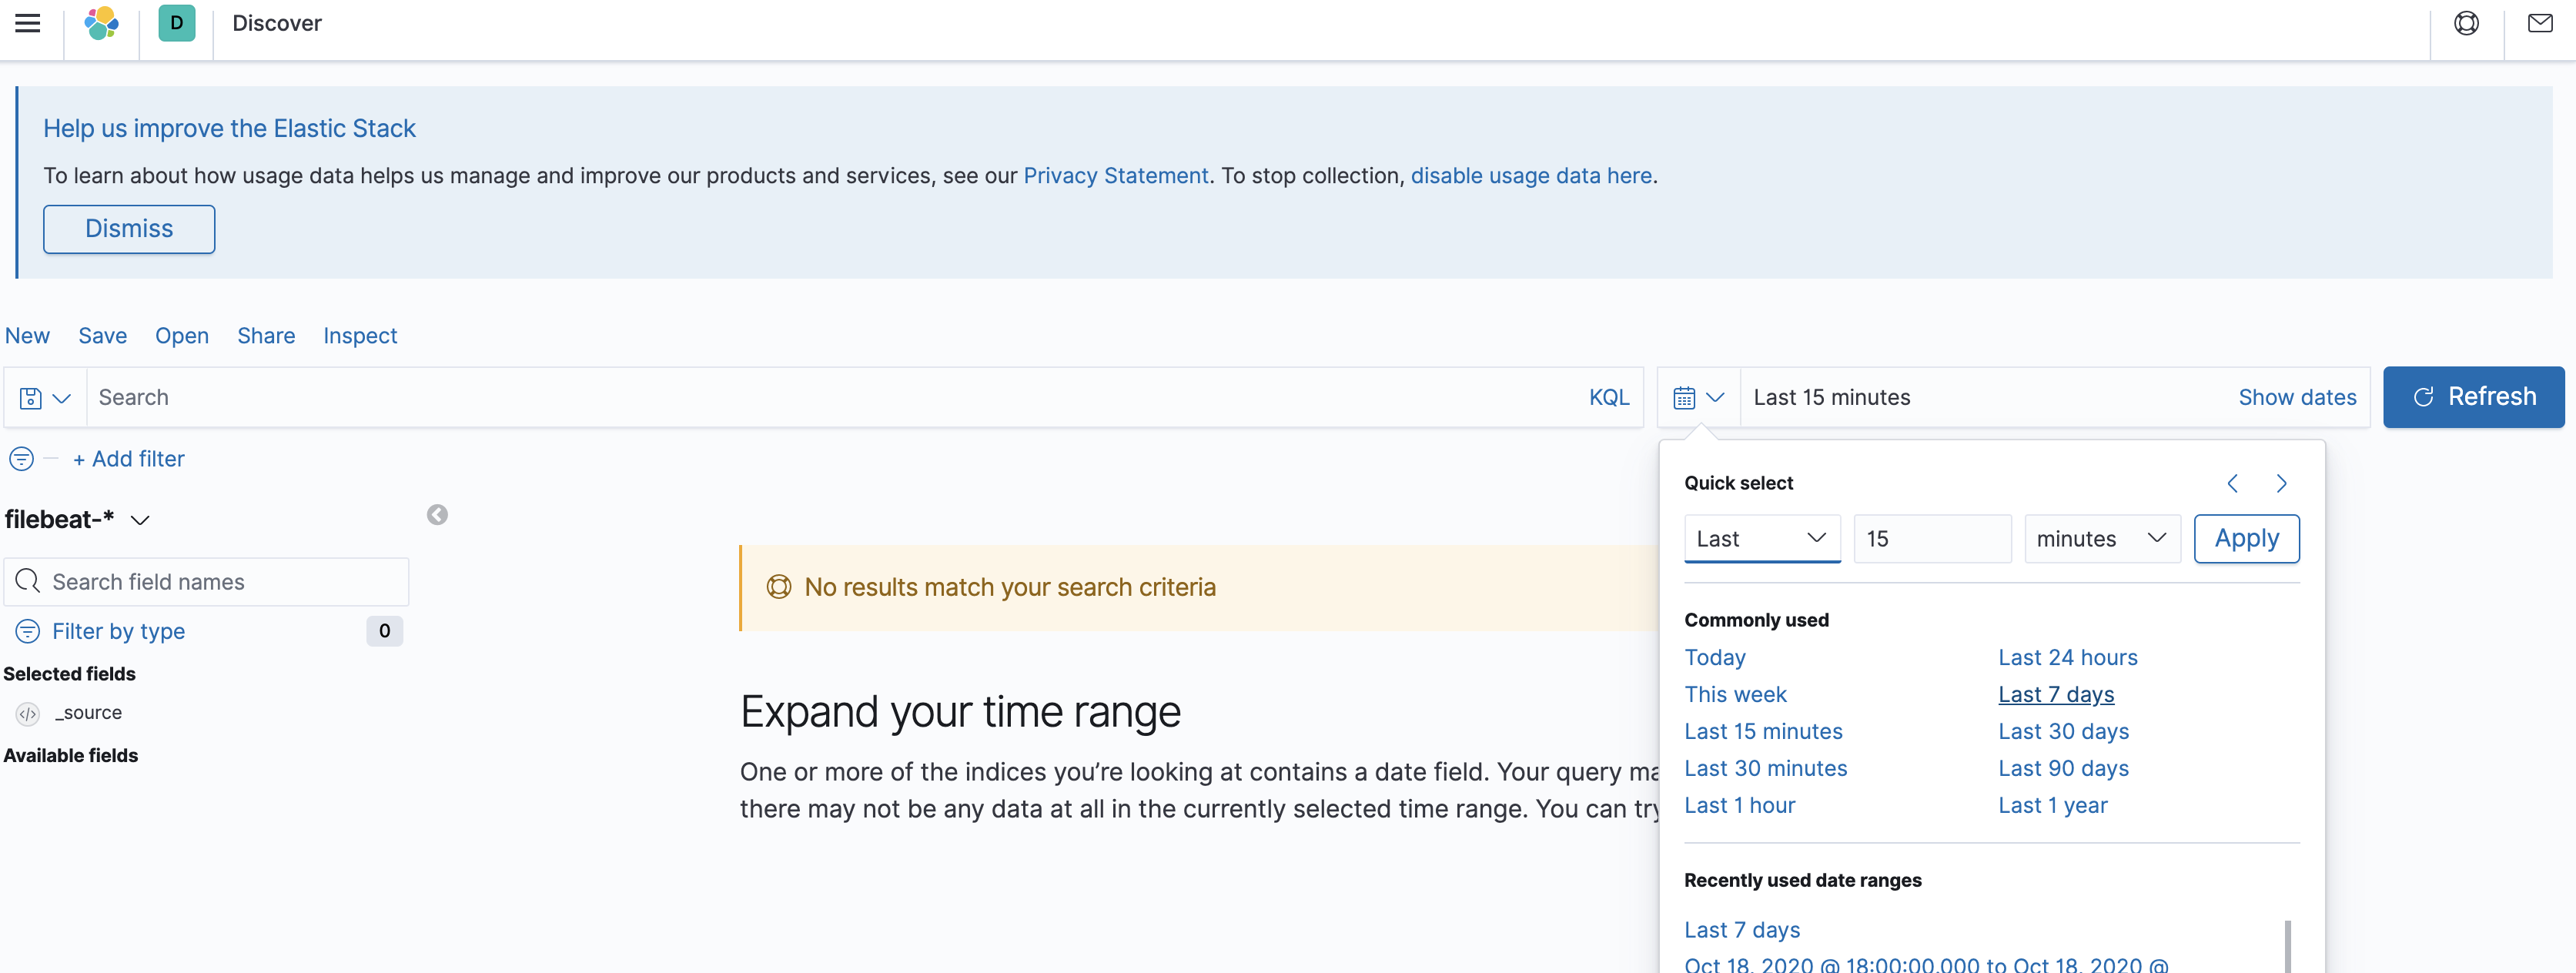
インデックスのKibana->Discoverを選択し、時間のレンジをログに合わせて変更します。
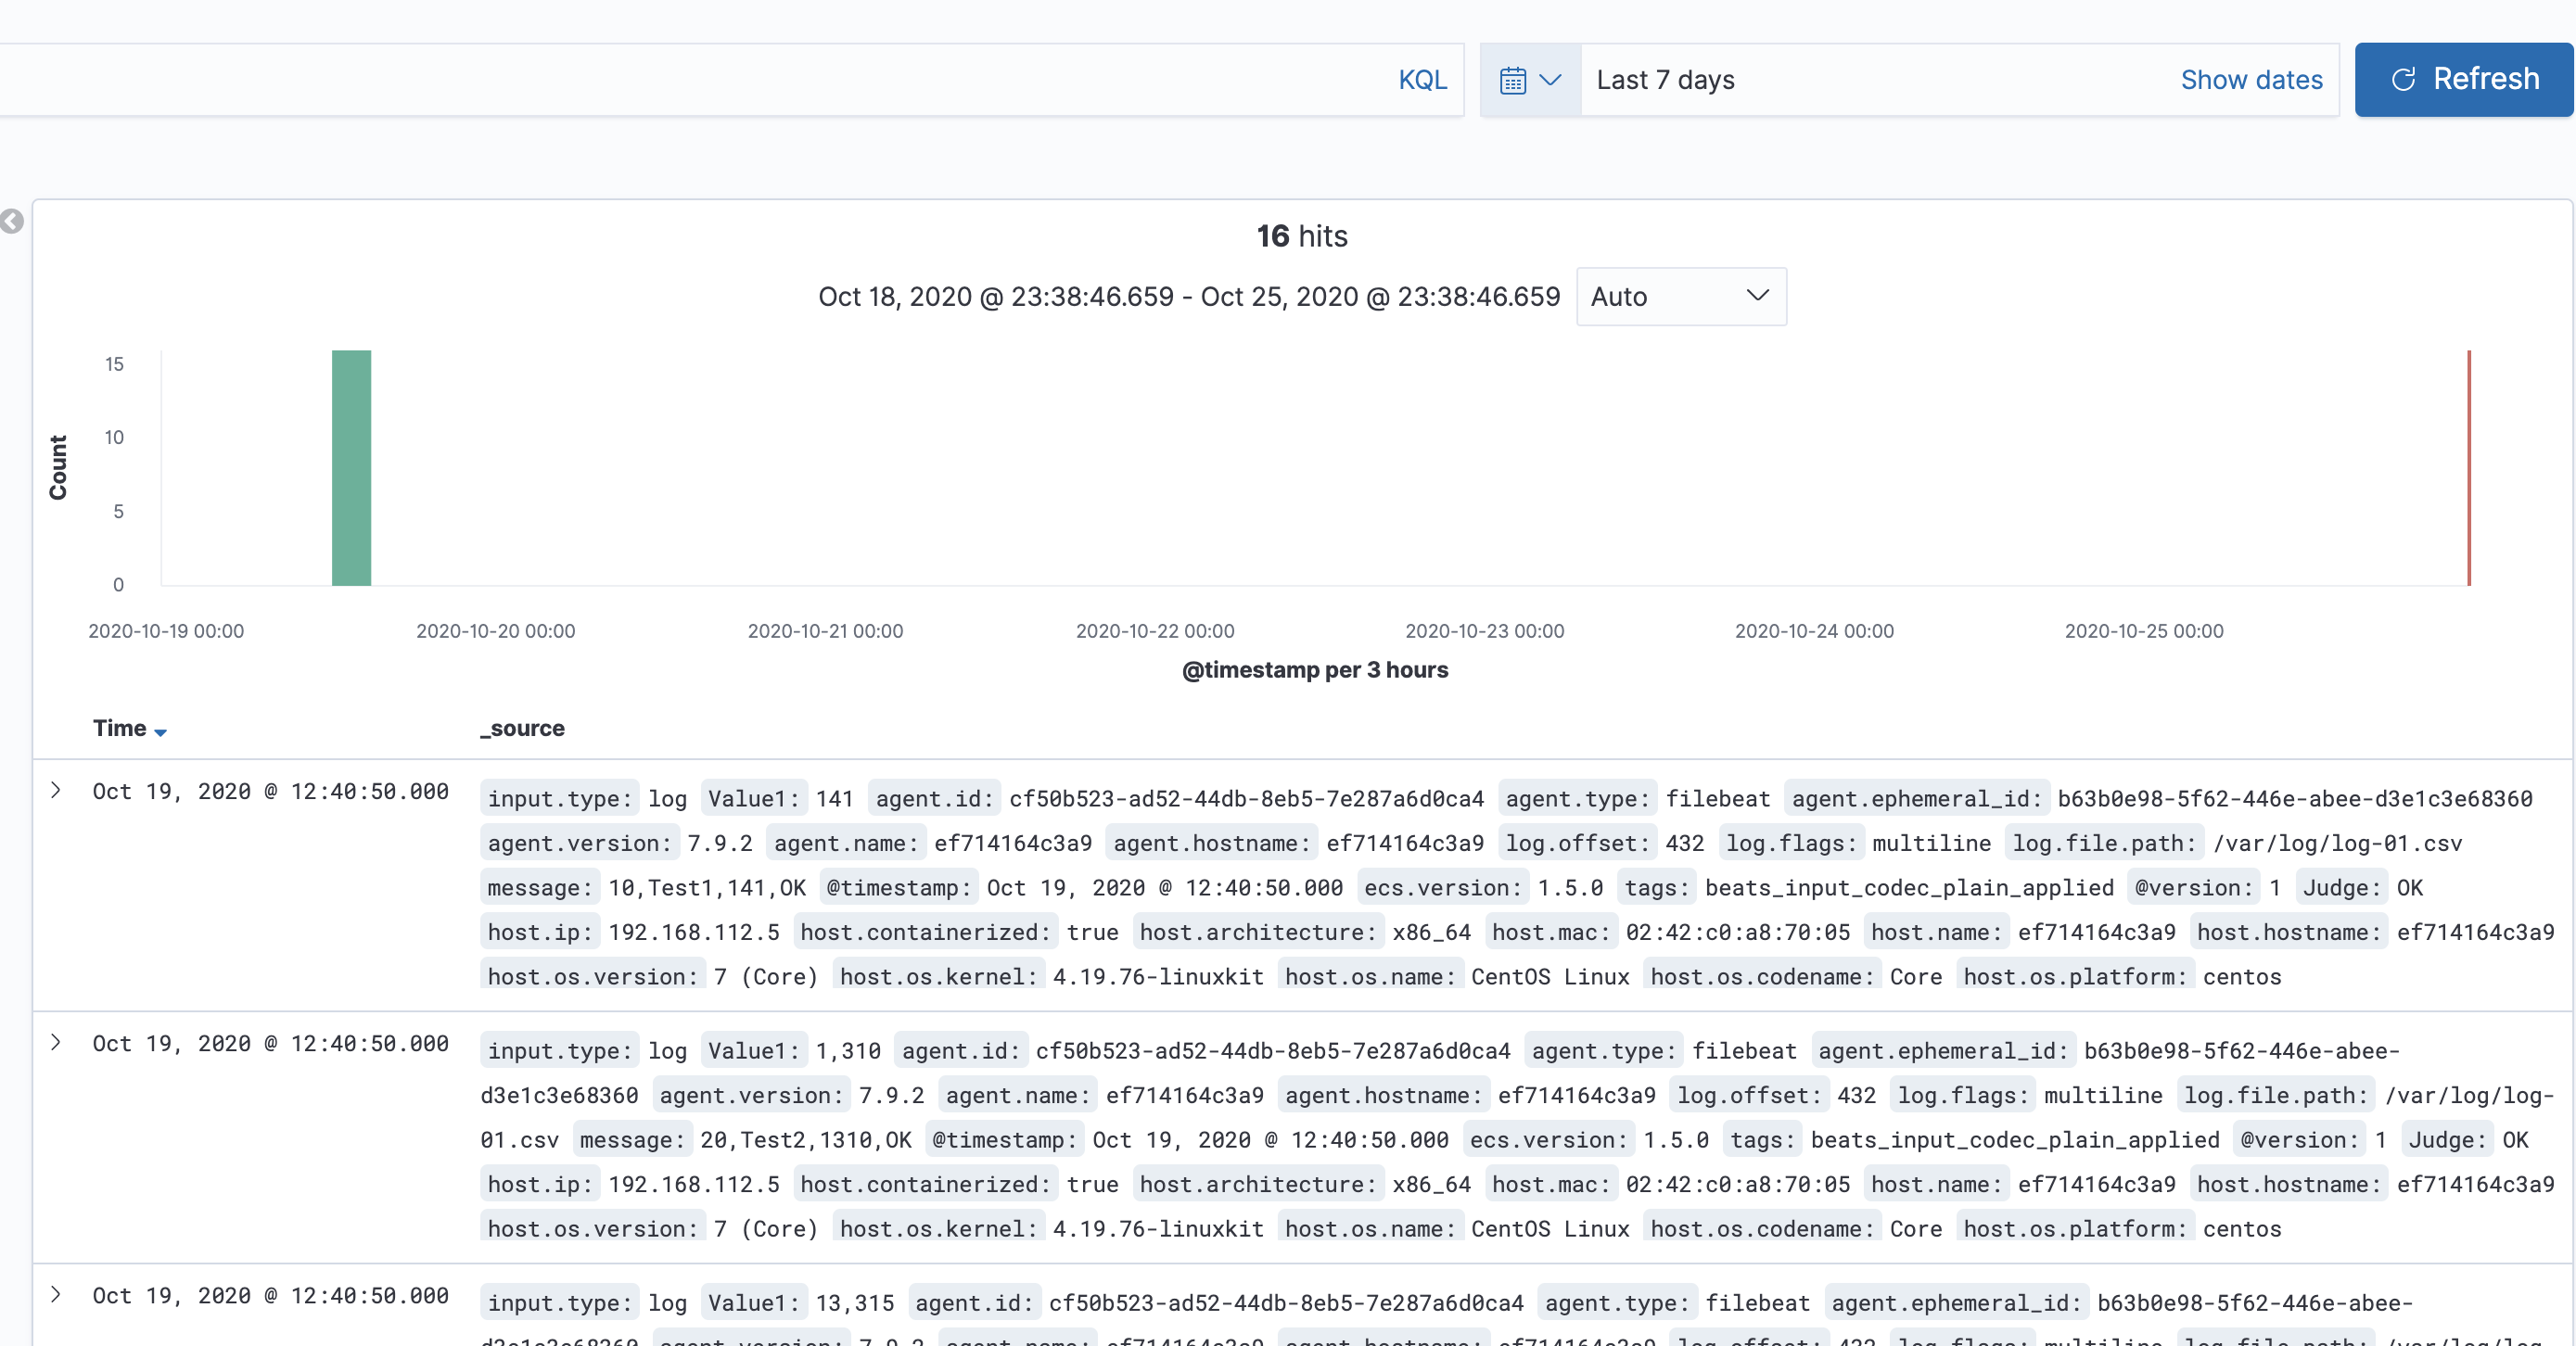
最後に、データが取り込まれていることを確認し完了です。
最後に
docker-composeで立ち上げる際の設定ファイルについて説明しました。
今後は、日本時間などの日付の分析方法、csvファイルの扱い方などについて紹介したいと思います。
