この記事の経緯
Effective C#4.0 の項目1「アクセス可能なデータメンバの代わりに常にプロパティを使用すること」を読んだ。
読んで得た知識をアウトプットすることで、理解度を高める。
結論
publicなメンバよりもプロパティのほうが、挙動の変更が容易にできるからだ。
なぜ挙動の変更が容易になるのか
アカウント作成を例になぜ変更が容易になるのか考えてみる。
publicなメンバを使う
まずはプロパティを使わない、以下のようなクラスを定義したとする。
public class Account
{
    public int Id;
    public string Password;
}
class Program
{
    static void Main(string[] args)
    {
        var account = new Account();
        account.Id = 1;
        account.Password = "1234567";

        var account2 = new Account();
        account2.Id = 2;
        account2.Password = "12345";
    }
}
現状、何の問題もない。
ただAccountクラスにIDとパスワードを設定するだけの処理だ。
ここで、パスワードを強化するために、パスワードの長さに制限を加えたい。
という仕様変更があったとしよう。
public class Account
{
    public int Id;
    public string Password;

    // 追加
    public void Validate()
    {
        if (Password.Length < 7)
        {
            throw new InvalidPasswordException("パスワードは7文字以上で設定してください。");
        }
    }

    public class InvalidPasswordException : Exception
    {
        public InvalidPasswordException() : base() { }
        public InvalidPasswordException(string message) : base(message) { }
        public InvalidPasswordException(string message, Exception inner) : base(message, inner) { }
    }
}
class Program
{
    static void Main(string[] args)
    {
        var account = new Account();
        account.Id = 1;
        account.Password = "1234567";
        account.Validate();  // 追加

        var account2 = new Account();
        account2.Id = 2;
        account2.Password = "12345";
        account.Validate();  // 追加
    }
}
Validateという検証用のメソッドを追加し、メソッドを呼び出すように変更を加えた。
ここで、重要なのは検証用のメソッドを利用する側が必ず呼び出さなければならないということだ。
つまり、パスワードを設定している箇所すべてにおいて、この検証メソッドを追加しなければならない。
バグ混入の可能性が大きくなることは容易に想像できる。
プロパティを使う
プロパティを使った例を見ていこう。
public class Account
{
    public int Id { get; set; }
    public string Password { get; set; }
}
class Program
{
    static void Main(string[] args)
    {
        var account = new Account();
        account.Id = 1;
        account.Password = "1234567";

        var account2 = new Account();
        account2.Id = 2;
        account2.Password = "12345";
    }
}
この時点では何も大差はない。
AccountクラスのIDとパスワードをプロパティに変更しただけだ。
ここに先程と同様の仕様変更を行う場合どうなるか。
public class Account
{
    public int Id { get; set; }
    private string _password;
    public string Password {
        get
        {
            return _password;
        }
        set
        {
            if(value.Length < 7)
            {
                throw new InvalidPasswordException("パスワードは7文字以上で設定してください。");
            }
            _password = value;
        }
    }

    public class InvalidPasswordException : Exception
    {
        public InvalidPasswordException() : base() { }
        public InvalidPasswordException(string message) : base(message) { }
        public InvalidPasswordException(string message, Exception inner) : base(message, inner) { }
    }
}
class Program
{
    static void Main(string[] args)
    {
        var account = new Account();
        account.Id = 1;
        account.Password = "1234567";

        var account2 = new Account();
        account2.Id = 2;
        account2.Password = "12345";
    }
}
プロパティのsetアクセサに対し、検証ロジックを追加した。
ここで重要なのは利用する側は一切変更していないということだ。
つまり、修正箇所がクラス内に限定されるため、バグが混入するリスクは少なくなり、挙動の変更も容易となる。
publicなメンバからプロパティに変更する際の注意点
プロパティを使ったほうが、挙動の変更が容易にできることは分かった。
それではすぐにpublicのメンバをプロパティに変更してしまおう。と思うかもしれないがそこは注意が必要だ。
なぜなら、publicなメンバへのアクセスとプロパティを介したアクセスではソース上では互換性があるかもしれないが、バイナリ上では互換性がないため、必ず再コンパイルする必要性が生じるからだ。
先程のコードが以下の構成で作られているとして、実験してみよう。
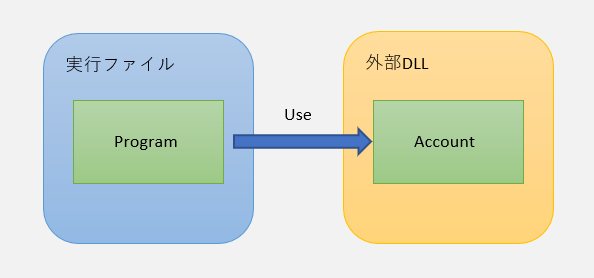
まずは、publicなメンバを持つ状態で実行してみる。
public class Account
{
    public int Id;
    public string Password;
}
class Program
{
    static void Main(string[] args)
    {
        var account = new Account();
        account.Id = 1;
        account.Password = "1234567";

        var account2 = new Account();
        account2.Id = 2;
        account2.Password = "12345";

        Console.WriteLine($"Account1 Id:{account.Id} Password:{account.Password}");
        Console.WriteLine($"Account2 Id:{account2.Id} Password:{account2.Password}");
        Console.ReadLine();
    }
}
Account1 Id:1 Password:1234567
Account2 Id:2 Password:12345
何の問題もなく、実行できることが確認できた。
次に、publicのメンバであろうが、プロパティを使おうが利用する側のコードは変わらないため、実行ファイルはそのまま利用し、dll側をプロパティに変更して実行してみよう。
public class Account
{
    public int Id { get; set; }
    public string Password { get; set; }
}
ハンドルされていない例外: System.MissingFieldException: フィールドが見つかりません: 'SampleLib.Account.Id'
...
MissingFieldExceptionが発生し、実行できなくなってしまった。
なぜこのような自体になってしまうのか、プロパティを使用した場合、実際どのようなコードを書いたことになるのか見てみよう。1
using System.Diagnostics;
using System.Reflection;
using System.Runtime.CompilerServices;
using System.Security;
using System.Security.Permissions;

[assembly: CompilationRelaxations(8)]
[assembly: RuntimeCompatibility(WrapNonExceptionThrows = true)]
[assembly: Debuggable(DebuggableAttribute.DebuggingModes.Default | DebuggableAttribute.DebuggingModes.DisableOptimizations | DebuggableAttribute.DebuggingModes.IgnoreSymbolStoreSequencePoints | DebuggableAttribute.DebuggingModes.EnableEditAndContinue)]
[assembly: SecurityPermission(SecurityAction.RequestMinimum, SkipVerification = true)]
[assembly: AssemblyVersion("0.0.0.0")]
[module: UnverifiableCode]
public class Account
{
    [CompilerGenerated]
    [DebuggerBrowsable(DebuggerBrowsableState.Never)]
    private int <Id>k__BackingField;

    [CompilerGenerated]
    [DebuggerBrowsable(DebuggerBrowsableState.Never)]
    private string <Password>k__BackingField;

    public int Id
    {
        [CompilerGenerated]
        get
        {
            return <Id>k__BackingField;
        }
        [CompilerGenerated]
        set
        {
            <Id>k__BackingField = value;
        }
    }

    public string Password
    {
        [CompilerGenerated]
        get
        {
            return <Password>k__BackingField;
        }
        [CompilerGenerated]
        set
        {
            <Password>k__BackingField = value;
        }
    }
}
<○○>k__BackingFieldというprivateなメンバが自動的に生成され、それにアクセスするためのsetアクセサ、getアクセサが定義されている。
つまり、プロパティはpublicなメンバを作成するのではなく、privateなメンバとそのアクセサを提供してくれるということだ。
そのため、再コンパイルせずに実行すると、publicなメンバであるIdが存在しないという自体が生じることになる。
このような自体が起こる可能性があるため、別アセンブリから参照されているメンバをプロパティに変える際は十分に注意が必要だ。
まとめ
Effective C#4.0 の項目1「アクセス可能なデータメンバの代わりに常にプロパティを使用すること」を読んで得た知識をまとめてみた。
publicなメンバよりもプロパティを使うことのメリットが少しでも伝われば幸いだ。
それではまた。
TomoProg