概要
Microsoft Learnのサイトでは次の画像のように目に付きやすいデザインがあります。
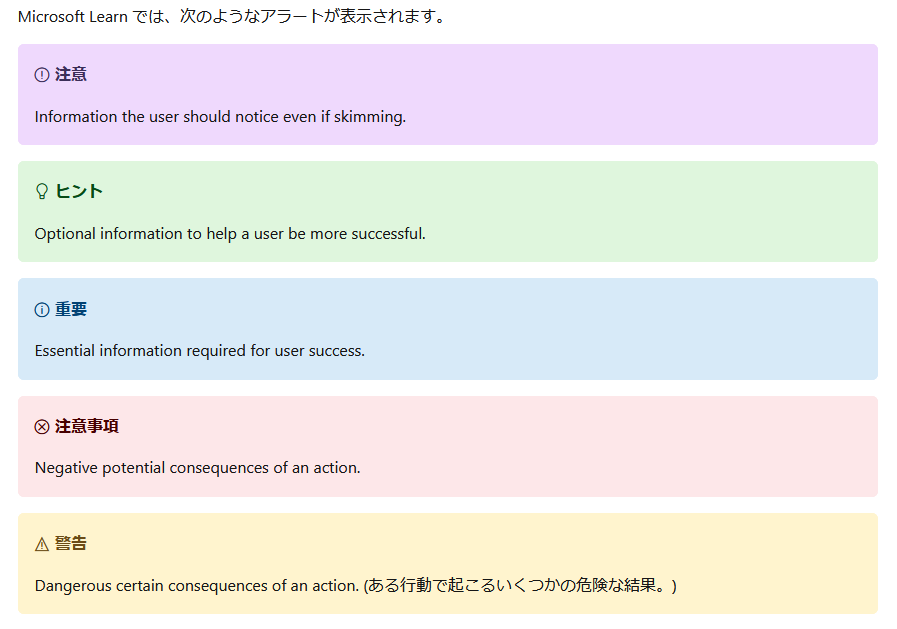
これを VSCodeでMarkdownを書くときにも設定したい! という記事になります。
前提
- VSCodeを使う
- VSCodeの拡張機能 Markdown Preview Enhanced をインストールする
Markdown Preview Enhancedのバージョンによって方法が変わりました。
2パターンあるため自身のバージョンによって変えてください(2025年7月13日更新)。
方法(version:0.7.1以下の場合)
こちらのサイトに書かれている方法を使います。
Markdown Badges for VSCode markdown-preview-enhanced users
- VSCodeで
Ctrl + Shift + Pを押します。 - 検索バーに
markdown-preview-enhanced.extendParserを入力します。 - 開いた
parser.jsを編集します。
特にparser.jsを編集していない人は、既存のコードを削除して、上記サイトのCodeに書かれているコードをコピーして貼り付けます。
その後、Markdownファイルを作ります。
サンプルとして以下のようなMarkdownを書いてみます。
# Test

これはテストです。

[!NOTE] メモ

[!TIP] TIP

[!INFO] Info

[!WARNING] 警告

[!CAUTION] 注意
これは次のような見た目になります。

方法(Version:0.7.2以降の場合)
以下にparser.jsのコード全文を貼ります。
((() => {
  const useHTMLBadges = true;
  const notificationTypes = {
    NOTE: {
      header: 'Note',
      md_icon: ':hand:',
      html_icon: '✋',
      background: '#e2daf1',
      color: '#38225d',
    },
    TIP: {
      header: 'Tip',
      md_icon: ':bulb:',
      html_icon: '💡',
      background: '#d2f9d2',
      color: '#094409',
    },
    INFO: {
      header: 'Information',
      md_icon: ':heavy_exclamation_mark:',
      html_icon: '❗',
      background: '#e0f2ff',
      color: '#002b4d',
    },
    WARNING: {
      header: 'Warning',
      md_icon: ':warning:',
      html_icon: '⚠',
      background: '#fff1cc',
      color: '#664b00',
    },
    CAUTION: {
      header: 'Caution',
      md_icon: ':no_entry_sign:',
      html_icon: '🚫',
      background: '#ffdacc',
      color: '#651b01',
    },
  };

  // HELPERS
  const errorParser = (err) => `<pre>${err.stack}</pre>`;

  const markdownParse = (markdown) => {
    // [!NOTE] Example Text
    let notificationRegex = null;

    for ([notificationType, notificationInfo] of Object.entries(
      notificationTypes,
    )) {
      // multi line comments
      notificationRegex = new RegExp(
        String.raw`\[\!${notificationType}\](.+\r?\n?)+(?=(\r?\n)?)`,
        'gm',
      );

      markdown = markdown.replace(notificationRegex, (message) => {
        return `> ${notificationInfo.md_icon} **${notificationInfo.header}**
                  ${message.substr(message.indexOf(' ') + 1)}`;
      });
    }

    return markdown;
  };

  const htmlParse = (html) => {
    const findCitations = (html) =>
      html.match(/<blockquote>[\S\s]*?<\/blockquote>/gi);

    const findBadges = (citationArray) => {
      let realBadges = [];

      for (index in citationArray) {
        for ([_, info] of Object.entries(notificationTypes)) {
          // minified version spits out <br> instead of <br />
          if (
            citationArray[index].match(
              `<strong>${info.header}<\/strong><br>`,
              'gm',
            )
          ) {
            realBadges[index] = citationArray[index];
          }
        }
      }

      return realBadges;
    };

    let badges = findCitations(html);
    badges = findBadges(badges);

    const getBadgeInfos = (badgeElement) => {
      let findTitle = '';

      for ([_, info] of Object.entries(notificationTypes)) {
        // returns a array of matches
        // minified version spits out <br> instead of <br />
        findTitle = badgeElement.match(
          `.*<strong>${info.header}<\/strong><br>`,
          'gm',
        );
        if (findTitle != null) {
          if (findTitle.length != 0) return info;
        }
      }

      return {};
    };

    const getBody = (badgeElement) => {
      // minified version spits out <br> instead of <br />
      const findBody = badgeElement.match(`(?<=<br>)(.|\r?\n)*?(?=<\/p>)`);

      if (findBody != null) {
        if (findBody.length != 0) return findBody[0].trim();
      }

      return '';
    };

    let infos = {};
    let body = '';

    for (index in badges) {
      html = html.replace(badges[index], (foundElement) => {
        infos = getBadgeInfos(foundElement);
        body = getBody(foundElement);

        if (infos == null)
          return `<div style="color:red">parsing error, see: <pre>~/.mume/parser.js</pre></div>`;

        const styling = `style="padding: 0.8rem 1rem; border-radius: 6px; margin: 1rem 0; background-color:${info.background}"`;

        return `<div ${styling}><p>${info.html_icon} <strong style="color: ${info.color}">${info.header}</strong></p><p style="margin: 0; text-align: left; line-height:1.3;">${body}</p></div>`;
      });
    }

    return html;
  };

  return {
    onWillParseMarkdown: async function(markdown) {
      return new Promise((resolve, reject) => {
        try {
          markdown = markdownParse(markdown);
        } catch (error) {
          markdown = errorParser(error);
        }

        return resolve(markdown);
      });
    },

    onDidParseMarkdown: async function(html) {
      return new Promise((resolve, reject) => {
        try {
          html = useHTMLBadges ? htmlParse(html) : html;
        } catch (error) {
          html = errorParser(error);
        }

        return resolve(html);
      });
    }
  }
})());
カスタマイズ
ここからはデフォルトの表示をカスタマイズする方法を記載します。
見た目の変更
絵文字や色の変更はparser.jsに書かれている以下部分を編集することで変えられます。
const notificationTypes = {
  NOTE: {
    header: 'Note',
    md_icon: ':hand:',
    html_icon: '✋',
    background: '#e2daf1',
    color: '#38225d',
  },
...
たとえば以下のようにheaderとiconを変えてみます。
const notificationTypes = {
  NOTE: {
    header: 'NOTE',
    md_icon: ':speech_balloon:',
    html_icon: '💬',
    background: '#e2daf1',
    color: '#38225d',
  },

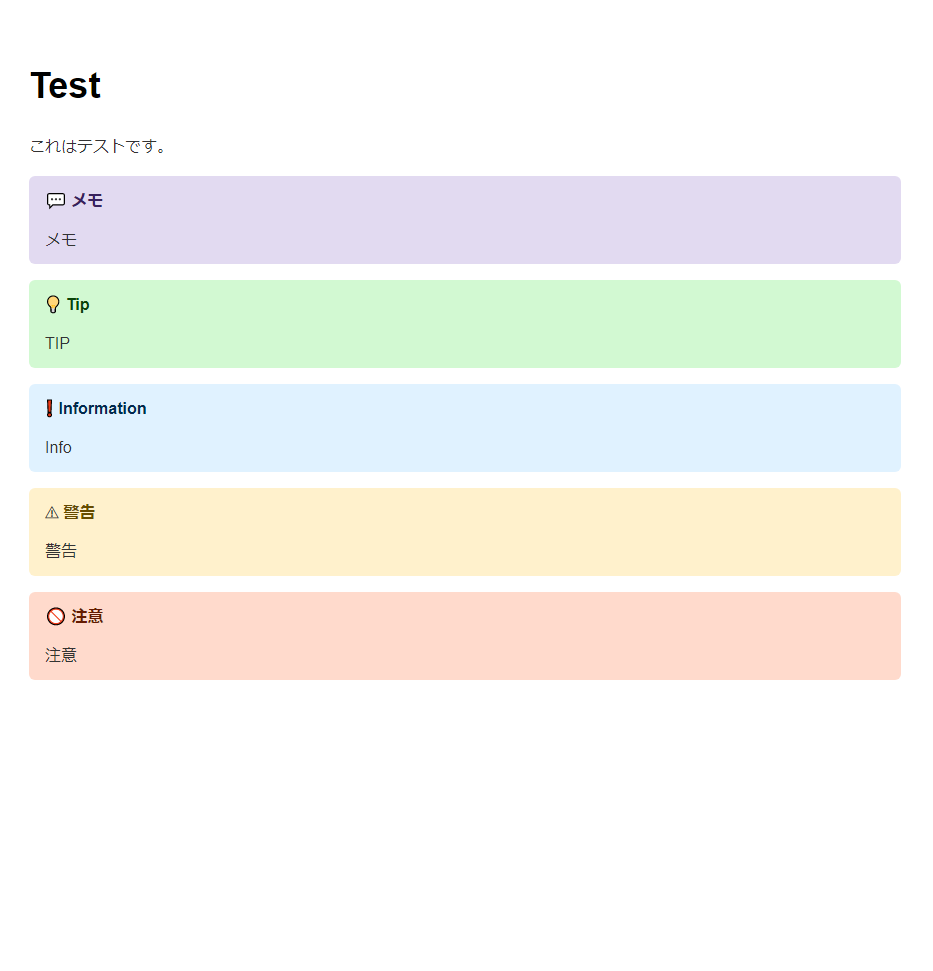
このように変わりました。
headerを日本語にしたい
デフォルトのコードだとheaderを日本語にした場合、表示がちょっと変わってしまいます。
const notificationTypes = {
  NOTE: {
    header: 'コメント',
    md_icon: ':speech_balloon:',
    html_icon: '💬',
    background: '#e2daf1',
    color: '#38225d',
  },

暫定的に回避するには以下のようにすると良いです。
※筆者はJavascriptに明るくないため、もっとうまい回避方法があれば教えてほしいです
まず、notificationTypesにheader_stringという要素を追加します。
これがheaderに表示する文字列です。
const notificationTypes = {
  NOTE: {
    header: 'Note',
+   header_string: 'メモ',
    md_icon: ':speech_balloon:',
    html_icon: '💬',
    background: '#e2daf1',
    color: '#38225d',
  },
  TIP: {
    header: 'Tip',
+   header_string: 'Tip',
    md_icon: ':bulb:',
    html_icon: '💡',
    background: '#d2f9d2',
    color: '#094409',
  },
  INFO: {
    header: 'Information',
+   header_string: 'Information',
    md_icon: ':heavy_exclamation_mark:',
    html_icon: '❗',
    background: '#e0f2ff',
    color: '#002b4d',
  },
  WARNING: {
    header: 'Warning',
+   header_string: '警告',
    md_icon: ':warning:',
    html_icon: '⚠',
    background: '#fff1cc',
    color: '#664b00',
  },
  CAUTION: {
    header: 'Caution',
+   header_string: '注意',
    md_icon: ':no_entry_sign:',
    html_icon: '🚫',
    background: '#ffdacc',
    color: '#651b01',
  },
};
次に、抜粋した以下の部分を編集します。
  for (index in badges) {
    html = html.replace(badges[index], (foundElement) => {
      infos = getBadgeInfos(foundElement);
      body = getBody(foundElement);

      if (infos == null)
        return `<div style="color:red">parsing error, see: <pre>~/.mume/parser.js</pre></div>`;

      const styling = `style="padding: 0.8rem 1rem; border-radius: 6px; margin: 1rem 0; background-color:${info.background}"`;

-     return `<div ${styling}><p>${info.html_icon} <strong style="color: ${info.color}">${info.header}</strong></p><p style="margin: 0; text-align: left; line-height:1.3;">${body}</p></div>`;
+     return `<div ${styling}><p>${info.html_icon} <strong style="color: ${info.color}">${info.header_string}</strong></p><p style="margin: 0; text-align: left; line-height:1.3;">${body}</p></div>`;
    });
  }

  return html;
};
これで次のように日本語のheaderになります。