Tkinter CookBook4
前提
1. 実行環境
本ページで記載しているプログラムコードはWindows10, python3.6で実行できることを確認しています。
2. 必要なpythonモジュール
下記のモジュールを別途インストールしておく必要があります。
- PIL
3. 本投稿の目的
tkinterで小さな部品をどんどん作っていこうと思います。
今回は画像を表示するGUIを作ります。
ただそれだけです!
それでは、はじめましょう。
import tkinter as tk
from PIL import Image, ImageTk

class ImageViewer:
    def __init__(self, root):
        self.label = tk.Label(root)
        self.label.grid(column=0, columnspan=2, row=1)

        self.entry = tk.Entry(root)
        self.entry.grid(column=0, row=0)
        self.entry["font"] = ("Helvetica", 20)

        self.button = tk.Button(root)
        self.button.grid(column=1, row=0)
        self.button["width"] = 10
        self.button["text"] = "表示"
        self.button["font"] = ("Helvetica", 20)
        self.button["command"] = self.setImage

    def setImage(self, event=None):
        img = Image.open(self.entry.get())
        self.image = ImageTk.PhotoImage(img.resize((500,500)))
        self.label["image"] = self.image
        self.label.image = self.image

if __name__=="__main__":
    root = tk.Tk()
    imageViewer = ImageViewer(root)
    root.mainloop()
実行すると下記のようなウィンドウが起動します。
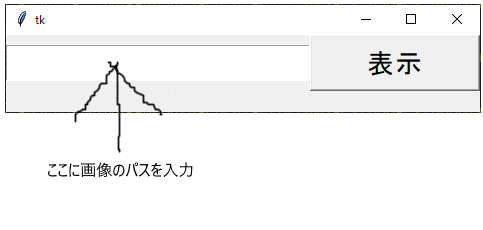
パスを入れ、表示と書かれたボタンを押すと、
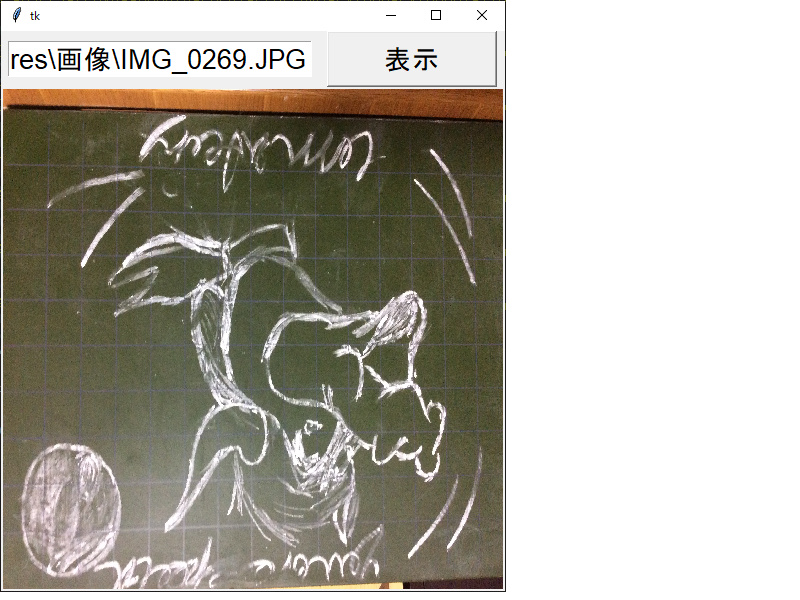
画像を表示します。(これだけです。)
このプログラムが行っていることは
- 「Label」,「Entry」,**「Button」**オブジェクトを配置
- ボタンが押された際に**「Entry」**オブジェクト内に入力されている文字列を取得し、その文字列に記載されているパスの画像を表示
です。
1.「Label」,「Entry」,**「Button」**オブジェクトを配置
def __init__(self, root):
        self.label = tk.Label(root)
        self.label.grid(column=0, columnspan=2, row=1)

        self.entry = tk.Entry(root)
        self.entry.grid(column=0, row=0)
        self.entry["font"] = ("Helvetica", 20)

        self.button = tk.Button(root)
        self.button.grid(column=1, row=0)
        self.button["width"] = 10
        self.button["text"] = "表示"
        self.button["font"] = ("Helvetica", 20)
        self.button["command"] = self.setImage
**tk.ウィジェット名(親オブジェクト名)**で各オブジェクト(ラベル、ボタン、エントリー)を作成しています。
「Button」はcommand属性にメソッドself.setImageを指定しています。ボタンが押されるとこのメソッドが呼び出されます。
また**「Label」オブジェクトをgridメソッドによって配置する際にcolumnspanという引数を指定しております。
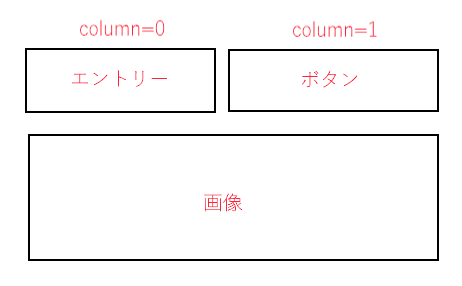
上図のようにcolumn=0にはエントリーオブジェクト、column=1にはボタンオブジェクトが配置されており、その下に画像を配置したいとします。このときに、画像はcolumn=0および1をまたぐ必要があります。その指定がcolumnspanです。
columnspan=2とすることで2つのcolumn**にまたがることが出来ます。
2. ボタンが押された際に**「Entry」**オブジェクト内に入力されている文字列を取得し、その文字列に記載されているパスの画像を表示
def setImage(self, event=None):
    img = Image.open(self.entry.get())
    self.image = ImageTk.PhotoImage(img.resize((500,500)))
    self.label["image"] = self.image
    self.label.image = self.image
単純に画像を表示するだけであれば、PILモジュールをインポートする必要はないです。
PILモジュールを入れた目的は画像のリサイズです。表示する画像のサイズが一定であると良いかなと思い、そのようにしました。
まずPILで画像を開くには**Image.open(画像のパス)とします。
上記のコードではパスをself.entry.get()**で取得します。**get()**はエントリーオブジェクト内に入力された文字列を取得するメソッドです。
またPILで開いた画像をtkinterで使用する場合はImageTk.PhotoImageを使用します。上記のコードでは合わせて画像のリサイズを行うメソッド**resize((x_size, y_size))**を使用しています。
最後に**「Label」オブジェクトのimage属性にImageTk.PhotoImage**オブジェクトを指定します。
tkinterのPhotoImageオブジェクトはpythonのガーベッジコレクトによってクリアされてしまいます。ここでは念の為self.label.imageもImageTk.PhotoImageオブジェクトを参照するようにしています。
"image"属性だけでPhotoImageオブジェクトを参照している場合は画像が表示されない場合があります。
http://effbot.org/tkinterbook/photoimage.htm