0
0

Delete article

Deleted articles cannot be recovered.

Draft of this article would be also deleted.

Are you sure you want to delete this article?

More than 3 years have passed since last update.

Netlifyで新しいサイト作って、netlify-cliでデプロイする

Last updated at Posted at 2020-10-17

前提

Netlifyのアカウントは作ってある
静的サイトはすでにできている

NetlifyのSiteを作成する。

NetlifyにLoginするとページの下部に以下のように表示されている。
スクリーンショット 2020-10-17 23.22.28.png

ここに静的サイトのフォルダーをドラッグ & ドロップする。
スクリーンショット 2020-10-17 23.26.59.jpg

するとこんな感じで新しいSiteができる。

次にドメインを変更する。

上のSiteをクリックすると以下のような画面にいける。

スクリーンショット 2020-10-17 23.29.26.jpg

Domain settingsを押す

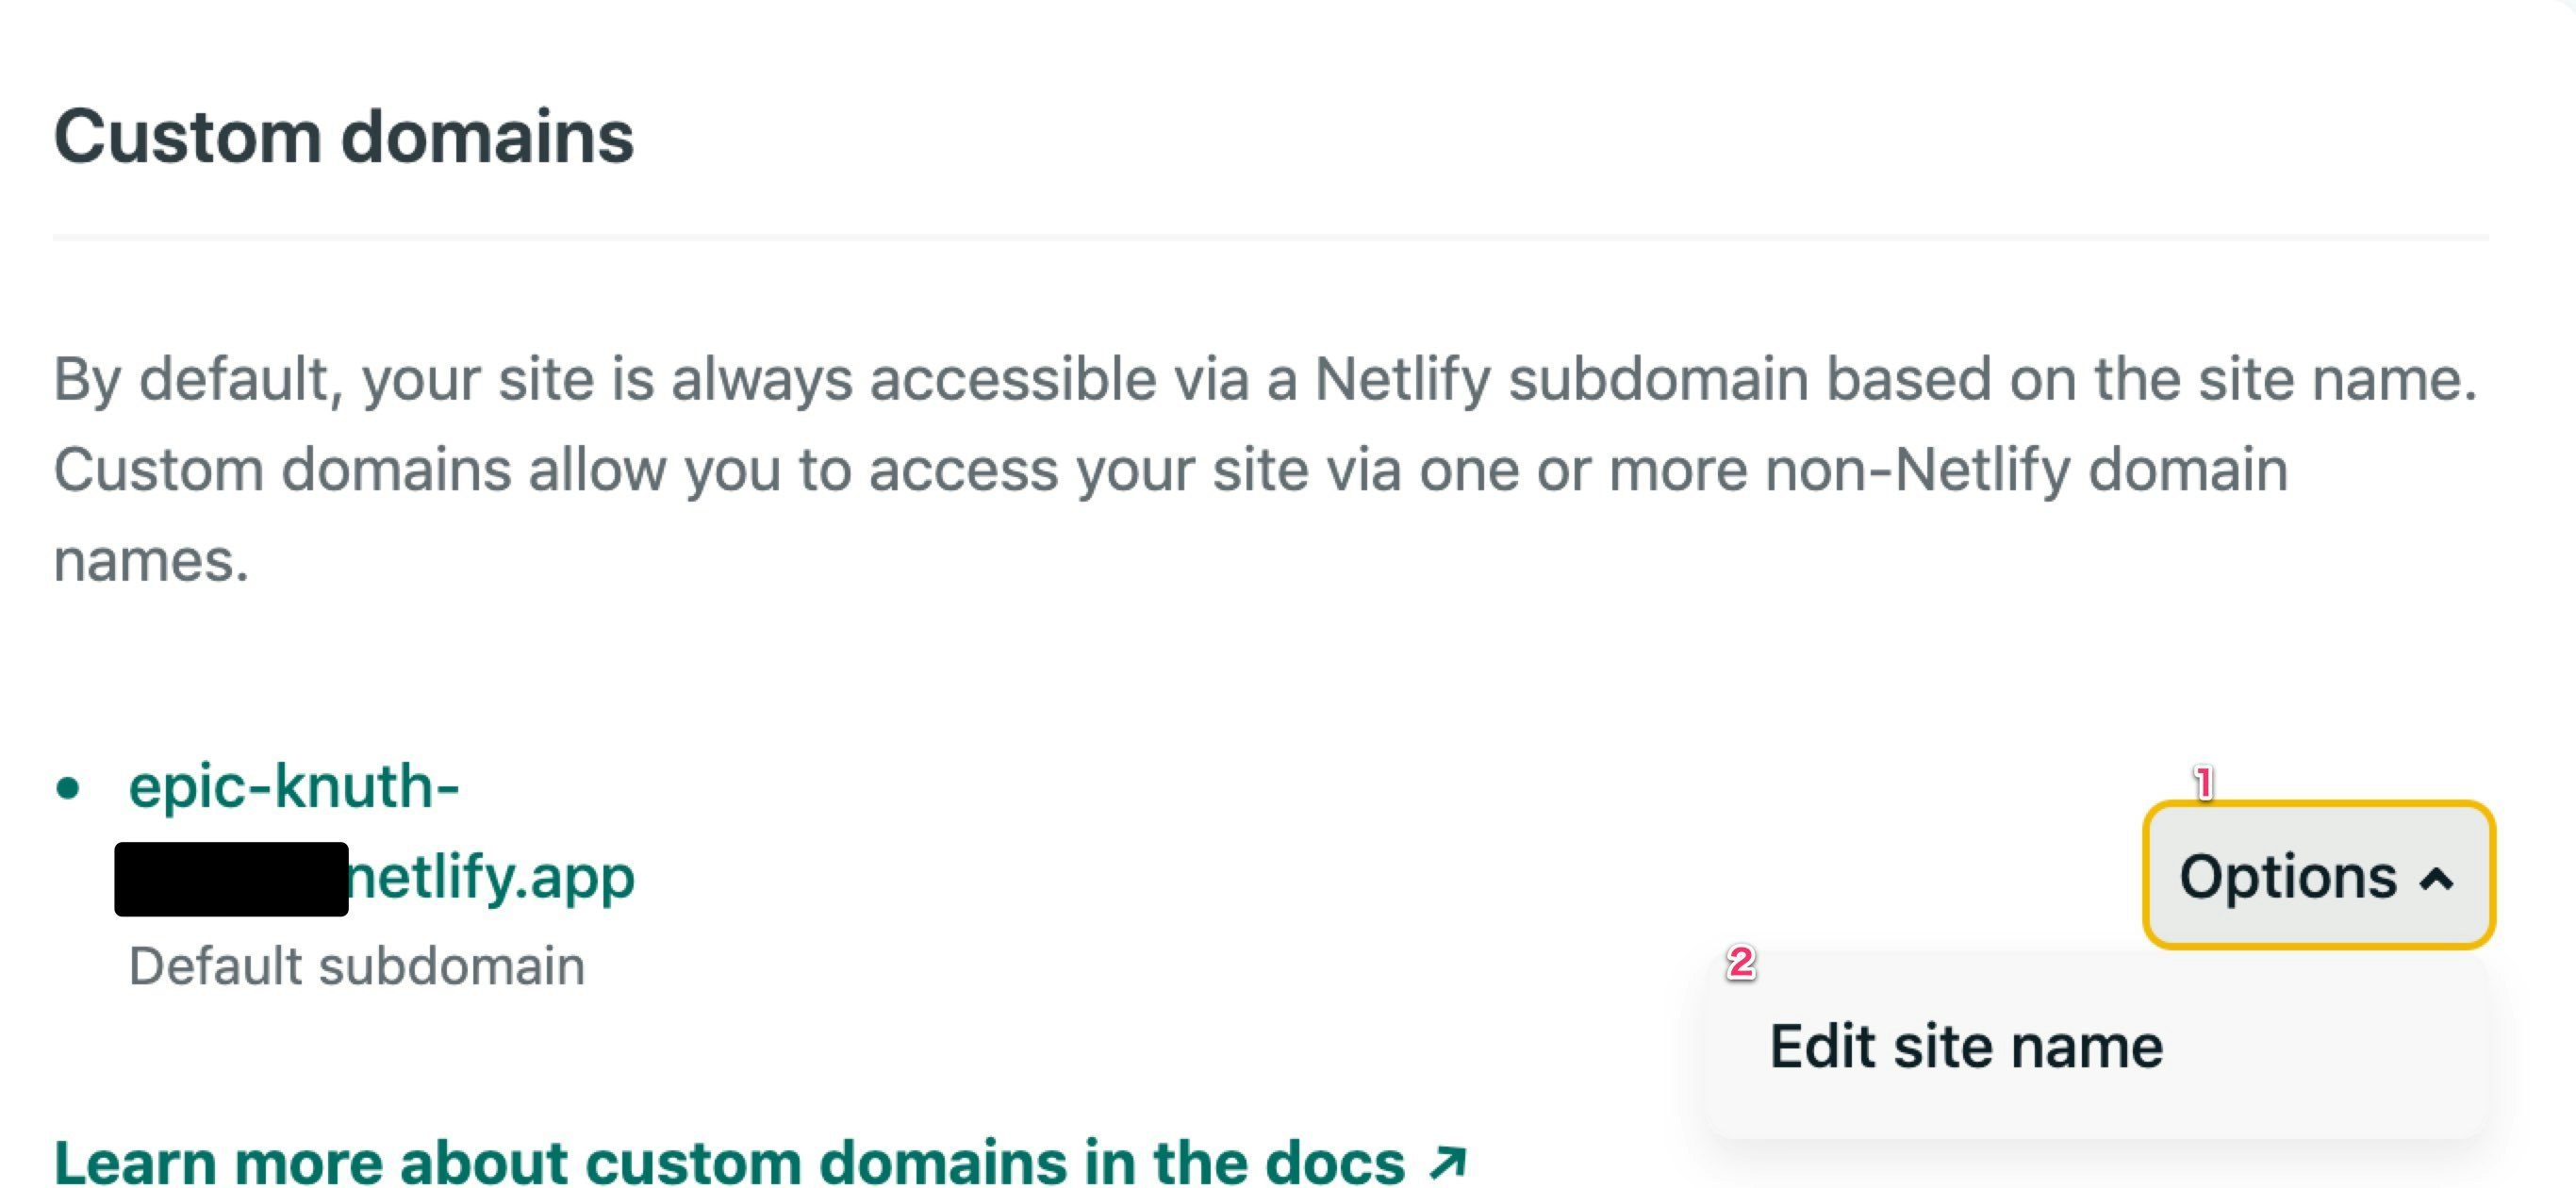
スクリーンショット 2020-10-17 23.32.04.jpg

Edit site name を押す
するとSite名を編集できるので適当な名前をつける。

すると、サイト名.netlify.appで公開されたサイトにアクセスできる。

netlify-cliを用いてデプロイする。

更新するときはnetlify-cliを用いる
ドキュメント

npm install netlify-cli -g

netlify deployでデプロイする
リファレンス

netlify deploy --dir=docs --prod --auth ${NETLIFY_AUTH_TOKEN} --site ${NETLIFY_SITE_ID}

--prodを付けないと下書き扱いとなり、本番とは別の自動生成されたURLで公開される。

NETLIFY_AUTH_TOKENの取得

(https://app.netlify.com/user/applications#personal-access-tokens)
ここから、New access tokenを押して作成する
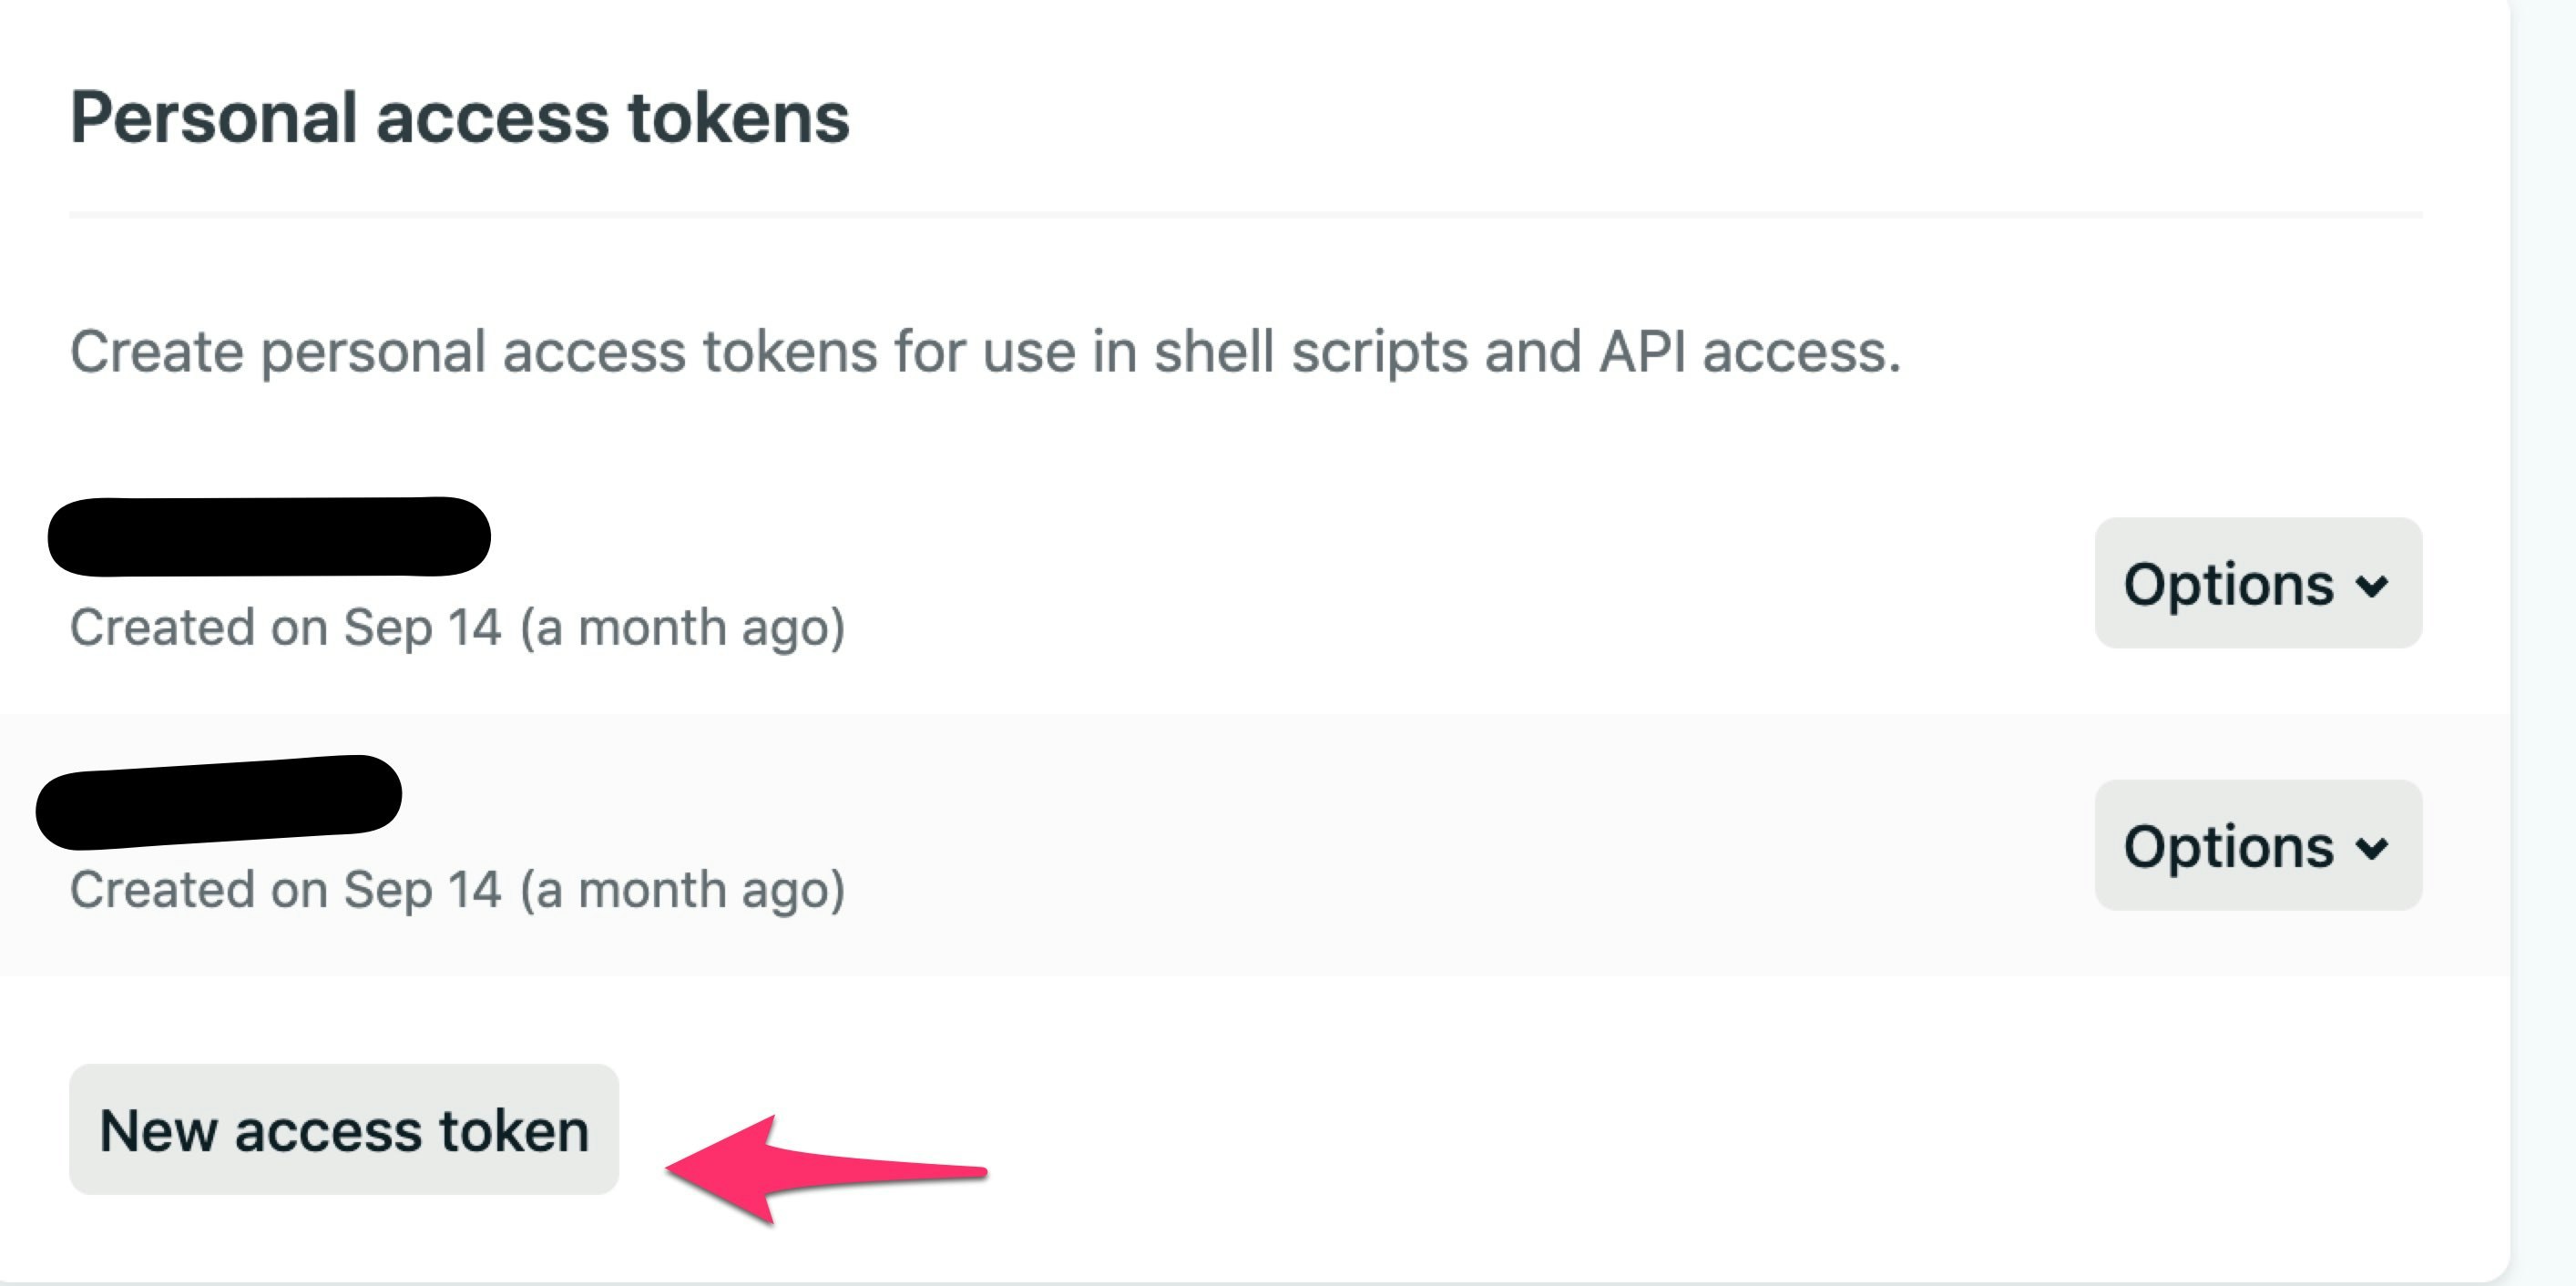
スクリーンショット 2020-10-17 23.50.12.jpg

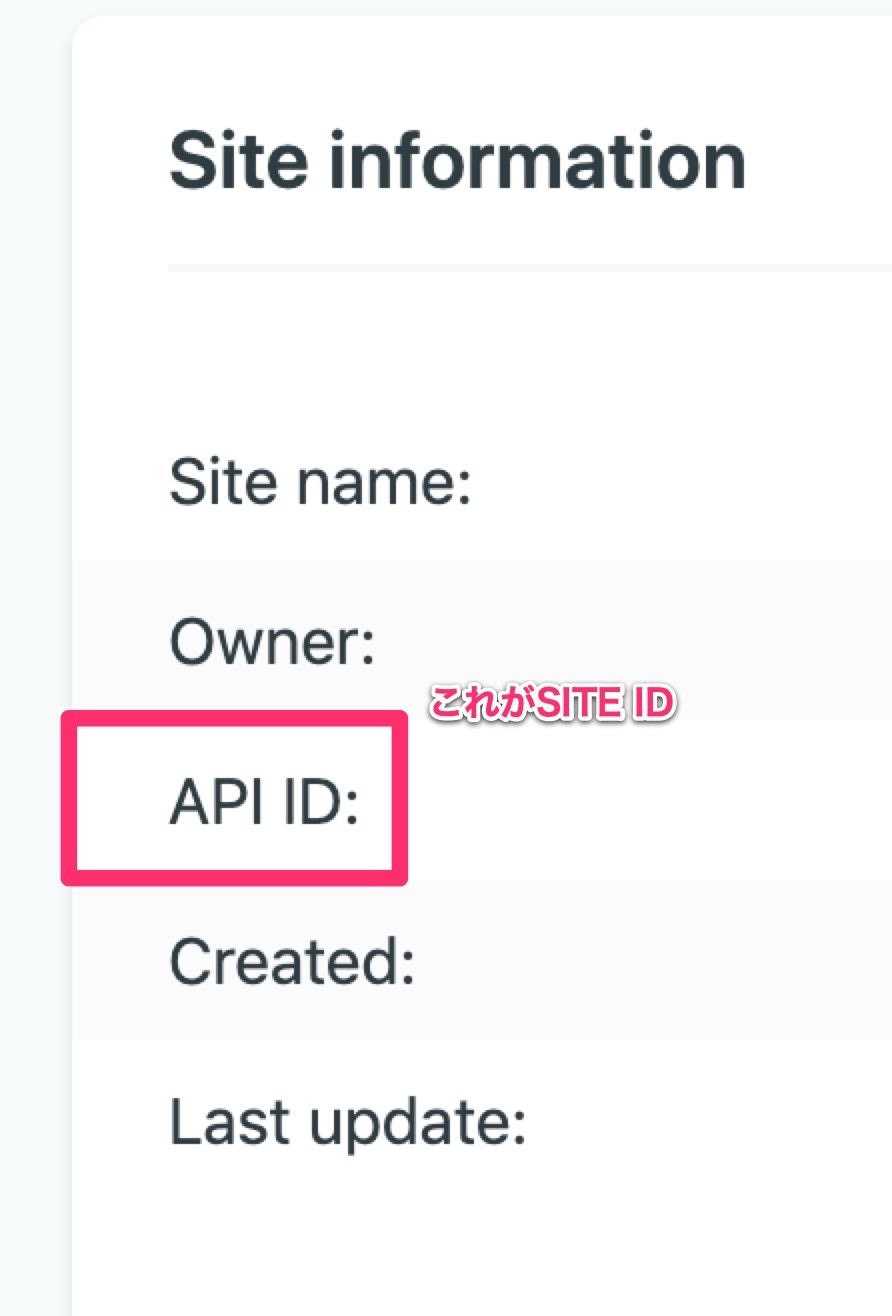
NETLIFY_SITE_IDの取得

スクリーンショット 2020-10-17 23.29.26-1.jpg

スクリーンショット 2020-10-17 23.55.48.jpg

ここに書いてある文字列をコピーすればOK

参考

Github ActionsでNetlifyに自動デプロイする

0
0
0

Register as a new user and use Qiita more conveniently

  1. You get articles that match your needs
  2. You can efficiently read back useful information
  3. You can use dark theme
What you can do with signing up
0
0

Delete article

Deleted articles cannot be recovered.

Draft of this article would be also deleted.

Are you sure you want to delete this article?