#プロパティオブザーバとは
格納型プロパティの値が更新される時、それをきっかけにして処理を書く事が出来ます。
例えば、プロパティオブザーバを使用する事で
var price = 100 の値を更新した時に、更新の回数をカウントする処理を書く事が出来たりする訳です。
このプロパティオブザーバには、値が変更される直前に呼び出されるwillSetと変更後に呼び出されるdidSetがあります。
これらはどちらか一方だけ書くこともできます。
書き方は以下の通りです。
var プロパティ名: 型 = 初期値 {
    willSet (仮引数) {
         変更直前に呼ばれる処理
   }
    didSet (仮引数) {
         変更直後に呼ばれる処理
   }
}
#それぞれの仮引数
willSetとdidSetにはそれぞれ仮引数を指定する事が出来ます。
willSetでは、プロパティに格納される直前の新しい値を仮引数で参照する事が出来ます。
仮引数を省略する場合は、newValueという名前で参照できます。
didSetでは、プロパティに今まで格納されていた古い値を仮引数で参照できます。
省略する場合は、oldValueで参照できます。
#willSet使ってみた
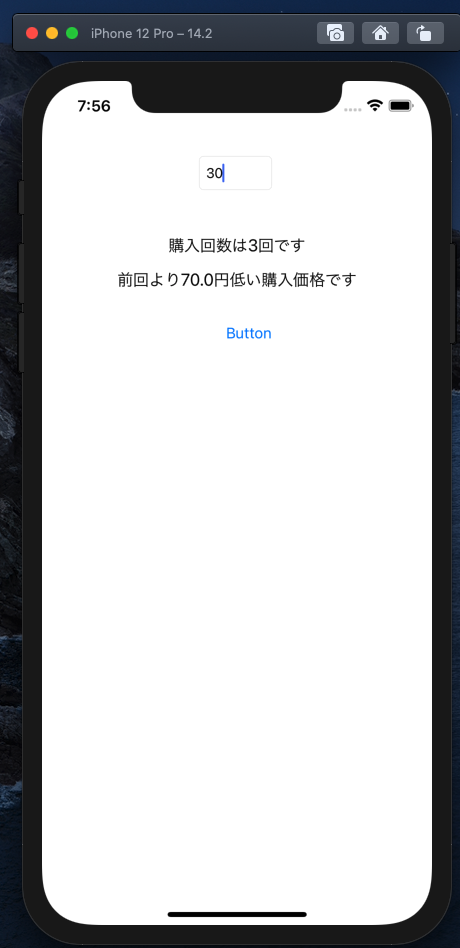
textFieldに購入金額を入力して、ボタンを押すとその回数と前回の金額との差を表示するアプリを作成してみました。
class ViewController: UIViewController {
    @IBOutlet var label: UILabel!
    @IBOutlet var priceTextField: UITextField!
    @IBOutlet var countLabel: UILabel!
    @IBOutlet var hikakuLabel: UILabel!
    var count = 0
    var  priceDifference = ""
    let minPrice = 1.0

    var buyingPrice: Double = 0 {
        willSet {
            count += 1
            guard newValue > buyingPrice else {
                priceDifference = "前回より\(buyingPrice - newValue)円低い購入価格です"
                return
            }
            priceDifference = "前回より\(newValue - buyingPrice)高い購入価格です"
        }
    }

    @IBAction func countUpButton(_ sender: Any) {
        buyingPrice = Double(priceTextField.text!) ?? 0
        countLabel.text = "購入回数は\(count)回です"
        hikakuLabel.text = priceDifference
    }
}
#####実行結果
willSet内で購入回数を取得し、価格差を計算して表示する事が出来ました。
#didSet使ってみた
didSetを使用して数字の最低値を設定し、それ以下にならないようにコードを書いてみます。
class ViewController: UIViewController {
    @IBOutlet var numberTextFIeld: UITextField!
    @IBOutlet var numberLabel: UILabel!
    let minNumber = 1

    var seisuu:Int = 1 {
        didSet {
            if seisuu < minNumber {
                seisuu = minNumber
            }
        }
    }

    @IBAction func button(_ sender: Any) {
        seisuu = Int(numberTextFIeld.text!) ?? 0
        numberLabel.text = String(seisuu)
    }
}
######実行結果
変数seisuuに数字がセットされた時に、最低値以下の場合は最低値になるように指定しているので、ボタンを押した時に1以下の数字は1と表示する事ができた。
#メリット
これらを使用する事で、コードがかなりコンパクトになります。
別のフィールドを作成する事なく、値を保持して取り出す事が出来ます。
#参考文献
https://qastack.jp/programming/24006234/what-is-the-purpose-of-willset-and-didset-in-swift
荻原 剛志、『詳解 Swift 第5版』、SBクリエイティブ株式会社、2019年11月25日、557ページ


