はじめに
「QualiArts Advent Callender 2023」の6日目の記事になります。
株式会社QualiArtsでUnityエンジニアをしております、篠木です。
この記事では、私がRiderでSourceGeneratorsを使用したツールを作成し、Unityへ導入する際のフローを紹介しています。
※SourceGeneratorとは、C#コンパイル時にコードを検査し、ソースコードの追加を行える機能になります
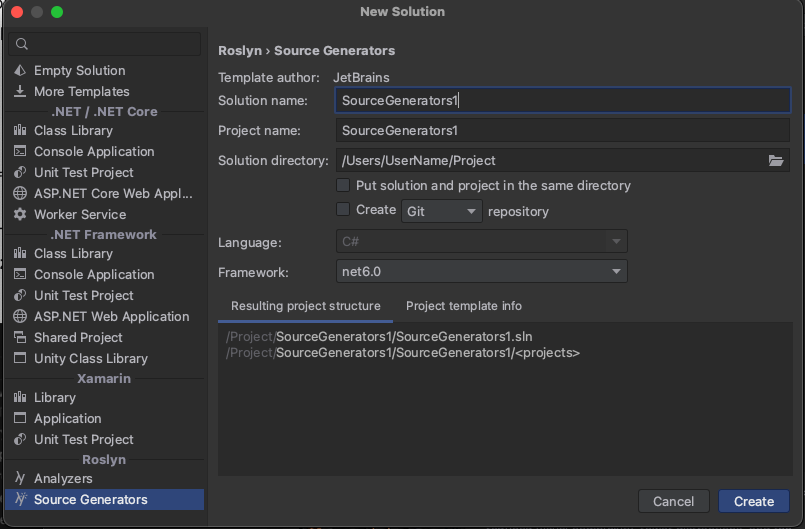
Riderのテンプレートからソリューションを作成する
Riderにはバージョン2023.2からSourceGenerator開発用のテンプレートが用意されています。こちらを使用し、SourceGeneratorツールを開発するソリューションを作成します。
テンプレートには3つのプロジェクトが含まれています。それぞれのプロジェクトの役割は次になります。
※名前はテンプレートのデフォルトを使用しています
SourceGenerators1
SourceGeneratorツールの本体になります。こちらのプロジェクトからビルドされたDLLをUnityへ配置する事で、UnityのプロジェクトへSourceGenerator機能の導入が行えます。
SourceGenerators1.Sample
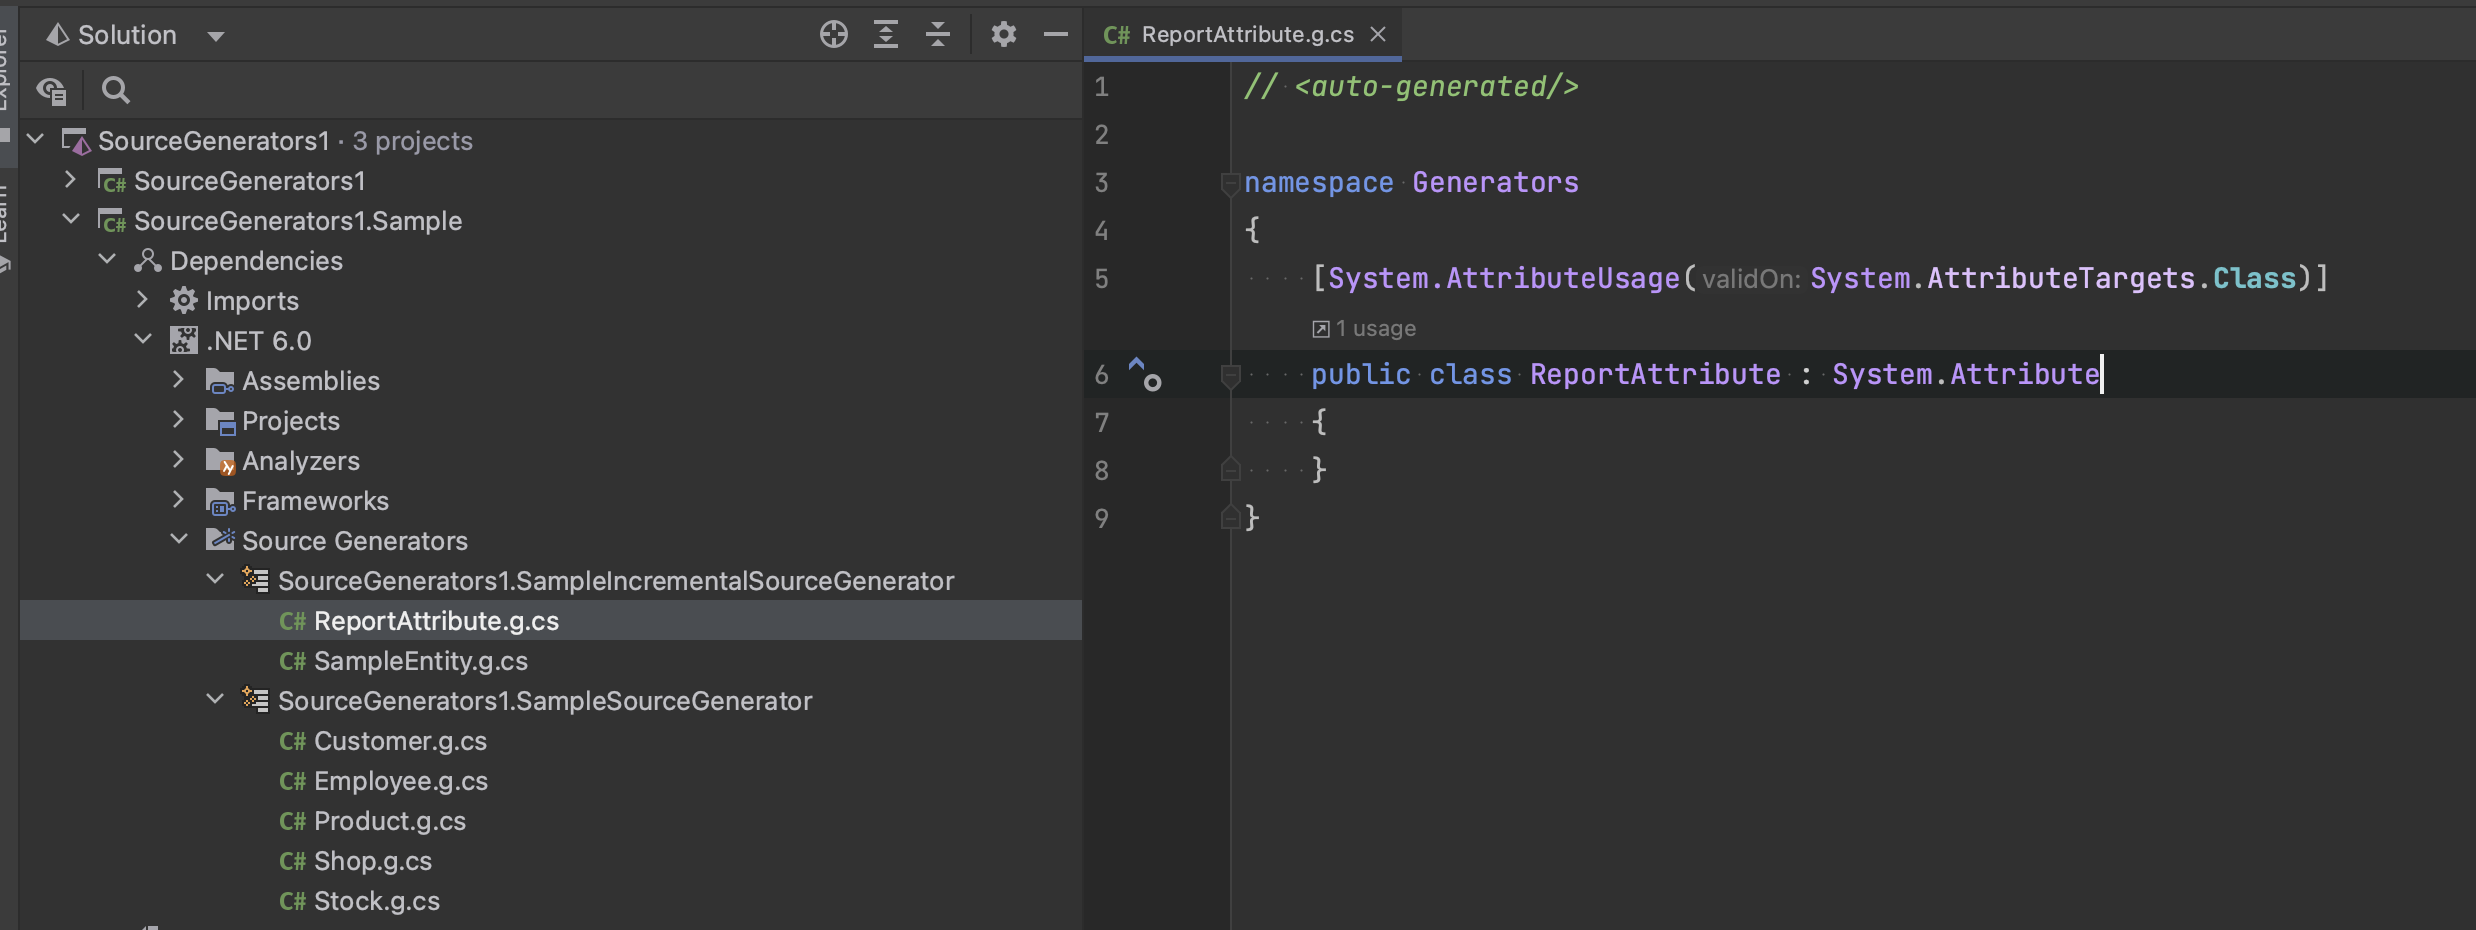
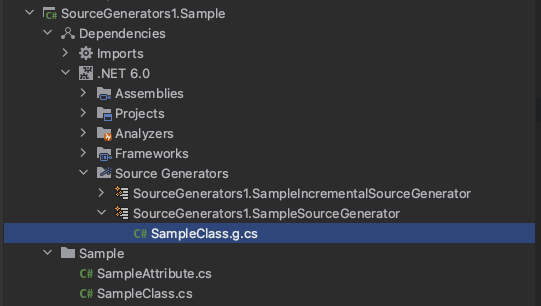
一つ目のプロジェクト(SorceGeneratorツール本体)をSorceGeneratorとして参照しているプロジェクトになります。テンプレートは最初からサンプル用のSorceGeneratorが動作するようになっているため、ソリューションをビルドすると、SorceGeneratorによりソースコードが生成されます。生成されたコードは Dependencies 内へ配置され、内容の確認をする事ができます。このプロジェクトはSorceGeneratorにより生成されるコードが無いとエラーになる状態です。ソリューションビルドを行うとコードが生成され、エラーが解消されます。
SourceGenerators.Tests
一つ目のプロジェクト(SorceGeneratorツール本体)を参照しているプロジェクトになります。このプロジェクトではSourceGeneratorの単体テストを行なっています。SourceGeneratorツールを開発中は基本的にこのプロジェクトで動作チェックをして行くのが良いと思います。
SourceGeneratorツールを作成する
テンプレートを元に、SorceGeneratorツールの機能を実装します。今回は例として、メンバ変数へ特定のアトリビュートを追加すると、そのメンバのGetメソッドが生成される機能を作ります。
SourceGeneratorツール本体の作成
SourceGenerators1/SampleSourceGenerator.cs を書き換えて、機能を実装して行きます。
まず、特定のアトリビュートが付与されたメンバ変数の情報を集める処理を書きます。この処理はISyntaxContextReceiverを継承したクラスを作成する事で実現できます。
    private class SyntaxContextReceiver : ISyntaxContextReceiver
    {
        // ここで指定したアトリビュートが付与されたメンバ変数の情報を集めます
        private const string attributeName = "Sample.SampleAttribute";

        public List<(INamedTypeSymbol classSymbol, List<IFieldSymbol> fieldSymbols)> Targets { get; } = new();

        public void OnVisitSyntaxNode(GeneratorSyntaxContext context)
        {
            // クラス毎に検索したいので、クラスの構文ノードのみ処理を行う
            if (context.Node is not ClassDeclarationSyntax classDeclarationSyntax) return;

            // クラスのシンボルを取得する
            if (context.SemanticModel.GetDeclaredSymbol(classDeclarationSyntax) is not INamedTypeSymbol classSymbol) return;

            var fieldList = new List<IFieldSymbol>();

            // クラスのメンバーを取得し、特定の属性を持つフィールドを取得する
            foreach (var fieldSymbol in classSymbol.GetMembers().OfType<IFieldSymbol>())
            {
                // attributeNameの属性を取得する
                var attribute = fieldSymbol.GetAttributes().FirstOrDefault(
                        attr => attr.AttributeClass?.ToDisplayString() == attributeName);

                // 属性が取得できれば、リストへ追加する
                if (attribute != null)
                {
                    fieldList.Add(fieldSymbol);
                }
            }

            if (fieldList.Count == 0) return;

            // 対象が見つかった場合は、クラスのシンボルとフィールドのシンボルをリストへ追加する
            Targets.Add((classSymbol, fieldList));
        }
    }
作成したクラスを SampleSourceGenerator の Initialize で登録を行います。
    public void Initialize(GeneratorInitializationContext context)
    {
        context.RegisterForSyntaxNotifications(() => new SyntaxContextReceiver());
    }
集められた情報を元に、Getメソッドを作成します。この処理は SampleSourceGenerator の Execute で行います。
    public void Execute(GeneratorExecutionContext context)
    {
        // 作成したSyntaxContextReceiverを取得する
        if (context.SyntaxContextReceiver is not SyntaxContextReceiver receiver) return;

        var builder = new StringBuilder();
        foreach (var target in receiver.Targets)
        {
            // クラスシンボルから、ネームスペースとクラス名を取得する。クラスはpartialクラスとして作成する
            builder.AppendLine($$"""
                                 // <auto-generated/>
                                 namespace {{target.classSymbol.ContainingNamespace.ToDisplayString()}}
                                 {
                                     partial class {{target.classSymbol.Name}}
                                     {
                                 """);

            // フィールド毎にGetメソッドを記述する
            foreach (var fieldSymbol in target.fieldSymbols)
            {
                builder.AppendLine($$"""
                                            public {{fieldSymbol.Type.ToDisplayString()}} Get()
                                            {
                                                return {{fieldSymbol.Name}};
                                            }
                                     """);
            }

            // クラスを閉じる
            builder.AppendLine($$"""
                                     }
                                 }
                                 """);


            // 記述したコードを クラス名+.g.cs というファイル名で追加する
            var code = builder.ToString();
            context.AddSource($"{target.classSymbol.Name}.g.cs", SourceText.From(code, Encoding.Unicode));

            builder.Clear();
        }
    }
単体テストの整備
SourceGeneratorツール本体のデバッグを行うため、単体テストの整備を行います。今回は SourceGenerators1.Tests/SampleSourceGeneratorTests を書き換えて、実装を行います。
まずは、付与を行うアトリビュートである SampleAttribute とアトリビュートを付与するクラスである SampleClass を作成します。
using System;

namespace Sample;

public partial class SampleAttribute : Attribute
{
}
namespace Sample;

public class SampleClass
{
    [SampleAttribute]
    private int _intValue;
}
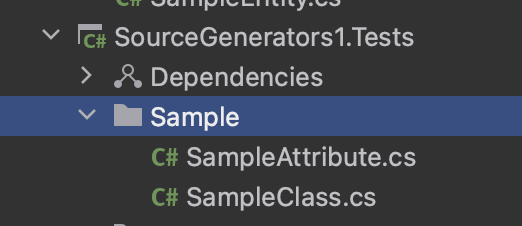
これらのクラスはSampleフォルダへ保存しました。
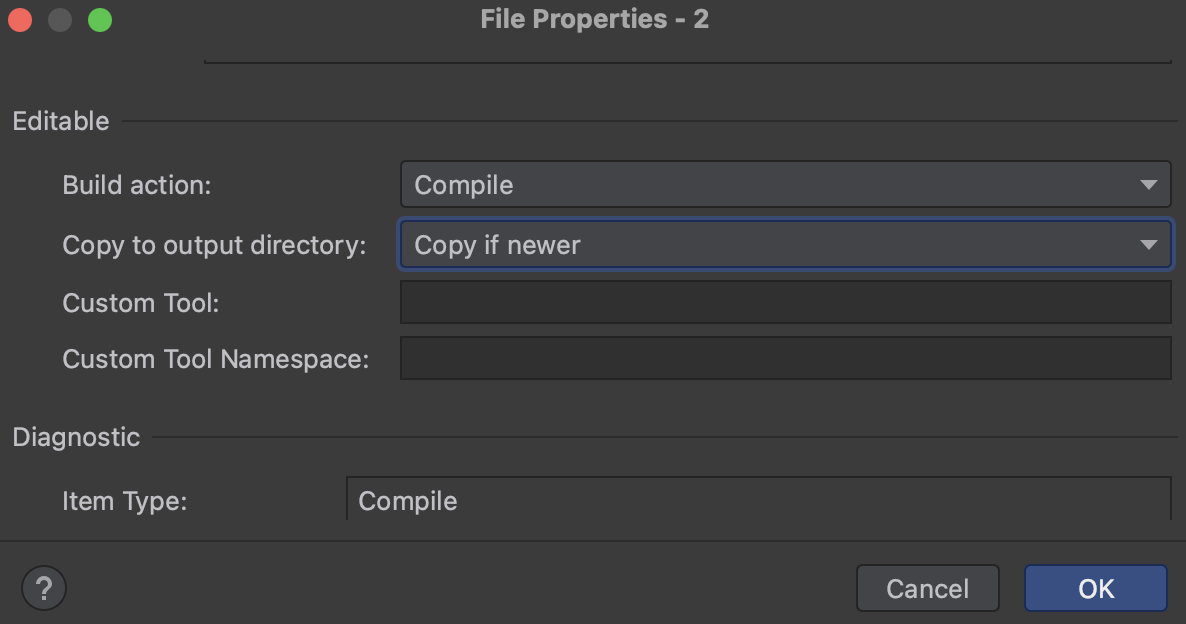
保存後、 Properties から Copy to output directory を Copy if newer に変更しておきます。この設定をしておく事で、ビルドされた際に出力ディレクトリへこのファイルがコピーされます。後の処理でファイル読み込みを行うため、この設定が必要になります。
保存したサンプルファイルを使用し、テストを作成します。今回の場合は次の様なテストを作りました。
public class SampleSourceGeneratorTests
{
    private readonly ITestOutputHelper _testOutputHelper;

    public SampleSourceGeneratorTests(ITestOutputHelper testOutputHelper)
    {
        // コンソールへ出力するため、ITestOutputHelperを受け取る
        _testOutputHelper = testOutputHelper;
    }

    [Fact]
    public void TestSampleSourceGenerator()
    {
        // テストするソースジェネレーターを生成
        var generator = new SampleSourceGenerator();

        var driver = CSharpGeneratorDriver.Create(generator);

        // テストするコードを生成
        var compilation = CSharpCompilation.Create(nameof(SampleSourceGeneratorTests), new[]
        {
            // テスト用のサンプルコードを読み込む
            CSharpSyntaxTree.ParseText(File.ReadAllText("Sample/SampleClass.cs")),
            CSharpSyntaxTree.ParseText(File.ReadAllText("Sample/SampleAttribute.cs"))
        }, new[]
        {
            // To support 'System.Attribute' inheritance, add reference to 'System.Private.CoreLib'.
            MetadataReference.CreateFromFile(typeof(object).Assembly.Location)
        });

        // 実行する
        var result = driver.RunGenerators(compilation).GetRunResult();

        // 生成されたコードを出力
        foreach (var generatedTree in result.GeneratedTrees)
        {
            _testOutputHelper.WriteLine(generatedTree.ToString());
        }
    }
}
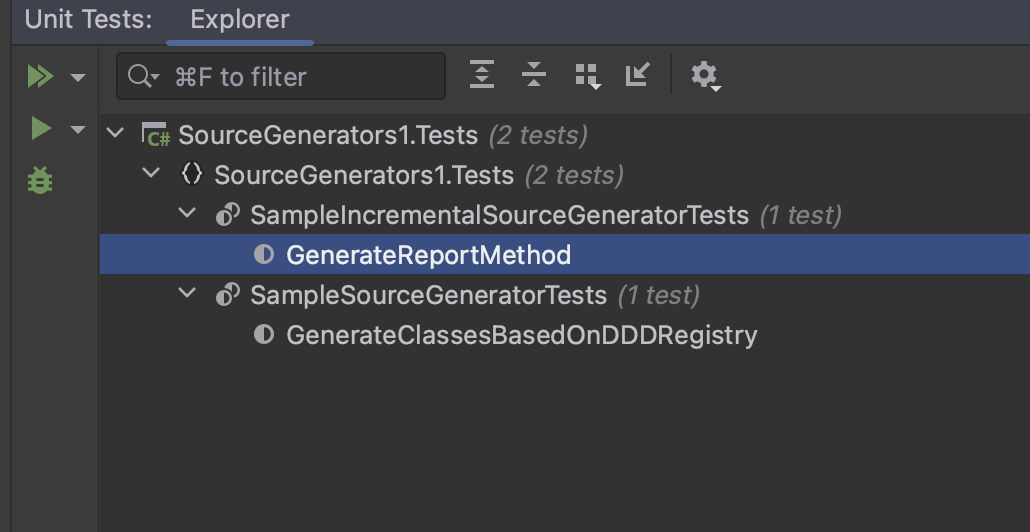
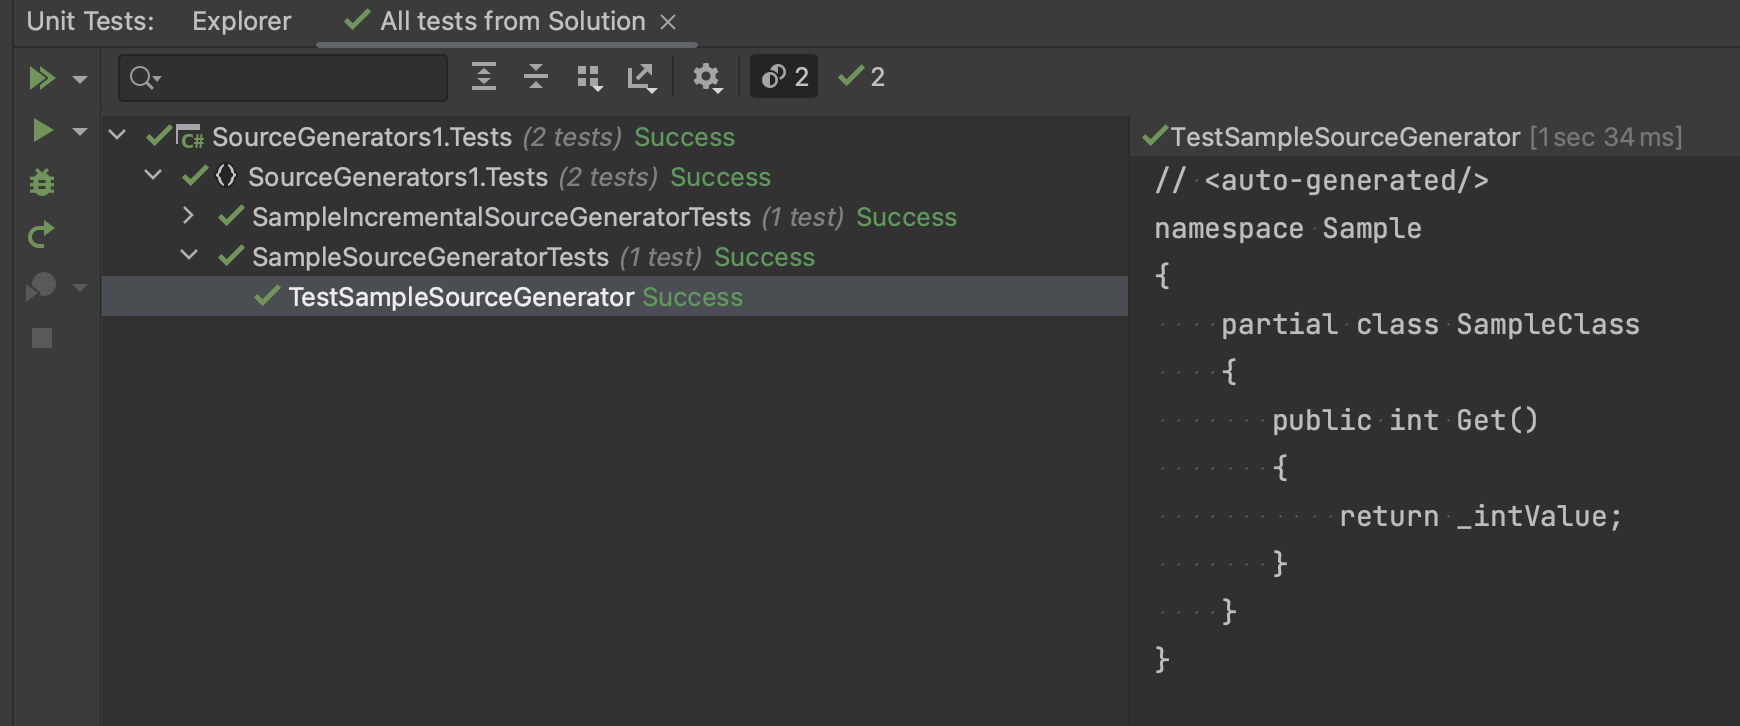
Unit Tests から今回作成した TestSampleSourceGenerator を実行すると、次の画像の様に生成されるコードが出力されます。
Debug Unit Test で実行を行えば、SourceGenerator本体のコードへデバッグポイントを貼ることもでき、次の画像の様に処理の途中状態を確認できます。
単体テストですが、行っていることは生成したコードの出力のみになっています。最初は作成中に仕様を変更する場合も多いので、本格的なテストは書かず、コード出力のみの方が自分には丁度良い感じでした。
SourceGeneratorツールの動作確認
最後にSourceGeneratorツールを実際に動作させ、問題がないか確認を行います。
まず、SourceGenerators1.Tests に作成した Sample フォルダを SourceGenerators1.Sample プロジェクト内へコピーし、SourceGenerators1.Tests 内の不要なファイルを削除します。
以上で動作確認の準備は終わりです。Build Solution を実行すると、次の画像の場所へSourceGenratorが作成したファイルが配置されます。コンパイルエラーが起きなければ、動作確認完了になります。
最終的なソリューション
今回使用しなかったファイルを削除し、SourceGeneratorツール開発用のソリューションは完成です。
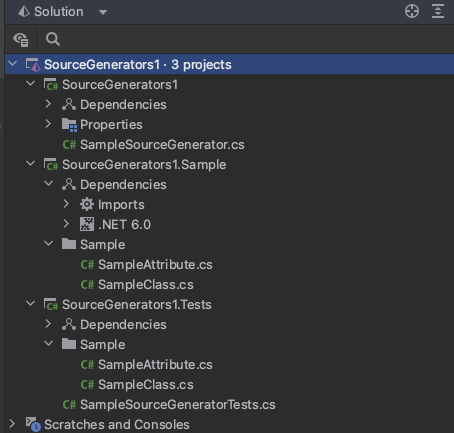
最終的なソリューションの全体像は次の画像の状態になります。
Unityへ導入
最後に、作成したSourceGeneratorツールをUnityへ導入します。
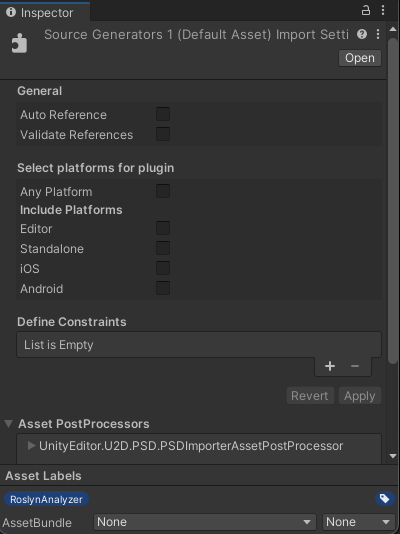
Build Solution を行うと、SourceGenerators1/bin/Release/netstandard2.0/SourceGenerators1.dll へDLLが作成されるので、このDLLをUnityプロジェクトのAssetsフォルダ内へ配置します。
配置後、インスペクターウィンドウから RoslynAnalyzer ラベルを付与し、 Select platforms for plugin の項目のチェックを全て外します。
以上で導入完了となります。クラスのメンバ変数に Sample.SampleAttribute を付与すると、付与したメンバ変数のGetメソッドが生成されます。
さいごに
以上が自分がSourceGeneratorを使用したツールを作成する際のフローになります。本記事がSourceGeneratorを使用する際の手助けになれば嬉しいです。
