はじめに
今回はレーザーの挙動を変える壁の第一弾。
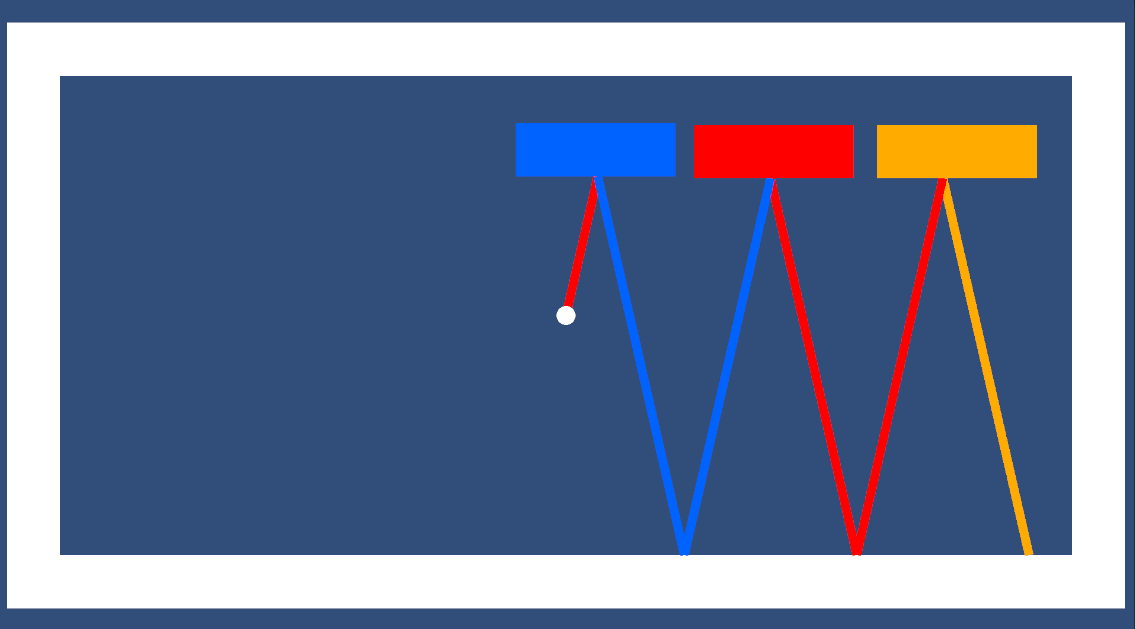
下の画像のように、当たるとレーザーの色を変える壁を作っていく。
前回の記事はこちら
概要
レーザーが特定の壁に衝突すると、その壁と同じ色にレーザーの色が変わる。
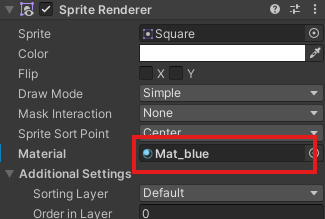
色の変更はレーザーのLineRendererに壁と同じマテリアルを設定することで実装する。
また、今後の機能拡張を視野に入れて、壁の種類をenumで管理するスクリプトを追加している。
作り方
1.壁にタグを付ける
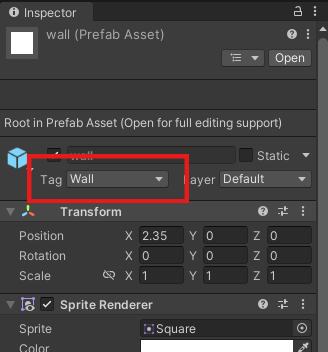
今後、様々なオブジェクトを作成することを想定して、レーザーが衝突したオブジェクトが壁であることを識別するためのタグを壁のオブジェクトに設定する。あとで、すべての壁にスクリプトをアタッチする必要があるのでプレハブとして用意しとくと楽。
タグの使い方は以下のサイトを参考にした。
今回はタグとして"Wall"を設定。
2.マテリアルの用意
今回は衝突した壁のマテリアルと同じマテリアルをレーザーに適応することで、レーザーの色が変わる機能を実装する。そのためLineRendererに設定しても適切に表示されるマテリアルを作成する。
新規マテリアルを作成
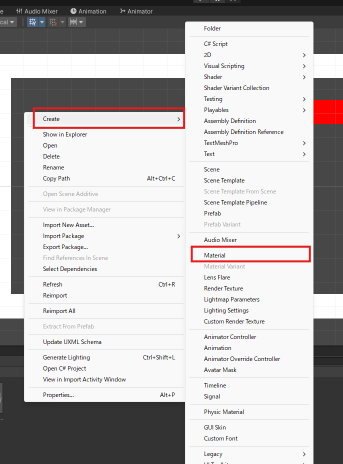
projectウィンドウ上で右クリックし「Create」→「Material」で新規マテリアルを作成。
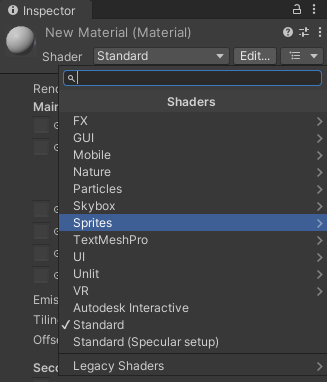
作成したら、NewMaterialのインスペクターのShaderを「Standard」から「Sprites」に変更。
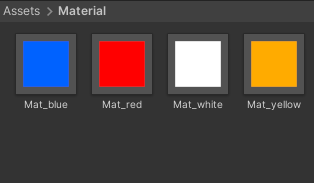
あとは、Colorと名前を任意のものに設定してマテリアルの準備は完了。
今回の例ではレーザー用3色とデフォルトの壁用の白のマテリアルを用意した。
3.スクリプトの変更、作成
「Lazer.cs」を以下のものに置き換える。
using System.Collections;
using System.Collections.Generic;
using UnityEngine;
using UnityEngine.UI;

public class Lazer : MonoBehaviour
{
  [SerializeField] private GameObject lazerPrefab;
  const float MAX_DISTANCE = 23.0f;  //箱の対角線の長さ
  const int REFLECT_NUM = 5;  //反射回数

  private bool isColorChange = false;
  List<Material> materials = new List<Material>(){};

  private GameObject preWall;
  public LineRenderer[] lazers;
  public Vector3 nowOrigin;
  public Vector2 nowDirection;

  /**
   * レーザー生成関数
   * @param {Vector3} origin - レーザーの原点
   * @param {Vector3} direction - レーザーの方向
   * @param {int} n - 何本目か(0はじまり)
  **/
  public void creat(Vector3 origin, Vector2 direction, int n){
    if(n == 0){
      nowOrigin = origin;
      nowDirection = direction;
      lazers = new LineRenderer[REFLECT_NUM + 1];
      preWall = null;
      isColorChange = false;
    };
    if(n < REFLECT_NUM + 1){
      GameObject lazerChild = Instantiate(lazerPrefab, this.transform);
      lazerChild.name = "lazer_" + n;
      LineRenderer line = lazerChild.GetComponent<LineRenderer>();
      lazers[n] = line;
      RaycastHit2D[] hits = Physics2D.RaycastAll(origin, direction, MAX_DISTANCE);
      var reflect = culcReflect(origin, direction, line);
      creat(reflect.origin, reflect.direction, ++n);
    }
  }

  /**
   * レーザー移動時に実行する関数
   * @param {Vector3} origin - レーザーの原点
   * @param {Vector3} direction - レーザーの方向
  **/
  public void move(Vector3 origin, Vector2 direction){
    preWall = null;
    nowOrigin = origin;
    nowDirection = direction;
    Vector3 startPos = origin;
    Vector2 nextDirection = direction;
    isColorChange = false;
    foreach(LineRenderer line in lazers){
      var reflect = culcReflect(startPos, nextDirection, line);
      startPos = reflect.origin;
      nextDirection = reflect.direction;
    }
  }

  /**
   * レーザーを描画し、反射角を計算し、原点と反射方向を返す
   * @return {Vector3} origin - 反射後のレーザーの原点
   * @return {Vector3} direction - 反射後のレーザーの方向
   * @param startPos {Vector3} - 反射前のレーザーの原点
   * @param nextDirection {Vector2} - 反射前のレーザーの方向
   * @param line {LineRenderer} - 描画するレーザーのLineRenderer
  **/
  private (Vector3 origin, Vector2 direction) culcReflect(Vector3 startPos, Vector2 nextDirection ,LineRenderer line){
    RaycastHit2D[] hits = Physics2D.RaycastAll(startPos, nextDirection, MAX_DISTANCE);
    Vector3 endPos = new Vector3(0,0,0);
    Vector2 reflectDirection = new Vector2(0,0);
    if(isColorChange)line.SetMaterials(materials);
    foreach(RaycastHit2D hit in hits){
      GameObject hitObj = hit.collider.gameObject;
      if (hitObj != preWall){
        if(hitObj.tag == "Wall"){
          switch(hitObj.GetComponent<Wall>().type){
            case Wall.WallType.Default:
            materials = new List<Material>(){line.material};
            isColorChange = true;
            break;
            case Wall.WallType.ColorChange:
            materials = new List<Material>(){hitObj.GetComponent<Renderer>().material};
            isColorChange = true;
            break;
          }
          endPos = hit.point;
          reflectDirection = Vector2.Reflect(nextDirection, hit.normal);

          line.SetPosition(0, startPos);
          line.SetPosition(1, endPos);
          preWall = hitObj;

          break;
        }
      }
    }
    return (endPos, reflectDirection);
  }

  //getter
  public Vector3 getOrigin(){
    return nowOrigin;
  }
  public Vector2 getDirection(){
    return nowDirection;
  }
}
新たに「Wall.cs」を作成。
using System.Collections;
using System.Collections.Generic;
using UnityEngine;

public class Wall : MonoBehaviour
{
  public enum WallType{  //壁の種類
    Default,
    ColorChange
  }

  public WallType type;
}
4.壁の設定
「Wall.cs」をすべての壁にアタッチする。例ではスクリプトをアタッチし、タグを設定した壁のプレハブを作成し、そのコピーをシーンに配置した。
色を変化させる壁は、インスペクターからTypeをColorChangeに設定する。
マテリアルを作成した任意のマテリアルに変更して完成。
色を変化させる壁の設定はプレハブではなく任意の各壁に設定するので注意
適切に設定できていればこれで動くはず。
解説
今回追加したコードの解説。
変数
今回追加したグローバル変数は以下の二つ。
| 変数名 | 型 | 役割 |
|---|---|---|
| isColorChange | bool | 色変更が実行されるかどうか |
| materials | List | LineRendererに設定する用のマテリアルのList |
private bool isColorChange = false;
List<Material> materials = new List<Material>(){};
衝突したオブジェクトが壁かどうかの判定
衝突したオブジェクトは前述した通り、タグで判別している。
以下のプログラムで衝突したゲームオブジェクトからタグを取得し、"Wall"と一致するか調べている。(hitObjには衝突したゲームオブジェクトが入っている)
if(hitObj.tag == "Wall")
衝突した壁の種類の判別
衝突した壁の種類は列挙型(enum)を使用して判別している。
壁のオブジェクトにアタッチした「Wall.cs」内で列挙型のWallTypeが定義されている。
列挙型の公式のドキュメントはこちら
今回は壁の種類として「Default」と「ColorChange」を用意している。以下がWallTypeの定義部分。
public enum WallType{  //壁の種類
  Default,
  ColorChange
}
Wall.csはpublicのグローバル変数としてWallType型の「type」を持つ。
publicな変数なのでUnityのエディタのインスペクターから列挙型の好きな要素を選択できる。
WallTypeを増やすことで壁の種類をどんどん増やしていける。
衝突した壁の「type」の取得は以下のコードで行っている。
hitObj.GetComponent<Wall>().type
衝突したゲームオブジェクトからアタッチされているWall.csを取得し、そこから変数「type」を取得している。
今回のプログラムでは、これをSwich文に入れ、壁の種類で条件分岐させている。
switch(hitObj.GetComponent<Wall>().type){
  case Wall.WallType.Default:
  materials = new List<Material>(){line.material};
  isColorChange = true;
  break;
  case Wall.WallType.ColorChange:
  materials = new List<Material>(){hitObj.GetComponent<Renderer>().material};
  isColorChange = true;
  break;
}
LineRendererのマテリアルを更新
レーザーの色の変更はLineRendererに設定されているマテリアルを更新することで実現している。
LineRendererの公式ドキュメントはこちら
ドキュメントを読むとLineRendererはマテリアルをListで保持していることがわかる。
Materials セクションには、このコンポーネントが使用するすべての マテリアル が列挙されています。
The materials in the list. You can assign a material asset to each element.
そのため、適用したいマテリアルを入れたListを定義し、LineRendererにセットしている。
materials = new List<Material>(){hitObj.GetComponent<Renderer>().material};
LineRendererの「Materials」を新たに割り当てる関数が用意されているのでそれを利用して用意したmaterialのListを割り当てる。
関数 説明 SetMaterials Assigns the shared materials of this object using the list of materials provided.
if(isColorChange)line.SetMaterials(materials);
補足
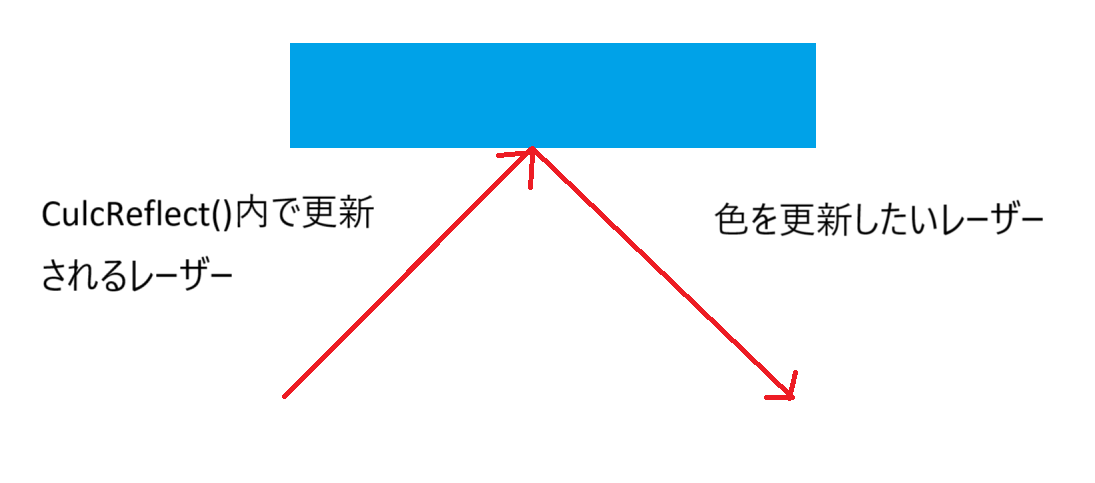
関数「culcReflect()」内で内容が更新されるLineRendereは図の左側の壁に向かうレーザーである。今回、色を変えたいLineRendererは反射後のレーザーのもの。
よって、次の繰り返しの「culcReflect()」内でLineRendererのMaterialsをセットする必要がある。
そのため、bool型のグローバル変数「isColorChange」で現在の繰り返しが色を変えるべき繰り返しかどうかを管理している。
終わりに
期待していた挙動は実装できた。
しかし、少し重くなってしまったように感じるので、もう少し軽い方法で色の変更を実装できないか考えてもよいかも。
次回、次々回は壁の種類を増やす予定。
コードの改良と新たな壁を加えて、完成版として記事にしました。
続き
参考
