Auth0 には「Actions」という機能があります。
Actions を利用すると
- ユーザーがログインした直後に「**」する
- ユーザー登録を行う直前に「**」する
- ユーザーがパスワードを変更した後に「**」する
など、ユーザーのアクションに合わせて、決まった処理を行うことができます。
今回は、Auth0の「Actions」について調べてみました。
ユーザーがログインした後に、新しいプロパティを設定する
最初はシンプルなユースケースにします。
ユーザーがログインした後、ユーザー名やEmailアドレスなどのユーザー情報に加えて「Hello」というプロパティに「World」という値を設定してみます。
Auth0の管理画面から [Actions] → [Flows] → [Login] を選択する
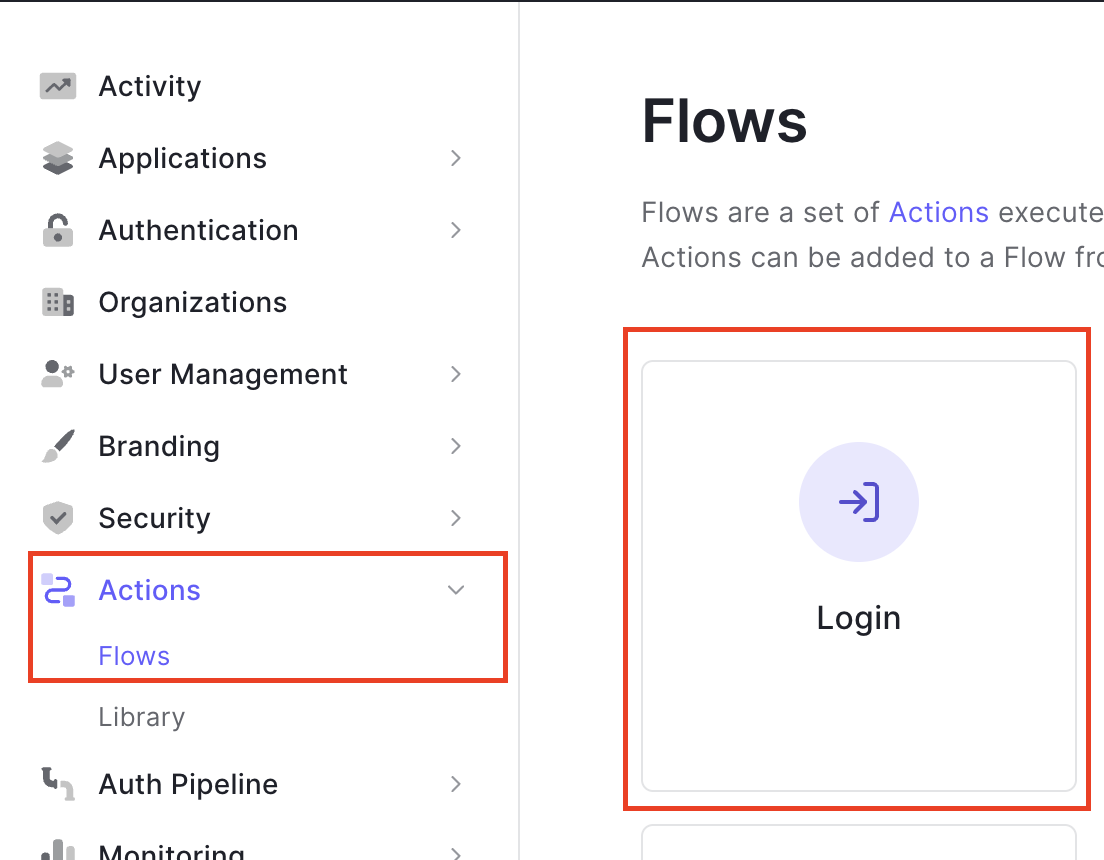
[Add Actions] → [Custom]を選択 → [+] をクリックして [Build Custom]を選択 → [Creat Action]から、作成したいカスタムアクションを設定する。
Name、Trigger, Runtimeを設定。
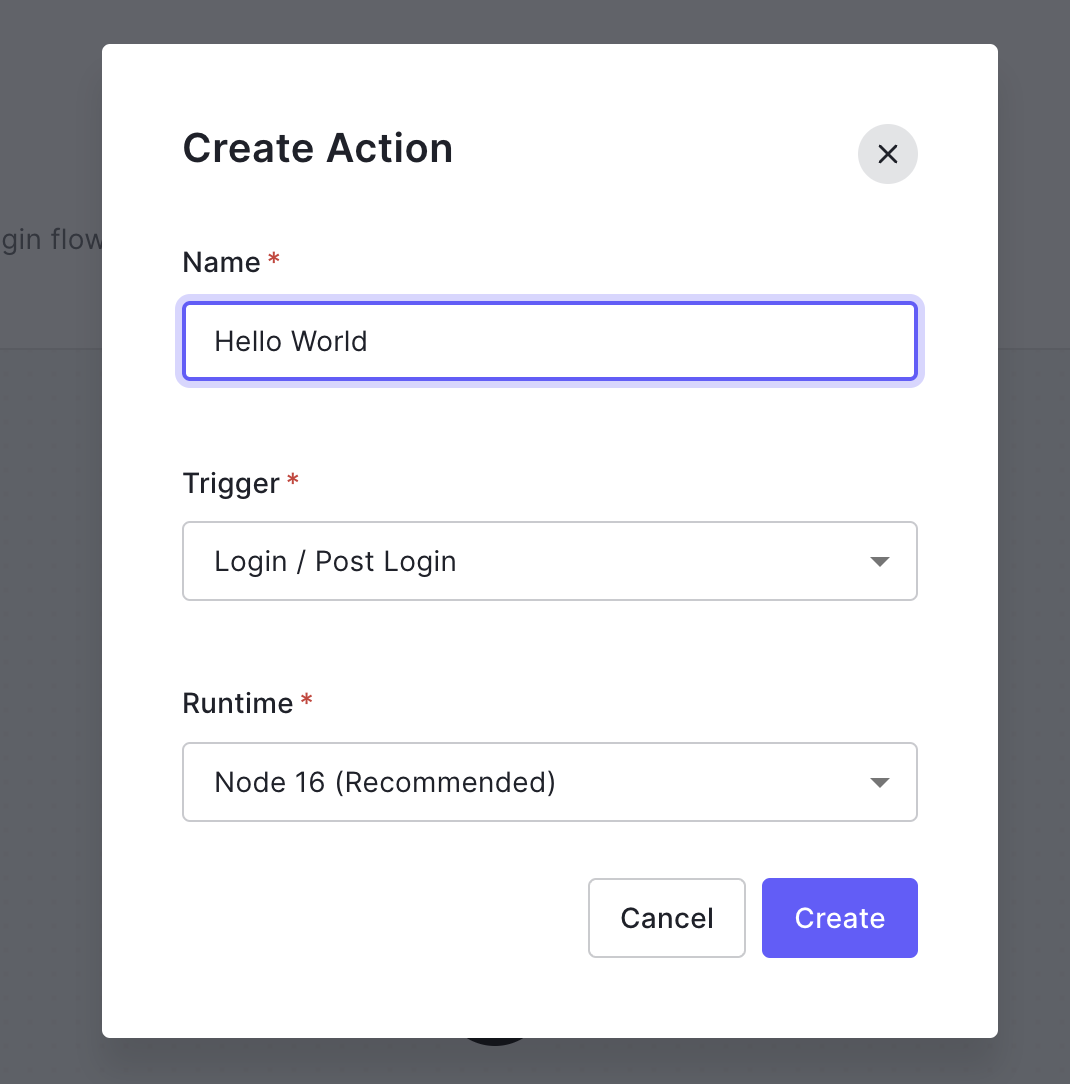
処理を Node.js で記述。
下記のように書いてみました。
exports.onExecutePostLogin = async (event, api) => {
  api.idToken.setCustomClaim("Hello", "World");
};

コードを記述したら「Draft」で保存。左のメニューから「Test」を選んで、挙動を確認します。

挙動に問題がなければ [Deploy] を行います。
Flowの設定画面に戻り、今作成したActionをログイン後に実行するよう、設定を保存します。

これで設定は完了。ログイン後に、IDTokenの値として自動的に追加されます。
Auth0が配布している サンプルアプリ で、実行結果を確認してみましょう。
こちらは、Actionを設定していない、デフォルトの状態の結果
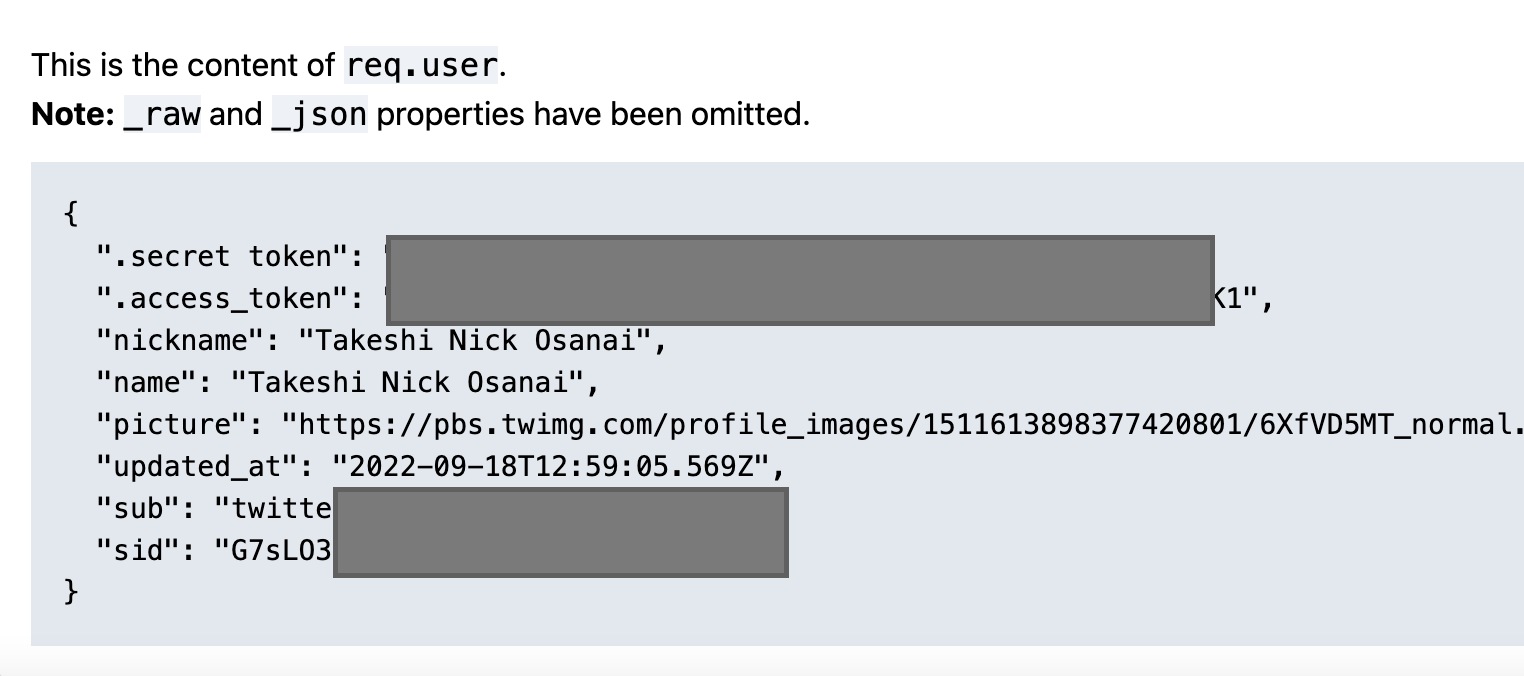
Actionを設定した後に、ログインを試行した結果。Actionで設定した値が、ユーザーデータに追加されているのが分かります。

ユーザーデータに追加された値は、アプリのバックエンドで取得・操作ができます。
Management API Tokenを設定する
Hello World のサンプルを修正して、もう少し実用的なコードに変更してみます。
Auth0では、IDプロバイダーの Credential 情報を取得するためには「Management API」と呼ばれるAPIをコールする必要があります。
例として
* Twitterを利用したソーシャルログインを設定する
* ログイン時に、Twitterから渡された access_token, secret_token を利用して、Twitter の API をコールしたい
という場合、手順としては以下のようになります。
- Auth0 の IDP として Twitter を設定
- ログイン後、Management API用のトークンを取得
- トークンを利用して、Management APIを叩き、Twitter の Credentical 情報を取得
- 取得した Credential の access_token, secret_token を利用して Twitter の API をコール
(詳細な手順は https://auth0.com/docs/authenticate/identity-providers/calling-an-external-idp-api を参照ください。)
設定
それでは設定をしていきます。
Auth0 の Actions では、Runtime に利用する Node のライブラリを管理画面から設定できます。
[npm install **] のような感覚で、あらかじめパッケージを追加します。
今回は [axios] を追加しました。
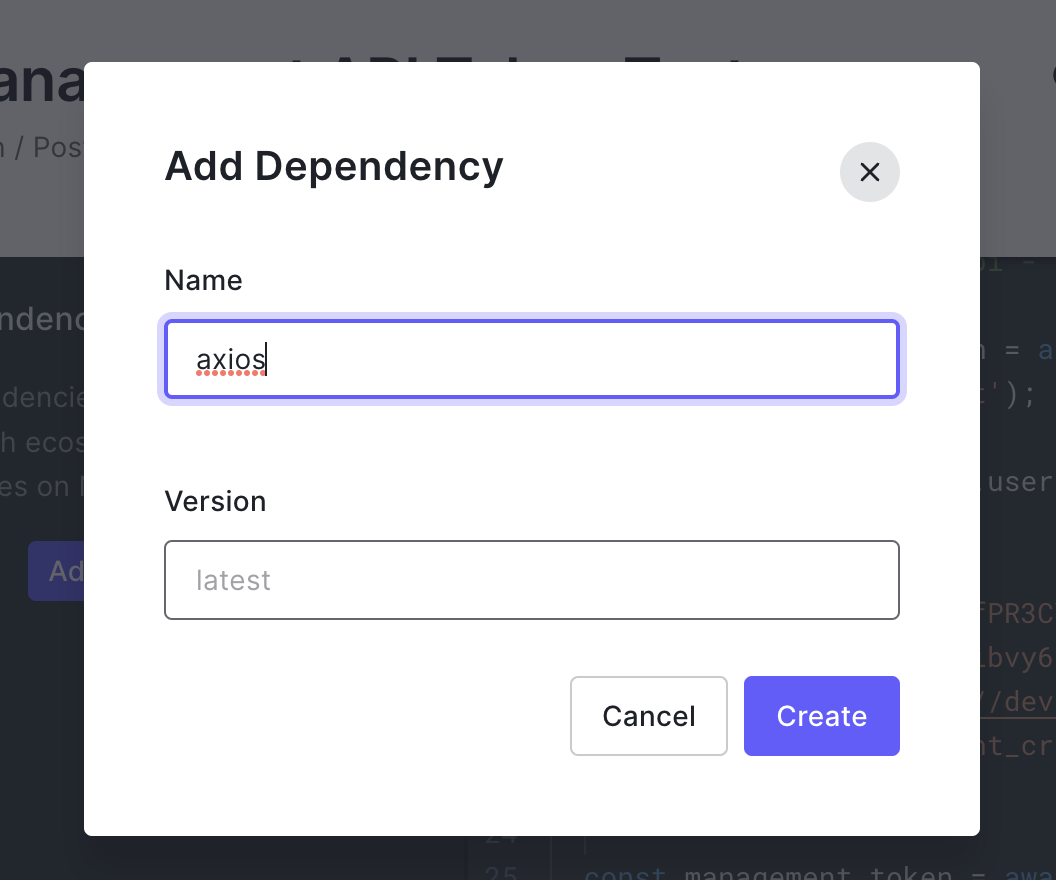
パッケージの追加が終わったら、コードを書きます。以下はサンプルです。
exports.onExecutePostLogin = async (event, api) => {
  const axios = require("axios");
  const client = {
    "client_id": "Auth0 の client id を記述",
    "client_secret": "Auth0 の client secret を記述",
    "audience": "https://your-tenant-domain/api/v2/",
    "grant_type": "client_credential"
  };
  const headers = {
    "Content-Type": "application/json",
  };
  const response =
    await axios.post("https://dev-4xsefms4.jp.auth0.com/oauth/token",client, {
      headers: headers
    });

  const management_token = response.data.access_token;

  api.idToken.setCustomClaim("management_token", management_token);
};
実行すると、ログイン後に Management API をコールするためのトークンが「management_token」のプロパティに設定されるので、アプリから利用してIDプロバイダーの Credential を操作します。
サンプルコードでは、コード内に client_id や secret を直書きしましたが、「Secrets」という機能を使うと、環境変数のような感覚で隠した値を利用できます。
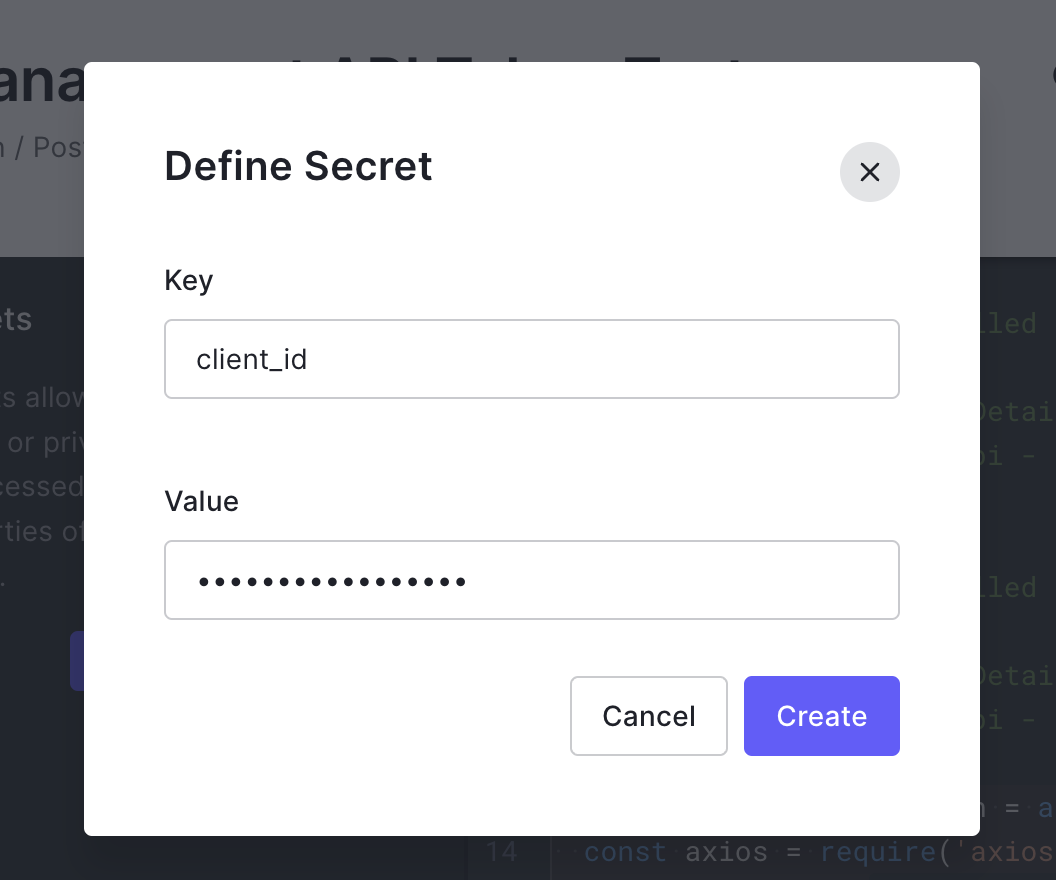
設定した Secrets の値は
event.secrets.client_id
のような記述を行うことで取得できます。
詳細はこちらをご覧ください。
https://auth0.com/docs/customize/actions/write-your-first-action#add-a-secret