はじめに
最近、Amazon Location Serviceを勉強し始めたので、Reactの地図ライブラリであるreact-map-glを使いつつ、手始めに地図を表示してみました。
概要
Amazon Location Serviceとは
Amazon Location Serviceは、Esri、HEREといったプロバイダーが提供する地図をアプリから利用できるサービスです。またGIS(地理情報システム)に必要な機能(ルート検索、ジオコーディング、ジオフェンス等)をAPI経由で利用することができます。
主な機能
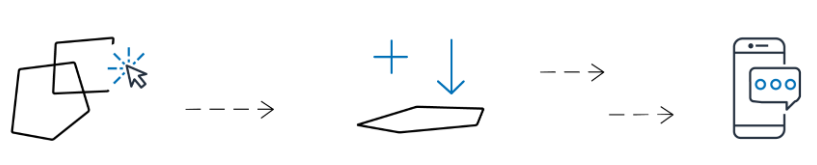
① Maps
Mapsは、地図データを提供し、アプリに地図を表示できる機能です。

画像の引用元:https://docs.aws.amazon.com/location/latest/developerguide/maps.html
② Places
Placesは、座標情報を提供することで、その地点の情報(住所、建物、道路など)をAPI経由で取得できる機能(ジオコーディング)です。また地点の情報から座標情報の逆引き(逆ジオコーディング)もすることができます。

画像の引用元:https://docs.aws.amazon.com/location/latest/developerguide/places.html
例えば、Googleマップを使っていて、これから行く居酒屋などの位置を検索することは、ないでしょうか?そういった機能を実現できます。
③ Routes
Routesは、座標情報を提供することで、移動経路の算出や分析をAPI経由で行うことができる機能です。

画像の引用元:https://docs.aws.amazon.com/location/latest/developerguide/routes.html
例えば、旅行の際にGoogleマップを使っていて、空港からホテルまでの経路を調べたりしたことはないでしょうか?そういった機能を実現できます。
④ Geofences
Geofencesは、地図上のジオフェンス(境界を表す多角形や円の形状)を管理できます。管理しているジオフェンスを活用して、例えばジオフェンス内に出入りを検知して、イベントを発火して通知することなどができます。
画像の引用元:https://docs.aws.amazon.com/location/latest/developerguide/geofences.html
⑤ Trackers
Trackersは、地図上のデバイスを管理できます。管理しているデバイスの位置を活用して、地図へのデバイスの現在位置の表示や、速度や方位といったメタデータを管理できます。

Geofences と Trackersを組み合わせることも可能で、Trackersで管理しているデバイスが特定のジオフェンスに出入りしたかをイベント化することができます。
2024年11月頃にAmazon Location Serviceがバージョンアップ
以前はMaps、Places、Routesを利用するためにAWS上にリソースを作成する必要がありましたが、バージョンアップ後はリソースを作成せずともAPIキーを発行すれば機能を利用できるようになりました。また、いくつかのAPIが追加され、機能も増えています。
react-map-glとは
react-map-glは、元々Mapbox GL JSやMapLibre GL JSというJavaScript向けの地図表示ライブラリがあり、それをReact向けにラップしたライブラリです。Amazon Location Serviceで作成したAPIキーを設定することで、地図表示が可能です。
実際に地図を表示してみる
1. 準備
1.1. フロントエンド環境の準備
1. フロントエンド開発用にViteというツールを使用し、 React と TypeScript のプロジェクトを作成します。
npm create vite@latest
2. プロジェクトディレクトリに移動し、必要な依存パッケージをインストールします。
cd <プロジェクト名>
npm install
3. 地図表示に必要なreact-map-glとmaplibre-glをインストールします。
npm add react-map-gl maplibre-gl
1.2. Amplify環境の準備
1. Amplifyの初期設定を行います。
npm create amplify@latest
2. サンドボックス環境の立ち上げます。
npx ampx sandbox
AWS Amplifyのサンドボックス環境とは
実際のAWSアカウント上に開発用リソースを作成しますが、本番環境とは分離された開発・テスト環境を構築できる機能です。Amplifyのコードを書き替えて保存すると、随時、AWS環境に反映されます。
1.3. Amazon Location ServiceのAPIキーを作成
1. APIキーを作成するため、backend.tsが作成されているので、下記に変更します。
import { defineBackend } from '@aws-amplify/backend';
import { auth } from './auth/resource';
import { data } from './data/resource';
import { CfnAPIKey } from "aws-cdk-lib/aws-location";


const backend = defineBackend({
  auth,
  data,
});

const locationStack = backend.createStack("location-stack");

new CfnAPIKey(locationStack, "LocationApiKey", {
  keyName: "api-key",
  noExpiry: true,
  restrictions: {
    allowActions: [
      "geo-maps:*"
    ],
    allowResources: [
      `arn:aws:geo-maps:${locationStack.region}::provider/default`
    ]
  }
});
CfnAPIKeyのパラメータは下記を参照
https://docs.aws.amazon.com/cdk/api/v2/python/aws_cdk.aws_location/CfnAPIKey.html
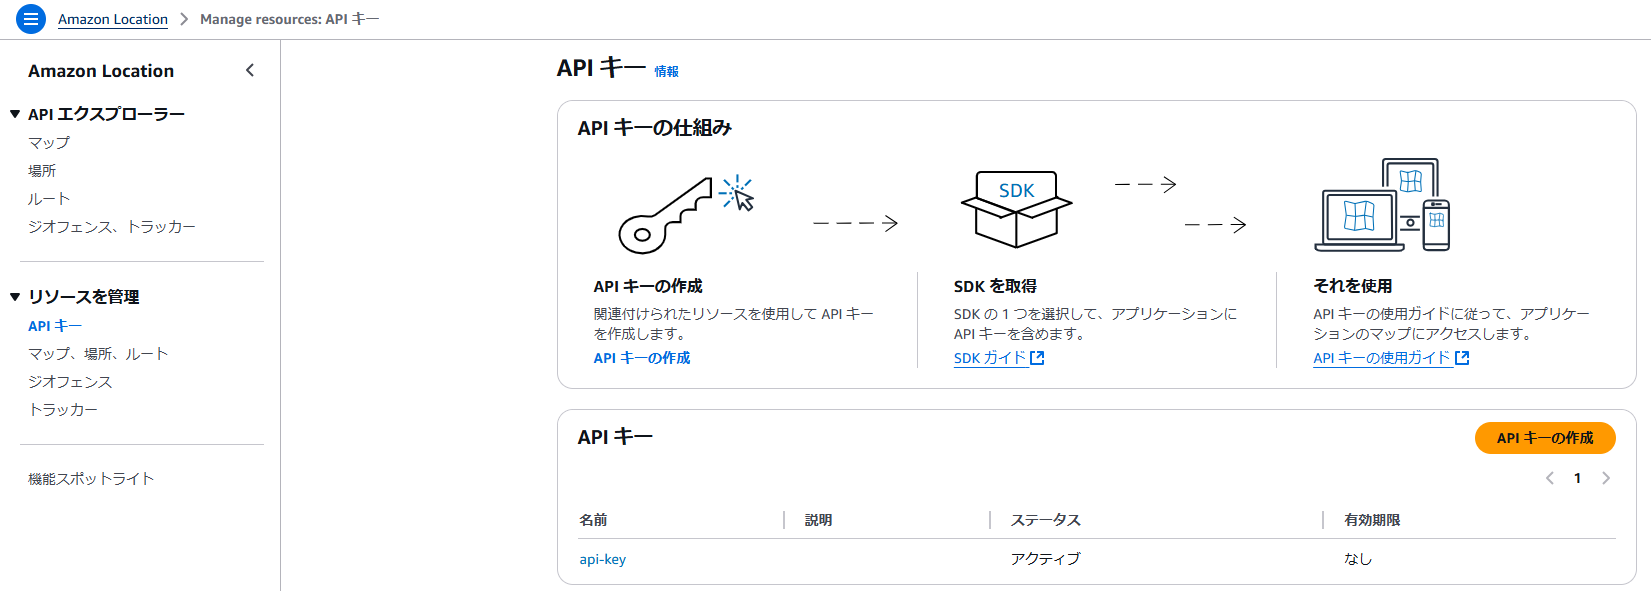
2. AWSマネジメントコンソールを確認すると、下記のようにAPIキーが作成されているのが分かります。
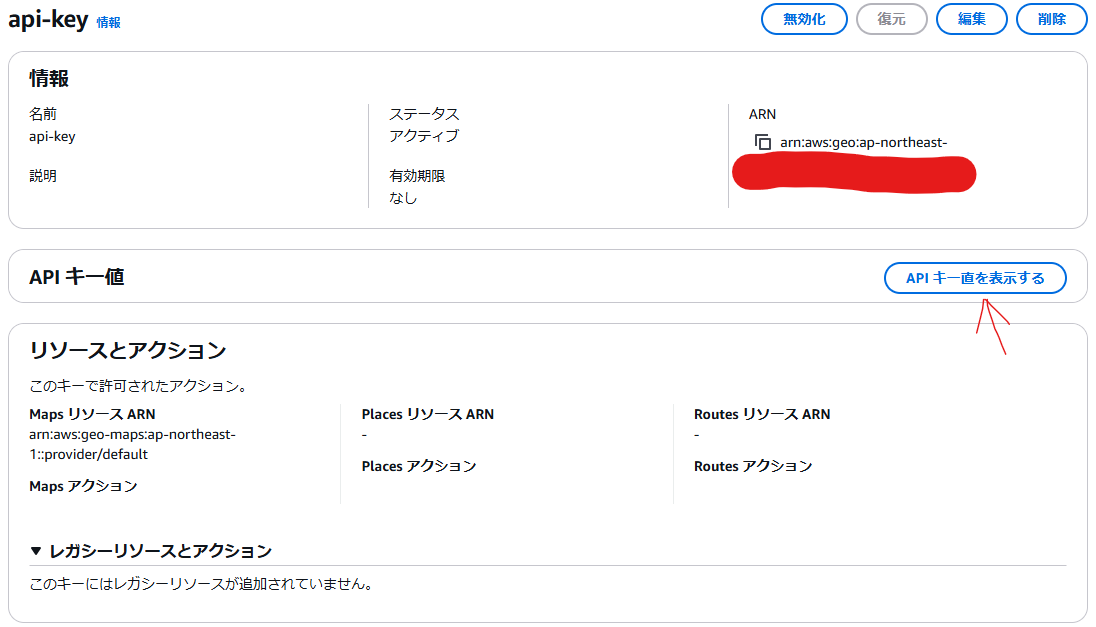
3. APIキーを選択し、「APIキー値を表示する」ボタンを押します。表示されたAPIキーをメモします。
2. 地図を表示してみる
2.1. 地図を画面に表示
1. App.tsxを以下のように修正します。
※今回はローカルでお試しなので、先ほどメモしたAPIキーを下記API_KEYにべた書きしました。実際にコードを外部へ公開する場合は、セキュリティにご留意ください。
import Map from 'react-map-gl/maplibre';
import 'maplibre-gl/dist/maplibre-gl.css';

function App() {

  const API_KEY = "省略"

    // 地図の中心(札幌駅)
  const initialLat: number = 43.06882911246343;
  const initialLon: number = 141.35077817693812;
  const initialZoom: number = 13;

  return (
    <Map
      initialViewState={{
        longitude: initialLat,
        latitude: initialLon,
        zoom: initialZoom
      }}
      style={{width: "100vw", height: "100vh"}}
      mapStyle={`https://maps.geo.ap-northeast-1.amazonaws.com/v2/styles/Standard/descriptor?key=${API_KEY}`}
    />
  )
}

export default App;
2. ローカル環境を立ち上げてみます。
npm run dev
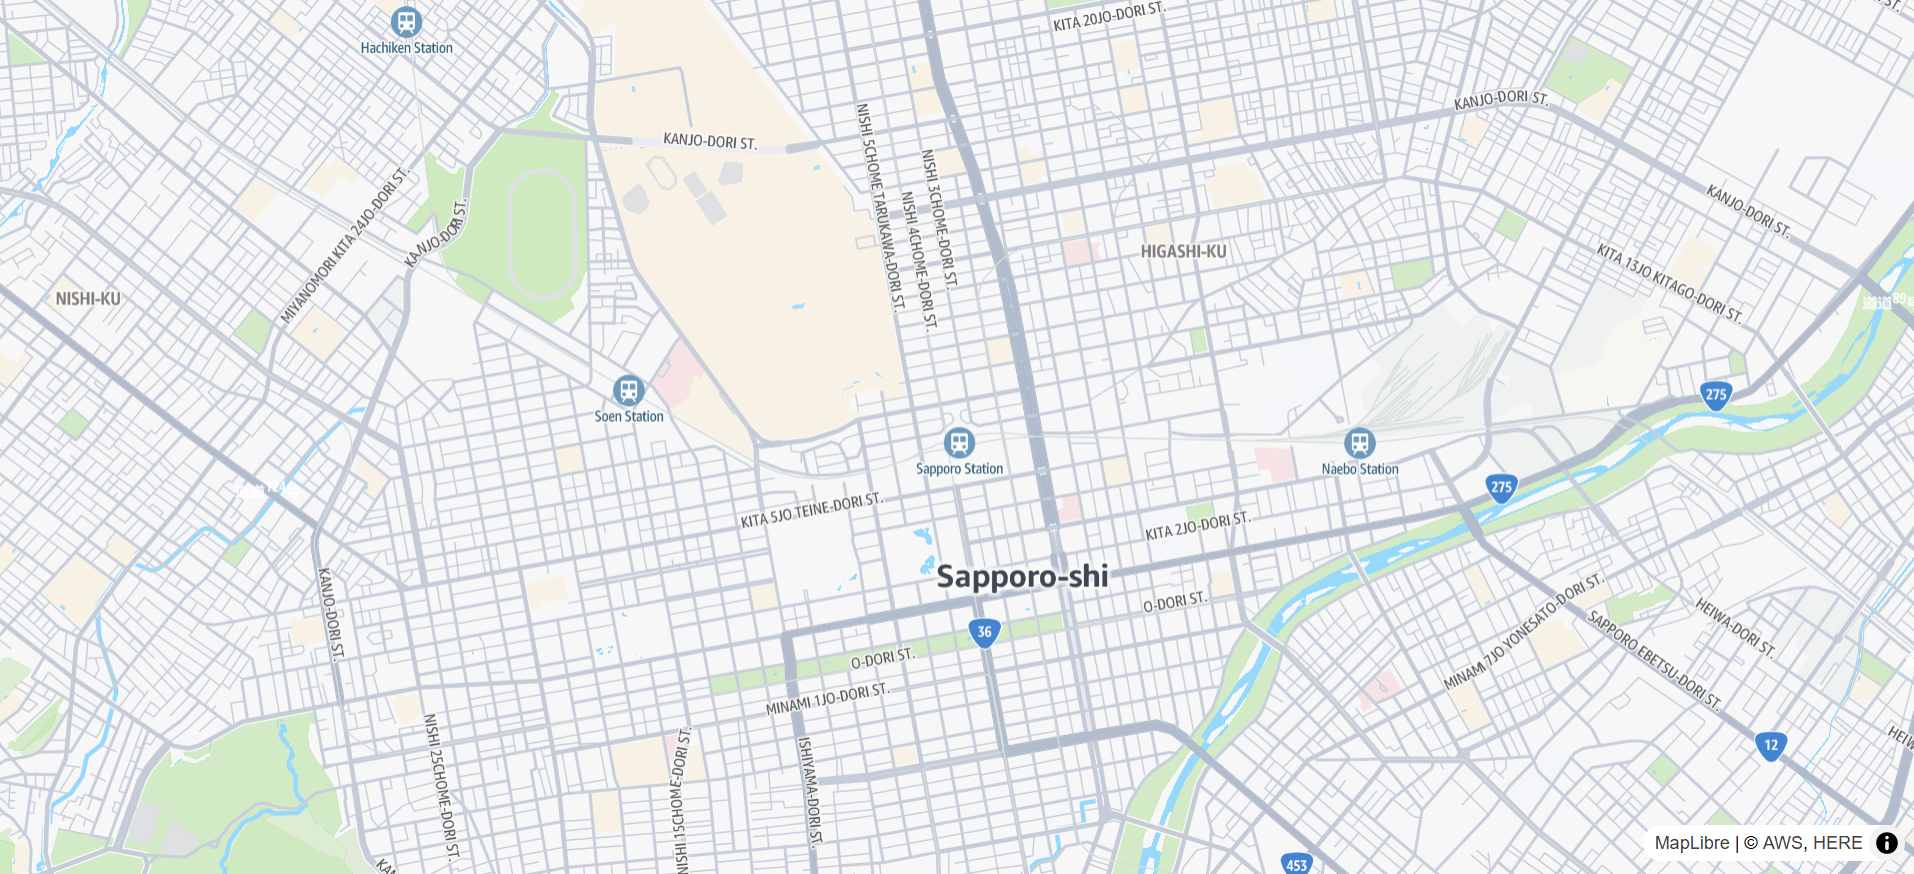
3. ブラウザで http://localhost:5173/ にアクセスすると、地図が表示されました!
2.2. 地図を日本語化する
1. 地図を日本語化するために以下の関数を新規作成します。
import type { StyleSpecification, LayerSpecification } from 'react-map-gl/maplibre';
import 'maplibre-gl/dist/maplibre-gl.css';
import { DataDrivenPropertyValueSpecification, FormattedSpecification } from 'maplibre-gl';


const API_KEY = "xxx"

async function getStyleWithPreferredLanguage(preferredLanguage: string) {
  const styleUrl = `https://maps.geo.ap-northeast-1.amazonaws.com/v2/styles/Standard/descriptor?key=${API_KEY}`;

  return fetch(styleUrl)
    .then(response => {
      if (!response.ok) {
        throw new Error('Network response was not ok ' + response.statusText);
      }
      return response.json();
    })
    .then(styleObject => {
      if (preferredLanguage !== "en") {
        styleObject = setPreferredLanguage(styleObject, preferredLanguage);
      }

      return styleObject;
    })
    .catch(error => {
      console.error('Error fetching style:', error);
    });
}

const setPreferredLanguage = (style: StyleSpecification, language: string) => {
  let nextStyle = { ...style };

  nextStyle.layers = nextStyle.layers.map(l => {
    if (l.type !== 'symbol' || !l?.layout?.['text-field']) return l;
    return updateLayer(l, /^name:([A-Za-z\-\_]+)$/g, `name:${language}`);
  });

  return nextStyle;
};

const updateLayer = (layer: LayerSpecification, prevPropertyRegex: RegExp, nextProperty: string) => {
  if (!layer.layout || !('text-field' in layer.layout)) return layer;
  const nextLayer = {
    ...layer,
    layout: {
      ...layer.layout,
      'text-field': recurseExpression(
        layer.layout['text-field'],
        prevPropertyRegex,
        nextProperty
      )
    }
  };
  return nextLayer;
};

const recurseExpression = (
  exp: DataDrivenPropertyValueSpecification<FormattedSpecification> | unknown,
  prevPropertyRegex: RegExp,
  nextProperty: string
): any => {
  if (!Array.isArray(exp)) return exp;
  if (exp[0] !== 'coalesce') return exp.map(v =>
    recurseExpression(v, prevPropertyRegex, nextProperty)
  );

  const first = exp[1];
  const second = exp[2];

  let isMatch =
  Array.isArray(first) &&
  first[0] === 'get' &&
  !!first[1].match(prevPropertyRegex)?.[0];

  isMatch = isMatch && Array.isArray(second) && second[0] === 'get';
  isMatch = isMatch && !exp?.[4];

  if (!isMatch) return exp.map(v =>
    recurseExpression(v, prevPropertyRegex, nextProperty)
  );

  return [
    'coalesce',
    ['get', nextProperty],
    ['get', 'name:en'],
    ['get', 'name']
  ];
};

export default getStyleWithPreferredLanguage;
参考
https://docs.aws.amazon.com/location/latest/developerguide/how-to-set-preferred-language-map.html
2. あとはApp.tsxで地図を読み込む際に関数を呼び出します。
import { useRef, useCallback } from 'react';
import Map from 'react-map-gl/maplibre';
import type { MapRef } from 'react-map-gl/maplibre';
import 'maplibre-gl/dist/maplibre-gl.css';

+ import getStyleWithPreferredLanguage from './getStyleWithPreferredLanguage';

function App() {
  const mapRef = useRef<MapRef>(null);

- const API_KEY = "省略"

  // 地図の中心(札幌駅)
  const initialLon: number = 141.35077817693812;
  const initialLat: number = 43.06882911246343;
  const initialZoom: number = 13;

+ const onMapLoad = useCallback(async () => {
+   if (!mapRef.current) return;
+
+   const styleObject = await getStyleWithPreferredLanguage("ja");
+   const map = mapRef.current.getMap();
+
+   map.setStyle(styleObject);
+ }, []);

  return (
    <Map
      ref={mapRef}
      initialViewState={{
        longitude: initialLon,
        latitude: initialLat,
        zoom: initialZoom
      }}
      style={{width: "100vw", height: "100vh"}}
+     onLoad={onMapLoad}
-     mapStyle={`https://maps.geo.ap-northeast-1.amazonaws.com/v2/styles/Standard/descriptor?key=${API_KEY}`}
    />
  )
}

export default App;
3. 改めて画面を見てみると、地図が日本語化されています!

2.3. 地図にコントロールを追加する
1. 地図にコントロールを追加するため、App.tsxを修正します。
import { useRef, useCallback } from 'react';
import Map, {
+ NavigationControl,
+ GeolocateControl,
+ FullscreenControl,
+ ScaleControl,
+ AttributionControl,
+ LogoControl
} from 'react-map-gl/maplibre';
import type { MapRef } from 'react-map-gl/maplibre';
import 'maplibre-gl/dist/maplibre-gl.css';

import getStyleWithPreferredLanguage from './getStyleWithPreferredLanguage';

function App() {
  const mapRef = useRef<MapRef>(null);

  // 地図の中心(札幌駅)
  const initialLon: number = 141.35077817693812;
  const initialLat: number = 43.06882911246343;
  const initialZoom: number = 13;

  const onMapLoad = useCallback(async () => {
    if (!mapRef.current) return;

    const styleObject = await getStyleWithPreferredLanguage("ja");
    const map = mapRef.current.getMap();

    map.setStyle(styleObject);
  }, []);

  return (
    <Map
      ref={mapRef}
      initialViewState={{
        longitude: initialLon,
        latitude: initialLat,
        zoom: initialZoom
      }}
      style={{width: "100vw", height: "100vh"}}
      onLoad={onMapLoad}
    >
+     <NavigationControl/>
+     <GeolocateControl/>
+     <FullscreenControl/>
+     <ScaleControl/>
+     <AttributionControl/>
+     <LogoControl/>
    </Map>
  )
}

export default App;
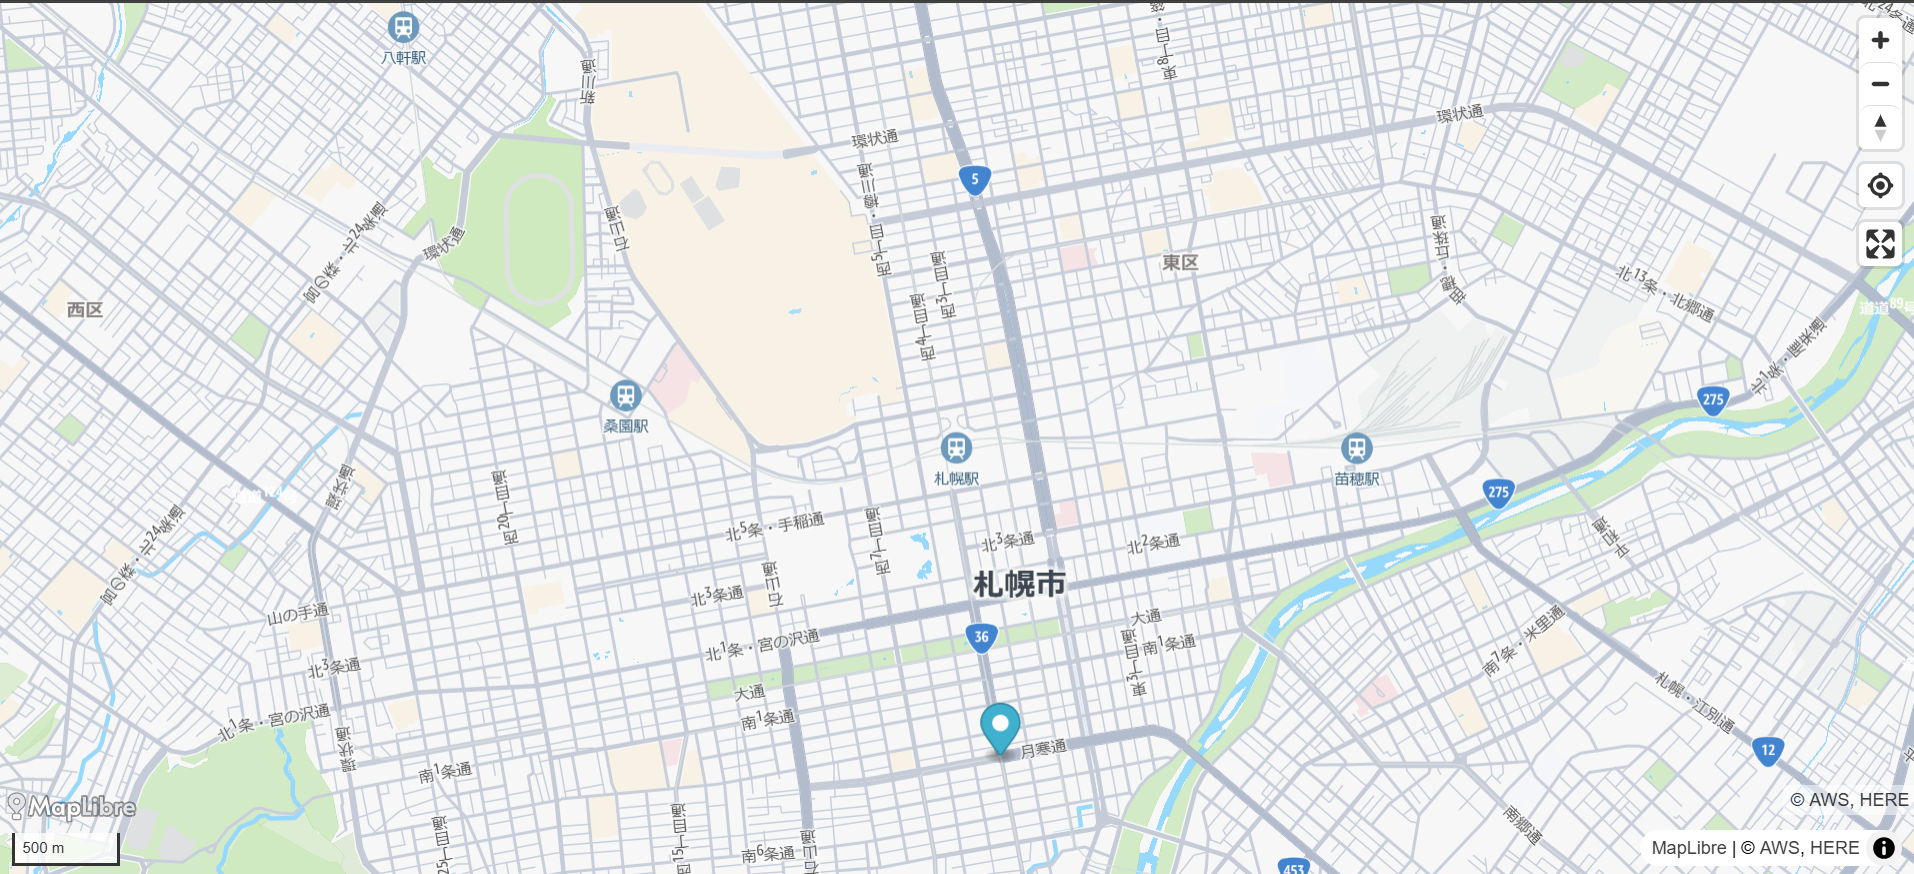
2. 地図を開くと、地図上にいくつかボタンなどUIが追加されています。

2.4. マーカーとポップアップを追加してみる
1. 地図にマーカーとポップアップを表示するため、PopupMarker.tsxを新規作成します。
import { useState } from 'react';
import { Marker, Popup, MarkerEvent } from 'react-map-gl/maplibre';


function PopupMarker() {

  // マーカー位置(すすきの)
  const markerLat: number = 43.055752329504365;
  const markerLon: number  = 141.35327587910047;

  const [showPopup, setShowPopup] = useState(false);

  const handleMarkerClick = ({ originalEvent }: MarkerEvent<MouseEvent> ) => {
    if (originalEvent) {
      originalEvent.stopPropagation();
      setShowPopup(true);
    };
  };

  return (
    <>
      <Marker
        latitude={markerLat}
        longitude={markerLon}
        onClick={handleMarkerClick}
      />
      {showPopup && (
        <Popup
          latitude={markerLat}
          longitude={markerLon}
          onClose={() => setShowPopup(false)}
        >
          <p>すすきの</p>
        </Popup>
      )}
    </>
  )
}

export default PopupMarker;
2. あとはApp.tsxから呼び出します。
import { useRef, useCallback } from 'react';
import Map, {
  NavigationControl,
  GeolocateControl,
  FullscreenControl,
  ScaleControl,
  AttributionControl,
  LogoControl
} from 'react-map-gl/maplibre';
import type { MapRef } from 'react-map-gl/maplibre';
import 'maplibre-gl/dist/maplibre-gl.css';

import getStyleWithPreferredLanguage from './getStyleWithPreferredLanguage';
+ import PopupMarker from './PopupMaker';

function App() {
  const mapRef = useRef<MapRef>(null);

  // 地図の中心(札幌駅)
  const initialLon: number = 141.35077817693812;
  const initialLat: number = 43.06882911246343;
  const initialZoom: number = 13;

  const onMapLoad = useCallback(async () => {
    if (!mapRef.current) return;

    const styleObject = await getStyleWithPreferredLanguage("ja");
    const map = mapRef.current.getMap();

    map.setStyle(styleObject);
  }, []);

  return (
    <Map
      ref={mapRef}
      initialViewState={{
        longitude: initialLon,
        latitude: initialLat,
        zoom: initialZoom
      }}
      style={{width: "100vw", height: "100vh"}}
      onLoad={onMapLoad}
    >
      <NavigationControl/>
      <GeolocateControl/>
      <FullscreenControl/>
      <ScaleControl/>
      <AttributionControl/>
      <LogoControl/>
+     <PopupMarker/>
    </Map>
  )
}

export default App;
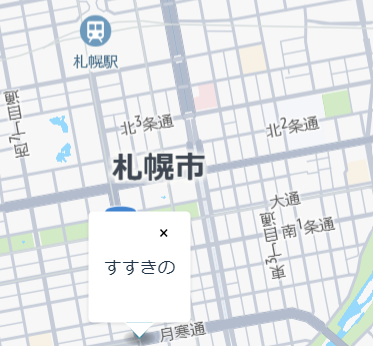
3. 地図にマーカーが表示されました!
4. マーカーをクリックすると、ポップアップも表示されました!
最後に
今回は、簡単な内容ではありますが、Amazon Location Serviceとreact-map-glを使って地図表示してみました。
本来はAmazon Location Serviceをがっつり触りたかったのですが、react-map-gl成分の方が多くなってしまいました...
次回は、場所の検索機能や場所までのルート表示機能あたりを触ってみたいと思います。
参考