前回、IDaaS認証の基礎的な仕組みをお伝えしましたが、今回は、Firebase Authenticationを使って、実装する時の様子をお伝えします。😀
FirebaseでWebアプリをデプロイする前提です。
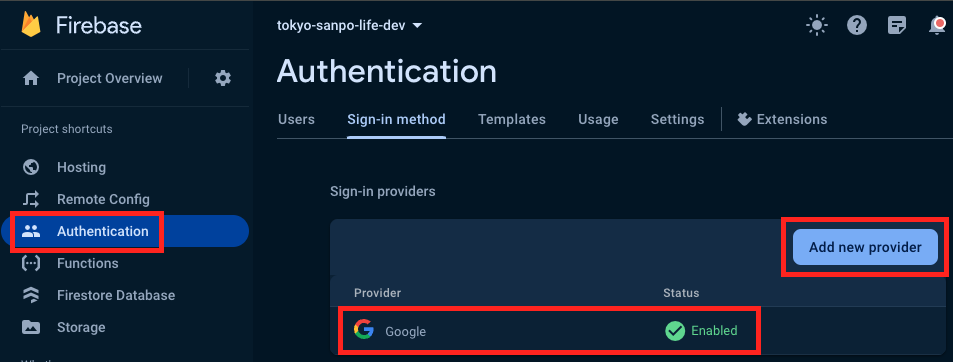
Firebaseには、Authenticationという仕組みがあるため、これを利用する登録手続きを行います。
ここではIdP(IDaaS Provider)としてGoogleを利用します。
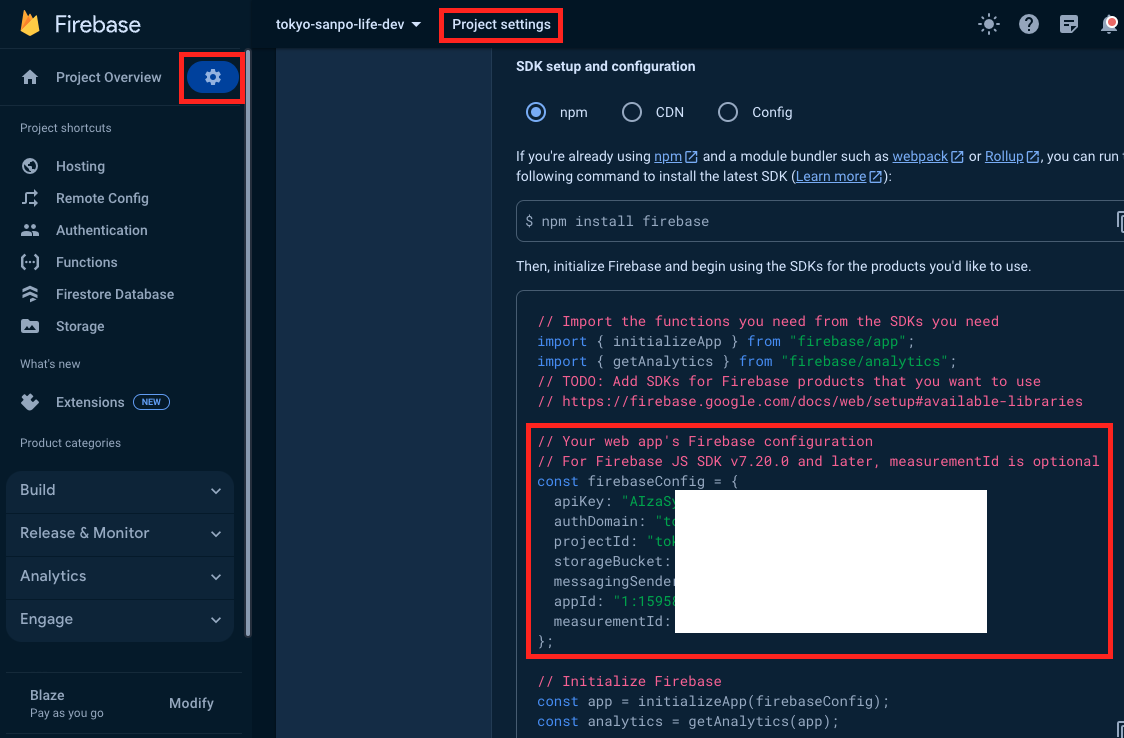
次に、フロント(js)側で使用する設定情報を、管理コンソールから入手します。
ログイン用の画面を用意して、ソーシャルログインを呼び出すボタンを表示しましょう。
以下は例です。

ログインボタンがクリックされたら、Firebase Authenticationを呼び出して、ユーザ向けのログイン画面を表示させます。以下、例です。
// ログインボタンのHTML要素のonclickに、この関数をセットする。
const loginWithGoogle = (async () => {
  await signInWithRedirect(auth, googleAuthProvider);
});
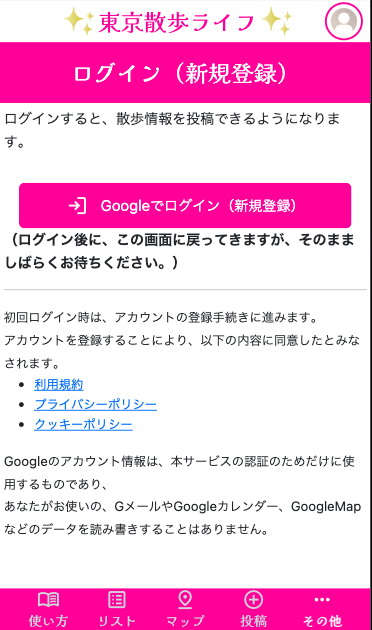
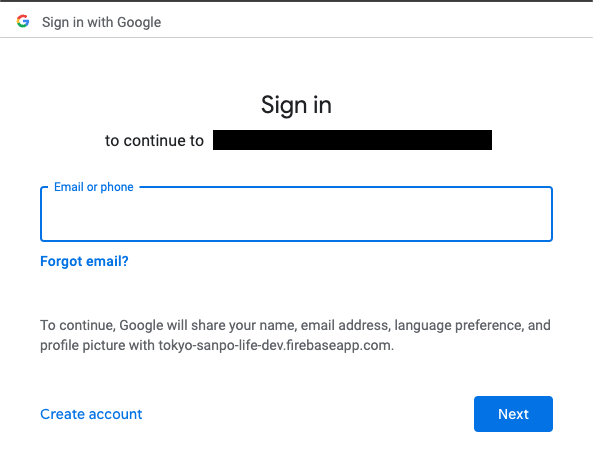
上のコードが実行されると、ユーザには、このような画面が見えます。

ログインに成功すると、元の画面に戻ってきます。
その後、IdPから受け取ったトークンを、何らかの方法で、サーバ側のプログラムに渡します。
getRedirectResult(auth)
.then(async (result) => {
  auth.currentUser.getIdToken(true).then(function(idToken) {
    // IdPから受け取ったIDトークンを、非表示のformにセットして、submitさせている。
    document.getElementById('idToken').value = idToken;
    document.getElementById('submit').click();
  }).catch(function(error) {
    // error handling
  });
}).catch((error) => {
  // error handling
});
ログインに成功した時の、resultの中身は、以下のようになっていました。
{"user":
  {"uid":"(長い英数字)",
  "email":"(ログインしたユーザのメルアド)",
  "emailVerified":true,
  "displayName":"(Googleに登録した姓と名)",
  "isAnonymous":false,
  "photoURL":"(Google上のユーザアイコンのURL)",
  "providerData":[{
    "providerId":"google.com",
    "uid":"(20-30文字くらいの数字)",
    "displayName":"(Googleに登録した姓と名)",
    "email":"(ログインしたユーザのメルアド)",
    "phoneNumber":"(電話番号)",
    "photoURL":"(Google上のユーザアイコンのURL)",
  }],
  "stsTokenManager":{
    "refreshToken":"(長い英数字)",
    "accessToken":"(JWT)",
    "expirationTime":"(UNIX epochTimeのミリ秒)"},
    "createdAt":"(UNIX epochTimeのミリ秒)",
    "lastLoginAt":"(UNIX epochTimeのミリ秒)",
    "apiKey":"(長い英数字)",
    "appName":"[DEFAULT]"
  },
  "providerId":"google.com",
  "_tokenResponse":{"federatedId":"https://accounts.google.com/(10-20文字くらいの数字)",
  "providerId":"google.com",
  "email":"(ログインしたユーザのメルアド)",
  "emailVerified":true,
  "firstName":"(Googleに登録した名)",
  "fullName":"(Googleに登録した姓と名)",
  "lastName":"(Googleに登録した姓)",
  "photoUrl":"(Google上のユーザアイコンのURL)",
  "localId":"(20-30文字くらいの英数字)",
  "displayName":"(Googleに登録した姓と名)",
  "idToken":"(JWT)",
  "context":"",
"oauthAccessToken":"(長い英数字)",
  "oauthExpireIn":"(数字)",
  "refreshToken":"(長い英数字)",
  "expiresIn":"(数字)",
  "oauthIdToken":"(JWT)",
  "rawUserInfo":"(ここに記載した他のデータをJSONの文字列形式にしたもの)",
  "kind":"identitytoolkit#VerifyAssertionResponse"},
  "operationType":"signIn"
}
サーバ側では、受け取ったトークンを検証して、その後、任意の処理を行います。
  // Express (Node.js)の例
  // HTTPSのPOSTで/loginにアクセスされると、この関数が実行される。
  app.post("/login", async function (req, res, next) {
    const firebaseUserId = await firebaseAuthManager.verifyIdToken(req.body.idToken);
    if (firebaseUserId == null) {
      // 不正なトークン。401画面に飛ばすなどの処理を入れる。
      return;
    }

    // firebaseUserIdがnullでなければ、Googleに登録されたユーザである。
    // あとは、独自WebアプリのDB(Firestoreなど)の中に、
    // このユーザのデータがあれば、マイページ画面などに転送し、
    // データがなければ、アカウントの新規登録画面を表示してあげると良い。
  });
ログアウト処理の実装も忘れずに・・。
// マイページ画面内の、ログアウトボタンのHTML要素のonclickに、この関数をセットする。
const logOut = (async () => {
  return await signOut(auth).then(() => {
    // ログアウト成功後の処理
  }).catch((error) => {
    // error handling
  });
});
まとめ
本ページには記載しておりませんが、実装中、色々と苦戦するところがありました。😅
本家のドキュメントを見ながら実装しましょう。

