はじめに
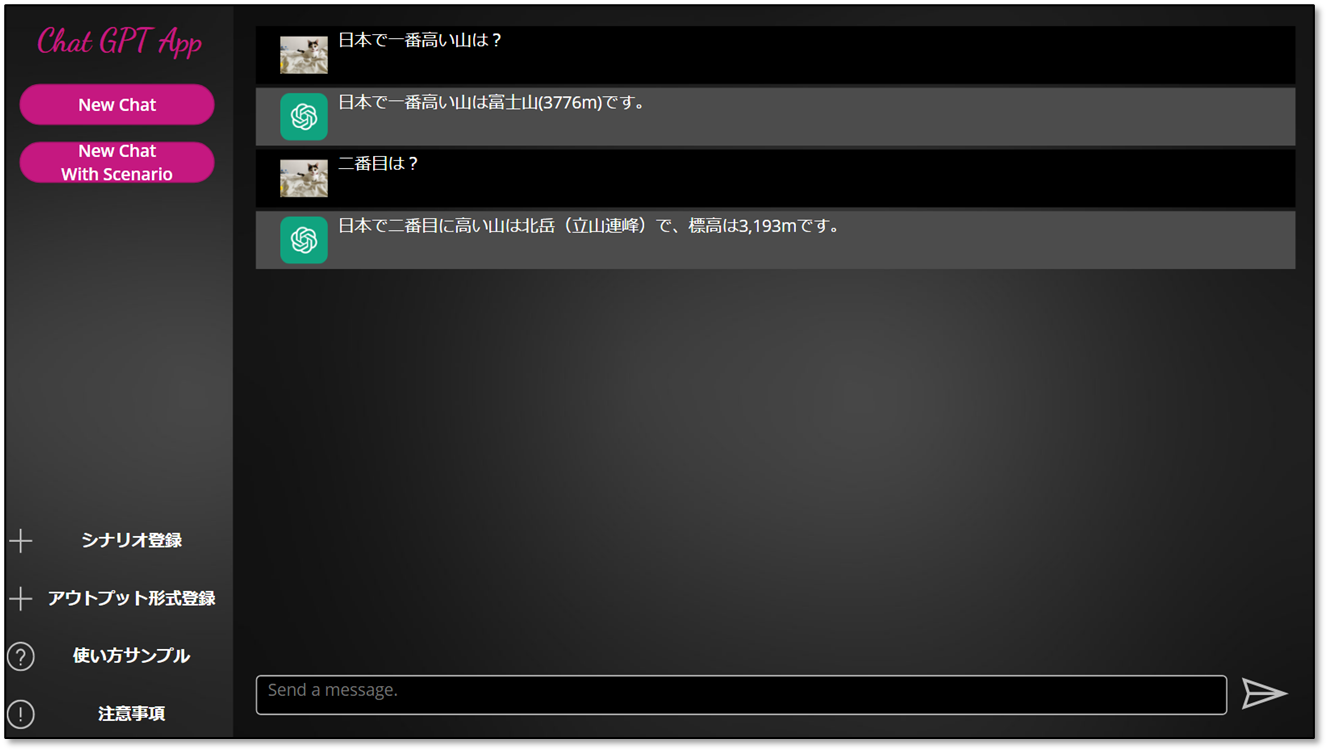
以前、こちらの記事で、フロントエンドを Power Apps にして、Azure OpenAI Service の ChatGPT と連携する方法を紹介しました。
こちらについて、どんなアーキテクチャになっているかというと、以下のようなイメージです。
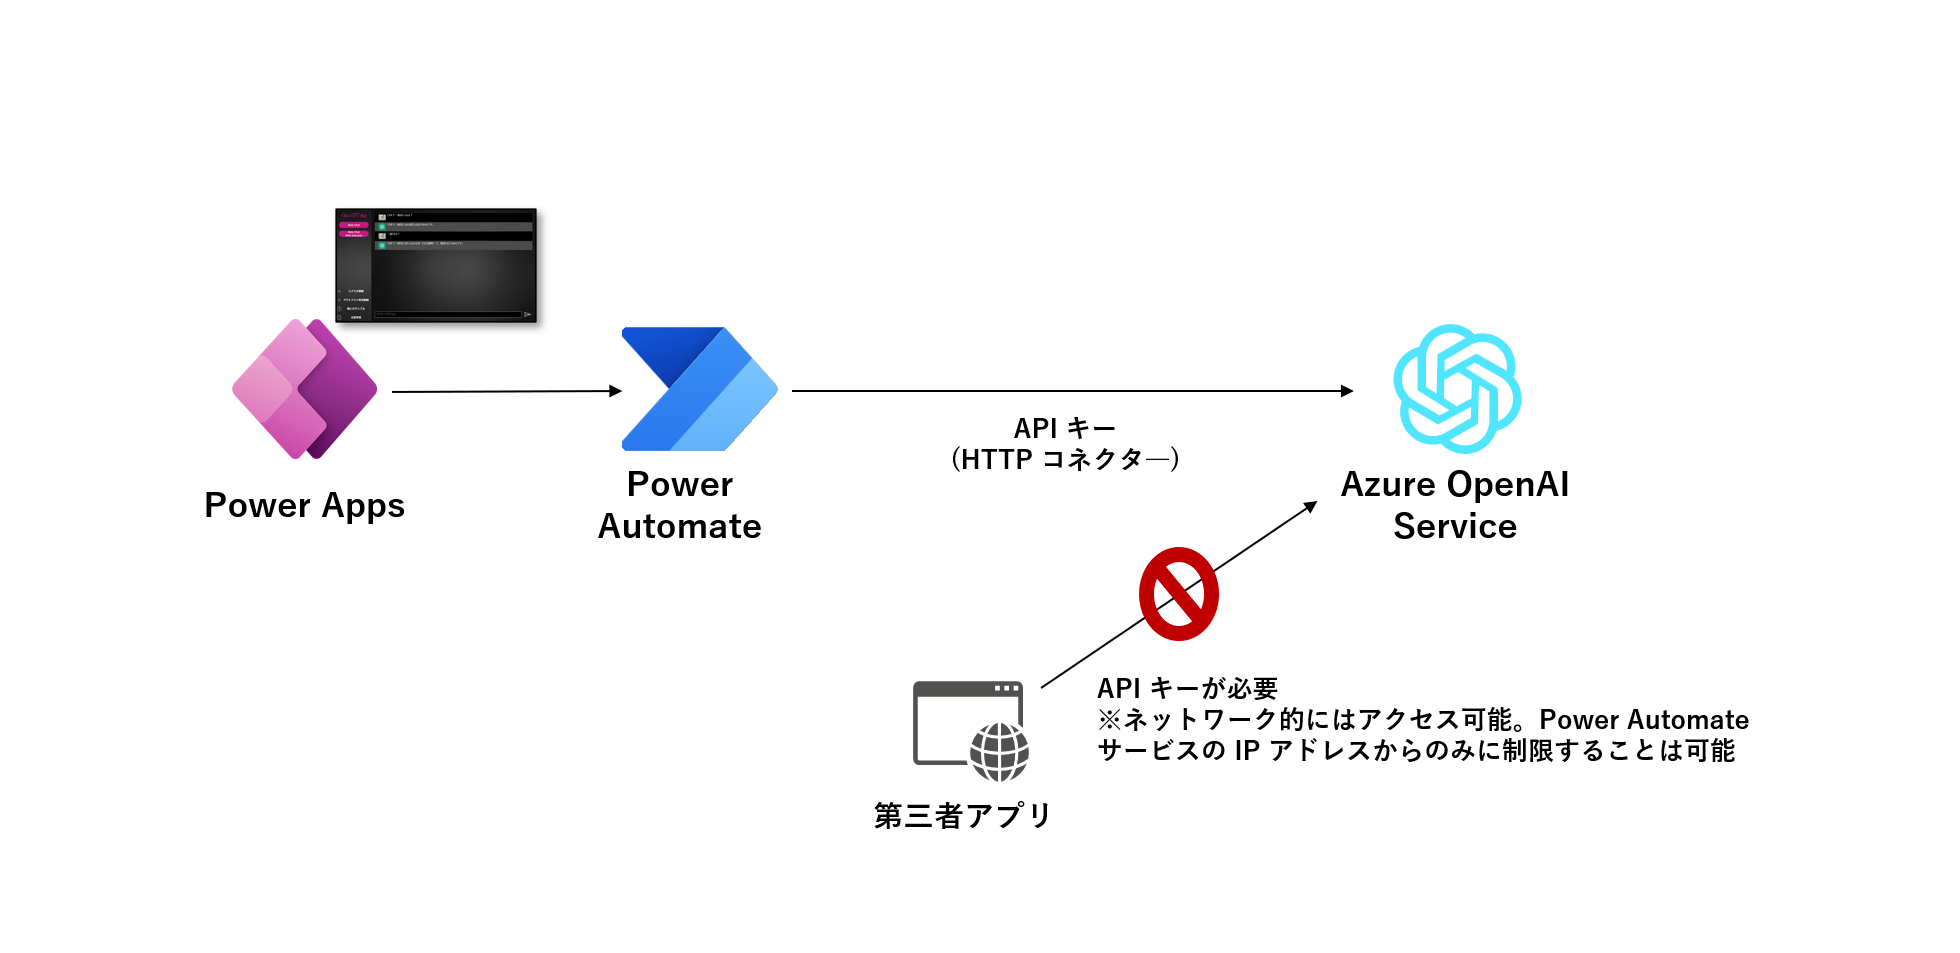
ネットワークセキュリティ周りがちょっときになったので、以下のようなアーキテクチャに組み替えてみました。今回、コアとなる Azure Functions の実装部分と、Power Apps からの呼び出し部分について紹介します。
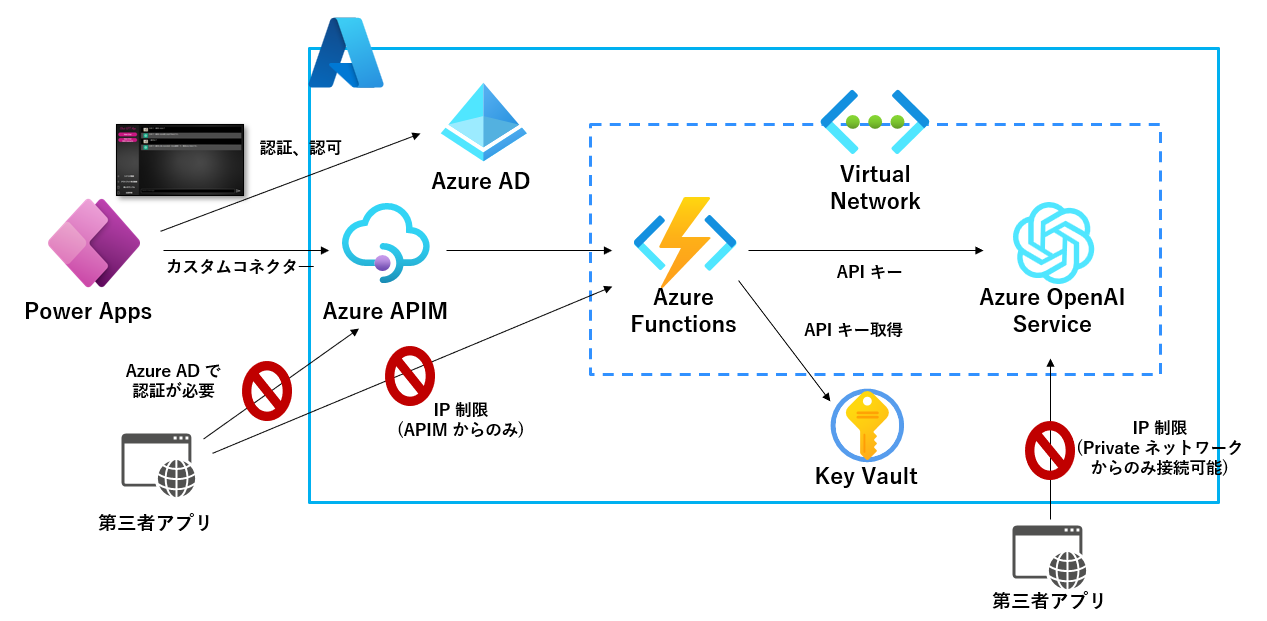
今回は API キーを利用していますが、最終的にはマネージド ID に変更しようと思います
Azure Functions 側
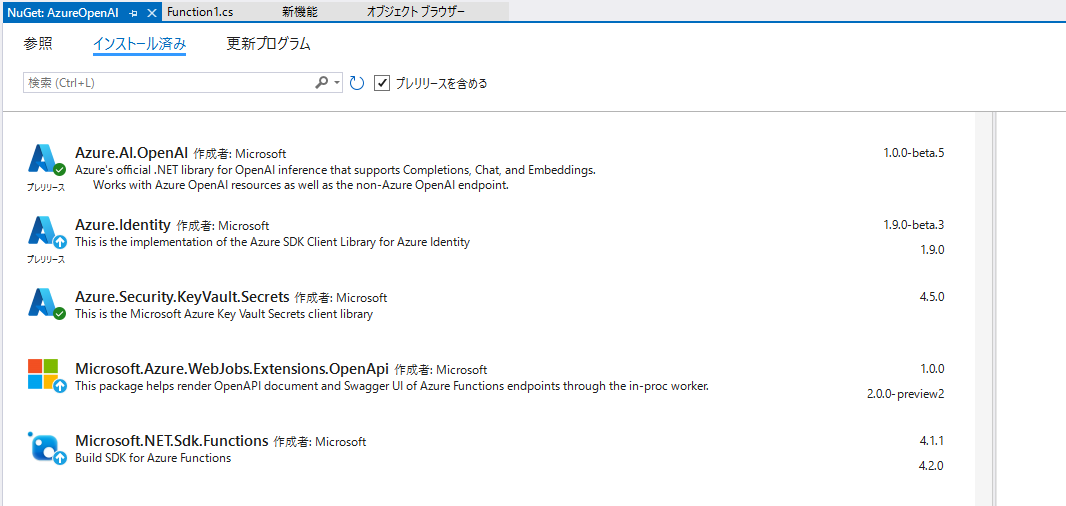
まず、Azure OpenAI Service の利用について、以下のライブラリを利用しています。
結果的に、Visual Studio で以下のライブラリを利用しています。
コードは以下のような感じです。長らく、C# でコード書いていなかったので ChatGPT さんのお世話になりました。あくまで、サンプルなので一旦以下のような感じで試してみようと思います。
一応、Json を受け取って、会話履歴を保持し、文脈を読んで回答することが出来るようにしています。
using System.IO;
using System.Threading.Tasks;
using Microsoft.AspNetCore.Mvc;
using Microsoft.Azure.WebJobs;
using Microsoft.Azure.WebJobs.Extensions.Http;
using Microsoft.AspNetCore.Http;
using Microsoft.Extensions.Logging;
using Newtonsoft.Json;
using System.Collections.Generic;
using Azure;
using Azure.AI.OpenAI;
using Azure.Identity;
using Azure.Security.KeyVault.Secrets;
using System;

namespace QuantumAIChat
{
	public class Message
	{
		public string Role { get; set; }
		public string Content { get; set; }
	}

	public class InputData
	{
		public string Model { get; set; }
		public List<Message> Messages { get; set; }
	}

	public static class QuantumMessageEngine
	{
		[FunctionName("QuantumChatProcessor")]
		public static async Task<IActionResult> Run(
			[HttpTrigger(AuthorizationLevel.Function, "post", Route = null)] HttpRequest req,
			Microsoft.Azure.WebJobs.ExecutionContext context,
			ILogger log)
		{
			try
			{
				log.LogInformation("C# HTTP trigger function processed a request.");

				string apiUrl = "API の URL";

				string keyVaultUrl = "***"; // Please specify the URL of Key Vault.
				string secretName = "ChatGPTKey"; // Please specify the name of the secret you want to retrieve.

				// Use ManagedIdentityCredential to utilize managed ID.
				var credential = new ManagedIdentityCredential();

				log.LogInformation("Connect to Key Vault.");

				// Create a KeyVaultSecretClient to communicate with Key Vault.
				var client = new SecretClient(new Uri(keyVaultUrl), credential);

				// Retrieve the secret.
				KeyVaultSecret secret = await client.GetSecretAsync(secretName);

				log.LogInformation("Get input data.");

				string requestBody = await new StreamReader(req.Body).ReadToEndAsync();
				InputData data = JsonConvert.DeserializeObject<InputData>(requestBody);

				log.LogInformation("Initialize message.");

				var options = new ChatCompletionsOptions();

				foreach (Message message in data.Messages)
				{
					Azure.AI.OpenAI.ChatRole chatRole;

					// Create an appropriate ChatRole instance based on message.Role.
					if (message.Role.Equals("User", StringComparison.OrdinalIgnoreCase))
					{
						chatRole = Azure.AI.OpenAI.ChatRole.User;
					}
					else if (message.Role.Equals("Assistant", StringComparison.OrdinalIgnoreCase))
					{
						chatRole = Azure.AI.OpenAI.ChatRole.Assistant;
					}
					else
					{
						// Record an error in the log, or perform appropriate processing.
						log.LogError($"Error: Unable to parse '{message.Role}' as a valid Azure.AI.OpenAI.ChatRole.");
						continue;
					}

					// Pass the created ChatRole instance to ChatMessage.
					options.Messages.Add(new ChatMessage(chatRole, message.Content));
				}
				options.MaxTokens = 200;

				log.LogInformation("Initialize OpenAI client.");

				// Initialize OpenAI client
				var openAIClient = new OpenAIClient(new Uri(apiUrl), new AzureKeyCredential(secret.Value));

				log.LogInformation("Get result from ChatGPT");

				var result = await openAIClient.GetChatCompletionsAsync(
					"モデル名",
					options
				);

				log.LogInformation("Return result.");

				// Return the result
				return new OkObjectResult(result.Value);
			}
			catch (Exception ex)
			{
				log.LogError($"Error: {ex.Message}");
				return new StatusCodeResult(StatusCodes.Status500InternalServerError);
			}
		}
	}
}
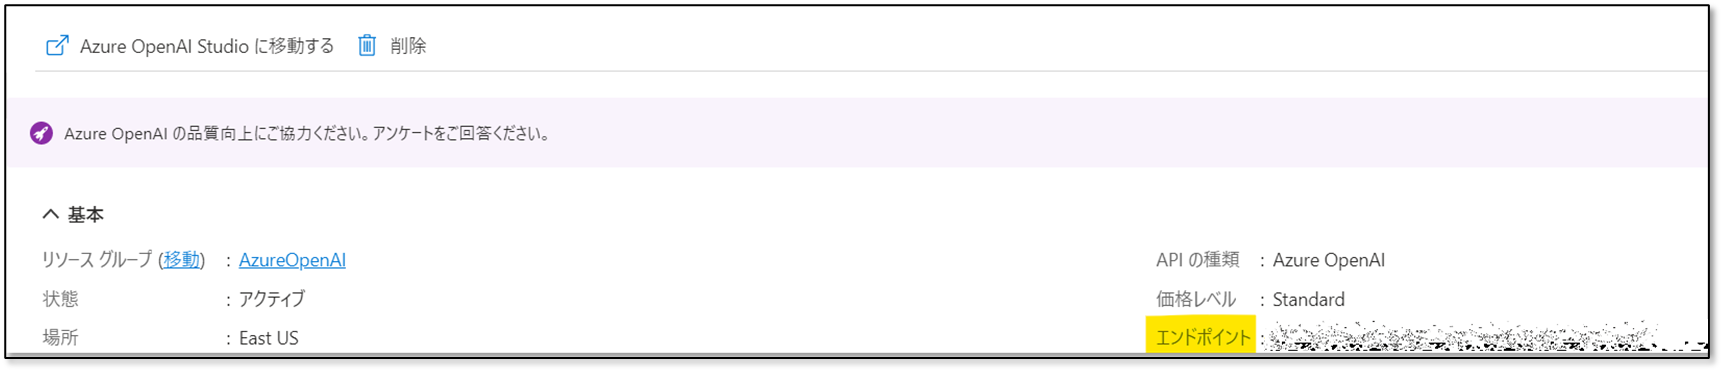
apiUrl はこちらで確認できるエンドポイント。
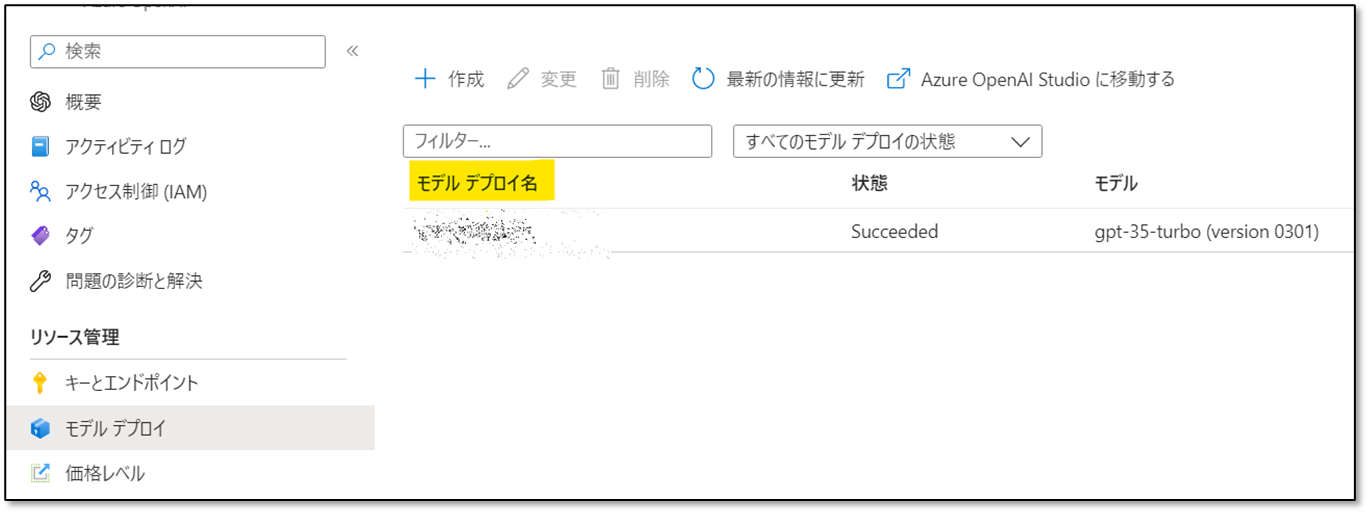
モデル名はこちらで確認できる名前を入れました。
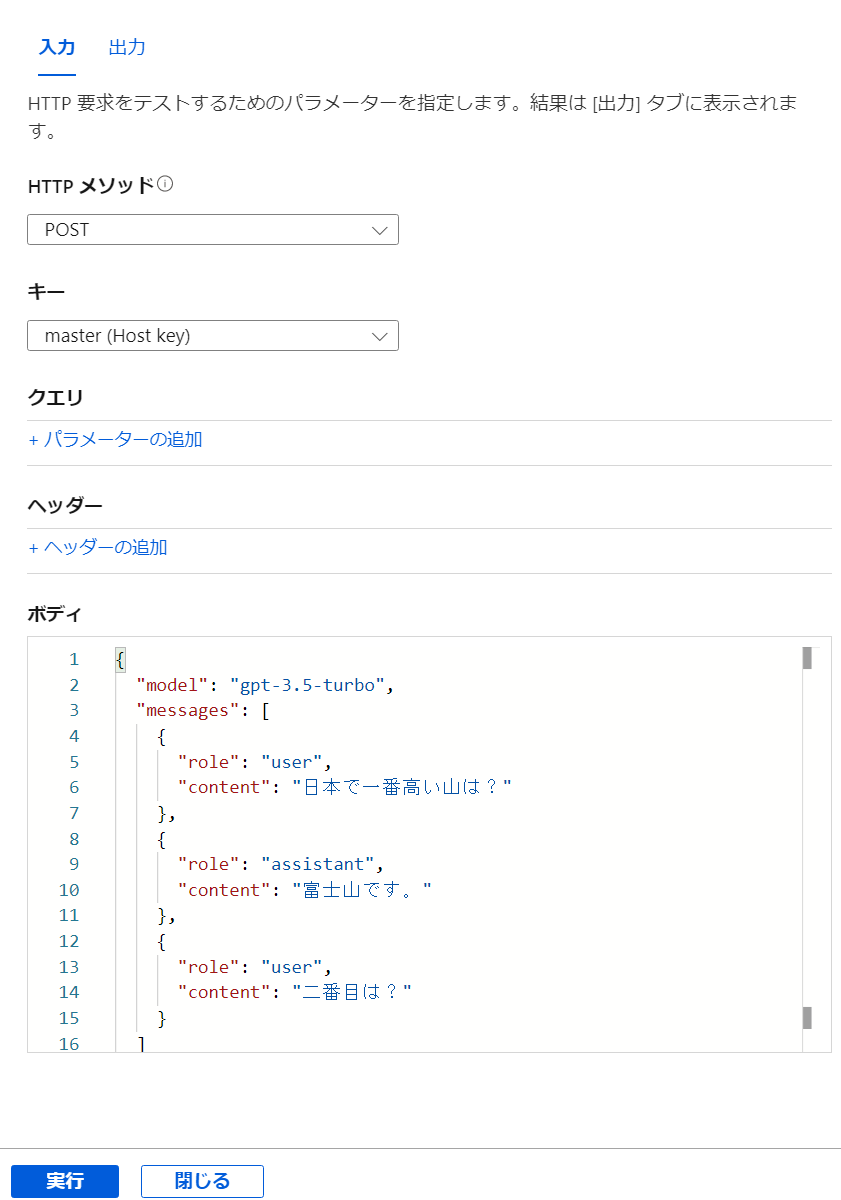
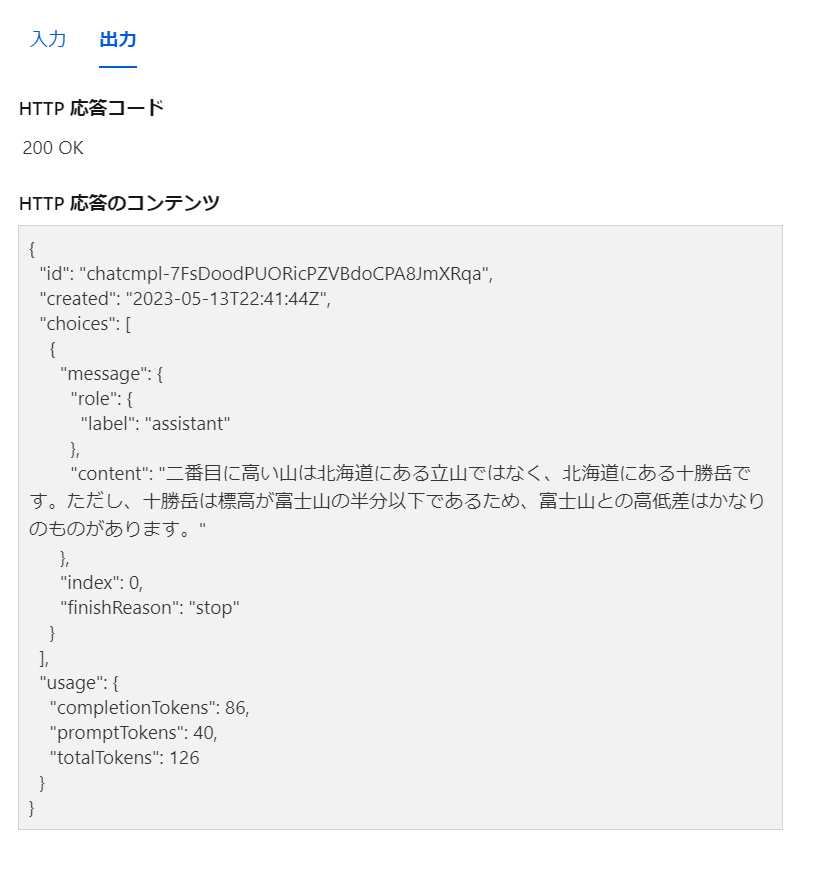
Azure Functions に発行してテストしてみます。
あとは、こちらを API Management (APIM) 経由でも使えるようにして、必要に応じてネットワーク観点でのセキュリティ対策を実施します。
Power Apps 側
ロジック部分
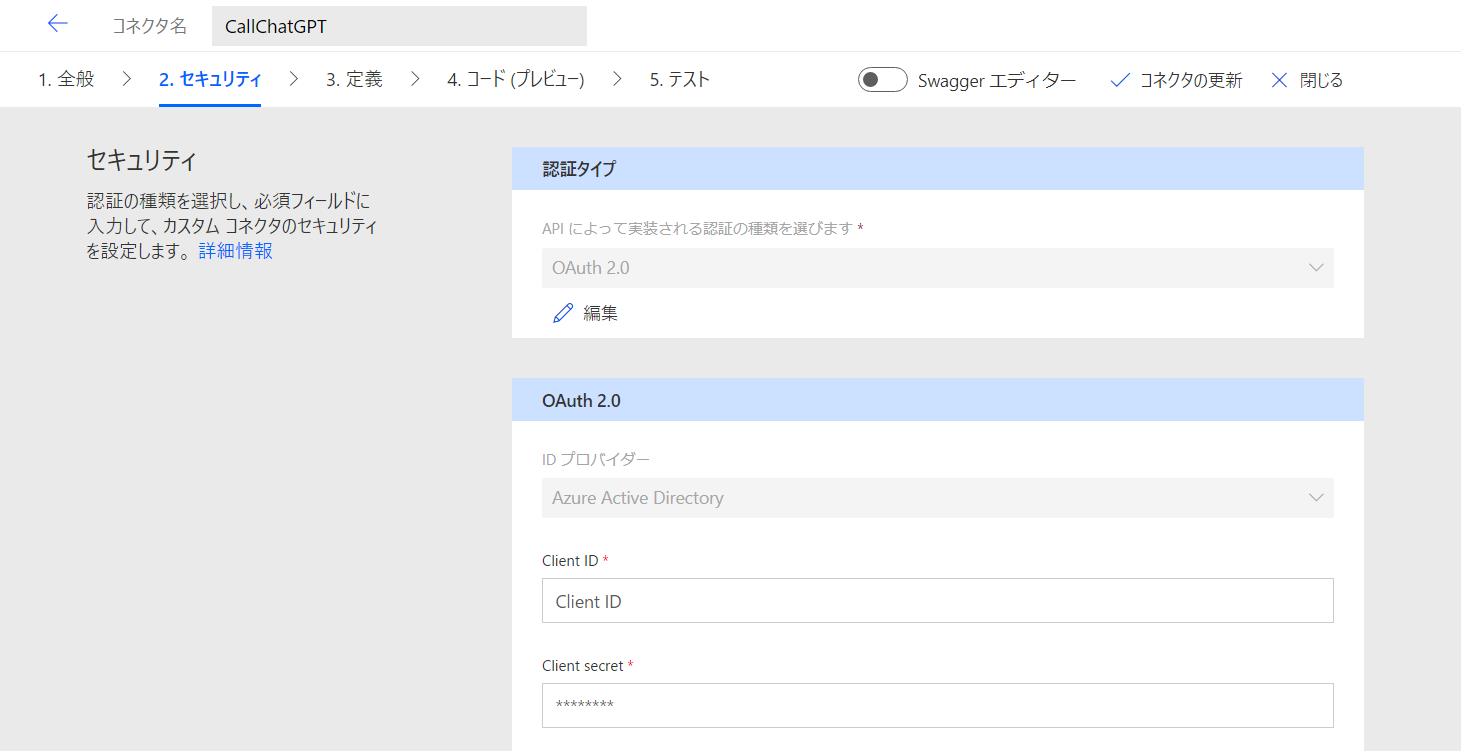
Power Apps からはカスタムコネクタを介して利用します。APIM を介しますが、アプローチとしては、以下と大きくは変わらないです。
APIM を OAuth で保護するところについては、いつもいろいろな記事を見ながらなんとかやっています。。
APIM の情報を Azure AD に API として登録し、そちらの API を利用するクライアントも登録し、必要な設定を行った後、カスタムコネクタのセキュリティ設定等を行います。Azure AD のユーザーで認証が出来れば OK です。
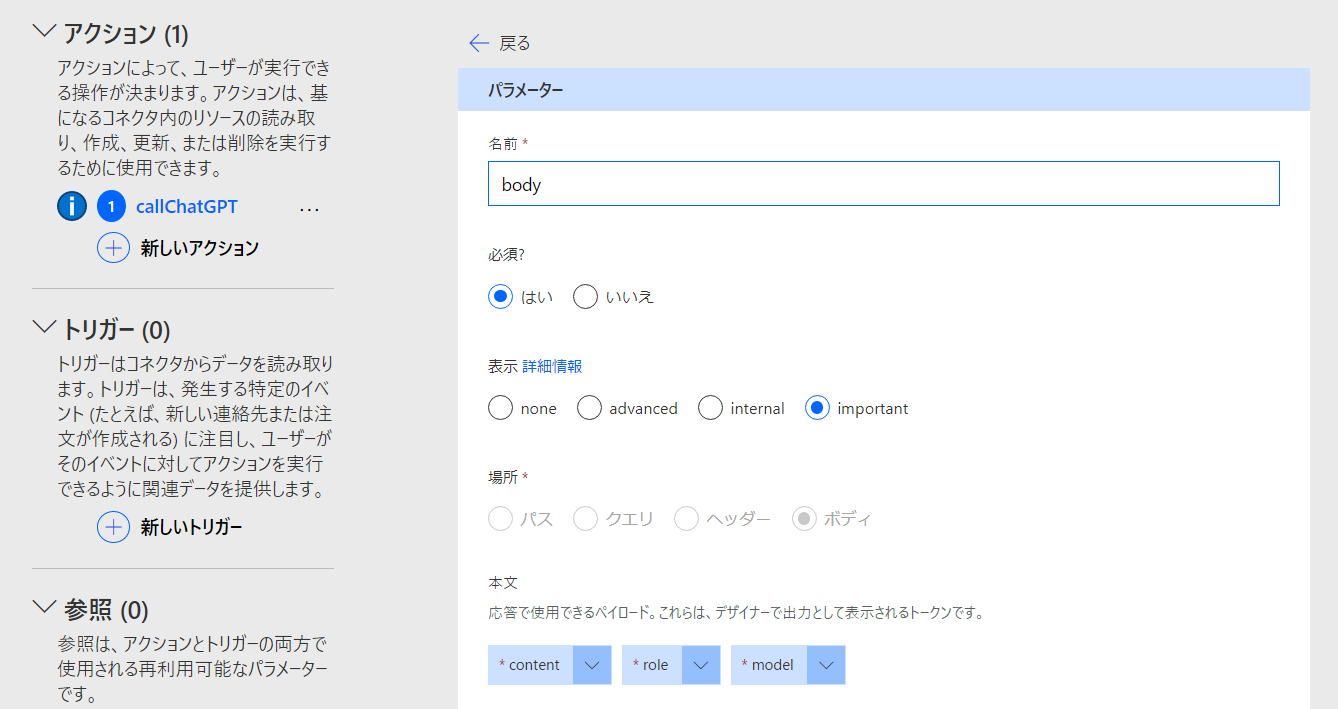
URL は APIM の URL になっています。
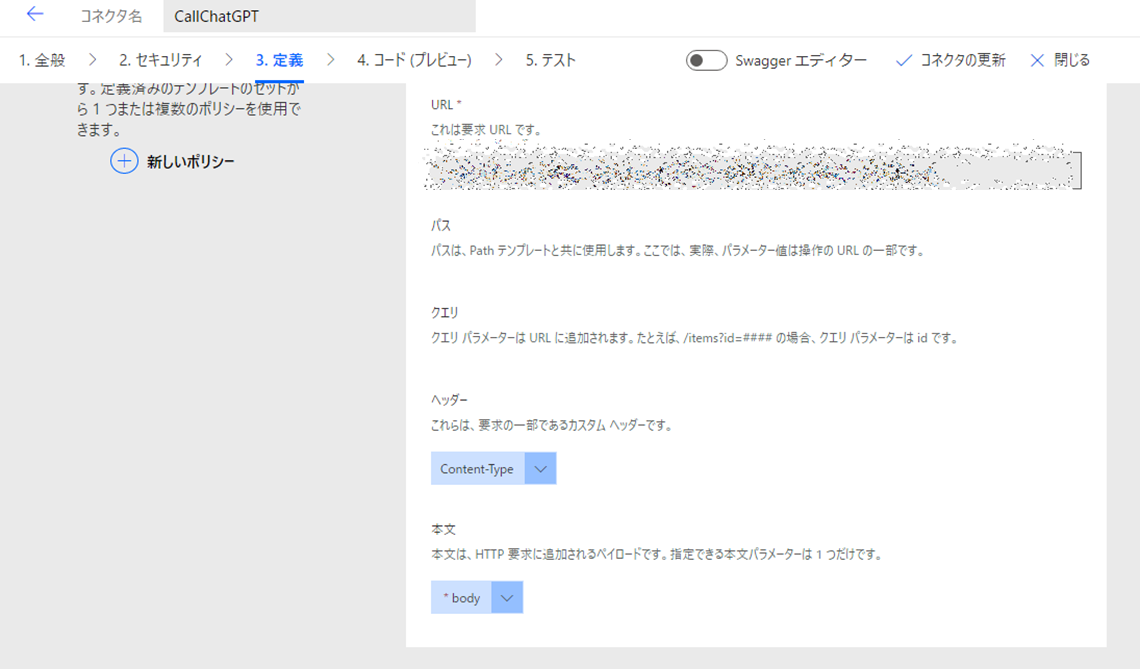
リクエストの Body の構造は代えていないので、サンプルから作成しています。
アプリ側もほとんど変えておらず、以下の送信ボタンを押した際の処理は以下のような感じです。ポイントは、返答を Collection に格納していくところですかね。
New Chat ボタンを押した際などに Collection をクリアしております。
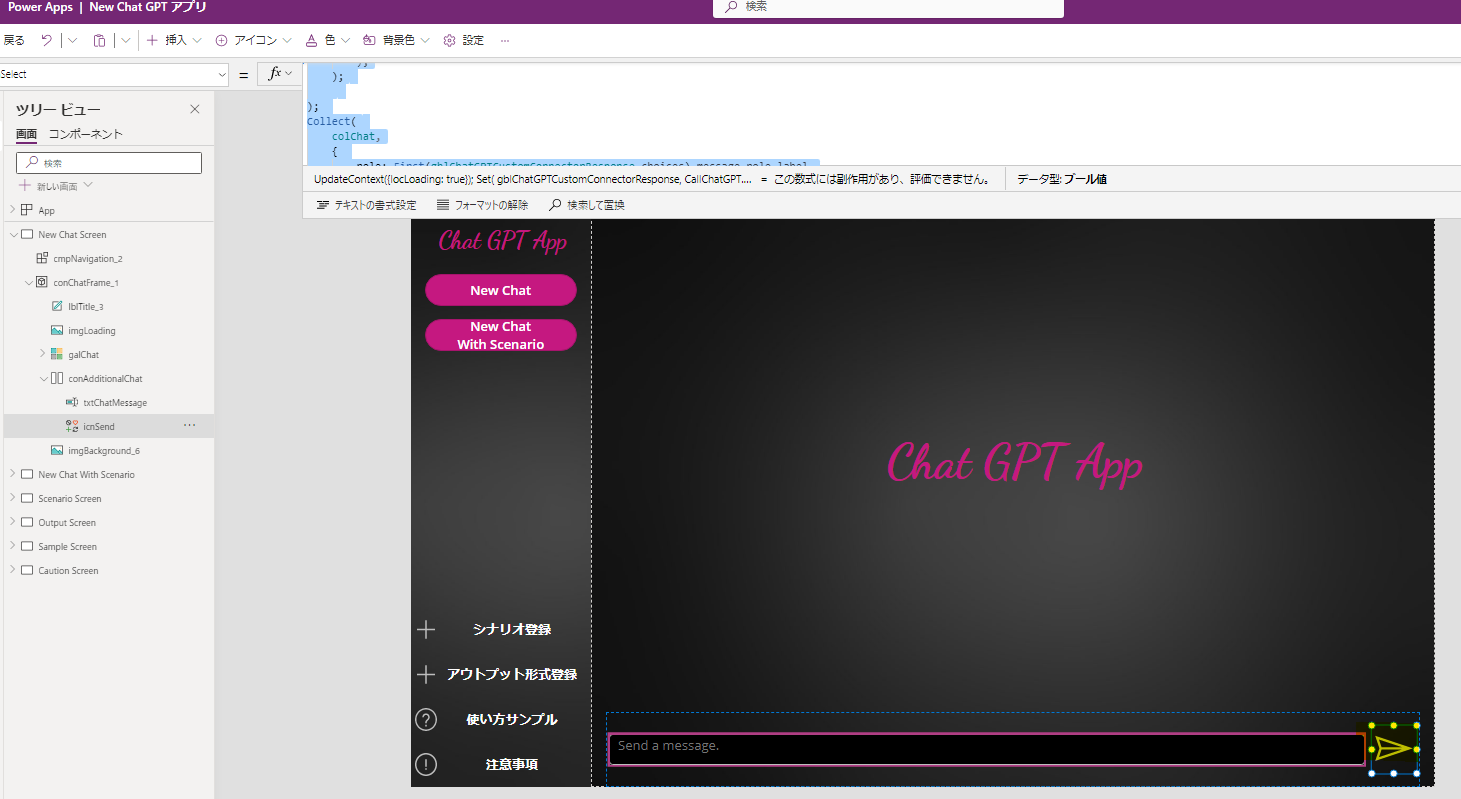
UpdateContext({locLoading: true});
Set(
    gblChatGPTCustomConnectorResponse,
    CallChatGPT.callChatGPT(
        "gpt-3.5-turbo",
        Collect(
            colChat,
            {
                role: "user",
                content: txtChatMessage.Text
            }
        );
    );

);
Collect(
    colChat,
    {
        role: First(gblChatGPTCustomConnectorResponse.choices).message.role.label,
        content: First(gblChatGPTCustomConnectorResponse.choices).message.content
    }
);
Select(
    galChat,
    CountRows(galChat.AllItems)
);
Reset(txtChatMessage);
UpdateContext({locLoading: false});
//Notify("成功しました",NotificationType.Success)
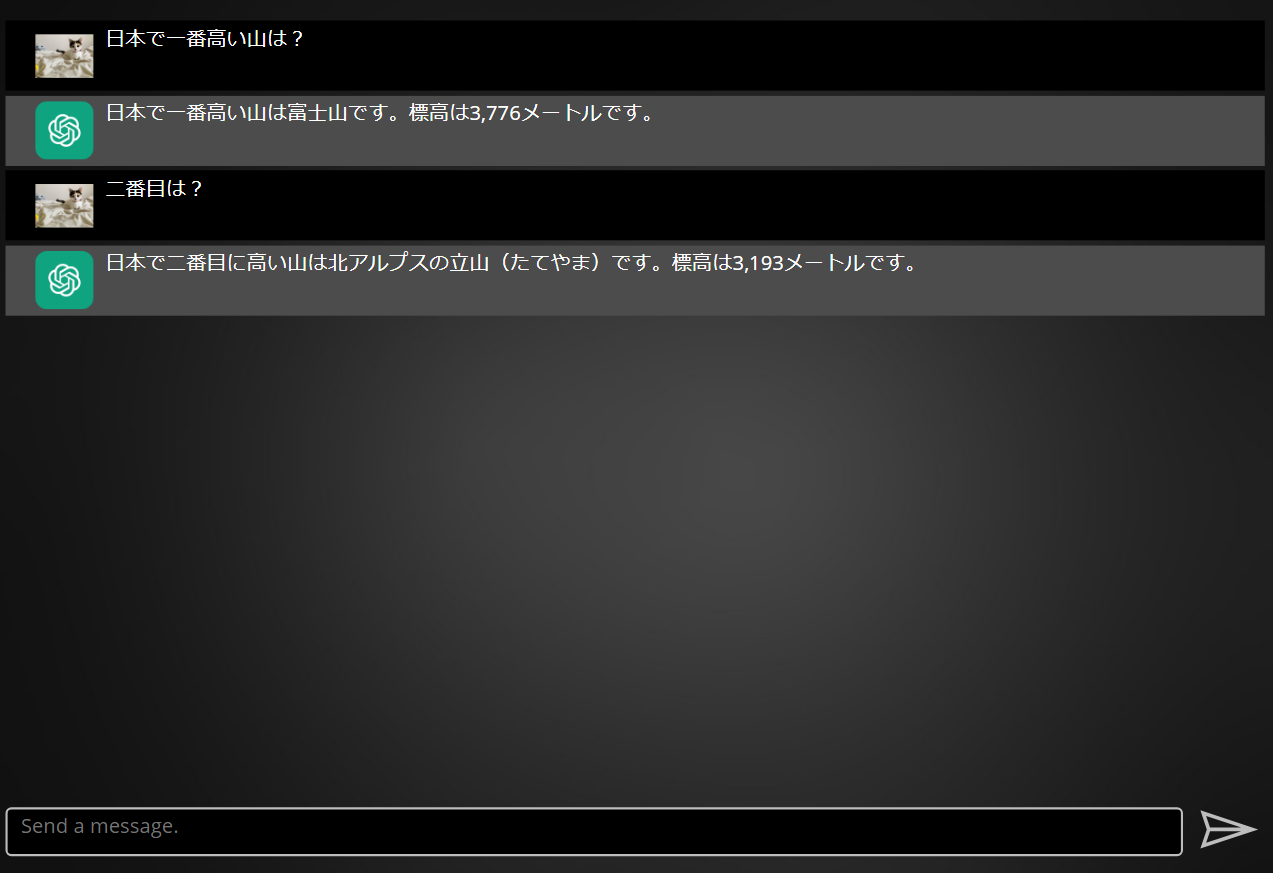
Power Apps でチャットエクスペリエンスを実装する (ギャラリー部分)
ギャラリーで以下のようにチャットエクスペリエンスを実装するアプローチについても補足します。
まず、ギャラリーの種類として、以下を選択します。

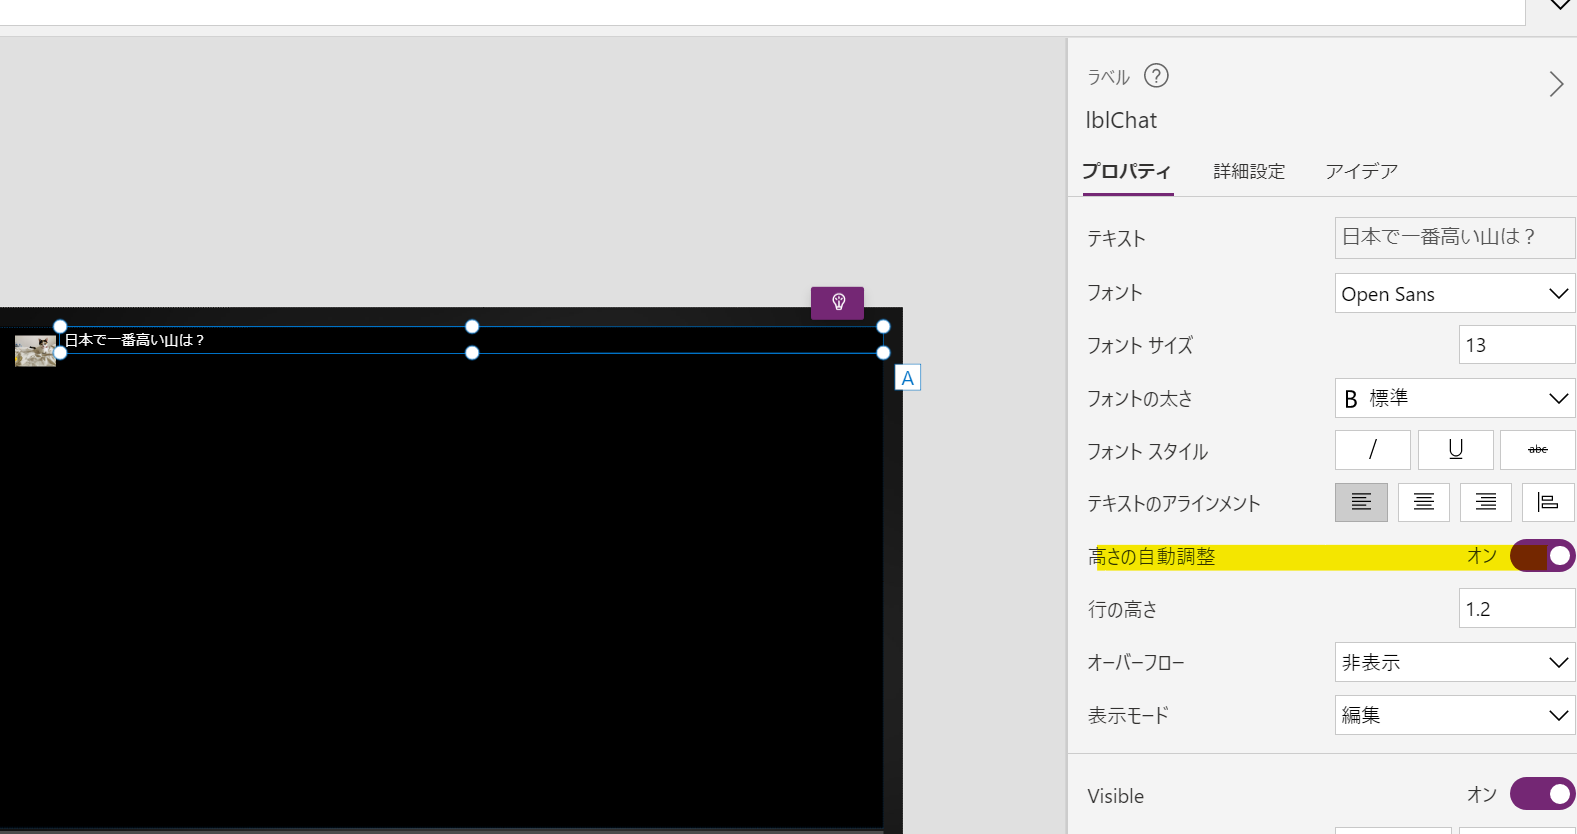
ギャラリー内のラベルについて、以下のように、高さの自動調整をオンにします。
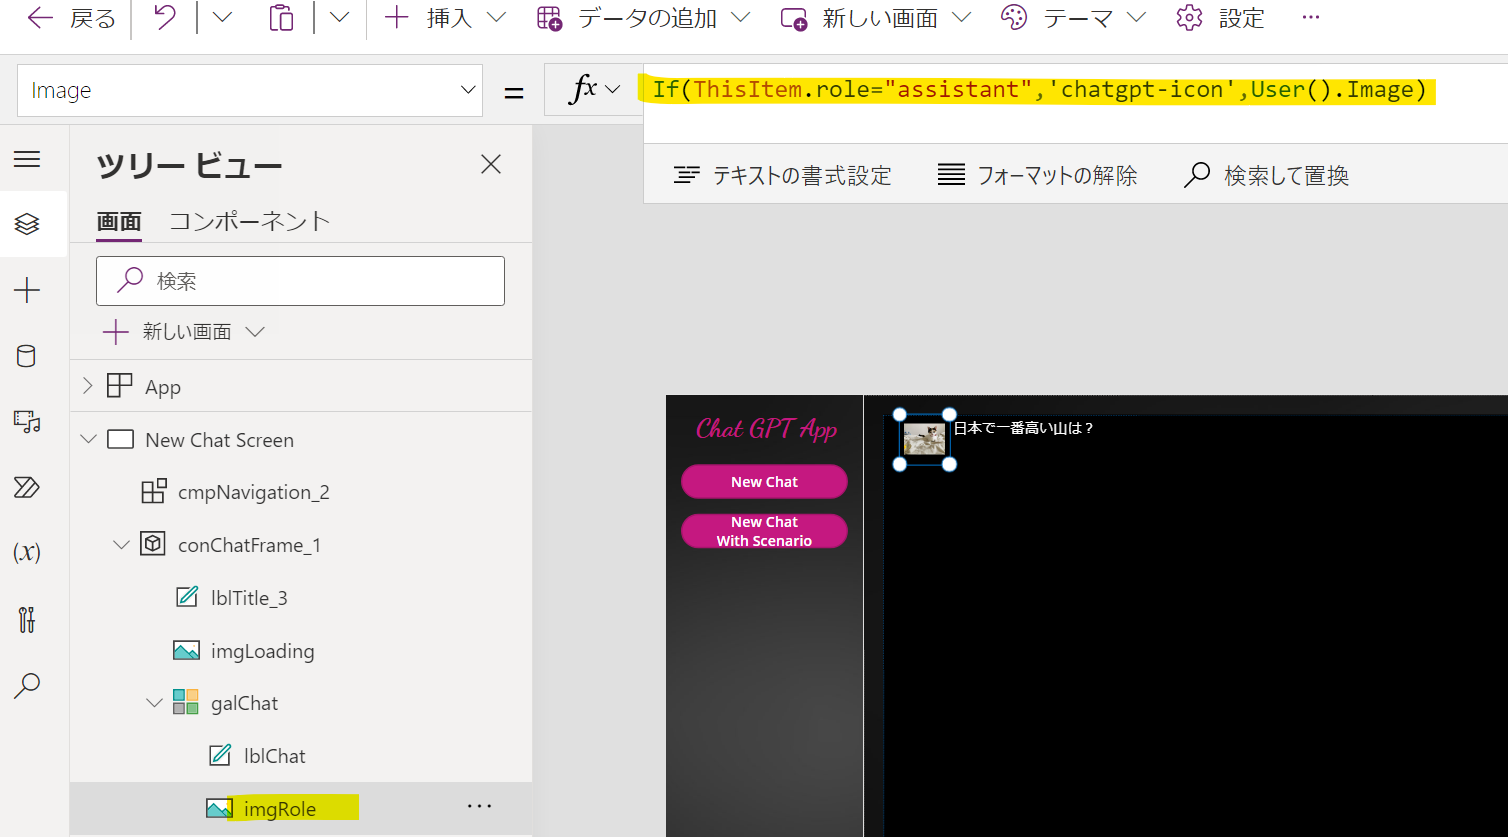
イメージコントロールを追加し、以下のように assistant と user で写真を変更します。
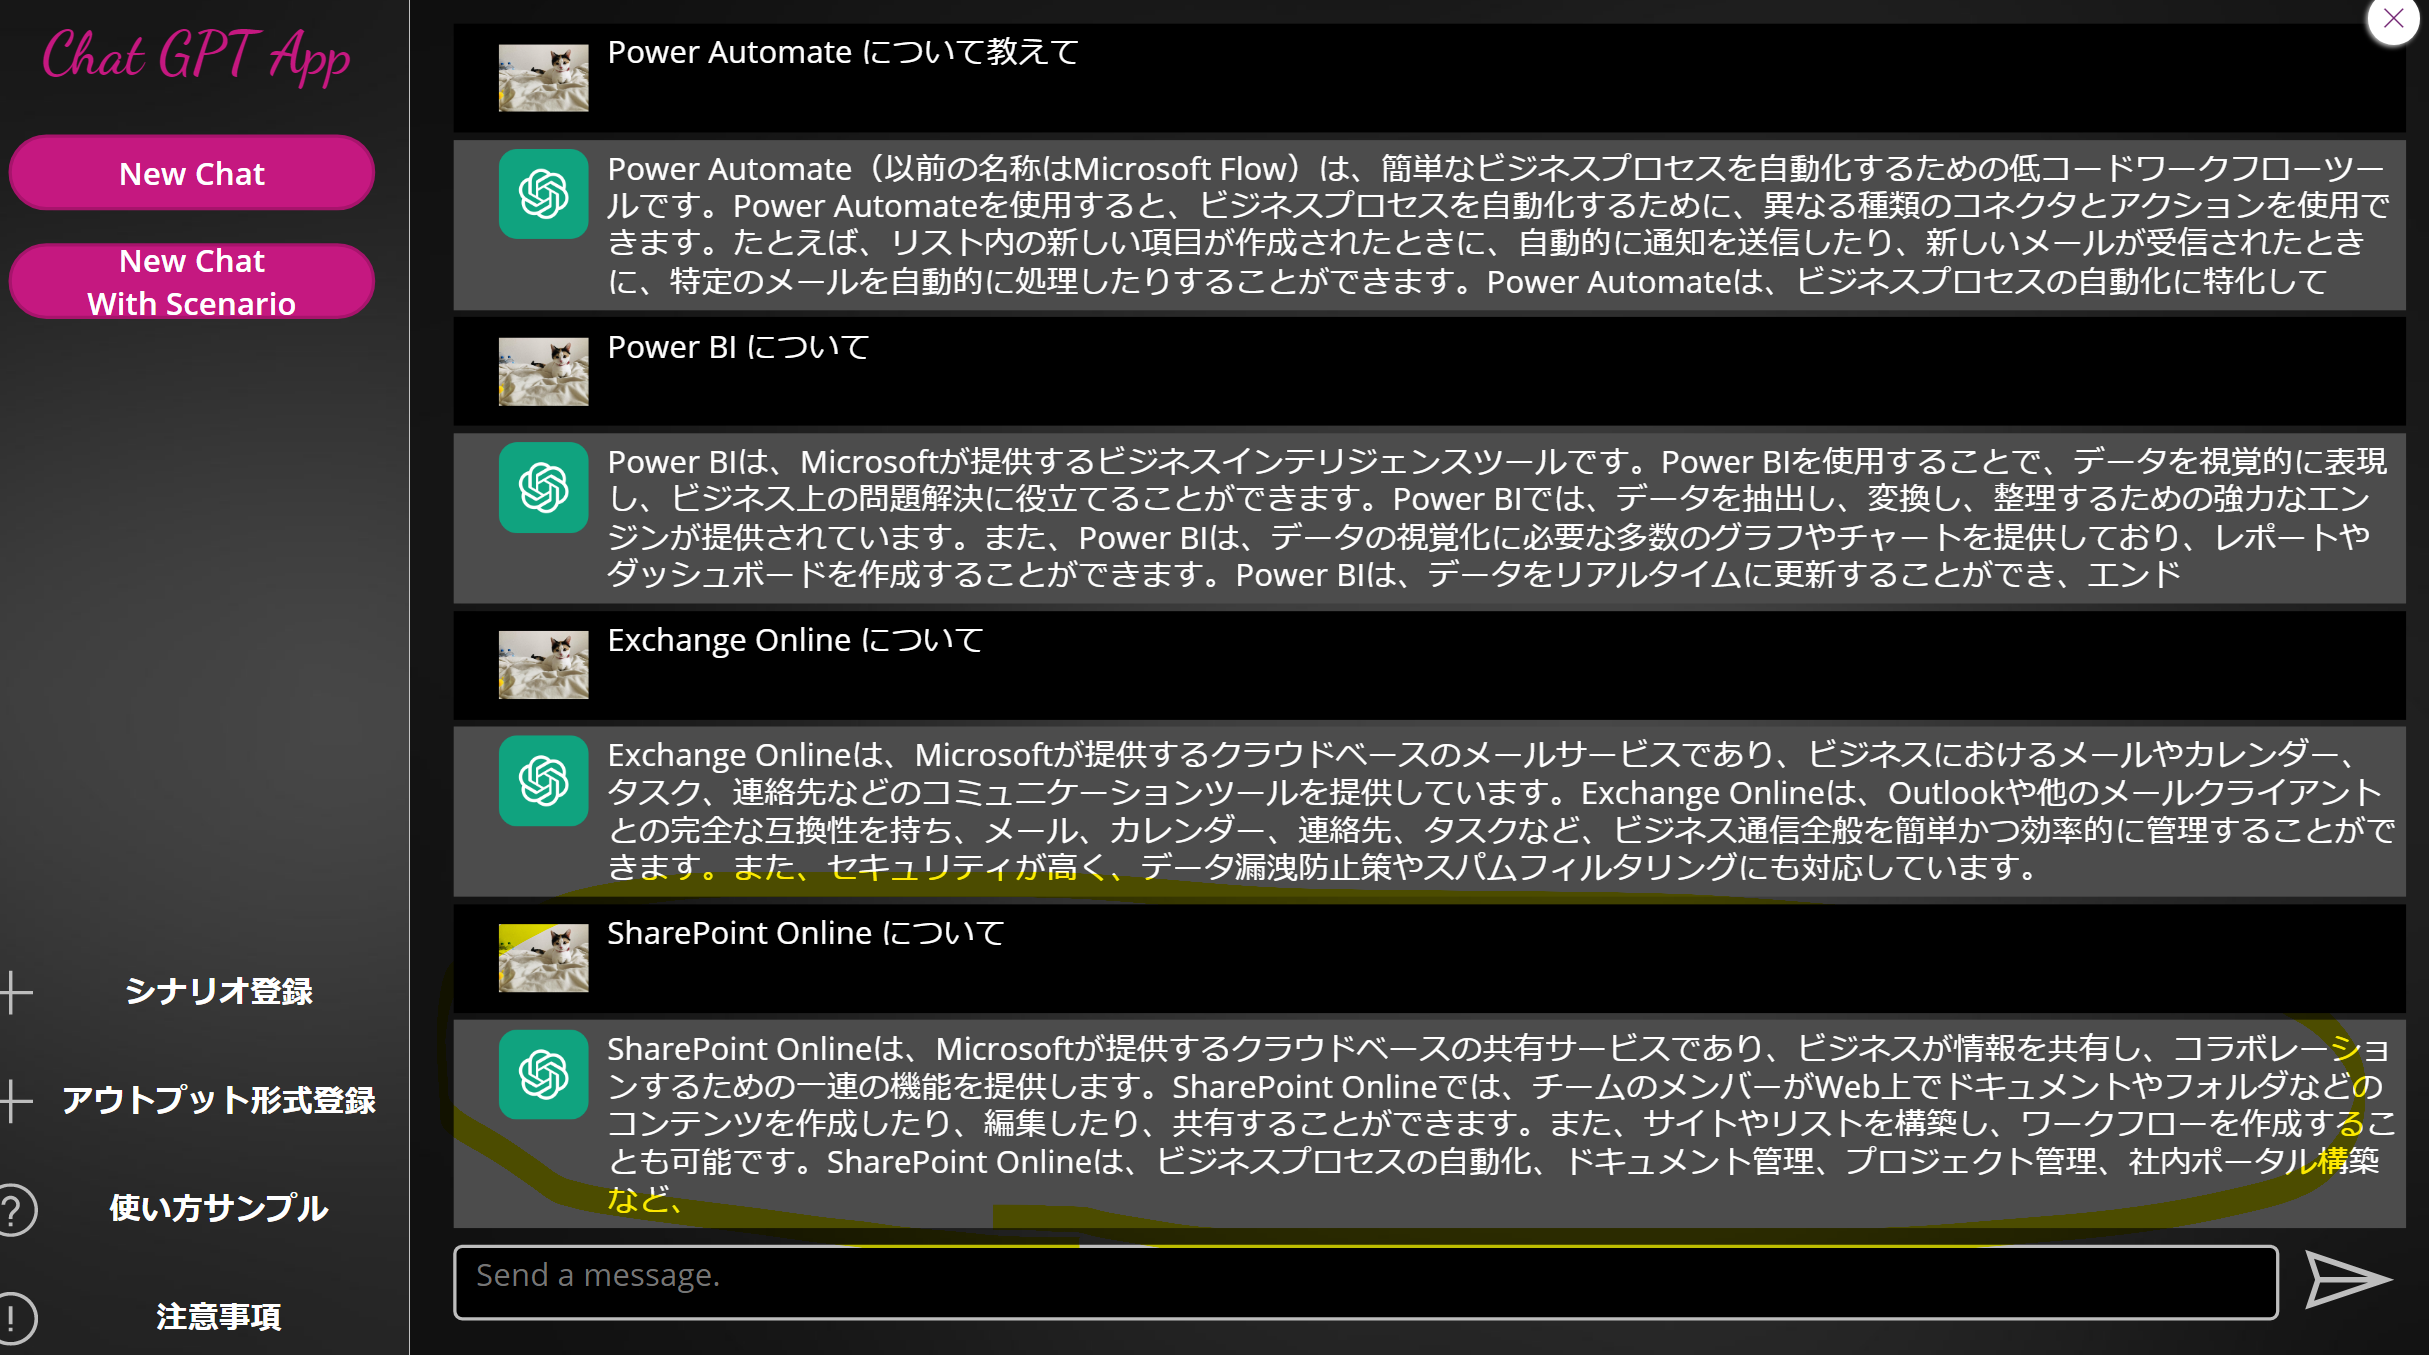
また、ギャラリーの[TemplateFill]を以下のように、自分と ChatGTP からの返答で色を分けます。
If(ThisItem.role="user",gblFontDark,ColorFade(gblFontDark,30%))
また、チャットのようなエクスペリエンスにするために、以下のようにチャットのやり取りが続いた際、一番最新のやり取り (ギャラリーで言うと一番下) が選択されるようにします。
こちらは、上述した送信ボタンの以下の処理により実現しております。こちらを実施しない場合、チャットが長くなった場合、一番したのやり取りが隠れてしまい、わざわざ下にスクロールしないといけなくなり、チャットのエクスペリエンスが低下すると思います。
Select(
    galChat,
    CountRows(galChat.AllItems)
);
まとめ
Azure OpenAI Service の SDK を利用し、フロントエンドを Power Apps にする際のアプローチについて紹介しました。構築コストは少なからず上がりますが、セキュリティ対策という観点や拡張性 (例:トークン数のコントロール、分析用のログの取得などの作りこみ)という観点でメリットがあると思います。
また、引き続きフロントエンドは Power Apps のため、こちらの構築コストは低く、有益な活用シナリオをアプリ内で共有したり (補足プロンプトを自動入力)、使い方サンプルや注意事項などを簡単に共有することが簡単にできますし、ちょっとしたカスタマイズもすぐにできるメリットは残ります。