AWS でWebアプリ作る機会があったので、色々調べるとAmplifyが便利そうだったので使ってみました。
今回作成するアプリの主な機能は以下:
- NuxtベースのTODOアプリ
- Lambda使ったGraphQLのAPI
- DynamoDBへのデータ保存/読込
- DynamoDBのデータとリアルタイム同期
- Cognitoによる認証機能
基本的には公式チュートリアルをなぞってますが、Nuxtで使うに当たりいくつか変更点があるので、Nuxt使いに役立てば幸いです。
Amplifyの初期設定
まずAmplifyのCLIをインストールしましょう。
$ npm install -g @aws-amplify/cli
インストールしたらamplifyコマンドが使えるようになってるはずです。早速configureで設定をしてみます。
$ amplify configure
Scanning for plugins...
Plugin scan successful
Follow these steps to set up access to your AWS account:

Sign in to your AWS administrator account:
https://console.aws.amazon.com/
Press Enter to continue
上記のようなログが流れて、AWSへのサインインが求められるので、サインインしてください。その次にまたコンソール戻りましょう。
戻ったら、regionの設定です。東京ならap-northeast-Xを選べば良いはず。user nameはデフォルトでもいいですが、わかりやすくamplify-adminとしてみました。
Specify the AWS Region
? region:  ap-northeast-1
Specify the username of the new IAM user:
? user name:  amplify-admin
Complete the user creation using the AWS console
https://console.aws.amazon.com/iam/home?region=undefined#/users$new?step=final&accessKey&userNames=amplify-admin&permissionType=policies&policies=arn:aws:iam::aws:policy%2FAdministratorAccess
Press Enter to continue
ここでAWS Consoleがブラウザで立ち上がり、ユーザー追加が求められます。基本的に全部デフォルトでOKです。
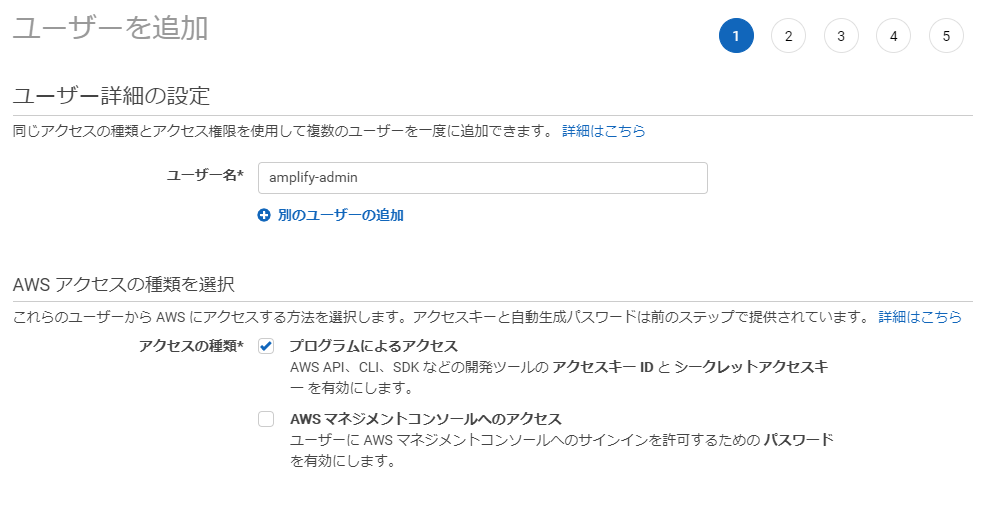
このままで次の画面進みます。
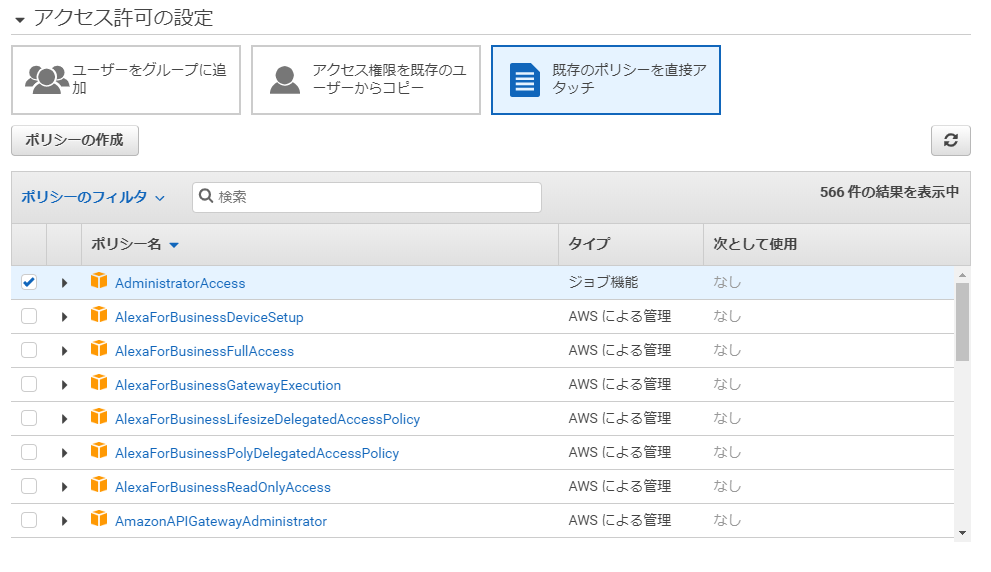
これもこのままで次に進みます。

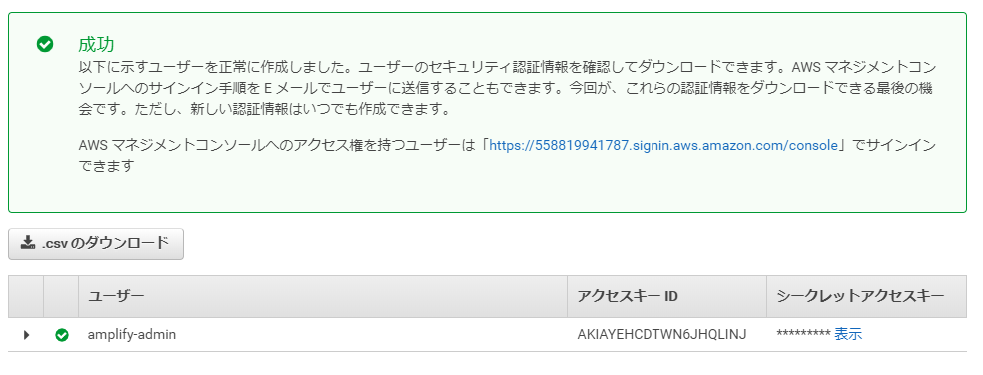
最終的に以下の画面が表示されます。このページはまだ閉じないでください。
コンソール画面に戻ります。
戻ったら、成功画面に表示されてる値を元にキーを入力してってください。キーは流出しないように注意して管理すること。Profile NameはなんでもOKです。今回はdefaultにしました。
Enter the access key of the newly created user:
? accessKeyId:  # 成功画面に表示されてるアクセスキーID
? secretAccessKey:  # 成功画面に表示されてるシークレットアクセスキー
This would update/create the AWS Profile in your local machine
? Profile Name:  default

Successfully set up the new user.
Nuxtアプリを用意する
Nuxtをcreate-nuxt-app使ってベースとなるアプリを用意します。アプリを作りたいディレクトリで以下のコマンド実行します。各オプションはお好みで。
$ npx create-nuxt-app nuxt-amplify

create-nuxt-app v3.2.0
✨  Generating Nuxt.js project in nuxt-amplify
? Project name: nuxt-amplify
? Programming language: JavaScript
? Package manager: Npm
? UI framework: Vuetify.js
? Nuxt.js modules: Axios
? Linting tools: ESLint, Prettier
? Testing framework: Jest
? Rendering mode: Single Page App
? Deployment target: Static (Static/JAMStack hosting)
? Development tools: jsconfig.json (Recommended for VS Code if you're not using typescript)
完了したら起動して動作するか試してみましょう。
$ npm run dev

(省略)

i Waiting for file changes
i Memory usage: 415 MB (RSS: 516 MB)
i Listening on: http://localhost:3000/
http://localhost:3000/ にアクセスして下の画面が見えたらOKです。

ついでに、次以降の作業のためにgenerateコマンドを使ってファイルを生成しておきます。
$ npm run generate
distディレクトリが作られて中身が入ってればOKです。
Amplifyのバックエンドを作成する
Nuxtプロジェクトのルートディレクトリで以下のコマンドを打ち、設定を進めます。
$ amplify init
Note: It is recommended to run this command from the root of your app directory
? Enter a name for the project nuxtamplify
? Enter a name for the environment dev
? Choose your default editor: Visual Studio Code
? Choose the type of app that you're building javascript
Please tell us about your project
? What javascript framework are you using vue
? Source Directory Path:  .
? Distribution Directory Path: dist
? Build Command:  npm.cmd run-script generate
? Start Command: npm.cmd run-script start
そうすると、以下の内容が更新されます。
-
/amplifyディレクトリが作成される。このディレクトリにはバックエンドの定義をコードベースで実装していき、Infrastructure as Codeを実現できる。 -
aws-exports.jsが作成されてバックエンドの情報が保存される。 -
.gitignoreが更新されていくつかのファイルが指定される。 - AWS Console上にプロジェクトが作られる。 ???
Amplifyのフロント用ライブラリをインストールする
続いて、Nuxt側から使うフロント用のAmplifyライブラリをnpmからインストールします。
$ npm install aws-amplify @aws-amplify/ui-vue
そしてNuxt側で/pluginsディレクトリにamplify.jsファイルを作成し、プラグインとしてインストールしたライブラリを読み込みます。
import Vue from 'vue'
import Amplify from 'aws-amplify'
import '@aws-amplify/ui-vue'
import awsExports from '../aws-exports'

Amplify.configure(awsExports)
Vue.use(Amplify)
作成したプラグインを読み込むようnuxt.config.jsのplugins配列で指定します。
// ...
  plugins: [{ src: '~/plugins/amplify.js', ssr: false }],
// ...
この状態でnpm run devしてビルドに失敗しなければ問題ないはずです。
GraphQL APIを作りデプロイする
続いて、API作っていきます。AmplifyではREST APIとGraphQL APIのどちらかが作れます。今回はGraphQLを使ってみましょう。
$ amplify add api
? Please select from one of the below mentioned services: GraphQL
? Provide API name: todoapi
? Choose the default authorization type for the API API key
? Enter a description for the API key: todo
? After how many days from now the API key should expire (1-365): 7
? Do you want to configure advanced settings for the GraphQL API No, I am done.
? Do you have an annotated GraphQL schema? No
? Choose a schema template: Single object with fields (e.g., “Todo” with ID, name, description)
? Do you want to edit the schema now? No
以上で、Graph QLのスキーマも自動で生成されます。ファイル内容を見てみましょう。
type Todo @model {
  id: ID!
  name: String!
  description: String
}
idとnameとdescriptionというデータが格納できるスキーマのモデルが作られてます。@modelと指定されていますがこれはGraph QL transformライブラリが用意するディレクティブです。これがあることにより、テーブルとCRUD機能が用意されます。つまり、APIの実装自体はもうほぼ完成だったりします。
なので、GraphQL APIをデプロイしましょう。
$ amplify push

Current Environment: dev

| Category | Resource name | Operation | Provider plugin   |
| -------- | ------------- | --------- | ----------------- |
| Api      | todoapi       | Create    | awscloudformation |
? Are you sure you want to continue? Yes

? Do you want to generate code for your newly created GraphQL API Yes
? Choose the code generation language target javascript
? Enter the file name pattern of graphql queries, mutations and subscriptions src\graphql\**\*.js
? Do you want to generate/update all possible GraphQL operations - queries, mutations and subscriptions Yes
? Enter maximum statement depth [increase from default if your schema is deeply nested] 2
これでAPIが作成されました。作成されたかを確認してみましょう。
$ amplify status

Current Environment: dev

| Category | Resource name | Operation | Provider plugin   |
| -------- | ------------- | --------- | ----------------- |
| Api      | todoapi       | No Change | awscloudformation |

GraphQL endpoint: https://######################.appsync-api.ap-northeast-1.amazonaws.com/graphql
GraphQL API KEY: ######################
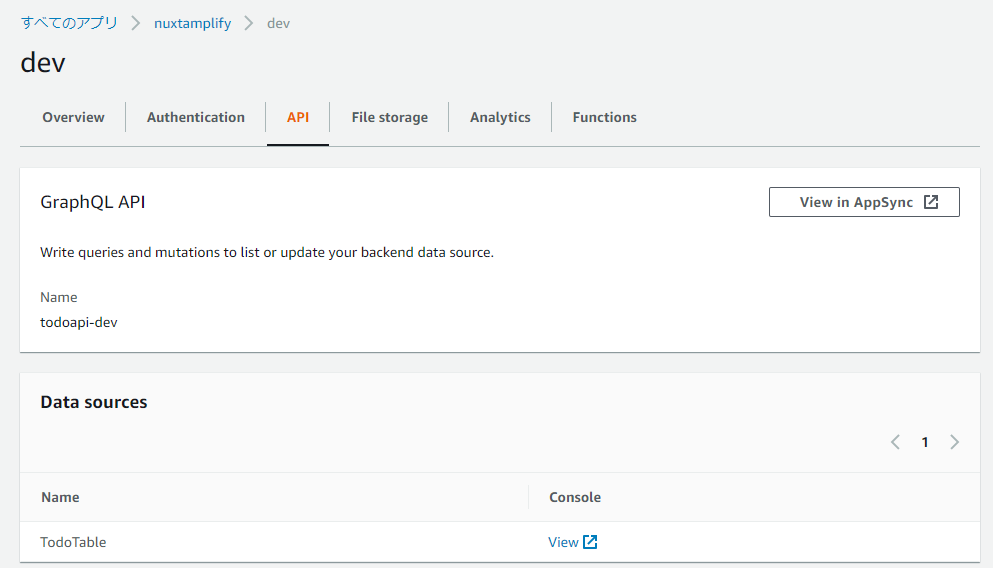
そしてAWS Console上からも確認してみましょう。
$ amplify console
これで以下画面が開きます。何も表示されなかったらリージョンがオハイオとかになってる可能性あるので、右上のメニューから東京にしてください。
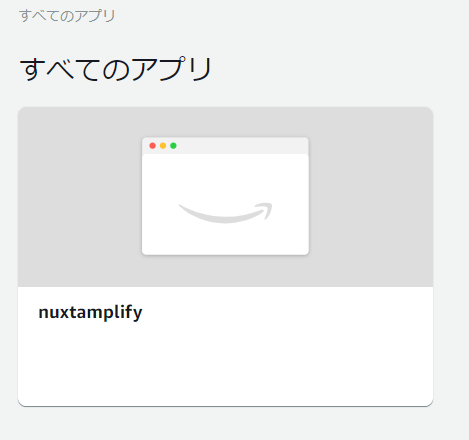
これクリックしてbackendを選択して以下の画面でView in AppSyncを選択します。
フロントエンドとAPIを接続する
フロントのNuxtアプリからAPIを叩くようにページを用意しましょう。
<template>
  <div>
    <h1>TodoApp</h1>
    <v-text-field v-model="name" label="Name"></v-text-field>
    <v-text-field v-model="description" label="Description"></v-text-field>
    <v-btn @click="createTodo">Create</v-btn>
    <ul>
      <li v-for="todo in todos" :key="todo.id">
        {{ todo.name }} : {{ todo.description }}
      </li>
    </ul>
  </div>
</template>

<script>
import { API } from 'aws-amplify'
import { createTodo } from '~/src/graphql/mutations'
import { listTodos } from '~/src/graphql/queries'

export default {
  data() {
    return {
      name: '',
      description: '',
      todos: [],
    }
  },
  async created() {
    await this.getTodos()
  },
  methods: {
    async createTodo() {
      const { name, description } = this
      if (!name || !description) return false
      const todo = { name, description }
      await API.graphql({
        query: createTodo,
        variables: { input: todo },
      })
      this.name = ''
      this.description = ''
      this.getTodos()
    },
    async getTodos() {
      const todos = await API.graphql({
        query: listTodos,
      })
      this.todos = todos.data.listTodos.items
    },
  },
}
</script>
このコードだと、初期のTODO取得と新規追加ができます。ですが、AmplifyのGraphQLはsubscriptionという機能を使ってリアルタイムでのデータ更新を実現できます。これはAPI作成時に自動で生成されているので、特に設定は不要で読み込む設定させすればできちゃいます。リアルタイムで同期するので、createTodoの末尾にあるthis.getTodos()は要らなくなります。
<template>
  <div>
    <h1>TodoApp</h1>
    <v-text-field v-model="name" label="Name"></v-text-field>
    <v-text-field v-model="description" label="Description"></v-text-field>
    <v-btn @click="createTodo">Create</v-btn>
    <ul>
      <li v-for="todo in todos" :key="todo.id">
        {{ todo.name }} : {{ todo.description }}
      </li>
    </ul>
  </div>
</template>

<script>
import { API } from 'aws-amplify'
import { createTodo } from '~/src/graphql/mutations'
import { listTodos } from '~/src/graphql/queries'
import { onCreateTodo } from '~/src/graphql/subscriptions'

export default {
  data() {
    return {
      name: '',
      description: '',
      todos: [],
    }
  },
  created() {
    this.getTodos()
    this.subscribe()
  },
  methods: {
    async createTodo() {
      const { name, description } = this
      if (!name || !description) return false
      const todo = { name, description }
      await API.graphql({
        query: createTodo,
        variables: { input: todo },
      })
      this.name = ''
      this.description = ''
    },
    async getTodos() {
      const todos = await API.graphql({
        query: listTodos,
      })
      this.todos = todos.data.listTodos.items
    },
    subscribe() {
      API.graphql({ query: onCreateTodo }).subscribe({
        next: (eventData) => {
          const todo = eventData.value.data.onCreateTodo
          if (this.todos.some((item) => item.name === todo.name)) return // remove duplications
          this.todos = [...this.todos, todo]
        },
      })
    },
  },
}
</script>
認証機能を追加する
認証もAmplifyで追加できます。認証はAWSのCognitoを利用します。
$ amplify add auth
 Do you want to use the default authentication and security configuration? Default configuration
 Warning: you will not be able to edit these selections. # 以下の設定は設定後の変更不可
 How do you want users to be able to sign in? Email
 Do you want to configure advanced settings? No, I am done.
これだけで準備完了です。後はサービスをデプロイするためにはpushしてあげる必要があります。
$ amplify push
? Are you sure you want to continue? Y
これでCognitoのセットアップが完了します。次はAmplifyが用意してくれてるVueコンポーネントを差し込んでみましょう。
<template>
  <amplify-authenticator>
    <h1>TodoApp</h1>
    <v-text-field v-model="name" label="Name"></v-text-field>
    <v-text-field v-model="description" label="Description"></v-text-field>
    <v-btn @click="createTodo">Create</v-btn>
    <ul>
      <li v-for="todo in todos" :key="todo.id">
        {{ todo.name }} : {{ todo.description }}
      </li>
    </ul>
    <amplify-sign-out></amplify-sign-out>
  </amplify-authenticator>
</template>
<amplify-authenticator>コンポーネントの子ノードは認証が通った後に表示されるようになります。<amplify-sign-out>コンポーネントは、いわゆるサインアウトボタンを表示させるだけです。スタイルはドキュメント見た限りカスタマイズできそう。以下はデフォルトの見た目です。英語です。
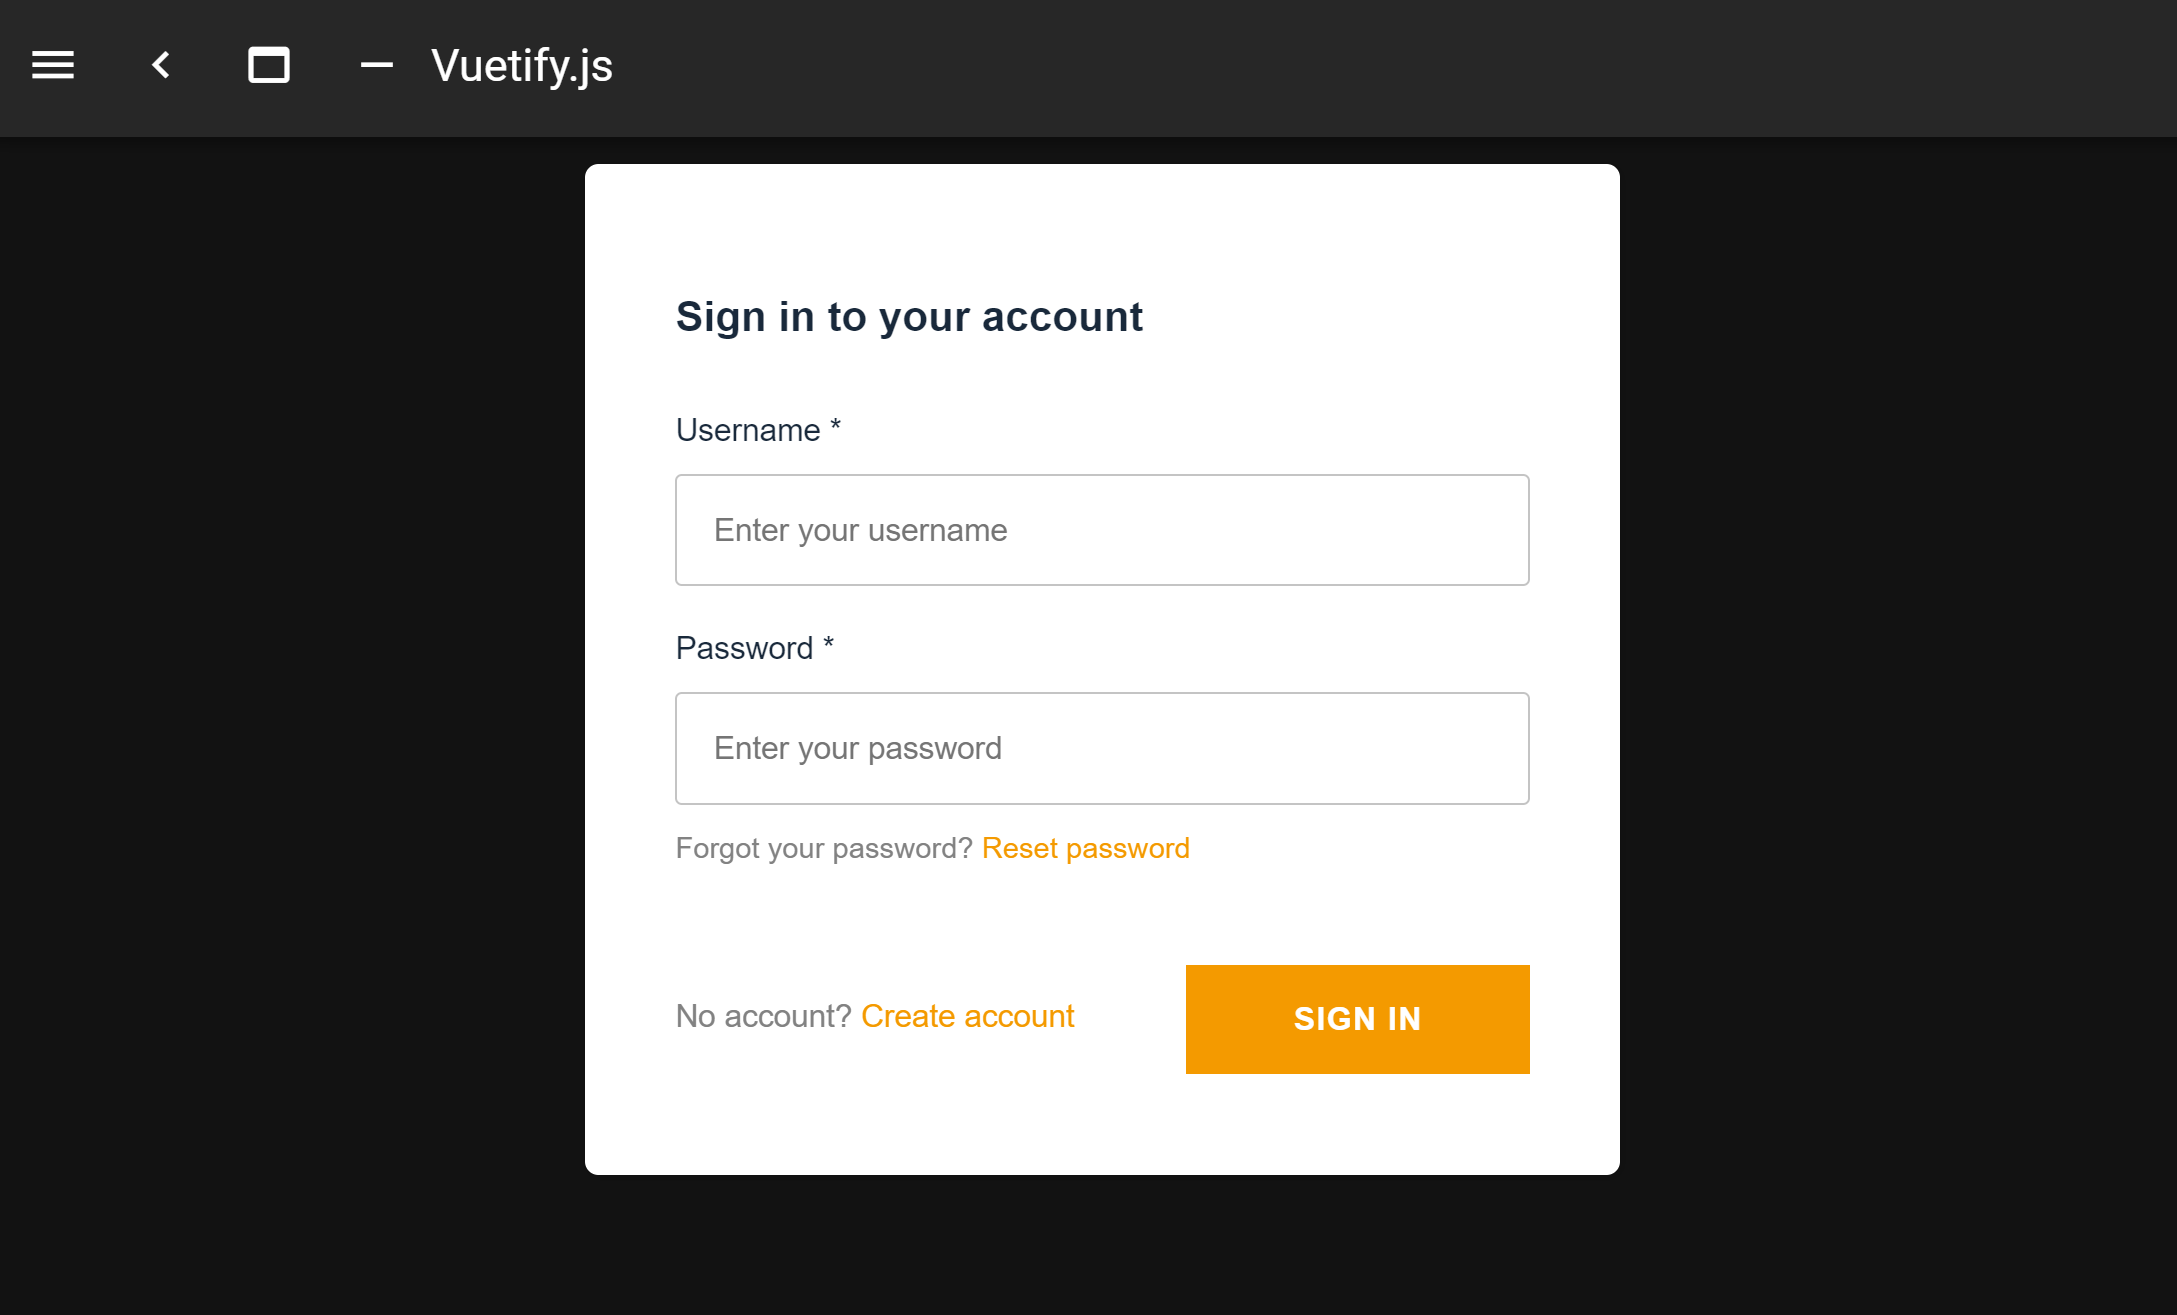
サインインすると、子ノードの内容が表示されます。
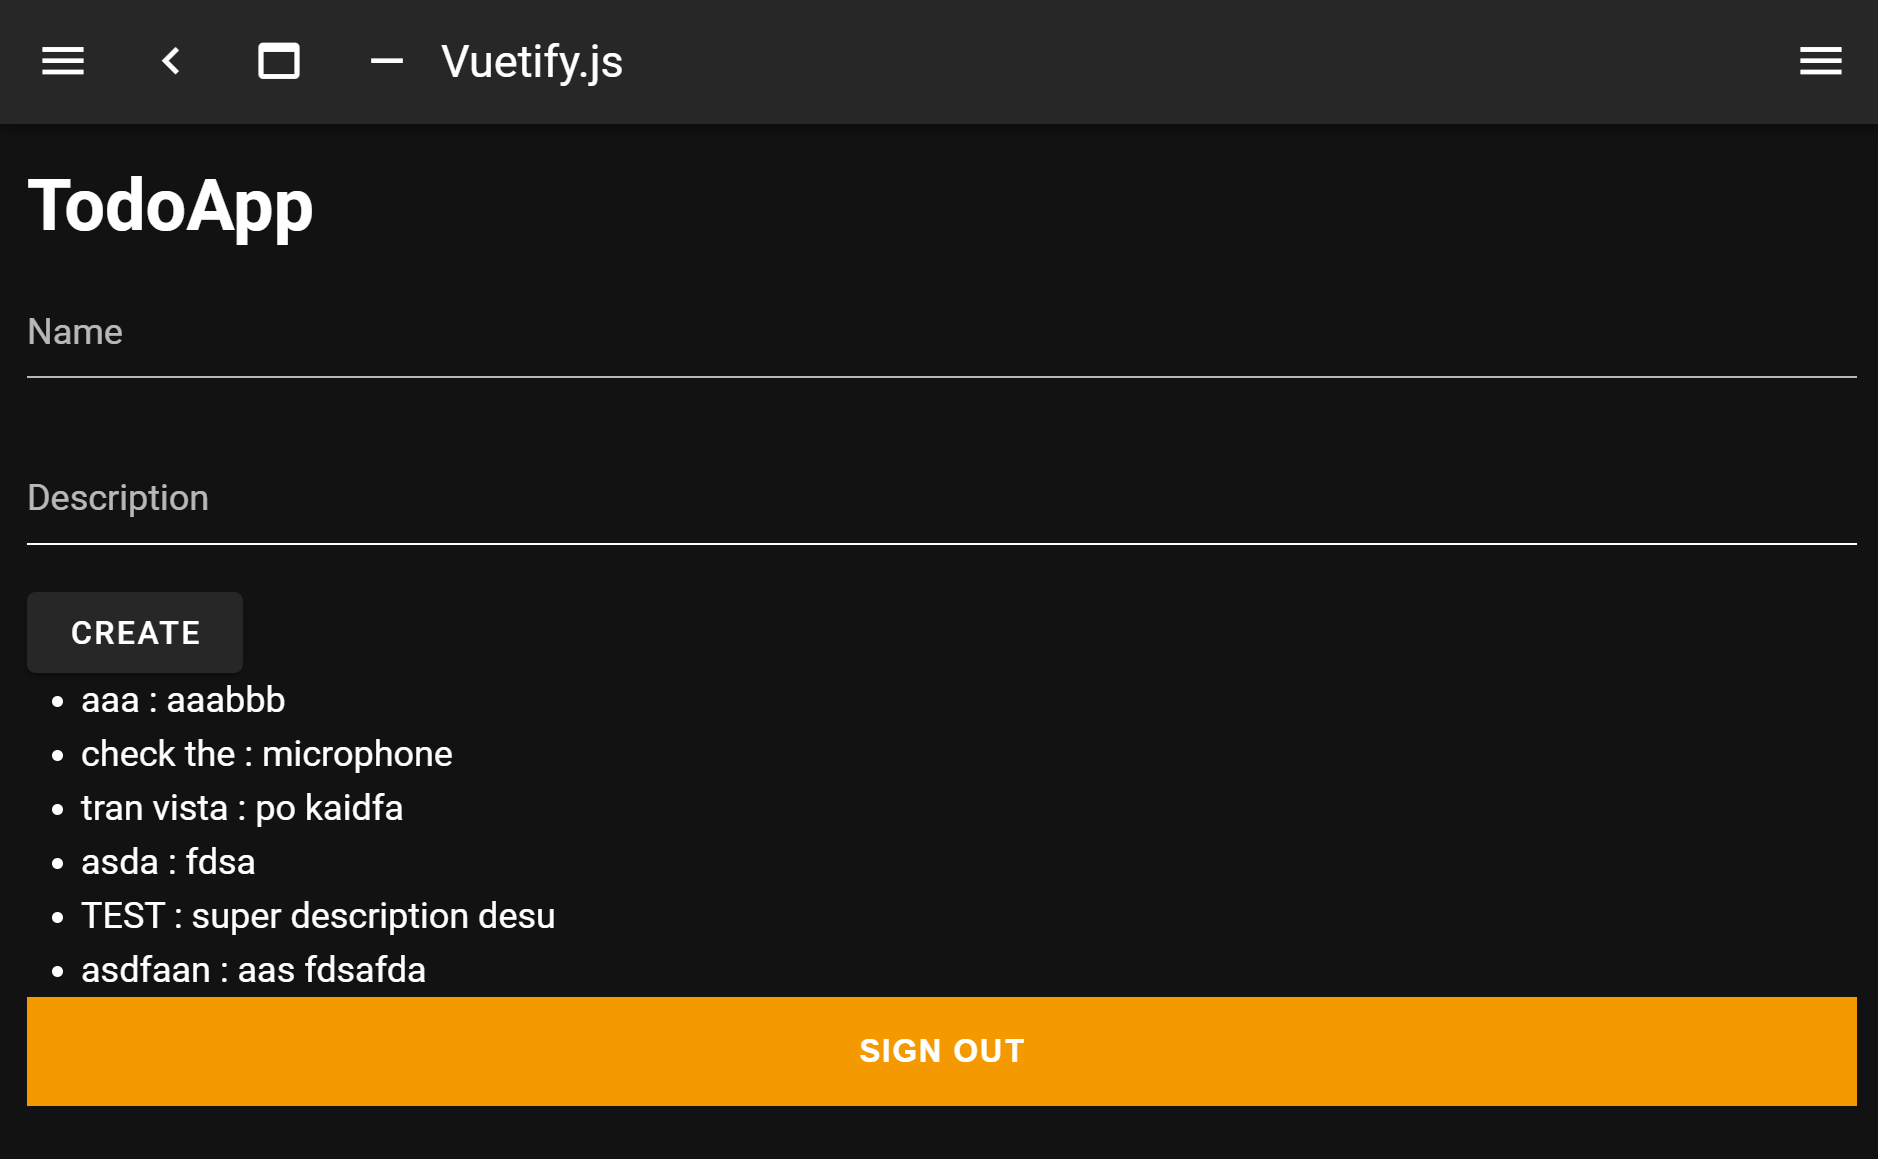
認証がこれだけで出来ちゃいます。もちろんCognito側でのアカウント管理もできます。サインインについては提供されてるコンポーネントの他にライブラリ側に用意されたAPIを利用して独自の処理を追加できます。例えば、アカウント情報登録時に追加の情報を登録するなども実現できそうです。
アプリをホスティング環境にデプロイする
AmplifyのCLI使ってデプロイするとS3上でホスティングしてくれるようになります。早速設定していきましょう。
$ amplify add hosting
? Select the plugin module to execute Hosting with Amplify Console (Managed hosting with custom domains, Continuous deployment)
? Choose a type Manual deployment
これでもう設定OKです。ではホスティング環境にデプロイしてみましょう。
$ amplify publish

Current Environment: dev

| Category | Resource name       | Operation | Provider plugin   |
| -------- | ------------------- | --------- | ----------------- |
| Hosting  | amplifyhosting      | Create    | awscloudformation |
| Api      | todoapi             | No Change | awscloudformation |
| Auth     | nuxtamplify2271a807 | No Change | awscloudformation |
? Are you sure you want to continue? Yes

...

✔ Deployment complete!
https://dev.XXXXXXXXXXX.amplifyapp.com
このURLクリックしてもらうともうアプリに触れると思います。
次のステップ
わずか数時間でシンプルなアプリがもう実現できたかと思います。
冒頭の繰り返しになりますが、Amplifyでは以下がAmplifyの機能を使って簡単に実現できるので、ドキュメントは英語中心になってますが色々調べながら次のステップを踏みアプリを効率よく開発していきましょう!
- Authentication
- DataStore
- User File Storage
- Serverless APIs
- Analytics
- AI/ML
- Push Notification
- PubSub
- AR/VR
トラブルシューティング
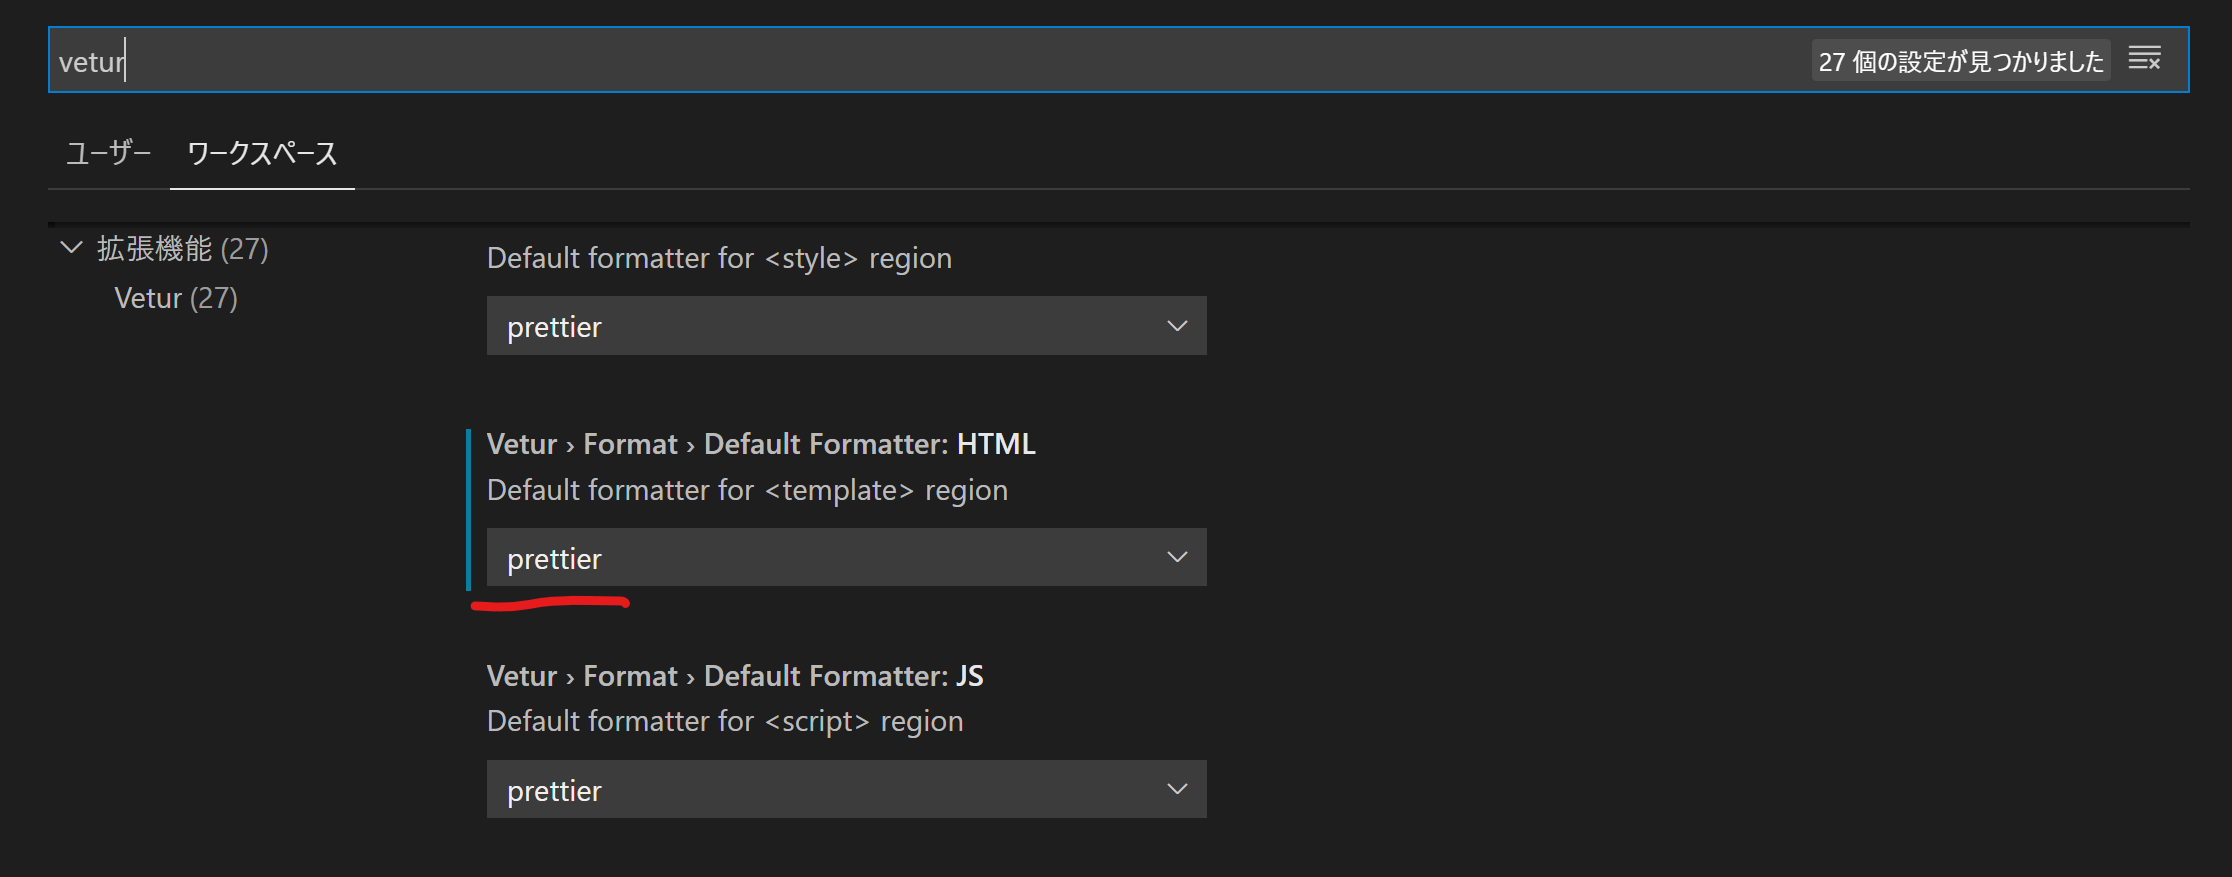
ビルド時にLinterで怒られる
Prettierの設定で怒られている可能性があります。.prettierrcファイルの差し替えてみてください。
{
  "tabWidth": 2,
  "arrowParens": "always",
  "trailingComma": "es5",
  "printWidth": 80,
  "semi": false,
  "singleQuote": true,
  "bracketSpacing": true,
  "useTabs": false,
  "endOfLine": "auto
}
あるいは、VSCodeの拡張機能であるVeturを入れてる場合は、VeturのHTMLデフォルトフォーマッターがprettyhtmlになっている可能性があります。ワークスペースの設定からフォーマッターをprettierに変更してください。