はじめに: Genvid SDKについて
Genvidは、動画ストリーミングとブラウザを介したインタラクティブな体験を組み合わせた「大規模インタラクティブ・ライブ・イベント」(Massive Interactive Live Events)を実現するSDKです。
https://www.genvidtech.com/ja/mile%E3%81%A8%E3%81%AF%EF%BC%9F/
ゲーム技術をベースに、リアルタイムで進行する動画番組に対して、動画視聴者が能動的に参加できるシステムを提供します。
コンテンツ内のキャラクターが次に何をするかを投票で決めたり、ミニゲームをプレイしてポイントをため、特定のキャラクターを応援するなどの活動を経て、物語が変化していきます。
MILEは、Unityを使いFacebook上で配信されている「Rival Peak」と、Unreal Engine 4を使った「Project Raven」があります。
『RIVAL PEAK』が示す次世代の視聴者参加型デジタルエンタテインメント
https://news.yahoo.co.jp/byline/onokenji/20210326-00229353
Genvid SDKの導入については、Genvidディベロッパーサイトの日本語マニュアルからご確認ください。
https://www.genvidtech.com/for-developers/
今回はGenvid SDK for Unityを使っていますが、Unreal Engineでも利用可能です。
変換行列(Matrix4x4)を使って動画と同期した座標情報を送る
さて、Genvid経由でゲームから動画と同期した「オブジェクトの位置」を送信して、そのデータをもとにHTML側のラベルを動かす処理を考えてみましょう。
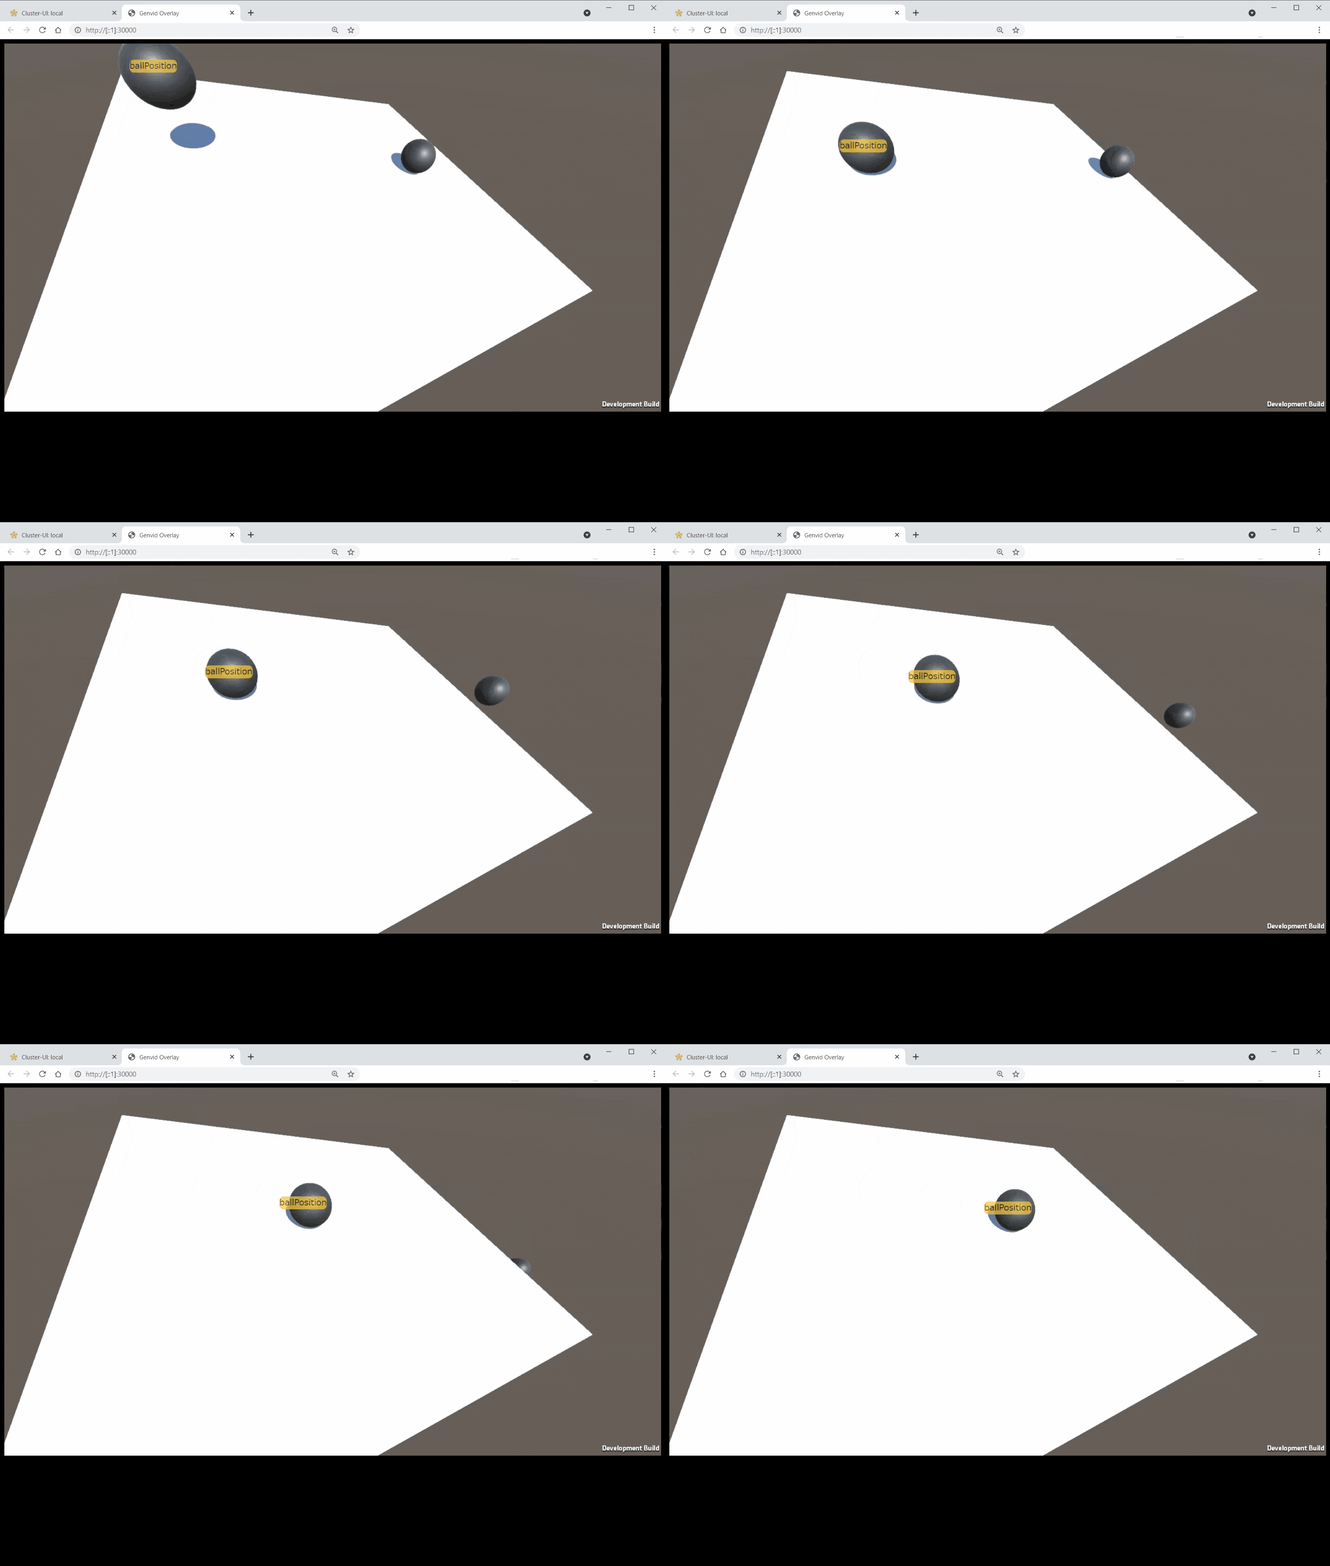
次のgifでは、黄色いラベルが黒い球に追従しています。
白い板と黒い球の部分は動画です。Unityで描画された内容を動画としてブラウザ上でストリーミング再生しています。
黒い球の座標を動画と一緒にブラウザに送り、ブラウザ側で黄色いラベルを描画する際に座標を使って位置を同期させています。
こうした演出をGenvidで行う場合、Unity側でオブジェクトの2D座標を計算してXY座標を送る方法が最も楽です。その手法については以下の手順で紹介しました。
GenvidでUnityからストリーミング動画と同期したデータ配信を行う
https://qiita.com/Takaaki_Ichijo/items/4fbc70e7efdbdef85459
これでもかまわないのですが、Unityインスタンス側に一定の処理コストがかかります。
そこで、今回は変換行列(Matrix4x4)を使って位置情報を送り、ブラウザ側で2D座標に変換する処理を考えましょう。
変換行列(Matrix4x4)では、位置を示すVector3, 回転を示すRotationとサイズの、3次元空間上の位置・回転・大きさが一意の値で表現できます。中身は16個の数値の配列です。
Matrix4x4
https://docs.unity3d.com/ja/current/ScriptReference/Matrix4x4.html
ゲームからMatrix4x4で位置情報を送りますが、その座標データを2Dに変換するために、カメラのマトリックス情報も同時に送ります。
Genvid Mathの活用
Genvidには、ブラウザ側で各種演算計算を行うための便利ライブラリとして「Genvid Math」が付属しています。
ベクトル演算や閾値チェック、距離の計算など3D座標系を取り扱うことができます。
Genvid Math API
https://www.genvidtech.com/doc/ja/SDK-1.32.0/reference/web_sdk/js/math.html
ブラウザ側(js)の実装
index.html
今回はGenvid Mathライブラリを使うので、ソースとしてgenvid.umd.jsと一緒にgenvid-math.umd.jsもインクルードします。
<!doctype html>
<html>
<head>
    <title>Genvid Overlay</title>
    <link rel="stylesheet" href="style.css">
</head>
<body style="background:black">
    <div id="video_player"></div>
    <div class="label" id="ballPosition">ballPosition</div>
    <script src="genvid.umd.js"></script>
    <script src="genvid-math.umd.js"></script>
    <script src="overlay.js"></script>
</body>
</html>
Genvidの初期化とGenvid Stream受け取りイベントの設定
overlay.jsは前回記事と同様です。drawの中身でgenvid-mathを使用します。
var genvidClient;

fetch("/api/public/channels/join", { method: "post" })
    .then(function (data) { return data.json() })
    .then(function (response) {
        genvidClient = genvid.createGenvidClient(response.info, response.uri, response.token, "video_player");

        genvidClient.onStreamsReceived(function (dataStreams) {
            for (let stream of [...dataStreams.streams, ...dataStreams.annotations]) {
                for (let frame of stream.frames) {
                    try {
                        frame.user = JSON.parse(frame.data);
                    }
                    catch (e) {
                        console.log(e, frame.data);
                    }
                }
            }
        });

        genvidClient.onDraw(function (frame) {
            let gameDataFrame = frame.streams["ball"];
            if (gameDataFrame && gameDataFrame.user) {
                draw(gameDataFrame.user);
            }
        });

        genvidClient.start();
    })
    .catch(function (e) { console.log(e) });
描画実行
draw関数では、Genvid Streamによって送られてきたデータgameDataから、ボールのマトリックスを取り出し、位置情報のVector3のみを取り出します。
また、カメラのマトリックスは後述するconvertMatrix関数でmat4データに変換後、genvidMath.projectPositionを使ってスクリーンのマトリックスとボールの位置から2D座標を計算します。
function draw(gameData) {

    let m = gameData.ballMatrix;
    let p = genvidMath.vec3(m.e03, m.e13, m.e23);

    let mat = this.convertMatrix(gameData.matProjView);
    let pos_2d = genvidMath.projectPosition(mat, p);

    this.center_at(ballPosition, pos_2d, blankSize);
}
送られてきたデータを4行からなる4x4 の行列データに加工する
Genvid経由でゲームから座標情報が来た時、実体的なデータは大きさが16の配列です。まずはそれをmat4の形に整形します。
function convertMatrix(rawmat) {
    return genvidMath.mat4(genvidMath.vec4(rawmat.e00, rawmat.e01, rawmat.e02, rawmat.e03),
        genvidMath.vec4(rawmat.e10, rawmat.e11, rawmat.e12, rawmat.e13),
        genvidMath.vec4(rawmat.e20, rawmat.e21, rawmat.e22, rawmat.e23),
        genvidMath.vec4(rawmat.e30, rawmat.e31, rawmat.e32, rawmat.e33));
}
2D座標からラベルの描画位置を計算する
draw関数で最後に呼び出しているcenter_atでは、中央の座標を計算してHTML要素の位置を書き換えます。引数にhtml要素、2d座標、ブラウザ内の動画以外の余白サイズ(デモでは縦方向)の3つを取ります。
まず-1~1の数値を0~1にノーマライズし、その後0から画面サイズとノーマライズされた位置情報を掛けて実際のサイズに変換します。
さらに、this.genvidClient.videoAspectRatioから現在のストリーミング動画のアス比から、ビデオが描画されていない縦方向の空白部分を計算します。
そしてセンタリング処理として移動する要素の中央ポイントになるよう調整したのち、left / bottomに対して座標を指定します。
function center_at(html_element, pos_2d) {
    // Convert from [-1, 1] range to [0, 1].
    let vh = genvidMath.vec2(0.5, 0.5);
    let pos_2d_n = genvidMath.mad2D(pos_2d, vh, vh);

    // Convert from [0, 1] range to [0, w].
    let p = html_element.parentElement;
    let p_size = genvidMath.vec2(p.clientWidth, p.clientHeight);
    let pos_in_parent = genvidMath.mul2D(pos_2d_n, p_size);

    // Calculate Video Height.
    let videoHeight = p.width / this.genvidClient.videoAspectRatio;
    let blankSize = p.height - videoHeight;

    // Adjust for centering element.
    let e_size = genvidMath.vec2(html_element.clientWidth, html_element.clientHeight);
    let e_offset = genvidMath.muls2D(e_size, -0.5);
    let pos_centered = genvidMath.add2D(pos_in_parent, e_offset);

    // Apply.
    html_element.style.left = pos_centered.x+"px";
    html_element.style.bottom = pos_centered.y + blankSize+"px";
    html_element.style.position = "absolute";
}
Unity側実装
Unity側の実装を見ていきましょう。本投稿ではGenvidの初期化関連は省略します。
前回記事と比較して、Genvid Streamで送るGameDataの構造が違います。
ボールの位置を送るSubmitBallPosition関数を作る
生成されたボールのマトリックス情報を定期的にGenvid Streamとして配信します。マトリックスはtransform.localToWorldMatrixから取得できます。
同様にカメラのプロジェクションビューをmainCam.projectionMatrix * mainCam.worldToCameraMatrixで計算し、「GameData」として同時に送信します。
public class BallPositionBroadcaster : MonoBehaviour
{
    public GameObject currentBallGameObject;    // translation matrix used to display tank position
    private Camera mainCam;

    private void Awake () {
        mainCam = Camera.main;
    }

    public void SubmitBallPosition(string streamId) {
        if (GenvidSessionManager.IsInitialized && GenvidSessionManager.Instance.enabled) {

            GameData gameData = new GameData () {
                matProjView = mainCam.projectionMatrix * mainCam.worldToCameraMatrix,
                ballMatrix = currentBallGameObject.transform.localToWorldMatrix,
            };

            GenvidSessionManager.Instance.Session.Streams.SubmitGameDataJSON (streamId, gameData);
        }
    }

    [System.Serializable]
    public struct GameData {
        [SerializeField]
        public Matrix4x4 matProjView;
        [SerializeField]
        public Matrix4x4 ballMatrix;
    }
}
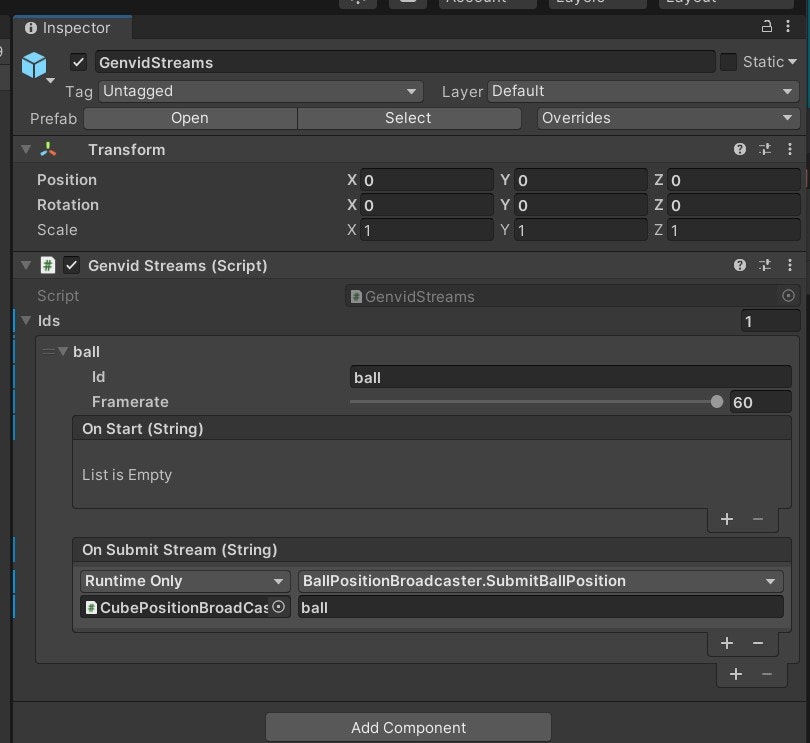
Genvid StreamプレハブからSubmitBallPosition関数を呼ぶ
この手順は前回記事と全く同一です。
Matrix4x4とGenvid Mathの活用
描画される内容は前回と全く一緒ですが、Unity側の処理負荷が若干下がることと、奥行き情報を含めたデータとしてブラウザ側に渡されるため、ほかのHTML要素のソート(ある地点では後ろに隠れるなど)といった処理が可能になります。
次回はより凝った演出について紹介します。

