Typescriptでwebpackを使用する学習を行ったので、復習も兼ねて投稿します。
目次
■Webpackとは
■環境構築
■実際に利用してみた
■参考文献
■webpack とは
結論 = モジュールバンドラー
■モジュール → ファイル・ファイル群
■バンドラー → 複数のものを1つにまとめるもの
つまり、
複数のファイルをぎゅっと1つにまとめることがwebpackの役割である。
- なぜ1つにまとめる必要があるのか -
理由は主に2つ。
①リクエストの回数を減らすことで効率UP
→ファイルが複数あるとリクエスト回数がその分増えるので、サーバにも負荷がかかります。
結果、読み込みの遅延やサーバーダウンなどにつながります。
②コードの最適化
→1つのファイルに小さくまとめることでファイルのサイズが小さくなり、パフォーマンスが向上します。
■環境構築
・ 事前準備
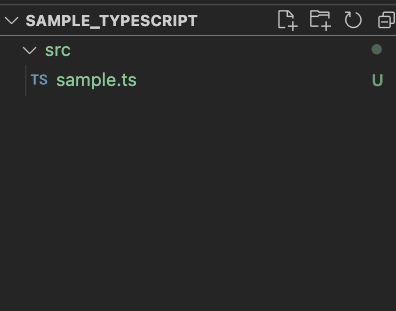
適当に下記のようなプロジェクトを作成します。
※Node.js(npm)はインストール済であること
・ package.jsonの作成
ターミナルを開き、package.jsonを作成。
■コマンド
npm init -y
■package.json
以下のようなものが作成されるはずです。
{
  "name": "sample_typescript",
  "version": "1.0.0",
  "description": "",
  "main": "index.js",
  "scripts": {
    "test": "echo \"Error: no test specified\" && exit 1"
  },
  "keywords": [],
  "author": "",
  "license": "ISC"
}
・ webpackのインストール
■コマンド
npm install --save-dev webpack webpack-cli
■webpack → 今回の主役。
■webpack-cli → webpackコマンドをターミナル等で実行する際はこのwebpack-cliを見るので、合わせてインストールすることが必須。
■--save-dev → 開発環境(devdependencies)にインストールする際に必要なオプションコマンド。説明は長くなるので省略。
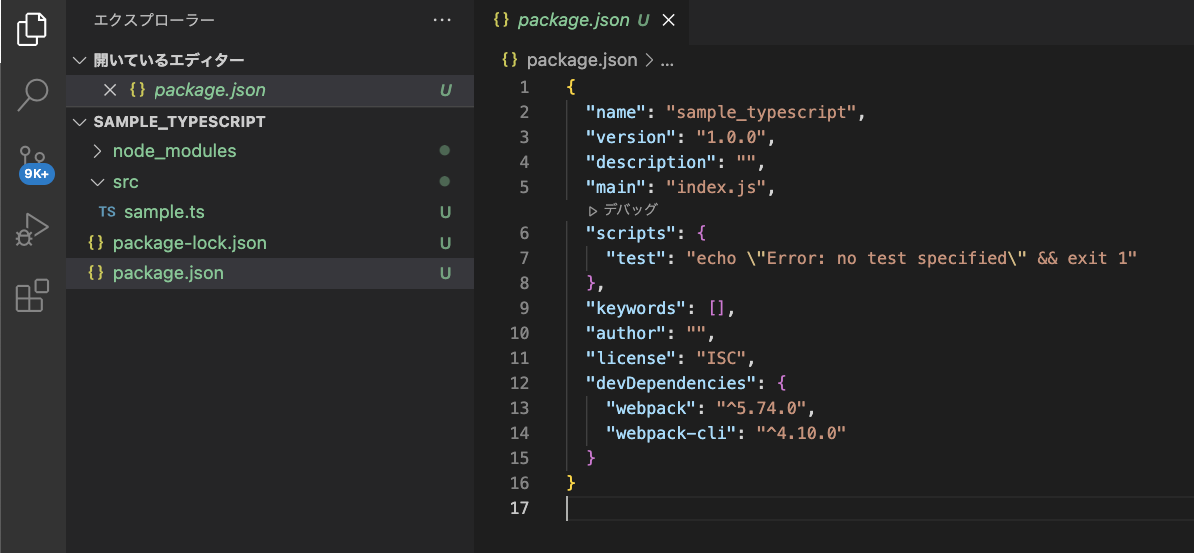
以下のように、node_modulesが追加され、package.jsonに追記されていればOKです。
・ ts-loaderのインストール
ts-loaderをインストールすることで、webpackがTypescriptを理解できるようになります。
■コマンド
npm install --save-dev ts-loader typescript
※注意
ts-loaderをインストールする際は、devdependenciesにTypescriptをインストールする必要があるので、ts-loaderを使用するときはTypescriptもセットでインストールすること。
・ 設定ファイル (webpack.config.js) の作成・設定
webpack用の設定ファイルを作成する。
このファイルは名前を必ず、webpack.config.jsにしなければならない。
作成し、中身を記載。
■webpack.config.js
/**
 * require → Node.js上で利用するimport文のこと
 *
 * path → Node.jsがデフォルトで内蔵しているモジュール(ファイル)のこと。
 * デフォルトで存在するものなので、インポートだけすれば使える仕様。
 */
const path = require('path');

module.exports = {

 // どのソースからスタートするか
 entry:"./src/sample.ts",

 output: {
    // 出力するファイル名
    filename: "bundle.js",

    // 出力するファイルをどこに出力するか(絶対パスで書く)
    path: path.resolve(__dirname, "dist")
 },

 // ts-loaderの設定
 module: {
    rules:[{
        // どんなファイルに対して
        test: /\.ts$/,

        // 何をするのか
         use: 'ts-loader',

         // node_modulesから持ってきたtsファイルはts-loaderの対象から省く
         exclude: /node_modules/
    }]
 },
 resolve: {
    /**
     * import文で記載しているファイル名を拡張子をつけずに記載した場合、
     * extensions配列内に記載した拡張子がついた同名のファイルがあるか検索し、
     * あればそのファイルをimportする。
     *
     * 検索は配列の左から順番に行う。
     */
    extensions: ['.ts', '.js']
 }
}
< 補足説明 >
■module.exports → Node.jsのエクスポート文。(ES6のexport文と意味は同じ)
webpackコマンドを打った時に、webpackが内部的にmodule.exportsでエクスポートしたオブジェクトを使用する。
■__dirname → Node.js上にあるグローバル変数。今いるディレクトリの絶対パスがこの変数に格納されている。
例) 今回であれば、

Users/${プロジェクトまでのパス}/SAMPLE_TYPESCRIPT
■path.resolve(__dirname, "dist") → 第一引数に与えたパスに、第二引数以降の文字列を連結し、新たなパスとして返す。
例) 今回であれば、

Users/${プロジェクトまでのパス}/SAMPLE_TYPESCRIPT/dist
ここまでで準備は完了です。
■実際に利用してみた
今回は以下のファイルを分割し、webpackでバンドリングしてみます。
// interface
interface Humans {
  name: string;
  age: number;
  gender: string;
  country: string;
}

// クラス①
class Man implements Humans {
  name = "michael";
  age = 25;
  gender = "male";
  country = "america";
}

// クラス②
class Woman implements Humans {
  name = "Catherine";
  age = 20;
  gender = "female";
  country = "america";
}

// クラス③
class Caller {
  public woman: Woman;

  public man: Man;

  constructor() {
    this.man = new Man();
    this.woman = new Woman();
  }

  call() {
    console.log(
      `My name is ${this.man.name}. ${this.man.age} years old from ${this.man.country}.`
    );
    console.log(
      `My name is ${this.woman.name}. ${this.woman.age} years old from ${this.woman.country}.`
    );
  }
}

const caller = new Caller();

caller.call();
型となるインターフェースと、
継承した2つのクラスとそのプロパティをよぶメソッドを持つクラスという簡単なものです。
■ESモジュールを利用して分割
・ interface.ts
export interface Humans {
  name: string;
  age: number;
  gender: string;
  country: string;
}
・ Man.ts
import { Humans } from "./interface";

export class Man implements Humans {
  name = "michael";
  age = 25;
  gender = "male";
  country = "america";
}
・ Woman.ts
import { Humans } from "./interface";

export class Woman implements Humans {
  name = "Catherine";
  age = 20;
  gender = "female";
  country = "america";
}
・ Caller.ts
import { Woman } from "./Woman";
import { Man } from "./Man";

export class Caller {
  public woman: Woman;

  public man: Man;

  constructor() {
    this.man = new Man();
    this.woman = new Woman();
  }

  call() {
    console.log(
      `My name is ${this.man.name}. ${this.man.age} years old from ${this.man.country}.`
    );
    console.log(
      `My name is ${this.woman.name}. ${this.woman.age} years old from ${this.woman.country}.`
    );
  }
}
・ sample.ts
import { Caller } from "./Caller";

const caller = new Caller();

caller.call();
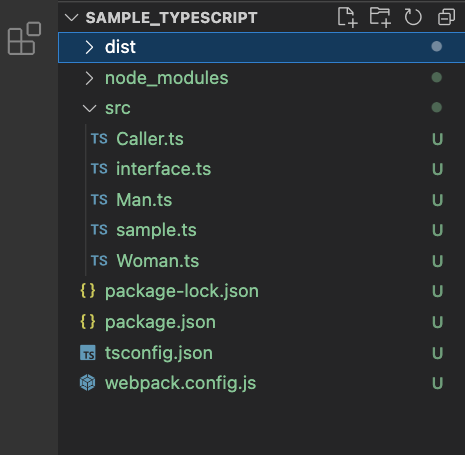
これで分割は完了です。
< 補足説明 >
各tsファイルにESモジュールによるimportが書かれていますが、
importするファイル名に拡張子の記載がありません。
それでもimportできるのは、webpack.config.tsで設定をしたからです。
■webpack.config.js
resolve: {
    extensions: ['.ts', '.js']
 }
この設定がないと、構文エラーとなります。
■バンドリングに向けて追加修正
・ distフォルダを追加
出力先パスが
path: path.resolve(__dirname, "dist")

// Users/${プロジェクトまでのパス}/SAMPLE_TYPESCRIPT/dist
なので、distフォルダを追加します。
・ package.jsonにエイリアス(別名)を追加
package.json内に、webpackを実行するようのエイリアスを追加。
■package.json
"scripts": {
    "test": "echo \"Error: no test specified\" && exit 1",
    // 追加
    "build": "webpack"
  },
これで環境構築は完了です。
■実行
ターミナルを開き、下記コマンドを実行します。
npm run build

コマンドが実行され、bundle.jsがdist内に出力されました。
これでバンドリング完了です。
完成したjsファイルを実行すると、

しっかり出力されました。
今回はconsoleで出力するだけでしたが、
ブラウザ上で表示させたりしたい場合は他にも設定が必要になります。
■参考文献