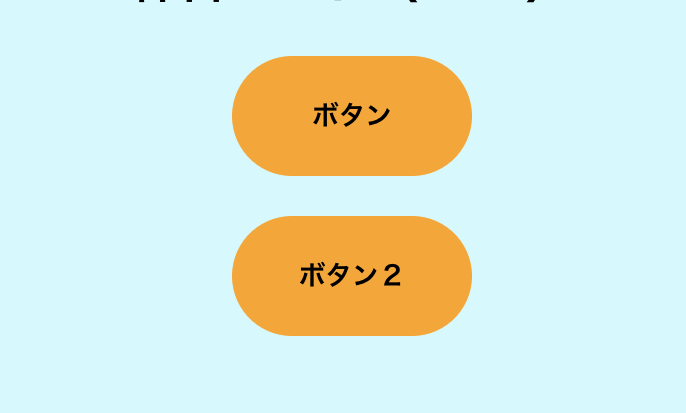
Reactのスタイリング方法についてまとめてみました。
※CSS Moduleは近い将来廃止される可能性があるため、まとめから省く。
■インラインスタイル
CSSスタイルの記述をJavascriptのオブジェクトと同じような形で記載する。
スタイルはHTMLタグに対して直接設定する。
例
export default function App() {
  const style = {
    width: 120,
    height: 60,
    display: "block",
    fontWeight: "bold",
    backgroundColor: "green"
  };

  return <button style={style}>ボタン</button>;
}
補足
オブジェクトなので、以下のように三項演算子などを用いて、
動的に変更することが可能。
{
   background: 何かしらの処理 ? "pink": "",
}
■注意点
・pxは単位は省略できる
インラインスタイルでは、pxは単位を省略すると、React側が自動でpxと認識してくれる。
※逆にいうと、省略したら必ずpxとして反映されてしまうので、px以外をつけたい場合は注意。
・プロパティ名はキャメルケース
プロパティ名は通常のCSSと違い、キャメルケースで記述する。
{
    width: 120,
    height: 60,
    display: "block",
    fontWeight: "bold",
    backgroundColor: "green"
  }
しかし、プロパティ名を文字列で記載する場合は、CSS同様ケバブケースで記述する。
{
    width: 120,
    height: 60,
    display: "block",
    fontWeight: "bold",
    "background-color": "green",
    "border-radius": 999,
  }
・擬似要素・擬似セレクタ・メディアクエリは使用できない。
インラインスタイルはHTMLタグに直接付けるのが前提なので、HTMLタグに直接設定できないCSSは使用できない。
パフォーマンスの低下
インラインスタイルはHTMLタグが読み込まれた時にスタイルの計算が全て行われるので、再レンダリング等で読み込まれる度に再計算される。
よって、パフォーマンスが低下する。
■外部のCSSを読み込む
作成したCSSファイルをimportして読み込む。
通常のCSSの使い方にかなり近い。
example.css
.btn {
    margin: auto;
    border-radius: 9999px;
    border: none;
    display: block;
    width: 120px;
    height: 60px;
    font-weight: bold;
    cursor: pointer;
}

.selected {
    background-color: pink;
}

.space {
    margin-bottom: 20px;
}
import "./Example.css" // CSSをimport

const Example = () => {

  return (
    <>
    {// ""で読み込み可能。}
    <div className="space">
      <button className="btn">
        ボタン
      </button>
    </div>

    {// {}でも読み込み可能。}
    <div className={"space"}>
      <button className={"btn"}>
        ボタン2
      </button>
    </div>
    </>
  );
};

export default Example;
補足
こちらも三項演算子などでクラスを動的に変えることで、スタイルを変更することが可能。
import { useState } from "react";
import "./Example.css"

const Example = () => {
  const [isSelectedA, setIsSelectedA] = useState(false);

  const [isSelectedB, setIsSelectedB] = useState(false);

  const clickHandlerA = () => setIsSelectedA((prev) => !prev);
  const clickHandlerB = () => setIsSelectedB((prev) => !prev);

  return (
    <>
    <div className={"space"}>
      <button className="btn" onClick={clickHandlerA}>
        ボタン
      </button>
    </div>

    <div>
      <button className={isSelectedB ? "selected btn" : "btn"} onClick={clickHandlerB}>
        ボタン2
      </button>
      <div style={{ textAlign: "center" }}>
        {(isSelectedA || isSelectedB) && "クリックされました。"}
      </div>
    </div>
    </>
  );
};

export default Example;
補足2
三項演算子の箇所は、下記のようにテンプレートリテラルを利用して記載することも可能。
 <button className={`btn ${isSelected ? "selected" : ""}`} onClick={clickHandlerB}>
        ボタン2
      </button>
■注意点
・コンポーネントごとにスタイルを分けられない
外部読み込みのスタイル適応方法では、コンポーネント単位でスタイルを分けるということができない。
修正前
ディレクトリ構造
root/
 ├ components/
 ├      └ SubButton.js
 ├      └ SubButton.css
 │
 ├ Example.js
 └ Example.css
css
/* Example.css */
.btn {
    margin: auto;
    border-radius: 9999px;
    border: none;
    display: block;
    width: 120px;
    height: 60px;
    font-weight: bold;
    cursor: pointer;
}


/* SubButton.css */
.btn {
    margin: auto;
    border-radius: 9999px;
    border: none;
    display: block;
    width: 120px;
    height: 60px;
    font-weight: bold;
    cursor: pointer;
    background-color: blue;
}
SubButton.js
import "./SubButton.css"

const SubButton = () => {

  return (
    <>
    <div className={"space"}>
      <button className="btn">
        ボタン
      </button>
    </div>
    </>
  );
};

export default SubButton;
Example.js
import { useState } from "react";
import SubButton from "./components/SubButton";
import "./Example.css"

const Example = () => {

  return (
    <>
    <div className={"space"}>
      <button className="btn" onClick={clickHandlerA}>
        ボタン
      </button>
    </div>

    <div className={"space"}>
      <button className={isSelectedB ? "selected btn" : "btn"} onClick={clickHandlerB}>
        ボタン2
      </button>
    </div>

    <biv className={"space"}>
      <SubButton />
    </biv>
    </>
  );
};

export default Example;
上記のように、SubButton.cssの内容が全てに適応されてしまう。
これは、外部からの読み込みはグローバルスコープとして採用されてしまうのと、
cssが後から読み込まれたものを採用するというデフォルトの仕様があるからである。
■styled-Component
よく使われているReactのスタイリングライブラリ。
①利用方法
ライブラリをインストール
npm install --save styled-components
②コンポーネントでimport
import styled from "styled-components";

const Example = () => {
  return ;
}
ポイント
このimportした styledには、HTMLタグのプロパティをデフォルトで保有している。プロパティの数はHTMLタグの数だけある。
③スタイルを定義
styled-componentsでは、スタイルをタグ付きテンプレートという記法で記載する。
※なぜこの記法なのかの詳しい理由は不明です...。
タグ付きテンプレートについては以下を参照。
import styled from "styled-components";

const Example = () => {

  const StyledButton = styled.button`
    margin: auto;
    border-radius: 9999px;
    border: none;
    display: block;
    width: 120px;
    height: 60px;
    font-weight: bold;
    cursor: pointer;
  `;

  return (
    <>
    <StyledButton>ボタン</StyledButton>
    </>
  );
};

export default Example;
上記のように、定義した StyledButtonをコンポーネントにして利用することでスタイルを反映させる。
補足
styled-componentsでは、スタイルのコンポーネントにpropsを渡すこともできる。
import { useState } from "react";
import styled from "styled-components";

const Example = () => {
  const [isSelected, setIsSelected] = useState(false);

  const clickHandler = () => setIsSelected((prev) => !prev);

  const StyledButton = styled.button`
    margin: auto;
    border-radius: 9999px;
    border: none;
    display: block;
    width: 120px;
    height: 60px;
    font-weight: bold;
    cursor: pointer;
    background: ${(props) => props.isSelected ? 'pink' : ''};
  `;

  return (
    <>
    <StyledButton isSelected={isSelected} onClick={clickHandler}>ボタン</StyledButton>
      <div style={{ textAlign: "center" }}>
        {isSelected && "クリックされました。"}
      </div>
    </>
  );
};

export default Example;
※タグ付きテンプレート内は文字列なので、変数を使用する場合はテンプレートリテラルでの記載となる。
補足②
継承をすることができる。
ほど同じ内容で一部違うようなスタイルコンポーネントを作成したいときなどに有効。
  const StyledButton = styled.button`
    margin: auto;
    border-radius: 9999px;
    border: none;
    display: block;
    width: 120px;
    height: 60px;
    font-weight: bold;
    cursor: pointer;
    background: ${(props) => props.isSelected ? 'pink' : ''};
  `;

  const OrangeButton = styled(StyledButton)`
    background-color: orange;
  `;

  return (
    <>
    <StyledButton isSelected={isSelected} onClick={clickHandler}>ボタン</StyledButton>
    <OrangeButton>ボタン</OrangeButton>
    </>
  );
CSSのスタイルは全て利用できる + ネスト記法も可能。
他のスタイリングとは違い、CSSは基本全て利用できる。
メディアクエリや擬似セレクタ等も利用可能。
また、通常のCSSでは利用できないSaSSのネスト記法も利用することが可能。
コンポーネントタグ内のspanタグのCSSを設定する。
  const OrangeButton = styled(StyledButton)`
    background-color: orange;

    :hover {
      color: red;
      opacity: 0.7;
    }
       /* ネスト記法 */
    span {
      background-color: black;
      color: white;
    }
  `;

 <OrangeButton><span>ボタン</span></OrangeButton>

