Apex:page
action属性に指定したメソッドはページ読み込み時に毎回実行される。
コントローラのコンストラクタはクラス初期化時の1回のみ実行される
//標準ヘッダやサイドバーを表示しない場合
//action属性に設定されたメソッドがページ読み込み時に毎回実行される
<apex:page showHeader="false" sidebar="false" standardStylesheets="false" applyHtmlTag="false" applyBodyTag="false"
   controller="xxx_VF_Ctrl" action="{!init}">
タグ表示 (apex:outputPanel)
ひとかたまりのHTMLタグの表示を制御したい場合はapex:outputPanelを使用する。
layout="none"を付けると、動的に生成されたタグに制御用のタグが含まれなくなる。
renderedを付けると、評価式がtrueの時のみ出力される
<apex:outputPanel layout="none">
・・・ 任意のHTML
</apex:outputPanel>

<apex:outputPanel rendered="{!IF(Asynchronous==true,false,true)}" layout="none">
・・・ 任意のHTML
</apex:outputPanel>

## renderedの例
rendered="{!type=='abc'}"
リストが空の場合
rendered="{!listItem.size==0}"
文字列の長さ
rendered="{!LEN(item.Subject) <= 32}"
テキスト表示、日付フォーマット表示(apex:outputText)
デフォルトはGMT時間なので、ロケール補正を忘れないこと
<apex:outputtext value="{0,date,yyyy/MM/dd}">
    <apex:param value="{!article.LastPublishedDate}"></apex:param>
</apex:outputtext>

//offsetはロケール補正値 (HHは24h表記、hhは12h表記)
<apex:outputtext value="{0, date, yyyy/MM/dd HH:mm:ss}">
   <apex:param value="{!apprvInfo.approvalDate+offset}"></apex:param>
</apex:outputtext>

<apex:outputText style="font-style:italic" value="This is {0} text with {1}.">
   <apex:param value="my"/>
   <apex:param value="arguments"/>
</apex:outputText>
繰り返し
<apex:repeat value="{!items}" var="item">
  {!item.Name}
</apex:repeat>
indexは使えないので、行番号を使いたい時は下記のよう変数を定義して対応する
<apex:variable var="num" value="0" />
<apex:repeat  value="{!items}" var="item">
  <apex:outputPanel layout="none" rendered="{!num=='0'}">
    xxx
  </apex:outputPanel>
  {!item.Name} {!num}
<apex:variable var="num" value="{!VALUE(num)+1}" />
</apex:repeat>

//ループ内で数値と比較したい場合は VALUE()関数を使う
<apex:outputPanel layout="none" rendered="{!VALUE(num)!=items.size}">
リンク
<apex:outputLink value="{!URLFOR('/apex/xxx')}">
    <apex:outputText value="{!article.Title}" />
    <apex:param name="id" value="{!article.Id}" />
    <apex:param name="articleId" value="{!article.KnowledgeArticleId}" />
</apex:outputLink>
URLFOR(Stylesheet, JS)
<apex:stylesheet value="{!URLFOR($Resource.ResourcesXX, 'js/jquery.1.3.4.css')}"/>
<script src="{!URLFOR($Resource.ResourceXX, '/scripts/libraries.js')}"></script>
Form と INPUT要素
targetに_blankを設定すると別ウィンドウが開く
actionは呼び出すサーバー側コントローラメソッド
<apex:form>
  <apex:commandButton action="{!serverFunc}" value="検索実行"/>
  <apex:inputHidden value="{!itemValue.value}" html-class="hidden_{!xx}" />
  <apex:inputText styleClass="form-control" value="{!itemValue.value}"/>
</apex:form>
サブミット
<!-- POSTサブミット -->
<apex:commandButton value="ボタンのラベル" action="{!serverMethodName}" />

<!-- rerender属性がないと通常のPOSTリクエスト, rerender属性にidをセットするとAjaxリクエストになる -->
<apex:commandLink styleClass="list-group-item" action="{!selectContact}" value="{!contact.Name}" target="_self" >
    <apex:param name="contactId" value="{!contact.Id}" assignTo="{!selectedContactId}"/>
    <apex:param name="contactName" value="{!contact.Name}" assignTo="{!selectedContactName}"/>
{!contact.Department__c}:{!contact.Title}
</apex:commandLink>
apex:commandButton
apex:commandLink
サブミットしない普通のAタグリンクはapex:outputLinkを使用
pageBlock
下記のように考えると良い。
pageBlock => Table
pageBlockSection => TR
pageBlockSectionItem => TD (ただしラベルと項目のペア)
pageBlockSettionItemの代わりに apex:InputField を直接配置することも可能
<apex:form> <!-- pageBlockの上の要素として配置 -->
  <apex:pageBlock title="サンプル">
    <apex:pageBlockSection>
      <apex:pageBlockSectionItem>
        <apex:outputLabel value="項目1" for="field1" />
        <apex:inputText value="{!selectedMsheetId}" id="field1" />
      </apex:pageBlockSectionItem>
    </apex:pageBlockSection>
  </apex:pageBlock>
</apex:form>

//inputFiledを配置
<apex:pageBlockSection title="My Content Section" columns="2">
    <apex:inputField value="{!account.name}"/>
    <apex:inputField value="{!account.site}"/>
</apex:pageBlockSection>

//2列にする場合
<apex:pageBlock title="サンプル">
  <apex:pageBlockSection columns="2">  <!-- columns属性を指定 -->
    <apex:pageBlockSectionItem>
      <apex:outputLabel value="項目1" for="field1" />
      <apex:inputText value="{!selectedMsheetId}" id="field1" />
    </apex:pageBlockSectionItem>
    <apex:pageBlockSectionItem>
      <apex:outputLabel value="項目2" for="field2" />
      <apex:inputText value="{!selectedMsheetId}" id="field2" />
    </apex:pageBlockSectionItem>
    </apex:pageBlockSection>
    <!-- buttonを配置  -->
    <apex:pageBlockButtons>
      <apex:commandButton value="保存" action="{!exportCsvData}" />
    </apex:pageBlockButtons>
</apex:pageBlock>
 [1列の場合]
 [2列の場合、ボタン付き ]
mode属性のデフォルトは"detail"、"maindetail"を指定すると下記のように白い背景でデータが表示される

ヘルプテキスト(HelpText)
ラベルの横にHelpTextを表示する
<apex:pageBlockSectionItem HelpText="xxxxx">
    <apex:outputLabel value="プロファイル" for="xxx" />
    ...
</apex:pageBlockSectionItem>
pageBlockButtons ボタン
<apex:pageBlockButtons>
  <apex:commandButton value="保存" action="{!exportCsvData}" />
</apex:pageBlockButtons>

<!-- ボタンの配置 -->
<!- デフォルトはbothで上限にボタンが表示される。 both|bottom|top -->
<apex:pageBlockButtons location="bottom">
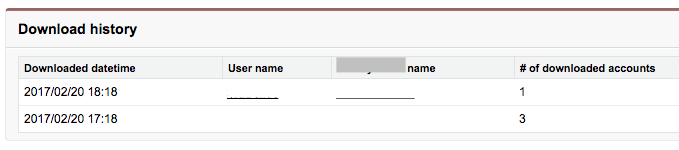
pageBlockTables テーブル
sObjectデータを表示する例
public List<AuditLog__c> auditLogs {get{
    return [SELECT DownloadDate__c, DownloadUser__c, Category0__c, NumberOfData__c FROM AuditLog__c ORDER By DownloadDate__c desc];
}}
<apex:pageBlock title="ダウンロード履歴">
    <apex:pageBlockTable value="{!auditLogs}" var="log">
        <apex:column value="{!log.DownloadDate__c}" />
        <apex:column value="{!log.DownloadUser__c}" />
        <apex:column value="{!log.Category0__c}" />
        <apex:column value="{!log.NumberOfData__c}" />
    </apex:pageBlockTable>
</apex:pageBlock>
inputFieldとinputText
inputFieldはsObjectに対して指定する
<apex:inputField value="{!acc.Name}"/>
それ以外はinputText
<apex:inputText value="{!searchWord}"/>
※ <apex:pageBlockSectionItem>で囲む必要はない
outputFieldとoutputText
outputFieldはsObjectに対して指定する
<apex:outputField value="{!acc.Name}"/>
それ以外はoutputText
<apex:outputText value="{!searchWord}"/>
※ <apex:pageBlockSectionItem>で囲む必要はない
selectList 選択
public String selectedId {set; get;}

public List<SelectOption> selectOptions { private set; get{
    if (selectOptions==null){
        selectOptions = new List<SelectOption>();
        for(GA_MS_MarketSurvey_Category0__c it : getMSheet()){
            selectOptions.add(new SelectOption(it.Id, it.Name)); //value, label
        }
    }
    return selectOptions;
}}
//複数選択のリスト
<apex:selectList size="5" value="{!selectedId}" multiselect="true" id="selectXX">
      <apex:selectOptions value="{!selectOptions}"/>
</apex:selectList>

//size=1とするとドロップダウンリストボックスになる
<apex:selectList size="1" value="{!selectedId}" multiselect="false" id="selectXX">
      <apex:selectOptions value="{!selectOptions}"/>
</apex:selectList>
selectRadio ラジオボタン
//selectInputと同じでSelectOptionを使用する
public List<SelectOption> typeOptions { private set; get{
   typeOptions = new List<SelectOption>();
   typeOptions.add(new SelectOption('1', '男'));  //value, label
   typeOptions.add(new SelectOption('2', '女'));
}}
<apex:pageBlockSection >
  <apex:pageBlockSectionItem >
    <apex:outputLabel value="項目A" for="selectType" />
    <!-- lineDirectionは横に並べる pageDirectionは縦に並べる -->
    <apex:selectRadio value="{!selectedType}" layout="pageDirection" id="selectType">
      <apex:selectOptions value="{!typeOptions}"/>
    </apex:selectRadio>
  </apex:pageBlockSectionItem >
</apex:pageBlockSection >
hidden(apex:inputHidden)
<apex:inputHidden value="{!item.value}"/>
<!-- JSで値をセットしたい場合はhtml-classでクラス名を指定する -->
<apex:inputHidden value="{!item.value}" html-class="hidden_{!item.itemNo}" />

<!-- js -->
$('hidden_value_' + ttemId).val(value);
エラーメッセージ
 <!-- ページ全体のエラー表示 -->
 <apex:pageMessages />

 <!-- 項目に対するエラー表示 -->
 <apex:inputField value="{!account.Name}" id="field1" />
  ...
 <apex:message for="field1" style="color:red"/>
カスタムラベル
{!$Label.XXX_XXXX}
Expression(式)
//コントローラのプロパティ値の出力
{!prop1]
{!prop1.attr}
//条件分岐で出力
{!IF(opportunity.IsPrivate, 'Private', 'Not Private')}
//論理否定
{!NOT(isActive)}
//Map属性からの出力 (値がnullだとエラーになるので必ず値がセットされていること)
{!mapValues[key]}
{!mapValues['I0001']}
{!listItem.size==0}
{!LEN(item.Subject) <= 32}
Lightning用のスタイルシートを読み込む
<apex:slds/>