今回は表示スタイルの変更を実施します
環境 AWS Cloud9
environment type EC2
instance type t2.micro
platform ubuntu server 18.04 LTS
リファクタリングの復習
リファクタリング(英:refactoring)とは
プログラムの動きを変えないまま、ソースコードを書き換えることです
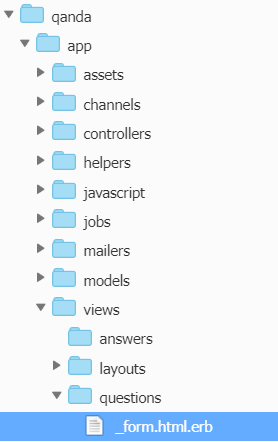
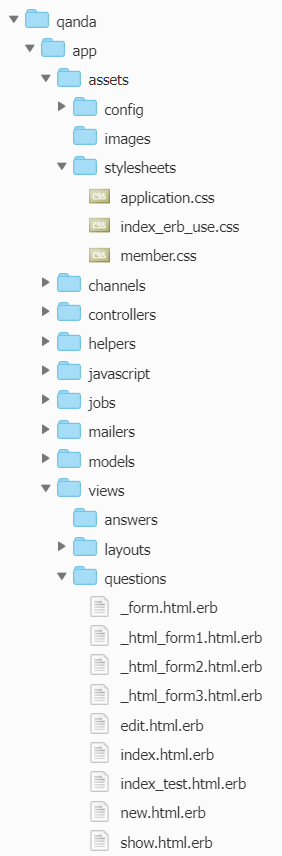
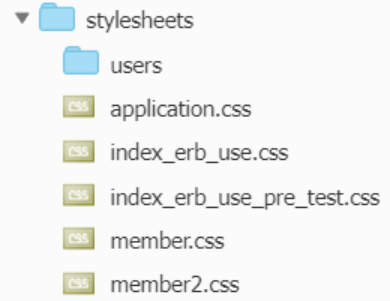
例えば以下のディレクトリの _form.html.erb は
リファクタリングを実施できます
<%= form_with model: @question do |form| %>
  <% if @question.errors.any? %>
    <div>
      <ul>
        <% @question.errors.full_messages.each do |message| %>
          <li><%= message %></li>
        <% end %>
      </ul>
    </div>
  <% end %>

  <div>
  <p>
    <%= form.label :タイトル %><br>
    <%= form.text_field :title %><br>

    <%= form.label :名前 %><br>
    <%= form.text_field :name %><br>

    <%= form.label :内容 %><br>
    <%= form.text_area  :content, size: "50x5" %><br>

    <%= form.submit "更新する" %>
  </p>
  </div>


  <ul>
  <li>
  <%= link_to '一覧画面に戻る', questions_path %>
  </ul>
  </li>
<% end %>
同様のディレクトリのファイルを変更します

<div class="member">
<div>
<h1>  編集画面</h1>
</div>
<%= render partial: 'form' %>
<h1>新規作成</h1>
<%= render partial: 'form' %>
デザインを入れる
以下にcssファイルを作成します

あくまでも一例ですが
以下のようになります
index_erb_useという名前のcssレイアウトを作成
p {
  font-size: 14px;
  position: relative;
  padding: 1rem .5rem;
}

p:after {
  position: absolute;
  bottom: 0;
  left: 0;
  width: 100%;
  height: 5px;
  content: '';
  background-image: -webkit-gradient(linear, left top, right top, from(#fa709a), to(#fee140));
  background-image: -webkit-linear-gradient(left, #fa709a 0%, #fee140 100%);
  background-image: linear-gradient(to right, #fa709a 0%, #fee140 100%);
}

ul {
  border: solid 2px #ffb03f;
  padding: 0.5em 1em 0.5em 2.3em;
  position: relative;
}

ul li {
  line-height: 1.5;
  padding: 0.5em 0;
  list-style-type: none!important;/*ポチ消す*/
}

ul li:before {
  font-family: "Font Awesome 5 Free";
  content: "\f00c";
  position: absolute;
  left : 1em; /*左端からのアイコンまで*/
  color: #ffb03f; /*アイコン色*/
}

h1 {
  position: relative;
  padding: 5px 26px 5px 42px;
  background: #fff0d9;
  font-size: 20px;
  color: #2d2d2d;
  margin-left: -33px;
  line-height: 1.3;
  border-bottom: solid 3px orange;
  z-index:-2;
}

h1:before {
  position: absolute;
  content: '';
  left: -2px;
  top: -2px;
  width: 0;
  height: 0;
  border: none;
  border-left: solid 40px white;
  border-bottom: solid 79px transparent;
  z-index: -1;
}

h1:after {
  position: absolute;
  content: '';
  right: -3px;
  top: -7px;
  width: 0;
  height: 0;
  border: none;
  border-left: solid 40px transparent;
  border-bottom: solid 79px white;
  z-index: -1;
}

h2 {
  position: relative;
  padding: 1rem 2rem calc(1rem + 10px);
  background: #fff100;
}

h2:before {
  position: absolute;
  top: -7px;
  left: -7px;
  width: 100%;
  height: 100%;
  content: '';
  border: 4px solid #000;
}
上記ファイルは
Viewのhtml.erb
ファイルに
member という名前のcssレイアウトも作成
member という名前のcssレイアウトも作成してみます
p {
  padding: 1rem 2rem;
  border-bottom: 3px solid #000;
  background: #f4f4f4;
}

ul {
  border: solid 2px #ffb03f;
  padding: 0.5em 1em 0.5em 2.3em;
  position: relative;
}

ul li {
  line-height: 1.5;
  padding: 0.5em 0;
  list-style-type: none!important;/*ポチ消す*/
}

ul li:before {
  font-family: "Font Awesome 5 Free";
  content: "\f00c";
  position: absolute;
  left : 1em; /*左端からのアイコンまで*/
  color: #ffb03f; /*アイコン色*/
}

h1 {
  position: relative;
  padding: 5px 26px 5px 42px;
  background: #fff0d9;
  font-size: 20px;
  color: #2d2d2d;
  margin-left: -33px;
  line-height: 1.3;
  border-bottom: solid 3px orange;
  z-index:-2;
}

h1:before {
  position: absolute;
  content: '';
  left: -2px;
  top: -2px;
  width: 0;
  height: 0;
  border: none;
  border-left: solid 40px white;
  border-bottom: solid 79px transparent;
  z-index: -1;
}

h1:after {
  position: absolute;
  content: '';
  right: -3px;
  top: -7px;
  width: 0;
  height: 0;
  border: none;
  border-left: solid 40px transparent;
  border-bottom: solid 79px white;
  z-index: -1;
}
上記ファイルは
Viewのhtml.erb
ファイルに
Viewにcssを反映する
上記のstylesheetsの中のindex_erb_use.cssを利用して
Viewのレイアウトを変更します
まずはindex.html.erbを変更します
<div class="index_erb_use">

<h1>  記事一覧</h1>

<p>
<%= link_to '新規作成', new_question_path %>
</p>


<table>

  <tr>
    <th><p>タイトル</p></th>
    <th><p>入力者</p></th>
    <th><p>詳細</p></th>
    <th></th>
  </tr>

  <% @questions.each do |question| %>
  <tr>

    <td><%= question.title %></td>
    <td><%= question.name %></td>
    <td><%= question.content %></td>
    <td><p><%= link_to '確認', question_path(question) %></p></td>
    <td><p><%= link_to '編集', edit_question_path(question) %></p></td>
    <td><p><%= link_to '削除', question_path(question),
          data: { turbo_method: 'delete', turbo_confirm: '本当に削除しますか?' }%></p></td>
  </tr>


  <% end %>
</table>
</p>
以下のようなデザインになりました!

css 全部読みこまれてしまう問題に直面
記事を書きつつ気付いたのですが
レイアウトを変更したいのに
全てが混ざったレイアウトになってしまいました
css 全部読みこまれてしまわないよう設定変更
以下のように変更を実施します

application.css の *=require_tree から = を消す。
これにより「全てのCSSを読み込む。」
という処理が行われなくなるそうです
https://note.com/sashimi299/n/n53cdf23effce
上記サイトを参考に設定変更

AWS Cloud9 ターミナルで以下を実行
rails assets:precompile
cssリンクを個別にViewに反映する!
https://www.sejuku.net/blog/64731
以下のように 記述することで、使用するCSSファイルを個別に設定出来ました!
<%= stylesheet_link_tag '使用するcssのpass' %>
実際の表示画面をふまえて
違いを説明します
例えば
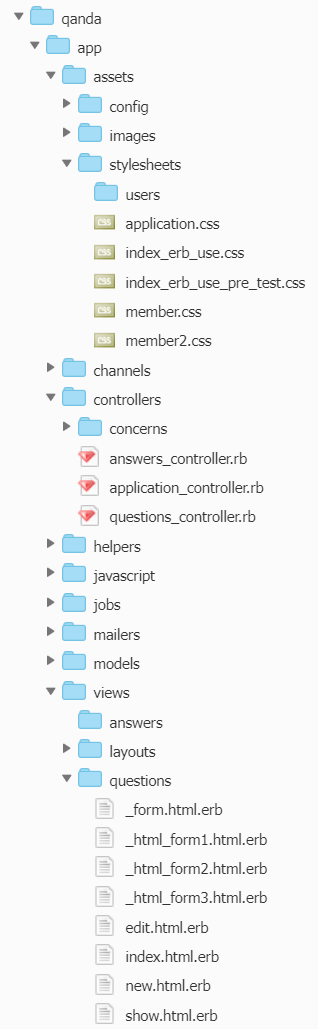
↓以下のようなディレクトリ構造だった場合
app/
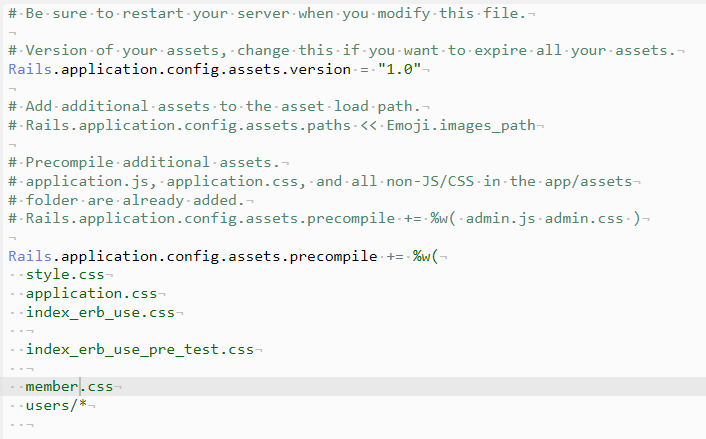
config/initializers/assets.rb

config/initializers/assets.rb
の内容を以下のように書き換えました
# Be sure to restart your server when you modify this file.

# Version of your assets, change this if you want to expire all your assets.
Rails.application.config.assets.version = "1.0"

# Add additional assets to the asset load path.
# Rails.application.config.assets.paths << Emoji.images_path

# Precompile additional assets.
# application.js, application.css, and all non-JS/CSS in the app/assets
# folder are already added.
# Rails.application.config.assets.precompile += %w( admin.js admin.css )

Rails.application.config.assets.precompile += %w(
  style.css
  application.css
  index_erb_use.css

  index_erb_use_pre_test.css

  member.css
  users/*
)
stylesheets ディレクトリィの内容つまり
使用するCSSファイルの名前を記述しました
これにより
<%= stylesheet_link_tag '〇〇' %>
の〇〇の部分をCSSファイルの名前を記述すると
呼び出すことができるんです!
app/views/questions/index.html.erb
のページで試してみましょう!!!
index_erb_use.css を使用する場合
<%= stylesheet_link_tag 'index_erb_use' %>

<h1>  記事一覧</h1>

<p>
<%= link_to '新規作成', new_question_path %>
</p>


<table>

  <tr>
    <th><p>タイトル</p></th>
    <th><p>入力者</p></th>
    <th><p>詳細</p></th>
    <th></th>
  </tr>

  <% @questions.each do |question| %>
  <tr>

    <td><%= question.title %></td>
    <td><%= question.name %></td>
    <td><%= question.content %></td>
    <td><p><%= link_to '確認', question_path(question) %></p></td>
    <td><p><%= link_to '編集', edit_question_path(question) %></p></td>
    <td><p><%= link_to '削除', question_path(question),
          data: { turbo_method: 'delete', turbo_confirm: '本当に削除しますか?' }%></p></td>
  </tr>


  <% end %>
</table>
</p>
表示結果は以下のようになりました

member.css を使用する場合
<%= stylesheet_link_tag 'index_erb_use' %>
を
<%= stylesheet_link_tag 'member' %>
に変更するだけで
cssレイアウトが変更されたものが適応されます!
<%= stylesheet_link_tag 'member' %>

以下省略
表示結果は以下のようになります

このようにページによって
登録した好きなcssレイアウトで
表示内容を変えることが可能です!!