Cellのサイズを決定する方法は2種類ある
- Main.Storyboardで設定
- コードで実装
storyboardで設定
ViewControllerにCollectionViewを追加し、上の画像のような設定項目の数値を変更することでCellサイズを変更することができる。
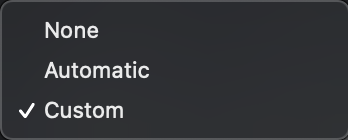
この際、Estimate Sizeが

上の画像のようにCustomになている必要がある。
あとは、好きなようにCellサイズを変更したりヘッターやフッターなどを設定することで実装することができる。
- メリット
- 比較的実装しやすい
- サイズの管理がしやすい
- デメリット
- 固定値しか設定できない(画面サイズによるCellサイズを動的に変動させることができない)
コードで実装する
    @IBOutlet weak var CollectionView: UICollectionView!
    @IBOutlet weak var CellLayout: UICollectionViewFlowLayout!

    override func viewDidLoad() {
        super.viewDidLoad()
        CellLayout.itemSize = CGSize(width: 300, height: 100)
    }
上の画像のようにIBOutletで下の画像にある立方体のアイコンのUICollectionViewFlowLayoutを繋ぐ。

こうすることで、コード上でCellのサイズやヘッターやフッターなどを設定することができる。
上の画像の
CellLayout.itemSize = CGSize(width: 300, height: 100)
はCellのサイズを決めるためのコーディングである。コードでは利用するiPhoneの画面サイズに応じたCellの大きさを設定することができる。
storyboardとコードの両方で設定した場合のCellサイズ
基本的にstoryboardのEstimate Sizeが何になっているかで優先度が決定する。
まず、Customになっている場合コードよりStoryboardの設定が優先され、Noneになっている場合、コードでの実装が優先される。
