はじめに
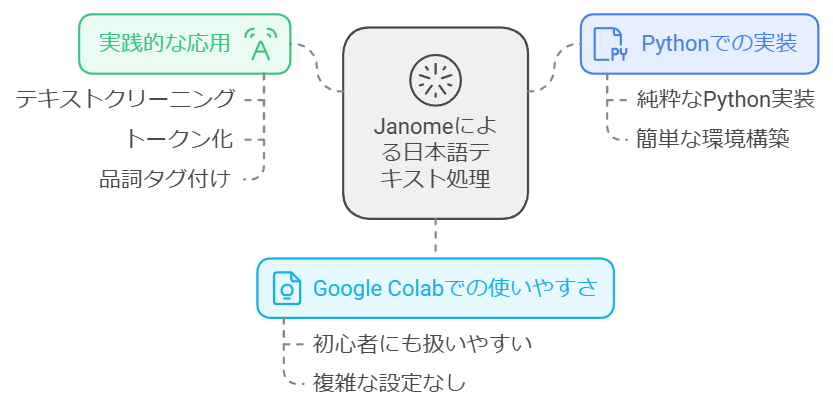
前回の記事では、MeCabを使用したテキストマイニングの基礎について解説しました。今回は、Google Colab上で手軽に使える形態素解析器「Janome」を使用して、実践的な日本語テキスト前処理の手法をご紹介します。Janomeは純粋なPythonで実装されているため、環境構築が簡単で、特に初めての方でも扱いやすいツールです。
目次
- Google Colab環境のセットアップ
- Janomeによる基本的な形態素解析
- 実践的な前処理パイプラインの構築
- テキストの可視化と分析
- まとめと応用例
1. Google Colab環境のセットアップ
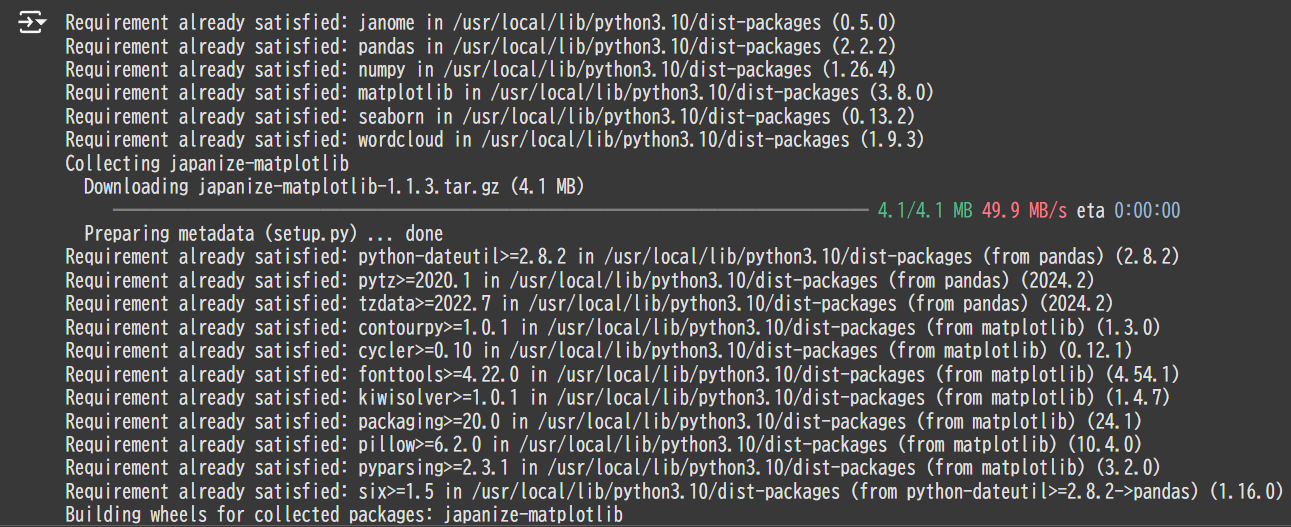
まずはGoogle Colabで必要なライブラリをインストールしましょう。
# 必要なライブラリのインストール
!pip install janome pandas numpy matplotlib seaborn wordcloud japanize-matplotlib

# ライブラリのインポート
from janome.tokenizer import Tokenizer
import pandas as pd
import numpy as np
import matplotlib.pyplot as plt
import seaborn as sns
import japanize_matplotlib
from wordcloud import WordCloud
from collections import Counter
import re

# 警告を無視
import warnings
warnings.filterwarnings('ignore')

# 日本語フォントの設定
!apt-get -q -y install fonts-noto-cjk fonts-noto-cjk-extra

print("セットアップ完了!")
2. Janomeによる基本的な形態素解析
2.1 サンプルテキストの準備
# サンプルテキストの準備
sample_texts = [
    "私はPythonでプログラミングを勉強しています。",
    "テキストマイニングは面白い技術です。",
    "データサイエンスの世界は奥が深いです。",
    "機械学習とAIの発展は目覚ましいです。",
    "プログラミング学習には実践が大切です。"
]

# DataFrameの作成
df = pd.DataFrame({
    'text': sample_texts,
    'category': ['学習', '技術', '科学', '技術', '学習']
})

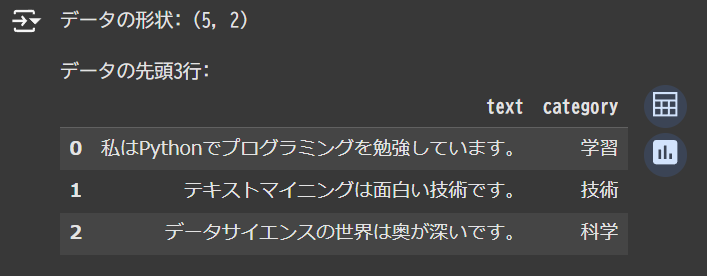
print("データの形状:", df.shape)
print("\nデータの先頭3行:")
display(df.head(3))
2.2 基本的な形態素解析
def basic_analysis(text):
    """
    基本的な形態素解析を行う関数
    """
    t = Tokenizer()
    tokens = t.tokenize(text)

    # 単語と品詞の抽出
    words_with_pos = []
    for token in tokens:
        word = token.surface  # 表層形
        pos = token.part_of_speech.split(',')[0]  # 品詞
        words_with_pos.append((word, pos))

    return words_with_pos

# テスト
sample_text = df['text'][0]
print("解析対象テキスト:", sample_text)
print("\n形態素解析結果:")
results = basic_analysis(sample_text)
for word, pos in results:
    print(f"{word}\t{pos}")
解析対象テキスト: 私はPythonでプログラミングを勉強しています。

形態素解析結果:
私	名詞
は	助詞
Python	名詞
で	助詞
プログラミング	名詞
を	助詞
勉強	名詞
し	動詞
て	助詞
い	動詞
ます	助動詞
。	記号
3. 実践的な前処理パイプラインの構築
3.1 テキスト前処理クラスの実装
class TextPreprocessor:
    def __init__(self, user_dict_path=None):
        # ユーザー辞書の読み込み(オプション)
        try:
            self.tokenizer = Tokenizer(user_dict_path) if user_dict_path else Tokenizer()
        except Exception as e:
            print(f"辞書読み込みエラー: {e}")
            self.tokenizer = Tokenizer()

        # 一般的なストップワード
        self.basic_stop_words = {'の', 'です', 'ます', 'を', 'は', 'に', 'が', 'も', 'と', 'た'}

        # 分析用途別のストップワード
        self.technical_stop_words = {'する', 'なる', 'できる', 'おる', 'いる', 'ある'}
        self.business_stop_words = {'御中', '様', '株式会社', '有限会社', '合同会社'}
        self.date_stop_words = {'年', '月', '日', '時', '分', '秒'}

        # デフォルトではすべてのストップワードを使用
        self.stop_words = self.basic_stop_words | self.technical_stop_words | \
                         self.business_stop_words | self.date_stop_words

    def normalize(self, text):
        """テキストの正規化"""
        if not isinstance(text, str):
            raise ValueError(f"テキストは文字列である必要があります。受け取った型: {type(text)}")
        if not text:
            return ""

        try:
            # 文字コードの正規化
            text = text.encode('utf-8').decode('utf-8')

            # 小文字化
            text = text.lower()

            # 改行の除去
            text = text.replace('\n', ' ')

            # 余分な空白の除去
            text = ' '.join(text.split())

            # 英数字以外の記号を除去(ただし句読点は保持)
            text = re.sub(r'[^\w\s。、!?]', '', text)

            return text

        except UnicodeEncodeError:
            print("文字コードエラー: 不正なUnicode文字が含まれています")
            # 不正な文字を除去して処理を継続
            text = ''.join(char for char in text if ord(char) < 0x10000)
            return self.normalize(text)

        except Exception as e:
            print(f"テキスト正規化エラー: {e}")
            return ""

    def tokenize(self, text, pos_filter=None, keep_pos=False):
        """
        テキストのトークン化

        Parameters:
        -----------
        text : str
            処理対象のテキスト
        pos_filter : list, optional
            抽出する品詞のリスト(デフォルトは名詞、動詞、形容詞)
        keep_pos : bool, optional
            品詞情報を保持するかどうか

        Returns:
        --------
        list : トークンのリスト(keep_pos=Trueの場合は(単語, 品詞)のタプルのリスト)
        """
        if pos_filter is None:
            pos_filter = ['名詞', '動詞', '形容詞']

        try:
            tokens = self.tokenizer.tokenize(text)
            words = []

            for token in tokens:
                try:
                    pos = token.part_of_speech.split(',')[0]
                    word = token.surface
                    base = token.base_form

                    # 品詞フィルタリングとストップワード除外
                    if pos in pos_filter and word not in self.stop_words:
                        # 活用のある語は原形を使用
                        if pos in ['動詞', '形容詞']:
                            word = base

                        # 長さ1の単語は除外(オプション)
                        if len(word) > 1:
                            if keep_pos:
                                words.append((word, pos))
                            else:
                                words.append(word)

                except Exception as e:
                    print(f"トークン処理エラー: {e} - スキップしました: {token.surface}")
                    continue

            return words

        except Exception as e:
            print(f"形態素解析エラー: {e}")
            return []

    def process(self, text):
        """テキストの前処理を行う"""
        # 正規化
        normalized_text = self.normalize(text)
        # トークン化
        tokens = self.tokenize(normalized_text)
        return tokens

# 前処理クラスのテスト
preprocessor = TextPreprocessor()
print("前処理前のテキスト:", sample_text)
print("\n前処理後のトークン:", preprocessor.process(sample_text))
前処理前のテキスト: 私はPythonでプログラミングを勉強しています。

前処理後のトークン: ['python', 'プログラミング', '勉強', 'する', 'いる']
3.2 データフレーム全体の前処理
# データフレームに前処理を適用
def preprocess_dataframe(df, text_column='text'):
    """データフレーム全体の前処理を行う"""
    preprocessor = TextPreprocessor()

    # テキストの前処理を適用
    df['processed_tokens'] = df[text_column].apply(preprocessor.process)

    # トークンの数を計算
    df['token_count'] = df['processed_tokens'].apply(len)

    return df

# 前処理の実行
processed_df = preprocess_dataframe(df)
print("前処理後のデータフレーム:")
display(processed_df.head())
4. テキストの可視化と分析
4.1 単語の出現頻度分析
def analyze_word_frequency(df, column='processed_tokens'):
    """単語の出現頻度を分析"""
    # 全トークンを結合
    all_tokens = [token for tokens in df[column] for token in tokens]

    # 出現頻度のカウント
    word_freq = Counter(all_tokens)

    # 頻出単語Top10のデータフレーム作成
    freq_df = pd.DataFrame(word_freq.most_common(10),
                          columns=['単語', '出現回数'])

    # 可視化
    plt.figure(figsize=(10, 6))
    sns.barplot(data=freq_df, x='単語', y='出現回数')
    plt.title('頻出単語Top10')
    plt.xticks(rotation=45)
    plt.tight_layout()
    plt.show()

    return freq_df

# 単語頻度分析の実行
freq_df = analyze_word_frequency(processed_df)
print("\n頻出単語Top10:")
display(freq_df)
4.2 ワードクラウドの生成
def create_wordcloud(df, column='processed_tokens'):
    """ワードクラウドの生成"""
    # 全トークンを結合して文字列に変換
    text = ' '.join([' '.join(tokens) for tokens in df[column]])

    # ワードクラウドの生成
    wordcloud = WordCloud(
        font_path='/usr/share/fonts/opentype/noto/NotoSansCJK-Regular.ttc',
        width=800,
        height=400,
        background_color='white',
        max_words=100
    ).generate(text)

    # 表示
    plt.figure(figsize=(15, 8))
    plt.imshow(wordcloud)
    plt.axis('off')
    plt.title('Word Cloud')
    plt.show()

# ワードクラウドの生成
create_wordcloud(processed_df)
4.3 カテゴリごとの特徴語分析
def analyze_category_words(df, category_column='category', token_column='processed_tokens'):
    """カテゴリごとの特徴語を分析"""
    category_words = {}

    # カテゴリごとの単語をカウント
    for category in df[category_column].unique():
        tokens = []
        category_texts = df[df[category_column] == category]
        for token_list in category_texts[token_column]:
            tokens.extend(token_list)
        category_words[category] = Counter(tokens)

    # カテゴリごとの結果を表示
    for category, word_counter in category_words.items():
        print(f"\n【{category}】カテゴリの頻出単語Top5:")
        for word, count in word_counter.most_common(5):
            print(f"・{word}: {count}回")

# カテゴリ分析の実行
analyze_category_words(processed_df)
【学習】カテゴリの頻出単語Top5:
・プログラミング: 2回
・python: 1回
・勉強: 1回
・する: 1回
・いる: 1回

【技術】カテゴリの頻出単語Top5:
・テキスト: 1回
・マイニング: 1回
・面白い: 1回
・技術: 1回
・機械: 1回

【科学】カテゴリの頻出単語Top5:
・データ: 1回
・サイエンス: 1回
・世界: 1回
・深い: 1回
5. まとめと応用例
実装のポイント
- Janomeは純粋なPythonで実装されているため、環境構築が容易
- 必要に応じて品詞フィルタリングを調整可能
- ストップワードリストはドメインに応じてカスタマイズ
- 可視化により、テキストデータの特徴を直感的に理解可能
応用可能な分野
- 文書分類
- 感情分析
- キーワード抽出
- 類似文書検索
- トピック分析
サンプルコード(まとめ)
以下のコードで、ここまでの処理を一括で実行できます:
# すべての処理をまとめて実行する関数
def analyze_text_data(texts, categories=None):
    """テキストデータの総合分析を行う"""
    # データフレームの作成
    df = pd.DataFrame({'text': texts})
    if categories is not None:
        df['category'] = categories

    # 前処理
    processed_df = preprocess_dataframe(df)

    # 単語頻度分析
    print("1. 単語頻度分析")
    freq_df = analyze_word_frequency(processed_df)

    # ワードクラウド生成
    print("\n2. ワードクラウド")
    create_wordcloud(processed_df)

    # カテゴリ分析(カテゴリがある場合)
    if categories is not None:
        print("\n3. カテゴリ分析")
        analyze_category_words(processed_df)

    return processed_df

# 使用例
new_texts = [
    "私はデータ分析の勉強をしています。",
    "機械学習は面白い分野です。",
    "プログラミングは楽しいです。"
]
new_categories = ['学習', '技術', '技術']

results = analyze_text_data(new_texts, new_categories)
改善点と発展的な使い方
エラー処理の重要性
コードには以下のようなエラー処理を追加しています:
- 文字コードエラーの適切な処理
- 不正な入力値のチェック
- 形態素解析時の例外ハンドリング
ストップワードのカスタマイズ
分析の目的に応じて、以下のようにストップワードを設定できます:
processor = TextPreprocessor()

# 技術文書向けの設定
processor.stop_words = processor.basic_stop_words | processor.technical_stop_words

# ビジネス文書向けの設定
processor.stop_words = processor.basic_stop_words | processor.business_stop_words
形態素解析の精度向上
Janomeではユーザー辞書を使用して解析精度を向上させることができます:
# ユーザー辞書の作成例
with open('user_dict.csv', 'w', encoding='utf-8') as f:
    f.write('ChatGPT,チャットジーピーティー,チャットGPT,名詞\n')
    f.write('PyTorch,パイトーチ,PyTorch,名詞\n')

# ユーザー辞書を指定してインスタンス化
processor = TextPreprocessor(user_dict_path='user_dict.csv')
おわりに
本記事では、Janomeを使用した実践的な日本語テキスト前処理の方法について解説しました。エラー処理の追加、ストップワードの拡充、形態素解析の精度向上など、より堅牢な実装を目指しました。Google Colab上で手軽に試せるため、ぜひ実際にコードを実行しながら理解を深めていただければと思います。


