はじめに
このガイドでは、ReactフロントエンドとFastAPIバックエンドを連携させる方法を紹介します。Reactを使用してフロントエンドを構築し、FastAPIを使用してバックエンドAPIを構築します。
前提条件
- Node.jsとnpmがインストールされている
- PythonとFastAPIがインストールされている
1. FastAPIのセットアップ
まず、FastAPIバックエンドをセットアップします。
1.1 FastAPIのインストール
FastAPIとUvicornをインストールします。
pip install fastapi
pip install uvicorn
1.2 FastAPIアプリケーションの作成
main.pyというファイルを作成し、以下の内容を追加します。
from fastapi import FastAPI
from fastapi.middleware.cors import CORSMiddleware

app = FastAPI()

# CORS設定
origins = [
    "http://localhost:3000",
]

app.add_middleware(
    CORSMiddleware,
    allow_origins=origins,
    allow_credentials=True,
    allow_methods=["*"],
    allow_headers=["*"],
)

@app.get("/api/data")
def read_data():
    return {"message": "Hello from FastAPI!"}
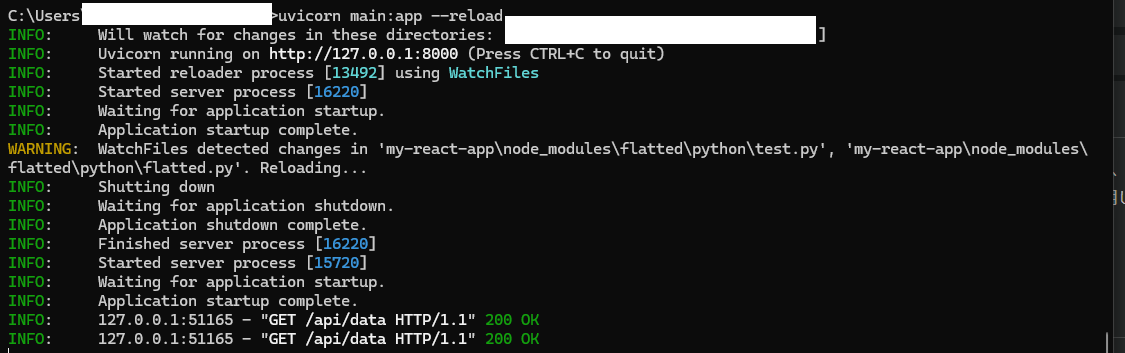
1.3 FastAPIサーバーの起動
以下のコマンドでFastAPIサーバーを起動します。
uvicorn main:app --reload
2. Reactのセットアップ
次に、Reactフロントエンドをセットアップします。
2.1 Reactアプリケーションの作成
create-react-appを使用して新しいReactアプリケーションを作成します。
npx create-react-app my-react-app
cd my-react-app
2.2 Axiosのインストール
Axiosを使用してFastAPIからデータを取得します。以下のコマンドでAxiosをインストールします。
npm install axios
2.3 Reactコンポーネントの作成
srcディレクトリにMyComponent.jsを作成し、以下の内容を追加します。
import React, { useState, useEffect } from 'react';
import axios from 'axios';

function MyComponent() {
  const [data, setData] = useState('');

  useEffect(() => {
    axios.get('http://localhost:8000/api/data')
      .then(response => {
        setData(response.data.message);
      })
      .catch(error => {
        console.error('There was an error!', error);
      });
  }, []);

  return (
    <div>
      <h1>Data from FastAPI:</h1>
      <p>{data}</p>
    </div>
  );
}

export default MyComponent;
2.4 App.jsの修正
src/App.jsを開き、MyComponentをインポートして使用します。
import React from 'react';
import MyComponent from './MyComponent';
import './App.css';

function App() {
  return (
    <div className="App">
      <header className="App-header">
        <MyComponent />
      </header>
    </div>
  );
}

export default App;
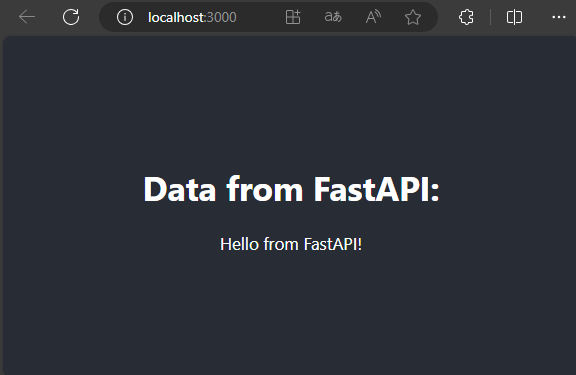
2.5 Reactアプリケーションの起動
以下のコマンドでReactアプリケーションを起動します。
npm start

ブラウザが自動的に開き、http://localhost:3000でReactアプリケーションが表示されます。FastAPIから取得したデータが表示されるはずです。
おわりに
このガイドでは、ReactフロントエンドとFastAPIバックエンドを連携させる基本的な方法を紹介しました。これにより、ReactアプリケーションからFastAPIエンドポイントにアクセスしてデータを取得し、表示することができます。さらなる機能追加や詳細な設定は、プロジェクトのニーズに応じて調整してください。